metricfats - raw design cyclesthank you for purchasing your new stealth rear turn signals for your...
TRANSCRIPT
METRICFATS.COM
Thank you for purchasing your new Stealth Rear Turn Signals for your Yamaha Raider. The instructional sheets that follow are thoroughly detailed and should be studied BEFORE picking up a tool. Take your time, work safe and you will enjoy your new turn signals within a couple hours. The pictures that are included as part of these instructions are a mix of “before” and “after” pictures. Just pay attention to the particular step being discussed. ATTENTION: You should ALWAYS disconnect your battery before performing any electrical work.
Preparation Installing the Stealth Turn Signals involves cutting off the plastic tail section that holds the stock turn signals, center reflector and license plate mount. Start by using a fine point felt tip pen, (preferably red.) and trace a line on the black plastic where it meets the chrome bezel of the taillight. You can also trial fit the Stealth Light. It will not seat all the way into position, but will give you an idea how it will eventually fit.
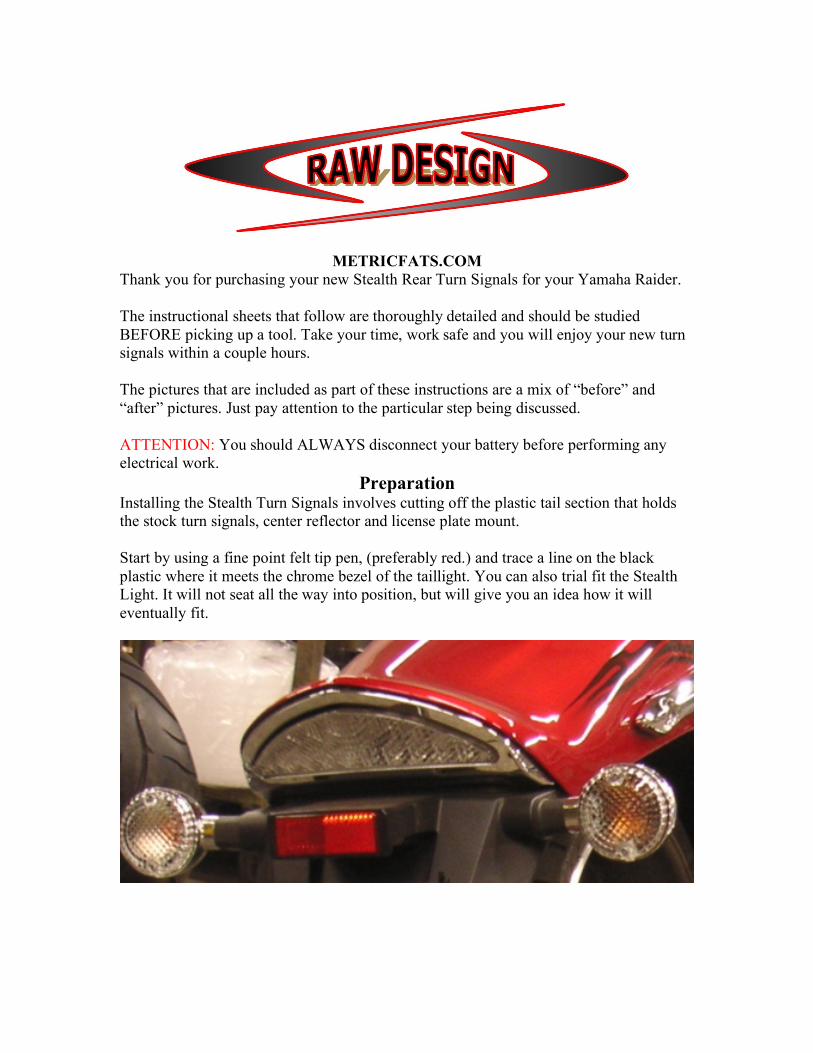
Removal Up inside the fender, remove the four bolts that hold the black plastic mount in place. There are 2 at the top and one on each side.
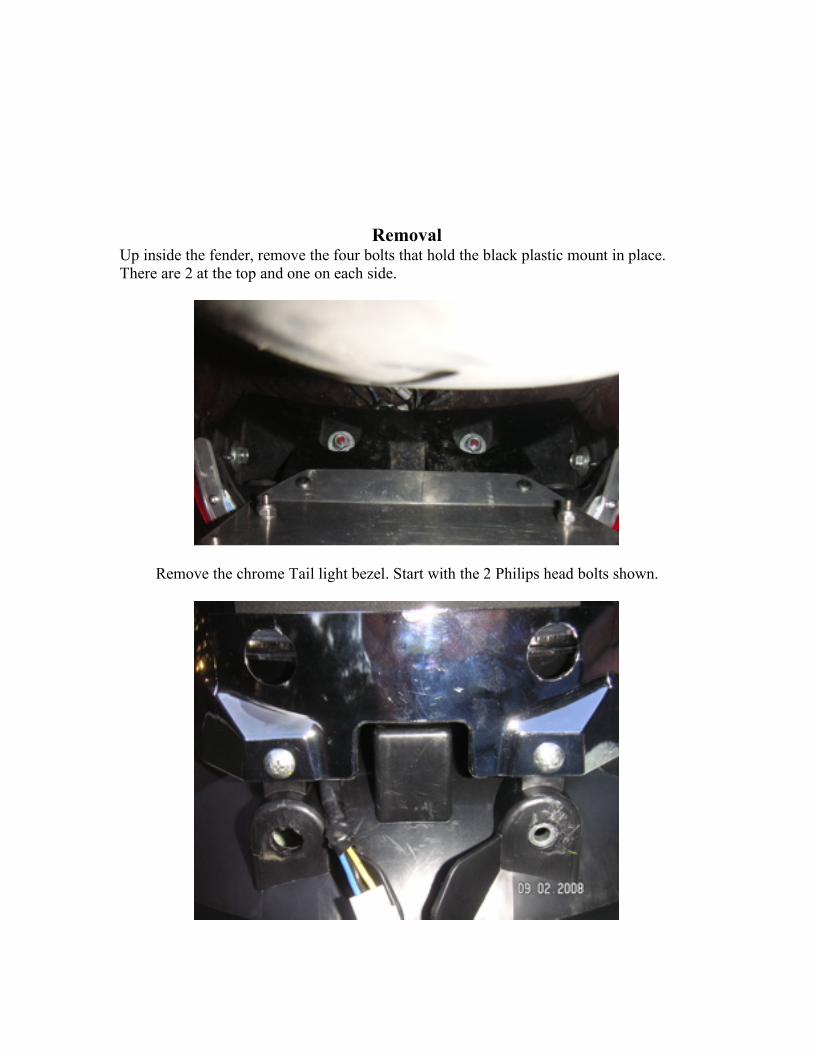
Remove the chrome Tail light bezel. Start with the 2 Philips head bolts shown.
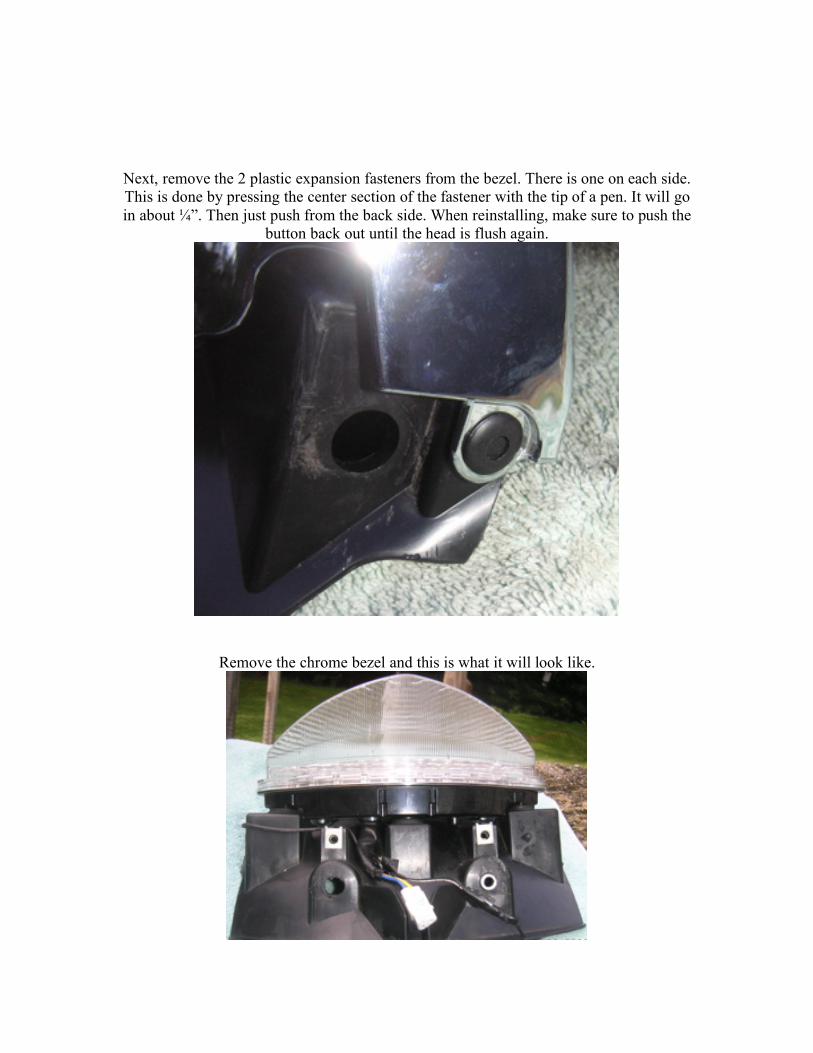
Next, remove the 2 plastic expansion fasteners from the bezel. There is one on each side. This is done by pressing the center section of the fastener with the tip of a pen. It will go in about ¼”. Then just push from the back side. When reinstalling, make sure to push the
button back out until the head is flush again.
Remove the chrome bezel and this is what it will look like.
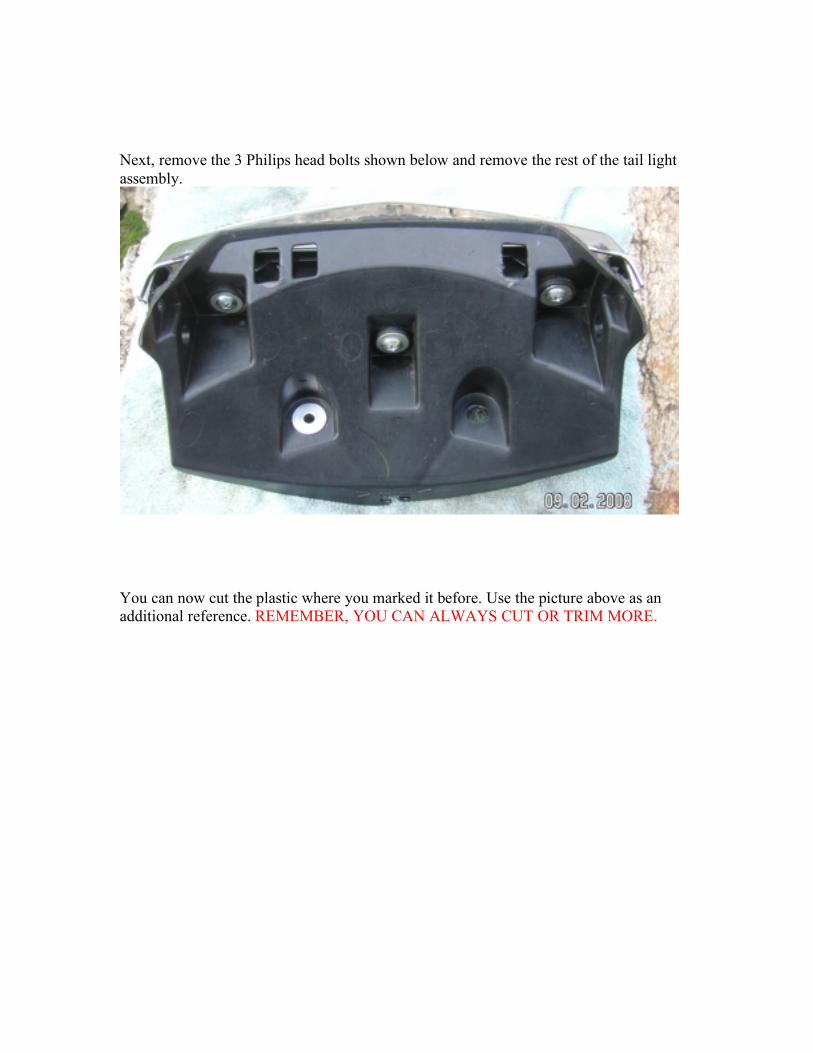
Next, remove the 3 Philips head bolts shown below and remove the rest of the tail light assembly.
You can now cut the plastic where you marked it before. Use the picture above as an additional reference. REMEMBER, YOU CAN ALWAYS CUT OR TRIM MORE.
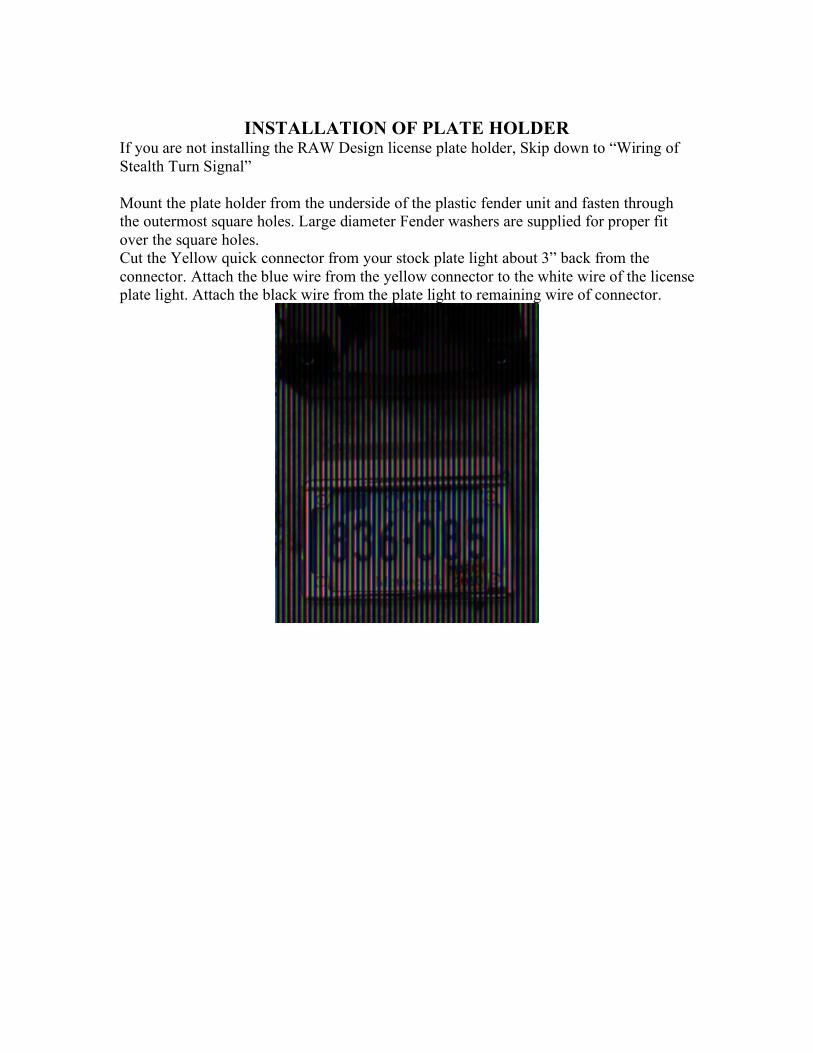
INSTALLATION OF PLATE HOLDER
If you are not installing the RAW Design license plate holder, Skip down to “Wiring of Stealth Turn Signal” Mount the plate holder from the underside of the plastic fender unit and fasten through the outermost square holes. Large diameter Fender washers are supplied for proper fit over the square holes. Cut the Yellow quick connector from your stock plate light about 3” back from the connector. Attach the blue wire from the yellow connector to the white wire of the license plate light. Attach the black wire from the plate light to remaining wire of connector.
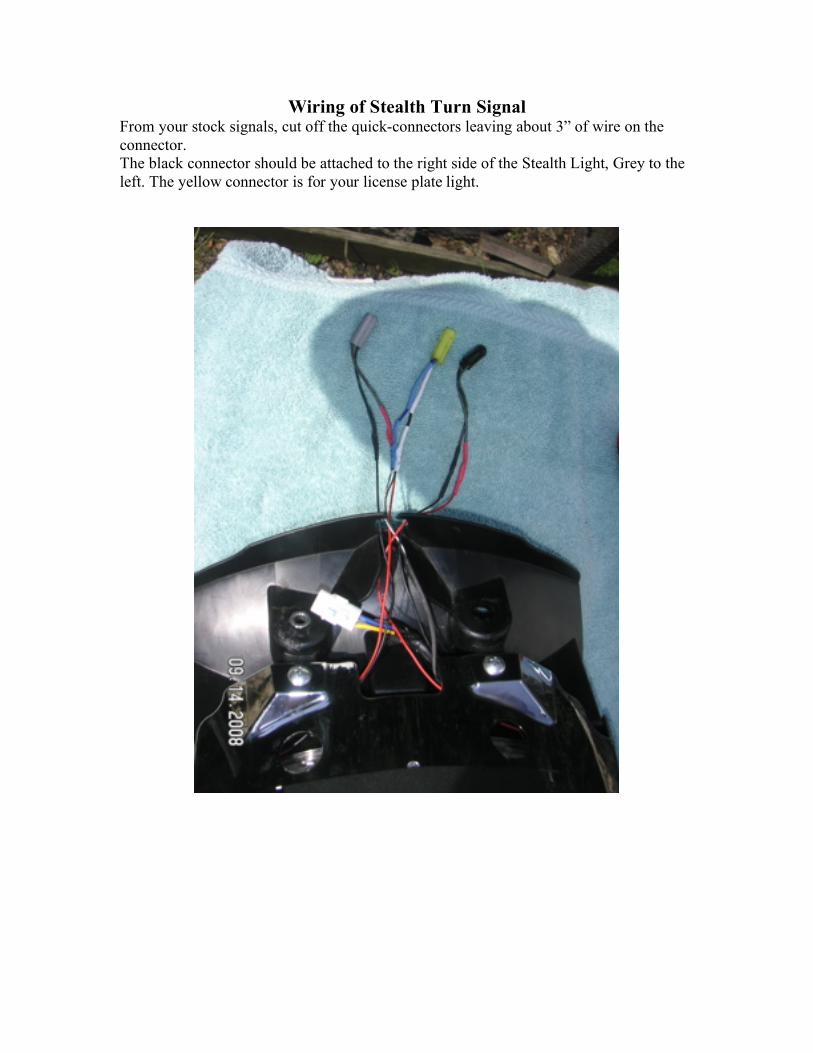
Wiring of Stealth Turn Signal From your stock signals, cut off the quick-connectors leaving about 3” of wire on the connector. The black connector should be attached to the right side of the Stealth Light, Grey to the left. The yellow connector is for your license plate light.
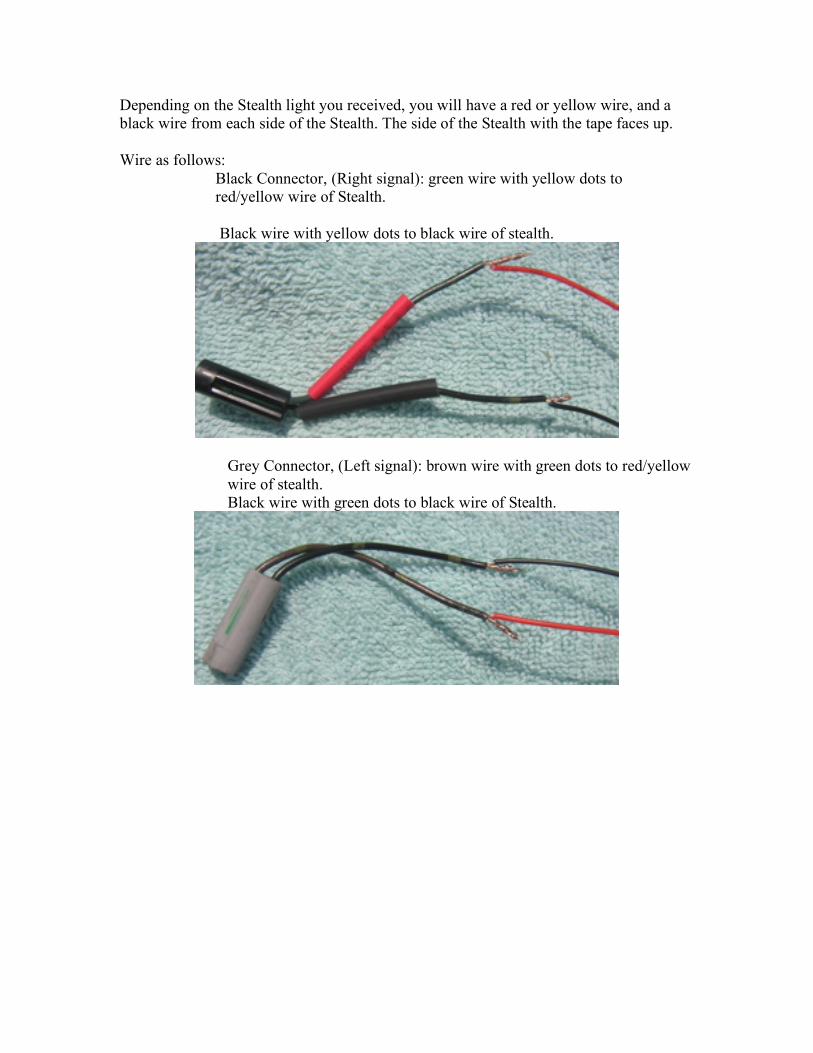
Depending on the Stealth light you received, you will have a red or yellow wire, and a black wire from each side of the Stealth. The side of the Stealth with the tape faces up. Wire as follows:
Black Connector, (Right signal): green wire with yellow dots to red/yellow wire of Stealth.
Black wire with yellow dots to black wire of stealth.
Grey Connector, (Left signal): brown wire with green dots to red/yellow wire of stealth. Black wire with green dots to black wire of Stealth.
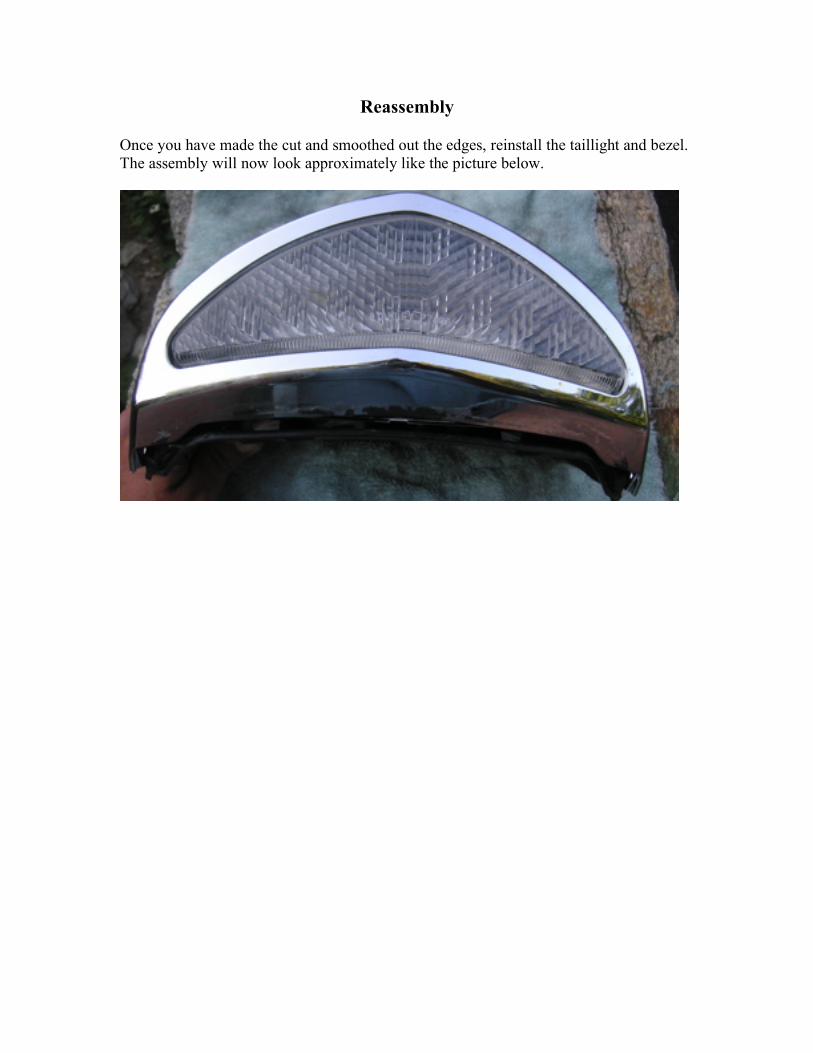
Reassembly Once you have made the cut and smoothed out the edges, reinstall the taillight and bezel. The assembly will now look approximately like the picture below.
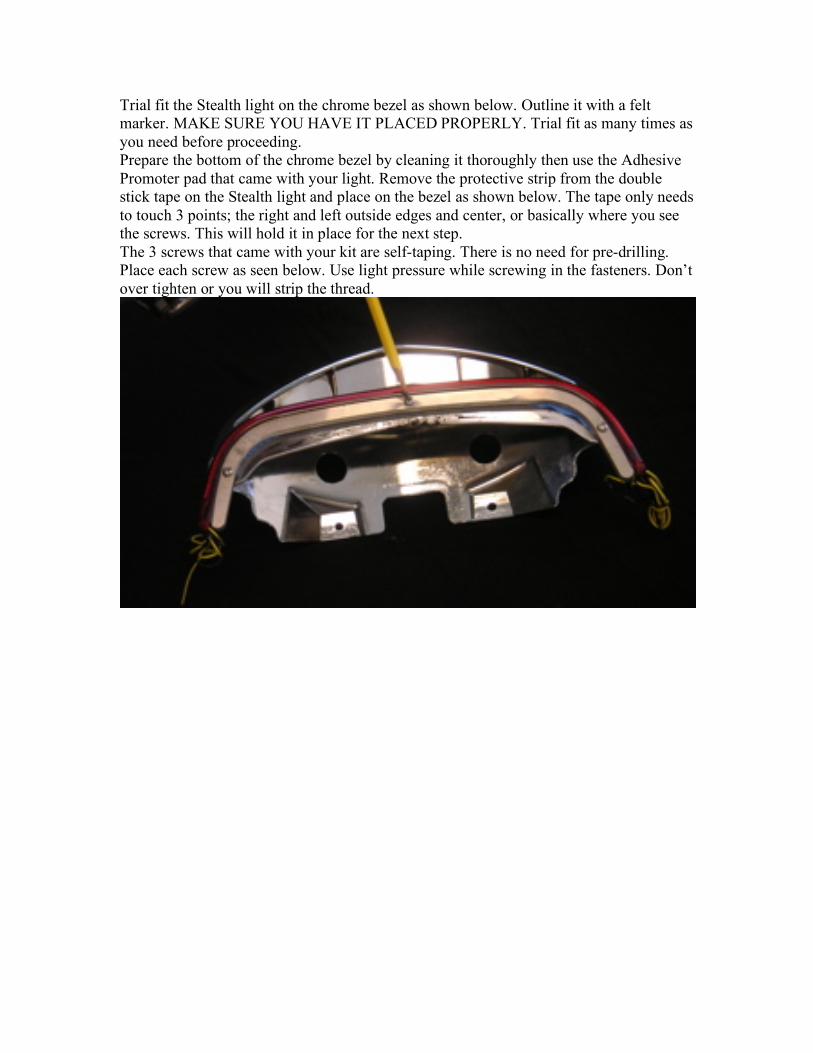
Trial fit the Stealth light on the chrome bezel as shown below. Outline it with a felt marker. MAKE SURE YOU HAVE IT PLACED PROPERLY. Trial fit as many times as you need before proceeding. Prepare the bottom of the chrome bezel by cleaning it thoroughly then use the Adhesive Promoter pad that came with your light. Remove the protective strip from the double stick tape on the Stealth light and place on the bezel as shown below. The tape only needs to touch 3 points; the right and left outside edges and center, or basically where you see the screws. This will hold it in place for the next step. The 3 screws that came with your kit are self-taping. There is no need for pre-drilling. Place each screw as seen below. Use light pressure while screwing in the fasteners. Don’t over tighten or you will strip the thread.
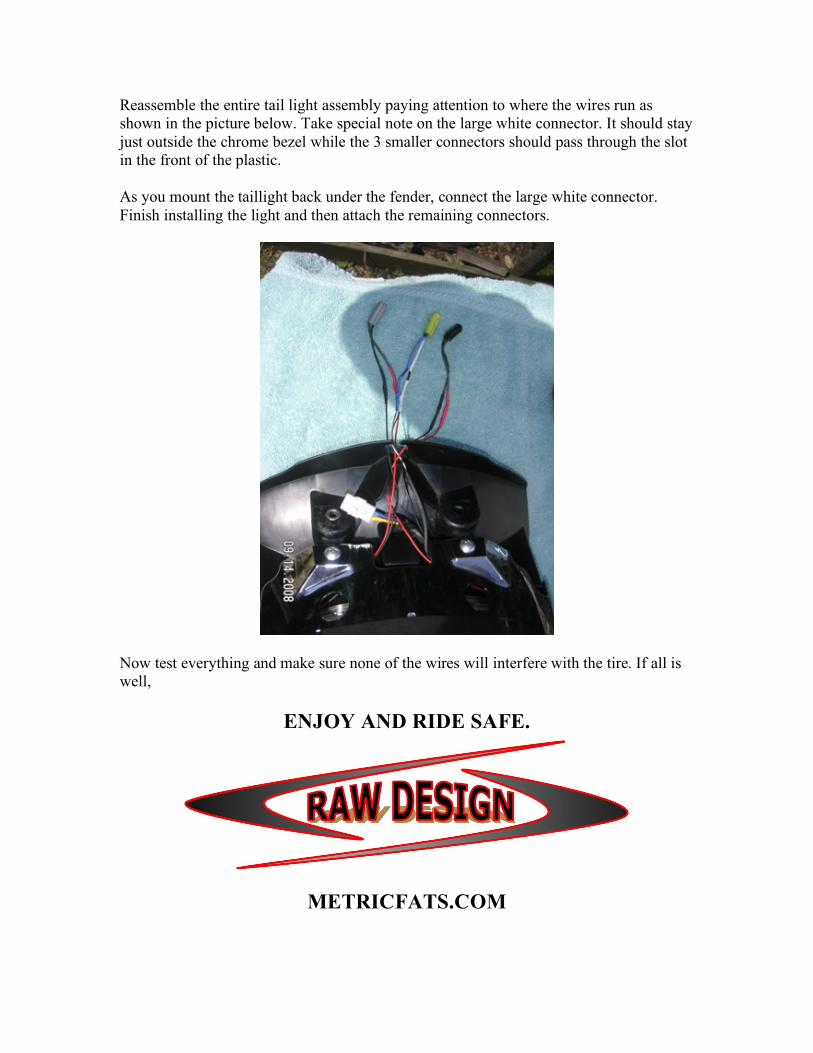
Reassemble the entire tail light assembly paying attention to where the wires run as shown in the picture below. Take special note on the large white connector. It should stay just outside the chrome bezel while the 3 smaller connectors should pass through the slot in the front of the plastic. As you mount the taillight back under the fender, connect the large white connector. Finish installing the light and then attach the remaining connectors.
Now test everything and make sure none of the wires will interfere with the tire. If all is well,
ENJOY AND RIDE SAFE.
METRICFATS.COM