mastering your - sew happins creative studiosewhappins.com/wp-content/uploads/v6-sw-combined.pdf ·...
TRANSCRIPT

©2009 BERNINA® of America, Inc.
Permission to copy and distribute in printed and electronic formats granted only to Authorized BERNINA ® Dealers
1
Mastering Your
Embroidery Software V6.0
Owner’s Workbook - Part 1
Mastering Your
©2009 BERNINA® of America, Inc.
Permission to copy and distribute in printed and electronic formats granted only to Authorized BERNINA ® Dealers
2
Table of Contents
Introduction .............................................................................................................................. 3
Class 1: Getting Started ............................................................................................................ Class Overview ............................................................................................................................. 4 Four Bonus programs in BERNINA Embroidery Software V.6 ....................................................... 5 Prepare Your Computer ................................................................................................................ 6 Introductory Tutorial ...................................................................................................................... 9 Lettering Basics .......................................................................................................................... 10 Lettering Baselines 1 .................................................................................................................. 11 Lettering Baselines 2 .................................................................................................................. 12 Editing Lettering 1 ....................................................................................................................... 13 Editing Lettering 2 ....................................................................................................................... 14 Follow Up .................................................................................................................................... 15
Class 2: Monogramming and Design Management ................................................................ Class Overview ........................................................................................................................... 17 Monogramming Overview ........................................................................................................... 18 Monogramming Tutorial .............................................................................................................. 19 Design Management with Portfolio .............................................................................................. 20
Class 3: Editing and Modifying Designs .................................................................................. Class Overview ........................................................................................................................... 23 Editing Tutorial ............................................................................................................................ 24 Removing Overlaps .................................................................................................................... 25 Modifying Designs - Alignment tools ........................................................................................... 26 Modifying Designs - Mirror-Merge tools ....................................................................................... 27 Modifying Designs - Wreath / Kaleidoscope tools ....................................................................... 28
Class 4: Automatic Digitizing and PhotoSnap ........................................................................ Class Overview ........................................................................................................................... 29 Auto-Digitizing Tutorial ................................................................................................................ 30 PhotoSnap .................................................................................................................................. 31

©2009 BERNINA® of America, Inc.
Permission to copy and distribute in printed and electronic formats granted only to Authorized BERNINA ® Dealers
3
Introduction
Congratulations on your purchase of BERNINA Embroidery Software V6.0!
This workbook is designed to be used in conjunction with the Owners classes you will take at your BERNINA
dealership, and contains a series of exercises intended to familiarize you with the features of
your new BERNINA Embroidery software, V6.0.
NOTE: We recommend that you attend Owners classes for your embroidery system and review the information in the Mastering Your BERNINA
Embroidery Module/Machine workbook before attending
BERNINA Embroidery software classes.
BERNINA EditorPlus V6 - - - With this software level, you can edit your existing designs and add lettering. You can also create attractive designs with a minimum of fuss from scanned artwork. Use powerful automatic digitizing features such as Auto Digitizer, Magic Wand and PhotoSnap. Specific functionality includes - - - Change color sequence for improved stitchouts Includes 55 different embroidery alphabets Includes Advanced Monogramming features Edit individual stitches to fine-tune your designs to a perfect finish Use Auto Digitizer to create attractive embroidery automatically from scanned artwork For greater control, use the Magic Wand to digitize selected areas/shapes of a graphic image Use PhotoSnap to turn graphic images into interesting line stitching. Work with Embroidery designs from USB sticks, CD’s and those downloaded from the Internet Includes Portfolio, BERNINA Quilter and Cross Stitch programs. BERNINA DesignerPlus V6 - - - This software level provides powerful features for digitizing, editing and lettering, combining both automatic and manual digitizing tools and methods for maximum control and quality. Specific functionality includes - - - Use of scanned or imported artwork to digitize designs on-screen In addition to the automatic digitizing tools, use specialized digitizing tools, plus a wide range of artistic,
decorative fill patterns. Includes 70 different embroidery alphabets Includes Advanced Monogramming features Create appliqué with EXCLUSIVE Auto Appli-
qué feature Convert Windows TrueType fonts to embroi-
dery alphabets Work with Embroidery designs from USB
sticks, CDs or stored on PC. Includes Portfolio, PhotoSnap, BERNINA
Quilter, and Cross Stitch programs
Be sure to register your BERNINA® Embroidery Software. My BERNINA Embroidery Software, V6.0 is (circle one): EditorPlus DesignerPlus My dongle serial number is:__________________ I purchased my software on:_____________(date) At_______________________________________

©2009 BERNINA® of America, Inc.
Permission to copy and distribute in printed and electronic formats granted only to Authorized BERNINA ® Dealers
4
Class 1 - Getting Started
Class Overview Software Overview EditorPlus DesignerPlus BERNINA Cross Stitch BERNINA PhotoSnap BERNINA Quilter Review of Computer Requirements for proper software operation Prepare Your Computer Setup Measurement system Screen Setup Hardware and Software Setup - Chapter 6 in Onscreen Manual, beginning at page 73 Calibrate Monitor - Help>Onscreen Manual, page 74 Setup Scanner - Help>Onscreen Manual, page 74 Introductory Tutorial Help>Quick Start Guide Chapter 7, page 77 Lettering Essentials Help>Onscreen Manual, Chapter 25- Lettering Essentials, page 294 Lettering Baselines Editing Lettering Help>Onscreen Manual, Chapter 26- Editing Embroidery Lettering, page 305 Follow Up Deleting Recovery and Backup files Keeping computer “clean” Helpful recommendations
This class is formatted for owners of the following levels of BERNINA
Embroidery Software, V6:
EditorPlus
DesignerPlus

©2009 BERNINA® of America, Inc.
Permission to copy and distribute in printed and electronic formats granted only to Authorized BERNINA ® Dealers
5
Four Bonus programs included!
Enjoy the four programs included in the BERNINA Embroidery Software V6.0 EditorPlus and Des-
ignerPlus programs:
BERNINA Portfolio - - -
A built-in design management program that provides access to design files from a variety of different computer sources - hard disk, CD-ROM, USB stick or floppy disk. View designs, sort designs, con-vert designs, work with Zip archives - Portfolio recognizes all design formats used by the BERNINA
Embroidery Software.
Refer to Page 375 in the Onscreen Manual for more information
BERNINA PhotoSnap - - -
This program provides the ability to create embroidery designs directly from graphic images such photographs, but not limited to photographs. If a graphic image can be opened in the V6 software, the PhotoSnap function can be ap-plied to it! PhotoSnap designs consist of layers of satin stitches with varied spacing values.
Refer to Page 164 in the Onscreen Manual for more information
BERNINA Cross Stitch - - -
Use the Cross Stitch program to create beautiful cross stitch motifs by embroidery machine rather than the traditional “hand” method. Simply scan in design motif and automatically digitize it or choose to manually digitize it with a variety of cross stitch tools. A variety of cross stitch types (10) are included as well as outline stitch options also. Refer to the Online Manual in the Cross Stitch program for more information
BERNINA Quilter - - - Use the Quilter program to preview quilt projects. Preview the blocks, layout, fabric, color and embroidery designs as they will apprear on the finished pro-ject before sewing a single stitch. Scan in fabrics and with DesignerPlus even create new blocks. When the designing is complete, the entire quilt file can be saved and printed out with yardage information, basic construction details and more! Refer to the Online Manual in the Quilter program for more information

©2009 BERNINA® of America, Inc.
Permission to copy and distribute in printed and electronic formats granted only to Authorized BERNINA ® Dealers
6
Class 1 - Prepare Your Computer
Setting up your measurement system For the most precise embroidery projects, it is recommended that the computer be set in metrics.
Follow these Simple Steps - - - (NOTE: Below are samples of a typical Window XP setup. Refer to computer manual if using a different setup.)
Start > Control Panel > Regional and Language Options > Customize > Numbers Tab > Measurement system When Metric has been selected, click on Apply > OK
Screen Setup Turn off Screen Saver and any Wallpaper to maximize your computer’s system resources. To do this, follow these simple instructions - - -
Right Mouse click on the Desktop From the options list, select Properties Select Desktop tab > Background > select None Select Screen Saver tab > Screen Saver > select None

©2009 BERNINA® of America, Inc.
Permission to copy and distribute in printed and electronic formats granted only to Authorized BERNINA ® Dealers
7
Class 1 - Prepare Your Computer
Screen Setup (con’t) Select Settings tab > Set Screen resolution to a minimum of 1024 by 768 pixels In the Settings tab > Set the Color quality to a minimum of High(16 bit) - set higher if available
After making ALL adjustments, Select Apply > OK
Open BERNINA Embroidery Software, V6
Hardware and Software Setup For detailed information on Hardware and Software Setup for computer, refer to Chapter 7 of the On-screen manual found in the General Toolbar under Help > Onscreen Manual. It is VERY important to Calibrate computer screen so that when using the 1:1 view feature, the motifs are viewed accurately. To use the Onscreen Manual effectively, let’s walk through a brief exercise.
Help > Onscreen Manual Single left mouse click to open- the Manual is an Adobe Acrobat .pdf file. It is a “linked” man-
ual, meaning that it may be searched for information. Simply click on a page number or words written in red and the manual will automatically to to that particular piece of information!
In the left hand column, select Index Use the Next Page feature to find the alphabetical listing for “C” in the Index Under “C”, locate “calibrate monitor” Note that there is a page number listed after this - scroll to page 59 OR hover the mouse over
the page number until it turns into a “hand with a pointing finger” Single Left mouse click. Page 59 is visible and the step-by-step information is listed to Calibrate the Computer Monitor!
Calibrate Monitor screen as instructed in manual

©2009 BERNINA® of America, Inc.
Permission to copy and distribute in printed and electronic formats granted only to Authorized BERNINA ® Dealers
8
Class 1 - Prepare Your Computer
Setting up Scanner With the EditorPlus and DesignerPlus levels, you can Import/Access your own artwork, fabrics, etc. . This can be done by simply accessing an existing file on your computer, or by using a scanner system. The BERNINA Embroidery software is compatible with a variety of TWAIN-compatible scanners, but does need to be setup in order to function properly. For set up information, refer to page 74 in the On-screen Manual.
For future reference - - - Scanning Tips
Type of Artwork Scanning Resolution Business cards, letter heads 150 - 300 dpi Hand sketches 150 - 300 dpi Photos and images 150 - 300 dpi Commercial art, line drawings 72 - 150 dpi
Notes:

©2009 BERNINA® of America, Inc.
Permission to copy and distribute in printed and electronic formats granted only to Authorized BERNINA ® Dealers
9
Class 1 - Introductory Tutorial
OPEN the BERNINA Embroidery Software Double-click on the Desktop icon
OPEN the Onscreen Manual Help > Quick Start Guide
Access Chapter 6, page 57 for the step-by-step instructions to create the motif shown above.
The Introductory Tutorial will introduce you to the basic functions and operation of your software.
Upon completion of the Tutorial, be sure to Save the design file (File>Save As).
The design is ready to send to the machine of choice for stitching.
Review Chapters 29 and 30, beginning on page 344 of the On-screen Manual. These chapters outline information for printing design templates/worksheets as well as sending the design to the embroidery ma-chine.
Review and Print your design worksheet Send design to the embroidery machine to be stitched
Notes:
Software level
EditorPlus. . . . . . yes
DesignerPlus. . . .yes
Always save (File>Save As) your work after every major change.
©2009 BERNINA® of America, Inc.
Permission to copy and distribute in printed and electronic formats granted only to Authorized BERNINA ® Dealers
10
Class 1 - Lettering Basics
Creating Lettering for Embroidery The complete listing of Alphabet styles may be viewed in Appendix C of the Onscreen Manual beginning on page 437. For best lettering results, remember to stay within the recom-mended size range for each selected style. OPEN the BERNINA Embroidery Software Double-click on the Desktop icon
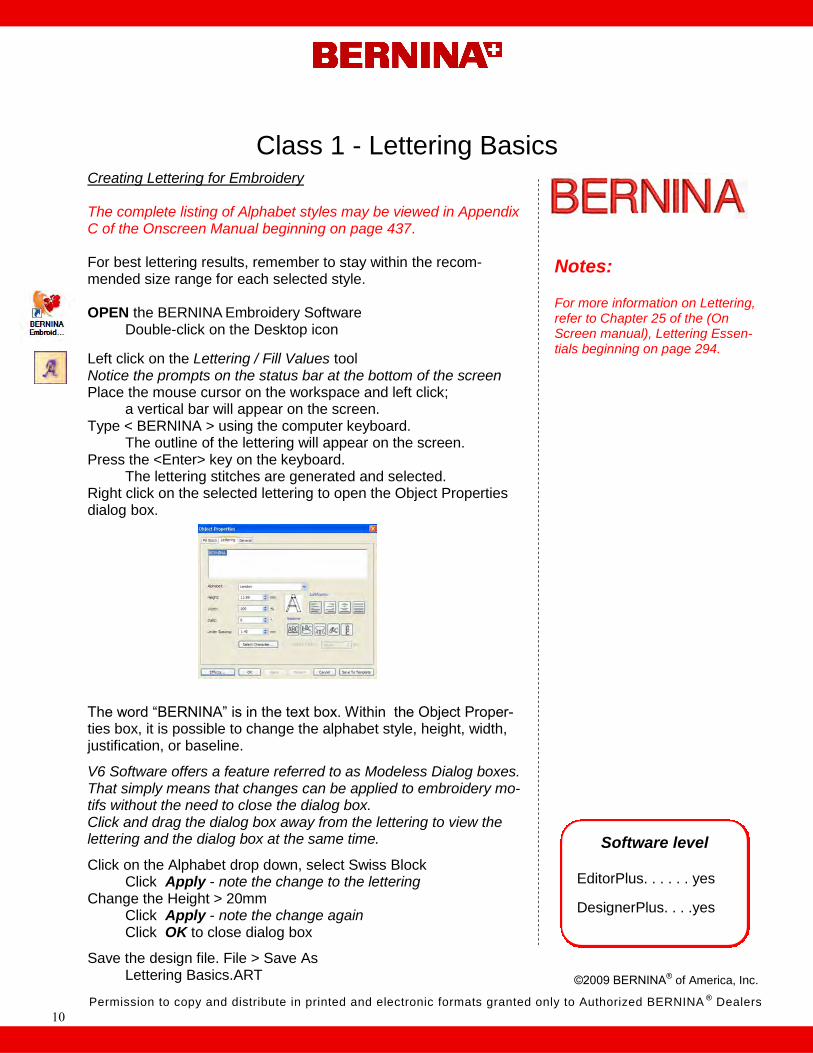
Left click on the Lettering / Fill Values tool Notice the prompts on the status bar at the bottom of the screen Place the mouse cursor on the workspace and left click; a vertical bar will appear on the screen. Type < BERNINA > using the computer keyboard. The outline of the lettering will appear on the screen. Press the <Enter> key on the keyboard. The lettering stitches are generated and selected. Right click on the selected lettering to open the Object Properties dialog box. The word “BERNINA” is in the text box. Within the Object Proper-ties box, it is possible to change the alphabet style, height, width, justification, or baseline.
V6 Software offers a feature referred to as Modeless Dialog boxes. That simply means that changes can be applied to embroidery mo-tifs without the need to close the dialog box. Click and drag the dialog box away from the lettering to view the lettering and the dialog box at the same time.
Click on the Alphabet drop down, select Swiss Block Click Apply - note the change to the lettering Change the Height > 20mm Click Apply - note the change again Click OK to close dialog box
Save the design file. File > Save As Lettering Basics.ART
Software level
EditorPlus. . . . . . yes
DesignerPlus. . . .yes
Notes:
For more information on Lettering, refer to Chapter 25 of the (On Screen manual), Lettering Essen-tials beginning on page 294.

©2009 BERNINA® of America, Inc.
Permission to copy and distribute in printed and electronic formats granted only to Authorized BERNINA ® Dealers
11
Class 1 - Lettering Baselines 1
OPEN a new file Select the File Menu > New or simply left click on New icon Straight Baseline Left click on the Lettering / Fill Values tool. Type < BERNINA > using the computer keyboard. Press the <Enter> key on the keyboard. Right click on the selected lettering to open the Object Prop erties dialog box. Select the Free Line Baseline with Center Justification. Change Alphabet > London Change Width > 80% Click on OK to accept changes and close dialog box. Clockwise Baseline Right click on the Lettering / Fill Values tool. Type the word < BERNINA> Select Anniversary Alphabet Select the Circle CW baseline with Center Justification Click on OK to accept changes and close dialog box. Follow the prompts on the status line - - - Single left click to define Center Point. Single left click to define Point on Circumference, dragging mouse as shown in diagram. Press <Enter> for Circle or set last Oval Point. With the lettering selected, right click to open Object Properties Change the Baseline Radius to 35mm Click on OK to accept changes. Counterclockwise Baseline Right click on the Lettering / Fill Values tool. Type the word < BERNINA> Select King Charles Alphabet Select the Circle CCW baseline with Center Justification Click on OK to accept changes and close dialog box Follow the prompts on the status line - - - Enter Center Point Enter Point on Circumference Enter Oval Point as shown Press <Enter> Save the design file. File > Save As Lettering Baselines 1.ART
Notes:
Software level
EditorPlus. . . . . . yes
DesignerPlus. . . .yes
For more information on Lettering, refer to Chapter 25 of the (On Screen manual), Lettering Essen-tials beginning on page 294.

©2009 BERNINA® of America, Inc.
Permission to copy and distribute in printed and electronic formats granted only to Authorized BERNINA ® Dealers
12
Class 1 - Lettering Baselines 2
OPEN a new file SelectFile> New or simply left click on New icon Vertical Baseline Press the “A” key on the keyboard to open the Lettering Object Properties box. Type the word < BERNINA > Select the Free Line Vertical Baseline Click Apply Follow prompts in status line - Single left click on the workspace to start text. The Object Properties box is still open the text is selected. Select Swiss Block Alphabet Click Apply, (view the change on screen) then OK to close box
Predefined (Multiple) Baseline Press the “A” key on your keyboard In the text box, type the following - BERNINA, press <Enter> V6.0, press <Enter> Software Select the Predefined Baseline and Center Justification Select Guinevere Alphabet Click OK Follow prompts in status line - Left click to set Center Point Left click to set a Point on Circumference Press <Enter> for Circle or Enter Oval Point
Any Shape Baseline Press the “A” key on your keyboard In the text box, type < Create Any Shape > Select the Any Shape Baseline Select Anniversary Alphabet Change Height >12mm Click OK Follow prompts in status line -
Enter point 1 of the curve Enter point 2 of the curve Enter point 3 of the curve Enter point 4 of the curve Press <Enter>
Save your design file. File > Save As Lettering Baselines 2.ART
TIP: When creating the Any Shape baseline, Left mouse click to create straight lines, right mouse click to create curves in the line. To elimi-nate a point just created, use the <Backspace> key to delete it.
Software level
EditorPlus. . . . . . yes
DesignerPlus. . . .yes
Notes:
For more information on Lettering, refer to Chapter 25 of the (On Screen manual), Lettering Essen-tials beginning on page 294.

©2009 BERNINA® of America, Inc.
Permission to copy and distribute in printed and electronic formats granted only to Authorized BERNINA ® Dealers
13
Class 1 - Editing Lettering 1
Editing Lettering Lettering can be altered or edited in many different ways. In this lesson we’ll explore several of these using the Reshape Object tool.
OPEN a new file (File>New) Right click on the Lettering / Fill Values tool Type < Bernina > in the text box. Select London Alphabet Press OK; left mouse click on screen to generate the lettering; notice the lettering is already selected. While selected, Copy and Paste 3x so that there are 4 words on the screen. Alternatively, use quick clone. Create a “clone” of the word “Bernina” by right mouse clicking on the selected word and dragging a duplicate into position. Select the top “Bernina” Select the Reshape Object tool The Reshape Object tool opens a variety of Control Points that can be used to edit the placement or justification of the existing text.
For detailed information on the purpose of each Control point, refer to the Onscreen Manual beginning on page 307.
Scaling Lettering with Reshape Object tool Using Control points (triangular handles), scale lettering vertically, proportionally, and horizontally. Make the following changes - - - Top “Bernina” - scale vertically (use Triangle handle on top) Second “Bernina” - scale proportionally (use Triangle handle at upper right-hand corner Third “Bernina” - scale horizontally (use Triangle handle on right edge)
Reshape the Baseline Select the bottom “Bernina” Select the Reshape Object tool To adjust the baseline length, click and drag the open triangle handle at the lower right-hand corner Save the design file. File > Save As Editing Lettering 1.ART
Software level
EditorPlus. . . . . . yes
DesignerPlus. . . .yes
Notes:
For more information on Lettering, refer to Chapter 25 of the (On Screen manual), Lettering Essen-tials beginning on page 294.

©2009 BERNINA® of America, Inc.
Permission to copy and distribute in printed and electronic formats granted only to Authorized BERNINA ® Dealers
14
Class 1 - Editing Lettering 2
Editing Lettering Lettering can be altered or edited in many different ways. In this lesson we’ll explore several of these using the Reshape Object tool.
OPEN a new file (File>New) Right click on the Lettering / Fill Values tool Type < Bernina > in the text box. Select London Alphabet Press OK; left mouse click on screen to generate the lettering; notice the lettering is selected. Use the Clone feature to create a total of 3 rows of text. Adjusting Individual Letter Spacing (Kerning) Select the top “Bernina” Select the Reshape Object tool Each letter has a colored diamond on it - left click on this diamond and the letter can be moved either right or left as desired. Move the letters to create the words “bear inn” (NOTE: When embroidering this word, it will spell “bear inn” when completed, but it will embroider each letter in the order created) Reshaping Letters Select the middle “Bernina” Use the Zoom Box tool to zoom in on the word. Select the Reshape Object tool Left click on the letter outline of the “e” Reshape nodes appear around it; play with the center of the “e” to create a heart as shown. Creatively shape other letters as desired. Recolor Individual Letters NOTE: No lettering is selected for this process Left click on the Lettering / Fill Values tool. On the bottom “Bernina”, click inside the lettering. An “I-beam” will appear between letters. To change the color of the letter, drag the cursor over it. Select a different color Press <Enter> Recolor several letters. Save the design file. File > Save As Editing Lettering 2.ART
Software level
EditorLite. . . . . . .yes
EditorPlus. . . . . . yes
DesignerPlus. . . .yes
Notes:
For more information on Lettering, refer to Chapter 25 of the (On Screen manual), Lettering Essen-tials beginning on page 294.

©2009 BERNINA® of America, Inc.
Permission to copy and distribute in printed and electronic formats granted only to Authorized BERNINA ® Dealers
15
Class 1 - Follow Up
Here are some suggestions for developing “Good Software Work” habits following each software session. Recovery and Backup files should be deleted according to the following schedule - - -
After you have used the software for about 10 hours Following any software crash
REMEMBER: The software MUST be closed before deleting recovery and backup files. Follow the listed pathway to complete this process: Start > Programs > BERNINA Embroidery Software > Delete Recovery Files
When the dialog box appears, also place a √ in the Delete Backup files
box as well. Then, click OK Computer Care Keep computer as “Clean” as possible and in good working order by us-ing the System utility programs within the computer
Disk Cleanup Using this program helps to Free Up Disk space by removing Temporary Internet files; Downloaded program files; Windows temporary files; optional Windows components not being used; Installed programs that are no longer in use; as well as Emptying the Recycle Bin. By removing these files, you can improve the performance of the computer.
Disk Defragmenter Using this program can speed up access to data. Fragmented files slow the overall performance of the computer. This pro-gram consolidates fragmented files and folders to speed up the writing and reading process to the hard disk.
To access these programs, follow the listed pathways: Start > Programs > Accessories > System Tools > Disk Cleanup Start > Programs > Accessories > System Tools > Disk Defragmenter Check out the Microsoft Windows Family homepage for the latest, great-est information for your computer and operating system! http://www.microsoft.com/windows/default.mspx
Notes:
Software level
EditorPlus. . . . . . yes
DesignerPlus. . . .yes

©2009 BERNINA® of America, Inc.
Permission to copy and distribute in printed and electronic formats granted only to Authorized BERNINA ® Dealers
16
Class 1 - Follow Up
To enhance your software experience, here are some helpful recommen-dations - - -
Read the entire Quick Start Guide.
Print the appropriate Tutorial lessons for your particular software level from the Quick Start Guide. Compile a notebook of these lessons.
Consider printing some of the resource information found in the Ap-
pendices of the Onscreen Manual - - - choose the appropriate infor-mation for your software level.
Alphabet Samples
Step Fill Samples
Fancy Fill Samples
Pattern Stamp, Run and Fill Samples
Craft Stitch Pattern Samples
NOTE: There are also reference embroidery files available for stitch-outs of many of the above samples. My Designs > Reference folder
Notes:
Software level
EditorPlus. . . . . . yes
DesignerPlus. . . .yes

©2009 BERNINA® of America, Inc.
Permission to copy and distribute in printed and electronic formats granted only to Authorized BERNINA ® Dealers
17
Class 2 - Monogramming and Design Management
Class Overview Monogramming Overview
For detailed information about the Monogramming feature, refer to the Onscreen Manual, Chapter 28 - Monogramming, beginning on page 328.
Monogramming Tutorial Quick Start Guide, Chapter 11, page 167 Design Management with Portfolio
For detailed information about Portfolio, refer to the Onscreen Manual, Chapters 31 and 32 - Portfolio Basics and Advanced, beginning on page 375.
This class is formatted for owners of the following levels of BERNINA
®
Embroidery Software, V6.0
EditorPlus
DesignerPlus

©2009 BERNINA® of America, Inc.
Permission to copy and distribute in printed and electronic formats granted only to Authorized BERNINA ® Dealers
18
Class 2 - Monogramming Overview
Monograms have traditionally been used to adorn personal items such as towels, pillowcases and even gar-ments. Generally, a monogram is composed of one or more letters, usually initials. Borders and decorative ele-ments may also be used to enhance the monogram. The Advanced Monogramming feature in V6 software of-fers a simple way to create personalized monograms. Select from - - - 16 pre-defined monogram styles - - -
44 pre-defined border shapes - - - 99 Ornament Monogram Elements and full use of all embroidery motifs as ornaments.
Combine any or all of the Monogram options quickly and easily in the Monogram Dialog Box. For detailed information about the Monogramming feature, refer to the Onscreen Manual, Chapter 28 - Monogramming, beginning on page 328.

©2009 BERNINA® of America, Inc.
Permission to copy and distribute in printed and electronic formats granted only to Authorized BERNINA ® Dealers
19
Class 2 - Monogramming Tutorial
OPEN the BERNINA Embroidery Software Double-click on the Desktop icon
OPEN the Quick Start Guide Help > Quick Start Guide
Access Quick Start Guide, chapter 10, page 158 for the step-by-step tutorial to create the motif shown above.
The Monogramming Tutorial will introduce the basic functionality of the Advance monogramming feature in V6 software.
Upon completion of the Tutorial, be sure to Save the design file.
Once the design is complete, send it to the machine of choice for stitching.
Review Chapters 29 and 30, beginning on page 344 of the On-screen Manual. These chapters outline information for printing the design as well as sending the design to the embroidery machine.
Review and Print design worksheet. Send design to the embroidery machine to be stitched.
Notes:
Software level
EditorPlus. . . . . . yes
DesignerPlus. . . .yes
Always save your work after every major change

©2009 BERNINA® of America, Inc.
Permission to copy and distribute in printed and electronic formats granted only to Authorized BERNINA ® Dealers
20
Class 2 - Design Management with Portfolio
IMPORTANT NOTE: BERNINA Embroidery software MUST be open in order to access Portfolio.
Open Portfolio File> Portfolio Be patient and wait - remember, the program is accessing all design file information
Computer Directory tree appears on the left (listing folders on your computer), design information will appear on the right. Find the My Designs folder on the C: drive Click once on the (+) next to the folder -
This will expand the directory to reveal the individual design folders within My Designs folder. Select the Animals folder (Be sure to have the correct design format se-lected to be able to view designs.)
There are 3 ways to view designs in Portfolio. Select Design > wm772 (rooster) Use the Change how to view designs tool to see the various view options: Thumbnail - - - Summary - - - List - - -
When a design has been selected, choose to: Open the design and edit/combine in the software Print design information Send directly to the machine to stitch Convert to a different file format Create a Zip archive View design properties
For more information on Portfolio, refer to Chapters 32 and 33, Portfolio Basics beginning on page 386 of the Onscreen Manual.
Software level
EditorPlus. . . . . . yes
DesignerPlus. . . .yes
Portfolio toolbar
Portfolio tools from left to right Open the Design in the Design Editor Print the selected designs Stitch the selected designs Convert the selected designs Hide/Show folders Sort the current list of designs Change how to view designs Create a Zip archive using the
selected designs View the properties for the selected
designs
Notes:

©2009 BERNINA® of America, Inc.
Permission to copy and distribute in printed and electronic formats granted only to Authorized BERNINA ® Dealers
21
Class 2 - Design Management with Portfolio (con’t)
Browsing Designs in a Folder Select the following design. My Designs > Animals > wm772 (rooster) Double click to open the Design Properties box. All information about the selected design is displayed. Navigation buttons provide the tools to move through the selected folder, viewing its contents from within the Design Properties box. Slide show buttons provide the tools to view (found within the
Design Properties box) A slide show of the designs within the selected folder Slow down, speed up or stop the slides View folder contents forward or backwards.
Select Cancel (to close dialog box)
Opening designs in the Embroidery software With design selected: Go to the Portfolio toolbar > click on Open the Design in the Design Editor tool > the design opens in either EditorPlus or DesignerPlus software Select File > Close Return to Portfolio
Archiving Design Files Hold down <Ctrl> key and select 3 designs to be archived. Click on the Create a Zip archive tool. Choose whether to archive the designs as individual files or all together as one file. Select Cancel
Select design wm772 only Right mouse click and select the option - Create Zip archive . .
Save As back into the same folder and name it - Rooster NOTE: The title of a Zip file is in italics
Software level
EditorPlus. . . . . . yes
DesignerPlus. . . .yes
Navigation toolbar
For more information on Portfolio, refer to Chapters 32 and 33, Portfolio Basics beginning on page 386 of the Onscreen Manual.
Portfolio toolbar
Portfolio tools from left to right Open the Design in the Design Editor Print the selected designs Stitch the selected designs Convert the selected designs Hide/Show folders Sort the current list of designs Change how to view designs Create a Zip archive using the
selected designs View the properties for the selected
designs
Notes:

©2009 BERNINA® of America, Inc.
Permission to copy and distribute in printed and electronic formats granted only to Authorized BERNINA ® Dealers
22
Class 2 - Design Management with Portfolio (con’t)
Opening a Zip Archive A Zip Archive can be opened to edit/combine in the embroidery soft-ware OR it can be extracted to the location of choice.
IMPORTANT NOTE: Archived (WinZip®) designs do not need to be extracted before opening)
To open a Zip archive for software editing or combining, Select the design: Either use the Open the Design tool Or right mouse click; select Open with BERNINA Embroidery Software option Extracting Design Files from a Zip Archive Select the Archive to be extracted. From the File menu > select Extract Zip Archive option. Determine where to store the extracted files. Converting File Formats Select the first 3 files in the Animal folder Select the Convert the selected designs tool. The Convert Options box opens Select the conversion format Select V4.0 BERNINA A730/A200designs Be sure to select the Destination Folder (so the designs can be found again!) Select the Browse button to determine the Destination Folder Click on OK A Conversion log can be recorded for the process. When conversion is completed, note there are 2 copies of the first 3 files in the Animal folder now; one copy is V6 and the other is V.4
Before leaving Portfolio, let’s clean up the designs from the lesson Hold down the <ctrl> key Select the V4 design copies and the Rooster Zip archive Go to Edit menu > elect Delete option Confirm Delete; the files will be deleted. NOTE: the file spaces are still present with green “?” in them. To clean the folder up, Go to View menu > select Refresh Folder option
Close Portfolio
Software level
EditorPlus. . . . . . yes
DesignerPlus. . . .yes
For more information on Portfolio, refer to Chapters 32 and 33, Portfolio Basics beginning on page 386 of the Onscreen Manual.
Portfolio toolbar
Portfolio tools from left to right Open the Design in the Design Editor Print the selected designs Stitch the selected designs Convert the selected designs Hide/Show folders Sort the current list of designs Change how to view designs Create a Zip archive using the
selected designs View the properties for the selected
designs
Notes:

©2009 BERNINA® of America, Inc.
Permission to copy and distribute in printed and electronic formats granted only to Authorized BERNINA ® Dealers
23
Class 3 - Editing and Modifying Designs
Class Overview Editing Tutorial Quick Start Guide, Chapter 7, page 75. Modifying Designs Removing Overlaps For information about the Remove Overlaps tool, refer to the Onscreen Manual, Chapter 20 - Specialized Digitizing Techniques, page 209. Alignment / Arrange tools Mirror Merge tools Wreath and Kaleidoscope tools
For detailed information about Arrange tools; Mirror Merge, Wreath, and Kaleidoscope tools; refer to the Onscreen Manual, Chapter 17, Arranging and Transforming Objects, beginning on page 178.
This class is formatted for owners of the following levels of BERNINA
®
Embroidery Software, V6:
EditorPlus
DesignerPlus

©2009 BERNINA® of America, Inc.
Permission to copy and distribute in printed and electronic formats granted only to Authorized BERNINA ® Dealers
24
Class 3 - Editing Tutorial
OPEN the Quick Start Guide Help > Quick Start Guide
Refer to Quick Start Guide, Chapter 7, page 75 for the step-by-step instructions to create the motif shown above.
The Editing Tutorial will introduce the basics of reviewing and edit-ing a design. This tutorial will cover how to correct errors and opti-mize designs.
Upon completion of the Tutorial, be sure to Save the design file. File>Save As Once the design is complete, it is ready to send to the machine of choice for stitching.
Review Chapters 29 and 30, beginning on page 344 of the On-screen Manual. These chapters outline information for printing the design as well as sending the design to the embroidery machine.
Review and Print your design worksheet Send design to the embroidery machine to be stitched
Notes:
Software level
EditorPlus. . . . . . yes
DesignerPlus. . . .yes
Always save your work after every major change.

©2009 BERNINA® of America, Inc.
Permission to copy and distribute in printed and electronic formats granted only to Authorized BERNINA ® Dealers
25
Class 3 - Modifying Designs - Removing Overlaps
Many times when combining embroidery creations, there are over-lapping objects that should be removed for optimal stitching. Using the Remove Overlaps tool makes this a very simple process.
Open Design File>Open>My Designs folder > Ornaments > Scroll 02.ART Insert Design File>Insert Design>My Designs folder > Ornaments > Circle Rose.ART Clone to create another CircleRose motif. Place one near the top and one near the bottom of the scroll in a pleasing arrangement, be sure the motifs overlap the scroll. Mirror image one of the Circle Rose motifs if desired.
Click on the Lettering / Fill Values tool. Click on the screen within the Scroll motif. Type name on screen; press <Enter>. Right click on text to open the Object Properties box: Select Medley alphabet Change the Height to 20mm Select OK Select text; hold down the <ctrl> key; select the Scroll motif> Select the Align Centers tool> Remove overlapping stitches Select text. Select the Remove Overlaps tool, a few seconds will pass as the stitches are being removed. Select one of the 2 CircleRose motifs. Select the Remove Overlaps tool; again, a few seconds will pass as the stitches are being removed. Repeat the process for the other CircleRose motif until all underlying stitches have been removed. Removing overlapping stitches couldn’t be any easier!
Save design file. File > Save As Removing Overlaps.ART
Notes:
For information about the Remove Overlaps tool, refer to the Onscreen Manual, Chapter 20 -Specialized Digitizing Techniques, page 209.
Software level
EditorPlus. . . . . . yes
DesignerPlus. . . .yes

©2009 BERNINA® of America, Inc.
Permission to copy and distribute in printed and electronic formats granted only to Authorized BERNINA ® Dealers
26
Class 3 - Modifying Designs - Alignment tools
Arrangement or Alignment tools Near the bottom of the software screen, notice the Arrange toolbar.
This toolbar contains the Group/Ungroup tools, 7 alignment tools and 5 Mirror-Merge tools.
Alignment tools These are great tools to use when multiple objects are combined in a single hooping and need to align perfectly. Use the arrow keys on the computer to nudge objects into position, or move them automati-cally using the quick alignment tools!
Open a Design File>Open>My Designs > Ornaments > Frame.ART Add a second design: File>Insert Design > Little Rose.ART; place in a pleasing position. Right click on Lettering / Fill Values tool. In the text box, type: Stop and Smell the Select Erica alphabet; Change the Height to 10mm. Select the Predefined Baseline; and Select OK. Follow prompts in Status bar to generate the text appear on the workspace.
NOTE: The Predefined Baseline leaves each line of text as an inde-pendent object. Each line is perfectly positioned and can be se-lected and edited independently. Right mouse click on “Stop”, change to Free Line Baseline, click OK. Right mouse click on “the”, change to Free Line Baseline, click OK.
Select “and Smell”; hold down the <ctrl> key and select the frame Select Align Centers tool. Move “Stop” into a pleasing position above “and Smell”. Select “and Smell”; hold down <ctrl> key, select frame and “Stop”. Select the Align Centers (Vertical) tool. Move “the” into a pleasing position.
Save the design file. File > Save As Alignment.ART
Software level
EditorPlus. . . . . . yes
DesignerPlus. . . .yes
Notes:
For detailed information regard-ing the Arrange tools, Mirror Merge and Kaleidescope tools, refer to the Onscreen Manual, Chapter 17: Arranging and Transforming Objects, beginning on page 178.

©2009 BERNINA® of America, Inc.
Permission to copy and distribute in printed and electronic formats granted only to Authorized BERNINA ® Dealers
27
Class 3 - Modifying Designs - Mirror Merge
Mirror Merge tools
Mirror Merge tools duplicate and transform selected embroidery objects, merging them into a single object. Colors are automatically re-sequenced to minimize color changes. If an object is grouped prior to using the Mirror Merge function, colors will not be combined. If combined images overlap, you will be prompted to merge designs (a grouped object cannot be merged). If you answer yes, over-lapped objects become one unit and must be edited as one. Caution: Merging overlapping areas can change the fill properties, which may or may not be desirable.
Open design. My Designs > Holice Turnbow Stencil Quilt Designs > HT114 Reduce design size to 80%. Copy design to the clipboard for use with additional exer-cises. Turn off Grid and Hoop display. Select Zoom Box tool and right click on motif to see more design area. Touch <Esc> key to turn the Zoom Box tool off.
Select design Select Mirror-Merge Horizontal tool Position the mirrored design to the left or right of the original quilt motif; notice that the duplicate is locked on the horizontal plane. Click to confirm motif placement. Paste another design. Select the design; select Mirror-Merge Vertical tool. Position the mirrored design to the top or bottom of the original quilt motif; notice that the duplicate is locked on the vertical plane. Click to accept motif placement Paste another design Select the design; select Mirror-Merge Horizontal & Vertical tool Position the mirrored design in a pleasing position; notice that the duplicates are locked on the both the horizontal and vertical planes Click to accept motif placement Save each Mirror-Merge file.
Software level
EditorPlus. . . . . . yes
DesignerPlus. . . .yes
Notes:
For detailed information regard-ing the Arrange tools, Mirror Merge and Kaleidoscope tools, refer to the Onscreen Manual, Chapter 17: Arranging and Transforming Objects, beginning on page 178.

©2009 BERNINA® of America, Inc.
Permission to copy and distribute in printed and electronic formats granted only to Authorized BERNINA ® Dealers
28
Class 3 - Modifying Designs - Wreath / Kaleidoscope tools
The Wreath tool duplicates objects around a central point. You decide how many spokes are desired in the wreath. Just like the other Mirror-Merge tools, colors are automatically re-sequenced to minimize color change. If an object is grouped prior to using the Wreath tool, colors will not be combined. If combined images over-lap, you will be prompted to merge designs (a grouped object can-not be merged). If you answer yes, overlapped objects become one unit and must be edited as one. Caution: Merging overlapping areas can change the fill properties, which may or may not be desirable. The Kaleidoscope tool is similar to the Wreath tool, but requires an even number of spokes as it mirrors every other motif in the wreath. The same rules apply regarding re-sequencing of colors and over-lapping objects. OPEN a new file File > New or simply left click on New icon Paste another design. Select the design; select Wreath tool. Select the number of Wreath points = 5 in sample. Position the mirrored design in a pleasing position. Click to accept motif placement. Save design file. File > Save As Wreath.ART OPEN a new file. Select the File > New or left click on New icon Paste another design. Select the design; select Kaleidoscope tool. Select the number of Wreath points = 6 in sample. Position the mirrored design in a pleasing position. Click to accept motif placement. Save the design file. File > Save As Kaleidoscope .ART
Software level
EditorPlus. . . . . . yes
DesignerPlus. . . .yes
Notes:
For detailed information regard-ing the Arrange tools, Mirror Merge and Kaleidescope tools, refer to the Onscreen Manual, Chapter 17: Arranging and Transforming Objects, beginning on page 178.

©2009 BERNINA® of America, Inc.
Permission to copy and distribute in printed and electronic formats granted only to Authorized BERNINA ® Dealers
29
Class 4 - Automatic Digitizing and PhotoSnap
Class Overview Auto-Digitizing Tutorial Quick Start Guide, Chapter 8, page 102 PhotoSnap For detailed information about PhotoSnap refer to the Onscreen Manual,
Chapter 15 - Automatic Digitizing, beginning on page 164.
This class is formatted for owners of the following levels of BERNINA
®
Embroidery Software, V6:
EditorPlus
DesignerPlus

©2009 BERNINA® of America, Inc.
Permission to copy and distribute in printed and electronic formats granted only to Authorized BERNINA ® Dealers
30
Class 4 - Auto-Digitizing Tutorial
OPEN the Quick Start Manual Help > Quick Start Manual Access Quick Start Manual, Chapter 8, page 102 for the step-by-step instructions to create the motif shown above.
The Auto-Digitizing Tutorial will introduce the basics of automati-cally digitizing a design as well as how to enhance the embroidery that was automatically generated. Learn how to adjust the stitching sequence as well as optimize the stitch-out.
NOTE: The Color Blending function described in the Tutorial is only available in the DesignerPlus level of software.
Upon completion of the Tutorial, be sure to Save the design file.
The design is ready to be sent to the machine of choice for stitch-ing.
Review Chapters 29 and 30, beginning on page 344 of the On-screen Manual. These chapters outline information for printing the design as well as sending the design to the embroidery machine.
Review and Print design worksheet. Send design to the embroidery machine to be stitched.
Software level
EditorPlus. . . . . . yes
DesignerPlus. . . .yes
Notes:

©2009 BERNINA® of America, Inc.
Permission to copy and distribute in printed and electronic formats granted only to Authorized BERNINA ® Dealers
31
Class 4 - PhotoSnap
The PhotoSnap feature provides a unique way in which to automati-cally digitize a graphic image. PhotoSnap designs consist of layers of satin stitches with varied spacing values.
Open a graphic image: Select the Art Canvas mode
Load picture > My Designs > Artwork > select Files of Type to be .jpegs > A_East_006.jpg>import. Press the Enter Key to position image on work-space.
Select the Embroidery Canvas.
Select Show All
Select the butterfly graphic Select the PhotoSnap tool; a stitch image is generated. The design can be edited in a number of different ways; select the image; select Object Properties:
Change the resolution Generate a dark or light background Change the Fill angle
Save favorite version of the design creation. File > Save As PhotoSnap butterfly.ART
Software level
EditorPlus. . . . . . yes
DesignerPlus. . . .yes
Default setting Fine Resolution
45° Fill angle Dark Background
For detailed information about Pho-toSnap refer to the Onscreen Man-ual, Chapter 15 - Automatic Digitiz-ing, beginning on page 164.
Notes:

©2009 BERNINA® of America, Inc.
1
Permission to copy and distribute in printed and electronic formats granted only to Authorized BERNINA ® Dealers
Mastering Your
Embroidery Software V6.0
Owner’s Workbook - Part 2
Mastering Your

©2009 BERNINA® of America, Inc.
2
Permission to copy and distribute in printed and electronic formats granted only to Authorized BERNINA ® Dealers
Table of Contents
Index .......................................................................................................................................... 2
Class 5: Digitizing ...................................................................................................................... Class Overview ............................................................................................................................. 3 Digitizing Tutorial .......................................................................................................................... 4 Blackwork Run .............................................................................................................................. 5
Class 6: Special Effects ............................................................................................................. Class Overview ............................................................................................................................. 6 TrueType Fonts ........................................................................................................................... 7 Elastic Lettering ............................................................................................................................ 8 Buttonholes ................................................................................................................................... 9 Gradient Fills............................................................................................................................... 10 Color Blending ............................................................................................................................ 11 Craft Stitch Borders..................................................................................................................... 12 Craft Stitch Fills ........................................................................................................................... 13 Craft Stitch Sampler .................................................................................................................... 14 Pattern Run Outlines ................................................................................................................... 16 Pattern Run Fills ......................................................................................................................... 17 Create a Pattern ......................................................................................................................... 18 Pattern Stamp ............................................................................................................................. 19

©2009 BERNINA® of America, Inc.
3
Permission to copy and distribute in printed and electronic formats granted only to Authorized BERNINA ® Dealers
Class 5 - Digitizing
Class Overview Digitizing Tutorial Quick Start Guide, Chapter 9, page 127 Blackwork Run For more information on Blackwork Run, refer to Chapter 20, page 207
This class is formatted for owners of the following levels of BERNINA
Embroidery Software, V6
DesignerPlus

©2009 BERNINA® of America, Inc.
4
Permission to copy and distribute in printed and electronic formats granted only to Authorized BERNINA ® Dealers
Class 5 - Digitizing Tutorial
OPEN the Quick Start Guide Help > Quick Start Guide Access Chapter 9 page 127for the step-by-step instructions to create the motif shown above.
The Auto-Digitizing Tutorial will introduce the basics of automati-cally digitizing a design as well how to enhance embroidery that was automatically generated Learn how to adjust the stitching sequence as well as optimize the stitch-out.
Upon completion of the Tutorial, be sure to Save the design file (File>Save As).
The design is ready to send to the machine of choice for stitching.
Review Chapters 29 and 30, beginning on page 344 of the On-screen Manual. These chapters outline information for printing design templates/worksheets as well as sending the design to the embroidery ma-chine.
Review and Print your design worksheet Send design to the embroidery machine to be stitched
Notes:
Software level
DesignerPlus. . . .yes
©2009 BERNINA® of America, Inc.
5
Permission to copy and distribute in printed and electronic formats granted only to Authorized BERNINA ® Dealers
Class 5 - Blackwork Run
An outline can make or break an embroidery design - a GREAT out-line just adds the perfect finishing touch!
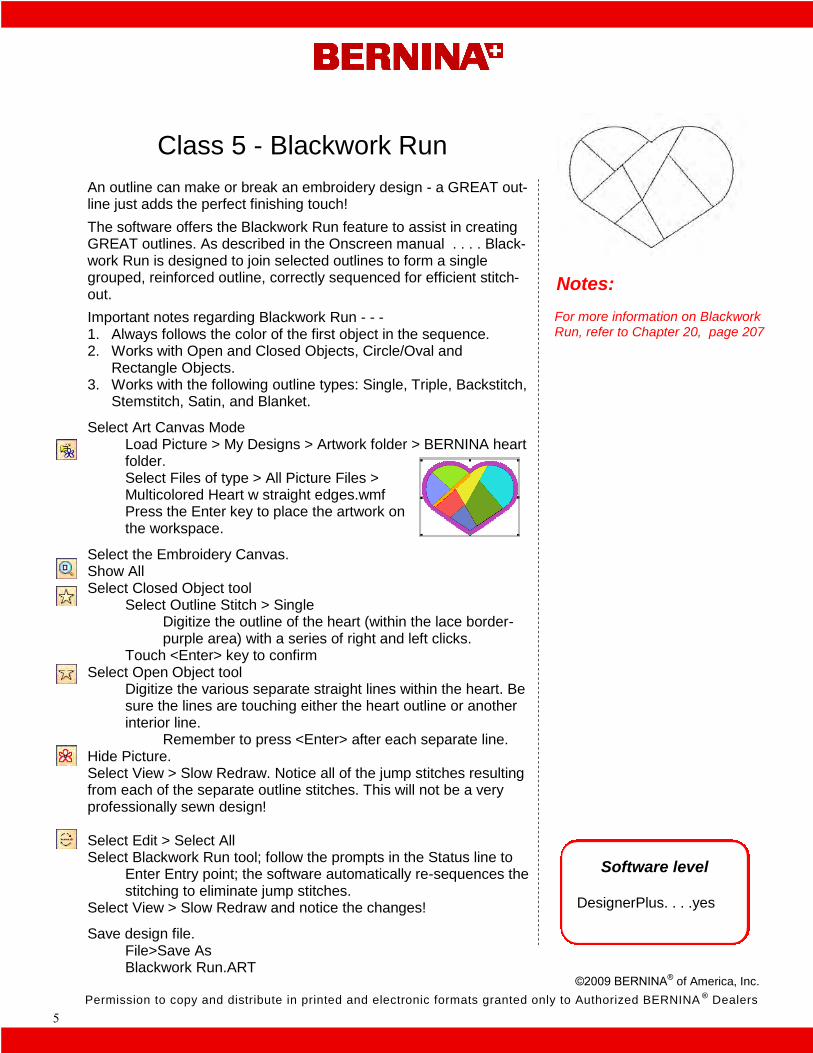
The software offers the Blackwork Run feature to assist in creating GREAT outlines. As described in the Onscreen manual . . . . Black-work Run is designed to join selected outlines to form a single grouped, reinforced outline, correctly sequenced for efficient stitch-out.
Important notes regarding Blackwork Run - - - 1. Always follows the color of the first object in the sequence. 2. Works with Open and Closed Objects, Circle/Oval and
Rectangle Objects. 3. Works with the following outline types: Single, Triple, Backstitch,
Stemstitch, Satin, and Blanket.
Select Art Canvas Mode Load Picture > My Designs > Artwork folder > BERNINA heart folder. Select Files of type > All Picture Files > Multicolored Heart w straight edges.wmf Press the Enter key to place the artwork on the workspace.
Select the Embroidery Canvas. Show All Select Closed Object tool Select Outline Stitch > Single Digitize the outline of the heart (within the lace border- purple area) with a series of right and left clicks. Touch <Enter> key to confirm Select Open Object tool Digitize the various separate straight lines within the heart. Be sure the lines are touching either the heart outline or another interior line. Remember to press <Enter> after each separate line. Hide Picture. Select View > Slow Redraw. Notice all of the jump stitches resulting from each of the separate outline stitches. This will not be a very professionally sewn design! Select Edit > Select All Select Blackwork Run tool; follow the prompts in the Status line to Enter Entry point; the software automatically re-sequences the stitching to eliminate jump stitches. Select View > Slow Redraw and notice the changes!
Save design file. File>Save As Blackwork Run.ART
Software level
DesignerPlus. . . .yes
For more information on Blackwork Run, refer to Chapter 20, page 207
Notes:

©2009 BERNINA® of America, Inc.
6
Permission to copy and distribute in printed and electronic formats granted only to Authorized BERNINA ® Dealers
Class 6 - Special Effects
Class Overview TrueType Fonts
For more information on TrueType fonts, refer to Chapter 27, beginning on page 317
Elastic Lettering For more information on Elastic Lettering, refer to Chapter 27, beginning on page 325
Buttonholes For more information on Buttonholes, refer to Chapter 20, beginning on page 213
Gradient Fills For more information on Gradient Fills, refer to Chapter 21, beginning on page 227
Color blending For more information on Color Blending, refer to Chapter 21, beginning on page 229
Craft Stitches For more information on Craft Stitches, refer to Chapter 23, beginning on page 255
Pattern Run Stitches For more information on Pattern Run Stitches, refer to Chapter 22, beginning on page 234
Create a Pattern For more information on Creating Pattern, refer to Chapter 22, beginning on page 243
Pattern Stamps For more information on Pattern Stamps, refer to Chapter 22 beginning on page 234
This class is formatted for owners of
the following levels of BERNINA®
Embroidery Software, V6:
DesignerPlus

©2009 BERNINA® of America, Inc.
7
Permission to copy and distribute in printed and electronic formats granted only to Authorized BERNINA ® Dealers
Class 6 - TrueType Fonts
The DesignerPlus level incorporates the ability to create embroi-dered lettering from fonts that are installed on your computer. These are known as TrueType fonts. IMPORTANT TIP: Remember that some TrueType fonts may not be suitable for embroidery. Experiment with the fonts and settings to find one that works for your creation. File > New Press <A> key on the keyboard to open the Lettering Object Properties box. Type <BERNINA> in the text box. Scroll through the alphabets to find True Type fonts. Select Comic Sans Change Height to 20mm Click OK; left click on screen to generate the lettering Change the lettering color to Color C3 - Red Experiment with at least 2 additional fonts. Save design file. File > Save As TrueType fonts.ART
Notes:
Software level
DesignerPlus. . . .yes
For more information on TrueType fonts, refer to Chapter 27, beginning on page 317
Font: Comic
Font: Jokerman
Font: Harrington

©2009 BERNINA® of America, Inc.
8
Permission to copy and distribute in printed and electronic formats granted only to Authorized BERNINA ® Dealers
Class 6 - Elastic Lettering
Using Elastic Lettering features is a great way to add personality to ettering creations! DesignerPlus software offers the ability to Bulge, Arch, Stretch, or Compress your lettering. In the Elastic Lettering menu, there are 4 options available - - - Straight, Curved, Perspective, Diamond File > New Press <A> key on the keyboard to open the Lettering Object Properties box. Type <ABC> into the text box Select Veranda Alphabet Change the height to 16mm Click OK; left click on screen to generate the lettering Change the lettering color to Color C3 - Red Quick Clone 7 more copies for a total of 8 - “ABC”’s on the screen. Select the first copy of <ABC> Edit > Elastic Lettering > Straight The selected lettering is now in a box with 4 yellow corner handles. The handles can be dragged independently or as pairs using either the <Ctrl> or <Shift> keys. (For specific information, refer to page 325 of the manual) Change each of the “ABC” lettering groups to reflect the 4 elastic lettering options; one with a single han-dle being moved and one with a pair of handles being moved. Save design file. File > Save As Elastic Lettering.ART
Notes:
Software level
DesignerPlus. . . .yes
For more information on Elastic Letter-ing, refer to Chapter 27, Special Lettering Effects beginning on page 325.

©2009 BERNINA® of America, Inc.
9
Permission to copy and distribute in printed and electronic formats granted only to Authorized BERNINA ® Dealers
Class 6 - Buttonholes
DesignerPlus software gives you the freedom to incorporate buttonholes as a functional or decorative feature in you embroidery creations. Adding a buttonhole and merging it into your embroidery motif couldn’t be any easier! Open Design File>Open>My Designs folder > Borders folder > FM902.ART Select the design Right click 1x on Rotate 45 deg CCW / CW Left click on Scale by 20% Down / Up
Quick Clone a second copy of the motif. Align the motifs vertically, with the corner points just touching. Envision a garment front with these embroidery motifs stitched down the front with buttonholes in each one. Arrange > Add Buttonhole A shadow of a buttonhole is now attached to the cursor. Click on the screen to place a buttonhole. Click in the corner area of each lace motif to add a buttonhole. Touch Esc on the keyboard to deactivate the buttonhole tool. Select a buttonhole Right mouse click to open Object Properties box; there are 9 button-hole styles to choose from. It is also possible to change the angle of the buttonhole and buttonhole size. Select Round buttonhole. Change the buttonhole to Horizontal orientation; Slit length > 18mm. Click OK.
Move the buttonhole into a pleasing position. Repeat the above process with the second buttonhole
To align both buttonholes perfectly, hold down the <Ctrl> key and select both buttonholes; use one of the vertical alignment tools.
To remove the stitches from under the buttonhole: Select the buttonhole. Select the Remove Overlaps tool; stitches are automatically removed. Repeat the process for the remaining buttonhole.
Save the design file. File > Save As Buttonholes.ART
Notes:
Software level
DesignerPlus. . . .yes
For more information on Buttonholes, refer to Chapter 20, Specialized Digitiz-ing Techniques beginning on page 213.

©2009 BERNINA® of America, Inc.
10
Permission to copy and distribute in printed and electronic formats granted only to Authorized BERNINA ® Dealers
Class 6 - Craft Stitch Borders
The DesignerPlus software level provides an entire category of Craft Stitches to design and create with. These stitches are designed to “mimic” hand-worked embroidery. The Craft Stitch category includes the following: Blackwork, Candlewicking, Lacework, Stipple, Backstitch, and Stemstitch. Craft stitches can be used to create borders and/or fills.
Let’s start with creating Craft Stitch borders. Select the Closed Object tool Select Outline > Single Digitize a heart shape, using the Grid as a guide; touch <Enter> key to generate the stitches. Create 5 more copies, for a total of 6 hearts, arranged two across and three down.
Select top hearts; change the outlines to a Blackwork Border. Select middle hearts; change the outline to a Candlewicking Border. Select bottom left heart; change the outline to a Stemstitch. Select bottom right heart; change the outline to a Backstitch. Select top right heart; right click to open Object Properties box. Select from different patterns to apply as well as changing both the size and spacing of the selected pattern. Choose pattern B0027a; select the Apply button to view; notice the pattern is very large on the heart. Change the Size and Spacing to 6mm; Apply to view changes; click OK to accept changes. Select middle right heart; open Object Properties box. Choose pattern Half Knot-3-5mm; Apply. Change Spacing to 4mm; Apply to view changes; click OK. Save design file. File > Save As Craft Stitch Borders.ART
Notes:
Software level
DesignerPlus. . . .yes
For more information on Craft Stitches, refer to Chapter 23, Craft Stitch Borders and Fills beginning on page 255.
Blackwork Run
Blackwork Border
Blackwork Fill
Candlewicking Bor-
Candlewicking Fill
Lacework
Stipple
Stemstitch
Backstitch
Right clicks
Left clicks

©2009 BERNINA® of America, Inc.
11
Permission to copy and distribute in printed and electronic formats granted only to Authorized BERNINA ® Dealers
Class 6 - Gradient Fills
Using Gradient Fills to add perspective or shading to embroidery creations. Gradient fills vary the stitch spacing between dense and open fills. The software offers several different Gradient Fill effects to choose from. File > New Begin by digitizing several square shapes using the Rectangle tool Create a total of 6 squares; to create a perfect square with the Rectangle tool, hold down the <Ctrl> key. To highlight the gradient effect, turn off Underlay when creating the squares. (Note: The boxes have been numbered for easy identification.) Select Box 1 Right click to open Object Properties box. Select the Effects button > Gradient Fill tab. Click in the Gradient Fill box to turn the feature on, select the First Profile. Go to the Others tab, notice the Travel on Edges option is selected. Click on OK. Select Box 2; repeat the above process, selecting Second Profile. Select Box 3; repeat the above process, selecting Third Profile. Select Box 4; repeat the above process, selecting Fourth Profile. Select Box 5; repeat the above process, selecting the first Profile again. Adjust the Maximum Spacing value to 0.1mm Select Box 6; repeat the above process, selecting the first Profile again. Adjust the Maximum Spacing value to 10mm. Save the design file. File > Save As Gradient Fills.ART
Notes:
Software level
DesignerPlus. . . .yes
For more information on Gradient Fills, refer to Chapter 21, Artistic Stitch Ef-fects beginning on page 227
1 2
3 4
5 6

©2009 BERNINA® of America, Inc.
12
Permission to copy and distribute in printed and electronic formats granted only to Authorized BERNINA ® Dealers
Class 6 - Color Blending
Color Blending is another way in which to add shading, perspective, three-dimensional looks and interesting color effects to embroidery creations. The DesignerPlus level of software offers several Color Blending options to choose from.
File > New Begin by digitizing six circle shapes using the Circle / Oval tool To highlight the color blending effect, deactivate auto Underlay turned off when creating the circle. (Note: The circles have been numbered for easy identification.)
Select Circle 1 Select the Color Blending tool. Select Profile 1; leaving Maximum Spacing at default settings. Adjust the Colors as follows - - - Bottom Layer - C5; Top Layer - C11 Click OK and click away from the circle to view the changes.
Select Circle 2; select Color Blending tool Select Profile 2; leaving Max. Spacing and Colors at the new default; Click OK.
Select Circle 3; select Color Blending tool Select Profile 3; leaving Max. Spacing and Colors at the new Default; Click OK.
Select Circle 4; select Color Blending tool Select Profile 4; leaving Max. Spacing and Colors at the new Default; Click OK.
Select Circle 5; select Color Blending tool Select Profile 1;change Maximum Spacing for both Bottom / Top layers to 5mm; Click OK.
Select Circle 6; select Color Blending tool Select Profile 1; change Maximum Spacing for both Bottom / Top layers to 1mm; Click OK.
Select Artistic View mode to see the various profile combinations. Save design file: File > Save As Color Blending.ART
Software level
DesignerPlus. . . .yes
For more information on Color Blend-ing, refer to Chapter 21, Artistic Stitch Effects beginning on page 229.
1 2
3 4
5 6
Notes:

©2009 BERNINA® of America, Inc.
13
Permission to copy and distribute in printed and electronic formats granted only to Authorized BERNINA ® Dealers
Class 6 - Craft Stitch Fills
We’ve created Craft Stitch borders, now let’s create some unique fills using the Craft Stitches Open the previous file > Craft Stitch Borders.ART Select top left heart; change the outline to a Blackwork Fill. Select top right heart; change the outline to a Candlewicking Fill. Select middle left heart; change the outline to Lacework. Select middle right heart; change the outline to Stipple Fill; accept the default settings by clicking on OK.
As with Craft Stitch borders, Object Properties can be changed on Craft Stitch fills. Select bottom left heart; change the outline to a Blackwork Fill. Right click to open the Object Properties box; select Fill Stitch tab. Choose pattern B0004a; select the Apply button to view; this is a fairly small pattern and fills the shape nicely. Let’s make some changes - - - Change Column Spacing > 4mm Change Row Spacing > 2mm Change Row Offset > 2mm Select the Apply button between each change to view the motif When complete, click OK. Select bottom right heart; change the outline to Stipple Fill; open Ob-ject Properties to adjust the Stitch Length and Loop Spacing. Change the Stitch Length > 1mm Change the Loop Spacing > 1mm Select OK. Save design file. File > Save As Craft Stitch Fills.ART
Software level
DesignerPlus. . . .yes
Blackwork Run
Blackwork Border
Blackwork Fill
Candlewicking Bor-
Candlewicking Fill
Lacework
Stipple
Stemstitch
Backstitch
Notes:
For more information on Craft Stitches, refer to Chapter 23, Craft Stitch Borders and Fills beginning on page 255.

©2009 BERNINA® of America, Inc.
14
Permission to copy and distribute in printed and electronic formats granted only to Authorized BERNINA ® Dealers
Class 6 - Craft Stitch Sampler
File > New Select the Art Canvas Tab Load Picture > My Designs folder > Artwork folder > Tulip Heart.bmp>import Press the Enter key on the keyboard. Select the Embroidery Canvas Select Show 1:1
Select the Rectangle tool > Fill Stitch > Step > Color(C45); digitize a square around the heart, larger than white area of graphic. Be sure to center the square over the graphic. Select Closed Object tool; Fill > Step; Color (C3); digitize heart.
Duplicate Heart > change to Outline > Candlewicking Border Right click > select Candlewick Pattern > Half Knot 3-5mm
Select Magic Wand; process the artwork. Digitize flower centers(C7); flower petals(C5) and digitize leaves(C3) Touch Ecs. Select the flower centers and leaves; select Object Properties. Select Effects>Others and adjust the pull compensation to .4; OK.
Remove the underlying stitches of the square and heart where the heart lies over the square and then where the flower petals lie over the heart. Use the Remove Overlaps tool to do this. Select the Heart > Remove Overlaps tool; this cuts a heart shaped hole in the Square Select the flower petals(C5) and centers(C7); select the Remove Overlaps tool again; the underlying stitches on the heart are removed.
Open Object Properties Select Outline Stitch tab > Stitch Type > Backstitch; change the stem thickness to 0.25mm > OK. Select Open Object tool; Color(C3); digitize center vein in each leaf. Open Object Properties > Outline Stitch > Stitch Type > Stemstitch; change spacing to 1mm; change stitch angle to 55° > OK. Select Open Object tool; Color(C3); digitize flower stems.
Open Object Properties > Outline Stitch > Stitch Type > Single > OK. Outline flower center, petal and leaves by selecting Color Film sections; Duplicate; change fills to Outline stitch > Single; Color(C13)
Software level
DesignerPlus. . . .yes
Blackwork Run
Blackwork Border
Blackwork Fill
Candlewicking Bor-
Candlewicking Fill
Lacework
Stipple
Stemstitch
Backstitch
Notes:
For more information on Craft Stitches, refer to Chapter 23, Craft Stitch Borders and Fills beginning on page 255.

©2009 BERNINA® of America, Inc.
15
Permission to copy and distribute in printed and electronic formats granted only to Authorized BERNINA ® Dealers
Class 6 - Craft Stitch Sampler (cont’d)
Select a flower petal. Open Object Properties > Fill Stitch tab > Blackwork Fill > select B0004a > change Rotation angle to 35° > OK. Repeat for other petal, using a Rotation angle value of -35° > OK. Select Heart Open Object Properties > Fill Stitch tab > Stitch Type > Lacework. Select lace pattern L0003a > OK. Select background square > Stipple . Open Object Properties to change Stitch Length and Loop Spacing to 2mm > OK. Save design file. (File>Save As)
Software level
DesignerPlus. . . .yes
Blackwork Run
Blackwork Border
Blackwork Fill
Candlewicking Bor-
Candlewicking Fill
Lacework
Stipple
Stemstitch
Backstitch
Notes:
For more information on Craft Stitches, refer to Chapter 23, Craft Stitch Borders and Fills beginning on page 255.

©2009 BERNINA® of America, Inc.
16
Permission to copy and distribute in printed and electronic formats granted only to Authorized BERNINA ® Dealers
Class 6 - Pattern Run Outlines
Pattern Run stitches are pre-defined simple design elements that can be applied to outlines, fills and even used as “stamps”.
File > New Settings > Options > Grid tab > Snap to Grid > OK. Open Object Properties box > Outline stitch > Pattern Run > NP005a pattern set > 660a Select Open Object tool > Outline stitch > Pattern Run Digitize from left to right in a zigzag pattern forming a rectangle. Note the grid lines turning red when placing a mouse click directly at the intersecting lines. Press the <Enter> key. The resulting image shows the selected Pattern Run stitch not fitting the digitized line very well.
Select the Pattern Run frame > right click to open Object Prop-erties box > change Size of Pattern to 15mm > OK. The Pattern now fits the digitized line much better.
Select the Rectangle tool; drag a box inside the first rectangle. Notice the size of this pattern is the original size that was set in the Object Properties box originally. File > Insert Design > My Designs folder > Florals folder > Fl940.ART Rotate design into a pleasing position within the Pattern Run Frames. Save the design file. File > Save As Pattern Run frame.ART
Notes:
Software level
DesignerPlus. . . .yes
For more information on Pattern Run Stitches, refer to Chapter 22, Pattern Stamps, Runs and Fills, beginning on page 234.

©2009 BERNINA® of America, Inc.
17
Permission to copy and distribute in printed and electronic formats granted only to Authorized BERNINA ® Dealers
Class 6 - Pattern Run Fills
Let’s take a look at Pattern Run fills.
File > New Settings menu > Options > Grid tab > deselect Snap to Grid > OK. Open Object Properties box > Fill Stitch tab > Stitch Type: Pattern Fill > BerninaV5 pattern set > NP005-15 > Apply > OK.
Select Closed Object tool > Pattern Fill Digitize a circle with 3 right mouse clicks as shown. Press the <Enter> key.
Duplicate or Quick Clone 5 more circles and arrange in design area. Select the Top left circle; right click to open Object Properties > select Fill Stitch tab > select Layout but-ton Within the Object Properties box numerical changes to the pattern fill may be entered to change the look of the pattern fill. The Layout op-tion provides a visual method to make pattern changes. (For specific details on the functions of the guide pattern stitches (blue stitches) refer to Onscreen manual, page 241.) To close the layout view, simply touch the <Esc> key. The Object Properties box reappears. Make the following changes to the circles -
Top left circle - no changes Top right circle - Size X and Size Y: 10mm Middle left circle - Rotate 45° Middle right circle - Column Spacing: 10mm Bottom left circle - Row Offset: 3mm Bottom right circle - Colum Spacing: 10mm; Row Spacing: 10mm; Row Offset: 5mm
Click OK to close the Object Properties box. Save the design file. File > Save As Pattern Run Fills.ART
Software level
DesignerPlus. . . .yes
For more information on Pattern Run Stitches, refer to Chapter 22, Pattern Stamps, Runs and Fills, beginning on page 234.
Notes:

©2009 BERNINA® of America, Inc.
18
Permission to copy and distribute in printed and electronic formats granted only to Authorized BERNINA ® Dealers
Class 6 - Create a Pattern
DesignerPlus software offers unlimited create options; including the ability to create custom patterns! File > New Select the Closed Object tool. Digitize a small diamond shape as shown press the <Enter> key to generate stitches. Select the diamond Settings > Create Pattern; a series of dialog boxes will appear. Name the new pattern, or create a new Pattern Set to save it in.
Create the new Pattern Set > enter new Pattern Name > OK.
After giving the Pattern a name > OK, the software will ask for digi-tized reference points at the beginning and end of the pattern to determine the direction of the stitch out. Follow the prompts in the Status line. Once completed, the fol-lowing dialog box appear. Each stitch within the Pattern will connect with the next based on where the reference points were placed. (Refer to page 243 in the Onscreen manual) Create several different connection options for the same diamond shape. Each pattern variation will require a different name. Repeat the above listed process for each new pattern. After creating a different pattern, select the Open Object tool > Outline > Pattern Run; digitize a row of stitching Save the design file. File > Save As Create Pattern.ART
Notes:
Software level
DesignerPlus. . . .yes
For more information on Creating Pat-terns, refer to Chapter 22, Pattern Stamps, Runs and Fills, beginning on page 243.

©2009 BERNINA® of America, Inc.
19
Permission to copy and distribute in printed and electronic formats granted only to Authorized BERNINA ® Dealers
Class 6 - Pattern Stamps
Place individual pattern stitches anywhere on the design composi-tion! File>Open > My Designs folder > Children folder > Cj406.ART Arrange > Pattern Stamp; the Select Pattern dialog box opens. Select Symbol Set: 01Monogram Ornaments > pattern M052a > OK.
The dialog box closes; the pattern is now attached to the cursor. Move the cursor to place the pattern; left click 1x. The stamp is connected to a rotating anchor point. Click a second time to set the stamp. Place several butterfly patterns around the “duck family” as desired. These patterns can also be scaled and rotated. When pleased with the design, touch the <Esc> key to deactivate the Pattern Stamp feature. Save the design file: File > Save As Pattern Stamps.ART
Notes:
Software level
DesignerPlus. . . .yes
For more information on Pattern Stamps, refer to Chapter 22, Pattern Stamps, Runs and Fills, beginning on page 234.

©2009 BERNINA® of America, Inc.
Permission to copy and distribute in printed and electronic formats granted only to Authorized BERNINA ® Dealers
1
Mastering Your
Embroidery Software V6.0
Owner’s Workbook - Part 3
Mastering Your

©2009 BERNINA® of America, Inc.
Permission to copy and distribute in printed and electronic formats granted only to Authorized BERNINA ® Dealers
2
Table of Contents
Index .......................................................................................................................................... 2
Class 7: Appliqué ....................................................................................................................... Class Overview ............................................................................................................................. 3 Auto Appliqué ............................................................................................................................... 4 Appliqué Tutorial ........................................................................................................................... 6
Class 8: Multi-Hooping .............................................................................................................. Class Overview ............................................................................................................................. 7 Multi-Hooping ............................................................................................................................... 8

©2009 BERNINA® of America, Inc.
Permission to copy and distribute in printed and electronic formats granted only to Authorized BERNINA ® Dealers
3
Class 7 - Appliqué
Class Overview Auto Appliqué For more detailed information about the Auto Appliqué feature, refer to the Onscreen Manual, Chapter 24 - Digitizing for Appliqué, beginning on page 274. Appliqué Tutorial using the Advanced Appliqué tool Quick Start Guide Chapter 11, page 176.
This class is formatted for owners of the following levels of BERNINA
®
Embroidery Software, V6:
DesignerPlus

©2009 BERNINA® of America, Inc.
Permission to copy and distribute in printed and electronic formats granted only to Authorized BERNINA ® Dealers
4
Class 7 - Auto Appliqué
In this design, will use a combination of Automatic Digitizing and appliqué.
Select Art Canvas. Load Picture > select Files of Type: WMF files (*.wmf) Select Snowflake.wmf>import and press Enter. Return to the Embroidery Canvas. Right click on Show Hoop icon. Be sure Show Hoop is selected. Select artista 255 x 145 Oval hoop. Show All. Creating the appliqué portion of the design: Before beginning the digitizing process, review the appliqué setting possibilities; select Settings > Options > Appliqué tab
This dialog box shows how many boundaries are being de-fined in the appliqué as well as determining the frame out po-sitioning. (Frame out - hoop moves for ease in positioning of applique fabric in hoop.)
Select Single Boundary and Automatic Frame Out position; click on OK. Select Auto Appliqué tool; follow the prompts in the Status line and digitize around the black hexagon shape in the snowflake graphic. Touch the <Enter> key three times to accept the default settings. The Satin cover stitch is created.
Select the AutoDigitizer tool. The Artwork Preparation dialog box opens. Number of colors: 4 colors. Click OK. Click on an area of the snowflake graphic; the dialog box opens. Choose these settings - - - Fills: Auto; Details: Satin; Omitted colors - All except the blue of the snow-flake design (select multiple colors by holding down the <Ctrl> key) Click OK. Select Show Picture icon to turn picture off; view the design in Artistic View.
Select the appliqué stitching, change the color to C2 to match the rest of the stitching.
Notes:
Software level
DesignerPlus. . . .yes
For more information on Auto Appli-qué, refer to Chapter 24, Digitizing for Appliqué beginning on page 274.

©2009 BERNINA® of America, Inc.
Permission to copy and distribute in printed and electronic formats granted only to Authorized BERNINA ® Dealers
5
Class 7 - Auto Appliqué (cont’d)
Adding fabric: With the appliqué selected; right click to open Object Properties. In the Fabric box, select Choose button; click on the (+) sign in front of the Benartex 2006 fabric collection; click on the (+) sign in front of the JollyOlStNick collection > select fabric chip 905-55; select OK.
Save design file. File > Save As Snowflake Appliqué.ART
Select Print Preview; select Options. Select the Hoop; Start/end Crosshairs; Appliqué Patterns; Actual Size options; click OK.
Print Preview should look like the following - - - the appliqué pattern is necessary to complete the embroidery.
Software level
DesignerPlus. . . .yes
IMPORTANT TIP: When cutting out the pattern, cut just past the line of the shape. If you cut on the line or inside the line, your shape will be too small for the appliqué process.
Notes:
For more information on Auto Appli-qué, refer to Chapter 24, Digitizing for Appliqué beginning on page 274.

©2009 BERNINA® of America, Inc.
Permission to copy and distribute in printed and electronic formats granted only to Authorized BERNINA ® Dealers
6
Class 7 - Appliqué Tutorial
OPEN the Quick Start Guide. Help > Quick Start Guide. Access Chapter 11, page 176 for the step-by-step instructions to create the motif shown above.
The Appliqué Tutorial will introduce the Advanced Appliqué feature used to create appliqués with open-objects.
Upon completion of the Tutorial, be sure to Save your design creation.
The design is ready to send to the machine of choice for stitching.
Review Chapters 29 and 30, beginning on page 344 of the On-screen Manual. These chapters outline information for printing design templates/worksheets as well as sending the design to the embroidery ma-chine.
Review and Print your design worksheet Send design to the embroidery machine to be stitched
Software level
DesignerPlus. . . .yes
For more information on Advanced Ap-pliqué, refer to Chapter 24 ,Digitizing for Appliqué beginning on page 274.
Notes:

©2009 BERNINA® of America, Inc.
Permission to copy and distribute in printed and electronic formats granted only to Authorized BERNINA ® Dealers
7
Class 8 - Multi-Hooping
Class Overview Hooping Large Designs with the Multi-Hooping feature. For detailed information on the Multi-Hooping feature, refer to the Onscreen Manual, Chapter 6, Hooping Designs, beginning on page 56.
For detailed information on Outputting multi-hooped designs, refer to the Onscreen Manual, Chapter 29, Outputting Designs, beginning on page 358.
This class is formatted for owners of the following levels of BERNINA
®
Embroidery Software, V.5:
DesignerPlus

©2009 BERNINA® of America, Inc.
Permission to copy and distribute in printed and electronic formats granted only to Authorized BERNINA ® Dealers
8
Class 8 - Multi-Hooping
Software level
DesignerPlus. . . .yes
For more information on Multi-Hooping refer to Chapters 6 and 29.
Notes:
Open the design
Select File/Open. Navigate to My Computer/C: My Designs Embroidery
Software 6: Seasons. Scroll to RC519. Click on Open. Select File/Save As and navigate to your v6 training
folder. Name the design, Multi-hooping. Click on Save.
Enlarging the design
Select the design and open Object Properties. Click on the General tab. Place a check mark by proportional scaling and change
the width to 200%. Click OK. Select the Zoom tool and right click on the screen two
times to zoom out. Hit Esc. Right click on the Show Hoop icon. Choose artista 255 x 145 Oval and make sure Display
Hoops is checked. Add hoops to the design
Prior to adding hoops, select View/Slow Redraw to watch the design stitch out. Notice the order of the stitch out and the predominant angle of the stitches.
Select the Hoop Layout mode. Move the hoop by clicking and dragging to the far left of
the design since this is the first area to stitch out. Click on the Add Hoop Right icon and move the hoop to
allow as much overlap of hoops as possible.
The black area of the design is one object and will have to be split in order to be covered by the two hoops.

©2009 BERNINA® of America, Inc.
Permission to copy and distribute in printed and electronic formats granted only to Authorized BERNINA ® Dealers
9
Class 8 - Multi-Hooping
Splitting the design Select the Splitting Guide Tool and digitize a splitting line
with right and/or left clicks. Use right clicks for curved lines & left clicks for straight lines.
Hit enter to activate. The entire design should turn green. Once the splitting guide is drawn, calculate the number of
hoopings by clicking on the Calculate Hoopings icon. If the software calculated 3 hoopings, try rotating the hoops
to a horizontal position with the Rotate Hoops icon. Hit Esc. Select the hoops and rotate each into a new position. See pictures below.
Delete the splitting guide by selecting the line and hitting the delete key. Re-draw a new splitting guide by selecting the icon and clicking in place.
Sending the design to the machine Return to Embroidery Canvas mode. Save the design. Select No to Export everything in one file. Click on the Write to Machine icon. The design will be split
automatically into separate files. You may preview the stitching sequence by clicking on
each file to see what part of the design stitches with each hooping.
Click on Send Now and choose the machine of your choice. Printing templates
Select File/Print Preview. Select Options and make sure Hooping Sequence is
checked. Notice that the hoops are printed and color coded for stitch
sequence. Click Close.
A Word About Splitting Right clicks draw curved lines and left clicks draw straight lines. Splits should be drawn within the sewing field of overlap-ping hoops. Split lines can be reshaped by selecting the line and using the Reshape Splitting Guide icon. One or more split lines can be digitized. The split will not necessarily occur along the digitized line; instead, it will be made as in-conspicuous as possible. Objects will preserve their object type, stitch angle, pa-rameters, and color. The splitting guide will only split those overlapping ob-jects which need to be split and will still follow the rule to “preserve the sewing se-quence”. This will sometimes produce more hoopings than the user would think (or like) but it means the integrity of the digitizers work is main-tained. Sometimes by moving the hoops a little closer together, you will get fewer hoopings. Sometimes by rotating the hoops, you will get fewer hoopings. Remember the benefit of Cal-culate Hoopings!

©2009 BERNINA® of America, Inc.
Permission to copy and distribute in printed and electronic formats granted only to Authorized BERNINA ® Dealers
1
Mastering Your
Embroidery Software V6.0
Owner’s Workbook - Bonus
Mastering Your

©2009 BERNINA® of America, Inc.
Permission to copy and distribute in printed and electronic formats granted only to Authorized BERNINA ® Dealers
2
Table of Contents
Index .......................................................................................................................................... 2
Class 9 ....................................................................................................................................... Class Overview ............................................................................................................................. 3 Quilter ........................................................................................................................................... 4 Block Editor………………………………………………………………………………………………… 7 Cross Stitch .................................................................................................................................. 9
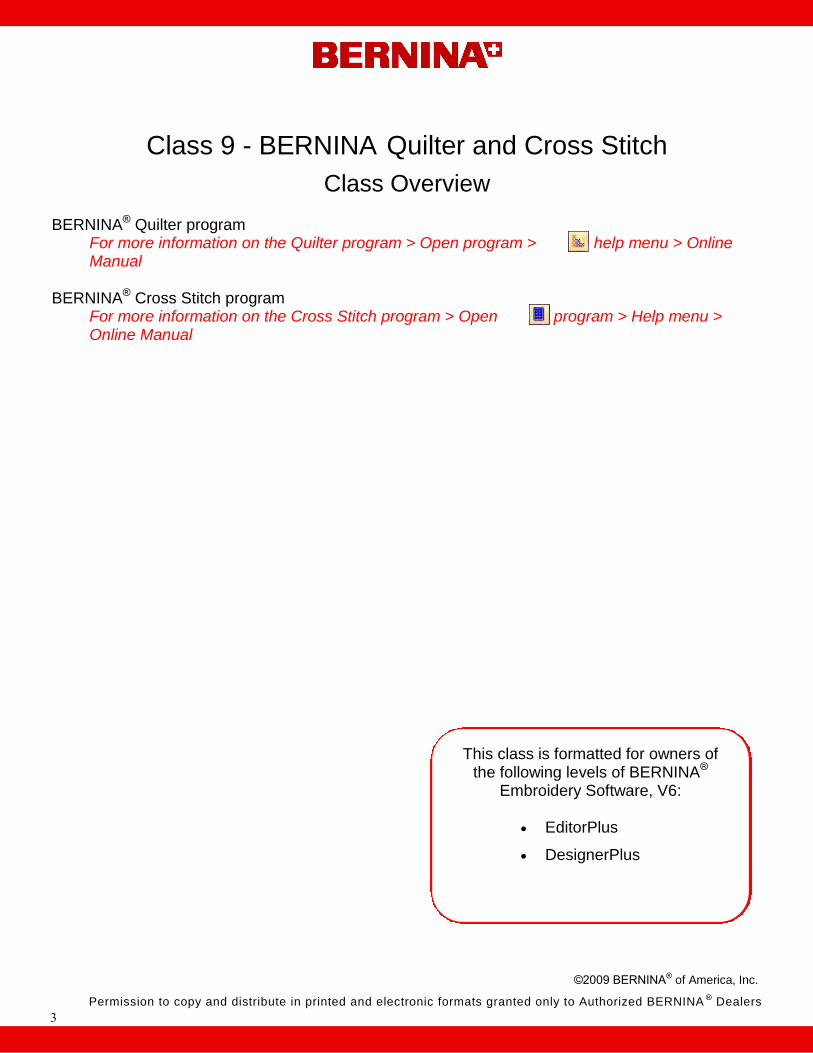
©2009 BERNINA® of America, Inc.
Permission to copy and distribute in printed and electronic formats granted only to Authorized BERNINA ® Dealers
3
Class 9 - BERNINA
Quilter and Cross Stitch
Class Overview BERNINA
® Quilter program
For more information on the Quilter program > Open program > help menu > Online Manual
BERNINA® Cross Stitch program
For more information on the Cross Stitch program > Open program > Help menu > Online Manual
This class is formatted for owners of the following levels of BERNINA
®
Embroidery Software, V6:
EditorPlus
DesignerPlus

©2009 BERNINA® of America, Inc.
Permission to copy and distribute in printed and electronic formats granted only to Authorized BERNINA ® Dealers
4
Class 9 - Quilter
Integrated within the EditorPlus and DesignerPlus levels of Bernina Embroidery Software is the Bernina Quilter Program. Use Bernina Quilter to design, preview, calculate yardage and scale embroidery designs directly on the project.
Opening the Quilter Program Click on the Quilter icon located on the Design toolbar to open
Quilter. Click on Layout to open the quilt layout dialog box. Input quilt design information:
Format: Diamond Blocks: 1 block across and 1 block down Width: 6” Height: 12” Sashing: Click on the drop down box next to Styles
and select Squares Sashing: Width (1”) Borders: Click Add, Style: Mitered , Width: 2” Click OK. Click Show All
Setting Blocks, Colors and Fabrics The Blocks
Click on the Library icon if necessary to open the Library. Click on the “+” beside a file name to view the block patterns in
each folder. Open the Log Cabin folder. Select the Pineapple Log Cabin. Select the Paintbrush from the Edit toolbar. Click on the center dia-
mond to assign the block style to the quilt layout. The Colors and Fabrics
Click on the Fabric button to access the fabric files. Click on the “+” beside Benartex 2006 to expand the folder. Click on the “+” beside the fabric line, Balis Tutti-Frutti, to preview
the fabric swatches. Click on fabric swatch, 415-42. (6th row; 3rd swatch) Click on To Palette. Fabric swatch is visible at the top of the
screen. Click on the Color button to select from solid color values. Click on Light, Medium or Dark to select from the desired shade. Place 3-4 solids on the palette to compliment the pineapple block
color scheme, by clicking To Palette.
Notes:
Bernina Embroidery Software must be open to access the Quilter Program. Input the finished block size-1/4” seam included.
The Library provides over 300 quilt blocks, a wide color pal-ette and fabrics from which to design the project. Be sure Blocks is selected in the Library. For a larger preview of the fabric tile, hold down the Alt key while clicking on the swatch.

©2009 BERNINA® of America, Inc.
Permission to copy and distribute in printed and electronic formats granted only to Authorized BERNINA ® Dealers
5
Class 9 - Quilter
Coloring the Quilt Select the Paintbrush from the Edit toolbar. Select a fabric/color from the Palette for the corner trian-
gle block (1). Click in the center of the triangle to fill with the select fabric/color. Hold down the Ctrl key and click in the center of the next triangle to fill the remaining corner triangles.
Select a fabric/color for the sashing (2). Hold down the Ctrl key while clicking in the triangle. Repeat for each (2) segment.
Color sashing corner triangles and borders using fabric/color of choice.
File> Save As > “Diamond Log Cabin.”
Adding Embroidery Click on the Embroidery Window icon to link to the soft-
ware Design View screen. Select File/Insert Design. My Computer: C: My Designs: Holice Turnbow Quilt Sten-
cil Designs. Select 111.ART60. Click Open. Select the design. Open the Color Bar from the color
menu, select a color that will contrast with the fabrics used on the quilt block for visibility > C11 dark brown.
Left click on the Rotate 45° two times. Left click one time on Scale by 20%. Select Arrange/Start & End and set the Start Needle Posi-
tion at the first stitch of the design and set the End Needle Position at the last stitch of the design.
Click OK. Turn on the Grid if it is off by left clicking on the Show Grid
icon. Select Mirror-Merge Vertical. Move the reference line to a
half a grid from object click. Select the Zoom Box and right click on the screen to zoom
out. Edit/Select All. Select Mirror-Merge Vertical. Move the reference line to a
half a grid from object and click. Click on the Quilter screen to link back to the Quilter Pro-
gram. Position the motif over the vertical border. While quilt motif is selected, select Copy; then Paste. Double click on the quilt motif to return to the Embroidery
Canvas window. Note: If the design is selected, you can double click on the design motif to return to the previous embroidery screen.

©2009 BERNINA® of America, Inc.
Permission to copy and distribute in printed and electronic formats granted only to Authorized BERNINA ® Dealers
6
Class 9 - Quilter
Click on the top quilted shape then hold down the Control key as you select each quilted shape, from top to bottom.
Select Arrange/Sequence as Selected. Select File/ Save As. Navigate to the v6 Training folder and name the file as
Border 1. Click Save. Select the last quilt motif and delete, leaving three in the
group. Select File> Save As. Name the file Border 2. Click on the Quilter screen to link back to the Quilter Pro-
gram Click on the Rotate 45°. Position the quilt motif on the top border. Click on the Save icon.
Notes:

©2009 BERNINA® of America, Inc.
Permission to copy and distribute in printed and electronic formats granted only to Authorized BERNINA ® Dealers
7
Class 9 - Quilter: Block Editor
BERNINA Quilter allows you to create your own block libraries and import new blocks . It also includes a Block Editor for creating your own
square blocks, available only in Designer Plus .
Create a Custom Library Open the Quilter program. Click on File > Manage Blocks. The Block Library Manager dialog
opens. Right-click on Library Manager and select New Library from the
popup menu. The Input Library Name dialog box opens. Enter the name for the library. Type “My Blocks”. Click OK. The
$ sign prefix denotes a custom library. Select the new library on the left side of the dialog box and right
-click on the right side of the dialog box. Select New Block from the popup menu. A new blank block is
added to the library. While the block is highlighted, name the block “Flower.” Hit Enter.
Creating a Custom Block Right-click on the blank block > select Edit Block. The selected
block opens in the Block Editor. Within the Block Editor, select Edit > Block Size. Change to 12 and
click OK. Select View and make sure Snap to Grid and Smart Snap are acti-
vated. Select the Rectangle tool.
Begin the rectangle 5 grid squares from the side and 3 grid squares from top. Click and drag to create a rectangle 2 grid squares by 5 grid squares. Click again to set the rectangle.
Select View and turn Snap to Grid off. Create a second rectangle below the first to create the stem,
centered below the first and extending to the bottom edge. Select the Line tool.
Begin by drawing a triangle on top of the rectangle. Click to set line and click again to set position.
Click in the top corner of the block. Draw a line to connect to the bottom of the large rectangle. Repeat for other side.
Click 4 grid squares in from top corner of block. Draw a line to connect to top of the large rectangle. Repeat for other side.
Click in the bottom corner of the block. Draw a line to connect to the bottom of large rectangle. Repeat for other side.
Click 2 grid squares in from bottom corner of block. Draw a line to connect to the large rectangle. Repeat for other side.
Notes:
Bernina Embroidery Software must be open to access the Quilter Program The Block Library Manager lets you create your own block libraries to store cus-tom blocks. The Library provides over 300 quilt blocks, a wide color pal-ette and fabrics from which to design the project. The blank block defaults to the 10 x 10 grid standard for quilt blocks. Snap to Grid forces the line/object to conform to the grid. Smart Snap forces the draw-ing tools to always join lines whether or not they are on the grid point. You can fine tune the position of an object by selecting it and using the arrow keys. If you wish to delete an ob-ject, select the Select Shape tool, select the line, and hit delete on the keyboard. In general the drawing tools work the same as in the BERNINA Embroidery Soft-ware.

©2009 BERNINA® of America, Inc.
Permission to copy and distribute in printed and electronic formats granted only to Authorized BERNINA ® Dealers
8
Class 9 - Quilter: Block Editor
Coloring the Block Select the Color tool. Select yellow from the Palette for the background. Click in
the shape to fill with the selected color. Select red from the Palette for the center rectangle and tri-
angle. Click in the shapes to fill. Select the pink from the Palette for the remaining petals.
Click in the shapes to fill. Select green from the Palette for the lower triangles and
stem rectangle. Click in the shapes to fill. File > Save.
Print Cutting Instructions
Select File > Print Preview. Select Block Construction. Block Construction adds the seam allowances and prints
the pieces at actual size. Click Close. Reselect File > Print Preview. Select Rotary Cutting Instructions. View the instructions for cutting out the block and print out
for easy reference. Close the instructions. Close the Block Editor.
Using the block
Close the Block Library Manager. Locate your designed block by clicking on the + sign in front
of $My Blocks.
Notes: You can choose custom col-ors by right clicking on a color chip. In the dialog box that opens, click on Define Custom Colors and choose the color you wish to use. If a shaped area is not com-pletely closed or connected, the color will bleed into the adjoining shaped area. To reshape a line or a shape, select the object and then click on the reshape icon. Reshaping lines in a block causes any current colors to be removed. This is ex-pected behavior as reshap-ing an area can change its geometry, making existing colors invalid.
You can print Rotary Cutting instructions for your own cus-tom blocks from inside the Block Editor.

©2009 BERNINA® of America, Inc.
Permission to copy and distribute in printed and electronic formats granted only to Authorized BERNINA ® Dealers
9
Class 9 - Cross Stitch
Notes:
Integrated into the EditorPlus and DesignerPlus levels of Bernina Embroidery is the Cross-Stitch program. Both automatic and man-
ual digitizing capabilities are included. Opening the Cross Stitch Program
Click on the Cross Stitch icon located on the Design toolbar to open Cross Stitch.
Select Settings>Fabric Count. Input 18 stitches per inch as the Fabric Count; click Update and OK
From the Picture mode, select Load Picture. From the Artwork Folder, select A_East_006.jpg>Open.
While the artwork is selected, right click to open the Bit-map Properties box. Change the height and width to80%. Press OK.
Auto-Stitch Basics
Select the Design mode. Select the Auto-Stitch tool; click on the artwork to open
the Auto-Stitch dialog box. Under Map Image, select Specific Thread
Chart. From the drop down menu, select Isacord 40wt numerical.
Under Maximum Number of Colors, select Omit Background.
Click OK. Stitches are automatically generated. Click on the Grid icon to hide the grid. Click on the Picture icon to hide the picture. Select Show All to view the design more closely.
Area Fill
Select the Area Fill tool; click on the Color Palette. Select a new wing color. Click on the wing to fill the
area with the newly selected color. Repeat for the op-posing wing.
Manually Setting Stitches
Click on the Select Object tool; draw a bounding box around the row of stitches under the butterfly.
Press the Delete key on the keyboard.
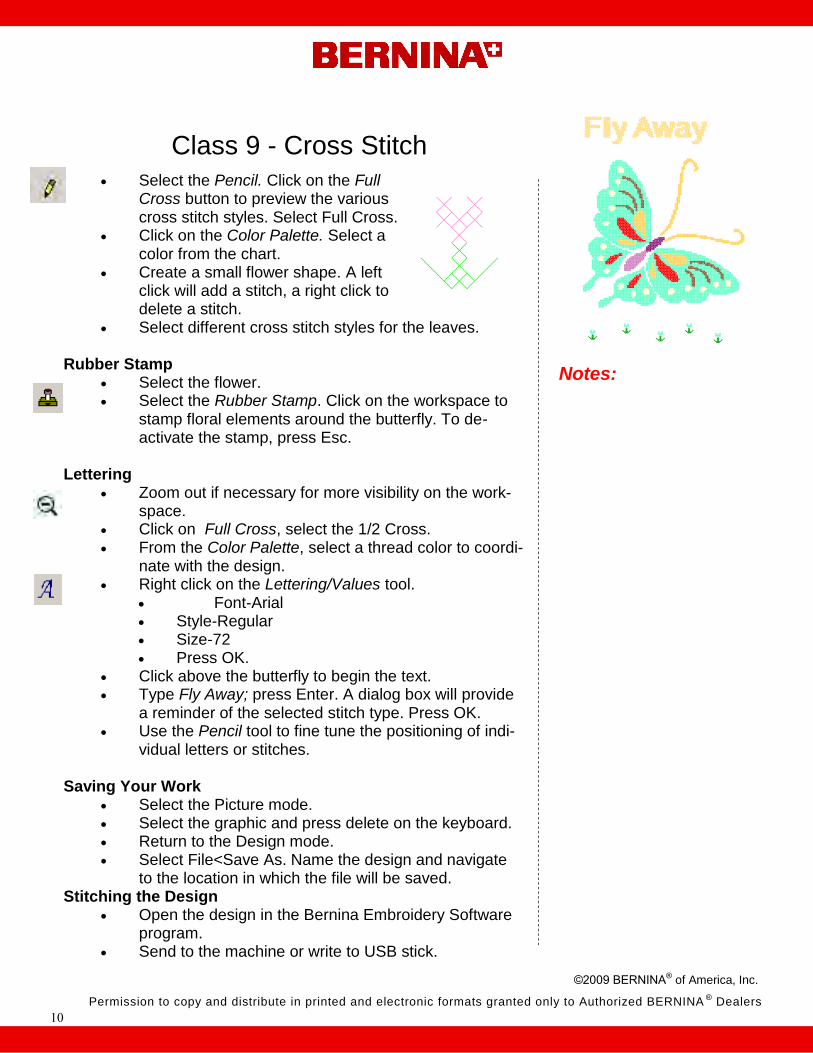
©2009 BERNINA® of America, Inc.
Permission to copy and distribute in printed and electronic formats granted only to Authorized BERNINA ® Dealers
10
Class 9 - Cross Stitch
Notes:
Select the Pencil. Click on the Full Cross button to preview the various cross stitch styles. Select Full Cross.
Click on the Color Palette. Select a color from the chart.
Create a small flower shape. A left click will add a stitch, a right click to delete a stitch.
Select different cross stitch styles for the leaves. Rubber Stamp
Select the flower. Select the Rubber Stamp. Click on the workspace to
stamp floral elements around the butterfly. To de-activate the stamp, press Esc.
Lettering
Zoom out if necessary for more visibility on the work-space.
Click on Full Cross, select the 1/2 Cross. From the Color Palette, select a thread color to coordi-
nate with the design. Right click on the Lettering/Values tool.
Font-Arial Style-Regular Size-72 Press OK.
Click above the butterfly to begin the text. Type Fly Away; press Enter. A dialog box will provide
a reminder of the selected stitch type. Press OK. Use the Pencil tool to fine tune the positioning of indi-
vidual letters or stitches. Saving Your Work
Select the Picture mode. Select the graphic and press delete on the keyboard. Return to the Design mode. Select File<Save As. Name the design and navigate
to the location in which the file will be saved. Stitching the Design
Open the design in the Bernina Embroidery Software program.
Send to the machine or write to USB stick.