manual_prymus 3-por_eng-pdf.cdr
TRANSCRIPT

FAVOR LER ATENTAMENTE ESTE MANUAL E
OBSERVAR AS SEGUINTES RECOMENDAÇÕES:
ESTE PARAPENTE CORRESPONDE NA HORA DA SUA ENTREGA À HOMOLOGAÇÃO DA NORMA LTF OU EN 926 OU AFNOR.
QUALQUER ALTERAÇÃO NO EQUIPAMENTO RESULTA NA ANULAÇÃODA RESPECTIVA HOMOLOGAÇÃO!
O VÔO COM ESTE PARAPENTE REALIZA-SE SOB RISCO PRÓPRIO!
FABRICANTE E REPRESENTANTES NÃO ASSUMEM NENHUMA RESPONSABILIDADE.
CADA PILOTO É RESPONSÁVEL PELA MANUTENÇÃO E AVALIAÇÃO DAUSABILIDADE DE SEU EQUIPAMENTO!
É PREMISSA BÁSICA QUE O PILOTO ESTEJA HABILITADO PARA VOARDE PARAPENTE !
03
Manual do Piloto
just for fun
LTF - 1 | EN - B
V. 03/2008
Prymus 3

04 05
ÍNDICE Bem vindo ao SOL Team..............................................................07Sobre a SOL.................................................................................08 Filosofia.......................................................................................09 O PRYMUS 3.................................................................................10 PRYMUS 3 O Projeto...................................................................11 Dados Técnicos............................................................................12. Peso total de decolagem..............................................................13 Materiais.....................................................................................13 Top/Botton................................................................................13 Perfis..........................................................................................13 Reforços diagonais internos.......................................................13 Reforços......................................................................................14 Linhas........................................................................................14 Tirantes......................................................................................14 Mosquetinhos..............................................................................14 Roldanas....................................................................................14 Sistema de suspensão...................................................................15 Sistema de acelerador.................................................................15 Ajustando seu acelerador..........................................................16
Funcionamento..........................................................................16 Utilização..................................................................................16 Mochila........................................................................................17 Selete..........................................................................................18 Vôo..............................................................................................18 Pré vôo......................................................................................18 Checagem de decolagem............................................................19 Decolagem.................................................................................19 Desempenho..............................................................................20 Curvas.......................................................................................20 Espiral positiva..........................................................................21 Vôo de térmica e lift...................................................................21 Vôo ativo...................................................................................22 Vôo acelerado............................................................................23 Pouso........................................................................................23 Decolagem por reboque.............................................................23 Chuva e umidade.......................................................................24 Vôo motorizado e vôo acrobático..............................................24 Comportamento em manobras extremas.....................................24 Fechamento Assimétrico Lateral (Fechada)...............................24 Full Stal.....................................................................................25 Curvas em negativa....................................................................25 Wingover....................................................................................26

Fechamento simétrico frontal....................................................26 Gravata......................................................................................26
Parachutagem...........................................................................27 Pilotagem de emergência..........................................................27 Manobras para descida rápida.....................................................28 Espiral.......................................................................................28 Orelhas......................................................................................28
stall........................................................................................29Conservação, manutenção e reparos...........................................30 Armazenagem............................................................................30
Zípper.........................................................................................31
Limpeza.....................................................................................30
Roldanas....................................................................................32
Dobragem..................................................................................30
Rasgos.......................................................................................32
Reparos.....................................................................................31
Linhas rompidas........................................................................32 Lacres........................................................................................32 Recomendações para uma vida longa..........................................33 Garantia SOL 3 anos/300 horas...................................................35
da Garantia...................................................................35 Condições da garantia...............................................................36 Esta garantia não cobre.............................................................36
Homologação PRYMUS 3 S.........................................................40Homologação PRYMUS 3 M.........................................................41Homologação PRYMUS 3 L..........................................................42Homologação PRYMUS 3 XL........................................................43Vista Geral..................................................................................44Plano de linhas...........................................................................45Relação de Vôos..........................................................................46Inspeção.....................................................................................47
Palavras finais.............................................................................37Dados..........................................................................................39
06
B-
Termos
BEM VINDO AO SOL TEAM!
Pedimos sua atenção para este manual , nele você encontrará informaçõesimportantes para o uso do seu novo equipamento.
Não esqueça de acessar freqüentemente o sitehttp://www.solsports.com.br para ficar informado sobre lançamentos,resultados e novidades do mundo do vôo livre.
Esperamos que seu PRYMUS 3 lhe traga muitos momentos felizes de sua
vida. Momentos daqueles que você fará questão de recordar eternamente!
Seja bem-vindo(a) ao SOL TEAM!
Obrigado por escolher a SOL PARAGLIDERS, você acaba de adquirir um
produto da mais alta qualidade, confeccionado dentro dos mais rígidospadrões estabelecidos pelo exigente mercado mundial.
Eventualmente você terá dúvidas sobre a utilização ou terá interesse nas
novidades preparadas pela SOL. Para isso estamos colocando nossa
estrutura de Vendas e de Manutenção à sua disposição, através dotelefone (47) 3275-7753 e dos e-mails [email protected] [email protected].
07

09
FILOSOFIA
A SOL tem como filosofia lançar produtos exponencialmente melhores do
que os atuais, garantindo significativos avanços em 4 atributos:
Segurança, Desempenho, Facilidade de Operação e Inovação
Segurança: que o produto que esta substituindo;
O novo produto deve oferecer segurança compatível ou maior
Desempenhoque o produto que está substituindo;
: O novo produto deve apresentar uma performance melhor
Facilidade de Operação: O novo produto deve apresentar maiores
Todo o processo de desenvolvimento de um novo produto inicia-se com ouso do computador. Softwares de desenho, modelagem (2D e 3D) esimulação são utilizados antes da confecção dos protótipos, garantindoassim uma maior precisão no projeto.
Inovação: Novos produtos devem trazer benefícios reais ao usuáriofacilitando a prática do vôo livre e aumentando a segurança, ou ambos.
facilidades operacionais que o produto que está substituindo;
08
SOBRE A SOL
Mais uma conquista na história desta jovem e dinâmica empresa, que hojefigura entre os dez maiores fabricantes mundiais de parapentes e acessórios!
No início de 2004 a SOL Paragliders foi certificada pelo DHV, o mais
respeitado órgão de regulamentação do vôo livre no mundo, que sepreocupa em saber se a fábrica tem capacidade de reproduzir fielmente oequipamento certificado em escala industrial. Poucas fábricas no mundo
possuem esta certificação no processo produtivo, sendo a SOL uma dasprimeiras a obter.
A SOL é uma das poucas empresas de parapente do mundo a ter fábrica
própria, além de testar todas as asas fabricadas antes de colocá-las nomercado, o que possibilita aos compradores a garantia e a confiabilidadenecessária para um bom desempenho nos vôos.
A SOL preocupa-se em manter seu parque fabril atualizado com as
melhores máquinas e equipamentos existentes no mercado, para destaforma tornar-se a cada dia mais precisa nos processos de produção econtrole, garantindo assim a qualidade dos produtos que levam a suamarca para 65 países do mundo.
Em 1995 a empresa mudou-se para o atual endereço, onde está instaladaem uma área de 3.400 m² e conta com uma equipe de 120 funcionários,sendo 22 pilotos, a quem fornece benefícios como plano de saúde,vale-transporte, seguro de vida, refeitório na empresa, passeiosmotivacionais para os funcionários que se destacam todo mês, convênioscom farmácias e bolsa de estudos.
Desde o início a SOL Paragliders adotou como filosofia a utilização de
projetos homologados, confeccionados com materiais importados da maisalta qualidade, produzidos por mão-de-obra treinada e especializada.
Fundada em 1991, após 6 meses de pesquisas e visitas a fábricas e
fornecedores, a SOL iniciou sua produção em parceria com as marcas
européias Condor, Comet e Nova, passando em 1999 a ter o seu próprio centro de desenvolvimento e testes.

11
PRYMUS 3 - O PROJETO
Na parte fechada da frente do perfil os reforços de Mylar garantemestabilidade e alta precisão da forma. As aberturas das células estão nointradorso. Reforços integrados de Dacron, dispostos diagonalmente nospontos de suspensão, garantem uma distribuição uniforme das cargas novelame.
Recomendações:
-Este parapente corresponde, na hora da sua entrega, à homologação danorma LTF e EN;-Qualquer alteração no equipamento resulta na anulação da respectivahomologação;-O vôo neste equipamento será realizado sob risco próprio; -O Fabricante e os Representantes não assumem nenhumaresponsabilidade pelo mau uso deste equipamento;
-Cada indivíduo é responsável pela manutenção e avaliação da usabilidadede seu equipamento.
-É premissa básica que o piloto esteja habilitado para voar de parapente;
-Este parapente é recomendado para uso em escola!
O PRYMUS 3 apresenta a combinação equilibrada entre alongamento real
e alongamento projetado sendo uma vela mais curvada sem exageros resul-tando numa vela que sobe facilmente nas térmicas e estável acelerado.
Uma atenção especial foi dada para os estabilizadores colocando uma maior tensão nos painéis e posicionamento com isto houve um melhoramentono arrasto nas velocidades máximas .
O PRYMUS 3 é composto de 39 células, diagonais ligadas aos perfis , es-
ta combinação faz com que haja uma melhor distribuição de carga em todaa vela permitindo que estes tragam uma melhor rigidez do parapente e deixem também o extra e intra dorso mais limpos resultando em menos arrasto aerodinâmico .
O PRYMUS 3 foi projetado por computador e o perfil foi escolhido por apre-
sentar o melhor em termos de performance e estabilidade. As características superiores deste perfil oferecem um grande intervalo de velocidades, com excelente estabilidade em vôo.
Grandes aberturas nos perfis permitem a ventilação interna sem afetar operfil e promovem boa reinflagem. A conexão dos pontos de linhas foram reduzidas fazendo com que o arrasto induzido perto do perfil diminua au-mentando o rendimento do parapente. A seleção cuidadosa dos melhores materiais permitiram otimizar este projeto. Você poderá encontrar mais de-talhes dos materiais escolhidos na seção MATERIAIS .
O PRYMUS 3 foi projetado para ter uma resistência maior a desinflagens
e uma maior facilidade nas reinflagens.
A taxa de afundamento e o desempenho de velocidade são excelentes paraum parapente com tal segurança. Fazendo sua rota para as nuvens seu XCfica muito mais fácil.
10
O PRYMUS 3
No ar o PRYMUS 3 é uma verdadeira alegria, a pressão dos freios são
perfeitos, quando aplicados progresivamente chegam a rotação exata, asmudanças de sentido não são nenhum problema.
O PRYMUS 3 tem sua certificação LTF-1 / EN-B com ótimos concei-
tos, sua inflagem é fácil e progressiva com uma pressão positiva nos tirantes facilitando sentir exatamente em que estágio está o parapente.
Após um ano de testes, vários protótipos e muitas horas de vôo, o resulta-
do é o PRYMUS 3 que oferece um novo conceito de conforto e perfor-
mance para pilotos que buscam um parapente que não se distancie do nível de segurança.
As características do PRYMUS 3 inspiram confiança fazendo com que você
busque maiores objetivos.
Nós esperamos que você aprecie cada momento com muita diversão.
O PRYMUS 3 inova em diversos pontos: plano de linhas, perfil, conceitos
de tensão de vela e nova geometria das entradas de ar (bocas).
A combinação equilibrada entre a tensão da vela e o alongamento faz com
que o comportamento do PRYMUS 3 seja mais estável e proporcione um
conforto em vôo.

12
DADOS TÉCNICOS
-Peso: Piloto + cerca de 17kg de equipamento;
-A etiqueta de identificação e informações encontra-se junto ao perfilcentral do parapente.
Tamanhos
Zoom
Células
Envergadura Projetada
Área Projetada
Alongamento Projetado
Envergadura Real
Área Real
Alongamento Real
Diâmetro das Linhas
Altura
Perfil Máximo
Perfil Mínimo
Peso da Vela
Peso de Decolagem
Velocidade Mínima
Velocidade sem Acelerador
Velocidade Máxima
Velocidade sem Acelerador
Velocidade Máxima
Planeio
Lugares
Homologação LTF
Homologação EN
XS S L XL
0,92
39
8,49
19,79
3,6
11,04
24,16
5,04
707,8
424
271
55,20
5,3
45/65
1
21+/-1
37+/-1
47+/-1
8,1+/-1
1
---
B
1,04
39
9,60
25,29
3,6
12,48
30,88
5,04
794
478
307
62,4
6,7
90/110
1
21+/-1
37+/-1
47+/-1
8,1+/-1
1
1
B
1,08
39
9,97
27,27
3,6
12,96
33,30
5,04
822
497
319
64,8
7
105/125
1
21+/-1
37+/-1
47+/-1
8,1+/-1
1
1
B
m
2m
m
2m
mm
cm
m
cm
cm
kg
kg
m/s
km/h
km/h
km/h
1,1 - 1,5 - 2,1
0,96
39
8,86
21,55
3,6
11,52
26,31
5,04
736,4
442
283
57,6
6
60/80
1
21+/-1
37+/-1
47+/-1
8,1+/-1
1
1
B
M
1
39
9,21
23,38
3,6
12
28,55
5,04
765
460
295
60
6,3
75/95
1
21+/-1
37+/-1
47+/-1
8,1+/-1
1
1
B
13
PESO TOTAL DE DECOLAGEM
O PRYMUS 3 foi testado para um faixa de peso definida, se sua faixa
de peso está entre dois tamanhos nossa sugestão é:
-Se você quer a melhor taxa de afundamento, se você voa em relevosretos, condições suaves, sugerimos que você voe mais próximo domínimo.
-Se você quer melhor velocidade, comandos precisos, se você geralmentevoa em montanhas e/ou fortes condições, sugerimos que você voe maispróximo do peso máximo.
MATERIAIS
Top / Bottom
Gelvenor LCN066 OLKS 49 g/m2Gelvenor LCN066 OLKS-2 45 g/m2
Perfis
Pro Nyl nylon rip stop revestido com poliuretano.
Reforços diagonais internos
Pro Nyl 42 g/m2 Nylon Rip Stop revestido com poliuretano.
Gelvenor Nylon rip stop revestido com silicone e poliuretano.Selecionado entre muitos outros tipos de tecido do mercado devido a suagrande durabilidade e resistência aos danos UV , rasgos, elasticidade. DoisTipos de tecido garantindo a melhor combinação peso X durabilidade no
mercado atual.
Selecionado pela sua estabilidade e resistência ao estiramento, muitoimportante para seu parapente por manter por longo tempo ascaracterísticas do vôo seguro.

15
As linhas dos freios saem do bordo de fuga e através da linha mestraligam-se aos batoques, passando por uma roldana presa no tirante 'D'.
SISTEMA DE SUSPENSÃO
As linhas do PRYMUS 3 consistem de um núcleo de Technora bege de
alta resistência à tração e baixa deformação, encapados por um manto em poliéster colorido. O conjunto é feito por linhas individuais, com laçoscosturados nas duas extremidades.
As linhas principais inferiores e a linha mestra dos freios possuemdiâmetros de 1,5 mm e 2,1 mm. As linhas superiores possuem umdiâmetro de 1,1 mm e 1,5 mm.
Distinguem-se no conjunto as linhas superiores (conectadas ao intradorso)e as linhas principais, que são conectadas aos mosquetinhos Maillon Rapide.Estes, por sua vez, conectam as linhas principais aos tirantes. As linhasdos estabilizadores são conectadas aos mesmos mosquetinhos.
As linhas 'A' e as de freio são de cor diferenciada das outras para facilitar opreparo de decolagem. Os mosquetinhos são triangulares, feitos em açoinox.
Nas linhas mestras dos freios existe uma marca no ponto ótimo deregulagem, em cuja altura estão presos os batoques. Esta regulagem nãodeve ser alterada para garantir um curso adequado e suficiente dosbatoques no caso de situações de figuras extremas de vôo e durante opouso. Além disso, nesta posição o parapente não está constantementefreado.
-No caso de uma ou mais linhas do freio ficarem agarradas no vôo, ouperder-se um batoque devido ao rompimento da linha, a vela pode ser pi-lotada puxando delicadamente os tirantes “D” para o controle direcional.
Atenção:
O PRYMUS 3 permite instalar um sistema de acelerador de pé. Possui 5
tirantes de cada lado, sendo que as linhas 'A' são presas ao tirante 'A', otirante 'A1' é destinado para as orelhas, as linhas 'B' e as linhas doestabilizador são presas ao tirante 'B', no tirante 'C' estão presas as linhas'C' e no tirante 'D' estão presas as linhas 'D', além do suporte da roldana
SISTEMA ACELERADOR
do freio.
14
Todos estes componentes são de alta qualidade e foram selecionados parauma maior durabilidade do seu equipamento.
Reforços
Reforço nobre de Mylar laminado. Selecionado para ajudar a durabilidade alongo prazo. Sua função é manter e dar forma principal do bordo de ataqueassegurando as características do seu parapente na decolagem e no vôo.
Mylar Diax 60/120 P
Linhas
As linhas são compostas de aramida e tem como referência sua resistênciaelevada e baixo estiramento no tempo.
Tirantes
Fitanew 19 x 2,0 mm Flat Multi 1600kg
Mosquetinhos
Ansung Precision 4mm 800kg
Roldanas
Charly / Austrialpin / Ansung
localizadas na parte inferior ou seja, estão conectadas aos tirantes.-2,1 mm Cousin Superaram - sua resistência ultrapassa 260 Kg e estão
-1,5 mm Cousin Superaram - sua resistência ultrapassa 150 Kg e estãolocalizadas na parte média da galeria.
-1,1 mm Cousin Superaram - sua resistência ultrapassa de 85 Kg e estãolocalizadas na parte superior da galeria, é o maior número de linhas noparapente.

17
-Caso o velame entre em colapso, solte imediatamente o estribo e façaas correções necessárias.
-Nunca largue os batoques.
Ilustração:
Tirantes:
1. Roldana do freio
2. Distorcedor
3. Batoque
4. Conexão acelerador
5. Linha aceleradora
MOCHILA
Sua mochila foi desenhada para ser confortável e prática, seu formato fazcom que sua bagagem fique bem distribuida, ombreiras e costas sãoacolchoadas para um melhor conforto nas caminhadas.
Para um maior volume de equipamentos, sua mochila tem um prolongadorpodendo ser aumentado este, seu espaço aumenta sem mudar suageometria. Para facilitar o manuseio de pequenos volumes a parte frontalcontém dois bolsos de tamanhos diferentes.
16
O piloto aciona o acelerador empurrando o estribo para frente. As roldanasnos tirantes reduzem para 2/3 a energia necessária e os tirantes dianteirossão encurtados.
O sistema do acelerador atua nos tirantes 'A', 'A1', 'B' e 'C'. Na posiçãonormal todos os tirantes possuem o mesmo comprimento: 52,5cm.O acionamento do acelerador encurta os tirantes 'A' em 12 cm ,'A1' em10.5 cm, o 'B' em 10 cm e o 'C' em 5cm. O tirante 'D' permanece na posi-ção original.
Ajustando seu Acelerador
A maioria das seletes modernas possui roldanas para montagem doacelerador de pé. No caso de não haver, é importante prender tais roldanas
A cordinha do acelerador deve ser firmemente presa (nó não escorregadio)ao estribo (barra de alumínio). A outra extremidade do cabo é passadapelas roldanas da selete e sai na direção vertical, sendo firmemente presaa um clip, um engate rápido ou, preferencialmente, fechado por rosca.
(costurando-as) de modo que tornem o uso do acelerador correto e mais suave.
Para ajustar o acelerador sugerimos que conecte sua selete e os tirantesdo seu parapente juntos suspensos do chão, peça para um amigo puxar ostirantes A para cima. Ajuste agora o comprimento das linhas até a barra
perna, permitindo a utilização máxima do curso do acelerador.
Funcionamento:
Utilização:
Antes de decolar deve-se conectar o engate rápido ou o mosquetinho naalça do sistema de aceleração dos tirantes. É importante observar que acordinha deve correr livre de empecilhos. O atrito com os tirantes podecausar danos.
-Um sistema montado incorretamente e que permite encurtamentosdiferentes dos indicados acima invalida a homologação.
-Nunca utilize o acelerador em manobras extremas.
-Lembre-se que no uso do acelerador o ângulo de ataque diminuipodendo fazer com que o parapente tome colapsos, consequentementeusar o acelerador perto do solo deve ser evitado. Nós recomendamosnão usar o acelerador em condições de turbulência.
Atenção:
ficar de forma que seja fácil acessá-lo com os pés em vôo, e estendendo a

18
SELETE
Para o PRYMUS 3 são recomendadas todas seletes do tipo ABS, testadas
com mosquetão na altura entre 41 e 46cm da tábua, dependendo otamanho da selete. Deve-se cuidar porque a altura dos mosquetões afeta aposição 'normal' do freio.
A distância de homologação entre os mosquetões (ajustável no peitoral) éde 40cm para os parapentes tamanho XS e S, 42cm para o M, 44cm parao L e 46cm para o XL. Variações de mais de 5cm neste valor alteramcaracterísticas fundamentais do velame e são potencialmente perigosas.
-Cruzilhões efetivos podem piorar a pilotagem e também não melhorama segurança.
Atenção:
VOO
Pré-Voo
Após abrir o parapente e colocá-lo em forma de ferradura, os seguintespontos devem ser verificados:
Um pré-vôo, com bastante atenção, é necessário para todo parapente,
assim como também para o PRYMUS 3. Este vôo deve ser realizado nomorro de treinamento.
-O parapente deve ser estendido de tal forma que, ao se tracionar ostirantes 'A', o centro do velame seja tracionado antes das extremidades.Isto proporciona uma decolagem fácil e com boa estabilidade direcional;
-Especial atenção deve ser dada à direção do vento ao se abrir o velame,de modo que as duas metades sejam infladas simetricamente;
Juntamente com seu parapente está acompanhando uma fita que irá auxi-liá-lo a achar a medida exata das distâncias entre os mosquetões.
19
Atenção:
-Antes e depois de cada vôo deve-se verificar as linhas, os tirantes e ovelame, para ver se não existem danos.
-Todas as linhas devem estar organizadas e não enroscadas a nada.Atenção especial deve ser dada às linhas 'A', que devem estar livres desdeos tirantes 'A' (com a marca vermelha) até o velame;
-Importância igual deve ser dada às linhas dos freios, que também devemestar totalmente livres e sem possibilidade de enroscar em qualquerobstáculo durante a decolagem;
-Todas as linhas devem ser verificadas e os tirantes devidamenteordenados. Quando os tirantes estão alinhados e não torcidos, as linhasdos freios estarão livres desde as roldanas (no tirante traseiro) até o bordode fuga do velame;
-É de extrema importância não haver linhas enroscadas no velame. Umalinha passando por baixo da vela ou um engravatamento podem terconseqüências desastrosas;
-Caso existam, mesmo que os danos sejam pequenos, não se deve decolar!
1. Seu reserva esta OK? Pinos e acionador corretos?2. Capacete; 3. Mosquetões fechados;4. Selete Fechos conectados;5. Tirantes A nas mãos;6. Freios desembaraçados na mão;7. Você deve estar no centro da vela;8. Área de decolagem livre;9. Parapente e piloto alinhados com o vento;10. Espaço aéreo frontal da decolagem livre;11. Checar se a distância entre os mosquetões está correta.
CHECAGEM DE DECOLAGEM - NÃO ESQUEÇA
É fácil decolar com o PRYMUS 3. O piloto, pronto para decolar, deve
segurar os tirantes 'A' , 'A 1´ juntamente com os batoques.
Decolagem
Antes da inflagem é obrigatório um último olhar de controle sobre oequipamento estendido.
Para facilitar a diferenciação entre as linhas, as linhas 'A', inclusive ostirantes 'A' possuem uma marca de cor diferenciada.
21
-Puxando um freio muito forte ou um excesso de comando somentede um lado, existe o perigo de se provocar uma negativa.
Atenção:
Caso o velame tome uma fechada durante este processo, deve-sedescomandar a espiral, pois também há uma redução da área vélica.
O PRYMUS 3 tem seu melhor planeio quando não se aplicam os freios.
Espiral Positiva
Quando o piloto aciona um freio somente, lenta e progressivamente, o
PRYMUS 3 inclina-se lateralmente num ângulo bem acentuado e entra
numa curva rápida e bastante inclinada, que pode ser levada a uma espiralpositiva.
Durante a espiral, o raio do giro pode ser controlado pela maior ou menorforça aplicada ao freio do lado interno. Para sair, o piloto deve soltar o freiolentamente e deslocar suavemente seu peso do lado externo da curva.
Saída brusca pode ocasionar um avanço exagerado da vela, ocorrendo umcolapso. Por isso, na saída da última curva deve-se acionar novamente esuavemente o freio do lado interior da curva.
Vôos de Térmica e Lift
O velame não deve pendular para frente e para trás, mas repousar sobre opiloto. Para isto, deve o mesmo aumentar a velocidade soltando os freiosao entrar numa térmica (dependendo de sua intensidade) ou frear ao sair.
Em condições turbulentas o parapente deve voar com os comandoslevemente freados. Consegue-se assim um aumento do ângulo de ataque
Isto faz parte da técnica básica de pilotagem ativa.
com conseqüente aumento da estabilidade do velame.
Atenção:
-Jamais combinar orelhas com espiral. A redução da área vélica comaumento da 'Força G', pelo efeito centrífugo, podem ocasionarrompimento de linhas, costura ou do velame;
-A saída de uma espiral com grande aceleração deve ser lenta eprogressiva.
-
a
Esta manobra requer grande altura (no mínimo 600 metros acimado solo) para que seja efetuada com segurança, pois tem uma taxade queda muito alta e existe a possibilidade do piloto perder a noção de altura. Nuca faç sem a devida experiência.
20
Deve-se segurar os braços estendidos de lado, como se fossem umprolongamento dos tirantes 'A'.Uma corrida decidida permite uma inflagem estável e rápida. Umaultrapassagem do velame é incomum.
Neste instante deve-se acionar os freios de maneira bem dosada, havendoa possibilidade para uma eventual correção na direção.
Após o esforço inicial para a inflagem o piloto deve manter uma pressãopara frente nos tirantes 'A' (empurrando-os para frente, e não os puxandopara baixo), até que o velame esteja sobre sua cabeça.
Mover-se para baixo do centro do parapente é o melhor método paracorreção, se houver espaço para tal.O piloto lança uma última olhada para cima para certificar-se de que ovelame está sobre si, totalmente desimpedido e inflado.
Neste momento o piloto toma a decisão de decolar, ou não. A decolagemreversa em vento forte também é fácil de executar.Devido ao risco do piloto decolar com as linhas enroladas (twist), éaltamente recomendado que o piloto pratique a decolagem reversaprimeiramente num morrinho plano de treinamento.
Desempenho
O PRYMUS 3 em vôo normal tem seu melhor rendimento com as mãos
para cima, aplicando 25 cm a vela entra na velocidade mínima com segu-rança.Para aumentar a velocidade durante o vôo use a barra do acelerador que lhe dará um aumento na velocidade em torno de 10 - 12 km/h.
Curvas
O PRYMUS 3 é muito sensível, reagindo fácil e instantaneamente aos
comandos de curvas. Através do deslocamento do peso nos tirantes,executam-se curvas planas com perda mínima de altura.
Uma técnica combinada de deslocamento de peso e acionamento adequadodo freio é o meio mais eficiente de se executar curvas em qualquer situação,sendo que o raio da curva é determinado pelo freio acionado.
Acionando-se levemente o freio do lado externo nas curvas, bem comoaplicando o máximo deslocamento de peso no tirante, aumenta-se aeficiência e também a resistência ao colapso em turbulências (borda detérmicas) do lado externo.
Caso seja necessário fazer curvas com o PRYMUS 3 em pouco espaço,
recomenda-se soltar o freio do lado externo da curva e puxar mais o freiodo lado interno.

22
Em vôo de colina é altamente recomendada uma altura mínima de 50m emrelação ao solo, por razões de segurança.
É muito importante conhecer e respeitar as regras de vôo, especialmentequando vários pilotos compartilham um espaço aéreo exíguo próximo àcolina, onde manobras anti-colisão de última hora não são realizáveis.
Atenção:
Atenção:
-O PRYMUS 3 requer uma pilotagem ativa em turbulência, com istopode-se evitar colapsos e deformações da vela.
Estes ajustes manterão o vôo mais controlado e com certeza podem reduziras possibilidades de um colapso.
Vôo ativo
Para um melhor desempenho seu durante o vôo, é importante que vocêesteja sempre atento ao que sua vela está lhe transmitindo, os elementoschaves do vôo ativo são os avanços e o controle de pressão.
Quando a vela se lança na frente de você, use os freios dosadamente paraque retorne para cima, já a vela indo para trás você deve liberar.
Voar com um pouco de freio aplicado (+ - 20 cm) faz com que a vela voeum pouco para trás em circunstâncias de turbulência, a pressão interna doparapente pode mudar e você sente isto através dos freios, a idéia émanter uma pressão constante, caso você sinta uma perda na pressão,levante rapidamente as mãos para a posição original.
Evite voar muito freado, pois excesso de comando pode fazer a vela pararde voar, considere sempre sua velocidade aerodinâmica, seus movimentospodem ser simétricos ou assimétricos podendo aplicar ambos os freios ousomente um.
Sugerimos que você faça treinos de solo, as simulações de avanços e perdasde pressão podem muitos bem ser simulados no solo.
-Nenhum piloto e nenhum parapente estão imunes aos colapsosentretanto o vôo ativo diminuirá tendências aos colapsos. Quando osvôos são turbulentos, seja mais ativo e evite os grandes avanços seantecipando nos comandos. Sempre esteja ciente de sua altura enunca entre num excesso de comandos. Nós os recomendamos asempre manter pressão nos seus freios e evitar voar em condiçõesde turbulência extrema.
23
Vôo Acelerado:
Recomenda-se utilizar o acelerador ao voar contra o vento ou em zonas decorrentes descendentes. Pelo fato de diminuir o ângulo de ataque, ovelame pode entrar em colapso mais facilmente do que na posição normal.O piloto deve lembrar que quanto maior for a velocidade, mais dinâmicaserá a reação a um colapso.
Pouso:
Com vento forte contrário o piloto deve frear muito levemente oueventualmente nem frear, devendo utilizar os tirantes 'C' para desinflar e'matar' o velame após o pouso. Acionar os freios num pouso com ventoforte contrário pode deixar a vela totalmente exposta ao vento, com
A aproximação final deve ser feita sempre em linha reta. Curvas fortes oualternadas podem produzir um perigoso movimento pendular perto do solo.
É muito fácil pousar com o PRYMUS 3. A perna final de aproximação
deve ser feita em linha reta contra o vento. Durante este planeio final oparapente deve ser desacelerado lentamente e, aproximadamente 1m dosolo, o piloto deve estolar o velame, de acordo com as condições.
conseqüente arrastamento do piloto para trás.
Decolagem por reboque
O PRYMUS 3 pode ser utilizado para vôo rebocado, desde que seja
acoplada no sistema para vôo rebocado (Ataque de Guincho).
Este deve ser acoplado nos mesmos mosquetões que unem a selete ao pa-rapente, sendo acionado através de um acionador estrategicamente posicio-nado que, quando puxado, libere o equipamento para o vôo.
Durante a decolagem deve-se evitar manter um ângulo pequeno do cabo emrelação ao solo.
A decolagem com o auxílio de guincho necessita de instrução e procedimen-tos apropriados – certifique-se que você detém os conhecimentos necessários e que a operação esteja sendo feita da forma segura e correta.

Chuva e Umidade:
Não é aconselhável voar com o PRYMUS 3 em dias de chuva ou com o
parapente molhado, pois as manobras de vôo ficam mais sensíveis e podeocorrer uma parachutagem na saída do B-Stoll ou com uso demasiado dos
Vôo Motorizado e Vôo Acrobático:
freios.
O PRYMUS 3 não foi projetado para vôo motorizado, nem para
acrobacias aéreas. Embora seja usado com sucesso por alguns pilotos.
COMPORTAMENTO EM MANOBRAS EXTREMAS
-Manobras extremas devem ser executadas sob a supervisão de uminstrutor qualificado, somente em cursos de segurança, com toda ainfra-estrutura e sobre água!
Atenção:
Fechamento Assimétrico Lateral (Fechada):Assim como qualquer outro velame, um ângulo de ataque negativo iráprovocar um fechamento. Para manter a direção com um fechamentoassimétrico lateral, o lado aberto deve ser freado.
No caso de um fechamento de grandes proporções, a quantidade de freiodeve ser muito bem dosada, de modo a evitar o descolamento do fluxo(estol) na parte aberta do velame.
Para facilitar a reinflagem do velame em colapso, a ação acima deve serseguida ao mesmo tempo por uma bombeada longa e lenta (2 segundos)no batoque do lado fechado. A ação do peso do corpo no tirante contrárioao lado fechado também ajuda a reinflagem e aumenta a segurança,solicitando menor ação de freio e distanciando o ponto de estol.
24
Atenção:
Caso o piloto não compense com o freio, o PRYMUS 3, na maioria das
vezes infla por si próprio em grandes colapsos assimétricos. O PRYMUS 3
pode girar até uma volta e caso o velame não reabrir por si próprio, sem ação dos comandos e corpo piloto, o parapente entrará numa espiral(positiva)
Para cessar esta espiral o piloto deve frear levemente o lado externo edeslocar seu peso do mesmo lado, até que o velame inicie a suaestabilização. Exatamente nesta fase do movimento pendular do piloto sobo velame é importante dosar a força exercida no freio e muitas vezes podese tornar necessário diminuir a força aplicada. Estando novamente em vôoreto, o lado fechado pode ser reinflado através da bombada.
-Se a espiral não for terminada ativamente pelo piloto, a mesmacontinuará até o chão!
Para induzir um 'Full Stall', o piloto deve puxar ambos os freios até o final,e segurá-los nesta posição, com toda a força.
Full Stall:
Nesta situação o PRYMUS 3 voa, na maioria das vezes de ré, formando
um cravete (como uma ferradura) para frente.
O velame deve ser estabilizado antes de ser iniciado o procedimento parareentrada em vôo normal. Uma retomada no início do processo de estol,quando o parapente recua bruscamente, pode provocar um avanço enormedo velame.
Para recuperar um 'Full Stall' ambos os freios devem ser liberadossimultaneamente e simetricamente, com velocidade moderada
(> = 1 segundo). O PRYMUS 3 irá avançar moderadamente ao entrarem vôo normal.
Uma recuperação assimétrica (soltar um freio antes do outro) de um 'FullStall' é usada por pilotos de teste, para simular um parapente sendoexpelido de uma térmica e não deve ser praticado por pilotos.
Curvas em Negativa:
Para induzir uma espiral negativa em velocidade (DHV) ou a partir davelocidade mínima (EN), o piloto puxa forte e rapidamente um freioaté o final.
Durante a negativa, o velame gira relativamente rápido em torno de seucentro, tendo o seu lado interno voando para trás.
25

26
Ao entrar numa negativa não intencional o piloto deve recuperar o vôoassim que perceber a situação, soltando um pouco o freio puxado para ovelame acelerar e voltar a voar estável, sem perder muita altura.
Ao manter propositalmente uma negativa prolongada, o PRYMUS 3
acelera assimetricamente para frente. Uma fechada frontal assimétricapode ser bastante impulsiva.
Para recuperação de uma espiral negativa intencional, o piloto deve soltaro freio puxado e prestar atenção numa forte aceleração do velame.
Wingover:
Para realizar um 'Wingover' o piloto deve realizar curvas alternadas,induzindo grandes pêndulos laterais. Uma possível fechada pode serdinâmica.
Atenção:
-Uma curva com inclinação lateral maior que 60º é considerada acrobacia.
Fechamento Simétrico Frontal:
Se ocorrer um engravatamento das linhas em torno do velame durante ovôo, o piloto deve tomar as seguintes providências:
Puxa-se fortemente os tirantes 'A' e 'A1' até obter uma fechada completade todo o comprimento do bordo de ataque da vela e solta-se os tirantesrapidamente até o fechamento.
O piloto não deve segurar os tirantes após a fechada. O piloto deve prestaratenção se a altura é suficiente.
O PRYMUS 3, na maioria das vezes, se recupera sozinho na fechada
simétrica frontal.
Em condição de vôo turbulento, pode ocorrer um avanço exagerado, quedeve ser controlada por uma ação precisa no comando dos freios.
Gravata:
-Tentar manter o vôo reto: Deslocar o peso do corpo para o lado aberto doparapente e auxiliar com uma ação suave dos freios no lado aberto.
27
-Para a reabertura: Puxar a linha do estabilizador do lado fechado (primeiralinha do tirante 'B' de cor diferenciada) até desarmar o emaranhamento daslinhas.
-Se o engravatamento for grande, não for possível manter um vôo estável(espiral) e se esteja com altura suficiente (>400 m), existe a possibilidadede resolver executando um 'Full Stall'.
Se esta última manobra não resolver ou a altura não for suficiente, o pilotodeve considerar a possibilidade de acionar o comando do pára-quedas deemergência (reserva).
-Gravatas acontecem normalmente na má preparação do equipamento nadecolagem, colapsos em acrobacias ou fechamentos assimétricos laterais.
Atenção:
Parachutagem:
O PRYMUS 3 não tem a tendência de entrar em parachutagem e
recupera por si próprio uma parachutagem intencional provocada porcomando dos freios.
Caso ocorra uma parachutagem ao sair muito lentamente de um B-Stoll, ésuficiente puxar um pouco para baixo os tirantes 'A' ou o acelerador,reduzindo o ângulo de ataque, reordenando e colando o fluxo de ar aovelame.
Pilotagem de Emergência:
No caso de impossibilidade de comando pelos freios, o piloto podeutilizar-se dos tirantes 'D' e deslocamento do corpo para pilotar o velame.
Prestar atenção no comprimento do comando, que será mais curto que ocomprimento do freio.
Ilustração

28
Espirais, conforme já descrito anteriormente, possuem uma alta taxa dequeda. Entretanto as grandes acelerações (G) impossibilitam sustentar aespiral por um período mais prolongado. A força de um espiral pode fazercom que o piloto desmaie e que o mesmo perca a pilotagem, podendo cair
MANOBRAS PARA DESCIDA RÁPIDA
Espiral:
até o chão. Além de provocar grandes forças atuantes no piloto e noequipamento.
O piloto nunca deve executar esta manobra em turbulências ou comângulos laterais muito grandes. Caso haja ventos fortes, o piloto deveficar ciente que haverá uma derivação durante a manobra.
A saída de uma espiral em grande aceleração deve ser pilotada.O piloto jamais deve combinar orelhas com espiral.
Atenção:
Puxando-se simultaneamente o tirante 'A1' externo, em cerca de 18 cm,obtém-se o fechamento das pontas do velame.
Orelhas:
Para recuperar, o piloto deve soltar as linhas do tirante 'A1' externo.Normalmente o velame reabre sozinho, mas o piloto também pode ajudar
O velame permanece totalmente dirigível através do acionamento de freiosunilaterais ou do deslocamento do peso do piloto para os tirantes, voandocom uma grande taxa de queda (até aproximadamente 5m/s).
dando uma “bombada” longa e rápida.
A SOL não recomenda a combinação de grandes orelhas com acelerador,
esta combinação pode trazer um grande fechamento asimétrico.
A SOL não recomenda a combinação de orelhas com espiral pois pode
exceder a carga projetada
Atenção:
Ilustração
29
Atenção:
Ilustração
B-Stall:
Para induzir um 'B-Stall' o piloto deve puxar os tirantes 'B' simultaneamente,entre 15 e 20cm. Haverá um descolamento do fluxo de ar no extradorso e ovelame entrará numa parachutagem.
Soltando rapidamente os tirantes 'B' o fluxo de ar recola no extradorso e ovelame passa a voar retornando à posição normal de vôo. Caso o velamenão recupere o vôo normal, veja a seção Parachutagem.
O movimento de retorno faz com que a vela tenha um avanço frontalpequeno, nós recomendamos não frear o parapente justamente para evitara parachutagem. A carga que aplica-se nas linhas B durante esta manobranão são boas para seu parapente, use somente em situações de emergência .
Caso os tirantes 'B' sejam puxados muito rápidos ou muito profundamente,poderá ocorrer um cravete (ferradura) para frente. Para recuperar o vôonormal, o piloto deve aplicar os freios suavemente.
-A melhor técnica é voar de modo correto e seguro. Assim você nuncaprecisará descer rapidamente.
-Todas as manobras para descida rápida devem ser praticadas emcondições de ar calmo e com altura suficiente, de modo que possam ser
empregadas quando necessárias em condições extremas de vôo;
-’Full Stalls' e negativas devem ser evitadas pois, independente doparapente, recuperações e saídas incorretas podem trazer conseqüênciasdesastrosas;

30
CONSERVAÇÃO, MANUTENÇÃO E REPAROS
Uma boa manutenção prolongará a vida do seu PRYMUS 3 por vários
anos.
Atenção:
Armazenagem:
Deve-se guardar o parapente seco, em lugar seco, protegido da luz (UV) elonge de produtos químicos.
Limpeza:
Deverá ser feita somente em caso de absoluta necessidade, recomendando-se a utilização somente de água e esponja (não áspera e macia) ou pano.
Não se deve utilizar nenhum produto químico, sob pena de danificarpermanentemente o tecido.
Dobragem:
Seguindo corretamente cada passo você estará ajudando a preservar avida útil do seu equipamento:
Atenção:
-Abra completamente sua vela ao chão;
-Coloque todas as linhas espalhadas pelo intradorso e tirantes ao centrofora da vela no borda de fulga;
-Deixe as dobras com aproximadamente 50 cm;
-Elimine todo o ar passando a mão do bordo de fuga ao bordo de ataque;
-Deixe o volume um pouco menor que o saco de proteção;
-Evite fazer dobras no tecido no mesmo lugar.
-Recomendamos a dobragem no método Acordeom. Com isto se permiteque os reforços do perfil (Mylar/Carbon) não sejam amassados e/oudobrados. Desta forma o parapente manterá por mais tempo ascaracterísticas de decolagem e vôo;
31
Passos:
Reparos devem ser efetuados somente pelo fabricante, distribuidor oupessoa autorizada.
Reparos:
?1-
Dobrar conforme o método acordeomde dobragem indicado no desenho;
2-
?Posicionar cada reforço de perfil sobre a célula correspondente;
3-
?Juntar as duas partes e enrolar a vela
sem comprimir fortemente. 4-
ZíperO zíper da mochila deve abrir e fechar macio com o cursor deslizando sua-vemente. Se houver dificuldade em movimentar o cursor, deve ser aplicadoparafina ou "spray" lubrificante nos dentes, para diminuir o atrito entre oscomponentes. Com alguma movimentação do zíper, você vai notar a dife-rença.
O zíper da mochila é possível na maioria das vezes ser reparado por você mesmo, caso o carrinho não feche mais o zíper empurre-o até o início na posição do começo e com uma alicate aperte levemente ambos os lados datração do zíper.
Abrir a vela sobre toda a envergadura

Roldanas
É importante manter sempre as roldanas lubrificadas pois caso elas nãofuncionem poderão desgastar a corda do acelerador ou mesmo o eixo , apliqueparafina ou "spray" lubrificante, leia com atenção sobre o lubrificante para
Ao adquirir o lubrificante, fique atento para que este produto não agrida aspropriedades do material, isso pode afetar a resistência dos tecidos e linhas.
Rasgos
Juntamente no seu kit você esta recebendo adesivos para reparos, peque-nos rasgos até 10 cm afastados dos pontos de linhas, podem ser efetuados por você, acima disso aconselhamos que a manutenção seja feita pelo fabri-cante ou oficina credenciada.
-Limpe o local aonde será aplicado o adesivo com pano úmido.-Deve haver no mínimo 2,5 cm a mais de bordas do adesivo do que o rasgo.-Arredonde os cantos para evitar depois de colado que se descole.-Aplique ambos os lados do rasgo.
Linhas Rompidas
Juntamente no seu kit você esta recebendo uma linha de espessura 1.1pa-ra efetuar um pequeno reparo, na troca deste, aconselhamos que a ponta não costurada seja costurada após a aferição da medida, não de nó pois es-te pode diminuir em até 80 % a resistência da linha.
Lacres
Juntamente no seu kit você esta recebendo Lacres para os mosquetinhos,não deixe seu tirante sem estes, pois eles evitam o movimento da porca, impossibilitando sua abertura.
32
evitar manchas e desgaste do tecido. Não passe sobre as costuras.
Atenção:
Recomendações para uma vida longa:
-O tecido do PRYMUS 3 é composto principalmente por Nylon que, como
qualquer outro material sintético, sofre influência da radiação ultravioleta(UV), decompondo-se, perdendo sua resistência mecânica e aumentandosua porosidade. Por isto deve-se evitar a exposição do parapentedesnecessariamente à luz solar, que possui um elevado valor de radiação UV, especialmente em grandes altitudes;
-Recomenda-se deixar o parapente guardado e bem protegido quando forade uso;
-Do mesmo modo, deve-se evitar absolutamente a dobra ou vinco naslinhas, principalmente das principais;
-Deve-se abrir o velame sempre num lugar limpo, pois sujeira pode penetrarnas fibras, encurtando as linhas ou estragando o tecido;
-Também não se deve deixar as linhas enroscar em obstáculos ao inflar paradecolagem, pois poderá ocorrer uma deformação excessiva das mesmas;
-Nunca se deve pisar sobre as linhas e a vela, sobretudo em chão duro;
-Não se deve permitir a entrada de areia, pedras ou neve nas células dovelame, pois o peso no bordo de fuga freia o velame, podendo até ocorrer
-Nas decolagens ou pousos com vento forte, um velame descontrolado podebater contra o solo com grande velocidade e o choque pode fissurar o tecido;
-As linhas do PRYMUS 3 são compostas por um núcleo de Polietileno de
Alta Performance (Dyneema) e Aramida (Technora), com um manto protetorde Poliéster. Deve-se evitar uma sobrecarga individual das linhas acima dosesforços normais em vôo, pois uma deformação excessiva é irreversível,tornando-se permanente;
um estol. Além disso, cantos vivos podem cortar o tecido;
-Em caso de emaranhamento, as linhas de freio podem esfolar ou uma linhaprincipal pode vir a ser cortada por uma linha de freio, rompendo devido africção;
-Durante o pouso, deve-se evitar que o bordo de ataque caia de frente parao chão, já que isto pode danificar os materiais que compõem a frente doparapente ou romper as costuras;
33

-Um Plano de Linhas encontra-se anexo ou pode ser solicitado ao fa-bricante ou distribuidor;
-O PRYMUS 3 deve ser levado para inspeção no fabricante ou distribuidor
uma vez por ano;
-Faça sempre uma revisão após um incidente ou caso a vela fique guardadapor um longo tempo.
água doce. Água salgada pode diminuir a resistência das linhas, mesmo seenxaguadas com água doce. Nunca secar diretamente ao sol, sempredevemos fazer a secagem à sombra. Depois de seco, o equipamento deve
-Recomenda-se não dobrar o velame sempre na mesma posição simétricaem relação ao centro, pois estando sempre para o lado de fora, poderáhaver fadiga da célula central;
-primeira inspeção obrigatória deve ser feita ao completar 24 meses ou100 voos, obedecendo o que for alcançado primeiro. Apos a primeirainspeção uma vela precisa ser inspecionada anualmente ou a cada 100voos (obedecendo o que for alcançado primeiro). Pode ocorrer que nainspeção seja definido um período mais curto para a próxima inspeção(por exemplo 50 voos ou 6 meses). Sem as inspeções obrigatórias oparapente perde a sua certificação e respectiva garantia;
O parapente deve obrigatoriamente seguir o calendário de inspeções.A
Seu PRYMUS 3 foi projetado e testado para ter o melhor desempenho
com segurança. Toda a modificação do seu parapente faz perder suahomolagação. Por estas razões recomendamos que você não altere nadano seu parapente.
Atenção:
ser enviado a uma oficina autorizada ou ao fabricante para uma revisão;
-A manipulação do parapente em decolagens de terra, muito vento aceleramo envelhecimento do seu equipamento;
-Após pousar na água ou arborizar, deve-se checar e testar as linhas. Nocaso de contato com água salgada, o parapente deve ser enxaguado com
34 35
Termos da Garantia:
GARANTIA SOL 3 ANOS/300 HORAS
Esta garantia diz respeito aos materiais e erros de fabricação do
Esta garantia cobre todo Parapente SOL homologado LTF/EN para uso
de lazer, não incluindo equipamentos de uso profissional (escola, competições, acro, etc).
Perante a situação de uso extremo os parapentes de competição, acro,
protótipos e uso profissional não estão cobertos pela garantia SOL 3
anos (300 horas). Todo parapente SOL destinado para competição eacro, tem garantia de 1 ano no que tange a defeitos de fabricação.
1º)
2º)
3º)
parapente, devidamente observadas as condições pré-definidas;
Condições da Garantia:
Deve ser mantido um registro de cada vôo, informando data, local etempo de duração;
2º)
Um formulário deve ser preenchido corretamente em 3 vias,
devendo a via da Fábrica ser enviada à SOL Paragliders até 30
dias após a compra, ficando outra com o Vendedor e a última com
1º)
o Proprietário;
O equipamento deverá ser operado e mantido conformeinstruções contidas no Manual do Equipamento. As instruçõesde armazenamento, dobragem, limpeza e outros cuidados
3º)
devem ser devidamente respeitadas;
Manutenções e revisões podem ser executadas somente pelofabricante ou oficina autorizada e devem ser devidamente
4º)
documentadas;
Todo parapente SOL inclui uma Garantia de 3 anos ou 300 horas de voo,
valendo o que for alcançado primeiro. Nossa tecnologia de desenvolvimento,através da utilização de materiais de qualidade e a adoção de novos processosde fabricação, fazem com que possamos oferecer mais esta grande vantagemà você, nosso cliente.
Por esta garantia entenda-se a reparação ou substituição gratuita, a critériodo fabricante, dos materiais por outros em perfeitas condições de uso.

37
PALAVRAS FINAIS
Segurança é o lema de nosso esporte. Para voar seguro os pilotos devem treinar, estudar, praticar e estar alerta aos perigos que nos rodam.
Para atingirmos um nível de segurança devemos voar regularmente na medida do possível, não ultrapassar nossos limites e evitarmos nos expor a perigos desnecessários. Voar é um aprendizado lento que leva anos, não coloque pressão sobre voce mesmo. Se ascondições não estiverem boas, guarde seu equipamento.
Não superestime suas habilidades, seja honesto com você mesmo. Todos os anos vemos muitos acidentes e a maioria deles poderiater sido evitada com pequenos gestos.
Desejamos bons e seguros vôos com o seu PRYMUS 3.
Fazemos parte da sociedade em que vivemos: amigos, familiares e atépessoas que não conhecemos se preocupam conosco, nossa obrigação comesta sociedade é nos mantermos saudáveis e que a cada pouso estejamosum pouco mais felizes. Voamos para nos sentirmos mais vivos.
36
Alteração das cores originais de tecidos, linhas e tirantes;1º)
Danos causados por erro de operação, incidentes, acidentes ousituações de emergência;
3º)
Danos causados por operação imprópria do Parapente;4º)
Parapentes que tenham sofrido qualquer alteração de seu projeto
original sem a devida autorização oficial da SOL Paragliders.
5º)
Danos causados por meios químicos, areia, atrito, produtos delimpeza ou água salgada;
2º)
6º)
O parapente deve obrigatoriamente seguir o calendário de inspeções.A primeira inspeção obrigatória deve ser feita ao completar 24 meses ou 100 voos, obedecendo o que for al-cançado primeiro. Apos a primeira inspeção uma vela precisaser inspecionada anualmente ou a cada 100 voos (obedecen-do o que for alcançado primeiro). Pode ocorrer que na inspe-ção seja definido um período mais curto para a próxima inspeção (por exemplo 50 voos ou 6 meses). Sem as inspe-ções obrigatórias o parapente perde a sua certificação erespectiva garantia;
5º)
Para pleitear a troca ou a reparação do equipamento, que de-
verá ser decidida e efetuada somente pela SOL Paragliders,
7º)
o proprietário deverá enviar à empresa:
a) Parapente em questão e cópia de todas as revisões realizadas e registro de vôos;
b) Via original do proprietário do Formulário de Cadastro Garantia SOL
Paragliders.
Esta Garantia não cobre:
6º) Danos causados por transporte, armazenamento ou instalação imprópria do produto;7º) Defeitos e danos decorrentes da utilização de componentes não compa- tíveis com o produto;8º) Uso de embalagem inadequada no envio do produto para reparo;9º) Apresentação do produto sem a etiqueta de identificação com o número de série;10º) Operação fora das especificações publicadas no manual do proprietário.
Todas as despesas de envio para Fábrica e retorno do equipamentocorrem por conta do proprietário;

38 39
Pilot´s Manual
PRYMUS 3
just for fun
LTF - 1 | EN - B
V.03/2008

40
PLEASE READ THIS MANUAL CAREFULLY
AND NOTE THE FOLLOWING DETAILS
THIS PARAGLIDER MEETS AT THE TIME OF DELIVERY THE REQUIREMENTSOF THE LTF (LUFTTÜCHTIGKEITSFORDERUNGEN) CERTIFICATION OR OF
THE EN 926 (EURO NORM) OR THE AFNOR (SHV AND AEROTESTS).
ANY ALTERATIONS TO THE PARAGLIDER WILL RENDER ITS CERTIFICATIONNULL AND VOID !
THE USE OF THIS PARAGLIDER IS SOLELY AT THE USER'S OWN RISK !
MANUFACTURER AND DISTRIBUTOR DO NOT ACCEPT ANY LIABILITY.
PILOTS ARE RESPONSIBLE FOR THEIR OWN SAFETY AND THEIR PARAGLIDER'S AIRWORTHINESS.
THE AUTHOR ASSUMES, THAT THE PILOT IS IN POSSESSION OF A VALIDPARAGLIDING LICENCE !
41
INDEX Welcome to the SOL family..........................................................53 About SOL...................................................................................54 Philosophy...................................................................................55 PRYMUS 3....................................................................................56 PRYMUS 3 The Design................................................................57 Technical Data.............................................................................58 Total take-off weight...................................................................59 Materials......................................................................................59 Top/Bottom...............................................................................59 Profiles......................................................................................59 Internal Diagonal Reinforcements.............................................59 Reinforcements...........................................................................59 Lines..........................................................................................59 Straps........................................................................................60 Quick Links................................................................................60 Pulleys.......................................................................................60 Suspension Systems....................................................................60 Speed System..............................................................................61 Adjusting your accelerator.........................................................61 Operation...................................................................................62 Usage........................................................................................62 Backpack......................................................................................63 Harness.......................................................................................63 Flight...........................................................................................63
First Flight...................................................................................63 Take-Off Checklist.......................................................................64 Take-Off.....................................................................................65 Performance..............................................................................65 Turns.........................................................................................66 Positive Spiral............................................................................66 Thermaling and Soaring.............................................................67 Active Flight................................................................................67 Accelerated Flight......................................................................68 Landing......................................................................................68 Istalation of tow release............................................................69 Rain and Humidity......................................................................69 Motorized Flight and Acrobatic Flight........................................69 Behavior in Extreme Manoeuvres...............................................69 Lateral Asymmetric Closing (Closed).........................................70 Full Stall......................................................................................70 Negative Turns............................................................................71 Wingover...................................................................................71

43
WELCOME TO THE SOL FAMILY!
We trust your PRYMUS 3 will bring you many great life memories you
will cherish forever.
We would like you to read this manual carefully and thoroughly. In it, youwill find important information about using your new equipment.
In the event you should have any questions about its usage or should you
wish to be updated on the latest news at SOL, we remain at your disposal
at our Sales and Service Departments at the telephone+55 (47) 3275-7753 and throught the e-mail addresses
Don’t forget to access our website often at www.solsports.com.br tokeep current on the latest world of paragliding. At this site you will also be able to:
models’ launchings, results and news from the
Subscribe to our newsletter Register your new paraglider for SOL Warranty eligibility Welcome to the SOL Family!
Thank you for selecting a SOL paraglider. You have just acquired a high quality
product, manufactured under one of the most demanding industry standards
worldwide.
42
Parachutal..................................................................................72 Emergency Flying 72....................................................................... Fast Descent Maneuvers...............................................................73 Spiral.........................................................................................73 Ears...........................................................................................73 B-Stall........................................................................................74 Up-Keep, Maintenance and Repairs..............................................75 Storage......................................................................................75
Zipper........................................................................................77
Cleaning.....................................................................................75
Pulleys.......................................................................................77
Folding.......................................................................................76
Tears..........................................................................................78
Sealings......................................................................................78
Repairs.......................................................................................76
Line breakage.............................................................................78
Recommendations for a long life.................................................78
SOL Warranty 3 Years/300 hours................................................80 Warranty Terms.........................................................................80 Warranty Pre-Requisites............................................................81 Not Covered Under This Warranty..............................................81 Final Words..................................................................................83Data Base.....................................................................................85 Certification DHV PRYMUS 3 S.................................................86 Certification DHV PRYMUS 3 M................................................87 Certification DHV PRYMUS 3 L.................................................88 Certification DHV PRYMUS 3 XL..............................................89 Overral Plan..............................................................................90 Line Plan....................................................................................91 Flight Log...................................................................................92 Inspection..................................................................................93
Frontal Symmetric Closing.........................................................71 Line-Over...................................................................................71

44 45
This is just one of the great accomplishments of this young and dynamiccompany, which presently is among the ten major paragliding and
ABOUT SOL Founded in 1991, after six months of research and many visits to several
manufacturing facilities and suppliers, SOL began its production in
partnership with the European brands Condor, Comet and Nova, andbecame autonomous in 1999 with its own testing and development centers.
From the beginning SOL has adopted the philosophy of utilizing certified
designs, manufactured with imported materials of the highestquality by specialized and skilled-trained staff.
In 1995, the company moved to its current facility, occupying an area of3.400 m² and has at its disposal a team of 98 employees, 22 of which are
pilots. SOL provides a comprehensive benefits package such as Health Plan,
Life Insurance, partnerships with pharmacies, transportation vouchers,incentive getaways to employees who outperform each month, andeducation grants.
At SOL, we take extreme measures to maintain our machinery and
manufacturing equipment current with the world market. This way, wesafeguard our accuracy everyday in the production process, control and
assuring the high quality of SOL brand and products throughout 65countries around the world.
SOL is one of the few paragliding enterprises worldwide to have its own
manufacturing facilities able to test every new model before making itavailable to the market, which fosters the reliability necessary for excellentperformance when flying.
In early 2004 SOL became certified by DHV, which is the most respected
regulating body of free-flying worldwide. Its mandate is to makesure its members have the capacity to reproduce faithfully the certifiedequipment on an industrial scale. Few facilities in the world possess this
certification in their manufacturing process. SOL was one of the firsts toobtain it.
accessories manufacturers in the world!
Safety: The new product has to offer a level of safety that is at par orbetter than the one it is replacing;
PHILOSOPHY
SOL's philosophy is to introduce products that are considerably better than
current ones, in order to guarantee significant advancements in fouraspects: Safety, Performance, Ease of Operation and Innovation.
The development process and design of every new product begins at thecomputer. Drawing Software, 2D, 3D modeling and simulation are utilizedbefore the actual manufacturing of prototypes, in order to ensure greater
Innovation: New products must display real benefits to the user, facilitatingfree-flying, increased safety, or both.
Ease of Operation: The new product must display higher levels and betteroperational ease than the one it is replacing;
Performance: The new product must perform better than the one it isreplacing;
accuracy in each new design.

47
PRYMUS 3 - THE DESIGN
On the profile's front facing area, the Mylar reinforcements ensure stabilityand superior shape accuracy. The cells' openings are in the inner layer.Integrated reinforcements of Dacron placed diagonally at the suspensionpoints ensure an even distribution of payload on the canopy.
Recommendations:
-This paraglider corresponds at the time of its delivery to the certification of norm LTF and EN;-Any equipment alteration will result in the cancellation of this respective certification;-Flying with this equipment shall be performed at the individual's own risk; -The manufacturer and its representatives are not liable and therefore notresponsible for any misusage nor mishandling of this equipment;
-Every pilot is responsible for the maintenance and assessment of equipment usability;
-It is a basic assumption that the pilot is certified to fly this paraglider;
-This paraglider is recommended to be used at flying schools.
PRYMUS 3 presents a balanced combination between the Aspect ratio and
Projected aspect ratio which results in a canopy that easily goes up in the thermals and it is speedy steady.
A greater tension was set up in the stabilizers with a greater tension in the panel making a better dragging in the maximal speedy.
PRYMUS 3 is made of 39 cells, diagonal lines connected to the profiles ma-
king a better load distribution along the canopy with a better rigidity, cleaner extra and intra sides and less aerodynamic dragging.
Big openings in the profiles allow internal ventilation without affect the pro-file and promote a good reinflation. The best materials were carefully selected for this project. You can find more details about the chosen mate-rials in the section MATERIALS .
46
The sink rate and the speed performance are excellent for a paraglider holding
safety ratings such as the PRYMUS 3, making your XC climb much easier.
THE PRYMUS 3
The PRYMUS 3 holds LTF 1 and EN B certifications with excellent ratings.
Its easy and progressive inflation with positive tension on the risers givesthe pilot a better sense of each opening stage.
In the air, the PRYMUS 3 is a true joy to fly! The braking tension is per-
fect!When applied progressively they come to an exact rotation, and swit-ching directions is not a problem.
PRYMUS 3 was designed to resist deflations and to be more responsive du-
ring re-inflations.
After one year of tests, many prototypes and many hours of flight, the re-
sult is PRYMUS 3 that offers a new concept in comfort and performance
for pilots who want a safe paraglider.
PRYMUS 3 innovates in many points: line plan, profile, canopy tension and
a new air entrance geometry.
A balanced combination between the canopy tension and extension makes
a more stable behavior of PRYMUS 3 and provides comfort during the
flight.
The PRYMUS 3 characteristics give you confidence which makes you go
after bigger goals.
We hope you enjoy every moment with a lot of fun.

48
-Weight: Pilot + about 20 kg (40 lbs) of equipment;
-The identification and information tag is found at the top of the middle profile.
TECHNICAL DATA
Tamanhos
Zoom Factor
Cell Number
Projected Wingspan
Projected Surface
Projected A/R
Real Wingspan
Real Surface
Real A/R
Line Diameter
Height
Total Lines
Profile Max
Profile Min
Weight
Legal Takeoff Weight
Sink Rate Min
Min Speed
Trim Speed
Max Speed
Glide Ratio
Places
DHV Certification
EN Certification
XS S L XL
0,92
39
8,49
19,79
3,6
11,04
24,16
5,04
707,8
424
271
55,20
5,3
45/65
1
21+/-1
37+/-1
47+/-1
8,1+/-1
1
---
B
1,04
39
9,60
25,29
3,6
12,48
30,88
5,04
794
478
307
62,4
6,7
90/110
1
21+/-1
37+/-1
47+/-1
8,1+/-1
1
1
B
1,08
39
9,97
27,27
3,6
12,96
33,30
5,04
822
497
319
64,8
7
105/125
1
21+/-1
37+/-1
47+/-1
8,1+/-1
1
1
B
m
2m
m
2m
mm
cm
m
cm
cm
kg
kg
m/s
km/h
km/h
km/h
1,1 - 1,5 - 2,1
0,96
39
8,86
21,55
3,6
11,52
26,31
5,04
736,4
442
283
57,6
6
60/80
1
21+/-1
37+/-1
47+/-1
8,1+/-1
1
1
B
M
1
39
9,21
23,38
3,6
12
28,55
5,04
765
460
295
60
6,3
75/95
1
21+/-1
37+/-1
47+/-1
8,1+/-1
1
1
B
49
-If you desire a better sink ratio, and if you usually fly above flat elevations,and light conditions, you should choose to fly near the minimum suggested
TOTAL WEIGHT ON TAKEOFF
The PRYMUS 3 has been certified for a defined weight range. If your we-
ight range falls between two sizes, we recommend the following:
-If you desire better speed, accurate commands, and if you usually fly overmountains and/or extreme conditions, you should choose to fly near themiddle to maximum suggested weight.
weight.
Pro Nyl 42 g/m2 Nylon Rip Stop coated with polyurethane.
Selected for its stability and stretching resistance, which is vital to yourparaglider in maintaining its flight safety characteristics longevity.
MATERIALS
Top / Bottom
Gelvenor Nylon rip stop coated with silicon and polyurethane.Selected among other types of fabrics in the current market because of itsdurability, resistance to UV deterioration and stretch ripping. Two types offabrics, ensuring an optimum combination of weight and durability.
Gelvenor LCN066 OLKS 49 g/m2Gelvenor LCN066 OLKS-2 45 g/m2
Profiles
Pro Nylon rip stop coated with polyurethane.
. Internal Diagonal Reinforcements
ReinforcementsMylar laminated reinforcement. Selected to improve long term durability.Its function is to maintain the main shape and attitude of attack, withoutsacrificing your paraglider's characteristics during takeoff and flight.
Bainbridge Mylar Diax 60/120 P
Lines
The lines are made of Aramide and are known for its high grade ofresistance and low stretching overtime.

50
-1,1 mm Cousin - Surpassed its resistance exceeding 85 kgs (175 lbs). These lines are located at the upper section of the gallery, and makes forthe majority of lines on the paraglider.
-1,5 mm Cousin - Surpassed its resistance exceeding 150 kgs (330 lbs). These lines are located at the middle section of the gallery.
-2,1 mm Cousin - Surpassed its resistance exceeding 250 kgs (572 lbs). These lines are located at the bottom section, and are connected to therisers.
Straps
Fitanew 19 x 2,0 mm Flat Multi 1600kg
Quick Links
Ansung Precidion 4mm 800kg
Pulleys
Charly / Austrialpin / Ansung
All components are of the highest grade and were selected with thelong-term durability of your equipment in mind.
The PRYMUS 3 lines consist of a beige Technora Core of high resistance to
tension and has low distortion rate, covered by a layer of colored polyester.The set is made of individual lines, with sewn ties on both extremities.
SUSPENSION SYSTEM
The main bottom lines and the braking master lines are 1,5 mm and 2,1 mmin diameter respectively. The upper lines are 1,1 mm and 1,5 mm in diameter.
The upper lines distinguish themselves (next to the inside layer) and themain lines, which are connected to the Quick Links. These, in turn connectto the main lines on the risers. The stabilizers' lines are connected to the same Quick Links.
The brake lines come out of the trailing edge, through the master line andare linked to the toggles, passing through a pulley attached to the 'D' riser.
Lines 'A' and the brake lines are of different color in order to facilitatetakeoff preparation. The Quick Links are triangular shaped and are madeof inox stainless steel.
51
On the brakes' master lines, there is a mark at the ideal setting point, atwhich height the toggles are affixed. This setting should not be altered asit ensures adequate and sufficient path and room for the toggles in case ofemergency situations during flight and landing. Further more, in thisposition the paraglider is not constantly on a stall.
Warning:
In the event of one or more brake lines get stuck during flight, or if atoggle is lost due to a line brake, the canopy can still be flown byapplying gentle pulling of the D risers, therefore controlling directionalchanges.
SPEED SYSTEM
The Speed System works on the risers 'A', 'A1', 'B' e 'C'. When set at thenormal position, all risers have the same length: 52,5cm.
The PRYMUS 3 allows for a Foot Speed System installation. It has 5
risers on each side, with the 'A' lines attached to the 'A' riser. The riser 'A1'is turned to the tabs. The 'B' lines and the stabilizer are attached to the 'B'riser. Lines 'C' are attached to riser 'C' and lines 'D' are attached to riser 'D',additionally to the brake pulley support.
When the Speed System is activated, it shortens the risers 'A' 12 cm,riser`A1´ 10,5cm, riser 'B' by 10cm and riser 'C' by 5cm. The riser 'D' rema-ins in its original position.
Adjusting your speed system
The majority of the latest harnesses have pulleys for assembling the FootSpeed System. In the eventuality the pulleys are not there, it is importantto attach such pulleys (sewing them) in such way to make the operationof the speed system softer.
The little chord on the speed system must be firmly attached (by anon-slippery knot) to the stirrup (aluminum bar). The other end of thecable is fed through the harness' pulleys and comes out vertically, andfirmly attached to a Quick Link with a strong coil, a sister clip orpreferably closed by a nut.
In order to adjust the Speed System, we suggest that you connect theharness and the risers together, suspended from the ground. Ask a friendto pull the risers 'A' upwards. At this time, adjust the length right to thebar in such way to be easily reachable with your feet in flight and bystretching the legs, make sure to allow for a clear path to maximize theaccelerator usage.

53
BACKPACK
Your backpack was designed with comfort and practicality in mind. Itsformat allows for good content distribution. Shoulder straps and backsupport are padded so that comfort is not compromised during walks. Forlarger equipment capacity, your backpack has an expandable compartment,which can easily be enlarged without sacrificing the layout. Two differentpocket sizes at the front allow` for easy storage of small articles.
The regulated distance between the large clips (adjustable at the chest) is40 cm for the paragliders sizes “XS” and “S”, 42 cm for the “M”, 44cm for the “L” and 46 cm for the “XL”. Variations of more than 5 cm above these oneswill alter the fundamental characteristics of the canopy and are potentiallydangerous.
HARNESS
Any harness of type ABS are recommended for the PRYMUS 3, tested with
large clips set at 43 cm and 47 cm heights from the board, depending onthe harness size. Care must be taken because the large clips height affects
-Cross straps may jeopardize flying and do not improve safety.
Warning:
SOL give free together all gliders and harnesses, since february 2007, a Measuring Tape to help pilots to check the distance between carabines.
the brake position when set at 'normal'.
A careful First Flight is necessary with every paraglider, the
PRYMUS 3
After unpacking the paraglider and laying out it in a horseshoe shape position, the following steps must be taken:
FLIGHT
First Flight:
52
Operation:
Usage:
The pilot activates the speed system by pushing the stirrup forward. Thepulleys on the risers reduce to 2/3 the necessary energy and the risers atthe front are shortened.
Before takeoff, the Quick Hook-Up sister clip or the Quick Link must be connected at the ring on the speed system risers. It is important to note thatthe little chord must run free of snags. The rubbing with the risers may causedamage.
-An incorrect system assembly, that allows for different measurementsother than the indicated above nullifies the certification!
-Never use the speed system in extreme maneuvers.
-In the event the canopy collapses, release the stirrup immediately andmake the appropriate corrections.
-Never let go of the toggles!
-Remember that when using the speed system, the angle of attackdecreases which may result in the collapse of the paraglider,consequently, the use of the speed system close to the ground shouldbe avoided. We do not recommend the use of the speed system in
Warning:
turbulent conditions.
Illustration:
Risers:
1. Break Pulley
2. Swivel
3. Toggle
4. Speed System Connection 5. Speeding Line

54
-The paraglider must be laid out in such a way that, when tension is applied to risers ‘A’, the canopy center should be extended before the extremities. This allows for an easy takeoff with good directional stability;
-Special attention must be paid to the wind’s direction upon the lifting
-All lines must be organized and completely free of any entanglements. Special attention must also be paid to the lines ‘A’, which must be free rig ht from the risers ‘A’ (with the red mark) to the canopy; -Same priority and care must be given to the brake lines, which must also be completely free and without any possibility of entanglement on any obstacle during takeoff; -All lines should be checked and all the risers in appropriate order. When the risers are aligned and not twisted, the brake lines will be free from the pulleys (on the rear risers) to the canopy’s rear edge; -It is extremely important that no entanglements nor bunched lines are present ; -Any line going under the canopy or overline may result in disastrous consequences; -Before and after each flight the lines, risers and canopy must be checked for any possible damage.
Warning: In case there is any damage present, as insignificant as it may be, the canopyshould not be flown!
TAKE-OFF PRE- FLIGHT CHECKLIST – DO NOT FORGET 01. Make sure reserve is OK? Opening device and pins activated? 02. Helmet 03. Large Carabiners Closed 04. Harness – Connected Locks 05. ‘A’ risers in hands 06. Untangled brakes in hand 07. You must be in the center of canopy 08. Takeoff path is clear 09. Paraglider and pilot aligned with the wind 10. Airspace ahead of takeoff area is clear. 11. Check if the distance between carabiners is correct.
55
Take-off: It’s very easy to fly the PRYMUS 3 . When ready to takeoff, the pilot must take risers ‘A’, ‘A1’ together with the toggles. In order to differentiate between the lines, line ‘A’ and risers ‘A’ inclusive are marked with a different color.
Before takeoff, a last check is required to ensure all the equipment is laid out properly.
The arms must be extended to the side, as if they were extensions of risers ‘A’ A decisive run allows for a quick and stable inflation. Canopy overtakes are not common. After the initial inflation momentum, the pilot must keep the tension forward on risers ‘A’ (pushing them ahead, and not pulling them downwards), until the canopy is above your head. At this point, the brakes must be carefully activated, ensuring room for the possibility of directional changes.
A move to underneath the center of the paraglider is the best method for corrections, provided there is room for it.
The pilot glances at last upwards to ensure the canopy is properly located above, completely unobstructed and inflated.
At this point, the pilot decides whether or not to takeoff. Reverse takeoffs in strong wind conditions are also very easy to execute. Due to risk of takeoff with entangled lines (twist), it is highly recommended to take some time and practice reverse takeoffs on a small, leveled hill initially.
Performance The PRYMUS 3 in its normal flight, performs better with the hands lifted, applying 25 cm the canopy enters safely the minimum speed range. In order to accelerate, use the speed stirrup, which will give you an increase around 10-12 km/h.
56
Turns: The PRYMUS 3 is very sensitive, responding instantly to turn commands.
Leveled turns can be achieved with the shifting of weight on the risers with minimum altitude loss. A combination of weight shifting and breaking technique is the most efficient way of executing turns in any situation. The given brake utilized determines the radius of turns. By activating the brakes on the outside edge of the turns, as well as applying maximum weight shifting on the risers, the efficiency and resistance to collapse in turbulences (at the edge of thermals) is increased.
In case it becomes necessary to perform turns in a constrained space with the PRYMUS 3 , we recommend you to release the outside brake in the given
turn and pull a little more the brake on the inside of the turn.
Warning: By pulling either brake too strongly or suddenly, there is a danger of creating a negative spiral!
The PRYMUS 3 glides best when no brakes are applied.
Positive Spiral:
When the pilot activates just one brake, slowly and progressively, the
PRYMUS 3 inclines sideways in a sharp angle and enters a steep and
quick turn, which may become a positive spiral.
During a spiral the rotation radius can be controlled by the greatest orsmallest force applied to the inside brake. In order to come out of it, thepilot must release the brake slowly and shift his/her weight lightly to theoutside of the turn.
A sudden exit may result in an exaggerated momentum forward of thecanopy, and collapsing it. For this reason, on exiting the last turn, the insidebrake of a given turn must be softly applied again.
In case the canopy collapses during this process, the spiral must becounter acted, as the active canopy area will be reduced.
57
Warning:
-Never combine ears with spirals. The canopy active area reduction plus the 'G'force, by the centrifugal effect, may result in line and/or canopy damage.
-Exiting of any spiral at great speeds must be piloted.
-This manouver requires high altitudes (at least 600 meter over ground) and isdangerous due to high descent ratio pilot can loose the altitude reference. Neverdo this manouver without sufficient experience.
The pendulum effect back and forth must be avoided! The canopy mustremain on top of the pilot. For this purpose, the speed must be increasedby releasing the brakes upon entering a thermal (depending on its intensity)or braking on exit. This is part of the basic technique on active flying.
In turbulent conditions, the paraglider must be flown with the brakes softlyapplied. An increase in angle of attack is achieved by this measure,resulting in greater canopy stability.
Thermaling and Soaring:
During flights over mountainous terrain, it is highly recommended aminimum height of 50m be kept, for safety reasons.
It is extremely important to know and respect flying regulations, especiallyso when the airspace within close proximity of canyons is shared amongseveral pilots, where last minute anti-collision maneuvers are not executable.
Warning:
The PRYMUS 3 requires active flying in turbulences! This can avoid canopy
closings and deformations.
Active flight
For best performance during your flight, it is important to be alwayssensitive to what your canopy is trying to communicate. The key elementsof active flying are the advancements and tension control.
When the canopy moves ahead of you, carefully apply the brakes, so thatthe canopy returns to be above you, and if the canopy moves behind you,you must release the brakes.
Flying with the brakes lightly applied (+/- 20 cm) allows the canopy to flyslightly behind. In turbulent circumstances the internal paraglider tensionmay change, which you will feel on the brakes. The idea is to maintain aconstant tension, and in case you feel loss of tension, lift your hands upquickly to the original position.

58
These adjustments will make for a more controlled flight, and help ineliminating the possibility of collapse.
Avoid flying excessively with the brakes on because you might brake to thepoint of stopping the canopy from flying. Always consider your aerodynamicspeed. Your movements can be symmetric or asymmetric and both or onebrake can be applied.
We suggest that you do ground practice runs and advancing simulations.Tension loss can be simulated well on the ground.
Warning:
Neither pilot nor any paraglider are immune to collapses; thereforeactive flying will decrease the chances of happening. When flying inturbulent conditions, be more active and avoid great advancements ofthe canopy by anticipating yourself too quickly with your responsemovements. Always maintain altitude awareness and do not get intoexcessive commanding mode. We advise you to maintain brake tensionand avoid flying in extreme turbulent conditions.
Accelerated Flight:
Landing:
It is recommended to use the accelerator when flying against the wind or in descending current zones. Due to a decreased angle of attack, the canopy may collapse easier as set at the normal position. The pilot must rememberthat the higher the speed, the more dynamic the collapse response orsymmetric closing will be.
It's very easy to land with the PRYMUS 3. The final approach stage must
be done in straight line upwind. During this final glide, the paraglider must be decelerated slowly and at about 1 m from the ground the pilot must stall thecanopy, according to the conditions.
With a strong head wind, the pilot should break only slightly or eventuallydon't even brake at all, and utilizing just the risers 'C' to de-inflate andovercome the canopy after the landing. By breaking during a landing instrong wind conditions, you may expose the canopy to the wind, whichcould lead to the pilot being dragged backwards.The final approach must be done always in a straight line. Sharp andalternating turns may produce a dangerous pendulum movement closeto the ground.
59
Instalation of tow release
The the
It must be connected to the same carabiners that join the harness with theparaglider. It is activated through an activator that is strategically locatedand when is pulled it releases the equipment to fly. During the taking off it
A taking off with tow release help needs instructions and appropriate pro-cedures. Make sure that you have the necessary knowledge and that the
PRYMUS 3 can be used for towed flight as long as is connected to
towed flight system (Tow release).
is necessary to avoid a small angle of the cable with the ground.
operation is made in a safe and correct way.
BEHAVIOUR IN EXTREME MANOEUVRES Warning:
?Extreme maneuvers must be executed under the supervision of aqualified instructor, on safe courses and with the entire infrastructure
available for above ground and water flying!
The PRYMUS 3 has not been designed for motorized flight, or acrobatics.
Although it has been successfully used for these purposes by some pilots.
Motorized Flight and Acrobatic Flight:
excessive usage of breaks.
It is not advisable to fly the PRYMUS 3 in rainy days or with a wet
paraglider, since the in-flight maneuvers become more sensitive and areserve deployment may occur upon exiting a B-Stoll or in the event of
Rain and Humidity:

60
Lateral Asymmetric Closing (Closing):
Like any other canopy, a negative angle of attack will result in a closing. In order to maintain directional control upon a lateral asymmetric closing, the brakes must be applied on the open side.
In case of a major closing, the amount of braking must be well graduated, in such way to avoid the airflow displacement (stall) on the open section of the canopy.
To facilitate the canopy re-inflation during a collapse, the steps above must be followed in conjunction with a long and slow brake pumping action (2 seconds) with the toggle on the closed side. The shifting of weight on the opposite side riser of the closing will also assist with the re-inflation and increase safety, requiring less brake action and keeping away from the stall point.
In case the pilot does not compensate with the brakes, the PRYMUS 3 inmost situations will inflate by itself even in major asymmetric collapses. The PRYMUS 3 can make a complete revolution and in the event it does not
open on its own, without action, the paraglider will begin a positive spiral.
The pilot must lightly apply the brake on the external side to stop a spiral and at the same time shift his/her weight on the same side until the canopy is stabilized. Exactly at this stage of pendulum effect under the canopy, it is important that the pilot controls carefully the amount of force applied on the brakes, and often it is needed to decrease the force. Once a straight flight is achieved, the closed side can be re-inflated by the pumping action.
Full Stall:
To create a ‘Full Stallthem tightly in this position.
’, the pilot must pull both brakes to the end, and hold
Warning:
?If the pilot does not actively terminate the spiral, it will continue all theway to the ground!
In this situation, the PRYMUS 3 flies in most times on reverse, in a
forward horseshoe shaped tie. The canopy must be stabilized beforethe procedure for normal flight re-entry is initiated. Any attempt ofrecover during the beginning stages of a stall, when the paragliderreverses suddenly can result in a sudden push forward of the canopy.
61
When recovering from a 'Full Stall', both brakes must be released slowly
simultaneously and symmetrically (> = 1 second). The PRYMUS 3 willmove forward gradually and begin normal flying.An asymmetric recovery (releasing one brake before the other) of a 'FullStall' is utilized only by test pilots to simulate a paraglider being expelledout of a thermal and must not be attempted by pilots!
Negative Turns:
To induce a fast Negative Turn (DHV) or starting from the minimum speed(EN), the pilot must pull tightly and quickly one toggle right to the endof it. During the negative spiral, the canopy rotates relatively fast aroundits center, with its inner side flying backwards.
When entering an unintentional Negative Turn, the pilot must recover assoon as it is noticed by releasing the brake slightly so that the canopy wil accelerate and returns to a stable flight, without loosing too much altitude.
When a negative turn is intentionally prolonged, the PRYMUS 3
accelerates forward asymmetrically. A frontal asymmetric closing shouldnot be under estimated. To recover from an intentional negative spiral, thepilot must release the pulled brake and pay close attention to a strongcanopy surge ahead.
In turbulent conditions, a front dive may occur, which must be overcomeby accurate brake control.
Frontal Symmetric Closing:
Risers 'A' and 'A1' are tightly pulled until a complete closing of the Leadingedge is achieved, then quickly release the risers until it is closed.
The pilot should not hold the risers after the closing. Special attention mustbe paid to ensure enough altitude is available.
The PRYMUS 3, on most instances, recovers on its own from a frontal
asymmetric closing.
Wingover:
In order to perform a 'Wingover' the pilot must generate a strong pendulumeffect by alternating turns on both sides. A complete closing of the canopyis possible.
Warning: ?A turn with an incline beyond 60º is considered aerobatic.

62
In the eventuality of lines going over the canopy during flight, the pilotmust take the following steps:
Line-Over:
-Try to maintain a straight flight: Shift the weight to the open side ofthe paraglider and assist with a light brake tension on the open side.
-To re open: Pull the stabilizer line on the closed side (first line of riser‘B' of a different color) until the line entanglement is cleared.
-If the line-over is serious, if it's not possible to maintain a stable flight(spiral) and if there is sufficient altitude (>400 m), there is a chance of resolving this mal function by executing a 'Full Stall'.
In case the above maneuver does not solve the problem, or if the altitudeis not sufficient, the pilot can activate the emergency parachute (reserve).
Warning: ?
Line-Overs are generally the result of poor preparation before takeoff,collapses during aerobatics or lateral asymmetric closings.
Parachutal:
The PRYMUS 3 does not have parachutal stall tendencies and recovers on
its own from an intentional parachutal stall induced by braking commands.
Emergency Flying:
In case braking controls are impossible, the canopy can be driven byutilizing risers 'D' and eventually land.
Pay close attention to the length of the command, which should be shorterthan braking commands.
In the event of a parachutal stall upon coming out of a B-Stall, it is enoughjust to pull the risers 'A' downwards or the accelerator, thus reducing theangle of attack, therefore reorganizing the air flow contact to the canopy.
63
Illustration
FAST DESCENT MANEUVERS
Spiral:
Spirals, as described earlier, carry a high rate of descent. Therefore highaccelerations (G) make it impossible to hold them for an extended periodof time. The spiral force may cause the pilot to faint and to lose flyingcontrols, and crash. Furthermore, they will exert a lot of force and affectthe pilot and equipment alike.
The pilot should never exercise this maneuver in turbulences or with widelateral angles. In windy conditions, the pilot must be aware of oscillationsduring the maneuver.
Warning:
Exiting out of a fast spiral must be piloted.
The pilot must never combine ears with spirals!
Ears:
By pulling simultaneously the external riser 'A1' at about 18 cm, the canopytips will close. The canopy remains completely maneuverable through the activating ofunilateral brakes or the shifting of weight towards the risers, flying at afast descending rate (up to approximately 5m/s).

64
Warning:
SOL does not recommend combining big ears with the accelerator. This
combination may result in a large asymmetric closing.
SOL does not recommend combining of ears and spirals, as this may
exceed the allowable load.
In order to recover, the pilot must release the external riser 'A1' lines.Usually the canopy re opens by itself, but the pilot can assist with a slowand quick pumping.
Illustration
B-Stall:
To induce a 'B-Stall', the pilot must pull the risers 'B' simultaneously,between 15 and 20cm. There will be a shift of air flow on the outer layerand the canopy will initiate a parachutal phase.
By releasing the risers 'B' quickly the airflow recoils on the outer layer andthe canopy returns to its normal flight position. In case the canopy does notrecover to normal flight, refer to the section on parachutal.
The momentum of return creates a forward motion by the canopy. Werecommend avoiding braking the paraglider eliminating the possibilityof a parachutal stall.
The load applied on the 'B' lines during this maneuver is not beneficial toyour paraglider. Use this maneuver only in emergencies.
In the event risers 'B' are pulled too quickly or too deeply, a horseshoe mayoccur towards the front. In order to regain normal flight, the pilot mustapply the brakes lightly.
65
Illustration
Warning:
The best flight technique is to fly safely and correctly. This way youwill never need to descend rapidly!
All fast descent maneuvers must be executed in light conditions and atsufficient altitude, so that they can be performed as necessary underextreme flying conditions;
'Full Stalls' and negative spirals must be avoided, regardless of theparaglider being flown. Incorrect recoveries and exits can result indisastrous consequences;
UP KEEP, MAINTENANCE AND REPAIRS
Warning:
A good maintenance will extend the life of your PRYMUS 3 for many
years to come.?
Storage:
The paraglider must be stored dry, in a dry place, protected from UV lightand away from chemical products.
Cleaning:
Cleaning must be performed only when it is absolutely necessary. Werecommend the use of water only with a smooth sponge or cloth.

66
By following each step properly, you will be helping to preserve the lifespan of your equipment:
Folding:
Warning: -Open the canopy completely on the ground;
-Place all the lines spread by the inner layer and risers in the middleoutside the canopy on the trailing edge;
-Remove all the air by sliding your hand from the trailing edge to theleading edge;
-Make sure the volume is a little smaller than the protection bag;
-Avoid multiple folds at the same place.
-Keep folding to approximately 50 cm
-We recommend folding your paraglider like an accordion. This will keepthe profile reinforcements (Mylar/Carbon) from being crumpled and/orfolded. By using this folding method, the paraglider will keep its takeoffand flight characteristics for longer;
Steps:
1. Open the canopy completely;
2. Packing the glider “accordion wise” as shown in the figures;
3. Place each profile reinforcement over the corresponding cell;
4. Bring together the two parts and roll the canopy up without compressing too strongly.
Repairs must be performed only by the manufacturer, distributor orauthorized personnel.
Repairs:
Do not use any chemical product, since it will damage the materialpermanently.
67
Zipper
The backpack zipper must open and close softly. If there is any difficulty to move it you must apply paraffin or a spray lubricant to diminish the attrition among the components. You will notice the difference when you move it.
It is possible most of the times you fix by yourself the zipper. In case it doesnot close any more just pull it until the beginning of the position and with a pliers press both sides of the zipper.
Pulleys
It is important you keep pulleys lubricated because in case they do not workmay consume the speedy handle or axle, apply paraffin or lubricant spray,read carefully about the lubricant to avoid spots and fabric consume. Do not apply on the sewing lines.
Attention:When buying the lubricant make sure that this product do not attack the material properties. This may affect the fabric and lines resistance.
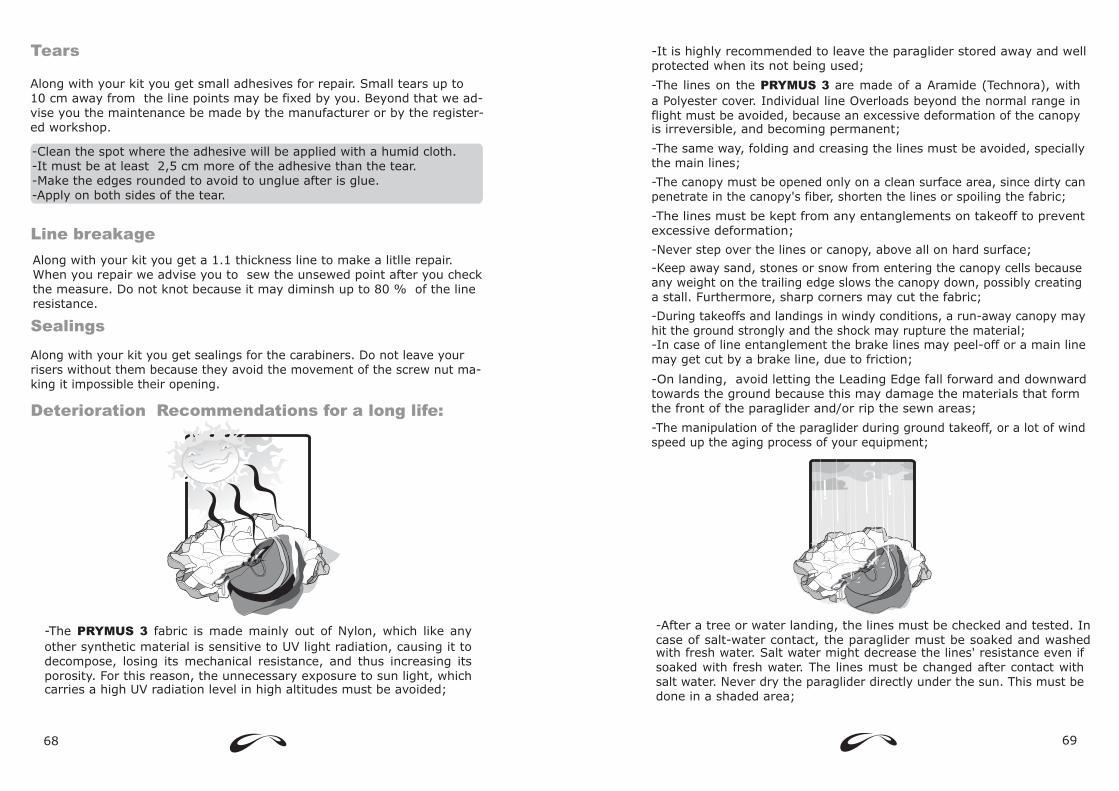
69
-It is highly recommended to leave the paraglider stored away and wellprotected when its not being used;
-The same way, folding and creasing the lines must be avoided, speciallythe main lines;
-Never step over the lines or canopy, above all on hard surface;
-The canopy must be opened only on a clean surface area, since dirty canpenetrate in the canopy's fiber, shorten the lines or spoiling the fabric;
-The lines must be kept from any entanglements on takeoff to preventexcessive deformation;
-The lines on the PRYMUS 3 are made of a Aramide (Technora), with
a Polyester cover. Individual line Overloads beyond the normal range inflight must be avoided, because an excessive deformation of the canopy
is irreversible, and becoming permanent;
-During takeoffs and landings in windy conditions, a run-away canopy mayhit the ground strongly and the shock may rupture the material;
-Keep away sand, stones or snow from entering the canopy cells becauseany weight on the trailing edge slows the canopy down, possibly creating
a stall. Furthermore, sharp corners may cut the fabric;
-In case of line entanglement the brake lines may peel-off or a main linemay get cut by a brake line, due to friction;
-On landing, avoid letting the Leading Edge fall forward and downwardtowards the ground because this may damage the materials that formthe front of the paraglider and/or rip the sewn areas;
-The manipulation of the paraglider during ground takeoff, or a lot of windspeed up the aging process of your equipment;
-After a tree or water landing, the lines must be checked and tested. Incase of salt-water contact, the paraglider must be soaked and washed
with fresh water. Salt water might decrease the lines' resistance even ifsoaked with fresh water. The lines must be changed after contact withsalt water. Never dry the paraglider directly under the sun. This must be
done in a shaded area;
68
Deterioration Recommendations for a long life:
-The PRYMUS 3 fabric is made mainly out of Nylon, which like any
other synthetic material is sensitive to UV light radiation, causing it todecompose, losing its mechanical resistance, and thus increasing itsporosity. For this reason, the unnecessary exposure to sun light, which
carries a high UV radiation level in high altitudes must be avoided;
?
?
Tears
Along with your kit you get small adhesives for repair. Small tears up to 10 cm away from the line points may be fixed by you. Beyond that we ad-vise you the maintenance be made by the manufacturer or by the register-ed workshop.
-Clean the spot where the adhesive will be applied with a humid cloth.-It must be at least 2,5 cm more of the adhesive than the tear. -Make the edges rounded to avoid to unglue after is glue.-Apply on both sides of the tear.
Line breakage
Along with your kit you get a 1.1 thickness line to make a litlle repair. When you repair we advise you to sew the unsewed point after you checkthe measure. Do not knot because it may diminsh up to 80 % of the line resistance.
Sealings
Along with your kit you get sealings for the carabiners. Do not leave your risers without them because they avoid the movement of the screw nut ma-king it impossible their opening.

70
-A Line Plan can be found in this manual or can be obtained with themanufacturer or distributor;
-The PRYMUS 3 must be brought in for inspection by the manufacturer
or distributor once a year;
The first inspection check is mandatory completing 24 months or 100flights, whichever comes first. After the first inspection any wing has tobe checked yearly or at each 100 flights, whichever comes first. In anyof these inspections may occur that a shorter period of time for thenext inspection will be defined (f.ex. 6 months or 50 flights).It is of utmost importance to follow these guidelines. Withoutperforming the mandatory inspections, the paraglider loses its
certification and the respective SOL warranty becomes null and void.
-Always check your equipment after an incident or in case the canopyhas been stored for a long time.
-It is recommended that the canopy should not folded in the samesymmetric position in relation to the center, this way the centercell will not be always exposed, therefore keeping the central cell
from fatigue overtime;
Warning: ?Your PRYMUS 3 was designed, tested and certified to perform the best.
Any alteration of your paraglider will nullify your certification andjeopardize your safety. For these reasons we strongly recommend youto avoid altering anything on your paraglider.
Every paraglider manufactured has a Warranty of 3 Years or 300 Hours ofFlight, whichever comes first.
SOL WARRANTY - 3 YEARS/300 HOURS
Our development technology, through the utilization of quality materials andthe adoption of new manufacturing processes, allows us to offer you, ourclient this added bonus.
1º) This warranty covers any materials, and manufacturing defects.
Warranty Terms:
2º) This Warranty covers every paraglider certified EN or DHV forleisure activities, excluding professional equipment (schools, competitions,acro, etc.).
This warranty is defined as repair or substitution of the defective equipment parts determined by the producer.
71
Warranty Pre-requisites:
1º) A three-copied filled-out form: One copy to be sent to SOL Paragliders
within 30 days after purchase; one copy to the sales person and one copy tothe purchaser;
2º) All flights must be logged providing information on date, place andlength of flight;
3º)The equipment must be kept in accordance with the instructions providedin this manual. All the storage, folding, cleaning and care instructions mustbe carefully taken;
4º)Maintenance and inspections can only be performed by the manufactureror authorized shop and must be properly documented;
5º)The first inspection check is mandatory completing 24 months or 100flights, whichever comes first. After the first inspection any wing has to bechecked yearly or at each 100 flights, whichever comes first. In any ofthese inspections may occur that a shorter period of time for the nextinspection will be defined (f.ex. 6 months or 50 flights). It is of utmostimportance to follow these guidelines. Without performing the mandatory
inspections, the paraglider loses its certification and the respective SOL
warranty becomes null and void.
6º)The owner is responsible for all shipping expenses to and from themanufacturer;
a)The Paraglider in question, and copies of all previous inspections and flightregistry;
b)Original copy of the Warranty Registration Form SOL Paragliders.
7º)In order to make a plea for repair or equipment exchange, or equipment
repair, which shall be decided and performed only SOL Paragliders, theowner must send the manufacturer the following:
1º) Any alterations on original fabric colors, lines and risers;
2º) Any damage caused by chemical products, sand, friction, cleaningproducts or salt water;
3º) Any damage caused as a result of errors during operation of theParaglider, incidents or emergency situations;
4º) Any damage caused by inadequate operation of the Paraglider;
5º) Paragliders that may have been subjected of any alteration from theoriginal design and without proper permission from SOL Paragliders.
This Warranty Does Not Cover:

73
FINAL WORDS
Safety is the major theme of our sport. In order to fly safely, pilots must train, study, practice and be alert to the dangers around us.
In order to achieve excellent safety levels, we must fly regularly as much as possible, don't go beyond our limitations and avoid exposing ourselves to unnecessary dangers. Learning to fly is a slow process and takes years, so don't pressure yourself. If conditions are not favorable, keep your equipment
Don't overestimate your skills and be honest with yourself. Every year we see many accidents which in most cases could be prevented with a minor adjustment.
We are part of the community in which we live: friends, family and evenpeople we don't necessarily know worry about us. Our obligation towards this community is to keep ourselves healthy and that at each landing we willbe one landing happier than before. We fly so that we can feel more alive.
We wish you good and safe flights with your PRYMUS 3.
stored away.
72

75
Data Base | Dados
PRYMUS 3 just for fun
LTF - 1 / EN B
74
77
CERTIFICATION DHV: PRYMUS 3 ‘XS
Data of the Paraglider | Dados do Paraglider Category | Categoria:
Paraglider Name of the Paraglider | Nome do Paraglider:
Sol Prymus 3 XS Manufacturer | Fábrica:
Sol Sports Industria e Comércio Ltda Test nº | Número do Teste:
PG_0253.2009Type of the applied Test | Tipo de teste aplicado:
Lufttüchtigkeitsforderungen für HG und GS Date of the Certification | Data da Certificação:
2009-08-06 Support of the Certification (DEU) | Suporte da Certificação (ALE): Sol Sports Industria e Comércio Ltda Support of the Certification (AUS) | Suporte da Certificação (AUS):
Sol Sports Industria e Comércio Ltda
Limit s of Operation | Limites de Operação Classification | Classificação:
1 GH Restriction of Harness | Restrição de Selete:
None | Nenhuma All up weight in the Flight | Peso total no vôo:
45Kg - 65Kg Number of Seats | Número de Assentos:
1 Support Tow | Suporte para Reboque:
Yes | Sim Interval of Inspection | Intervalo de Inspeção:
24 months | 24 meses - 100H
Characteristics | Caracteristicas Trimmers | Trimmers:
No | Não Accelerator | Acelerador:
Yes | Sim Weight of the Paraglider | Peso do Parapente:
5,3Kg
76

79
CERTIFICATION DHV: PRYMUS 3 ‘M
Data of the Paraglider | Dados do Paraglider Category | Categoria:
Paraglider Name of the Paraglider | Nome do Paraglider:
Sol Prymus 3 M Manufacturer | Fábrica:
Sol Sports Industria e Comércio Ltda Test nº | Número do Teste:
DHV GS-01-1758-08Type of the applied Test | Tipo de teste aplicado:
Lufttüchtigkeitsforderungen für HG und GS Date of the Certification | Data da Certificação:
2008-03-20 Support of the Certification (DEU) | Suporte da Certificação (ALE): Sol Sports Industria e Comércio Ltda Support of the Certification (AUS) | Suporte da Certificação (AUS):
Sol Sports Industria e Comércio Ltda
Limits of Operation | Limites de Operação Classification | Classificação:
1 GH Restriction of Harness | Restrição de Selete:
None | Nenhuma All up weight in the Flight | Peso total no vôo:
75Kg - 95Kg Number of Seats | Número de Assentos:
1 Support Tow | Suporte para Reboque:
Yes | Sim Interval of Inspection | Intervalo de Inspeção:
24 months | 24 meses - 100H
Characteristics | Caracteristicas Trimmers | Trimmers:
No | Não Accelerator | Acelerador:
Yes | Sim Weight of the Paraglider | Peso do Parapente:
6,0Kg
78
CERTIFICATION DHV: PRYMUS 3 ‘S
Data of the Paraglider | Dados do Paraglider Category | Categoria:
Paraglider Name of the Paraglider | Nome do Paraglider:
Sol Prymus 3 S Manufacturer | Fábrica:
Sol Sports Industria e Comércio Ltda Test nº | Número do Teste:
DHV GS-01-1757-08Type of the applied Test | Tipo de teste aplicado:
Lufttüchtigkeitsforderungen für HG und GS Date of the Certification | Data da Certificação:
2008-03-20 Support of the Certification (DEU) | Suporte da Certificação (ALE): Sol Sports Industria e Comércio Ltda Support of the Certification (AUS) | Suporte da Certificação (AUS):
Sol Sports Industria e Comércio Ltda
Limit s of Operation | Limites de Operação Classification | Classificação:
1 GH Restriction of Harness | Restrição de Selete:
None | Nenhuma All up weight in the Flight | Peso total no vôo:
60Kg - 80Kg Number of Seats | Número de Assentos:
1 Support Tow | Suporte para Reboque:
Yes | Sim Interval of Inspection | Intervalo de Inspeção:
24 months | 24 meses - 100H
Characteristics | Caracteristicas Trimmers | Trimmers:
No | Não Accelerator | Acelerador:
Yes | Sim Weight of the Paraglider | Peso do Parapente:
5,7Kg

81
CERTIFICATION DHV: PRYMUS 3 ‘XL
Data of the Paraglider | Dados do Paraglider Category | Categoria:
Paraglider Name of the Paraglider | Nome do Paraglider:
Sol Prymus 3 XL Manufacturer | Fábrica:
Sol Sports Industria e Comércio Ltda Test nº | Número do Teste:
DHV GS-01-1760-08Type of the applied Test | Tipo de teste aplicado:
Lufttüchtigkeitsforderungen für HG und GS Date of the Certification | Data da Certificação:
2008-03-20 Support of the Certification (DEU) | Suporte da Certificação (ALE): Sol Sports Industria e Comércio Ltda Support of the Certification (AUS) | Suporte da Certificação (AUS):
Sol Sports Industria e Comércio Ltda
Limits of Operation | Limites de Operação Classification | Classificação:
1 GH Restriction of Harness | Restrição de Selete:
None | Nenhuma All up weight in the Flight | Peso total no vôo:
105Kg - 125Kg Number of Seats | Número de Assentos:
1 Support Tow | Suporte para Reboque:
Yes | Sim Interval of Inspection | Intervalo de Inspeção:
24 months | 24 meses - 100H
Characteristics | Caracteristicas Trimmers | Trimmers:
No | Não Accelerator | Acelerador:
Yes | Sim Weight of the Paraglider | Peso do Parapente:
6,7Kg
80
CERTIFICATION DHV: PRYMUS 3 ‘L
Data of the Paraglider | Dados do Paraglider Category | Categoria:
Paraglider Name of the Paraglider | Nome do Paraglider:
Sol Prymus 3 L Manufacturer | Fábrica:
Sol Sports Industria e Comércio Ltda Test nº | Número do Teste:
DHV GS-01-1759-08Type of the applied Test | Tipo de teste aplicado:
Lufttüchtigkeitsforderungen für HG und GS Date of the Certification | Data da Certificação:
2008-03-20 Support of the Certification (DEU) | Suporte da Certificação (ALE): Sol Sports Industria e Comércio Ltda Support of the Certification (AUS) | Suporte da Certificação (AUS):
Sol Sports Industria e Comércio Ltda
Limits of Operation | Limites de Operação Classification | Classificação:
1 GH Restriction of Harness | Restrição de Selete:
None | Nenhuma All up weight in the Flight | Peso total no vôo:
90Kg - 110Kg Number of Seats | Número de Assentos:
1 Support Tow | Suporte para Reboque:
Yes | Sim Interval of Inspection | Intervalo de Inspeção:
24 months | 24 meses - 100H
Characteristics | Caracteristicas Trimmers | Trimmers:
No | Não Accelerator | Acelerador:
Yes | Sim Weight of the Paraglider | Peso do Parapente:
6,3Kg

LINE PLAN | PLANO DE LINHAS
83
D1
C1
B1
A1
F3
F4
F1
F2
C2
C3
C4
F5
F6
F7
F8
C5
C6
C7
C8
F1
0F
9F
11
C1
0C
9C
11
A2
A4
A3
A5
A6
A7
A8
A1
0A
9A
11
C1
5
F1
5F
13
F1
2F
14
C1
2C
13
C1
4
F1
6F
17
C1
6C
17
A1
5A
13
A1
2A
14
A1
6A
17
AM
6A
M5
AM
4A
M3
AM
2
AM
1
CM
6C
M5
CM
4C
M3
CM
2C
M1AR
1A
R2
AR
3C
R1
CR
2C
R3
SR
FM
FM
FM
FM
FM
FM
FM
FM
FM
BM
6B
M5
BM
4B
M3
BM
2
BM
1
DM
6D
M5
DM
4D
M3
DM
2D
M1
B1
7B
16
B1
5B
14
B1
3B
12
B11
B1
0B
9B
8B
7B
6B
5B
4B
3B
2
D2
D3
D4
D5
D6
D7
D8
D9
D1
0D
11D
12
D1
3D
14
D1
5D
16
D1
7
BR
3D
R3
BR
2D
R2
BR
1D
R1
MS
P
RY
U3
OVERALL PLAN | VISTA GERAL
English Português
1 Brake lines Linhas de freio
2 Top Lines Linhas superiores
3 Stabilo Estabilizador
4 Trailing edge Bordo de fuga
5 Labels Etiquetas
6 Leading Edge Bordo de ataque
7 Middle Lines Linhas intermediárias
8 Stabilo Line Linha estabilizador
9 Main Lines Linhas principais
10 Risers Tirantes
11 Brake Handle Batoque de freio
82

FLIGHT LOG | RELAÇÃO DE VOOS Model | Modelo: Size | Tamanho: ___________________
Serial Number | Número de Série: _________ Date | Data: ___/___/___
Purchased From | Comprado de: ________________________________
Date Data
Site Local
Duration Duração
Flight Details Observações
84
INSPECTION | INSPEÇÃO
Model | Modelo: _____________________________________________
Owner | Proprietário: _________________________________________
Address | Endereço: __________________________________________
Phone | Fone:_______________________ Date | Data:____/____/____
Condition
Condição
Condition
Condição
Leading edge cell openings
Teste de porosidade
C Line - Middle Linhas C - Centro
Dacron re-enforcements Bocas
D Line - Middle Linhas D - Centro
Top surface panels Painéis extradorso
A Line - Main Linhas A - Principais
Bottom surface panels Painéis intradorso
B Line - Main Linhas B - Principais
Trailing edge Bordo de ataque
C Line - Main Linhas C - Principais
Brake control line att. Alças de freio
D Line - Main Linhas D - Principais
A Line - Upper Linhas A - Galeria
Brake control lines Linhas de freio
B Line - Upper Linhas B - Galeria
Internal cell walls & cross ports
Perfis
C Line - Upper Linhas C - Galeria
Risers Tirantes
D Line - Upper Linhas D - Galeria
Maillon rapides Mosquetinhos
A Line - Middle Linhas A - Centro
Brake control handles Batoques
B Line - Middle Linhas B - Centro
Comments | Comentários: _____________________________________
________________________________________________________
85