manual for ip-camera super client pnp - smarthome - owner's manual for... · 1.1 introduction...
TRANSCRIPT
Copyright © Shenzhen Vstarcam Technology Co., Ltd., All Rights Reserved
Manual For IP-Camera Super Client(PnP)
Copyright © Shenzhen Vstarcam Technology Co., Ltd., All Rights Reserved
Table of contents
LESSON 1:Introduction
1.1 Introduction of Ip-Camera Super Client
LESSON 2: Installation
2.1 The procedure of installation
2.2 Setting path to save recordings
2.3 To make the IP-Camera Super Client autorun
LESSON 3: Introduction of main interface
3.1The Origin interface
3.2 The main menus
LESSON 4: Instruction Guide
4.1 Add a new Camera
4.2 Record video
4.2.1Setting recording video
4.2.2Check video
4.3 Alarming settings
4.3.1Motion detection settings
4.3.2Check aralming records
4.4 WIFI settings
LESSON 5: FAQ
Copyright © Shenzhen Vstarcam Technology Co., Ltd., All Rights Reserved
�
LESSON 1:Introduction
1.1 Introduction of IP-Camera Super Client
IP-Camera Super Client is a kind of software used for multiple camera monitoring, characterized with multi-camera monitoring, PTZ control, record, alarm and access authority management function, as well as easy operation and strong capability.
Function List:
1.Support at most 81-video monitoring in one area;
2.Support always, schedule and alarm record, alarm snapshot;
3.Support multiple language.Chinese, Chinese(Traditional),English,Spanish,French,
Japanese are available.
4.Support inquiry and browse of alarm records as well as operation records;
5.Support play and playback video saved on the current PC;
6.Support alarming of motion detection;
7.Support paging manually or automatically
LESSON 2: Installation
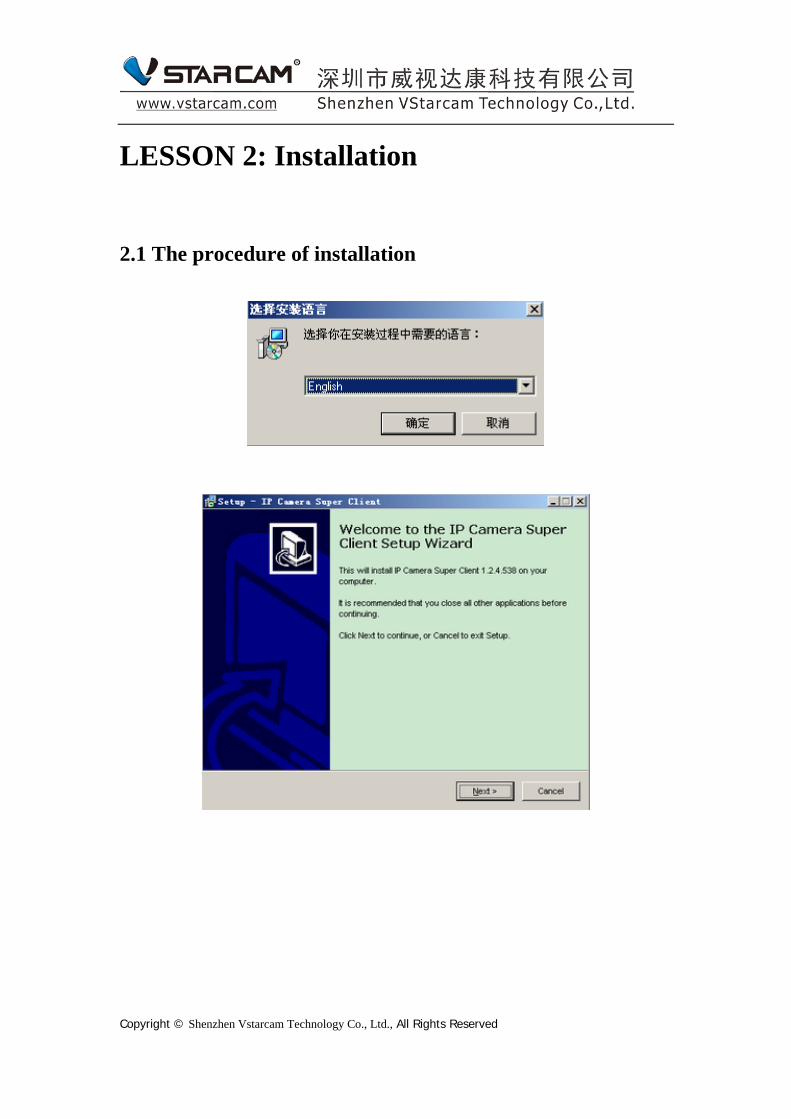
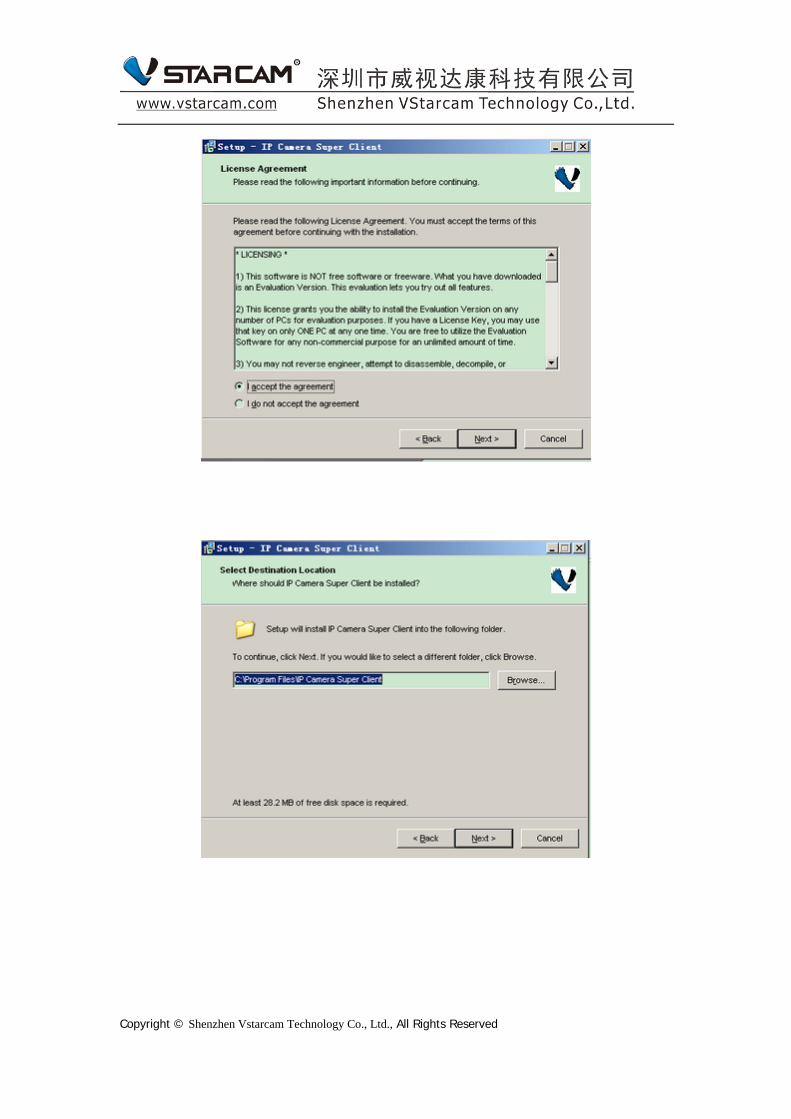
2.1 The procedure of installation
Copyright © Shenzhen Vstarcam Technology Co., Ltd., All Rights Reserved
Copyright © Shenzhen Vstarcam Technology Co., Ltd., All Rights Reserved
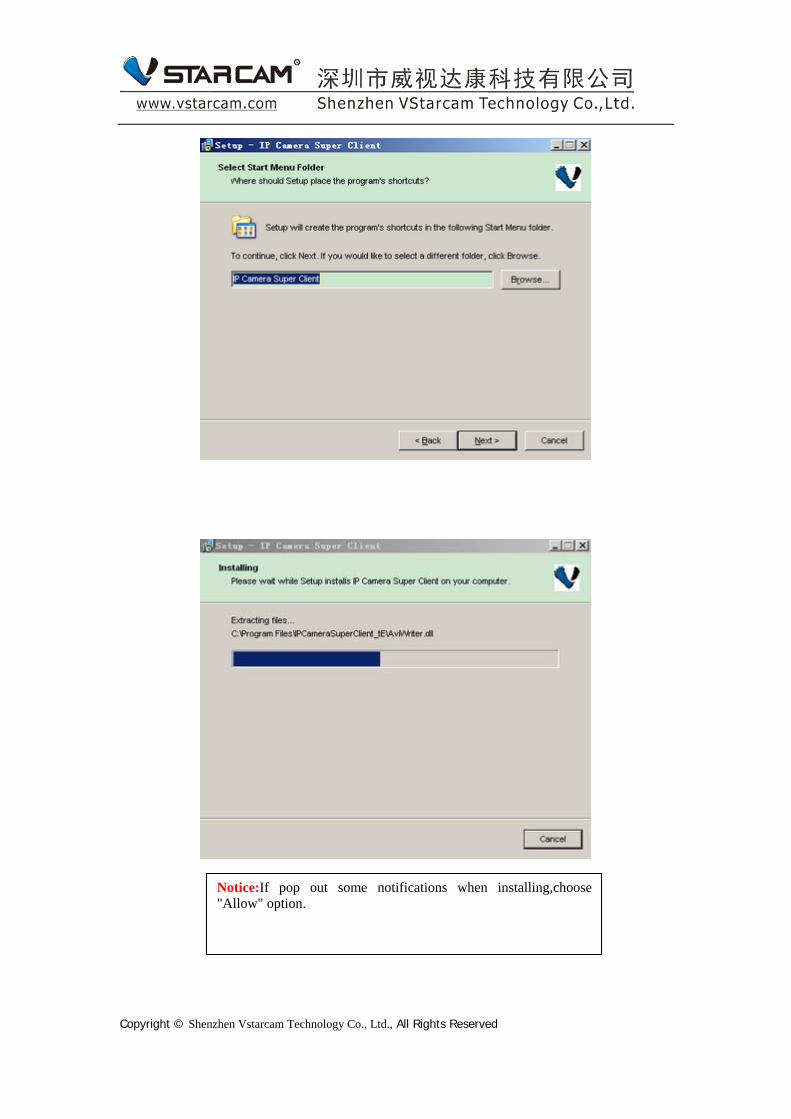
Notice:If pop out some notifications when installing,choose "Allow" option.
Copyright © Shenzhen Vstarcam Technology Co., Ltd., All Rights Reserved
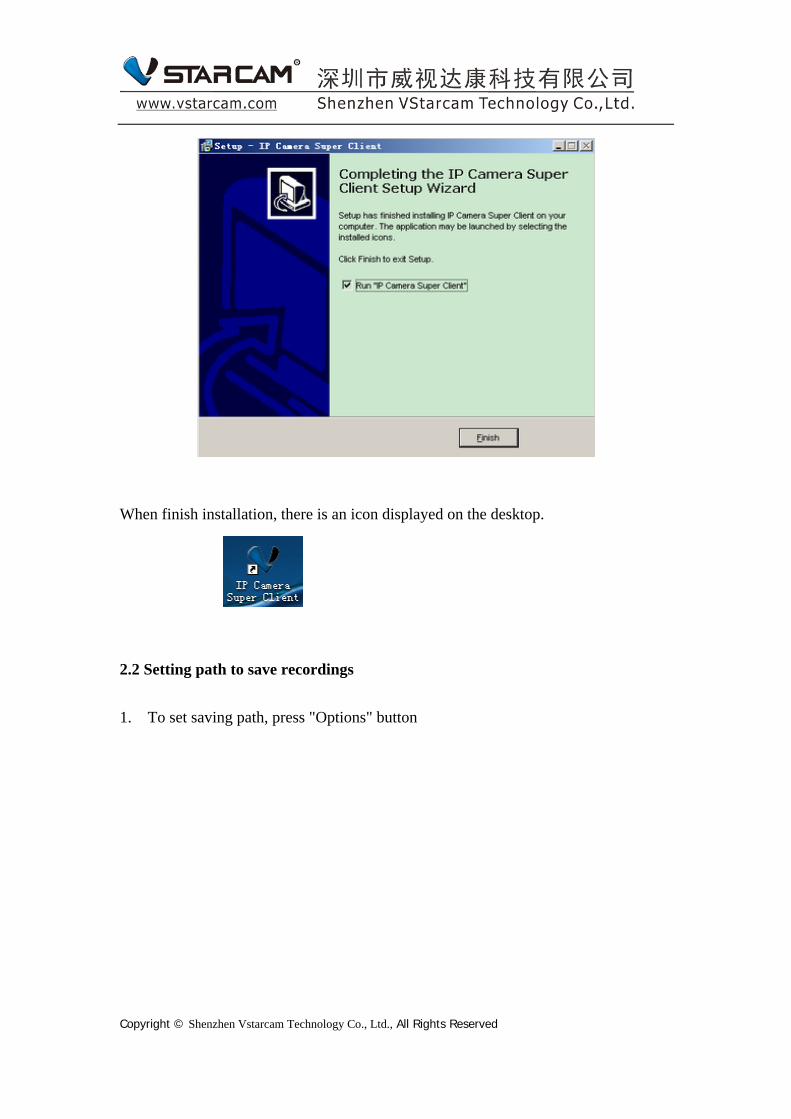
When finish installation, there is an icon displayed on the desktop.
2.2 Setting path to save recordings
1. To set saving path, press "Options" button
Copyright © Shenzhen Vstarcam Technology Co., Ltd., All Rights Reserved
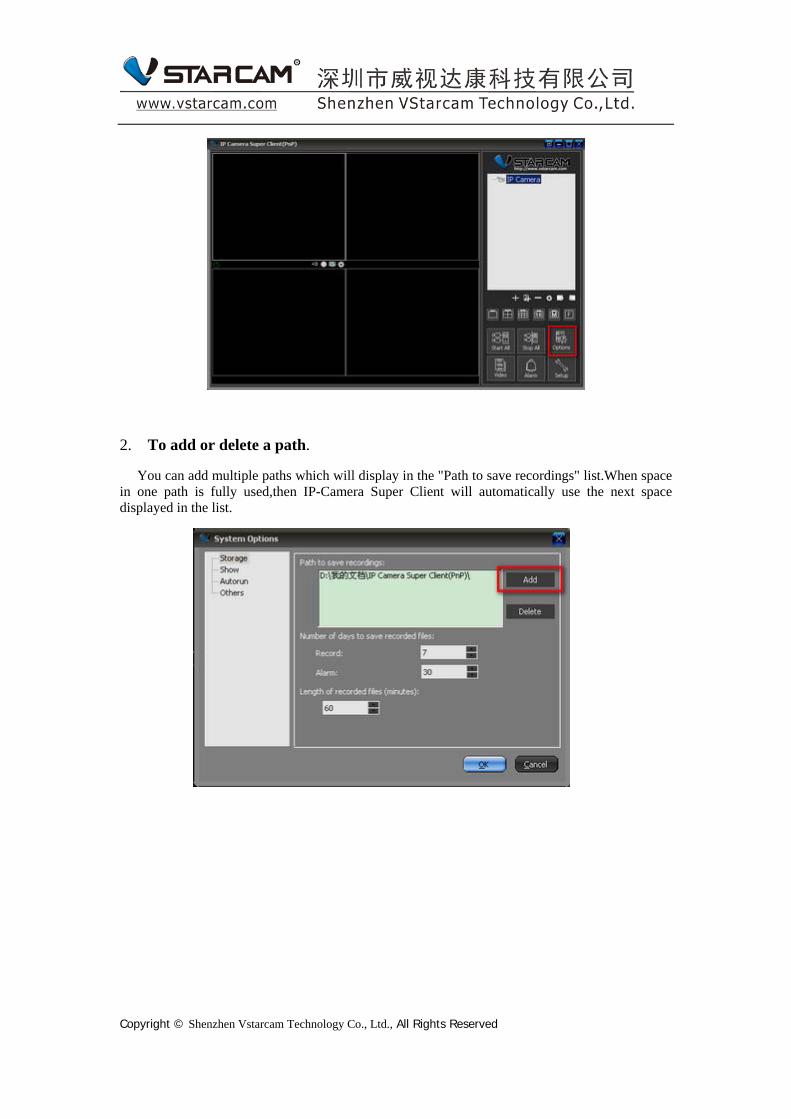
2. To add or delete a path.
You can add multiple paths which will display in the "Path to save recordings" list.When space in one path is fully used,then IP-Camera Super Client will automatically use the next space displayed in the list.
Copyright © Shenzhen Vstarcam Technology Co., Ltd., All Rights Reserved
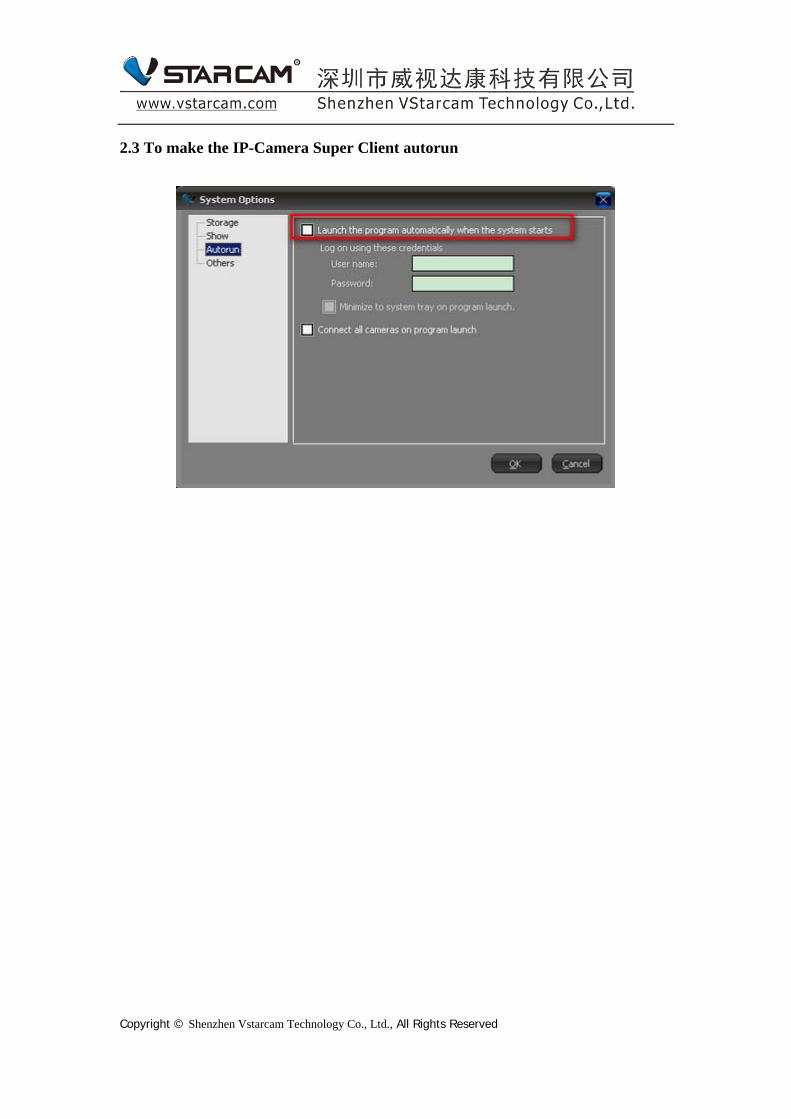
2.3 To make the IP-Camera Super Client autorun
Copyright © Shenzhen Vstarcam Technology Co., Ltd., All Rights Reserved
LESSON 3: Introduction of main interface
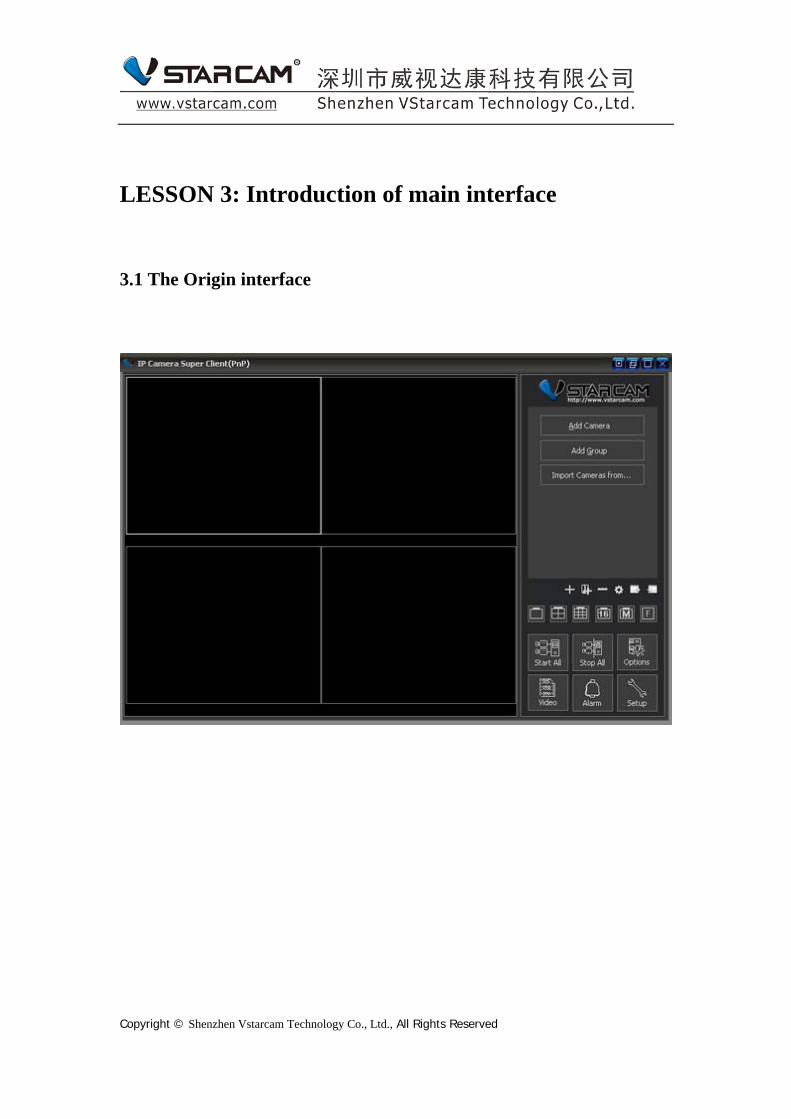
3.1 The Origin interface
Copyright © Shenzhen Vstarcam Technology Co., Ltd., All Rights Reserved
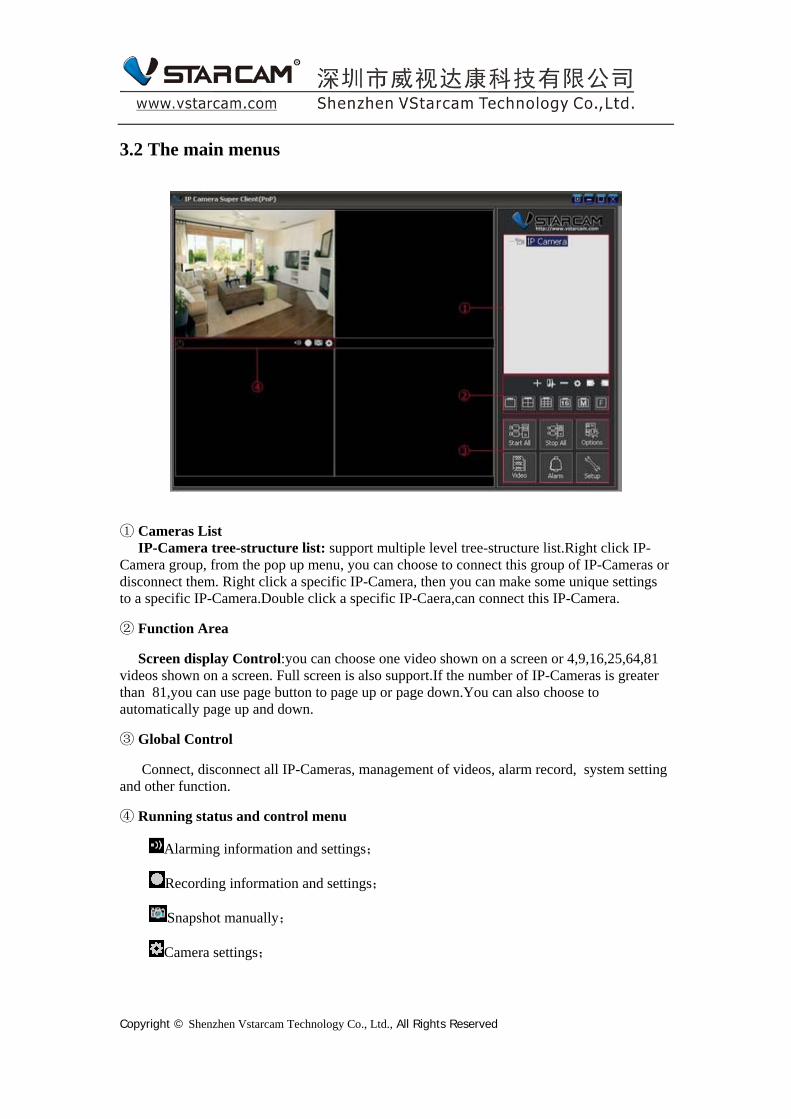
3.2 The main menus
① Cameras List
IP-Camera tree-structure list: support multiple level tree-structure list.Right click IP-Camera group, from the pop up menu, you can choose to connect this group of IP-Cameras or disconnect them. Right click a specific IP-Camera, then you can make some unique settings to a specific IP-Camera.Double click a specific IP-Caera,can connect this IP-Camera.
② Function Area
Screen display Control:you can choose one video shown on a screen or 4,9,16,25,64,81 videos shown on a screen. Full screen is also support.If the number of IP-Cameras is greater than 81,you can use page button to page up or page down.You can also choose to automatically page up and down.
③ Global Control
Connect, disconnect all IP-Cameras, management of videos, alarm record, system setting and other function.
④ Running status and control menu
Alarming information and settings;
Recording information and settings;
Snapshot manually;
Camera settings;
Copyright © Shenzhen Vstarcam Technology Co., Ltd., All Rights Reserved
LESSON 4: Instruction Guide
4.1 Add a new Camera
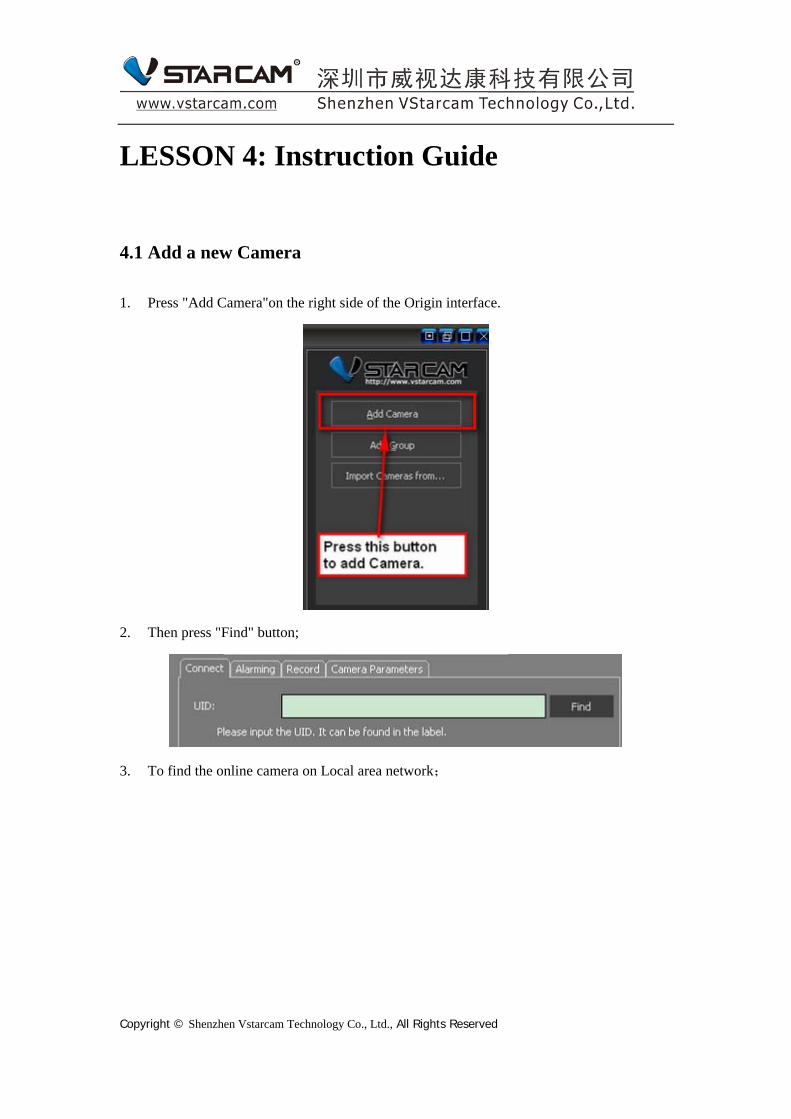
1. Press "Add Camera"on the right side of the Origin interface.
2. Then press "Find" button;
3. To find the online camera on Local area network;
Copyright © Shenzhen Vstarcam Technology Co., Ltd., All Rights Reserved
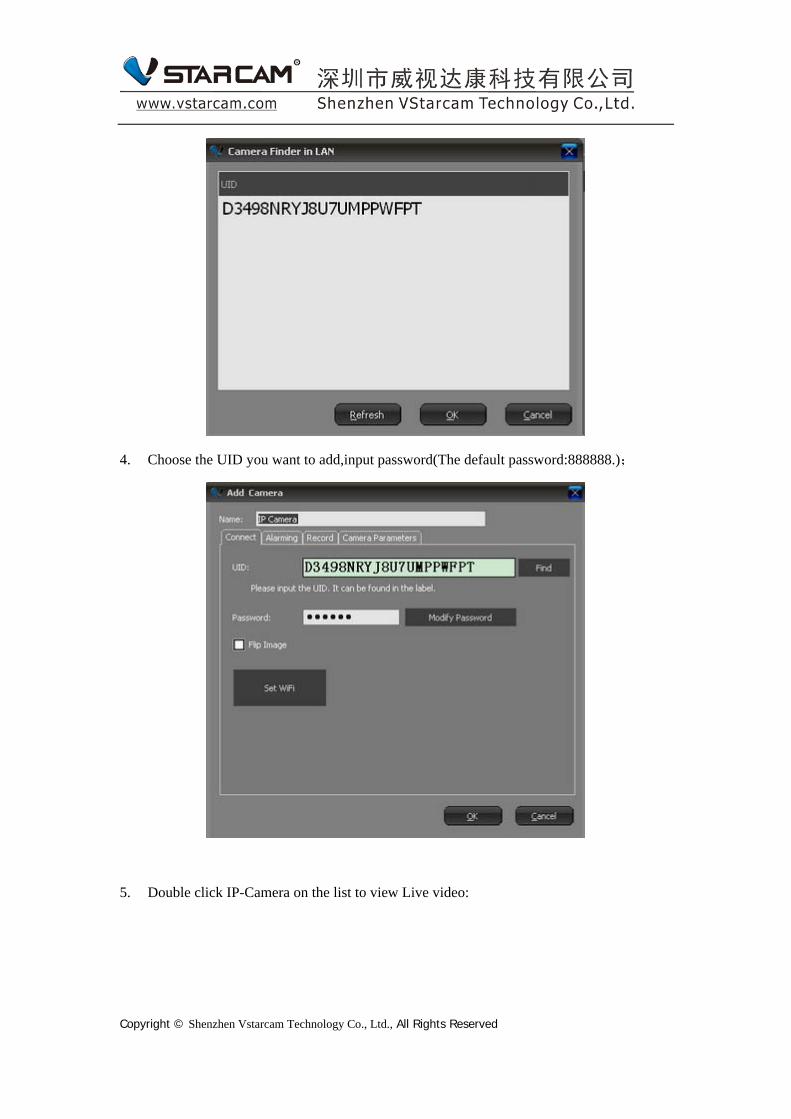
4. Choose the UID you want to add,input password(The default password:888888.);
5. Double click IP-Camera on the list to view Live video:
Copyright © Shenzhen Vstarcam Technology Co., Ltd., All Rights Reserved
4.2 Settings of recording video
4.2.1 Settings on recording video
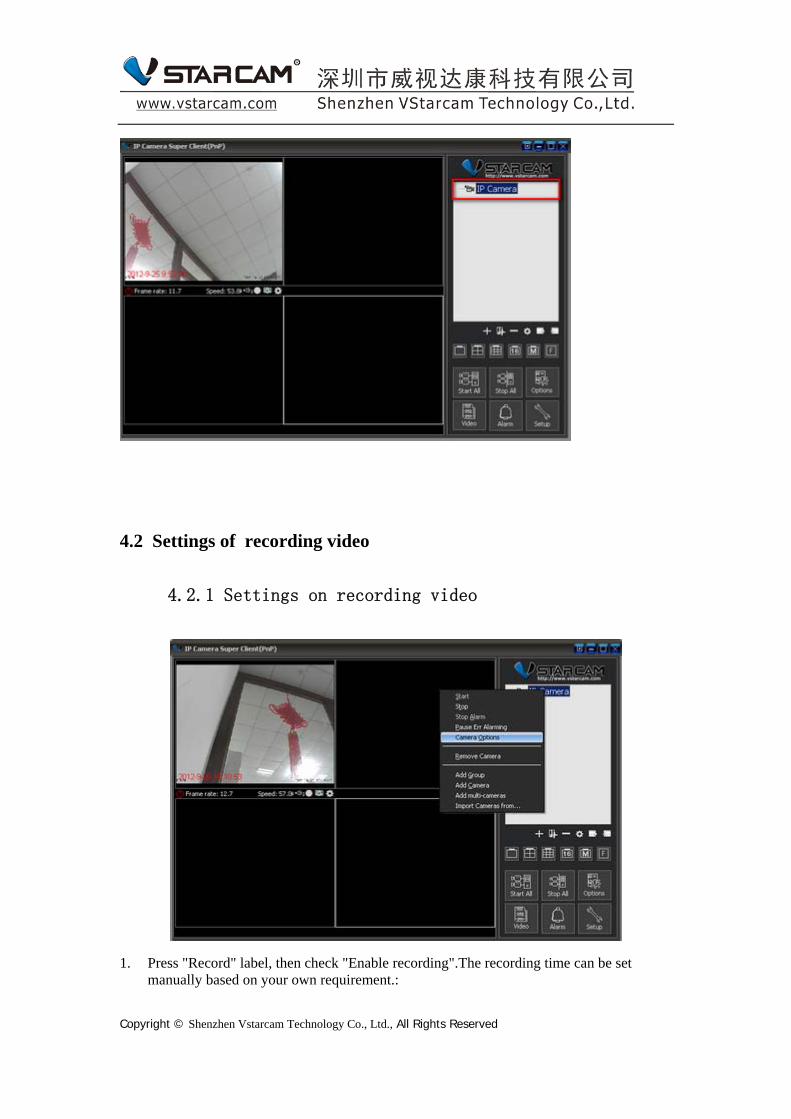
1. Press "Record" label, then check "Enable recording".The recording time can be set manually based on your own requirement.:
Copyright © Shenzhen Vstarcam Technology Co., Ltd., All Rights Reserved
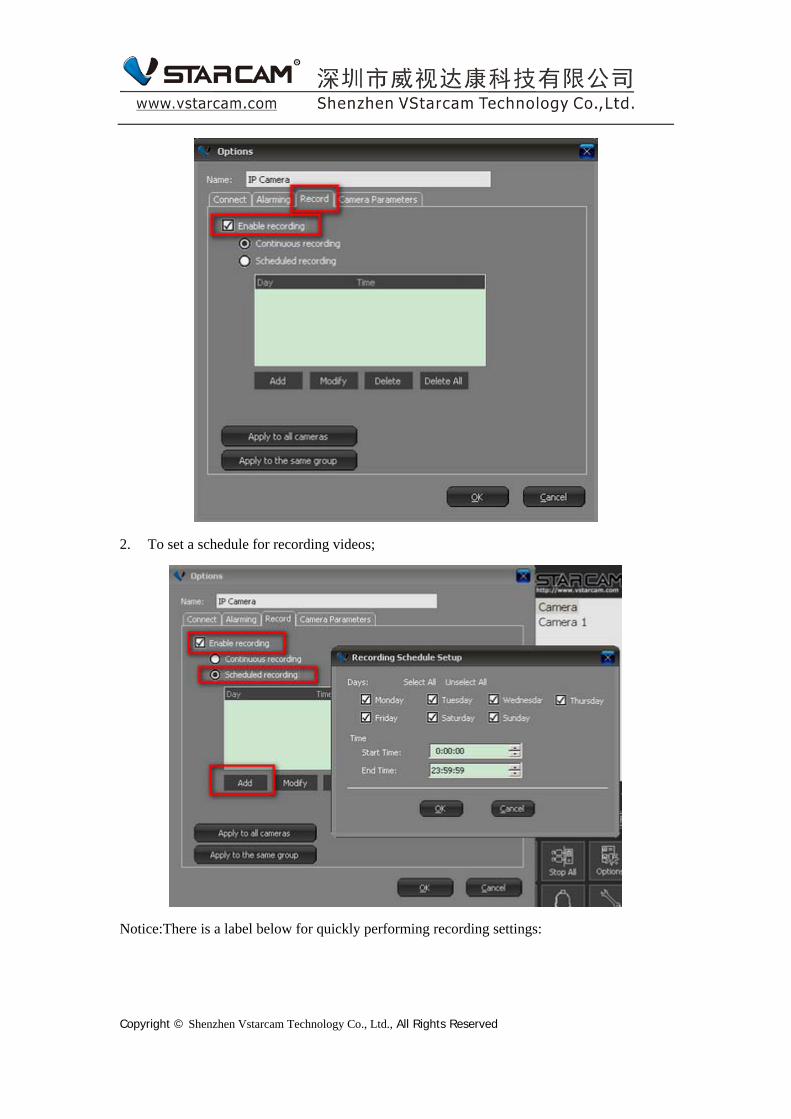
2. To set a schedule for recording videos;
Notice:There is a label below for quickly performing recording settings:
Copyright © Shenzhen Vstarcam Technology Co., Ltd., All Rights Reserved
4.2.2 Check videos
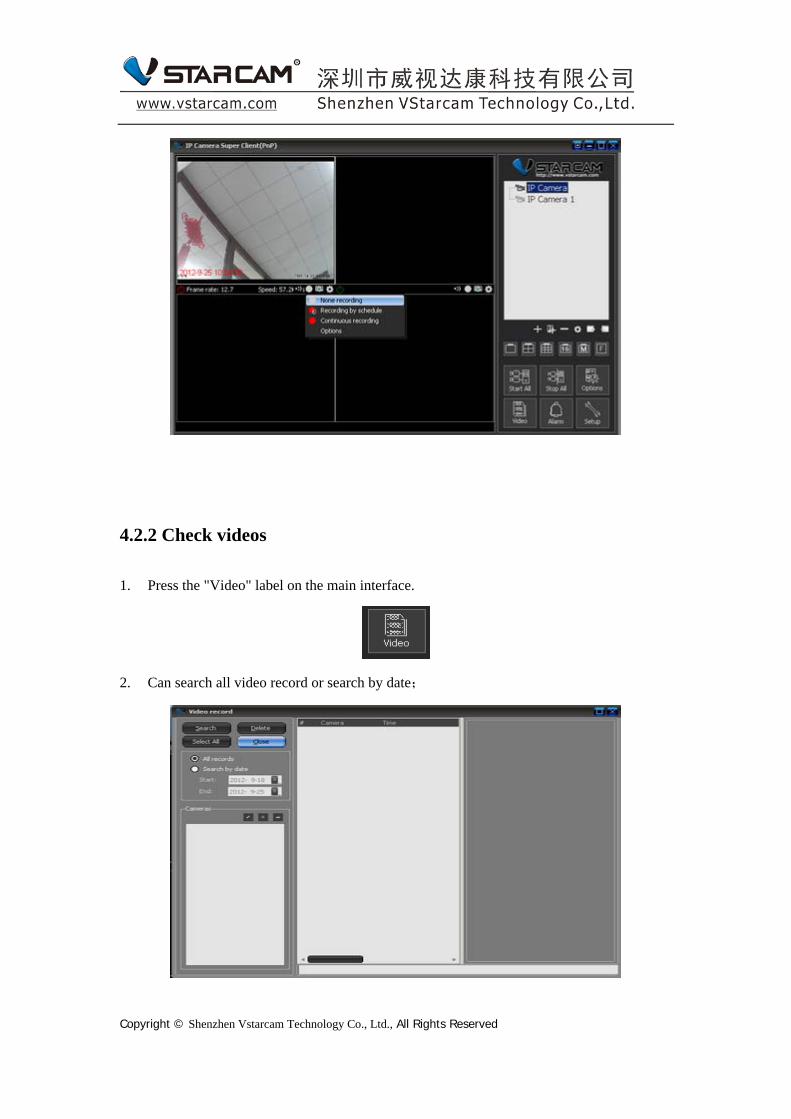
1. Press the "Video" label on the main interface.
2. Can search all video record or search by date;
Copyright © Shenzhen Vstarcam Technology Co., Ltd., All Rights Reserved

4.3 Alarming settings
4.3.1 Motion detection settings
1. Press Camera label displayed on the Camera list,then from the pop out menu, choose "camera option".
2. press "Camera parameters";
3. Press "Get" button:
Copyright © Shenzhen Vstarcam Technology Co., Ltd., All Rights Reserved
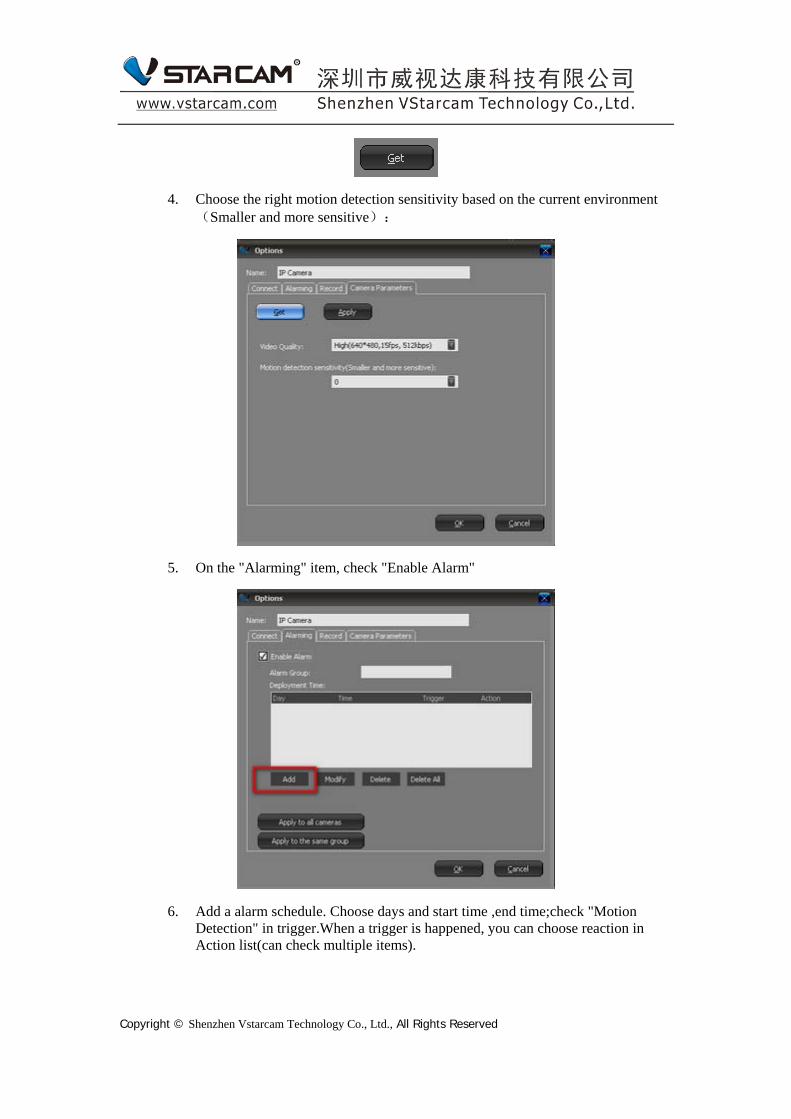
4. Choose the right motion detection sensitivity based on the current environment(Smaller and more sensitive):
5. On the "Alarming" item, check "Enable Alarm"
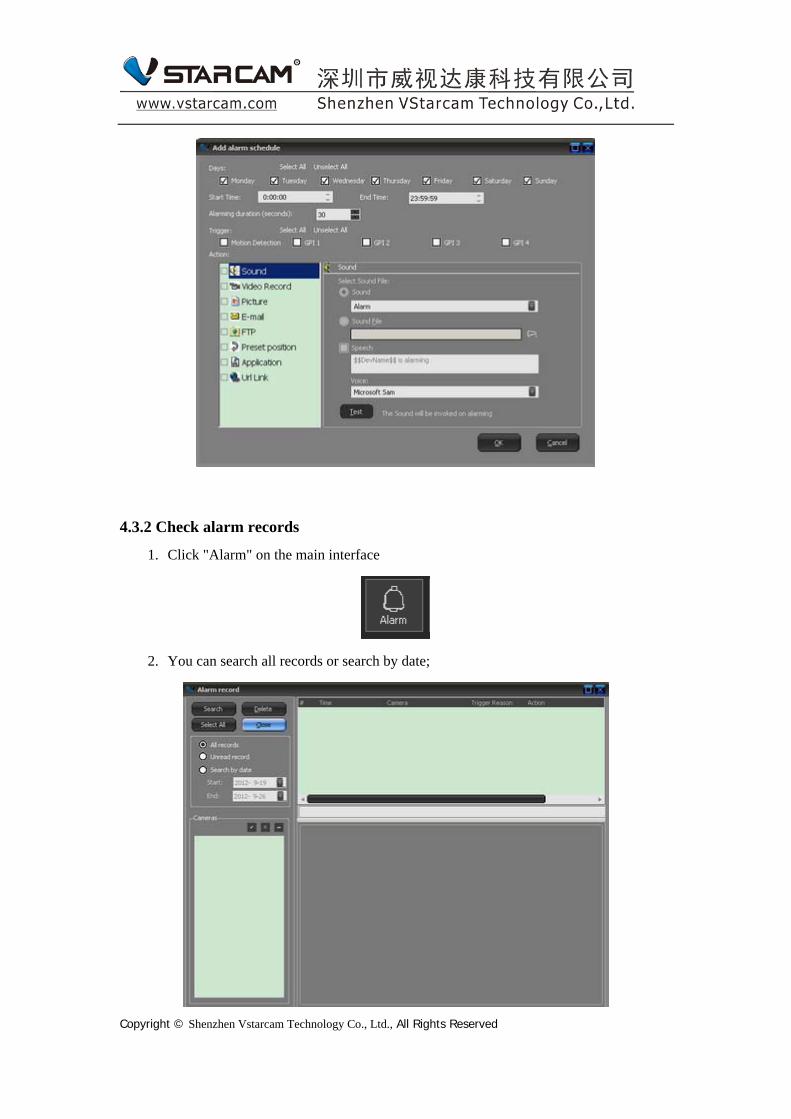
6. Add a alarm schedule. Choose days and start time ,end time;check "Motion Detection" in trigger.When a trigger is happened, you can choose reaction in Action list(can check multiple items).
Copyright © Shenzhen Vstarcam Technology Co., Ltd., All Rights Reserved
4.3.2 Check alarm records
1. Click "Alarm" on the main interface
2. You can search all records or search by date;
Copyright © Shenzhen Vstarcam Technology Co., Ltd., All Rights Reserved
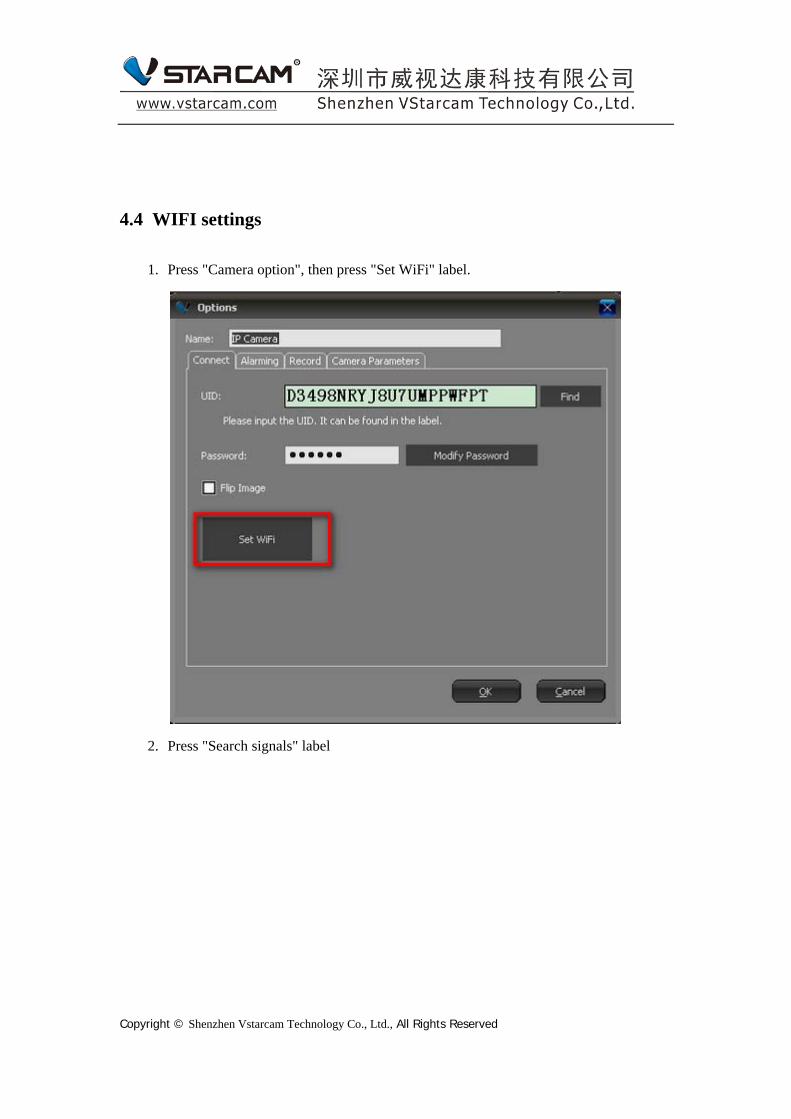
4.4 WIFI settings
1. Press "Camera option", then press "Set WiFi" label.
2. Press "Search signals" label
Copyright © Shenzhen Vstarcam Technology Co., Ltd., All Rights Reserved
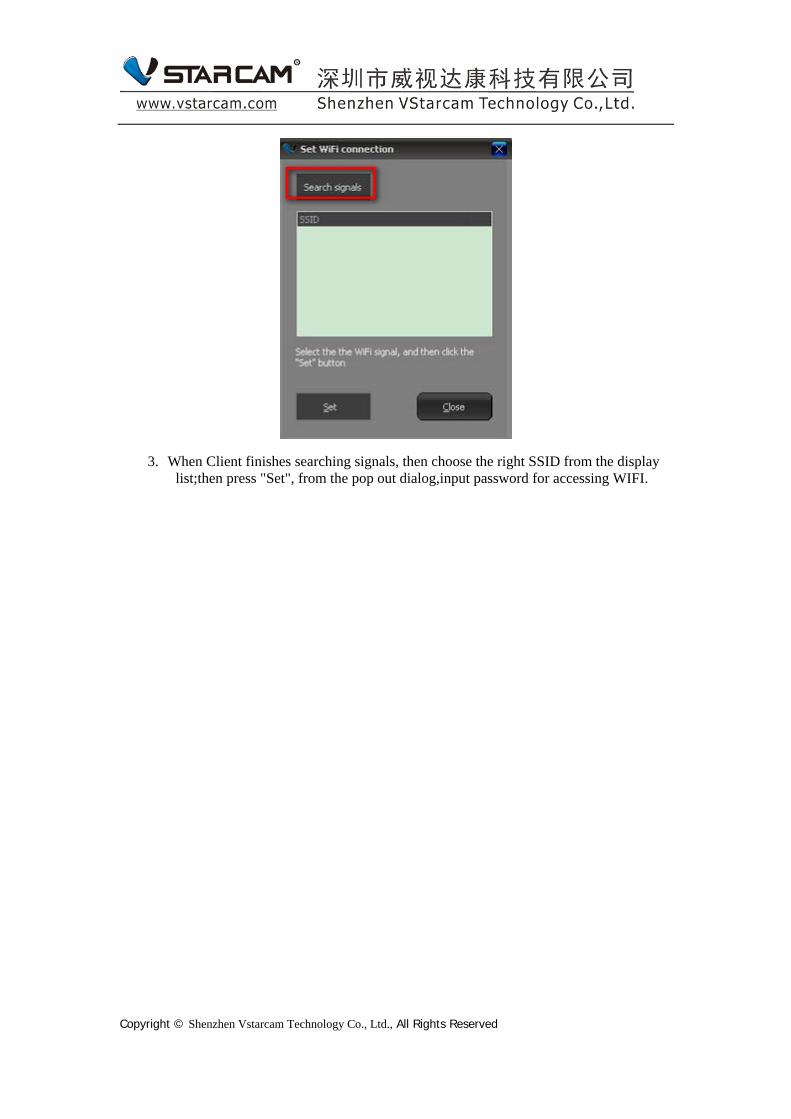
3. When Client finishes searching signals, then choose the right SSID from the display list;then press "Set", from the pop out dialog,input password for accessing WIFI.
Copyright © Shenzhen Vstarcam Technology Co., Ltd., All Rights Reserved