living snow fence training in beerston, new york, region 9 ...met at the living snow fence...
TRANSCRIPT
Page 1 of 16
Living Snow Fence Training in Beerston, New York, Region 9:Wednesday May 25, 2011 and Thursday May 26, 2011
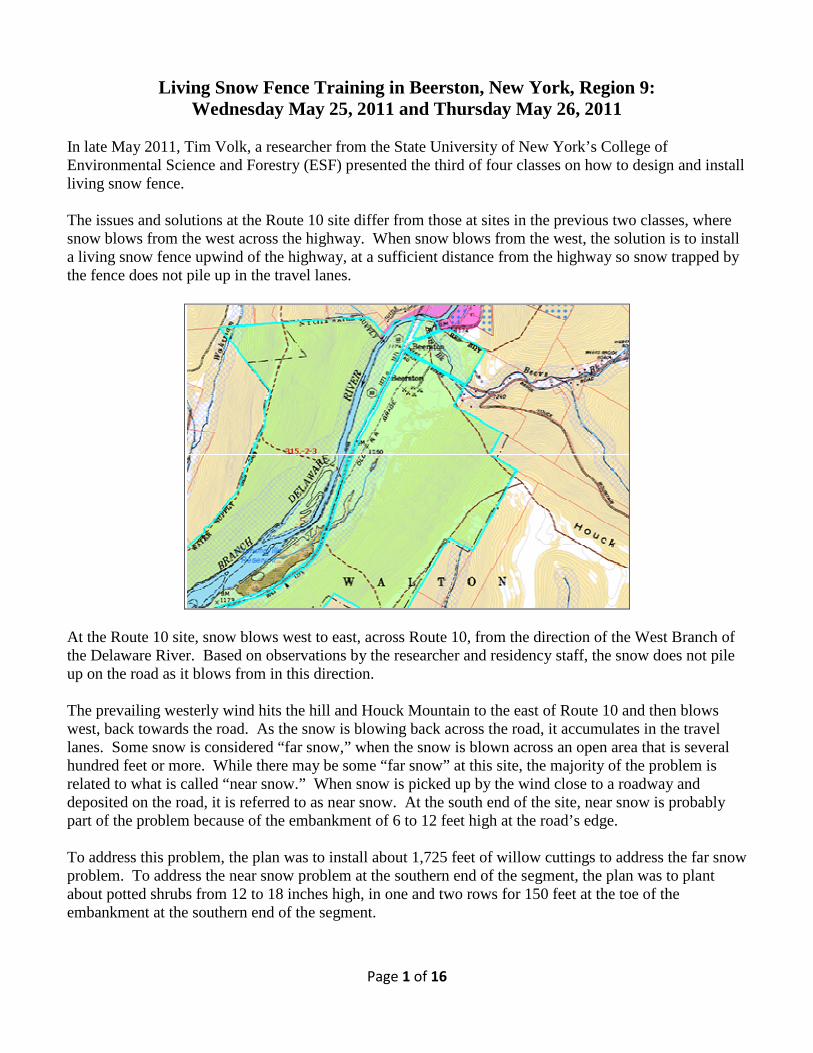
In late May 2011, Tim Volk, a researcher from the State University of New York’s College ofEnvironmental Science and Forestry (ESF) presented the third of four classes on how to design and installliving snow fence.
The issues and solutions at the Route 10 site differ from those at sites in the previous two classes, wheresnow blows from the west across the highway. When snow blows from the west, the solution is to installa living snow fence upwind of the highway, at a sufficient distance from the highway so snow trapped bythe fence does not pile up in the travel lanes.
At the Route 10 site, snow blows west to east, across Route 10, from the direction of the West Branch ofthe Delaware River. Based on observations by the researcher and residency staff, the snow does not pileup on the road as it blows from in this direction.
The prevailing westerly wind hits the hill and Houck Mountain to the east of Route 10 and then blowswest, back towards the road. As the snow is blowing back across the road, it accumulates in the travellanes. Some snow is considered “far snow,” when the snow is blown across an open area that is severalhundred feet or more. While there may be some “far snow” at this site, the majority of the problem isrelated to what is called “near snow.” When snow is picked up by the wind close to a roadway anddeposited on the road, it is referred to as near snow. At the south end of the site, near snow is probablypart of the problem because of the embankment of 6 to 12 feet high at the road’s edge.
To address this problem, the plan was to install about 1,725 feet of willow cuttings to address the far snowproblem. To address the near snow problem at the southern end of the segment, the plan was to plantabout potted shrubs from 12 to 18 inches high, in one and two rows for 150 feet at the toe of theembankment at the southern end of the segment.

Page 2 of 16
On Day One, the class convened, in a classroom in the Delaware County Soil and Water ConservationDistrict’s headquarters in Walton, New York. Tim Volk provided an overview of the concept of livingsnow fences and focused on design guidance.
Tim and his colleague Larry Abrahamson finished classroom instruction by lunch time. After lunch, staffmet at the living snow fence installation site on Route 10, just south of Beerston.
Looking south, photograph one, below, shows the general area of the plantings, and the hill that reversesthe snow back across the road.
The first step in the installation process is to identify the area or areas that will be planted. This is donethrough the design work explained in the class.
Once the areas to be planted are identified, the next step is to apply an herbicide to kill the vegetation.
Page 3 of 16
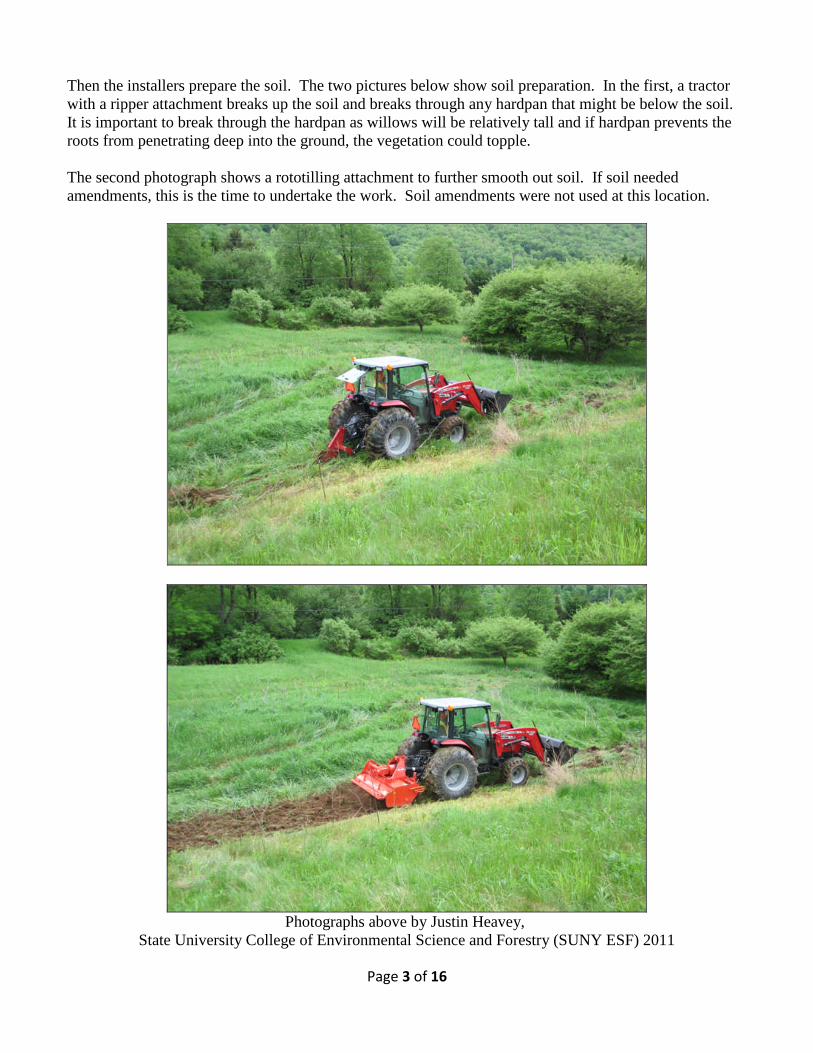
Then the installers prepare the soil. The two pictures below show soil preparation. In the first, a tractorwith a ripper attachment breaks up the soil and breaks through any hardpan that might be below the soil.It is important to break through the hardpan as willows will be relatively tall and if hardpan prevents theroots from penetrating deep into the ground, the vegetation could topple.
The second photograph shows a rototilling attachment to further smooth out soil. If soil neededamendments, this is the time to undertake the work. Soil amendments were not used at this location.
Photographs above by Justin Heavey,State University College of Environmental Science and Forestry (SUNY ESF) 2011
Page 4 of 16
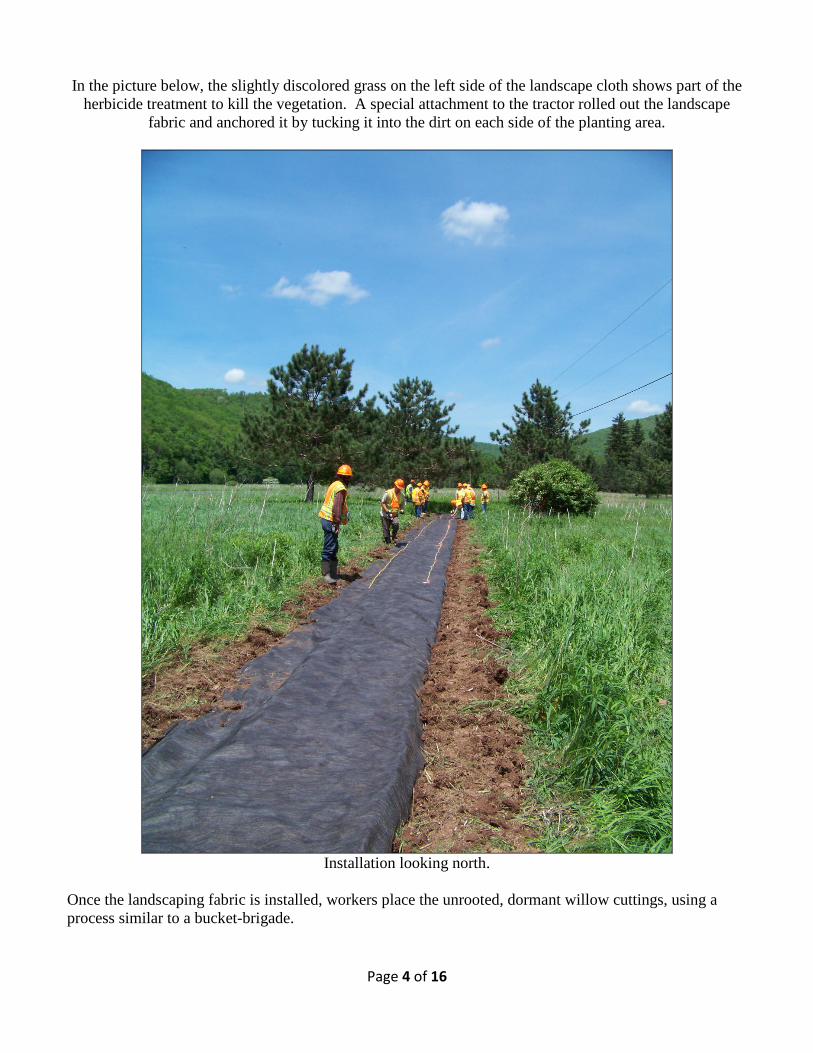
In the picture below, the slightly discolored grass on the left side of the landscape cloth shows part of theherbicide treatment to kill the vegetation. A special attachment to the tractor rolled out the landscape
fabric and anchored it by tucking it into the dirt on each side of the planting area.
Installation looking north.
Once the landscaping fabric is installed, workers place the unrooted, dormant willow cuttings, using aprocess similar to a bucket-brigade.
Page 5 of 16
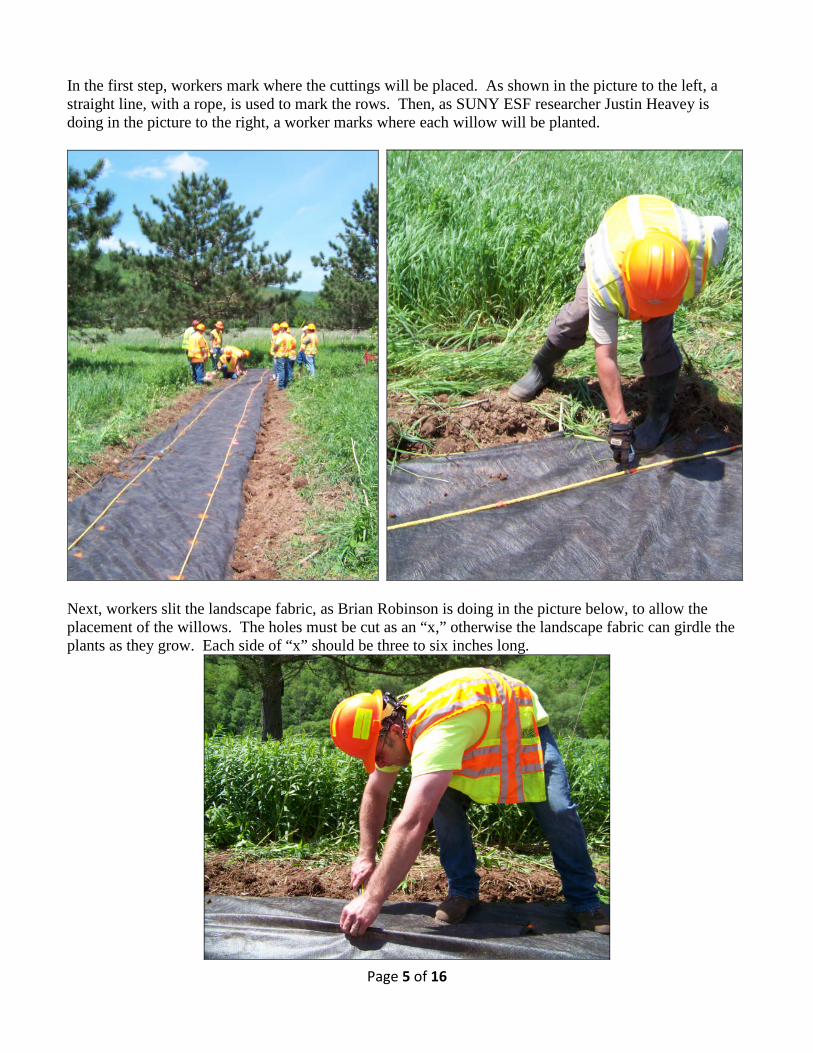
In the first step, workers mark where the cuttings will be placed. As shown in the picture to the left, astraight line, with a rope, is used to mark the rows. Then, as SUNY ESF researcher Justin Heavey isdoing in the picture to the right, a worker marks where each willow will be planted.
Next, workers slit the landscape fabric, as Brian Robinson is doing in the picture below, to allow theplacement of the willows. The holes must be cut as an “x,” otherwise the landscape fabric can girdle theplants as they grow. Each side of “x” should be three to six inches long.
Page 6 of 16
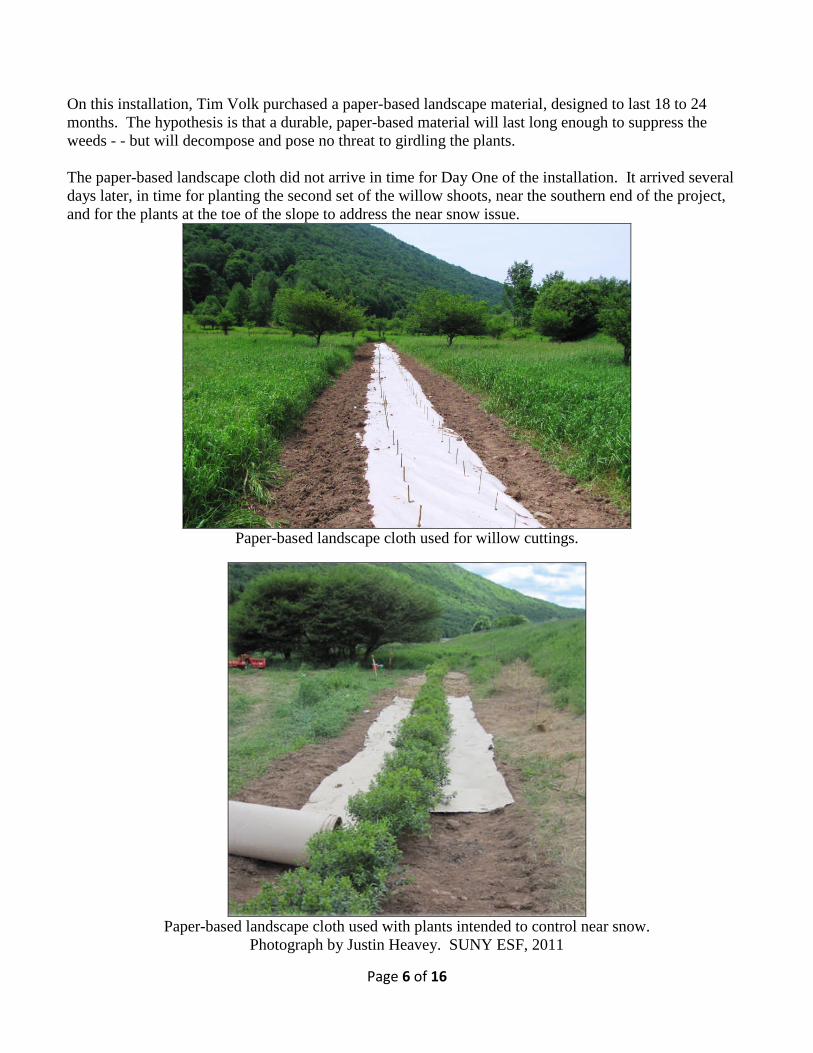
On this installation, Tim Volk purchased a paper-based landscape material, designed to last 18 to 24months. The hypothesis is that a durable, paper-based material will last long enough to suppress theweeds - - but will decompose and pose no threat to girdling the plants.
The paper-based landscape cloth did not arrive in time for Day One of the installation. It arrived severaldays later, in time for planting the second set of the willow shoots, near the southern end of the project,and for the plants at the toe of the slope to address the near snow issue.
Paper-based landscape cloth used for willow cuttings.
Paper-based landscape cloth used with plants intended to control near snow.Photograph by Justin Heavey. SUNY ESF, 2011
Page 7 of 16
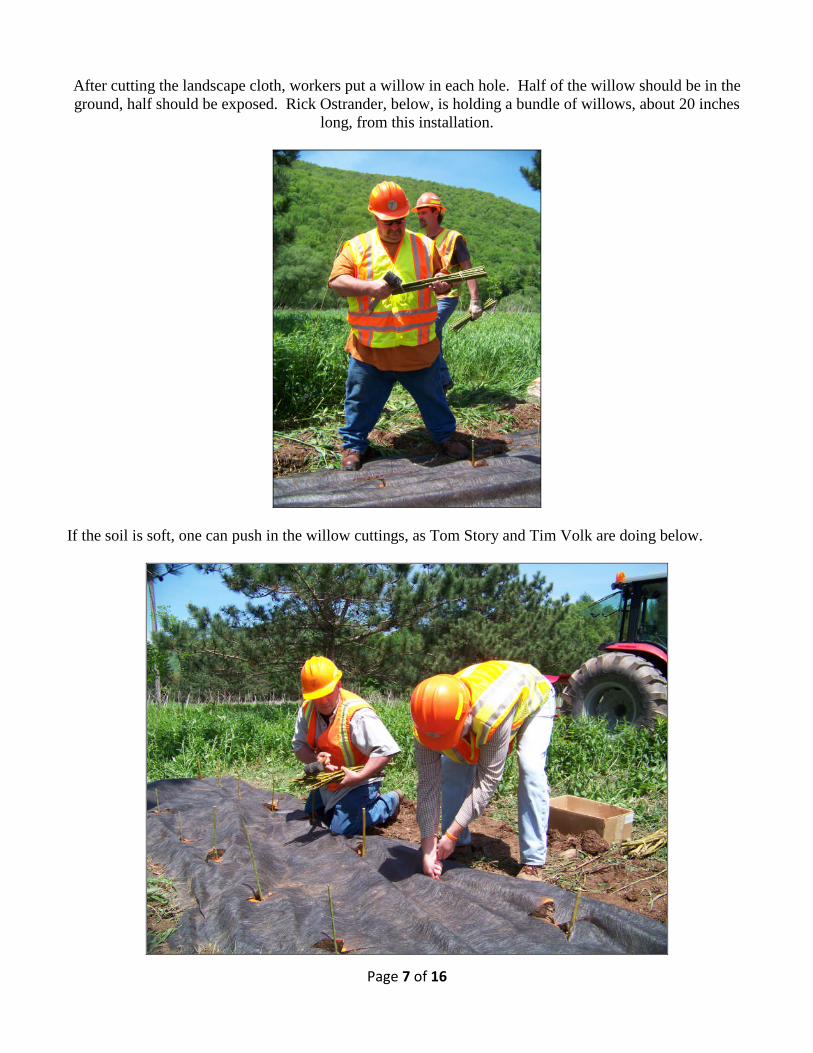
After cutting the landscape cloth, workers put a willow in each hole. Half of the willow should be in theground, half should be exposed. Rick Ostrander, below, is holding a bundle of willows, about 20 inches
long, from this installation.
If the soil is soft, one can push in the willow cuttings, as Tom Story and Tim Volk are doing below.

Page 8 of 16
If soil is harder, a few gentle taps with a mallet are needed to get the willow cutting deep enough, asLewis Lacey and Walter Geidel, Town of Walton Highway Superintendent, are doing.
Page 9 of 16
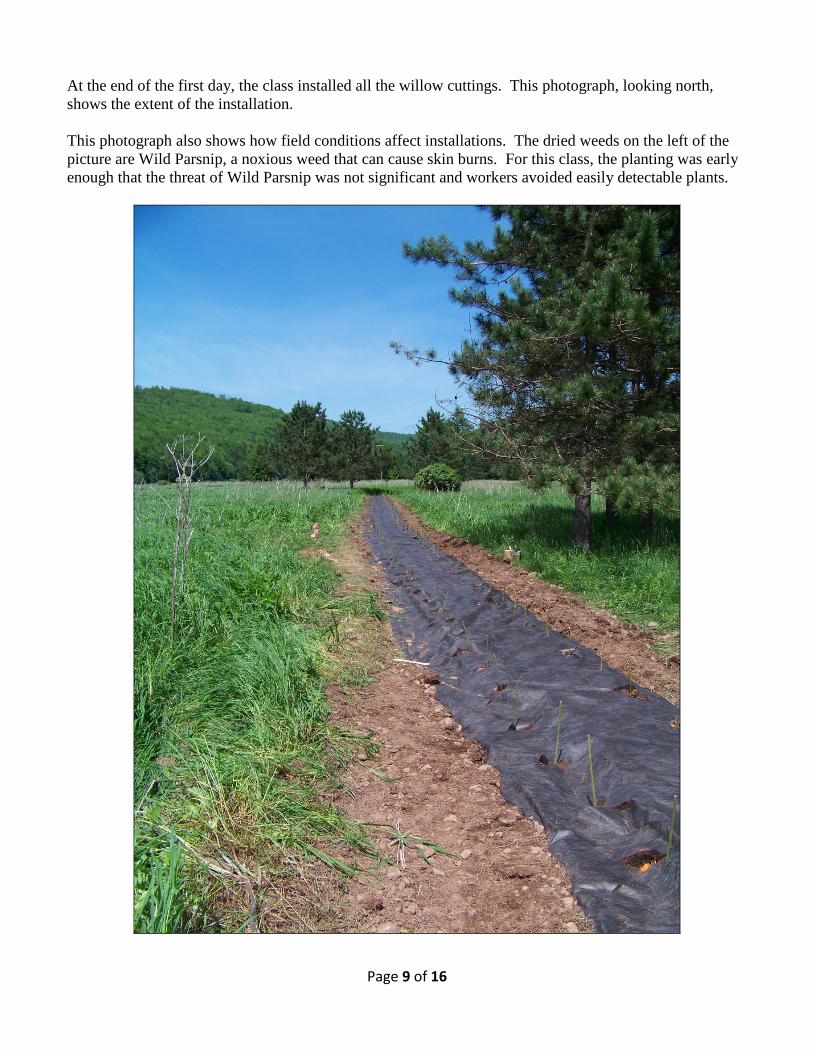
At the end of the first day, the class installed all the willow cuttings. This photograph, looking north,shows the extent of the installation.
This photograph also shows how field conditions affect installations. The dried weeds on the left of thepicture are Wild Parsnip, a noxious weed that can cause skin burns. For this class, the planting was earlyenough that the threat of Wild Parsnip was not significant and workers avoided easily detectable plants.

Page 10 of 16
Wood chips help suppress weeds and prevent them from overwhelming willow plantings. MostNYSDOT Residencies do not have the equipment, staff or time to water new plantings. Wood chips alsoserve to retain moisture as the summer progresses.
For this installation, Delaware South and Sullivan Residencies provided about 160 cubic yards of chips tocover the three planted areas.
Where site conditions allow, the best practice is to use mechanical equipment to place the chips. Forproductivity, the largest loader that fits in the setting should be used.
On Day 2 of the class, Steve Dufton, the Delaware South Supervisor for this segment of Route 10,assigned an articulated loader and John Letosky, the operator, to help. The bucket on this loader couldhold enough chips to mulch 24 feet of the willow cuttings before returning for another load.
When working with wood chips, it is important to limit the amount of live vegetation in them. A skilledoperator will maximize the amount of chips that can be placed in a single trip. In the picture on the left,Tom Story, Everett Cass and Chris Kappeller are unloading chips. In the picture on the right, PeterNorton and Phil Castellano are unloading the chips and trying to keep live vegetation out of the planting.

Page 11 of 16
Once the chips are unloaded, workers need to spread them out, to realize the weed control and moistureretention benefits. These pictures show Brian Robinson, Peter Norton, Lewis Lacey, Tom Story, BobRichter, Paula Bagley and Everett Cass placing chips.
Here are pictures of the completed work as of Day 2:

Page 12 of 16
To address near snow at the south end of the project, bushes were planted at the base of the highwayslope. The researchers developed the following planting plan, to guide the work in the field.
Planting Chart by Justin Heavey. SUNY ESF, 2011
For this installation, the bushes were ordered as potted plants. The benefit is that they are larger and havea higher likelihood of survival once planted. When potted stock is ordered, however, the stock must bekept watered and protected before planting, as is shown in the photograph, below:
Photograph by Justin Heavey. SUNY ESF, 2011
Page 13 of 16
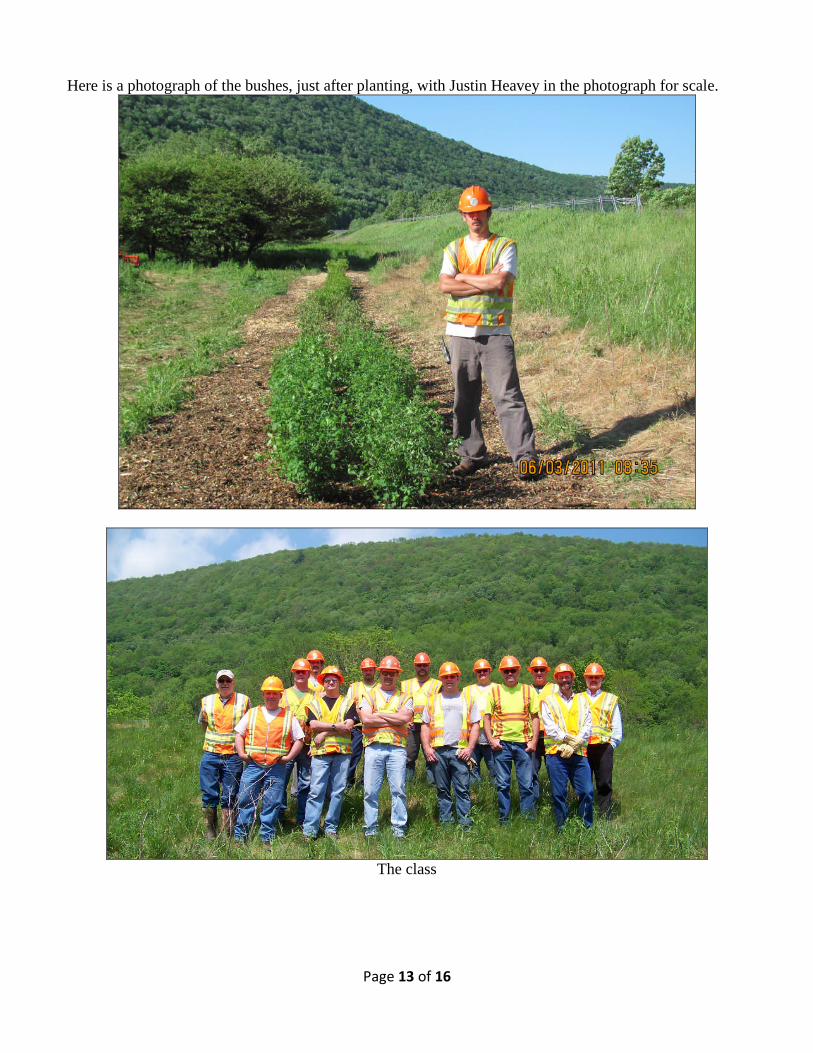
Here is a photograph of the bushes, just after planting, with Justin Heavey in the photograph for scale.
The class
Page 14 of 16
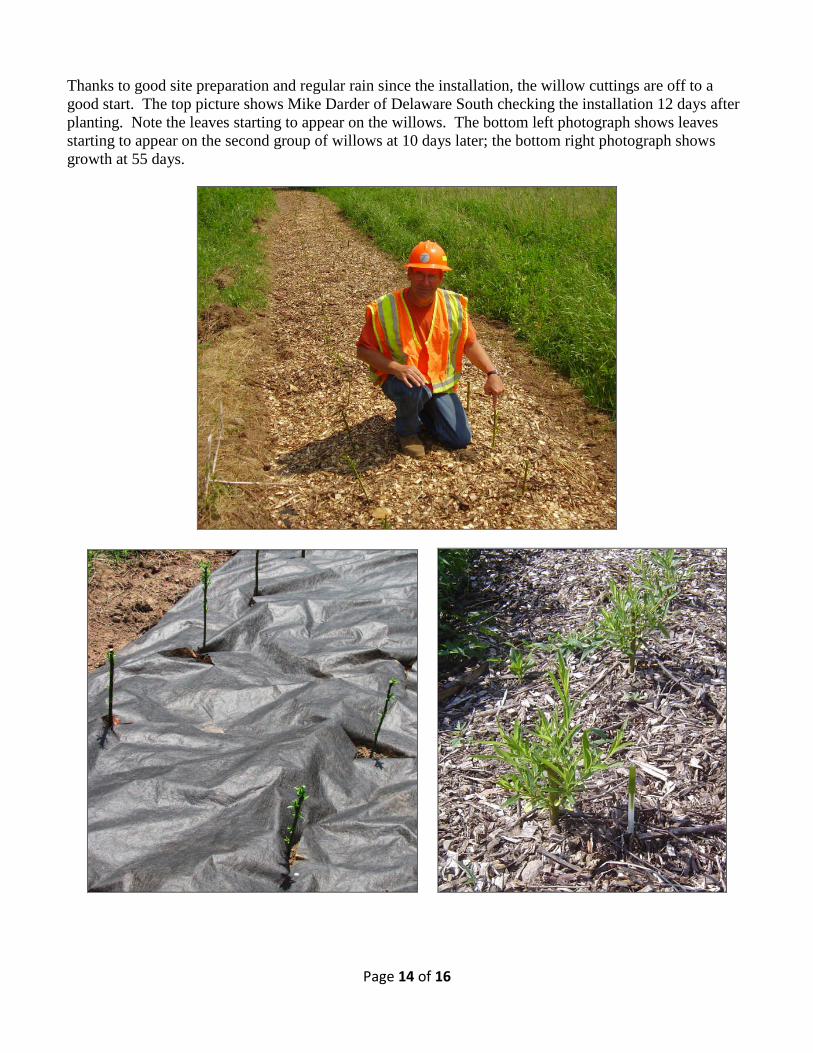
Thanks to good site preparation and regular rain since the installation, the willow cuttings are off to agood start. The top picture shows Mike Darder of Delaware South checking the installation 12 days afterplanting. Note the leaves starting to appear on the willows. The bottom left photograph shows leavesstarting to appear on the second group of willows at 10 days later; the bottom right photograph showsgrowth at 55 days.

Page 15 of 16
On this page and the following are three panoramic photographs of the willow and bush installation 55days after the planting. A common factor in all the pictures is good weed control. Below are the bushesat the toe of the slope, looking south

Page 16 of 16
In the photographs below, note good willow survival, good weed control and strong growth in the first 55days. The lower left picture is looking north at the main willow installation. The lower right photographis looking south at the installation of the southern rows of willows.