lesson 2 pp tutorial
TRANSCRIPT
UNIT 7.1 | LET’S MAKE A FILM!
Windows Movie Maker
WINDOWS MOVIE MAKER
In this session you will be focusing on Windows Movie Maker:
1. How to assess Movie Maker
2. How to use it
3. The skills of the software
4. Features the software has
This PowerPoint will show you a step-by-step guide/tutorial on using Movie Maker, it will show all the important key features, skills and everything you need to know about the software.
By the end of the session you will all be experts at using Windows Movie Maker!
STEP-BY-STEP GUIDE/TUTORIALS
Follow the PowerPoint instructions which will tell
you what to do step-by-step and how to use the
software.
Movie Maker is very fun and enjoyable, you can
create amazing movies from this software. Let’s
have a go!
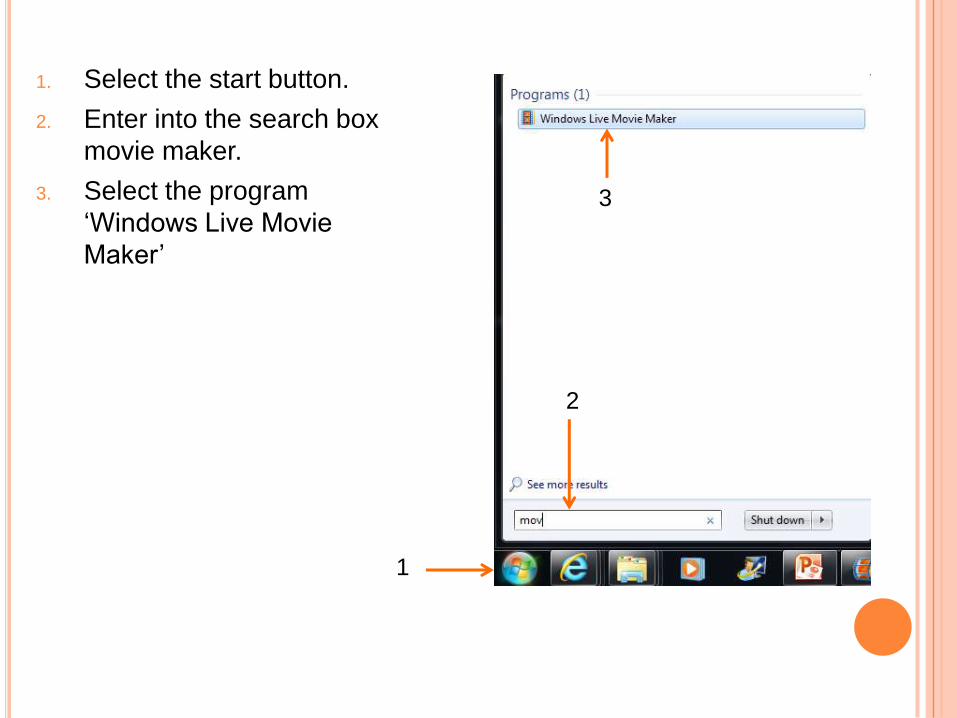
1. Select the start button.
2. Enter into the search box
movie maker.
3. Select the program
‘Windows Live Movie
Maker’
1
2
3

The print screen above shows you what will then appear onto
your screen. This is windows movie maker. This is the
software you will all complete your film project. You should
work through the PowerPoint so you know how to use it very
well.
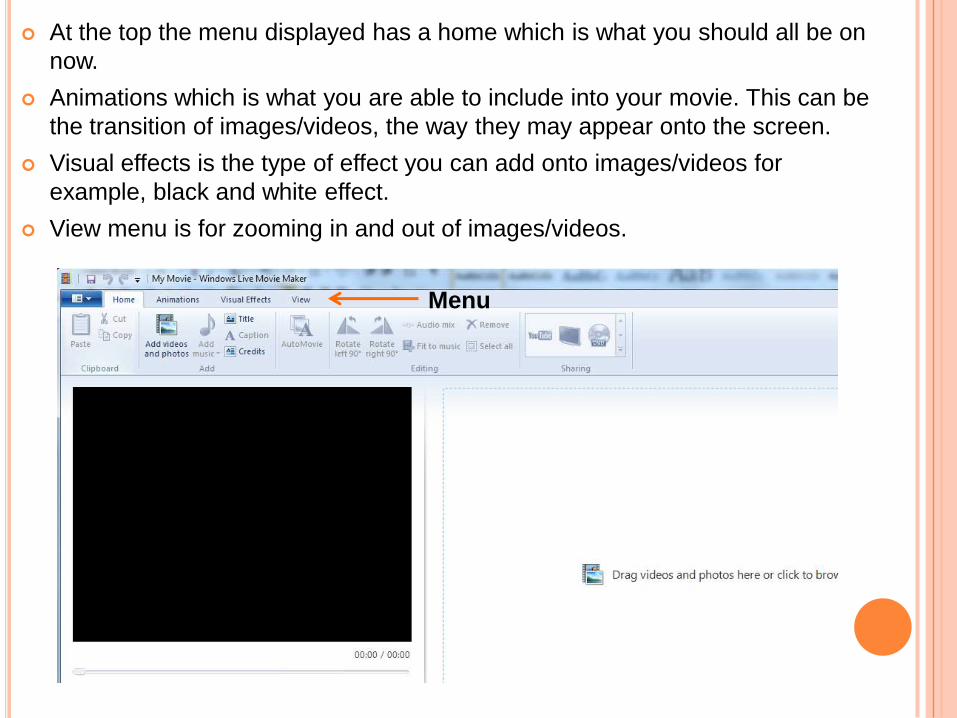
At the top the menu displayed has a home which is what you should all be on
now.
Animations which is what you are able to include into your movie. This can be
the transition of images/videos, the way they may appear onto the screen.
Visual effects is the type of effect you can add onto images/videos for
example, black and white effect.
View menu is for zooming in and out of images/videos.
Menu
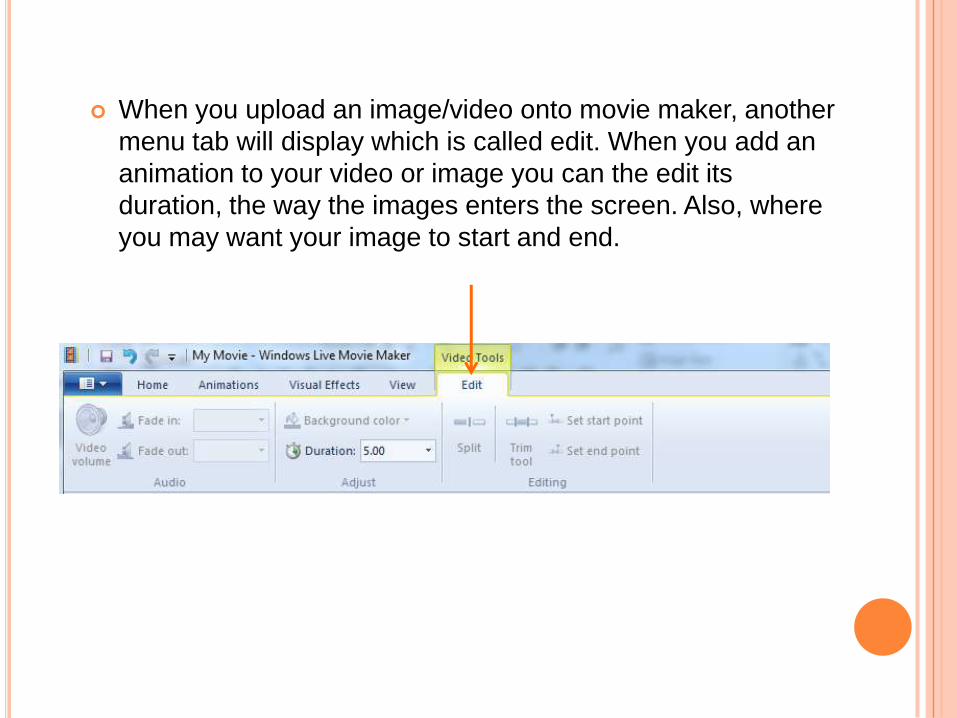
When you upload an image/video onto movie maker, another
menu tab will display which is called edit. When you add an
animation to your video or image you can the edit its
duration, the way the images enters the screen. Also, where
you may want your image to start and end.
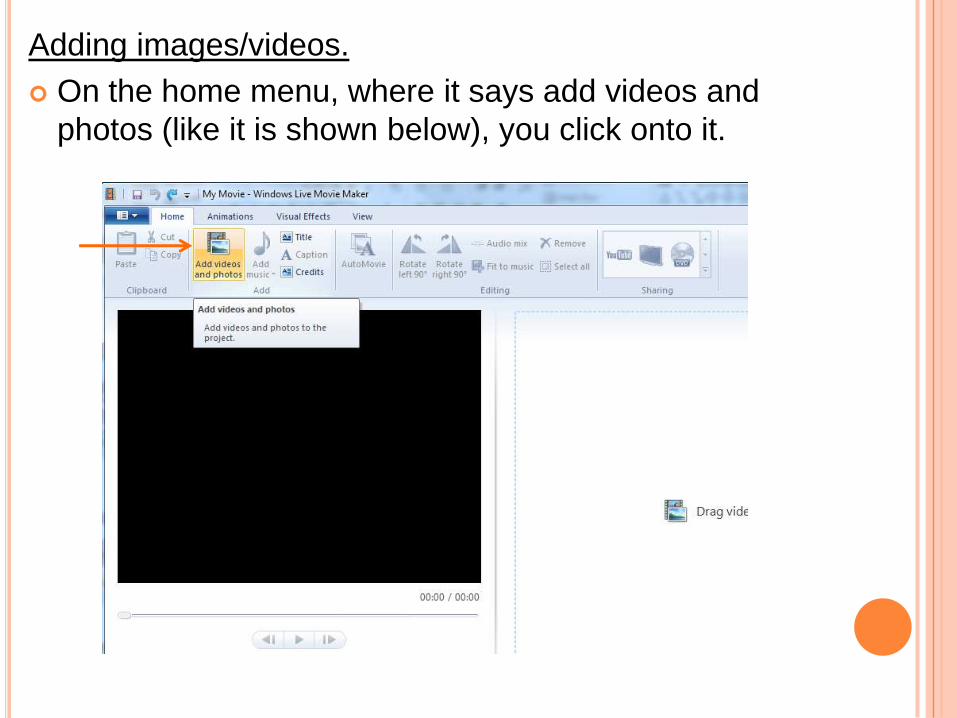
Adding images/videos.
On the home menu, where it says add videos and
photos (like it is shown below), you click onto it.
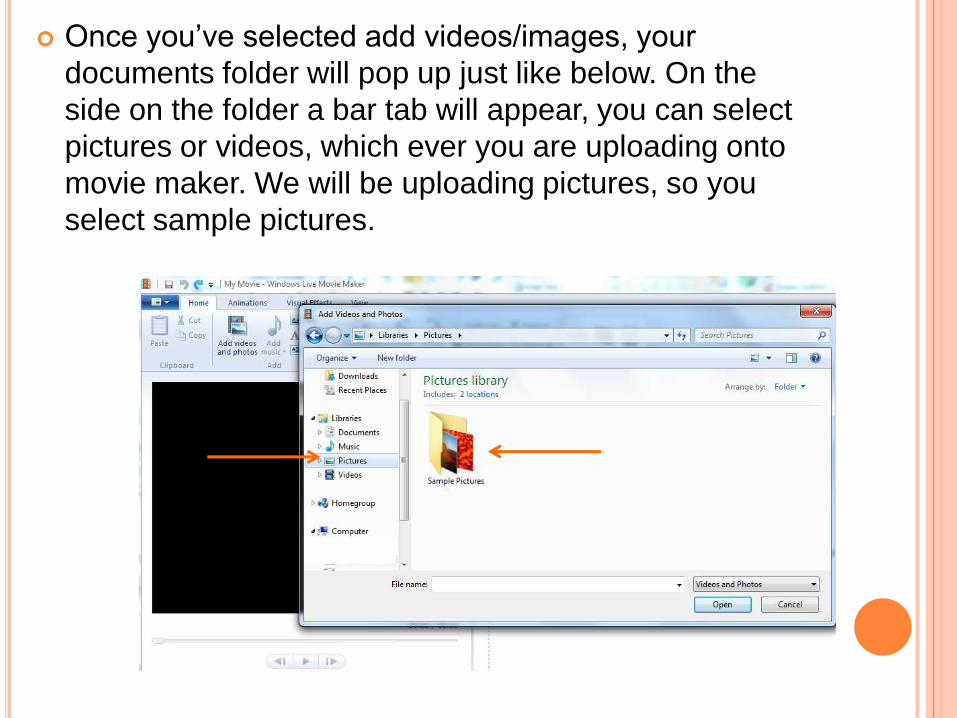
Once you’ve selected add videos/images, your
documents folder will pop up just like below. On the
side on the folder a bar tab will appear, you can select
pictures or videos, which ever you are uploading onto
movie maker. We will be uploading pictures, so you
select sample pictures.
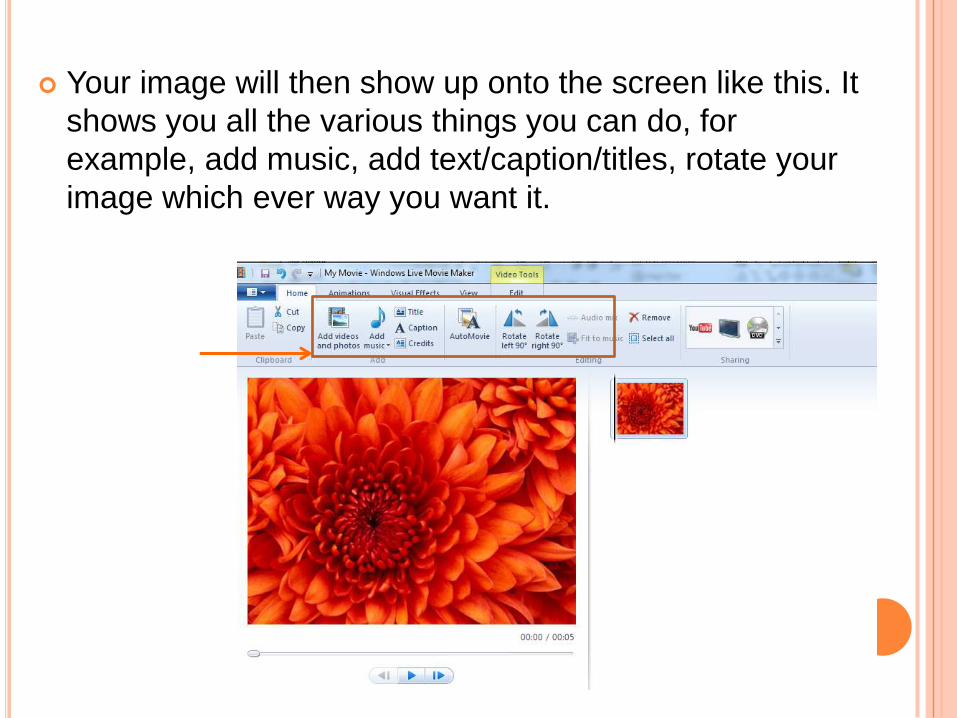
Your image will then show up onto the screen like this. It
shows you all the various things you can do, for
example, add music, add text/caption/titles, rotate your
image which ever way you want it.
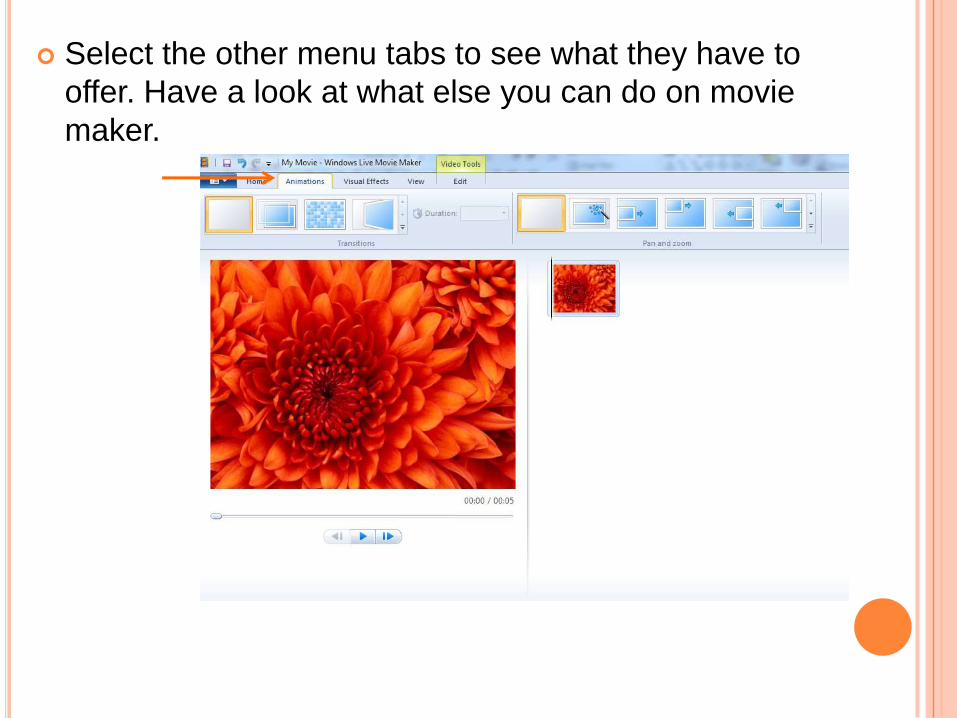
Select the other menu tabs to see what they have to
offer. Have a look at what else you can do on movie
maker.
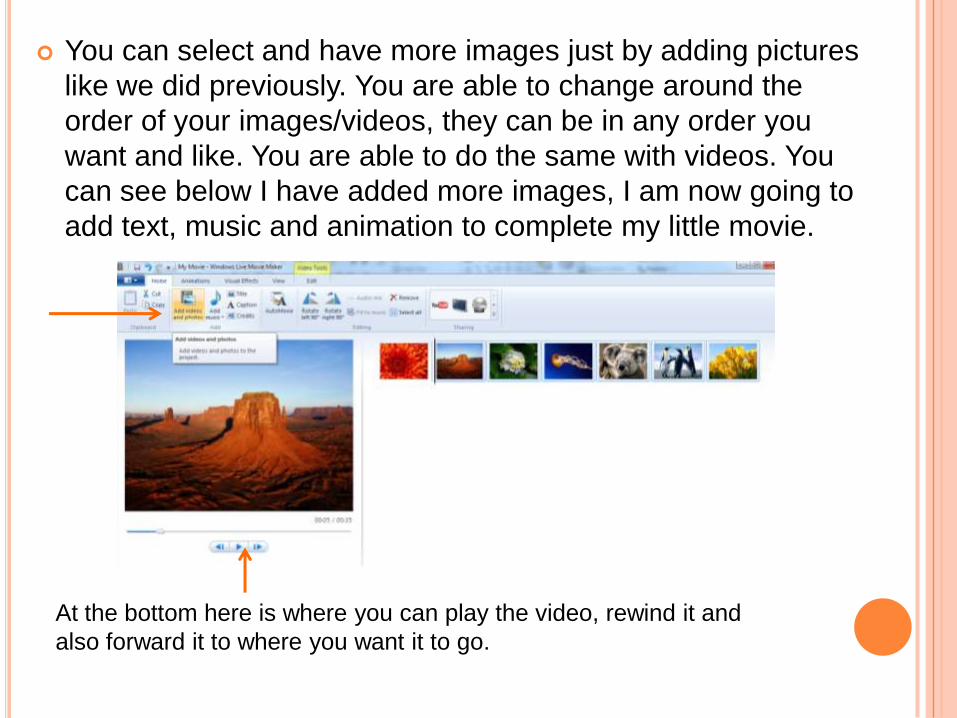
You can select and have more images just by adding pictures
like we did previously. You are able to change around the
order of your images/videos, they can be in any order you
want and like. You are able to do the same with videos. You
can see below I have added more images, I am now going to
add text, music and animation to complete my little movie.
At the bottom here is where you can play the video, rewind it and
also forward it to where you want it to go.
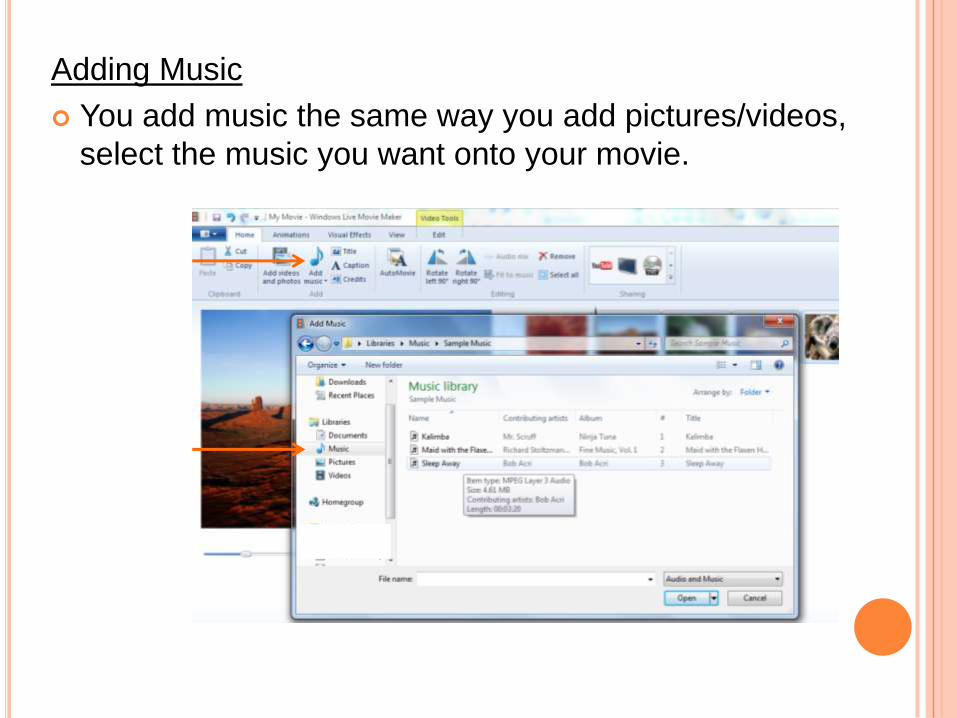
Adding Music
You add music the same way you add pictures/videos,
select the music you want onto your movie.
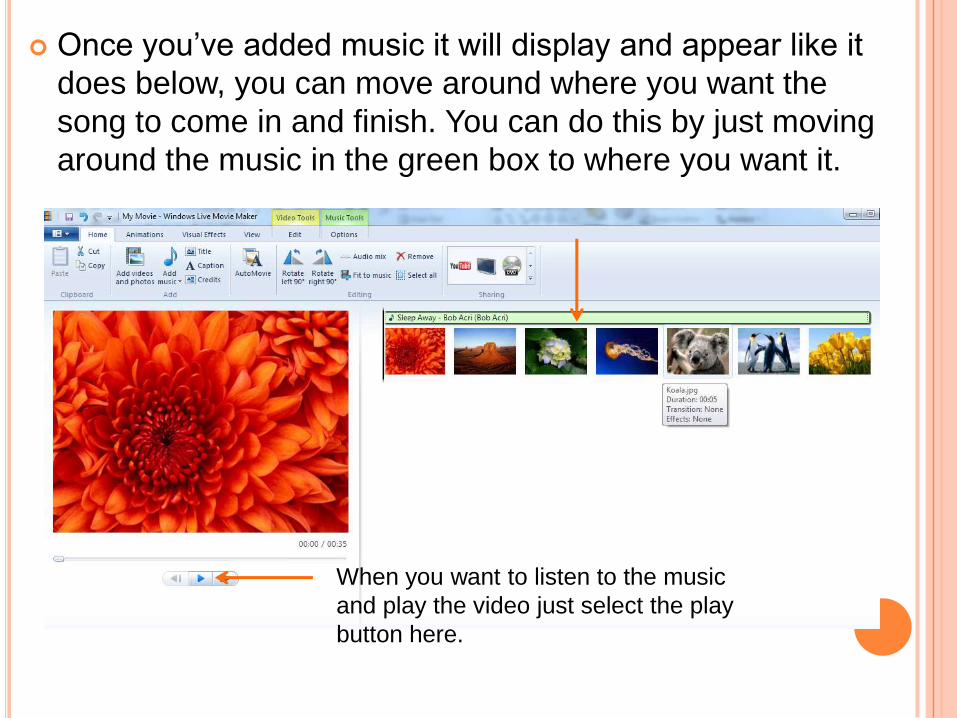
Once you’ve added music it will display and appear like it
does below, you can move around where you want the
song to come in and finish. You can do this by just moving
around the music in the green box to where you want it.
When you want to listen to the music
and play the video just select the play
button here.
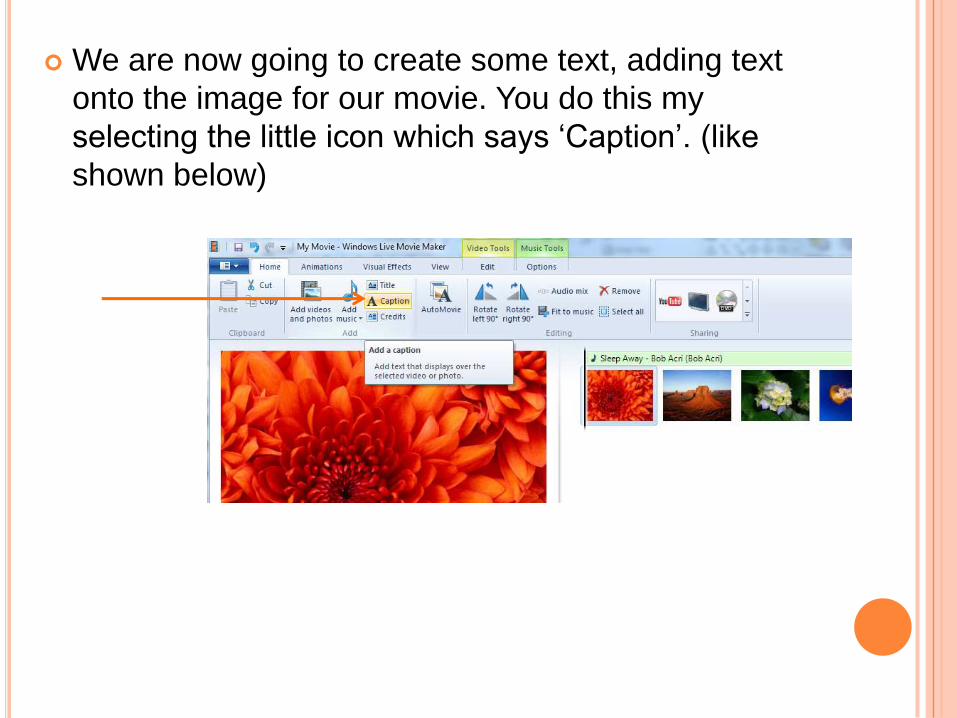
We are now going to create some text, adding text
onto the image for our movie. You do this my
selecting the little icon which says ‘Caption’. (like
shown below)
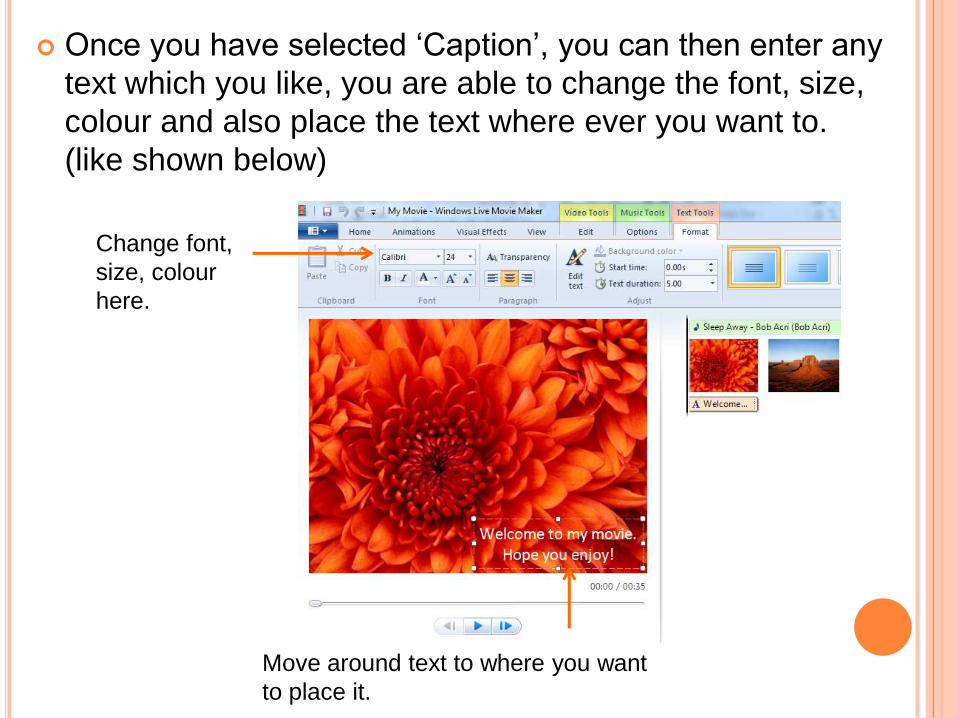
Once you have selected ‘Caption’, you can then enter any
text which you like, you are able to change the font, size,
colour and also place the text where ever you want to.
(like shown below)
Move around text to where you want
to place it.
Change font,
size, colour
here.
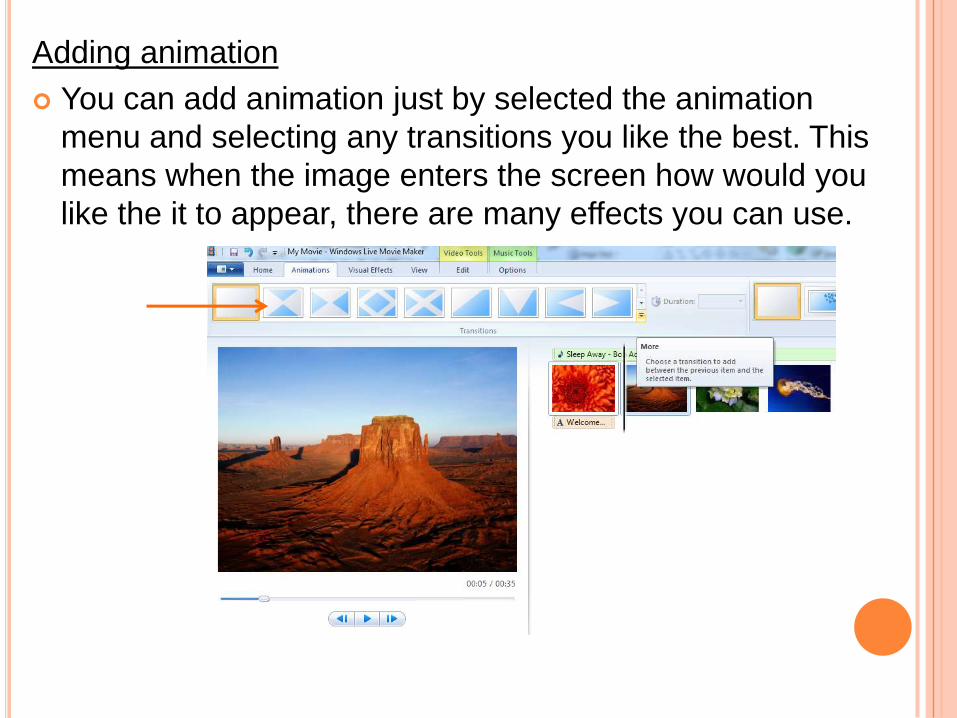
Adding animation
You can add animation just by selected the animation
menu and selecting any transitions you like the best. This
means when the image enters the screen how would you
like the it to appear, there are many effects you can use.

Once you have selected the transition you want, you can
then select the duration of the transition you want the
images to have.
You can also select pan and zoom, which is if you want
the images to zoom in as they come appearing onto the
screen.
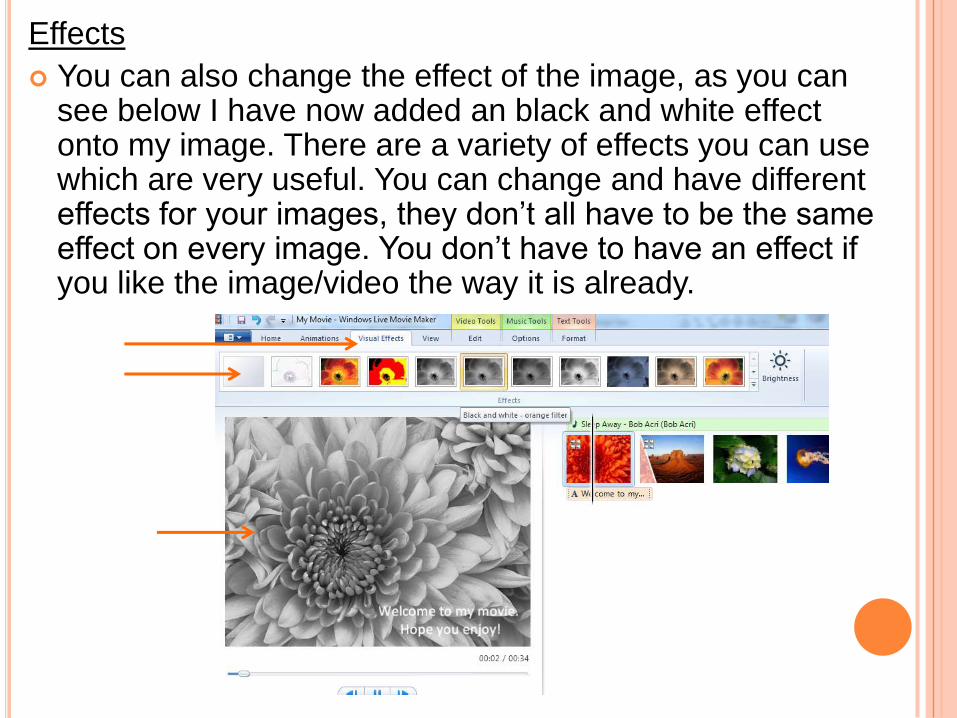
Effects
You can also change the effect of the image, as you can see below I have now added an black and white effect onto my image. There are a variety of effects you can use which are very useful. You can change and have different effects for your images, they don’t all have to be the same effect on every image. You don’t have to have an effect if you like the image/video the way it is already.
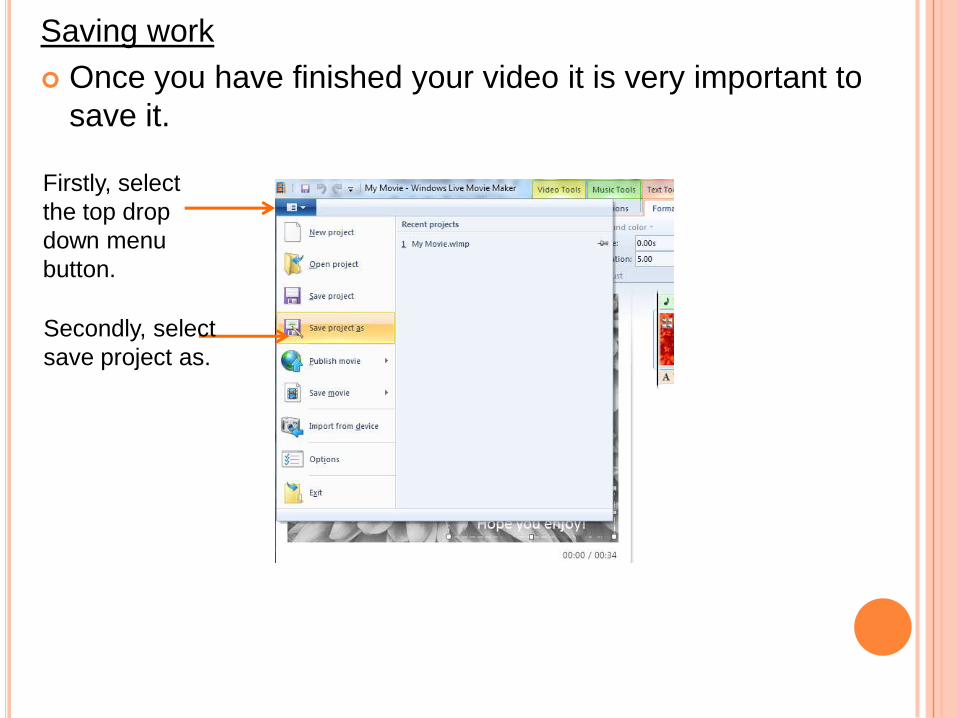
Saving work
Once you have finished your video it is very important to
save it.
Firstly, select
the top drop
down menu
button.
Secondly, select
save project as.
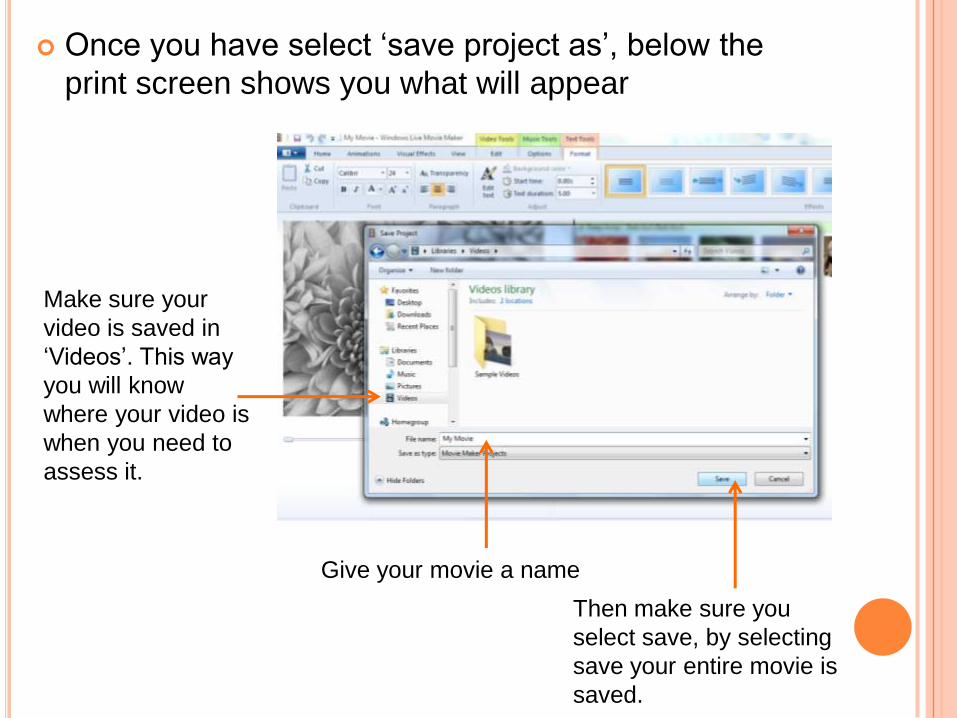
Once you have select ‘save project as’, below the
print screen shows you what will appear
Make sure your
video is saved in
‘Videos’. This way
you will know
where your video is
when you need to
assess it.
Give your movie a name
Then make sure you
select save, by selecting
save your entire movie is
saved.
If you would like to add any other features onto your
movie then do so. Make your film interesting and
attractive. Use all the features and be creative!
This is your film, you are in charge, you can use
what ever you like. Be imaginative movie stars.
You can continue exploring Movie Maker, use
different features. Its now your turn!!