lalaloopsy fuchsia
DESCRIPTION
CrochetTRANSCRIPT
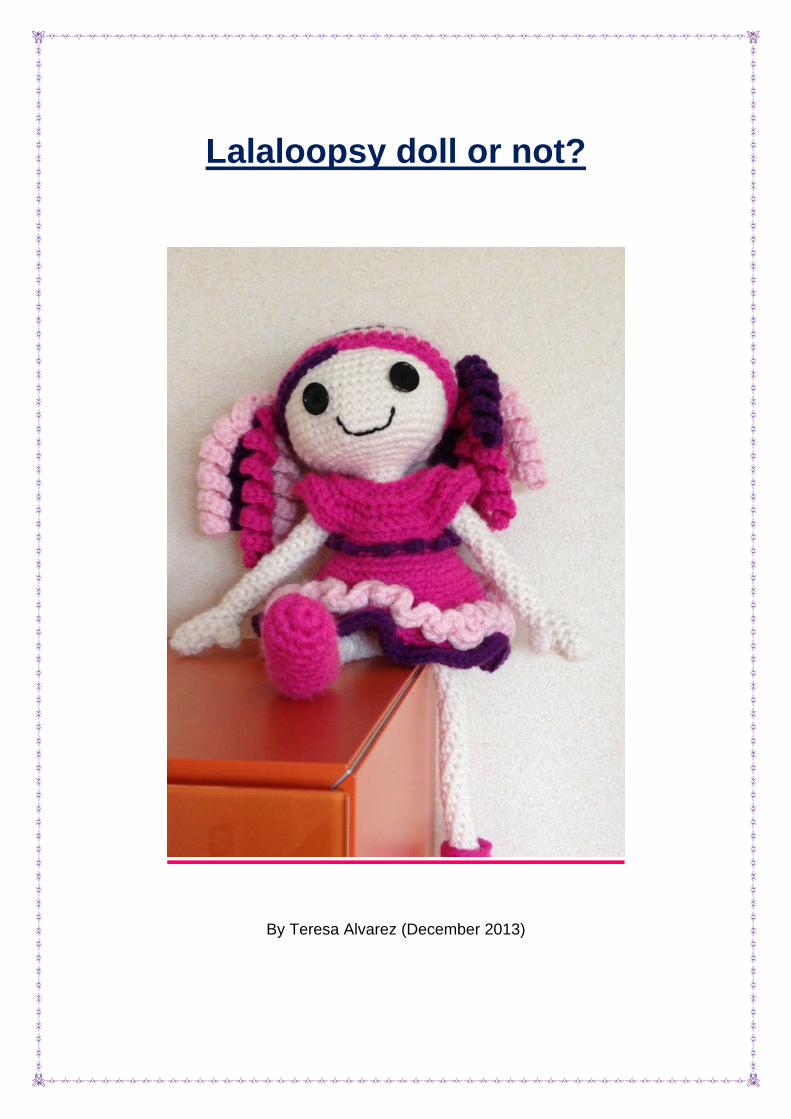
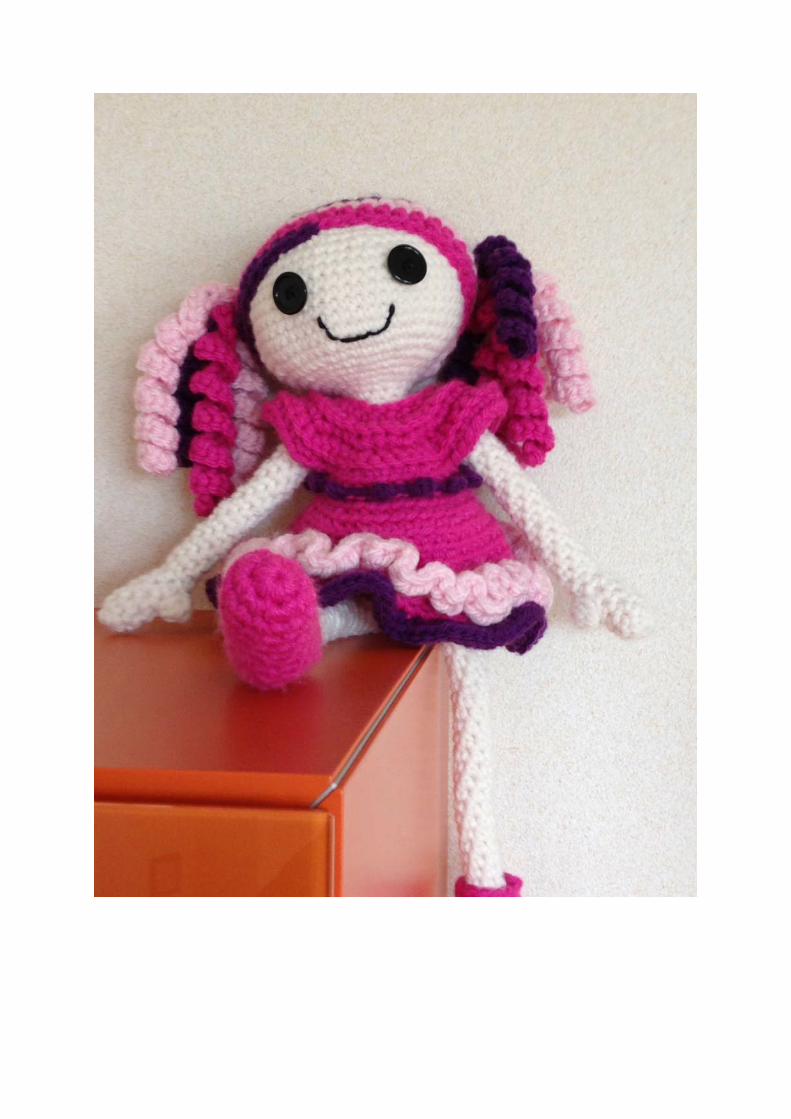
Lalaloopsy doll or not?
By Teresa Alvarez (December 2013)

About copyright: It’s really something great when people like what I have designed. You can sell the final item or whatever you like, but it would be nice to reference where you found the pattern!
If there is anything you do not understand or there are any mistakes, please, send me a message!
As you can see in the way I write, English is not my first language. So, you could come across some mistakes and grammatical inconsistencies. Sorry and my apologies!
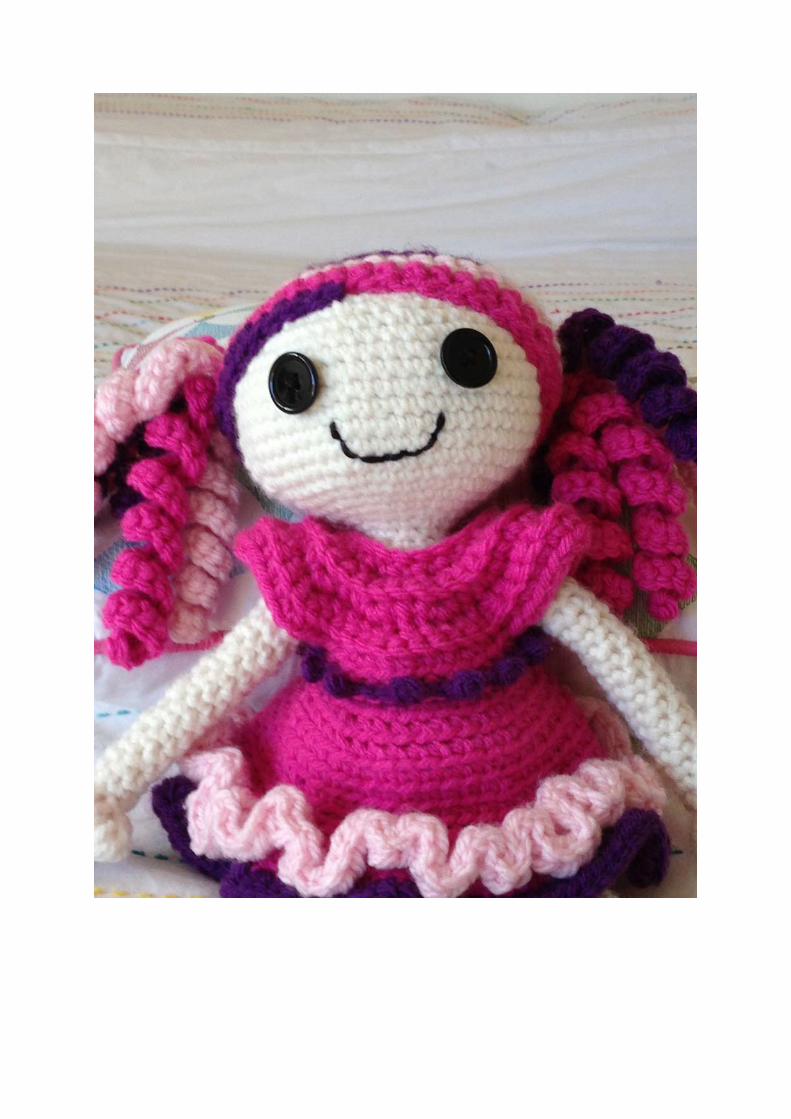
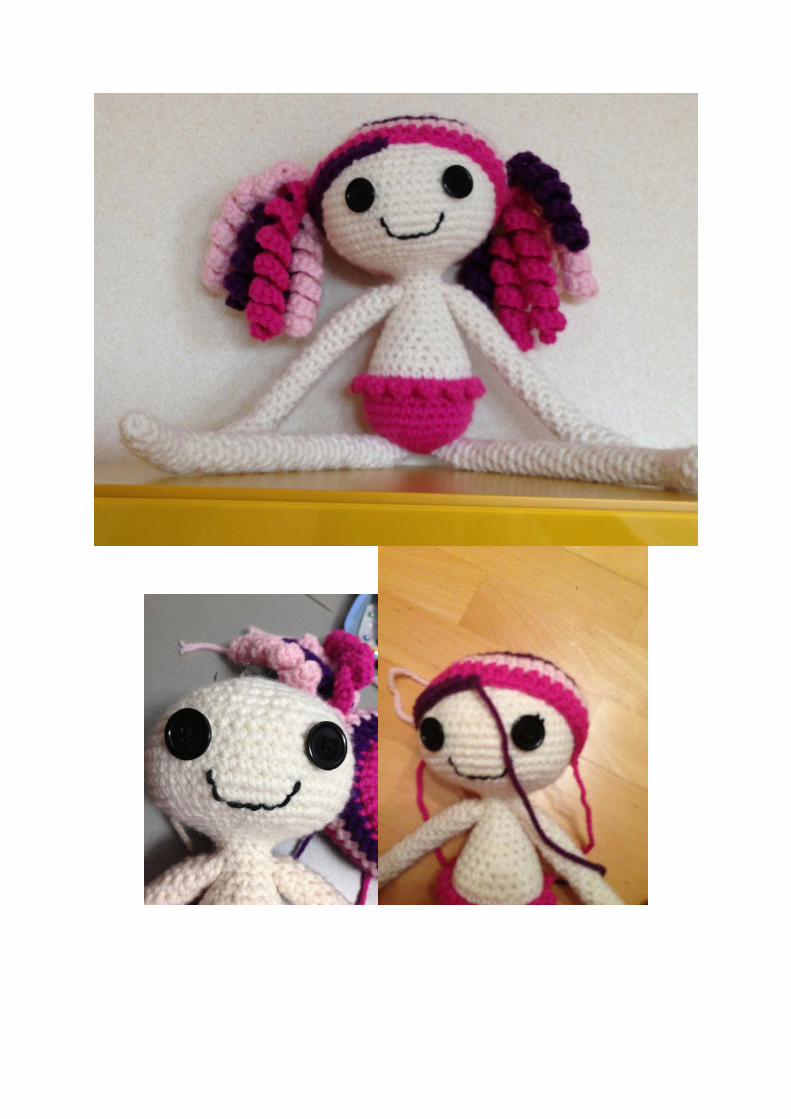
This file describes how to crochet a doll that has some resemblance to th very well known Lalaloopsy dolls. My daughter loves them, but I wanted something softer, so this is the first doll. She didn’t want the cheeks and wanted a pale skin. She chose the colors and the way she wanted it! I made the doll and then the dress, this way the doll can have a wardrobe as big as your imagination!
ABOUT YARN: The yarn is Alaska from Katia (Spanish manufacturer). Yardage: 3.5 ounces (100 grams) and 126 yards (115 meters).
Number of skeins: 1 of each color: beige (skin), pale pink, purple and fuchsia. ABOUT GAUGE: It is not important, as far as you are consistent with your tension. ABOUT HOOK: 4 mm hook Remember that when making amigurumis, stitches should be tight. YOU WILL NEED: Yarn for the doll and some black yarn for the mouth. Two buttoms. Stuffing. Tapestry needle. ABOUT CROCHET TERMS: I’ve followed the US terminology. Stitch: st Chain: ch Slip stitch: sl st Single crochet: sc FLO: Front Loop Only BLO: Back Loop Only Sc2tog: decreasing two sc (i.e., 2 st become 1)
Sc3tog: decreasing 3 sc (i.e. 3 stitches become 1) Bobble: yarn over, insert hook in next stitch, [yarn over and draw up a loop, yarn over
and draw it through the first 2 loops on your hook] repeat 6 times, yarn over and draw hook through all the remaining loops.
Picot: ch3, sl st in 1st ch. NOTE: I’ve made all the decreases as invisible decreases
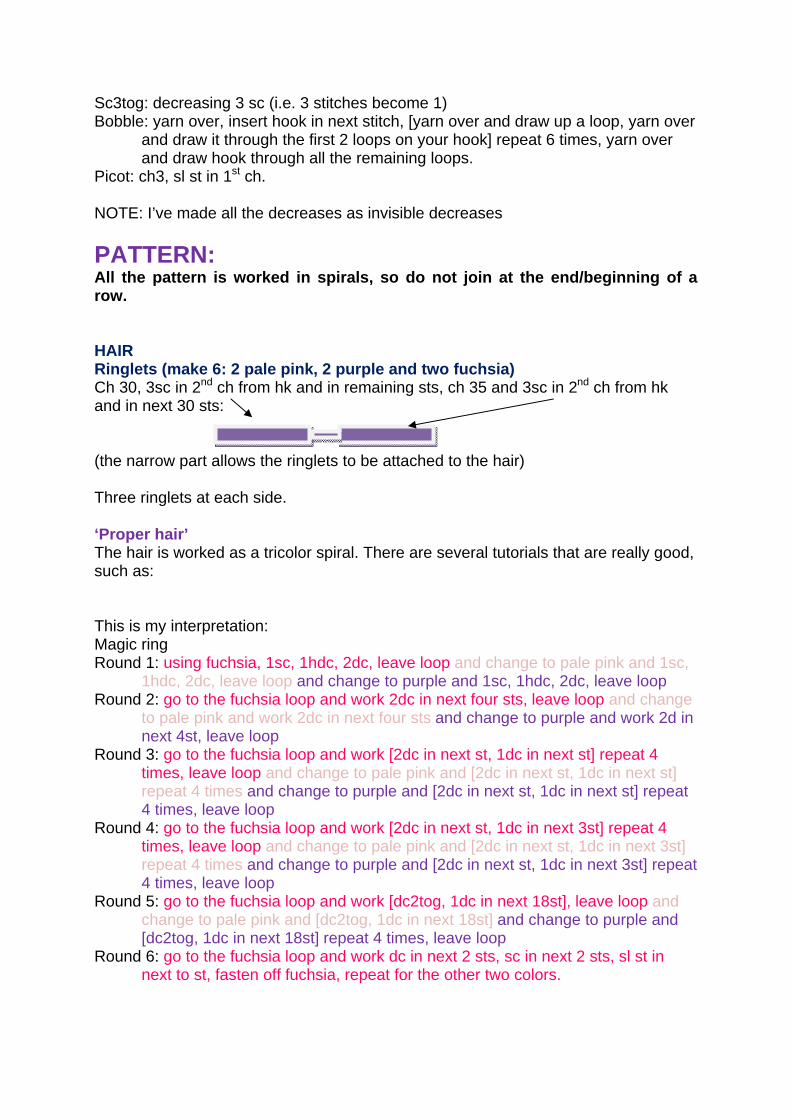
PATTERN: All the pattern is worked in spirals, so do not join at the end/beginning of a row. HAIR Ringlets (make 6: 2 pale pink, 2 purple and two fuchsia) Ch 30, 3sc in 2nd ch from hk and in remaining sts, ch 35 and 3sc in 2nd ch from hk and in next 30 sts: (the narrow part allows the ringlets to be attached to the hair) Three ringlets at each side. ‘Proper hair’ The hair is worked as a tricolor spiral. There are several tutorials that are really good, such as: This is my interpretation: Magic ring Round 1: using fuchsia, 1sc, 1hdc, 2dc, leave loop and change to pale pink and 1sc,
1hdc, 2dc, leave loop and change to purple and 1sc, 1hdc, 2dc, leave loop Round 2: go to the fuchsia loop and work 2dc in next four sts, leave loop and change
to pale pink and work 2dc in next four sts and change to purple and work 2d in next 4st, leave loop
Round 3: go to the fuchsia loop and work [2dc in next st, 1dc in next st] repeat 4 times, leave loop and change to pale pink and [2dc in next st, 1dc in next st] repeat 4 times and change to purple and [2dc in next st, 1dc in next st] repeat 4 times, leave loop
Round 4: go to the fuchsia loop and work [2dc in next st, 1dc in next 3st] repeat 4 times, leave loop and change to pale pink and [2dc in next st, 1dc in next 3st] repeat 4 times and change to purple and [2dc in next st, 1dc in next 3st] repeat 4 times, leave loop
Round 5: go to the fuchsia loop and work [dc2tog, 1dc in next 18st], leave loop and change to pale pink and [dc2tog, 1dc in next 18st] and change to purple and [dc2tog, 1dc in next 18st] repeat 4 times, leave loop
Round 6: go to the fuchsia loop and work dc in next 2 sts, sc in next 2 sts, sl st in next to st, fasten off fuchsia, repeat for the other two colors.

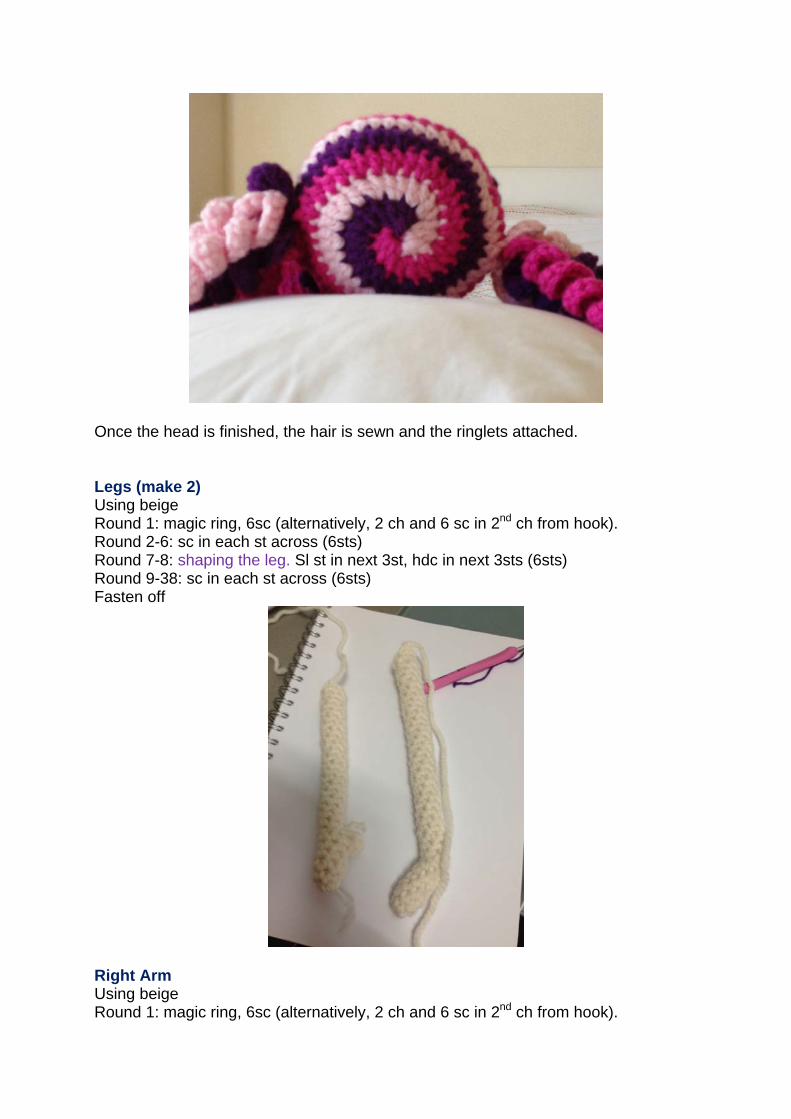
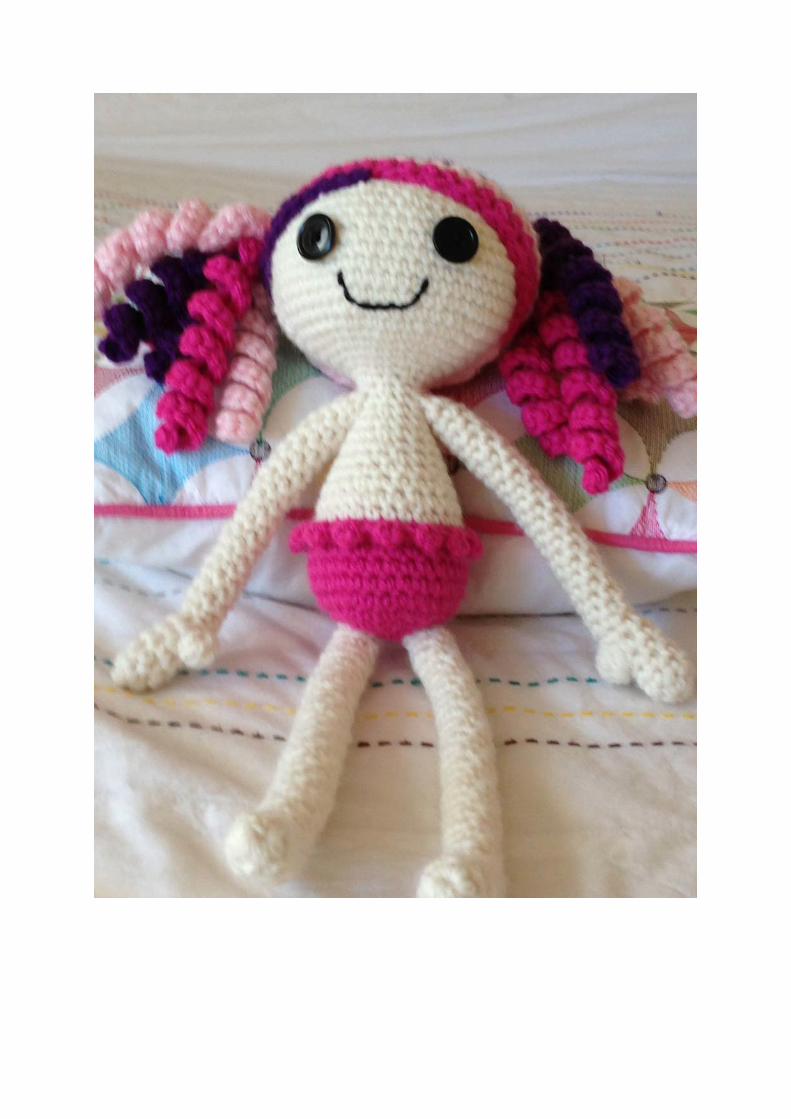
Once the head is finished, the hair is sewn and the ringlets attached. Legs (make 2) Using beige Round 1: magic ring, 6sc (alternatively, 2 ch and 6 sc in 2nd ch from hook). Round 2-6: sc in each st across (6sts) Round 7-8: shaping the leg. Sl st in next 3st, hdc in next 3sts (6sts) Round 9-38: sc in each st across (6sts) Fasten off
Right Arm Using beige Round 1: magic ring, 6sc (alternatively, 2 ch and 6 sc in 2nd ch from hook).
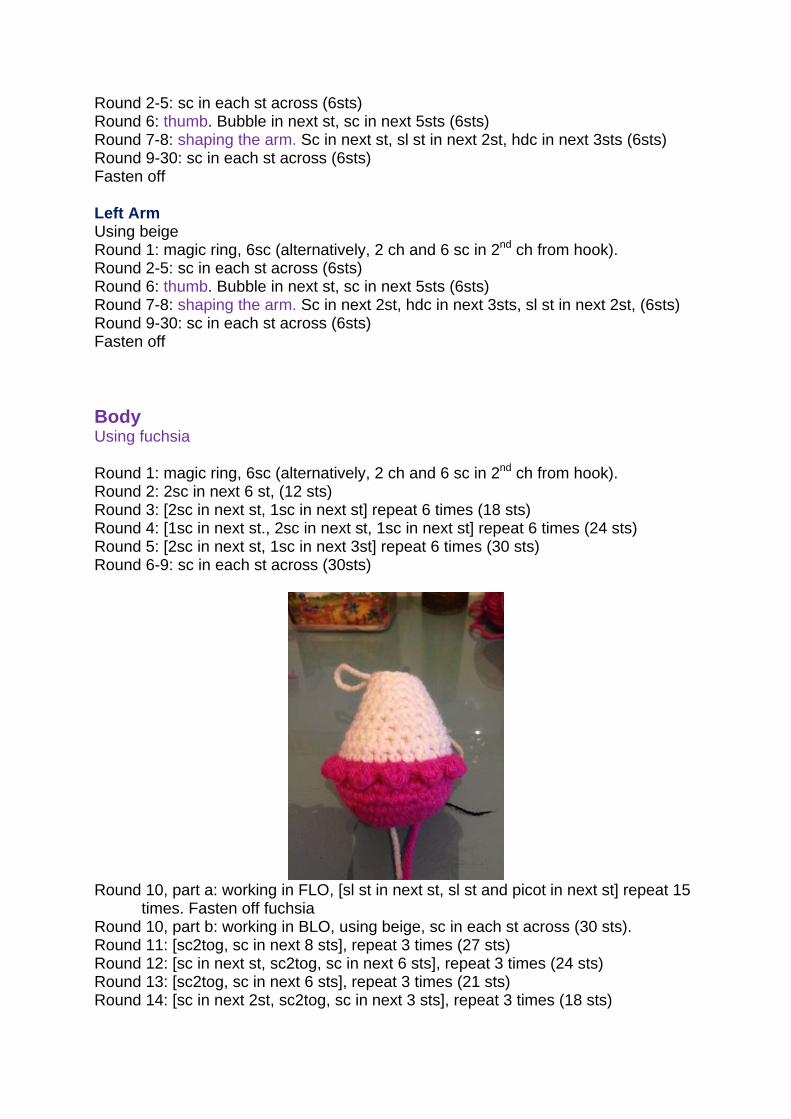
Round 2-5: sc in each st across (6sts) Round 6: thumb. Bubble in next st, sc in next 5sts (6sts) Round 7-8: shaping the arm. Sc in next st, sl st in next 2st, hdc in next 3sts (6sts) Round 9-30: sc in each st across (6sts) Fasten off Left Arm Using beige Round 1: magic ring, 6sc (alternatively, 2 ch and 6 sc in 2nd ch from hook). Round 2-5: sc in each st across (6sts) Round 6: thumb. Bubble in next st, sc in next 5sts (6sts) Round 7-8: shaping the arm. Sc in next 2st, hdc in next 3sts, sl st in next 2st, (6sts) Round 9-30: sc in each st across (6sts) Fasten off Body Using fuchsia Round 1: magic ring, 6sc (alternatively, 2 ch and 6 sc in 2nd ch from hook). Round 2: 2sc in next 6 st, (12 sts) Round 3: [2sc in next st, 1sc in next st] repeat 6 times (18 sts) Round 4: [1sc in next st., 2sc in next st, 1sc in next st] repeat 6 times (24 sts) Round 5: [2sc in next st, 1sc in next 3st] repeat 6 times (30 sts) Round 6-9: sc in each st across (30sts)
Round 10, part a: working in FLO, [sl st in next st, sl st and picot in next st] repeat 15
times. Fasten off fuchsia Round 10, part b: working in BLO, using beige, sc in each st across (30 sts). Round 11: [sc2tog, sc in next 8 sts], repeat 3 times (27 sts) Round 12: [sc in next st, sc2tog, sc in next 6 sts], repeat 3 times (24 sts) Round 13: [sc2tog, sc in next 6 sts], repeat 3 times (21 sts) Round 14: [sc in next 2st, sc2tog, sc in next 3 sts], repeat 3 times (18 sts)
Round 15: sc in every st across (18sts) Round 16: [sc2tog, sc in next 7 sts] repeat 2 times (16 sts) Round 17: [sc2tog, sc in next 6 sts] repeat 2 times (14 sts) Round 18: [sc2tog, sc in next 5 sts] repeat 2 times (12 sts) Round 19: placing arms: sc in next 2 sts, working through both thicknesses (arm and
body) sc in next 3 sts, sc in next 3 sts, working through both thicknesses (arm and body) sc in next 3 sts, sc in next st (12 sts). COMMENT: be careful when placing the arms, beware of the thumbs! And remember to stuff body!
Round 20: [sc2tog, sc in next 4 sts] repeat 2 times (10 sts) Round 21: Beginning of head: [2sc in next st, sc in next 4 sts] repeat 2 times (12 sts) Round 22: [2sc in next st, 1sc in next st] repeat 6 times (18 sts) Round 23: [1sc in next st., 2sc in next st, 1sc in next st] repeat 6 times (24 sts) Round 24: [2sc in next st, 1sc in next 3st] repeat 6 times (30 sts) Round 25: [1sc in next 2st, 2sc in next st, sc in next 2st] repeat 6 times (36 sts) Round 26: [2sc in next st, sc in next 5 st], repeat 6 times (42 sts) Round 27: [2sc in next st, sc in next 6st] repeat 6 times (48 sts) Round 28: [2sc in next st, sc in next 7st] repeat 6 times (54 sts) Round 29-35: sc in each st across (54 sts) Round 36: [sc2tog, sc in next 7sts] (48sts) Round 37: [sc2tog, sc in next 6sts] (42sts) Round 38: [sc2tog, sc in next 5st], repeat 6 times (36 sts) Round 39: [sc in next st, sc2tog, sc in next 3st], repeat 6 times (30 sts) (Stuff head as you go, embroider mouth, sew eyes and place eyes. Although, you
can stop crocheting the head at this point, then crochet the hair, and without fixing it you can check the place where you want the eyes and mouth )
Round 40: [sc2tog using invisible decrease, sc in next 3st], repeat 6 times (24 sts) Round 41: [sc2tog using invisible decrease, sc in next 2st], repeat 6 times (18 sts) Round 42: [sc2tog using invisible decrease, sc in next st], repeat 6 times (12 sts) Round 43: [sc2tog using invisible decrease], repeat 6 times (6 sts) Fasten off and weave ends. Legs can be sewn at this point, remember that the original doll has the feet (slightly) pointing to each other
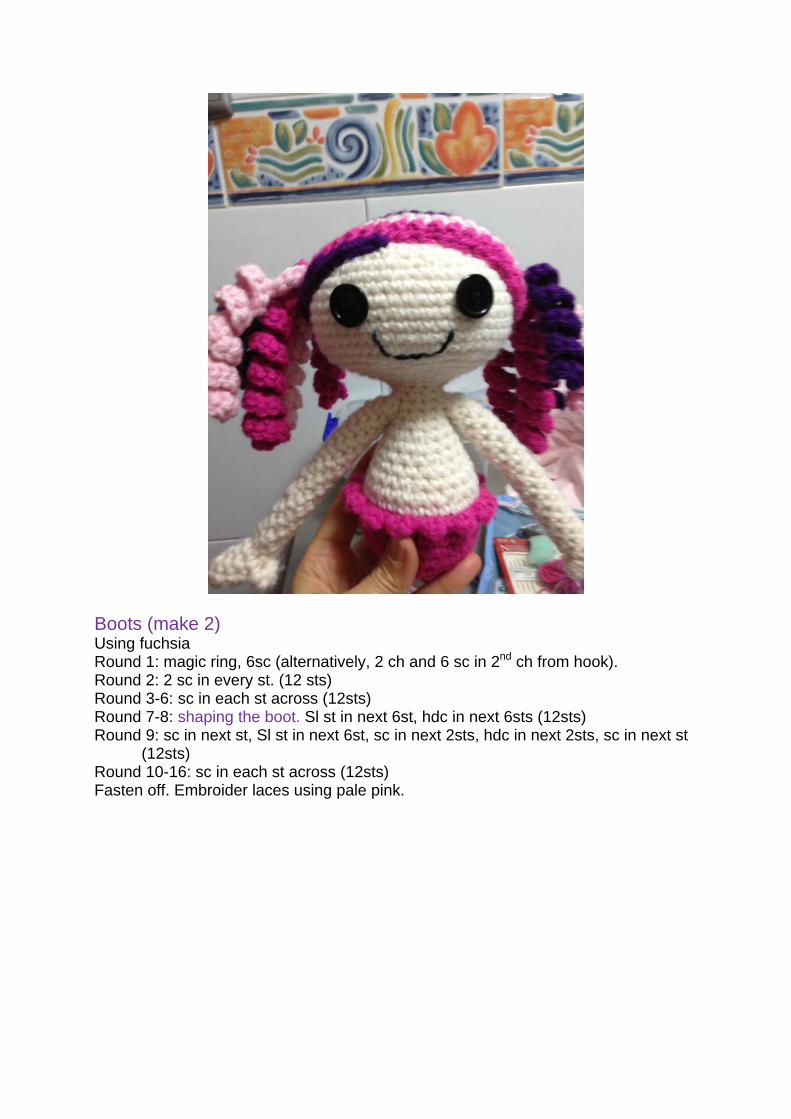
Boots (make 2) Using fuchsia Round 1: magic ring, 6sc (alternatively, 2 ch and 6 sc in 2nd ch from hook). Round 2: 2 sc in every st. (12 sts) Round 3-6: sc in each st across (12sts) Round 7-8: shaping the boot. Sl st in next 6st, hdc in next 6sts (12sts) Round 9: sc in next st, Sl st in next 6st, sc in next 2sts, hdc in next 2sts, sc in next st
(12sts) Round 10-16: sc in each st across (12sts) Fasten off. Embroider laces using pale pink.
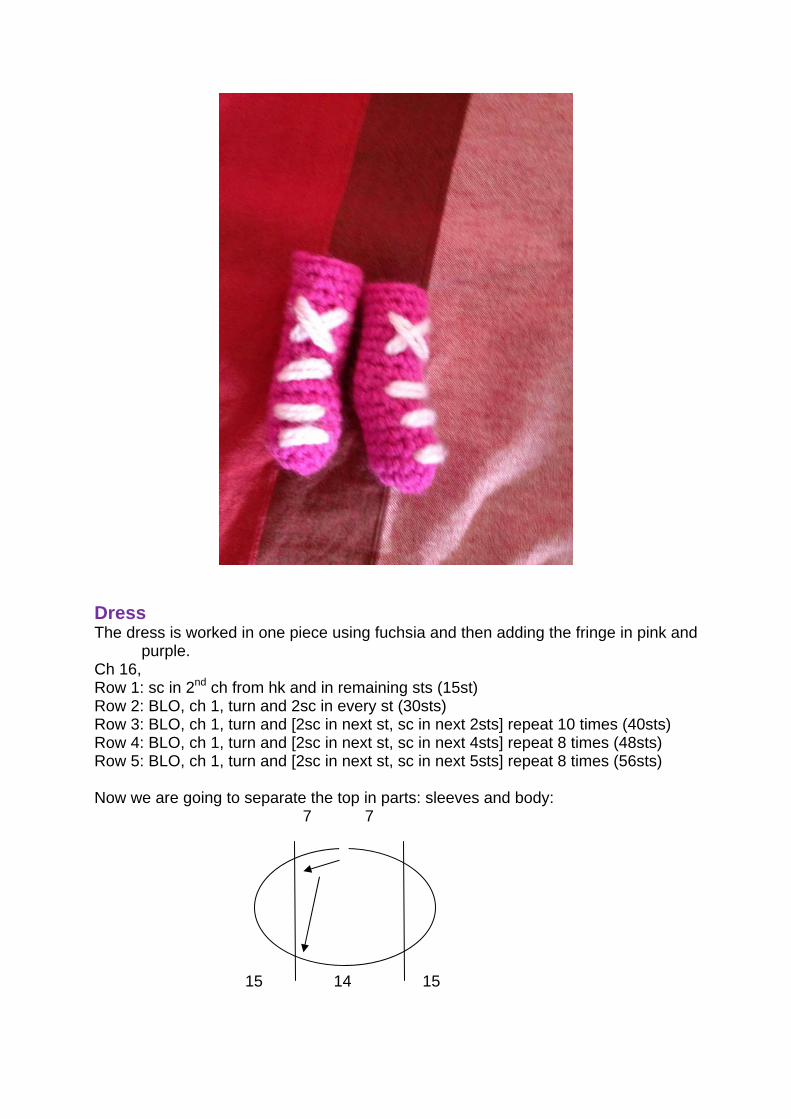
Dress The dress is worked in one piece using fuchsia and then adding the fringe in pink and
purple. Ch 16, Row 1: sc in 2nd ch from hk and in remaining sts (15st) Row 2: BLO, ch 1, turn and 2sc in every st (30sts) Row 3: BLO, ch 1, turn and [2sc in next st, sc in next 2sts] repeat 10 times (40sts) Row 4: BLO, ch 1, turn and [2sc in next st, sc in next 4sts] repeat 8 times (48sts) Row 5: BLO, ch 1, turn and [2sc in next st, sc in next 5sts] repeat 8 times (56sts) Now we are going to separate the top in parts: sleeves and body: 7 7 15 14 15
From this point onwards we are working in rounds in BLO: only the body of the dress is worked.
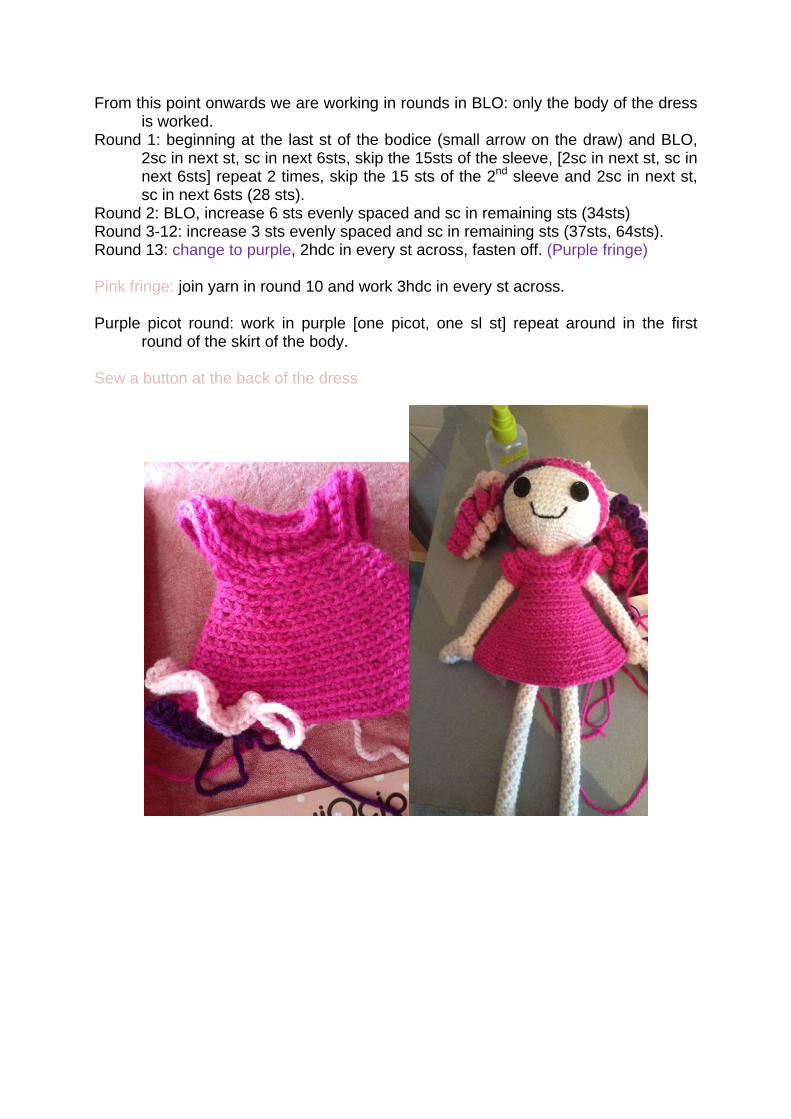
Round 1: beginning at the last st of the bodice (small arrow on the draw) and BLO, 2sc in next st, sc in next 6sts, skip the 15sts of the sleeve, [2sc in next st, sc in next 6sts] repeat 2 times, skip the 15 sts of the 2nd sleeve and 2sc in next st, sc in next 6sts (28 sts).
Round 2: BLO, increase 6 sts evenly spaced and sc in remaining sts (34sts) Round 3-12: increase 3 sts evenly spaced and sc in remaining sts (37sts, 64sts). Round 13: change to purple, 2hdc in every st across, fasten off. (Purple fringe) Pink fringe: join yarn in round 10 and work 3hdc in every st across. Purple picot round: work in purple [one picot, one sl st] repeat around in the first
round of the skirt of the body. Sew a button at the back of the dress