kawasaki zx-6r 2005-2006 kawasaki zx-6rr 2005 … · parts list: qs4 control unit qs4 harness shift...
TRANSCRIPT

Parts List:QS4 Control Unit
QS4 HarnessShift Switch & Mounting Hardware
Cable TiesVelcro
USB CableSwingarm Stickers
Download Z-Fi Mapper Software at www.bazzaz.netSoftware instructions available at www.bazzaz.net
Kawasaki ZX-6R 2005-2006Kawasaki ZX-6RR 2005-2006
Contact Bazzaz tech support at 909-597-8300 for questions
QS4 USB (Stand-alone quickshift) Installation InstructionsPart #’s Q444S, Q444R
In order to fit the Bazzaz reverse quickshift on this application, aftermarket rearsets must be used
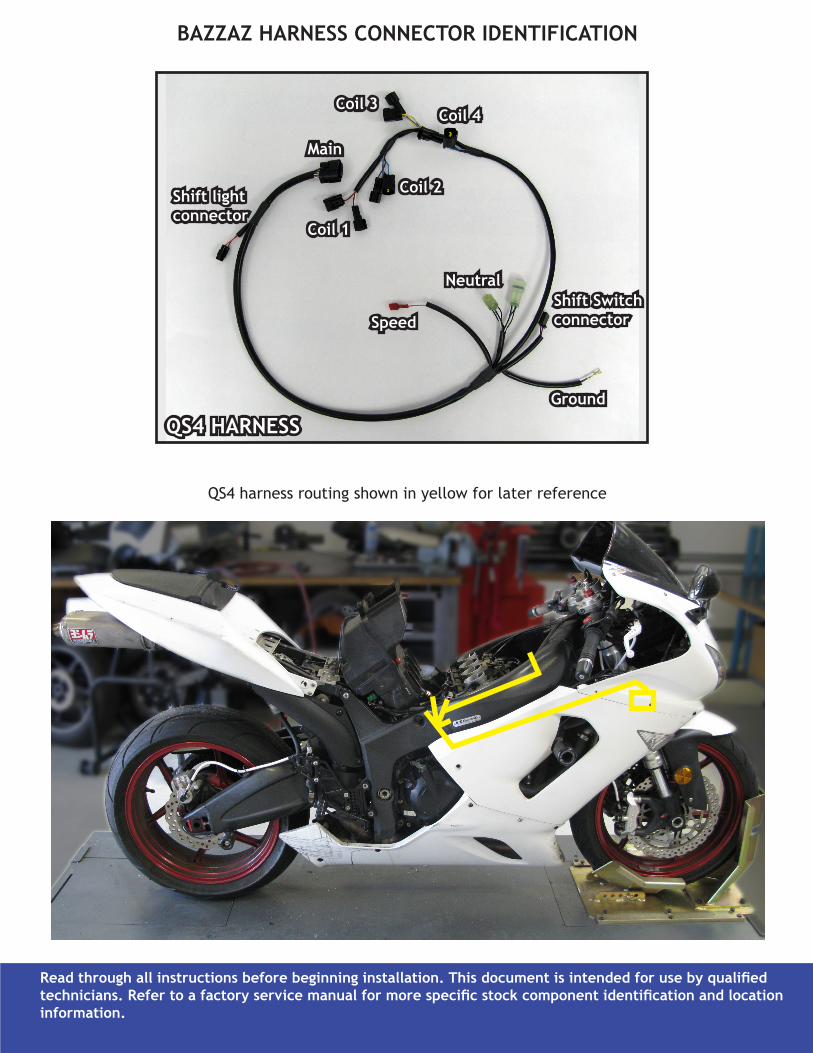
BAZZAZ HARNESS CONNECTOR IDENTIFICATION
QS4 harness routing shown in yellow for later reference
Read through all instructions before beginning installation. This document is intended for use by qualified technicians. Refer to a factory service manual for more specific stock component identification and location information.
QS4 HARNESS
Main
Shift light connector
Coil 1
Coil 3Coil 4
Coil 2
Speed
NeutralShift Switch connector
Ground
WE STRONGLY SUGGEST THAT AN EXPERIENCED TECHNICIAN INSTALL THIS BAZZAZ PRODUCT
1. Begin the installation by removing the seat, fuel tank, airbox and right side vanity panel.
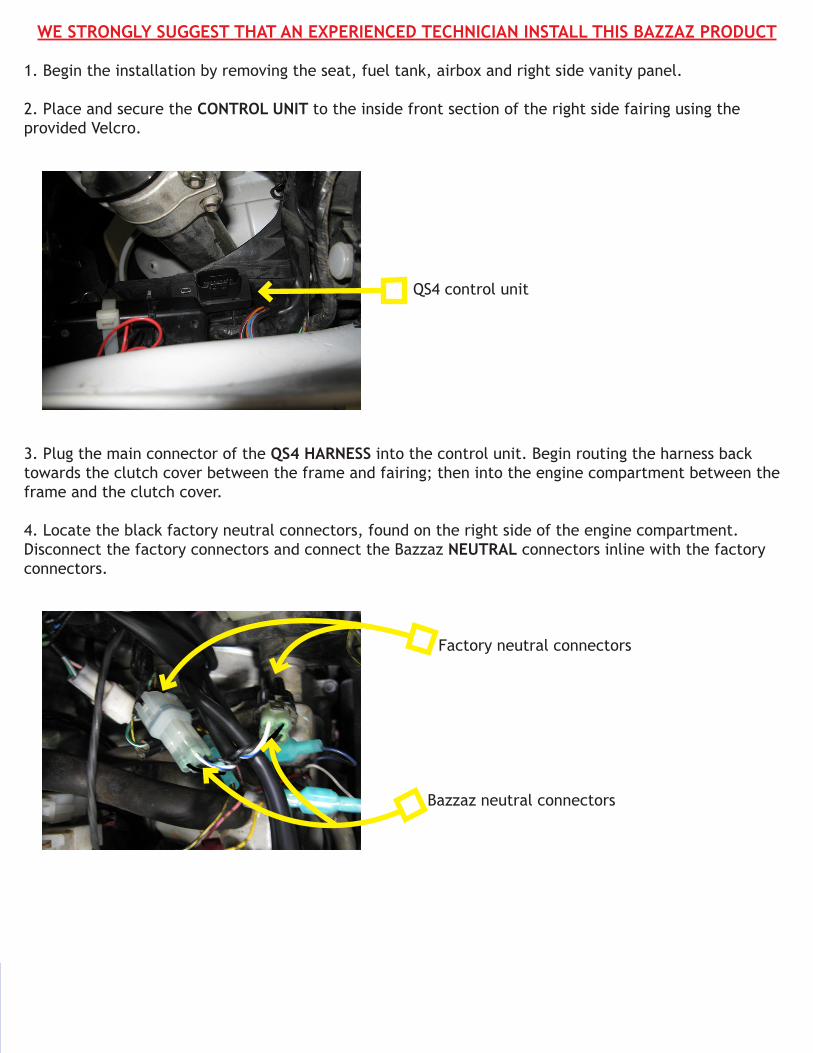
2. Place and secure the CONTROL UNIT to the inside front section of the right side fairing using the provided Velcro.
3. Plug the main connector of the QS4 HARNESS into the control unit. Begin routing the harness back towards the clutch cover between the frame and fairing; then into the engine compartment between the frame and the clutch cover.
4. Locate the black factory neutral connectors, found on the right side of the engine compartment. Disconnect the factory connectors and connect the Bazzaz NEUTRAL connectors inline with the factory connectors.
QS4 control unit
Bazzaz neutral connectors
Factory neutral connectors
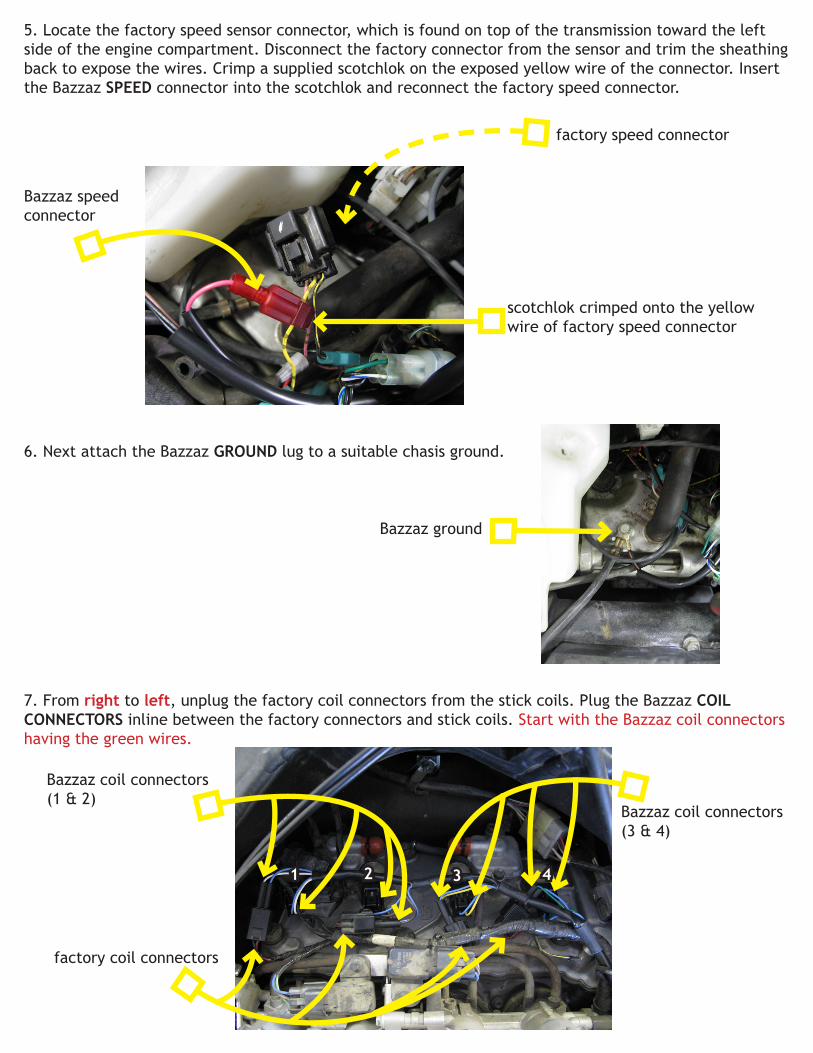
5. Locate the factory speed sensor connector, which is found on top of the transmission toward the left side of the engine compartment. Disconnect the factory connector from the sensor and trim the sheathing back to expose the wires. Crimp a supplied scotchlok on the exposed yellow wire of the connector. Insert the Bazzaz SPEED connector into the scotchlok and reconnect the factory speed connector.
6. Next attach the Bazzaz GROUND lug to a suitable chasis ground.
7. From right to left, unplug the factory coil connectors from the stick coils. Plug the Bazzaz COIL CONNECTORS inline between the factory connectors and stick coils. Start with the Bazzaz coil connectors having the green wires.
scotchlok crimped onto the yellow wire of factory speed connector
Bazzaz ground
Bazzaz speedconnector
factory speed connector
1 2 3
Bazzaz coil connectors(1 & 2)
Bazzaz coil connectors (3 & 4)
factory coil connectors
4
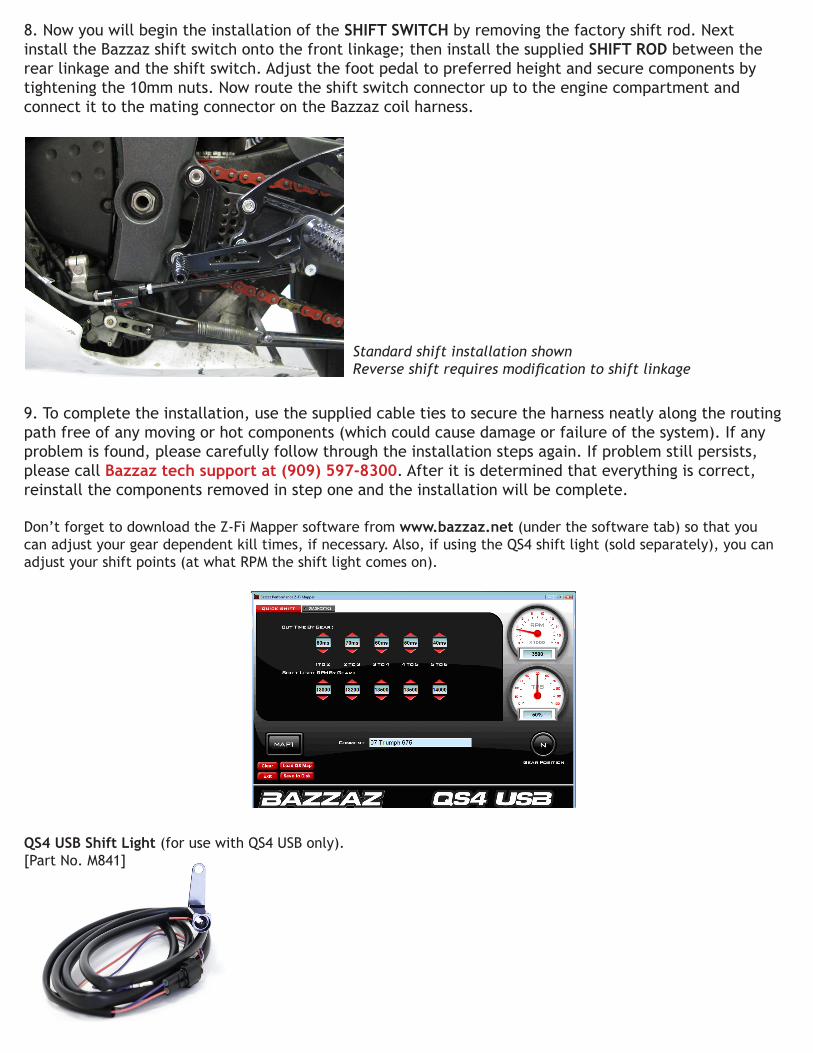
8. Now you will begin the installation of the SHIFT SWITCH by removing the factory shift rod. Next install the Bazzaz shift switch onto the front linkage; then install the supplied SHIFT ROD between the rear linkage and the shift switch. Adjust the foot pedal to preferred height and secure components by tightening the 10mm nuts. Now route the shift switch connector up to the engine compartment and connect it to the mating connector on the Bazzaz coil harness.
9. To complete the installation, use the supplied cable ties to secure the harness neatly along the routing path free of any moving or hot components (which could cause damage or failure of the system). If any problem is found, please carefully follow through the installation steps again. If problem still persists, please call Bazzaz tech support at (909) 597-8300. After it is determined that everything is correct, reinstall the components removed in step one and the installation will be complete.
Don’t forget to download the Z-Fi Mapper software from www.bazzaz.net (under the software tab) so that you can adjust your gear dependent kill times, if necessary. Also, if using the QS4 shift light (sold separately), you can adjust your shift points (at what RPM the shift light comes on).
QS4 USB Shift Light (for use with QS4 USB only).[Part No. M841]
Standard shift installation shownReverse shift requires modification to shift linkage