jquery fundamentals - australia china business...
TRANSCRIPT
jQuery FundamentalsBy Rebecca Murphey
http://github.com/rmurphey/jqfundamentals
With contributions by James Padolsey, Paul Irish, and others. See the GitHub repository for a complete history of contributions.Copyright © 2011
Licensed by Rebecca Murphey under the Creative Commons Attribution-Share Alike 3.0 United States license. You are free to copy, distribute, transmit, and remix this work, provided you attribute the work to Rebecca Murphey as the original author and reference the GitHub repository for the work. If you alter, transform, or build upon this work, you may distribute the resulting work only under the same, similar or a compatible license. Any of the above conditions can be waived if you get permission from the copyright holder. For any reuse or distribution, you must make clear to others the license terms of this work. The best way to do this is with a link to the license.
Reporting IssuesYour feedback is essential to improving jQuery Fundamentals; if you see an error or an opportunity for improvement, please open an issue.
Suggesting Changes to ContentIf you’d like to suggest a change to the book, the strong preference is that you submit a pull request rather than describing your proposed change in an issue. Once a pull request is submitted, it will be reviewed for inclusion.
Suggesting Additions to ContentIf you’ve come across a blog post or other resource that would be great for inclusion in jQuery Fundamentals, please open an issue with a link to the resource, and indicate in the issue whether you’ve already discussed inclusion of the resource with the author.
Contributing ContentContributions to jQuery Fundamentals are always welcome. The best way to submit your content for consideration is to submit a pull request to the jQuery learning repo.
Contents• Chapter 1: Welcome • Chapter 2: JavaScript Basics • Chapter 3: jQuery Basics • Chapter 4: jQuery Core
• Chapter 5: Events • Chapter 6: Effects • Chapter 7: Ajax • Chapter 8: Plugins • Chapter 9: Performance Best Practices • Chapter 10: Code Organization • Chapter 11: Custom Events
List of Examples• Example 1.1: An example of inline JavaScript • Example 1.2: An example of including external JavaScript • Example 1.3: Example of an example • Example 2.1: A simple variable declaration • Example 2.2: Whitespace has no meaning outside of quotation marks • Example 2.3: Parentheses indicate precedence • Example 2.4: Tabs enhance readability, but have no special meaning • Example 2.5: Concatenation • Example 2.6: Multiplication and division • Example 2.7: Incrementing and decrementing • Example 2.8: Addition vs. concatenation • Example 2.9: Forcing a string to act as a number • Example 2.10: Forcing a string to act as a number (using the unary-plus operator) • Example 2.11: Logical AND and OR operators • Example 2.12: Comparison operators • Example 2.13: Flow control • Example 2.14: Values that evaluate to true • Example 2.15: Values that evaluate to false • Example 2.16: The ternary operator • Example 2.17: A switch statement • Example 2.18: Loops • Example 2.19: A typical for loop • Example 2.20: A typical while loop • Example 2.21: A while loop with a combined conditional and incrementer • Example 2.22: A do-while loop • Example 2.23: Stopping a loop • Example 2.24: Skipping to the next iteration of a loop • Example 2.25: A simple array • Example 2.26: Accessing array items by index • Example 2.27: Testing the size of an array • Example 2.28: Changing the value of an array item • Example 2.29: Adding elements to an array • Example 2.30: Working with arrays • Example 2.31: Creating an "object literal" • Example 2.32: Function Declaration • Example 2.33: Named Function Expression • Example 2.34: A simple function • Example 2.35: A function that returns a value
• Example 2.36: A function that returns another function • Example 2.37: A self-executing anonymous function • Example 2.38: Passing an anonymous function as an argument • Example 2.39: Passing a named function as an argument • Example 2.40: Testing the type of various variables • Example 2.41: A function invoked using Function.call • Example 2.42: A function created using Function.bind • Example 2.43: A function being attached to an object at runtime • Example 2.44: Functions have access to variables defined in the same scope • Example 2.45: Code outside the scope in which a variable was defined does not have
access to the variable• Example 2.46: Variables with the same name can exist in different scopes with
different values• Example 2.47: Functions can "see" changes in variable values after the function is
defined• Example 2.48: Scope insanity • Example 2.49: How to lock in the value of i? • Example 2.50: Locking in the value of i with a closure • Example 2.51: Using a closure to access inner and outer object instances
simultaneously• Example 3.1: A $(document).ready() block • Example 3.2: Shorthand for $(document).ready() • Example 3.3: Passing a named function instead of an anonymous function • Example 3.4: Selecting elements by ID • Example 3.5: Selecting elements by class name • Example 3.6: Selecting elements by attribute • Example 3.7: Selecting elements by compound CSS selector • Example 3.8: Pseudo-selectors • Example 3.9: Testing whether a selection contains elements • Example 3.10: Storing selections in a variable • Example 3.11: Refining selections • Example 3.12: Using form-related pseduo-selectors • Example 3.13: Chaining • Example 3.14: Formatting chained code • Example 3.15: Restoring your original selection using $.fn.end • Example 3.16: The $.fn.html method used as a setter • Example 3.17: The html method used as a getter • Example 3.18: Getting CSS properties • Example 3.19: Setting CSS properties • Example 3.20: Working with classes • Example 3.21: Basic dimensions methods • Example 3.22: Setting attributes • Example 3.23: Getting attributes • Example 3.24: Moving around the DOM using traversal methods • Example 3.25: Iterating over a selection • Example 3.26: Changing the HTML of an element • Example 3.27: Moving elements using different approaches • Example 3.28: Making a copy of an element
• Example 3.29: Creating new elements • Example 3.30: Creating a new element with an attribute object • Example 3.31: Getting a new element on to the page • Example 3.32: Creating and adding an element to the page at the same time • Example 3.33: Manipulating a single attribute • Example 3.34: Manipulating multiple attributes • Example 3.35: Using a function to determine an attribute's new value • Example 4.1: Checking the type of an arbitrary value • Example 4.2: Storing and retrieving data related to an element • Example 4.3: Storing a relationship between elements using $.fn.data • Example 4.4: Putting jQuery into no-conflict mode • Example 4.5: Using the $ inside a self-executing anonymous function • Example 5.1: Event binding using a convenience method • Example 5.2: Event biding using the $.fn.bind method • Example 5.3: Event binding using the $.fn.bind method with data • Example 5.4: Switching handlers using the $.fn.one method • Example 5.5: Unbinding all click handlers on a selection • Example 5.6: Unbinding a particular click handler • Example 5.7: Namespacing events • Example 5.8: Binding Multiple Events • Example 6.1: A basic use of a built-in effect • Example 6.2: Setting the duration of an effect • Example 6.3: Augmenting jQuery.fx.speeds with custom speed definitions • Example 6.4: Running code when an animation is complete • Example 6.5: Run a callback even if there were no elements to animate • Example 6.6: Custom effects with $.fn.animate • Example 6.7: Per-property easing • Example 7.1: Using the core $.ajax method • Example 7.2: Using jQuery's Ajax convenience methods • Example 7.3: Using $.fn.load to populate an element • Example 7.4: Using $.fn.load to populate an element based on a selector • Example 7.5: Turning form data into a query string • Example 7.6: Creating an array of objects containing form data • Example 7.7: Using YQL and JSONP • Example 7.8: Setting up a loading indicator using Ajax Events • Example 8.1: Creating a plugin to add and remove a class on hover • Example 8.2: The Mike Alsup jQuery Plugin Development Pattern • Example 8.3: A simple, stateful plugin using the jQuery UI widget factory • Example 8.4: Passing options to a widget • Example 8.5: Setting default options for a widget • Example 8.6: Creating widget methods • Example 8.7: Calling methods on a plugin instance • Example 8.8: Responding when an option is set • Example 8.9: Providing callbacks for user extension • Example 8.10: Binding to widget events • Example 8.11: Adding a destroy method to a widget • Example 10.1: An object literal • Example 10.2: Using an object literal for a jQuery feature
• Example 10.3: The module pattern • Example 10.4: Using the module pattern for a jQuery feature • Example 10.5: Using RequireJS: A simple example • Example 10.6: A simple JavaScript file with dependencies • Example 10.7: Defining a RequireJS module that has no dependencies • Example 10.8: Defining a RequireJS module with dependencies • Example 10.9: Defining a RequireJS module that returns a function
Back to top
WelcomejQuery is fast becoming a must-have skill for front-end developers. The purpose of this book is to provide an overview of the jQuery JavaScript library; when you're done with the book, you should be able to complete basic tasks using jQuery, and have a solid basis from which to continue your learning. This book was designed as material to be used in a classroom setting, but you may find it useful for individual study.
This is a hands-on class. We will spend a bit of time covering a concept, and then you’ll have the chance to work on an exercise related to the concept. Some of the exercises may seem trivial; others may be downright daunting. In either case, there is no grade; the goal is simply to get you comfortable working your way through problems you’ll commonly be called upon to solve using jQuery. Example solutions to all of the exercises are included in the sample code.
Getting the CodeThe code we’ll be using in this book is hosted in a repository on Github. You can download a .zip or .tar file of the code, then uncompress it to use it on your server. If you’re git-inclined, you’re welcome to clone or fork the repository.
SoftwareYou'll want to have the following tools to make the most of the class:
• The Firefox browser
• The Firebug extension for Firefox
• A plain text editor
• For the Ajax portions: A local server (such as MAMP or WAMP), or an FTP or SSH client to access a remote server.
Adding JavaScript to Your PageJavaScript can be included inline or by including an external file via a script tag. The order in which you include JavaScript is important: dependencies must be included before the script that depends on them.
For the sake of page performance, JavaScript should be included as close to the end of your HTML as is practical. Multiple JavaScript files should be combined for production use.
Example 1.1: An example of inline JavaScript
1 <script>2 console.log('hello');
3 </script>
Example 1.2: An example of including external JavaScript
1 <script src='/js/jquery.js'></script>
JavaScript DebuggingA debugging tool is essential for JavaScript development. Firefox provides a debugger via the Firebug extension; Safari and Chrome provide built-in consoles.
Each console offers:
• single- and multi-line editors for experimenting with JavaScript
• an inspector for looking at the generated source of your page
• a Network or Resources view, to examine network requests
When you are writing JavaScript code, you can use the following methods to send messages to the console:
• console.log() for sending general log messages• console.dir() for logging a browseable object• console.warn() for logging warnings• console.error() for logging error messages
Other console methods are also available, though they may differ from one browser to another. The consoles also provide the ability to set break points and watch expressions in your code for debugging purposes.
ExercisesMost chapters in the book conclude with one or more exercises. For some exercises, you’ll be able to work directly in Firebug; for others, you will need to include other scripts after the jQuery script tag as directed in the individual exercises.
In some cases, you will need to consult the jQuery documentation in order to complete an exercise, as we won’t have covered all of the relevant information in the book. This is by design; the jQuery library is large, and learning to find answers in the documentation is an important part of the process.
Here are a few suggestions for tackling these problems:
• First, make sure you thoroughly understand the problem you're being asked to solve.
• Next, figure out which elements you'll need to access in order to solve the problem, and determine how you'll get those elements. Use Firebug to verify that you're getting the elements you're after.
• Finally, figure out what you need to do with the elements to solve the problem. It can be helpful to write comments explaining what you're going to do before you try to write the code to do it.
Do not be afraid to make mistakes! Do not try to make your code perfect on the first try! Making mistakes and experimenting with solutions is part of learning the library, and you’ll be a better developer for it. Examples of solutions for these exercises are located in the /solutions directory in the sample code.
Conventions used in this bookMethods that can be called on jQuery objects will be referred to as $.fn.methodName. Methods that exist in the jQuery namespace but that cannot be called on jQuery objects will be referred to as $.methodName. If this doesn't mean much to you, don't worry — it should become clearer as you progress through the book.
Example 1.3: Example of an example
1 // code examples will appear like this
Remarks will appear like this.
NoteNotes about a topic will appear like this.
Reference MaterialThere are any number of articles and blog posts out there that address some aspect of jQuery. Some are phenomenal; some are downright wrong. When you read an article about jQuery, be sure it's talking about the same version as you're using, and resist the urge to just copy and paste — take the time to understand the code in the article.
Here are some excellent resources to use during your jQuery learning. The most important of all is the jQuery source itself: it contains, in code form, complete documentation of the library. It is not a black box — your understanding of the library will grow exponentially if you spend some time visiting it now and again — and I highly recommend bookmarking it in your browser and referring to it often.
• The jQuery source
• jQuery documentation
• jQuery forum
• Delicious bookmarks
• #jquery IRC channel on Freenode
Part I. JavaScript 101Back to top
JavaScript Basics
OverviewjQuery is built on top of JavaScript, a rich and expressive language in its own right. This section covers the basic concepts of JavaScript, as well as some frequent pitfalls for people who have not used JavaScript before. While it will be of particular value to people with no programming experience, even people who have used other programming languages may benefit from learning about some of the peculiarities of JavaScript.
If you’re interested in learning more about the JavaScript language, I highly recommend JavaScript: The Good Parts by Douglas Crockford.
Syntax BasicsUnderstanding statements, variable naming, whitespace, and other basic JavaScript syntax.
Example 2.1: A simple variable declaration
1 var foo = 'hello world';
Example 2.2: Whitespace has no meaning outside of quotation marks
1 var foo = 'hello world';
Example 2.3: Parentheses indicate precedence
1 2 * 3 + 5; // returns 11; multiplication happens first
2 2 * (3 + 5); // returns 16; addition happens first
Example 2.4: Tabs enhance readability, but have no special meaning
1 var foo = function() {2 console.log('hello');3 };
Operators
Basic OperatorsBasic operators allow you to manipulate values.
Example 2.5: Concatenation
1 var foo = 'hello';2 var bar = 'world';3
4 console.log(foo + ' ' + bar); // 'hello world'
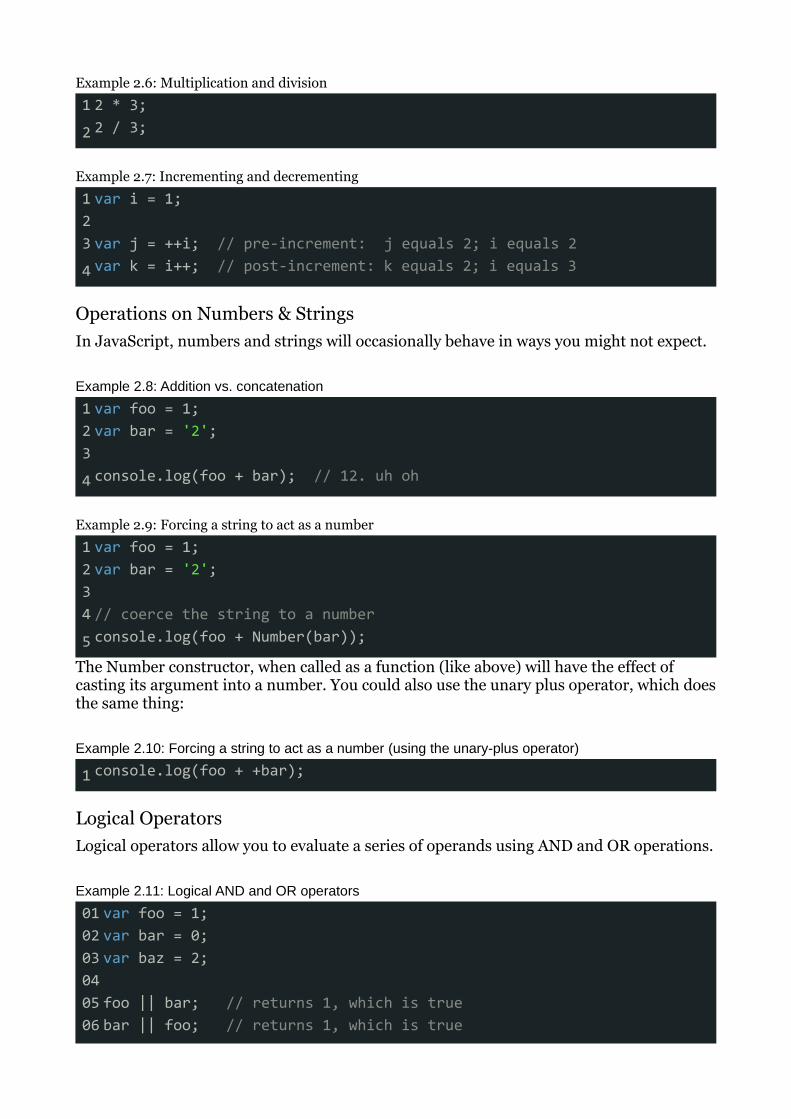
Example 2.6: Multiplication and division
1 2 * 3;
2 2 / 3;
Example 2.7: Incrementing and decrementing
1 var i = 1;2 3 var j = ++i; // pre-increment: j equals 2; i equals 2
4 var k = i++; // post-increment: k equals 2; i equals 3
Operations on Numbers & StringsIn JavaScript, numbers and strings will occasionally behave in ways you might not expect.
Example 2.8: Addition vs. concatenation
1 var foo = 1;2 var bar = '2';3
4 console.log(foo + bar); // 12. uh oh
Example 2.9: Forcing a string to act as a number
1 var foo = 1;2 var bar = '2';3 4 // coerce the string to a number
5 console.log(foo + Number(bar));
The Number constructor, when called as a function (like above) will have the effect of casting its argument into a number. You could also use the unary plus operator, which does the same thing:
Example 2.10: Forcing a string to act as a number (using the unary-plus operator)
1 console.log(foo + +bar);
Logical OperatorsLogical operators allow you to evaluate a series of operands using AND and OR operations.
Example 2.11: Logical AND and OR operators
01 var foo = 1;02 var bar = 0;03 var baz = 2;04 05 foo || bar; // returns 1, which is true06 bar || foo; // returns 1, which is true
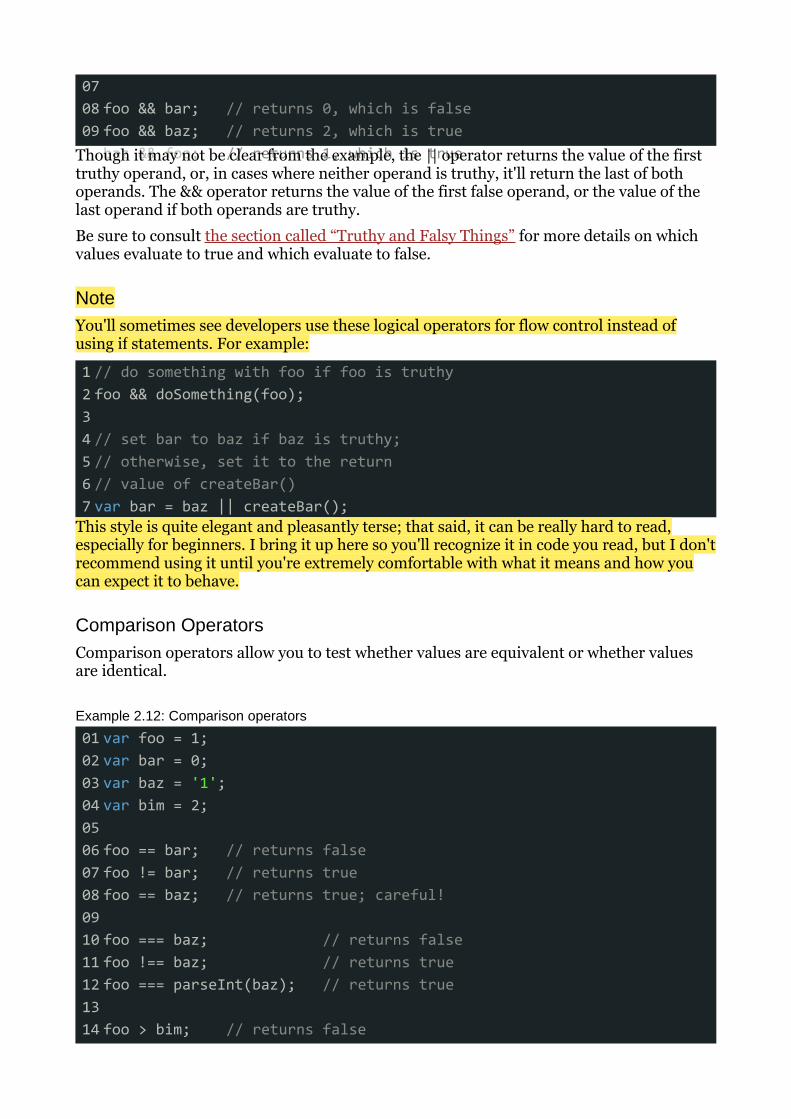
07 08 foo && bar; // returns 0, which is false09 foo && baz; // returns 2, which is true
baz && foo; // returns 1, which is trueThough it may not be clear from the example, the || operator returns the value of the first truthy operand, or, in cases where neither operand is truthy, it'll return the last of both operands. The && operator returns the value of the first false operand, or the value of the last operand if both operands are truthy.
Be sure to consult the section called “Truthy and Falsy Things” for more details on which values evaluate to true and which evaluate to false.
NoteYou'll sometimes see developers use these logical operators for flow control instead of using if statements. For example:
1 // do something with foo if foo is truthy2 foo && doSomething(foo);3 4 // set bar to baz if baz is truthy;5 // otherwise, set it to the return6 // value of createBar()7 var bar = baz || createBar();
This style is quite elegant and pleasantly terse; that said, it can be really hard to read, especially for beginners. I bring it up here so you'll recognize it in code you read, but I don't recommend using it until you're extremely comfortable with what it means and how you can expect it to behave.
Comparison OperatorsComparison operators allow you to test whether values are equivalent or whether values are identical.
Example 2.12: Comparison operators
01 var foo = 1;02 var bar = 0;03 var baz = '1';04 var bim = 2;05 06 foo == bar; // returns false07 foo != bar; // returns true08 foo == baz; // returns true; careful!09 10 foo === baz; // returns false11 foo !== baz; // returns true12 foo === parseInt(baz); // returns true13 14 foo > bim; // returns false
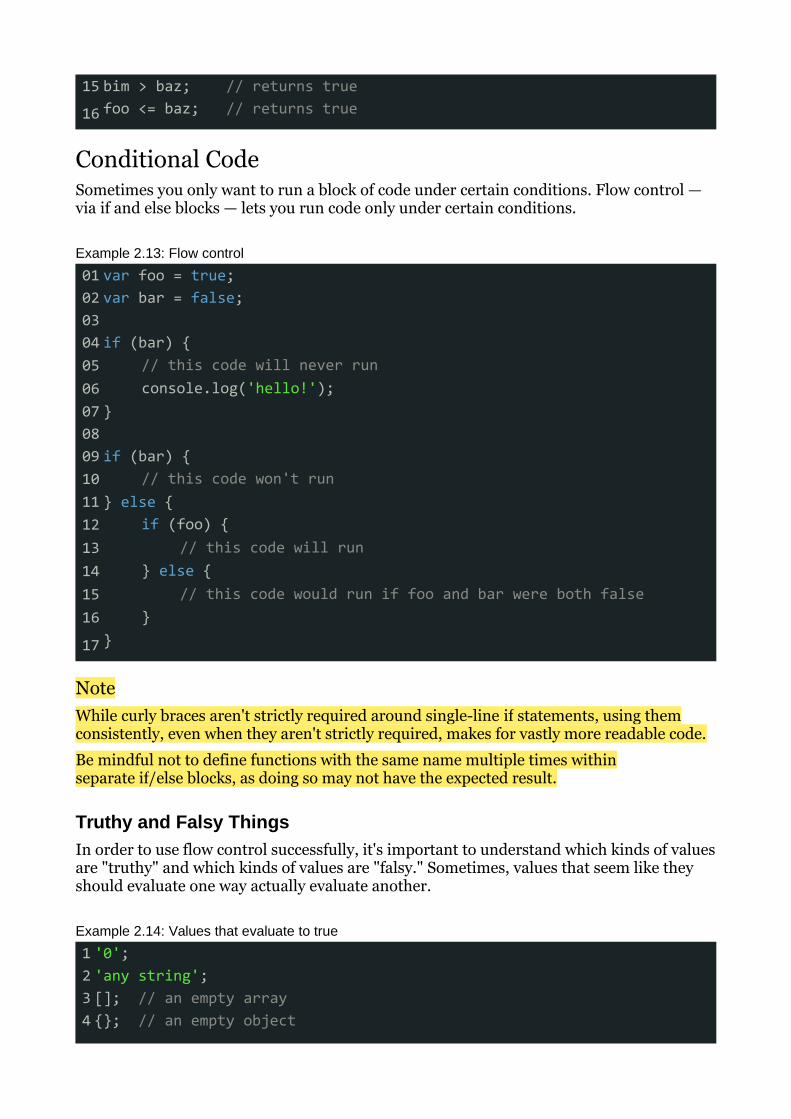
15 bim > baz; // returns true
16 foo <= baz; // returns true
Conditional CodeSometimes you only want to run a block of code under certain conditions. Flow control — via if and else blocks — lets you run code only under certain conditions.
Example 2.13: Flow control
01 var foo = true;02 var bar = false;03 04 if (bar) {05 // this code will never run06 console.log('hello!');07 }08 09 if (bar) {10 // this code won't run11 } else {12 if (foo) {13 // this code will run14 } else {15 // this code would run if foo and bar were both false16 }17 }
NoteWhile curly braces aren't strictly required around single-line if statements, using them consistently, even when they aren't strictly required, makes for vastly more readable code.
Be mindful not to define functions with the same name multiple times within separate if/else blocks, as doing so may not have the expected result.
Truthy and Falsy ThingsIn order to use flow control successfully, it's important to understand which kinds of values are "truthy" and which kinds of values are "falsy." Sometimes, values that seem like they should evaluate one way actually evaluate another.
Example 2.14: Values that evaluate to true
1 '0';2 'any string';3 []; // an empty array4 {}; // an empty object
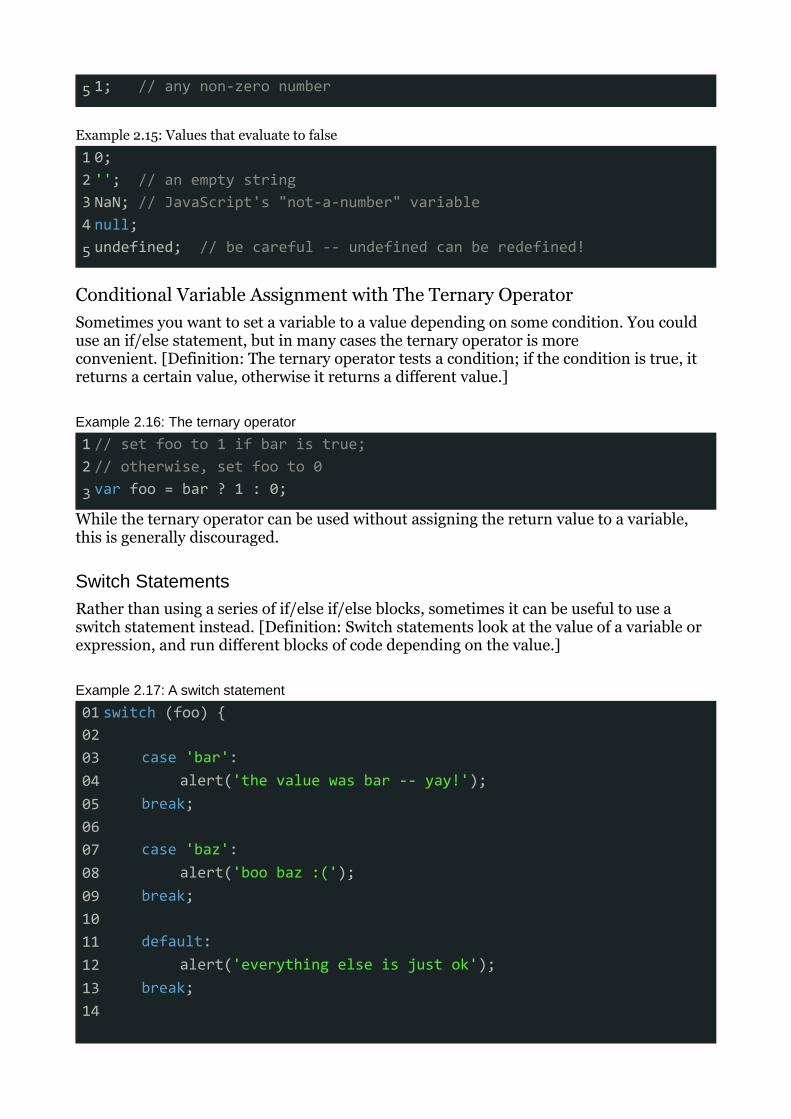
5 1; // any non-zero number
Example 2.15: Values that evaluate to false
1 0;2 ''; // an empty string3 NaN; // JavaScript's "not-a-number" variable4 null;
5 undefined; // be careful -- undefined can be redefined!
Conditional Variable Assignment with The Ternary OperatorSometimes you want to set a variable to a value depending on some condition. You could use an if/else statement, but in many cases the ternary operator is more convenient. [Definition: The ternary operator tests a condition; if the condition is true, it returns a certain value, otherwise it returns a different value.]
Example 2.16: The ternary operator
1 // set foo to 1 if bar is true;2 // otherwise, set foo to 0
3 var foo = bar ? 1 : 0;
While the ternary operator can be used without assigning the return value to a variable, this is generally discouraged.
Switch StatementsRather than using a series of if/else if/else blocks, sometimes it can be useful to use a switch statement instead. [Definition: Switch statements look at the value of a variable or expression, and run different blocks of code depending on the value.]
Example 2.17: A switch statement
01 switch (foo) {02 03 case 'bar':04 alert('the value was bar -- yay!');05 break;06 07 case 'baz':08 alert('boo baz :(');09 break;10 11 default:12 alert('everything else is just ok');13 break;14
15 }
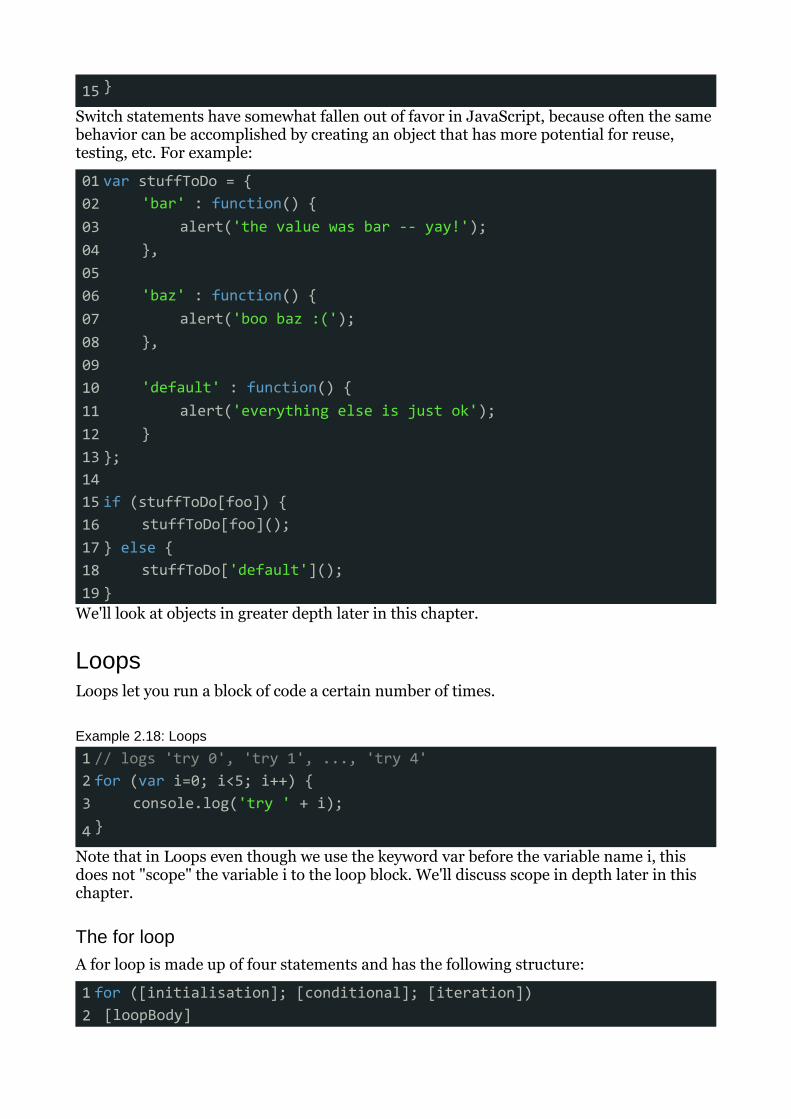
Switch statements have somewhat fallen out of favor in JavaScript, because often the same behavior can be accomplished by creating an object that has more potential for reuse, testing, etc. For example:
01 var stuffToDo = {02 'bar' : function() {03 alert('the value was bar -- yay!');04 },05 06 'baz' : function() {07 alert('boo baz :(');08 },09 10 'default' : function() {11 alert('everything else is just ok');12 }13 };14 15 if (stuffToDo[foo]) {16 stuffToDo[foo]();17 } else {18 stuffToDo['default']();19 }
We'll look at objects in greater depth later in this chapter.
LoopsLoops let you run a block of code a certain number of times.
Example 2.18: Loops
1 // logs 'try 0', 'try 1', ..., 'try 4'2 for (var i=0; i<5; i++) {3 console.log('try ' + i);4 }
Note that in Loops even though we use the keyword var before the variable name i, this does not "scope" the variable i to the loop block. We'll discuss scope in depth later in this chapter.
The for loopA for loop is made up of four statements and has the following structure:
1 for ([initialisation]; [conditional]; [iteration])2 [loopBody]
The initialisation statement is executed only once, before the loop starts. It gives you an opportunity to prepare or declare any variables.
The conditional statement is executed before each iteration, and its return value decides whether or not the loop is to continue. If the conditional statement evaluates to a falsey value then the loop stops.
The iteration statement is executed at the end of each iteration and gives you an opportunity to change the state of important variables. Typically, this will involve incrementing or decrementing a counter and thus bringing the loop ever closer to its end.
The loopBody statement is what runs on every iteration. It can contain anything you want. You'll typically have multiple statements that need to be executed and so will wrap them in a block ( {...}).
Here's a typical for loop:
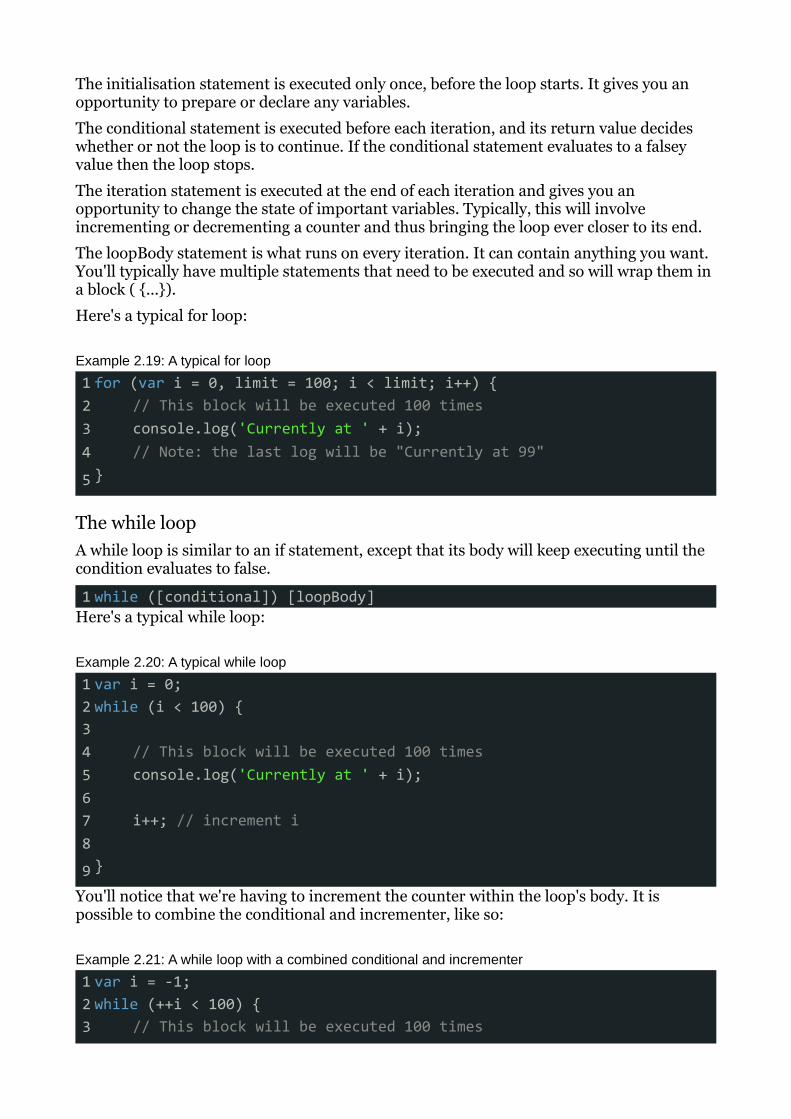
Example 2.19: A typical for loop
1 for (var i = 0, limit = 100; i < limit; i++) {2 // This block will be executed 100 times3 console.log('Currently at ' + i);4 // Note: the last log will be "Currently at 99"5 }
The while loopA while loop is similar to an if statement, except that its body will keep executing until the condition evaluates to false.
1 while ([conditional]) [loopBody]Here's a typical while loop:
Example 2.20: A typical while loop
1 var i = 0;2 while (i < 100) {3 4 // This block will be executed 100 times5 console.log('Currently at ' + i);6 7 i++; // increment i8
9 }
You'll notice that we're having to increment the counter within the loop's body. It is possible to combine the conditional and incrementer, like so:
Example 2.21: A while loop with a combined conditional and incrementer
1 var i = -1;2 while (++i < 100) {3 // This block will be executed 100 times
4 console.log('Currently at ' + i);5 }
Notice that we're starting at -1 and using the prefix incrementer (++i).
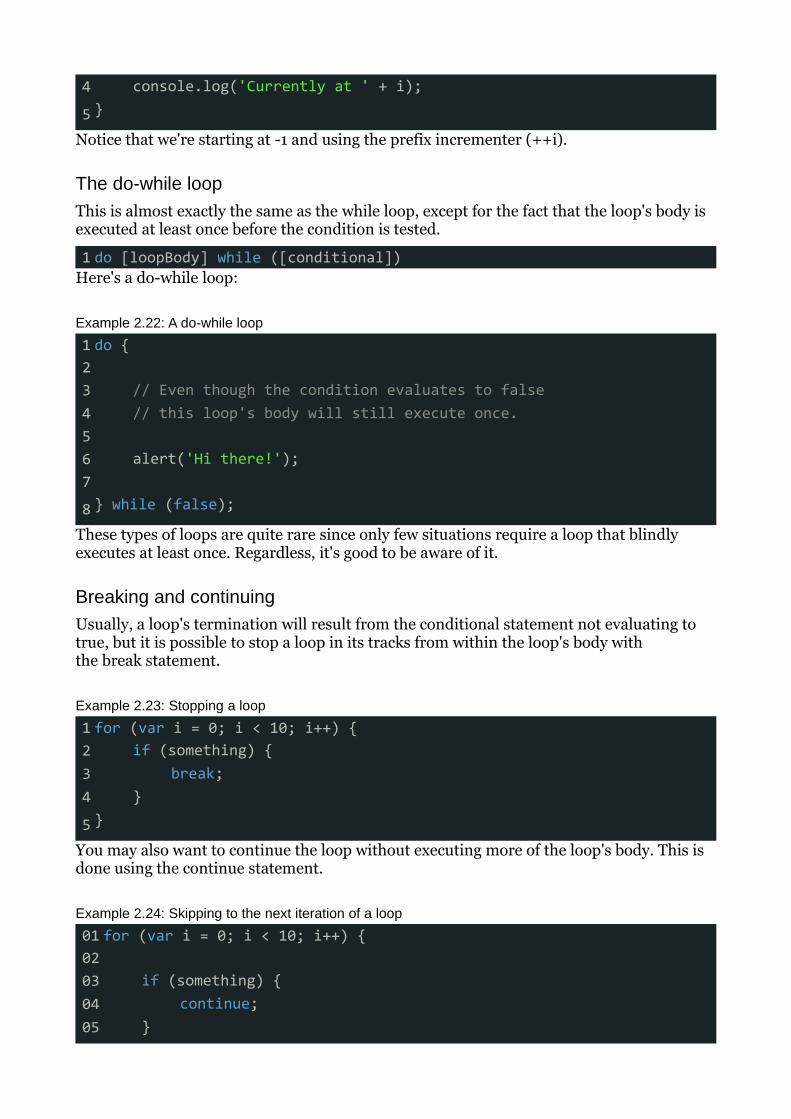
The do-while loopThis is almost exactly the same as the while loop, except for the fact that the loop's body is executed at least once before the condition is tested.
1 do [loopBody] while ([conditional])Here's a do-while loop:
Example 2.22: A do-while loop
1 do {2 3 // Even though the condition evaluates to false4 // this loop's body will still execute once.5 6 alert('Hi there!');7
8 } while (false);
These types of loops are quite rare since only few situations require a loop that blindly executes at least once. Regardless, it's good to be aware of it.
Breaking and continuingUsually, a loop's termination will result from the conditional statement not evaluating to true, but it is possible to stop a loop in its tracks from within the loop's body with the break statement.
Example 2.23: Stopping a loop
1 for (var i = 0; i < 10; i++) {2 if (something) {3 break;4 }5 }
You may also want to continue the loop without executing more of the loop's body. This is done using the continue statement.
Example 2.24: Skipping to the next iteration of a loop
01 for (var i = 0; i < 10; i++) {02 03 if (something) {04 continue;05 }
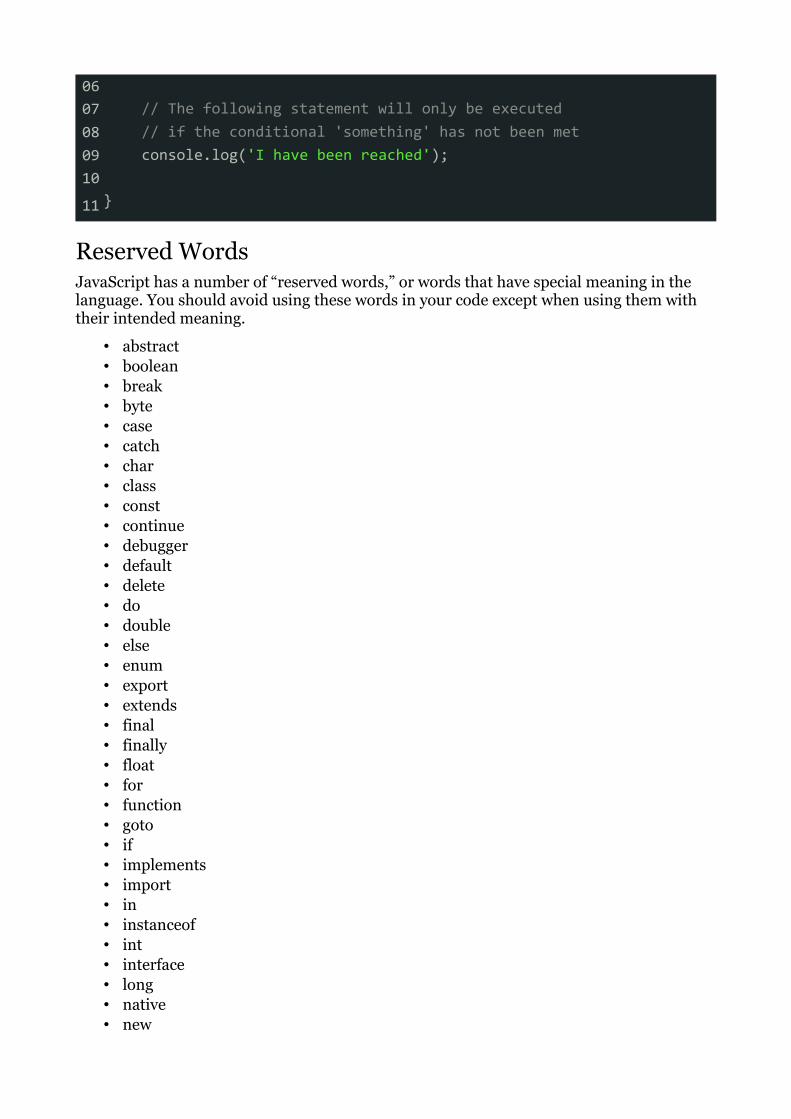
06 07 // The following statement will only be executed08 // if the conditional 'something' has not been met09 console.log('I have been reached');10
11 }
Reserved WordsJavaScript has a number of “reserved words,” or words that have special meaning in the language. You should avoid using these words in your code except when using them with their intended meaning.
• abstract• boolean• break• byte• case• catch• char• class• const• continue• debugger• default• delete• do• double• else• enum• export• extends• final• finally• float• for• function• goto• if• implements• import• in• instanceof• int• interface• long• native• new
• package• private• protected• public• return• short• static• super• switch• synchronized• this• throw• throws• transient• try• typeof• var• void• volatile• while• with
ArraysArrays are zero-indexed lists of values. They are a handy way to store a set of related items of the same type (such as strings), though in reality, an array can include multiple types of items, including other arrays.
Example 2.25: A simple array
1 var myArray = [ 'hello', 'world' ];
Example 2.26: Accessing array items by index
1 var myArray = [ 'hello', 'world', 'foo', 'bar' ];
2 console.log(myArray[3]); // logs 'bar'
Example 2.27: Testing the size of an array
1 var myArray = [ 'hello', 'world' ];
2 console.log(myArray.length); // logs 2
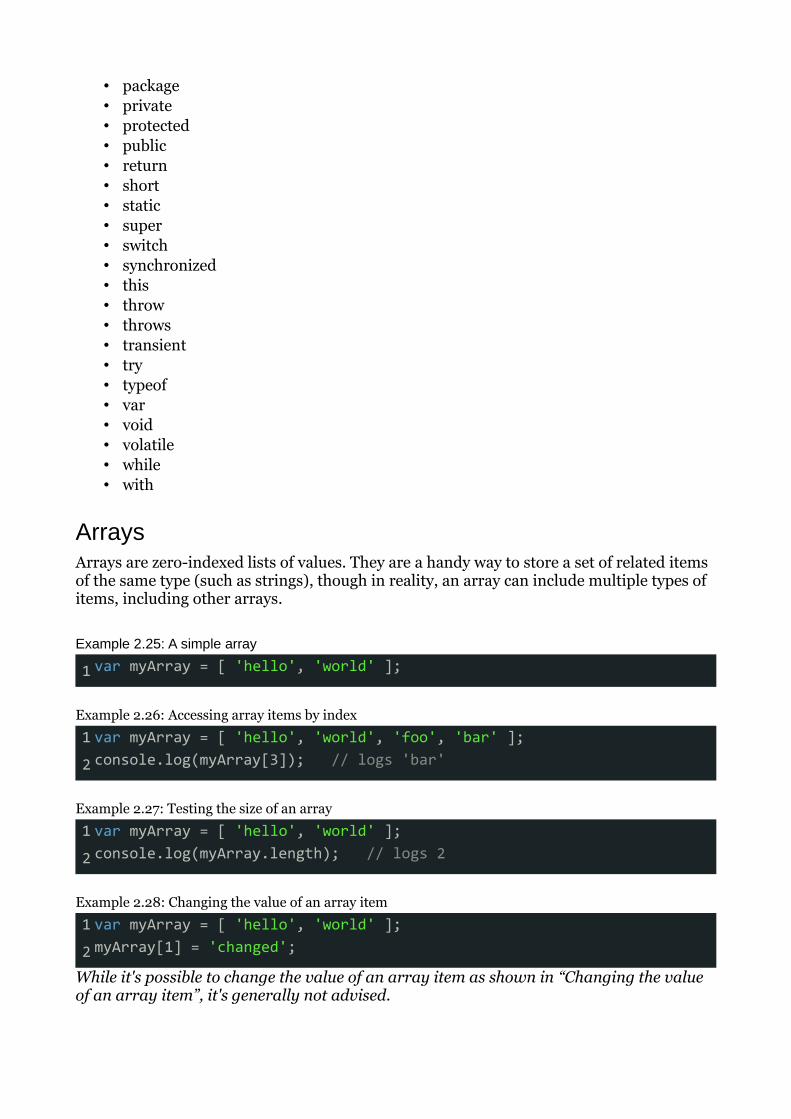
Example 2.28: Changing the value of an array item
1 var myArray = [ 'hello', 'world' ];
2 myArray[1] = 'changed';
While it's possible to change the value of an array item as shown in “Changing the value of an array item”, it's generally not advised.
Example 2.29: Adding elements to an array
1 var myArray = [ 'hello', 'world' ];
2 myArray.push('new');
Example 2.30: Working with arrays
1 var myArray = [ 'h', 'e', 'l', 'l', 'o' ];2 var myString = myArray.join(''); // 'hello'
3 var mySplit = myString.split(''); // [ 'h', 'e', 'l', 'l', 'o' ]
ObjectsObjects contain one or more key-value pairs. The key portion can be any string. The value portion can be any type of value: a number, a string, an array, a function, or even another object.
[Definition: When one of these values is a function, it’s called a method of the object.] Otherwise, they are called properties.
As it turns out, nearly everything in JavaScript is an object — arrays, functions, numbers, even strings — and they all have properties and methods.
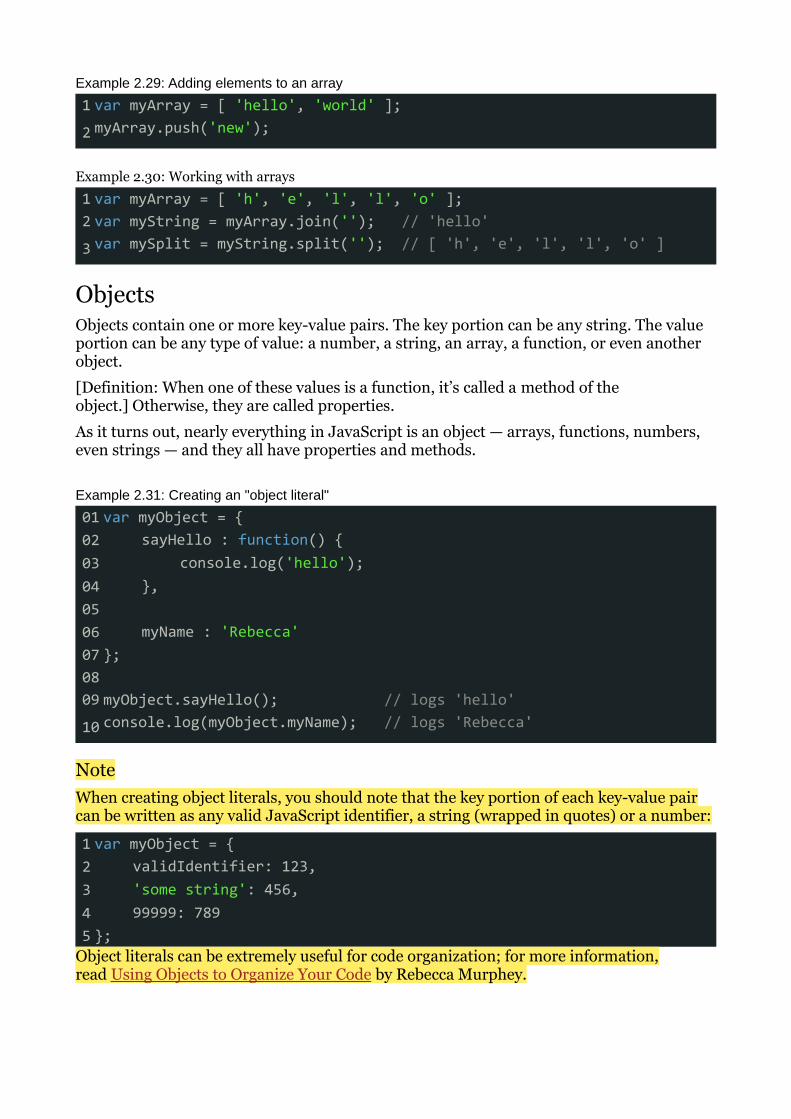
Example 2.31: Creating an "object literal"
01 var myObject = {02 sayHello : function() {03 console.log('hello');04 },05 06 myName : 'Rebecca'07 };08 09 myObject.sayHello(); // logs 'hello'
10 console.log(myObject.myName); // logs 'Rebecca'
NoteWhen creating object literals, you should note that the key portion of each key-value pair can be written as any valid JavaScript identifier, a string (wrapped in quotes) or a number:
1 var myObject = {2 validIdentifier: 123,3 'some string': 456,4 99999: 7895 };
Object literals can be extremely useful for code organization; for more information, read Using Objects to Organize Your Code by Rebecca Murphey.
FunctionsFunctions contain blocks of code that need to be executed repeatedly. Functions can take zero or more arguments, and can optionally return a value.
Functions can be created in a variety of ways:
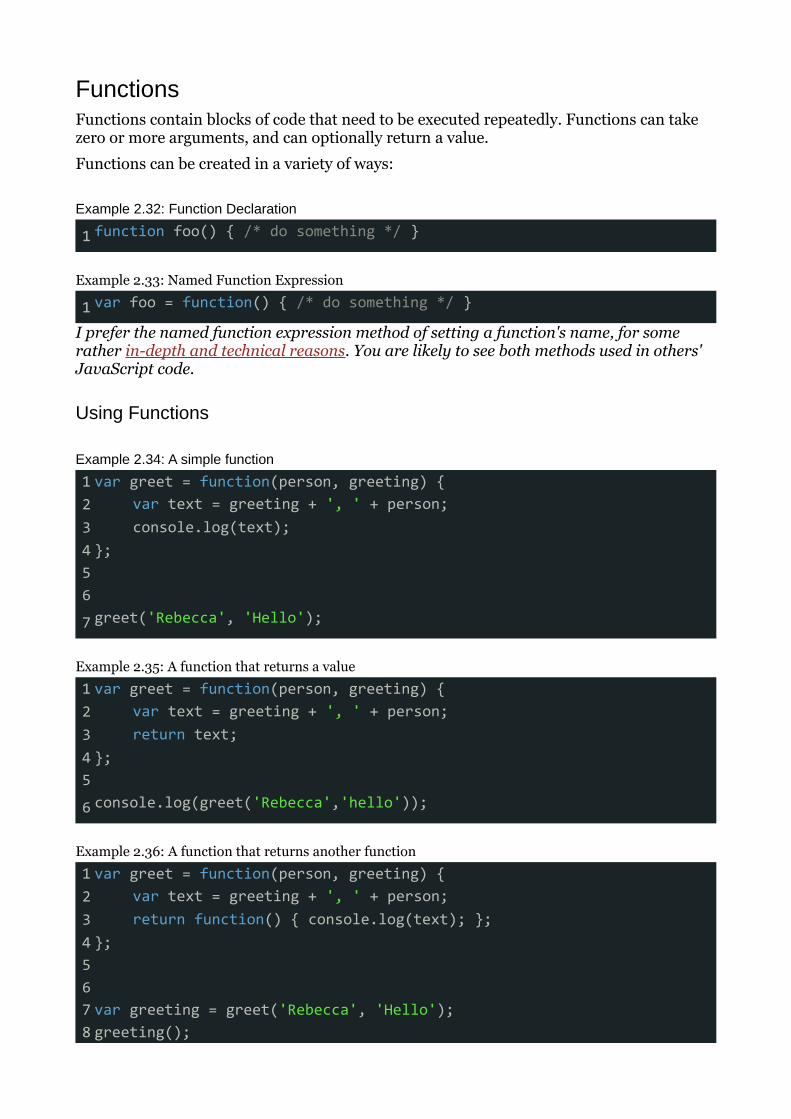
Example 2.32: Function Declaration
1 function foo() { /* do something */ }
Example 2.33: Named Function Expression
1 var foo = function() { /* do something */ }
I prefer the named function expression method of setting a function's name, for some rather in-depth and technical reasons. You are likely to see both methods used in others' JavaScript code.
Using Functions
Example 2.34: A simple function
1 var greet = function(person, greeting) {2 var text = greeting + ', ' + person;3 console.log(text);4 };5 6
7 greet('Rebecca', 'Hello');
Example 2.35: A function that returns a value
1 var greet = function(person, greeting) {2 var text = greeting + ', ' + person;3 return text;4 };5
6 console.log(greet('Rebecca','hello'));
Example 2.36: A function that returns another function
1 var greet = function(person, greeting) {2 var text = greeting + ', ' + person;3 return function() { console.log(text); };4 };5 6 7 var greeting = greet('Rebecca', 'Hello');8 greeting();
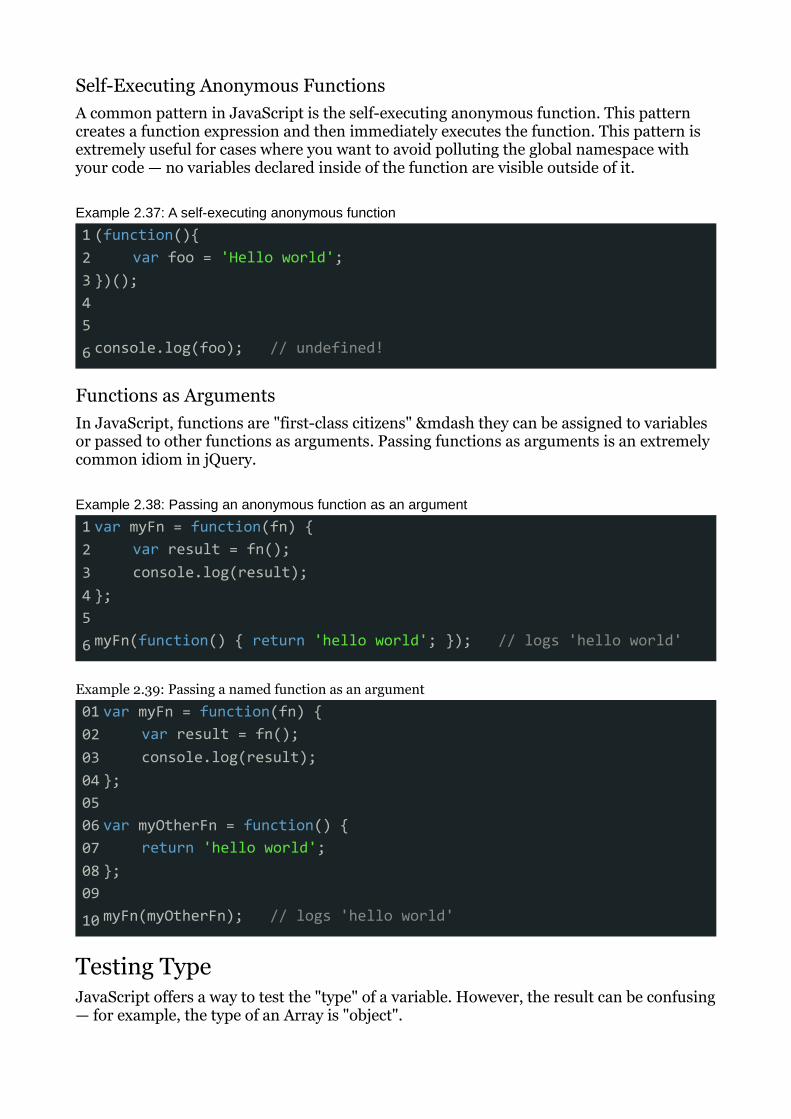
Self-Executing Anonymous FunctionsA common pattern in JavaScript is the self-executing anonymous function. This pattern creates a function expression and then immediately executes the function. This pattern is extremely useful for cases where you want to avoid polluting the global namespace with your code — no variables declared inside of the function are visible outside of it.
Example 2.37: A self-executing anonymous function
1 (function(){2 var foo = 'Hello world';3 })();4 5
6 console.log(foo); // undefined!
Functions as ArgumentsIn JavaScript, functions are "first-class citizens" &mdash they can be assigned to variables or passed to other functions as arguments. Passing functions as arguments is an extremely common idiom in jQuery.
Example 2.38: Passing an anonymous function as an argument
1 var myFn = function(fn) {2 var result = fn();3 console.log(result);4 };5
6 myFn(function() { return 'hello world'; }); // logs 'hello world'
Example 2.39: Passing a named function as an argument
01 var myFn = function(fn) {02 var result = fn();03 console.log(result);04 };05 06 var myOtherFn = function() {07 return 'hello world';08 };09
10 myFn(myOtherFn); // logs 'hello world'
Testing TypeJavaScript offers a way to test the "type" of a variable. However, the result can be confusing — for example, the type of an Array is "object".

It's common practice to use the typeof operator when trying to determining the type of a specific value.
Example 2.40: Testing the type of various variables
01 var myFunction = function() {02 console.log('hello');03 };04 05 var myObject = {06 foo : 'bar'07 };08 09 var myArray = [ 'a', 'b', 'c' ];10 11 var myString = 'hello';12 13 var myNumber = 3;14 15 typeof myFunction; // returns 'function'16 typeof myObject; // returns 'object'17 typeof myArray; // returns 'object' -- careful!18 typeof myString; // returns 'string';19 typeof myNumber; // returns 'number'20 21 typeof null; // returns 'object' -- careful!22 23 24 if (myArray.push && myArray.slice && myArray.join) {25 // probably an array26 // (this is called "duck typing")27 }28 29 if (Object.prototype.toString.call(myArray) === '[object Array]') {30 // Definitely an array!31 // This is widely considered as the most robust way32 // to determine if a specific value is an Array.33 }
jQuery offers utility methods to help you determine the type of an arbitrary value. These will be covered later.
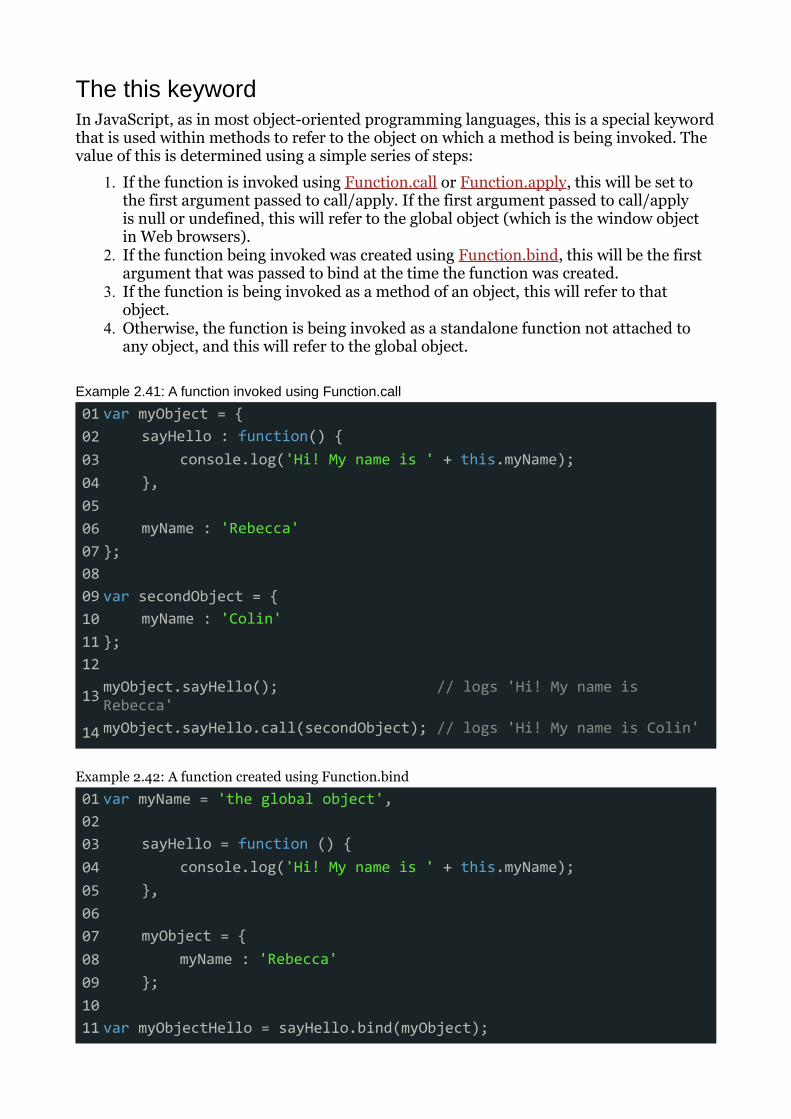
The this keywordIn JavaScript, as in most object-oriented programming languages, this is a special keyword that is used within methods to refer to the object on which a method is being invoked. The value of this is determined using a simple series of steps:
1. If the function is invoked using Function.call or Function.apply, this will be set to the first argument passed to call/apply. If the first argument passed to call/apply is null or undefined, this will refer to the global object (which is the window object in Web browsers).
2. If the function being invoked was created using Function.bind, this will be the first argument that was passed to bind at the time the function was created.
3. If the function is being invoked as a method of an object, this will refer to that object.
4. Otherwise, the function is being invoked as a standalone function not attached to any object, and this will refer to the global object.
Example 2.41: A function invoked using Function.call
01 var myObject = {02 sayHello : function() {03 console.log('Hi! My name is ' + this.myName);04 },05 06 myName : 'Rebecca'07 };08 09 var secondObject = {10 myName : 'Colin'11 };12
13 myObject.sayHello(); // logs 'Hi! My name is Rebecca'
14 myObject.sayHello.call(secondObject); // logs 'Hi! My name is Colin'
Example 2.42: A function created using Function.bind
01 var myName = 'the global object',02 03 sayHello = function () {04 console.log('Hi! My name is ' + this.myName);05 },06 07 myObject = {08 myName : 'Rebecca'09 };10 11 var myObjectHello = sayHello.bind(myObject);
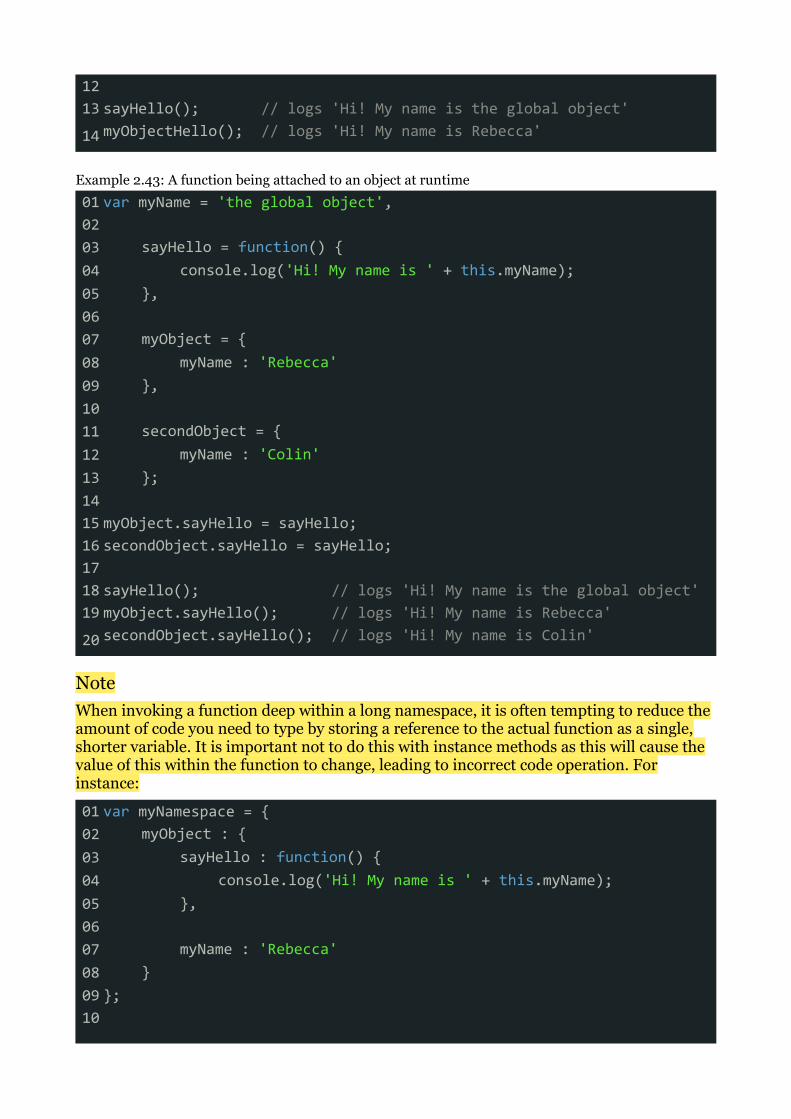
12 13 sayHello(); // logs 'Hi! My name is the global object'
14 myObjectHello(); // logs 'Hi! My name is Rebecca'
Example 2.43: A function being attached to an object at runtime
01 var myName = 'the global object',02 03 sayHello = function() {04 console.log('Hi! My name is ' + this.myName);05 },06 07 myObject = {08 myName : 'Rebecca'09 },10 11 secondObject = {12 myName : 'Colin'13 };14 15 myObject.sayHello = sayHello;16 secondObject.sayHello = sayHello;17 18 sayHello(); // logs 'Hi! My name is the global object'19 myObject.sayHello(); // logs 'Hi! My name is Rebecca'
20 secondObject.sayHello(); // logs 'Hi! My name is Colin'
NoteWhen invoking a function deep within a long namespace, it is often tempting to reduce the amount of code you need to type by storing a reference to the actual function as a single, shorter variable. It is important not to do this with instance methods as this will cause the value of this within the function to change, leading to incorrect code operation. For instance:
01 var myNamespace = {02 myObject : {03 sayHello : function() {04 console.log('Hi! My name is ' + this.myName);05 },06 07 myName : 'Rebecca'08 }09 };10
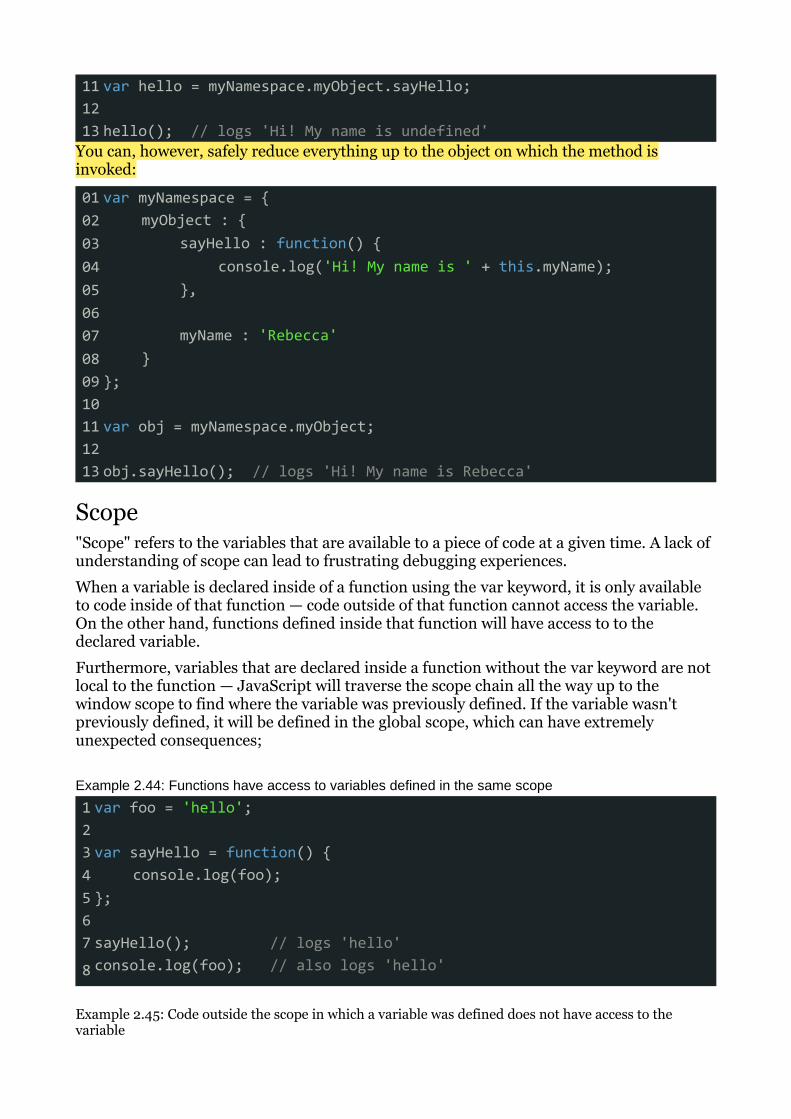
11 var hello = myNamespace.myObject.sayHello;12 13 hello(); // logs 'Hi! My name is undefined'
You can, however, safely reduce everything up to the object on which the method is invoked:
01 var myNamespace = {02 myObject : {03 sayHello : function() {04 console.log('Hi! My name is ' + this.myName);05 },06 07 myName : 'Rebecca'08 }09 };10 11 var obj = myNamespace.myObject;12 13 obj.sayHello(); // logs 'Hi! My name is Rebecca'
Scope"Scope" refers to the variables that are available to a piece of code at a given time. A lack of understanding of scope can lead to frustrating debugging experiences.
When a variable is declared inside of a function using the var keyword, it is only available to code inside of that function — code outside of that function cannot access the variable. On the other hand, functions defined inside that function will have access to to the declared variable.
Furthermore, variables that are declared inside a function without the var keyword are not local to the function — JavaScript will traverse the scope chain all the way up to the window scope to find where the variable was previously defined. If the variable wasn't previously defined, it will be defined in the global scope, which can have extremely unexpected consequences;
Example 2.44: Functions have access to variables defined in the same scope
1 var foo = 'hello';2 3 var sayHello = function() {4 console.log(foo);5 };6 7 sayHello(); // logs 'hello'
8 console.log(foo); // also logs 'hello'
Example 2.45: Code outside the scope in which a variable was defined does not have access to the variable
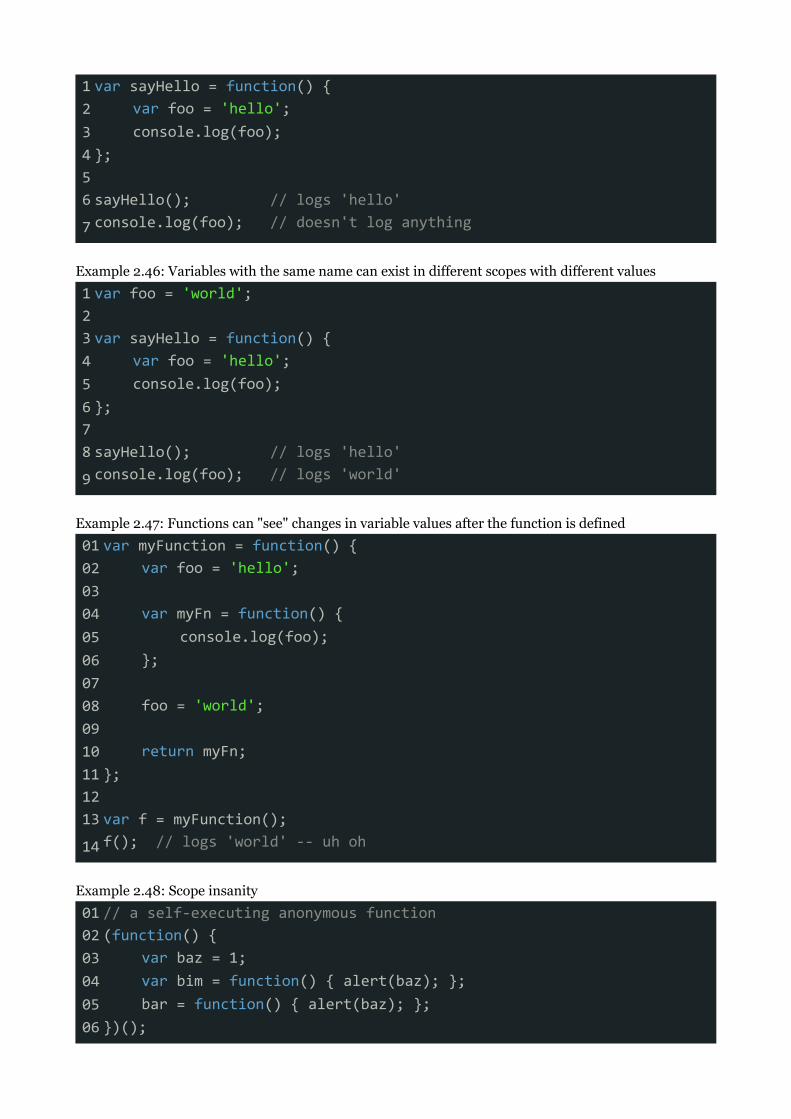
1 var sayHello = function() {2 var foo = 'hello';3 console.log(foo);4 };5 6 sayHello(); // logs 'hello'
7 console.log(foo); // doesn't log anything
Example 2.46: Variables with the same name can exist in different scopes with different values
1 var foo = 'world';2 3 var sayHello = function() {4 var foo = 'hello';5 console.log(foo);6 };7 8 sayHello(); // logs 'hello'
9 console.log(foo); // logs 'world'
Example 2.47: Functions can "see" changes in variable values after the function is defined
01 var myFunction = function() {02 var foo = 'hello';03 04 var myFn = function() {05 console.log(foo);06 };07 08 foo = 'world';09 10 return myFn;11 };12 13 var f = myFunction();
14 f(); // logs 'world' -- uh oh
Example 2.48: Scope insanity
01 // a self-executing anonymous function02 (function() {03 var baz = 1;04 var bim = function() { alert(baz); };05 bar = function() { alert(baz); };06 })();
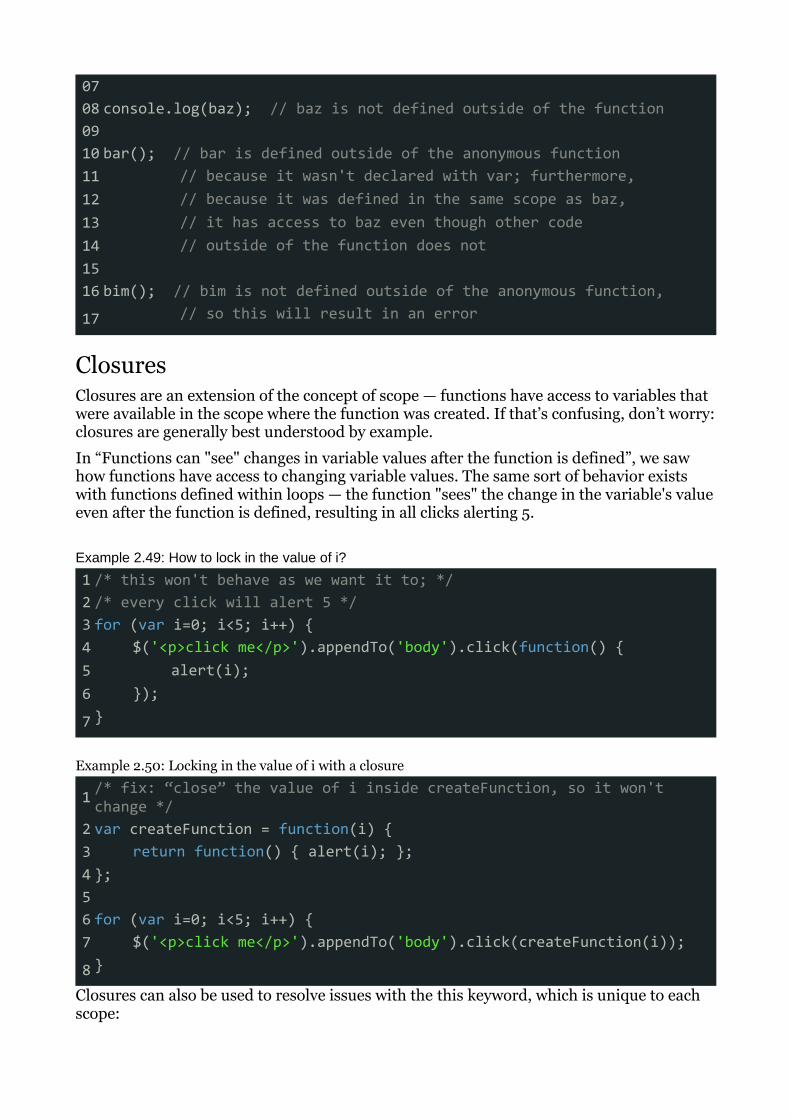
07 08 console.log(baz); // baz is not defined outside of the function09 10 bar(); // bar is defined outside of the anonymous function11 // because it wasn't declared with var; furthermore,12 // because it was defined in the same scope as baz,13 // it has access to baz even though other code14 // outside of the function does not15 16 bim(); // bim is not defined outside of the anonymous function,
17 // so this will result in an error
ClosuresClosures are an extension of the concept of scope — functions have access to variables that were available in the scope where the function was created. If that’s confusing, don’t worry: closures are generally best understood by example.
In “Functions can "see" changes in variable values after the function is defined”, we saw how functions have access to changing variable values. The same sort of behavior exists with functions defined within loops — the function "sees" the change in the variable's value even after the function is defined, resulting in all clicks alerting 5.
Example 2.49: How to lock in the value of i?
1 /* this won't behave as we want it to; */2 /* every click will alert 5 */3 for (var i=0; i<5; i++) {4 $('<p>click me</p>').appendTo('body').click(function() {5 alert(i);6 });7 }
Example 2.50: Locking in the value of i with a closure
1 /* fix: “close” the value of i inside createFunction, so it won't change */2 var createFunction = function(i) {3 return function() { alert(i); };4 };5 6 for (var i=0; i<5; i++) {7 $('<p>click me</p>').appendTo('body').click(createFunction(i));8 }
Closures can also be used to resolve issues with the this keyword, which is unique to each scope:
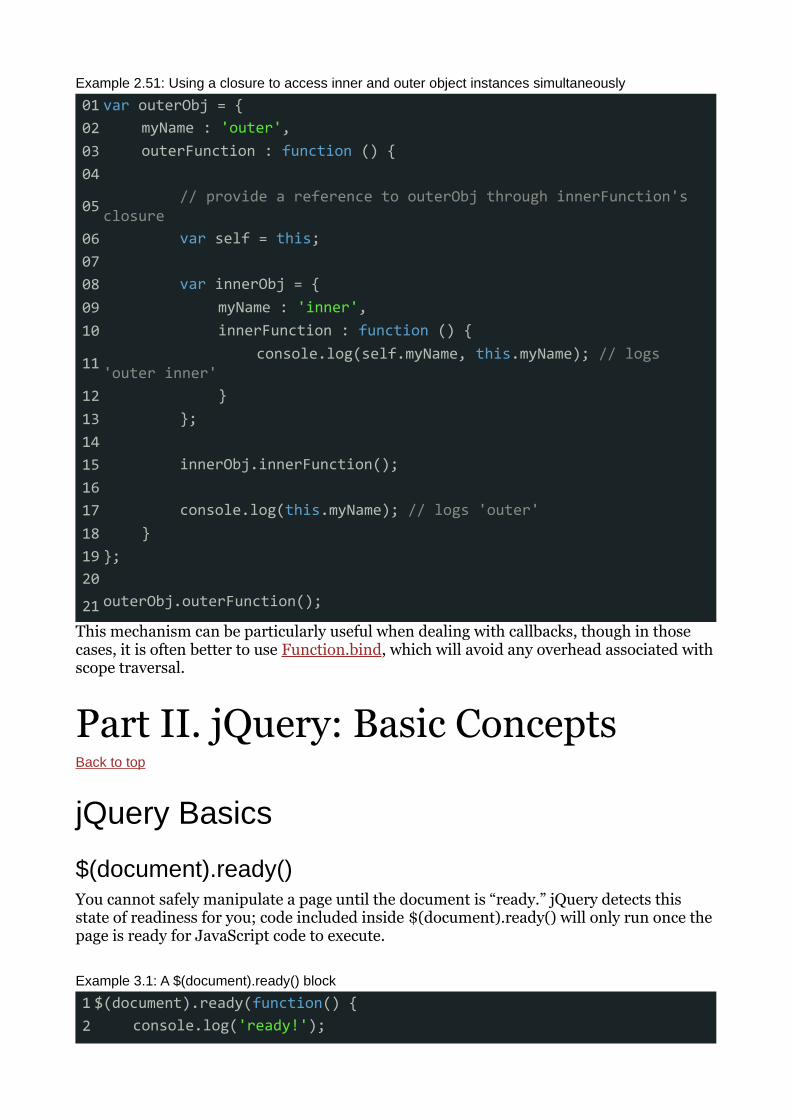
Example 2.51: Using a closure to access inner and outer object instances simultaneously
01 var outerObj = {02 myName : 'outer',03 outerFunction : function () {04
05 // provide a reference to outerObj through innerFunction's closure06 var self = this;07 08 var innerObj = {09 myName : 'inner',10 innerFunction : function () {11 console.log(self.myName, this.myName); // logs 'outer inner'12 }13 };14 15 innerObj.innerFunction();16 17 console.log(this.myName); // logs 'outer'18 }19 };20
21 outerObj.outerFunction();
This mechanism can be particularly useful when dealing with callbacks, though in those cases, it is often better to use Function.bind, which will avoid any overhead associated with scope traversal.
Part II. jQuery: Basic ConceptsBack to top
jQuery Basics
$(document).ready()You cannot safely manipulate a page until the document is “ready.” jQuery detects this state of readiness for you; code included inside $(document).ready() will only run once the page is ready for JavaScript code to execute.
Example 3.1: A $(document).ready() block
1 $(document).ready(function() {2 console.log('ready!');
3 });
There is a shorthand for $(document).ready() that you will sometimes see; however, I recommend against using it if you are writing code that people who aren't experienced with jQuery may see.
Example 3.2: Shorthand for $(document).ready()
1 $(function() {2 console.log('ready!');3 });
You can also pass a named function to $(document).ready() instead of passing an anonymous function.
Example 3.3: Passing a named function instead of an anonymous function
1 function readyFn() {2 // code to run when the document is ready3 }4 5
6 $(document).ready(readyFn);
Selecting ElementsThe most basic concept of jQuery is to “select some elements and do something with them.” jQuery supports most CSS3 selectors, as well as some non-standard selectors. For a complete selector reference, visit http://api.jquery.com/category/selectors/.
Following are a few examples of common selection techniques.
Example 3.4: Selecting elements by ID
1 $('#myId'); // note IDs must be unique per page
Example 3.5: Selecting elements by class name
1 $('div.myClass'); // performance improves if you specify element type
Example 3.6: Selecting elements by attribute
1 $('input[name=first_name]'); // beware, this can be very slow
Example 3.7: Selecting elements by compound CSS selector
1 $('#contents ul.people li');
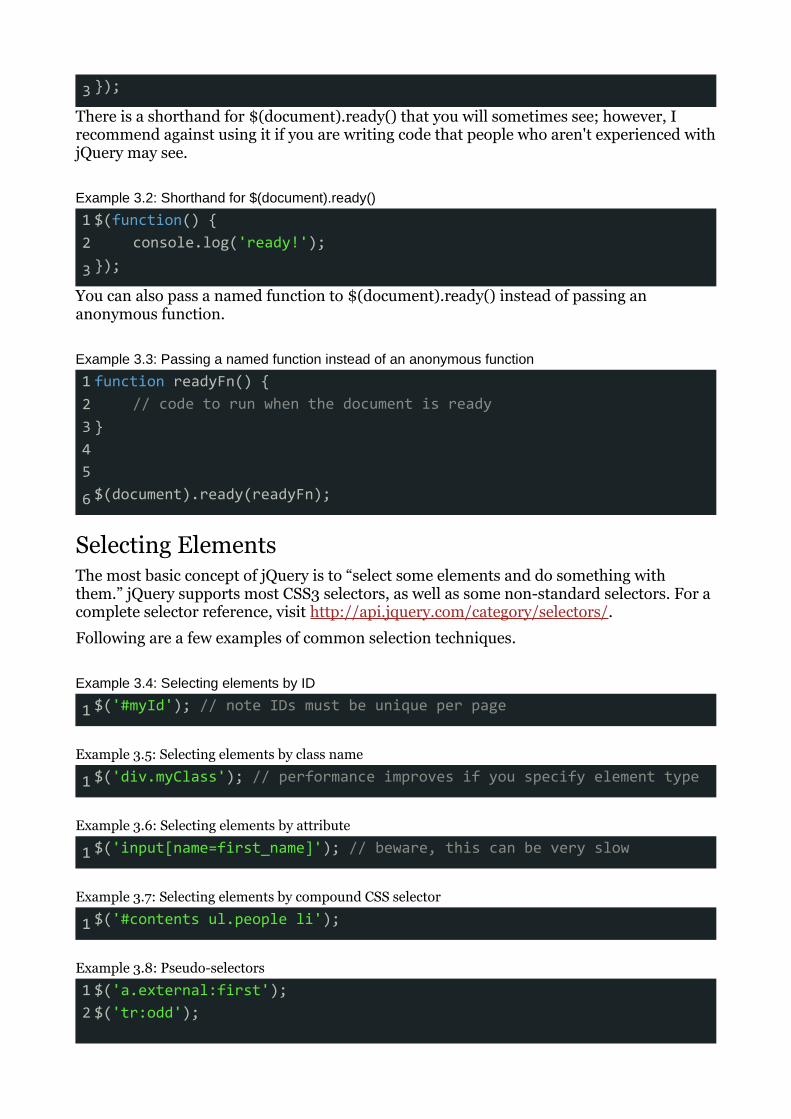
Example 3.8: Pseudo-selectors
1 $('a.external:first');2 $('tr:odd');
3 $('#myForm :input'); // select all input-like elements in a form4 $('div:visible');5 $('div:gt(2)'); // all except the first three divs
6 $('div:animated'); // all currently animated divs
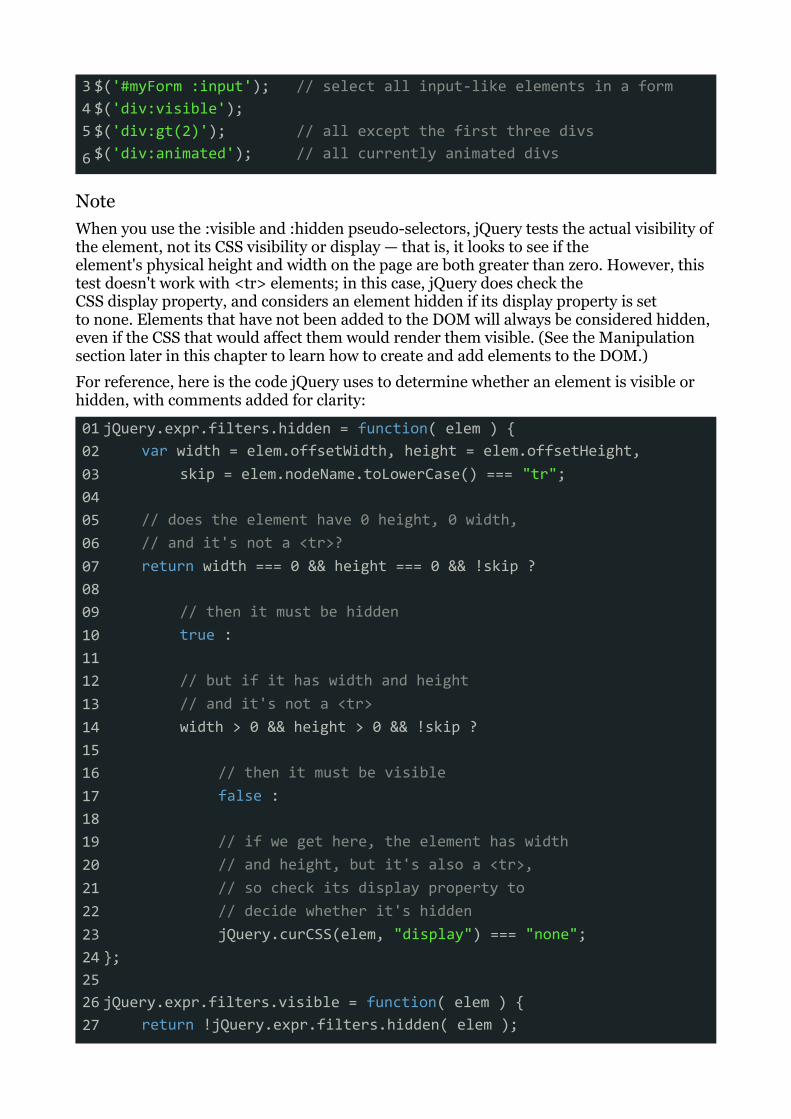
NoteWhen you use the :visible and :hidden pseudo-selectors, jQuery tests the actual visibility of the element, not its CSS visibility or display — that is, it looks to see if the element's physical height and width on the page are both greater than zero. However, this test doesn't work with <tr> elements; in this case, jQuery does check the CSS display property, and considers an element hidden if its display property is set to none. Elements that have not been added to the DOM will always be considered hidden, even if the CSS that would affect them would render them visible. (See the Manipulation section later in this chapter to learn how to create and add elements to the DOM.)
For reference, here is the code jQuery uses to determine whether an element is visible or hidden, with comments added for clarity:
01 jQuery.expr.filters.hidden = function( elem ) {02 var width = elem.offsetWidth, height = elem.offsetHeight,03 skip = elem.nodeName.toLowerCase() === "tr";04 05 // does the element have 0 height, 0 width,06 // and it's not a <tr>?07 return width === 0 && height === 0 && !skip ?08 09 // then it must be hidden10 true :11 12 // but if it has width and height13 // and it's not a <tr>14 width > 0 && height > 0 && !skip ?15 16 // then it must be visible17 false :18 19 // if we get here, the element has width20 // and height, but it's also a <tr>,21 // so check its display property to22 // decide whether it's hidden23 jQuery.curCSS(elem, "display") === "none";24 };25 26 jQuery.expr.filters.visible = function( elem ) {27 return !jQuery.expr.filters.hidden( elem );

28 };Choosing Selectors
Choosing good selectors is one way to improve the performance of your JavaScript. A little specificity — for example, including an element type such as div when selecting elements by class name — can go a long way. Generally, any time you can give jQuery a hint about where it might expect to find what you're looking for, you should. On the other hand, too much specificity can be a bad thing. A selector such as #myTable thead tr th.special is overkill if a selector such as #myTable th.special will get you what you want.
jQuery offers many attribute-based selectors, allowing you to make selections based on the content of arbitrary attributes using simplified regular expressions.
1 // find all <a>s whose rel attribute2 // ends with "thinger"3 $("a[rel$='thinger']");
While these can be useful in a pinch, they can also be extremely slow — I once wrote an attribute-based selector that locked up my page for multiple seconds. Wherever possible, make your selections using IDs, class names, and tag names.
Want to know more? Paul Irish has a great presentation about improving performance in JavaScript, with several slides focused specifically on selector performance.
Does My Selection Contain Any Elements?Once you've made a selection, you'll often want to know whether you have anything to work with. You may be inclined to try something like:
1 if ($('div.foo')) { ... }This won't work. When you make a selection using $(), an object is always returned, and objects always evaluate to true. Even if your selection doesn't contain any elements, the code inside the if statement will still run.
Instead, you need to test the selection's length property, which tells you how many elements were selected. If the answer is 0, the length property will evaluate to false when used as a boolean value.
Example 3.9: Testing whether a selection contains elements
1 if ($('div.foo').length) { ... }
Saving SelectionsEvery time you make a selection, a lot of code runs, and jQuery doesn't do caching of selections for you. If you've made a selection that you might need to make again, you should save the selection in a variable rather than making the selection repeatedly.
Example 3.10: Storing selections in a variable
1 var $divs = $('div');
NoteIn “Storing selections in a variable”, the variable name begins with a dollar sign. Unlike in other languages, there's nothing special about the dollar sign in JavaScript — it's just
another character. We use it here to indicate that the variable contains a jQuery object. This practice — a sort of Hungarian notation — is merely convention, and is not mandatory.
Once you've stored your selection, you can call jQuery methods on the variable you stored it in just like you would have called them on the original selection.
NoteA selection only fetches the elements that are on the page when you make the selection. If you add elements to the page later, you'll have to repeat the selection or otherwise add them to the selection stored in the variable. Stored selections don't magically update when the DOM changes.
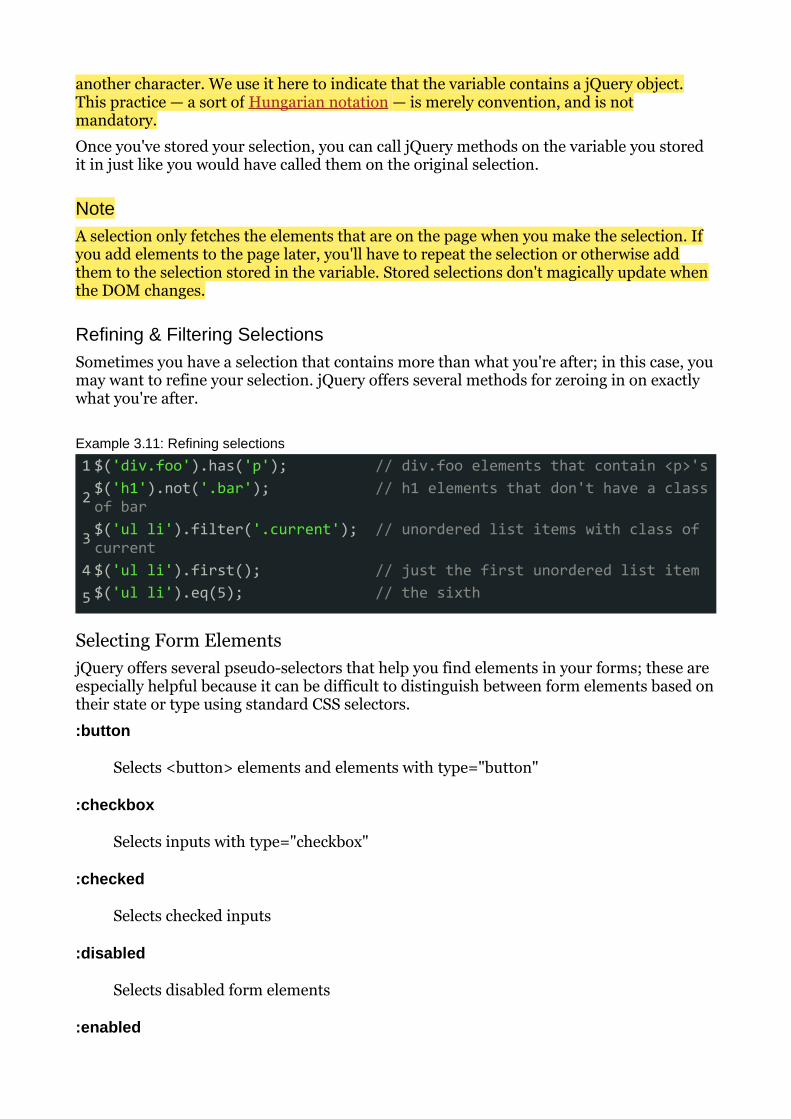
Refining & Filtering SelectionsSometimes you have a selection that contains more than what you're after; in this case, you may want to refine your selection. jQuery offers several methods for zeroing in on exactly what you're after.
Example 3.11: Refining selections
1 $('div.foo').has('p'); // div.foo elements that contain <p>'s
2 $('h1').not('.bar'); // h1 elements that don't have a class of bar
3 $('ul li').filter('.current'); // unordered list items with class of current4 $('ul li').first(); // just the first unordered list item
5 $('ul li').eq(5); // the sixth
Selecting Form ElementsjQuery offers several pseudo-selectors that help you find elements in your forms; these are especially helpful because it can be difficult to distinguish between form elements based on their state or type using standard CSS selectors.
:button
Selects <button> elements and elements with type="button"
:checkbox
Selects inputs with type="checkbox"
:checked
Selects checked inputs
:disabled
Selects disabled form elements
:enabled
Selects enabled form elements
:file
Selects inputs with type="file"
:image
Selects inputs with type="image"
:input
Selects <input>, <textarea>, and <select> elements
:password
Selects inputs with type="password"
:radio
Selects inputs with type="radio"
:reset
Selects inputs with type="reset"
:selected
Selects options that are selected
:submit
Selects inputs with type="submit"
:text
Selects inputs with type="text"
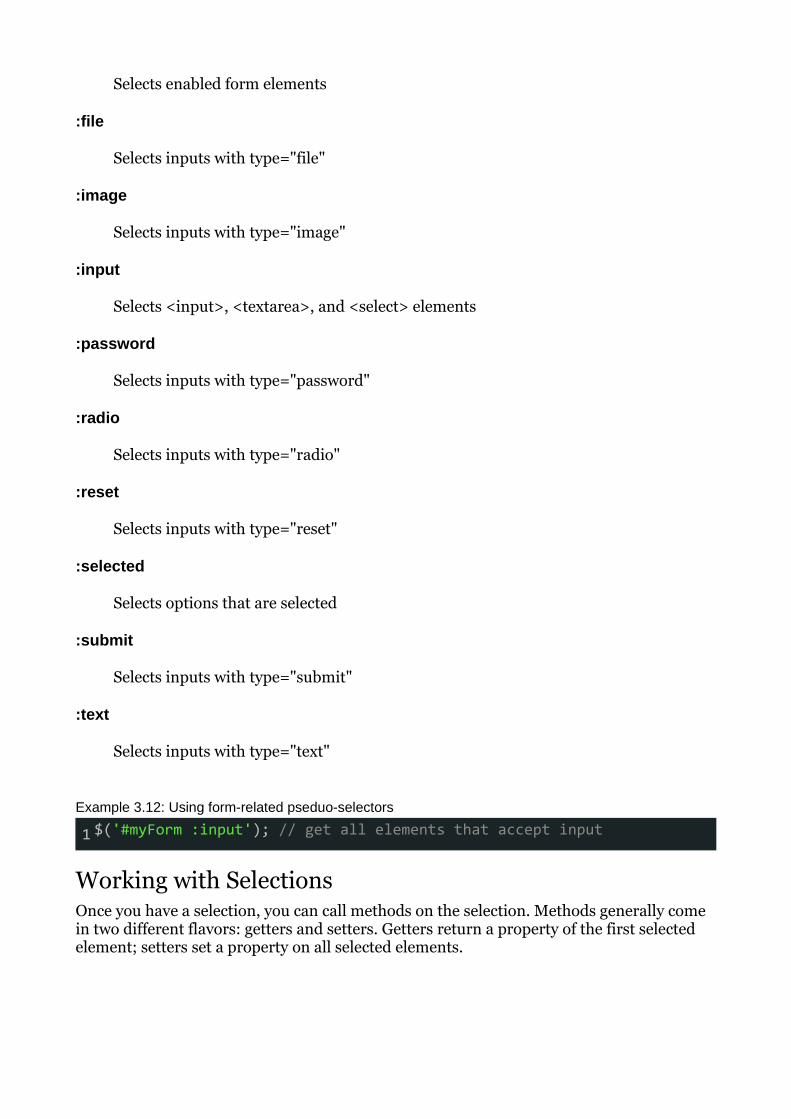
Example 3.12: Using form-related pseduo-selectors
1 $('#myForm :input'); // get all elements that accept input
Working with SelectionsOnce you have a selection, you can call methods on the selection. Methods generally come in two different flavors: getters and setters. Getters return a property of the first selected element; setters set a property on all selected elements.

ChainingIf you call a method on a selection and that method returns a jQuery object, you can continue to call jQuery methods on the object without pausing for a semicolon.
Example 3.13: Chaining
1 $('#content').find('h3').eq(2).html('new text for the third h3!');
If you are writing a chain that includes several steps, you (and the person who comes after you) may find your code more readable if you break the chain over several lines.
Example 3.14: Formatting chained code
1 $('#content')2 .find('h3')3 .eq(2)4 .html('new text for the third h3!');
If you change your selection in the midst of a chain, jQuery provides the $.fn.end method to get you back to your original selection.
Example 3.15: Restoring your original selection using $.fn.end
1 $('#content')2 .find('h3')3 .eq(2)4 .html('new text for the third h3!')5 .end() // restores the selection to all h3's in #content6 .eq(0)7 .html('new text for the first h3!');
NoteChaining is extraordinarily powerful, and it's a feature that many libraries have adapted since it was made popular by jQuery. However, it must be used with care. Extensive chaining can make code extremely difficult to modify or debug. There is no hard-and-fast rule to how long a chain should be — just know that it is easy to get carried away.
Getters & SettersjQuery “overloads” its methods, so the method used to set a value generally has the same name as the method used to get a value. When a method is used to set a value, it is called a setter. When a method is used to get (or read) a value, it is called a getter. Setters affect all elements in a selection; getters get the requested value only for the first element in the selection.
Example 3.16: The $.fn.html method used as a setter
1 $('h1').html('hello world');
Example 3.17: The html method used as a getter
1 $('h1').html();
Setters return a jQuery object, allowing you to continue to call jQuery methods on your selection; getters return whatever they were asked to get, meaning you cannot continue to call jQuery methods on the value returned by the getter.
CSS, Styling, & DimensionsjQuery includes a handy way to get and set CSS properties of elements.
NoteCSS properties that normally include a hyphen need to be camel cased in JavaScript. For example, the CSS property font-size is expressed as fontSizewhen used as a property name in JavaScript. This does not apply, however, when passing the name of a CSS property to the $.fn.css method as a string — in that case, either the camel cased or hyphenated form will work.
Example 3.18: Getting CSS properties
1 $('h1').css('fontSize'); // returns a string such as "19px"
2 $('h1').css('font-size'); // also works
Example 3.19: Setting CSS properties
1 $('h1').css('fontSize', '100px'); // setting an individual property
2$('h1').css({ 'fontSize' : '100px', 'color' : 'red' }); // setting multiple properties
Note the style of the argument we use on the second line — it is an object that contains multiple properties. This is a common way to pass multiple arguments to a function, and many jQuery setter methods accept objects to set mulitple values at once.
Using CSS Classes for StylingAs a getter, the $.fn.css method is valuable; however, it should generally be avoided as a setter in production-ready code, because you don't want presentational information in your JavaScript. Instead, write CSS rules for classes that describe the various visual states, and then simply change the class on the element you want to affect.
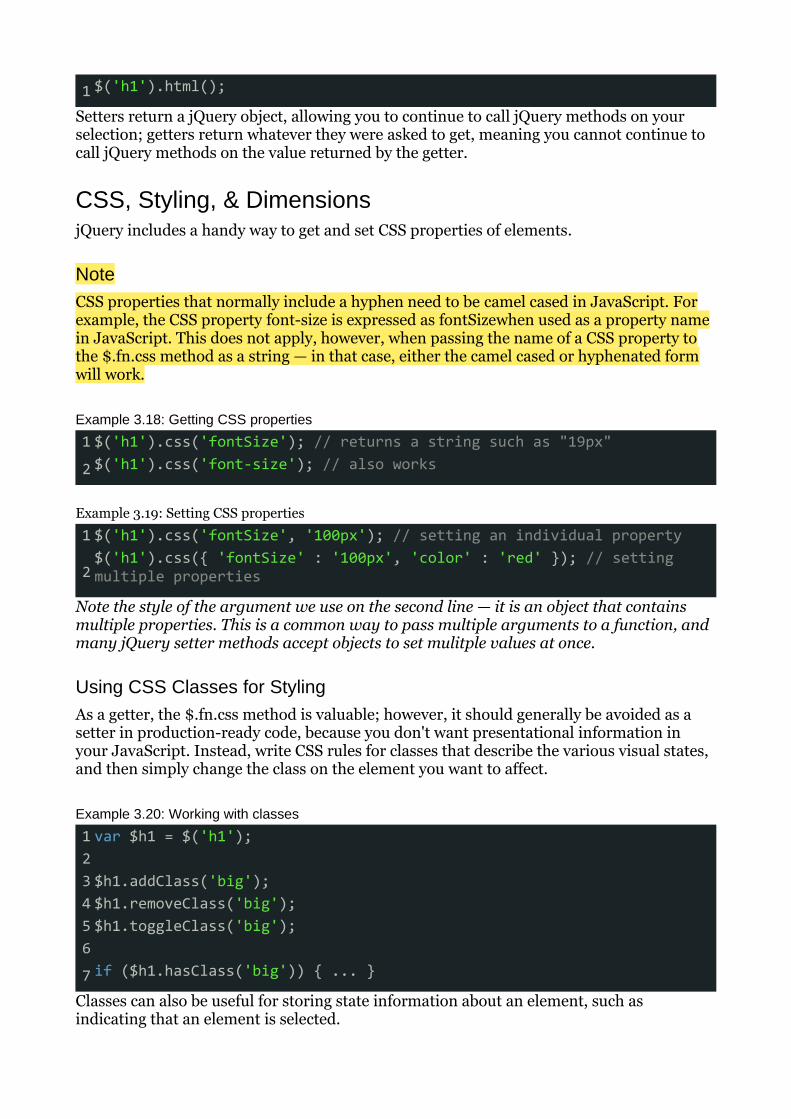
Example 3.20: Working with classes
1 var $h1 = $('h1');2 3 $h1.addClass('big');4 $h1.removeClass('big');5 $h1.toggleClass('big');6
7 if ($h1.hasClass('big')) { ... }
Classes can also be useful for storing state information about an element, such as indicating that an element is selected.
DimensionsjQuery offers a variety of methods for obtaining and modifying dimension and position information about an element.
The code in “Basic dimensions methods”, is just a very brief overview of the dimensions functionality in jQuery; for complete details about jQuery dimension methods, visit http://api.jquery.com/category/dimensions/.
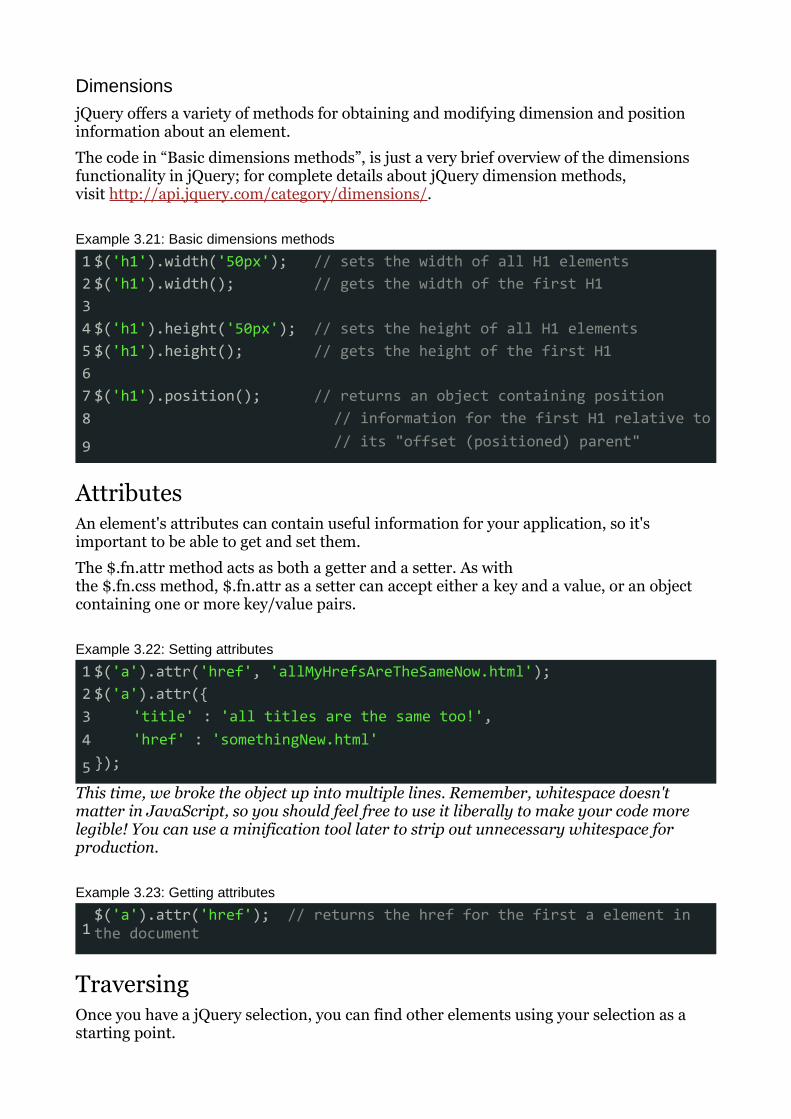
Example 3.21: Basic dimensions methods
1 $('h1').width('50px'); // sets the width of all H1 elements2 $('h1').width(); // gets the width of the first H13 4 $('h1').height('50px'); // sets the height of all H1 elements5 $('h1').height(); // gets the height of the first H16 7 $('h1').position(); // returns an object containing position8 // information for the first H1 relative to9 // its "offset (positioned) parent"
AttributesAn element's attributes can contain useful information for your application, so it's important to be able to get and set them.
The $.fn.attr method acts as both a getter and a setter. As with the $.fn.css method, $.fn.attr as a setter can accept either a key and a value, or an object containing one or more key/value pairs.
Example 3.22: Setting attributes
1 $('a').attr('href', 'allMyHrefsAreTheSameNow.html');2 $('a').attr({3 'title' : 'all titles are the same too!',4 'href' : 'somethingNew.html'5 });
This time, we broke the object up into multiple lines. Remember, whitespace doesn't matter in JavaScript, so you should feel free to use it liberally to make your code more legible! You can use a minification tool later to strip out unnecessary whitespace for production.
Example 3.23: Getting attributes
1$('a').attr('href'); // returns the href for the first a element in the document
TraversingOnce you have a jQuery selection, you can find other elements using your selection as a starting point.
For complete documentation of jQuery traversal methods, visit http://api.jquery.com/category/traversing/.
NoteBe cautious with traversing long distances in your documents — complex traversal makes it imperative that your document's structure remain the same, something that's difficult to guarantee even if you're the one creating the whole application from server to client. One- or two-step traversal is fine, but you generally want to avoid traversals that take you from one container to another.
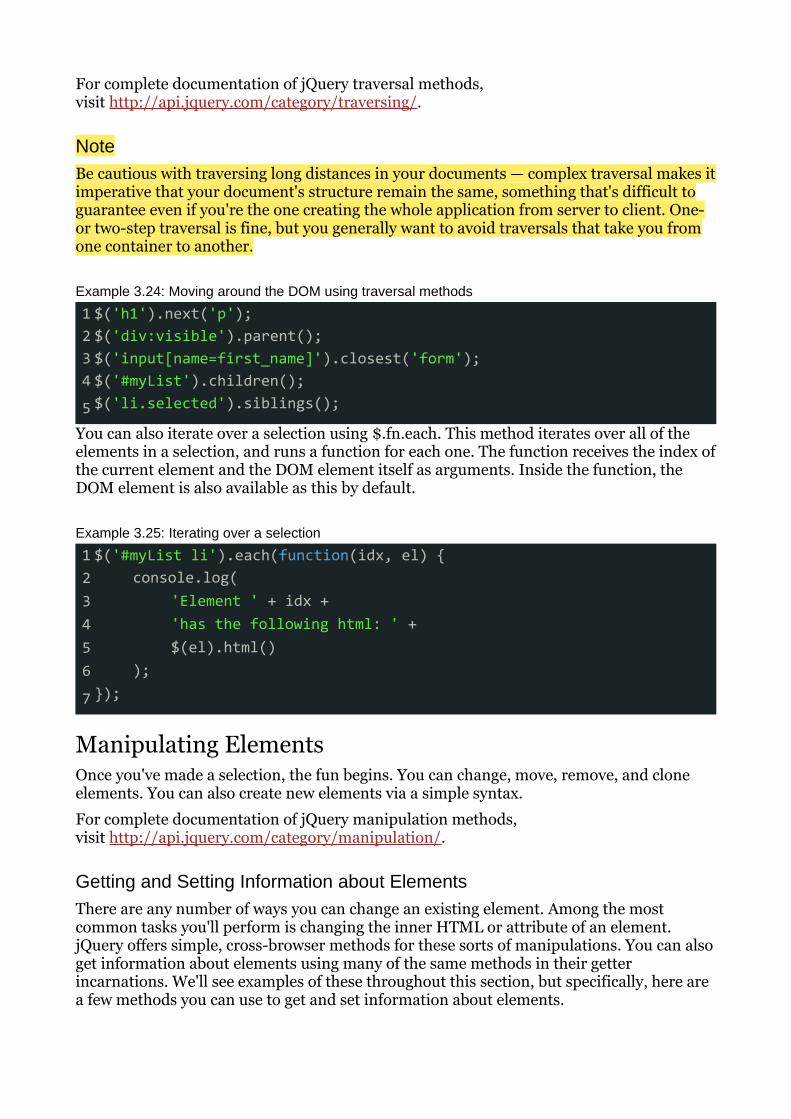
Example 3.24: Moving around the DOM using traversal methods
1 $('h1').next('p');2 $('div:visible').parent();3 $('input[name=first_name]').closest('form');4 $('#myList').children();
5 $('li.selected').siblings();
You can also iterate over a selection using $.fn.each. This method iterates over all of the elements in a selection, and runs a function for each one. The function receives the index of the current element and the DOM element itself as arguments. Inside the function, the DOM element is also available as this by default.
Example 3.25: Iterating over a selection
1 $('#myList li').each(function(idx, el) {2 console.log(3 'Element ' + idx +4 'has the following html: ' +5 $(el).html()6 );7 });
Manipulating ElementsOnce you've made a selection, the fun begins. You can change, move, remove, and clone elements. You can also create new elements via a simple syntax.
For complete documentation of jQuery manipulation methods, visit http://api.jquery.com/category/manipulation/.
Getting and Setting Information about ElementsThere are any number of ways you can change an existing element. Among the most common tasks you'll perform is changing the inner HTML or attribute of an element. jQuery offers simple, cross-browser methods for these sorts of manipulations. You can also get information about elements using many of the same methods in their getter incarnations. We'll see examples of these throughout this section, but specifically, here are a few methods you can use to get and set information about elements.
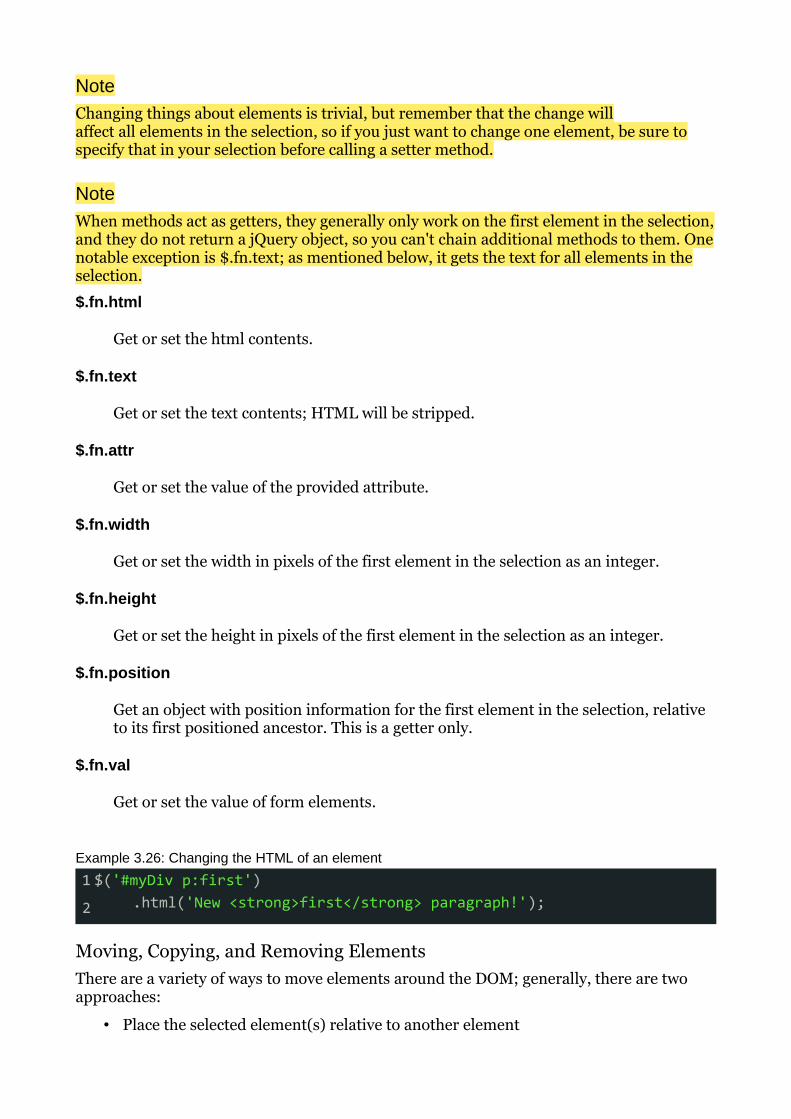
NoteChanging things about elements is trivial, but remember that the change will affect all elements in the selection, so if you just want to change one element, be sure to specify that in your selection before calling a setter method.
NoteWhen methods act as getters, they generally only work on the first element in the selection, and they do not return a jQuery object, so you can't chain additional methods to them. One notable exception is $.fn.text; as mentioned below, it gets the text for all elements in the selection.
$.fn.html
Get or set the html contents.
$.fn.text
Get or set the text contents; HTML will be stripped.
$.fn.attr
Get or set the value of the provided attribute.
$.fn.width
Get or set the width in pixels of the first element in the selection as an integer.
$.fn.height
Get or set the height in pixels of the first element in the selection as an integer.
$.fn.position
Get an object with position information for the first element in the selection, relative to its first positioned ancestor. This is a getter only.
$.fn.val
Get or set the value of form elements.
Example 3.26: Changing the HTML of an element
1 $('#myDiv p:first')
2 .html('New <strong>first</strong> paragraph!');
Moving, Copying, and Removing ElementsThere are a variety of ways to move elements around the DOM; generally, there are two approaches:
• Place the selected element(s) relative to another element
• Place an element relative to the selected element(s)
For example, jQuery provides $.fn.insertAfter and $.fn.after. The $.fn.insertAfter method places the selected element(s) after the element that you provide as an argument; the $.fn.after method places the element provided as an argument after the selected element. Several other methods follow this pattern: $.fn.insertBefore and $.fn.before; $.fn.appendTo and $.fn.append; and $.fn.prependTo and $.fn.prepend.
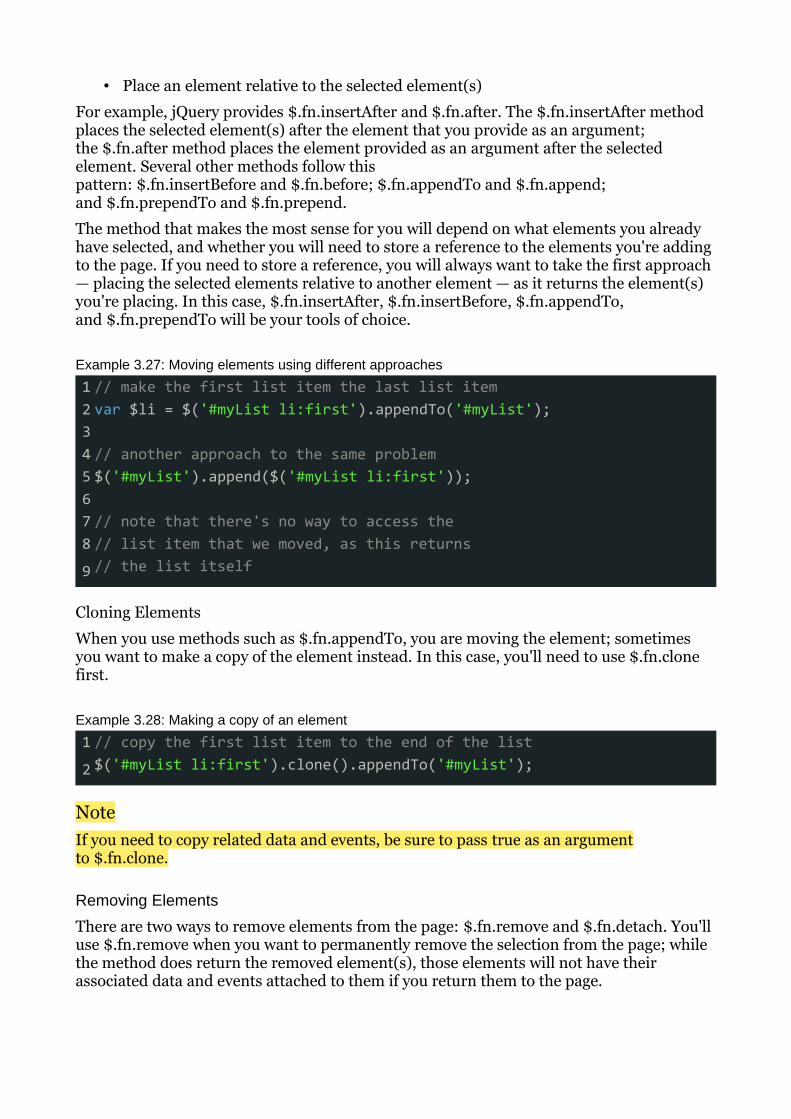
The method that makes the most sense for you will depend on what elements you already have selected, and whether you will need to store a reference to the elements you're adding to the page. If you need to store a reference, you will always want to take the first approach — placing the selected elements relative to another element — as it returns the element(s) you're placing. In this case, $.fn.insertAfter, $.fn.insertBefore, $.fn.appendTo, and $.fn.prependTo will be your tools of choice.
Example 3.27: Moving elements using different approaches
1 // make the first list item the last list item2 var $li = $('#myList li:first').appendTo('#myList');3 4 // another approach to the same problem5 $('#myList').append($('#myList li:first'));6 7 // note that there's no way to access the8 // list item that we moved, as this returns
9 // the list itself
Cloning Elements
When you use methods such as $.fn.appendTo, you are moving the element; sometimes you want to make a copy of the element instead. In this case, you'll need to use $.fn.clone first.
Example 3.28: Making a copy of an element
1 // copy the first list item to the end of the list
2 $('#myList li:first').clone().appendTo('#myList');
NoteIf you need to copy related data and events, be sure to pass true as an argument to $.fn.clone.
Removing Elements
There are two ways to remove elements from the page: $.fn.remove and $.fn.detach. You'll use $.fn.remove when you want to permanently remove the selection from the page; while the method does return the removed element(s), those elements will not have their associated data and events attached to them if you return them to the page.
If you need the data and events to persist, you'll want to use $.fn.detach instead. Like $.fn.remove, it returns the selection, but it also maintains the data and events associated with the selection, so you can restore the selection to the page at a later time.
NoteThe $.fn.detach method is extremely valuable if you are doing heavy manipulation to an element. In that case, it's beneficial to $.fn.detach the element from the page, work on it in your code, and then restore it to the page when you're done. This saves you from expensive "DOM touches" while maintaining the element's data and events.
If you want to leave the element on the page but simply want to remove its contents, you can use $.fn.empty to dispose of the element's inner HTML.
Creating New ElementsjQuery offers a trivial and elegant way to create new elements using the same $() method you use to make selections.
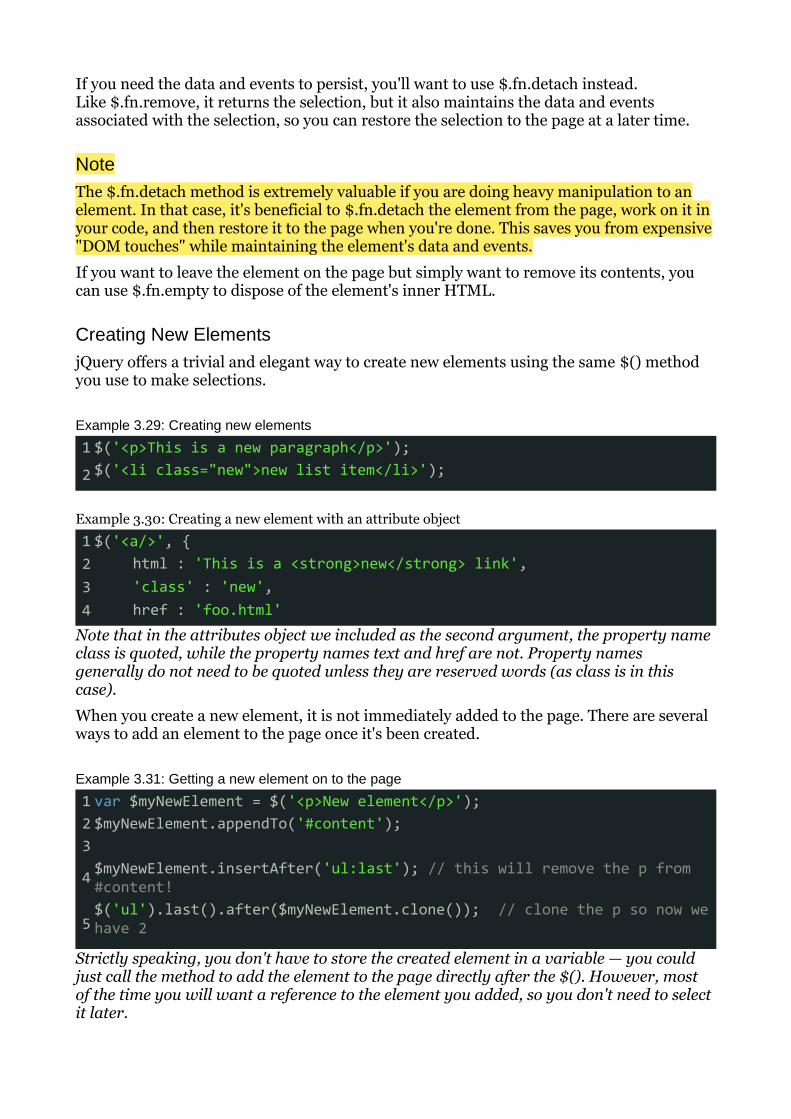
Example 3.29: Creating new elements
1 $('<p>This is a new paragraph</p>');
2 $('<li class="new">new list item</li>');
Example 3.30: Creating a new element with an attribute object
1 $('<a/>', {2 html : 'This is a <strong>new</strong> link',3 'class' : 'new',4 href : 'foo.html'
Note that in the attributes object we included as the second argument, the property name class is quoted, while the property names text and href are not. Property names generally do not need to be quoted unless they are reserved words (as class is in this case).
When you create a new element, it is not immediately added to the page. There are several ways to add an element to the page once it's been created.
Example 3.31: Getting a new element on to the page
1 var $myNewElement = $('<p>New element</p>');2 $myNewElement.appendTo('#content');3
4 $myNewElement.insertAfter('ul:last'); // this will remove the p from #content!
5$('ul').last().after($myNewElement.clone()); // clone the p so now we have 2
Strictly speaking, you don't have to store the created element in a variable — you could just call the method to add the element to the page directly after the $(). However, most of the time you will want a reference to the element you added, so you don't need to select it later.
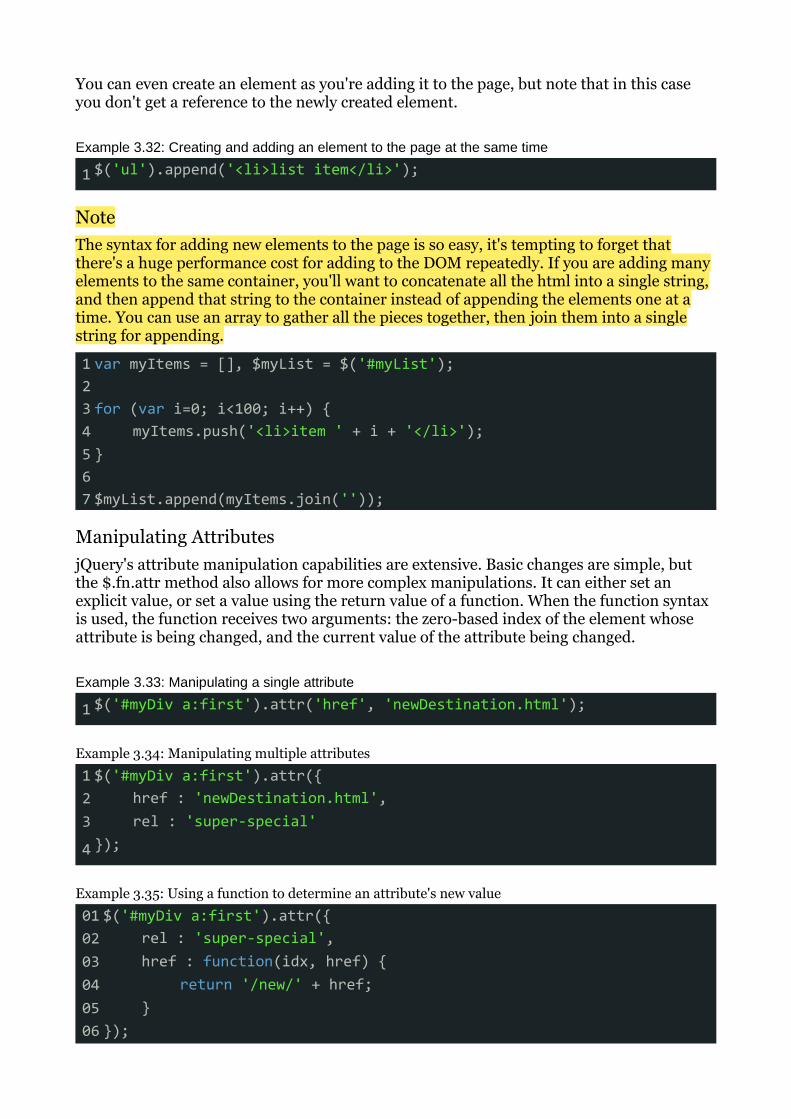
You can even create an element as you're adding it to the page, but note that in this case you don't get a reference to the newly created element.
Example 3.32: Creating and adding an element to the page at the same time
1 $('ul').append('<li>list item</li>');
NoteThe syntax for adding new elements to the page is so easy, it's tempting to forget that there's a huge performance cost for adding to the DOM repeatedly. If you are adding many elements to the same container, you'll want to concatenate all the html into a single string, and then append that string to the container instead of appending the elements one at a time. You can use an array to gather all the pieces together, then join them into a single string for appending.
1 var myItems = [], $myList = $('#myList');2 3 for (var i=0; i<100; i++) {4 myItems.push('<li>item ' + i + '</li>');5 }6 7 $myList.append(myItems.join(''));
Manipulating AttributesjQuery's attribute manipulation capabilities are extensive. Basic changes are simple, but the $.fn.attr method also allows for more complex manipulations. It can either set an explicit value, or set a value using the return value of a function. When the function syntax is used, the function receives two arguments: the zero-based index of the element whose attribute is being changed, and the current value of the attribute being changed.
Example 3.33: Manipulating a single attribute
1 $('#myDiv a:first').attr('href', 'newDestination.html');
Example 3.34: Manipulating multiple attributes
1 $('#myDiv a:first').attr({2 href : 'newDestination.html',3 rel : 'super-special'4 });
Example 3.35: Using a function to determine an attribute's new value
01 $('#myDiv a:first').attr({02 rel : 'super-special',03 href : function(idx, href) {04 return '/new/' + href;05 }06 });
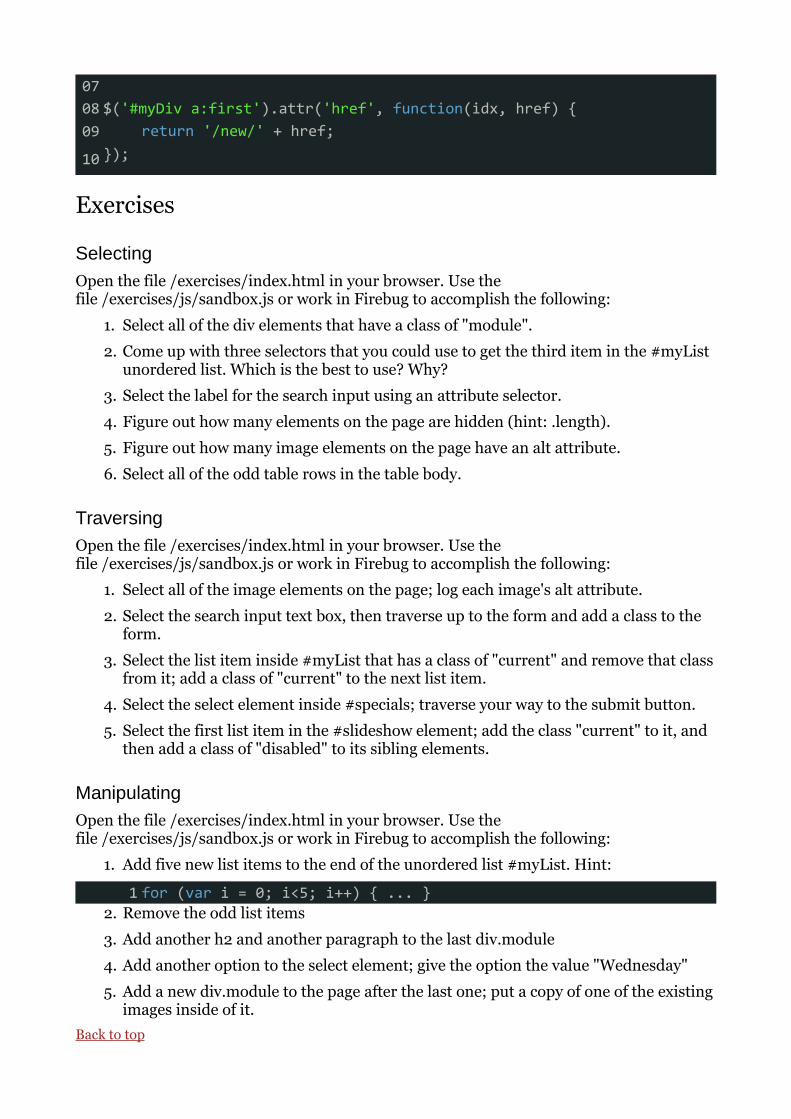
07 08 $('#myDiv a:first').attr('href', function(idx, href) {09 return '/new/' + href;10 });
Exercises
SelectingOpen the file /exercises/index.html in your browser. Use the file /exercises/js/sandbox.js or work in Firebug to accomplish the following:
1. Select all of the div elements that have a class of "module".
2. Come up with three selectors that you could use to get the third item in the #myList unordered list. Which is the best to use? Why?
3. Select the label for the search input using an attribute selector.
4. Figure out how many elements on the page are hidden (hint: .length).
5. Figure out how many image elements on the page have an alt attribute.
6. Select all of the odd table rows in the table body.
TraversingOpen the file /exercises/index.html in your browser. Use the file /exercises/js/sandbox.js or work in Firebug to accomplish the following:
1. Select all of the image elements on the page; log each image's alt attribute.
2. Select the search input text box, then traverse up to the form and add a class to the form.
3. Select the list item inside #myList that has a class of "current" and remove that class from it; add a class of "current" to the next list item.
4. Select the select element inside #specials; traverse your way to the submit button.
5. Select the first list item in the #slideshow element; add the class "current" to it, and then add a class of "disabled" to its sibling elements.
ManipulatingOpen the file /exercises/index.html in your browser. Use the file /exercises/js/sandbox.js or work in Firebug to accomplish the following:
1. Add five new list items to the end of the unordered list #myList. Hint:
1 for (var i = 0; i<5; i++) { ... }2. Remove the odd list items
3. Add another h2 and another paragraph to the last div.module
4. Add another option to the select element; give the option the value "Wednesday"
5. Add a new div.module to the page after the last one; put a copy of one of the existing images inside of it.
Back to top
jQuery Core
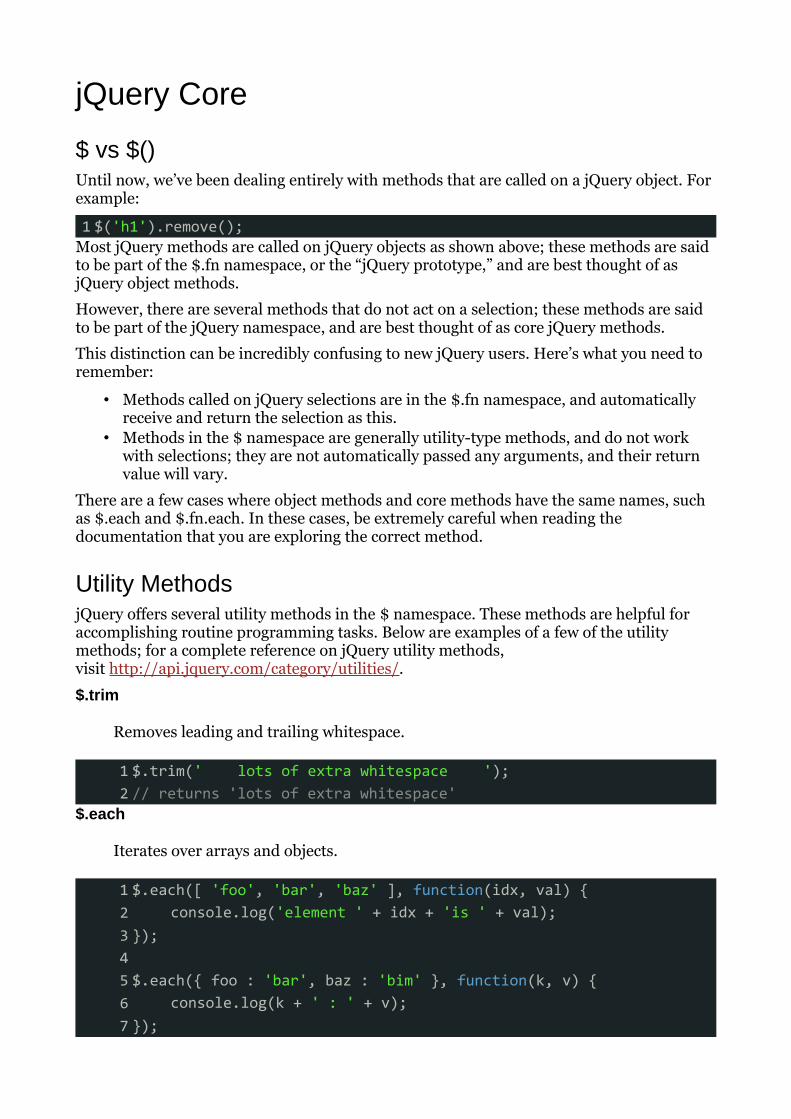
$ vs $()Until now, we’ve been dealing entirely with methods that are called on a jQuery object. For example:
1 $('h1').remove();Most jQuery methods are called on jQuery objects as shown above; these methods are said to be part of the $.fn namespace, or the “jQuery prototype,” and are best thought of as jQuery object methods.
However, there are several methods that do not act on a selection; these methods are said to be part of the jQuery namespace, and are best thought of as core jQuery methods.
This distinction can be incredibly confusing to new jQuery users. Here’s what you need to remember:
• Methods called on jQuery selections are in the $.fn namespace, and automatically receive and return the selection as this.
• Methods in the $ namespace are generally utility-type methods, and do not work with selections; they are not automatically passed any arguments, and their return value will vary.
There are a few cases where object methods and core methods have the same names, such as $.each and $.fn.each. In these cases, be extremely careful when reading the documentation that you are exploring the correct method.
Utility MethodsjQuery offers several utility methods in the $ namespace. These methods are helpful for accomplishing routine programming tasks. Below are examples of a few of the utility methods; for a complete reference on jQuery utility methods, visit http://api.jquery.com/category/utilities/.
$.trim
Removes leading and trailing whitespace.
1 $.trim(' lots of extra whitespace ');2 // returns 'lots of extra whitespace'
$.each
Iterates over arrays and objects.
1 $.each([ 'foo', 'bar', 'baz' ], function(idx, val) {2 console.log('element ' + idx + 'is ' + val);3 });4 5 $.each({ foo : 'bar', baz : 'bim' }, function(k, v) {6 console.log(k + ' : ' + v);7 });

NoteThere is also a method $.fn.each, which is used for iterating over a selection of elements.
$.inArray
Returns a value's index in an array, or -1 if the value is not in the array.
1 var myArray = [ 1, 2, 3, 5 ];2 3 if ($.inArray(4, myArray) !== -1) {4 console.log('found it!');5 }
$.extend
Changes the properties of the first object using the properties of subsequent objects.
1 var firstObject = { foo : 'bar', a : 'b' };2 var secondObject = { foo : 'baz' };3 4 var newObject = $.extend(firstObject, secondObject);5 console.log(firstObject.foo); // 'baz'6 console.log(newObject.foo); // 'baz'
If you don't want to change any of the objects you pass to $.extend, pass an empty object as the first argument.
1 var firstObject = { foo : 'bar', a : 'b' };2 var secondObject = { foo : 'baz' };3 4 var newObject = $.extend({}, firstObject, secondObject);5 console.log(firstObject.foo); // 'bar'6 console.log(newObject.foo); // 'baz'
$.proxy
Returns a function that will always run in the provided scope — that is, sets the meaning of this inside the passed function to the second argument.
1 var myFunction = function() { console.log(this); };2 var myObject = { foo : 'bar' };3 4 myFunction(); // logs window object5 6 var myProxyFunction = $.proxy(myFunction, myObject);7 myProxyFunction(); // logs myObject object
If you have an object with methods, you can pass the object and the name of a method to return a function that will always run in the scope of the object.
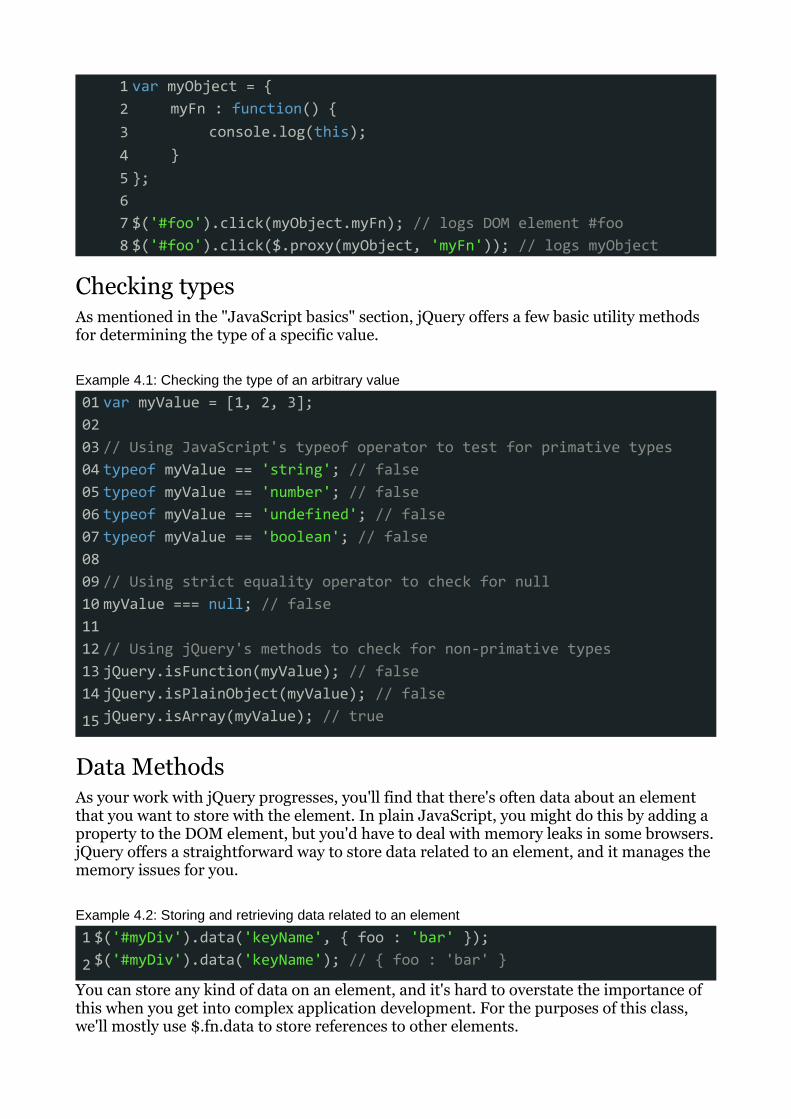
1 var myObject = {2 myFn : function() {3 console.log(this);4 }5 };6 7 $('#foo').click(myObject.myFn); // logs DOM element #foo8 $('#foo').click($.proxy(myObject, 'myFn')); // logs myObject
Checking typesAs mentioned in the "JavaScript basics" section, jQuery offers a few basic utility methods for determining the type of a specific value.
Example 4.1: Checking the type of an arbitrary value
01 var myValue = [1, 2, 3];02 03 // Using JavaScript's typeof operator to test for primative types04 typeof myValue == 'string'; // false05 typeof myValue == 'number'; // false06 typeof myValue == 'undefined'; // false07 typeof myValue == 'boolean'; // false08 09 // Using strict equality operator to check for null10 myValue === null; // false11 12 // Using jQuery's methods to check for non-primative types13 jQuery.isFunction(myValue); // false14 jQuery.isPlainObject(myValue); // false
15 jQuery.isArray(myValue); // true
Data MethodsAs your work with jQuery progresses, you'll find that there's often data about an element that you want to store with the element. In plain JavaScript, you might do this by adding a property to the DOM element, but you'd have to deal with memory leaks in some browsers. jQuery offers a straightforward way to store data related to an element, and it manages the memory issues for you.
Example 4.2: Storing and retrieving data related to an element
1 $('#myDiv').data('keyName', { foo : 'bar' });
2 $('#myDiv').data('keyName'); // { foo : 'bar' }
You can store any kind of data on an element, and it's hard to overstate the importance of this when you get into complex application development. For the purposes of this class, we'll mostly use $.fn.data to store references to other elements.
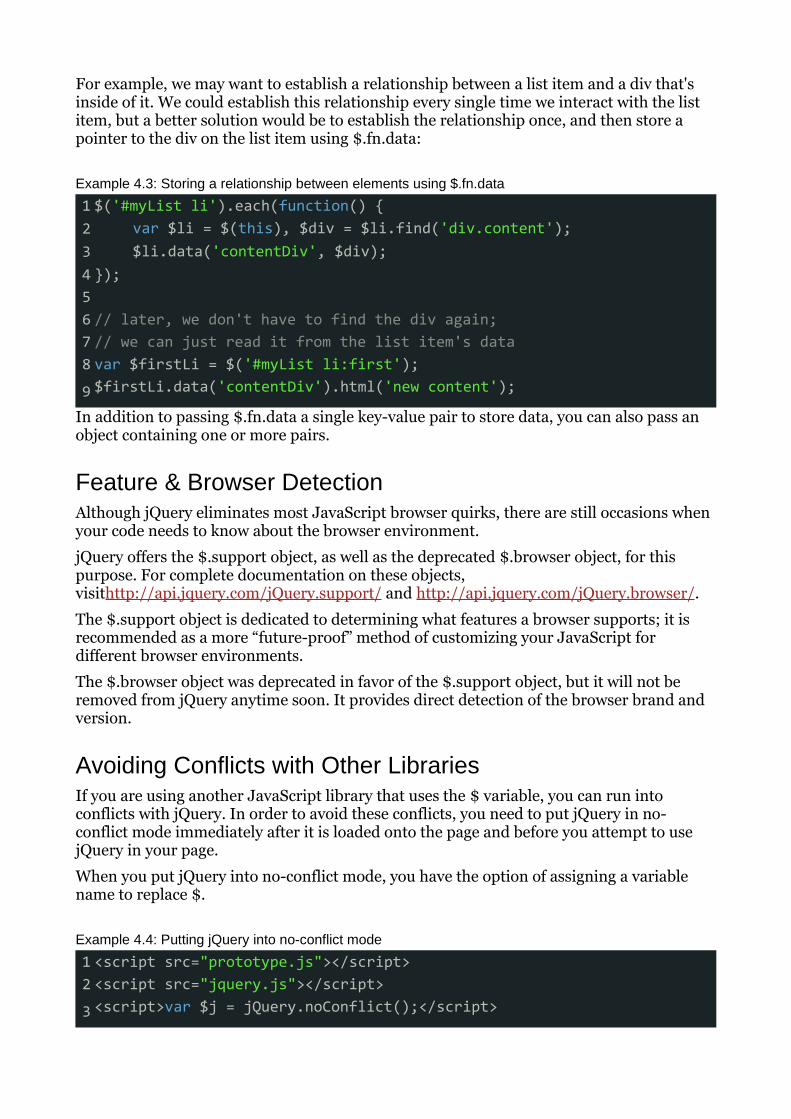
For example, we may want to establish a relationship between a list item and a div that's inside of it. We could establish this relationship every single time we interact with the list item, but a better solution would be to establish the relationship once, and then store a pointer to the div on the list item using $.fn.data:
Example 4.3: Storing a relationship between elements using $.fn.data
1 $('#myList li').each(function() {2 var $li = $(this), $div = $li.find('div.content');3 $li.data('contentDiv', $div);4 });5 6 // later, we don't have to find the div again;7 // we can just read it from the list item's data8 var $firstLi = $('#myList li:first');
9 $firstLi.data('contentDiv').html('new content');
In addition to passing $.fn.data a single key-value pair to store data, you can also pass an object containing one or more pairs.
Feature & Browser DetectionAlthough jQuery eliminates most JavaScript browser quirks, there are still occasions when your code needs to know about the browser environment.
jQuery offers the $.support object, as well as the deprecated $.browser object, for this purpose. For complete documentation on these objects, visithttp://api.jquery.com/jQuery.support/ and http://api.jquery.com/jQuery.browser/.
The $.support object is dedicated to determining what features a browser supports; it is recommended as a more “future-proof” method of customizing your JavaScript for different browser environments.
The $.browser object was deprecated in favor of the $.support object, but it will not be removed from jQuery anytime soon. It provides direct detection of the browser brand and version.
Avoiding Conflicts with Other LibrariesIf you are using another JavaScript library that uses the $ variable, you can run into conflicts with jQuery. In order to avoid these conflicts, you need to put jQuery in no-conflict mode immediately after it is loaded onto the page and before you attempt to use jQuery in your page.
When you put jQuery into no-conflict mode, you have the option of assigning a variable name to replace $.
Example 4.4: Putting jQuery into no-conflict mode
1 <script src="prototype.js"></script>2 <script src="jquery.js"></script>
3 <script>var $j = jQuery.noConflict();</script>
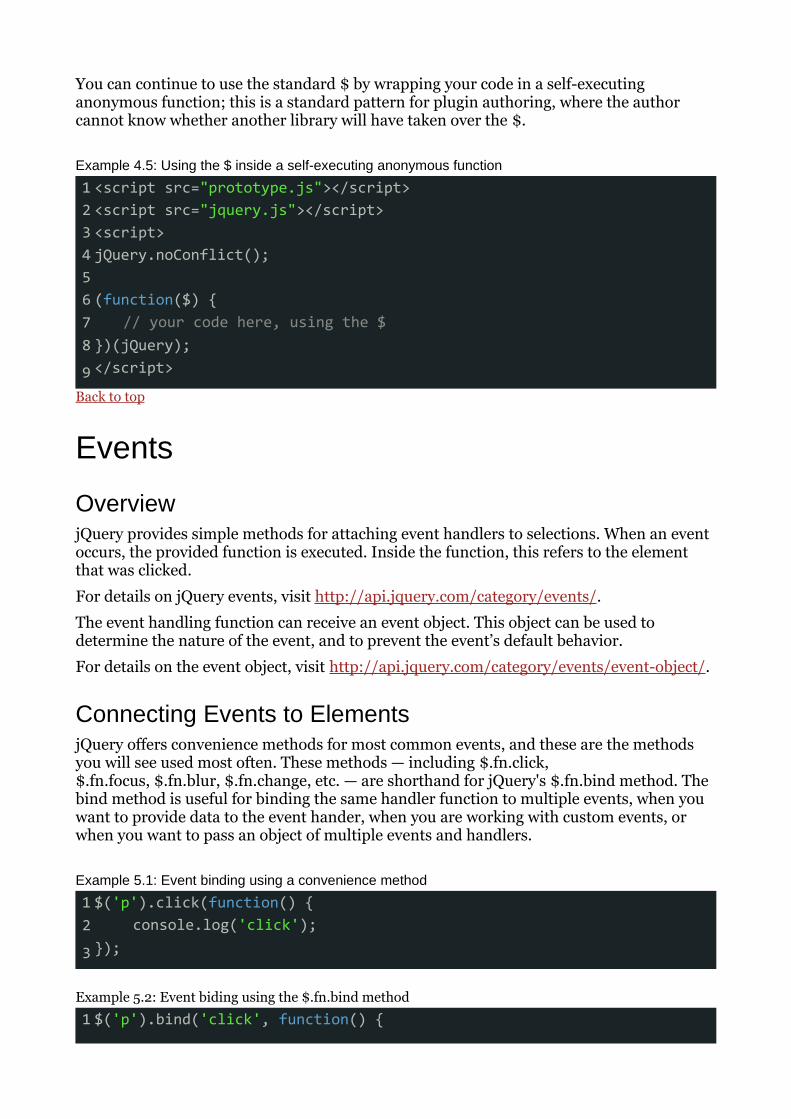
You can continue to use the standard $ by wrapping your code in a self-executing anonymous function; this is a standard pattern for plugin authoring, where the author cannot know whether another library will have taken over the $.
Example 4.5: Using the $ inside a self-executing anonymous function
1 <script src="prototype.js"></script>2 <script src="jquery.js"></script>3 <script>4 jQuery.noConflict();5 6 (function($) {7 // your code here, using the $8 })(jQuery);
9 </script>
Back to top
Events
OverviewjQuery provides simple methods for attaching event handlers to selections. When an event occurs, the provided function is executed. Inside the function, this refers to the element that was clicked.
For details on jQuery events, visit http://api.jquery.com/category/events/.
The event handling function can receive an event object. This object can be used to determine the nature of the event, and to prevent the event’s default behavior.
For details on the event object, visit http://api.jquery.com/category/events/event-object/.
Connecting Events to ElementsjQuery offers convenience methods for most common events, and these are the methods you will see used most often. These methods — including $.fn.click,$.fn.focus, $.fn.blur, $.fn.change, etc. — are shorthand for jQuery's $.fn.bind method. The bind method is useful for binding the same handler function to multiple events, when you want to provide data to the event hander, when you are working with custom events, or when you want to pass an object of multiple events and handlers.
Example 5.1: Event binding using a convenience method
1 $('p').click(function() {2 console.log('click');3 });
Example 5.2: Event biding using the $.fn.bind method
1 $('p').bind('click', function() {
2 console.log('click');3 });
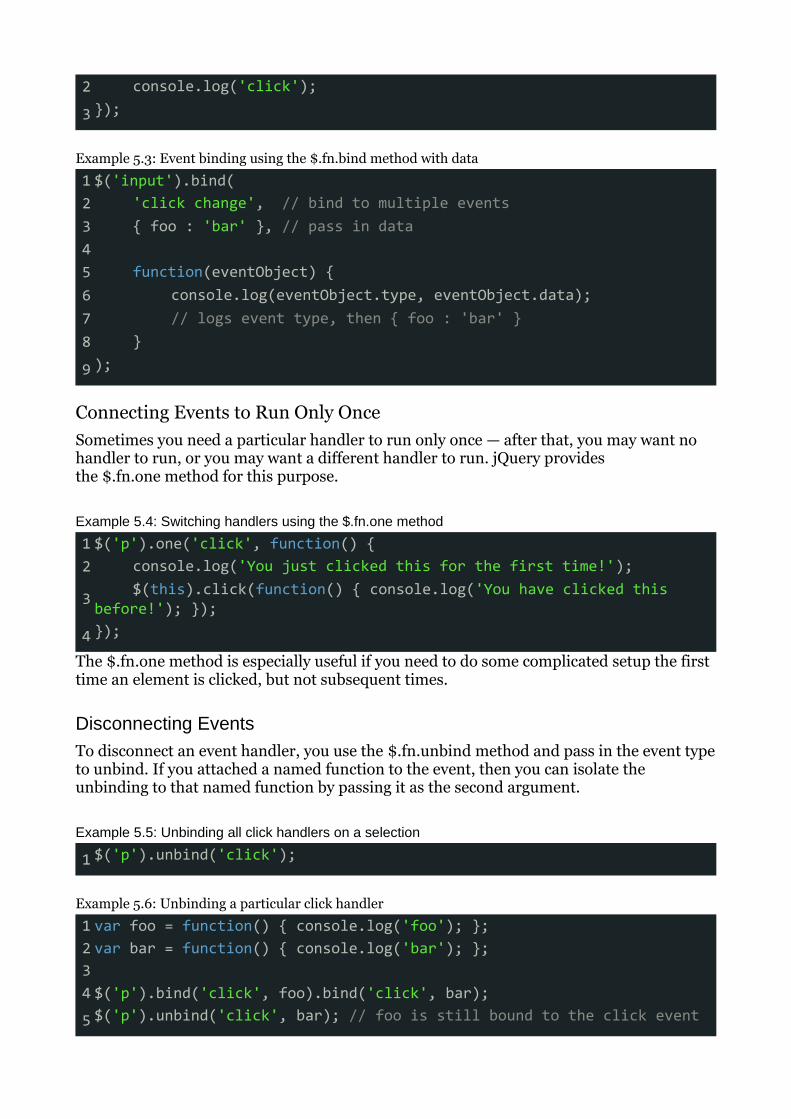
Example 5.3: Event binding using the $.fn.bind method with data
1 $('input').bind(2 'click change', // bind to multiple events3 { foo : 'bar' }, // pass in data4 5 function(eventObject) {6 console.log(eventObject.type, eventObject.data);7 // logs event type, then { foo : 'bar' }8 }9 );
Connecting Events to Run Only OnceSometimes you need a particular handler to run only once — after that, you may want no handler to run, or you may want a different handler to run. jQuery provides the $.fn.one method for this purpose.
Example 5.4: Switching handlers using the $.fn.one method
1 $('p').one('click', function() {2 console.log('You just clicked this for the first time!');3 $(this).click(function() { console.log('You have clicked this before!'); });
4 });
The $.fn.one method is especially useful if you need to do some complicated setup the first time an element is clicked, but not subsequent times.
Disconnecting EventsTo disconnect an event handler, you use the $.fn.unbind method and pass in the event type to unbind. If you attached a named function to the event, then you can isolate the unbinding to that named function by passing it as the second argument.
Example 5.5: Unbinding all click handlers on a selection
1 $('p').unbind('click');
Example 5.6: Unbinding a particular click handler
1 var foo = function() { console.log('foo'); };2 var bar = function() { console.log('bar'); };3 4 $('p').bind('click', foo).bind('click', bar);
5 $('p').unbind('click', bar); // foo is still bound to the click event
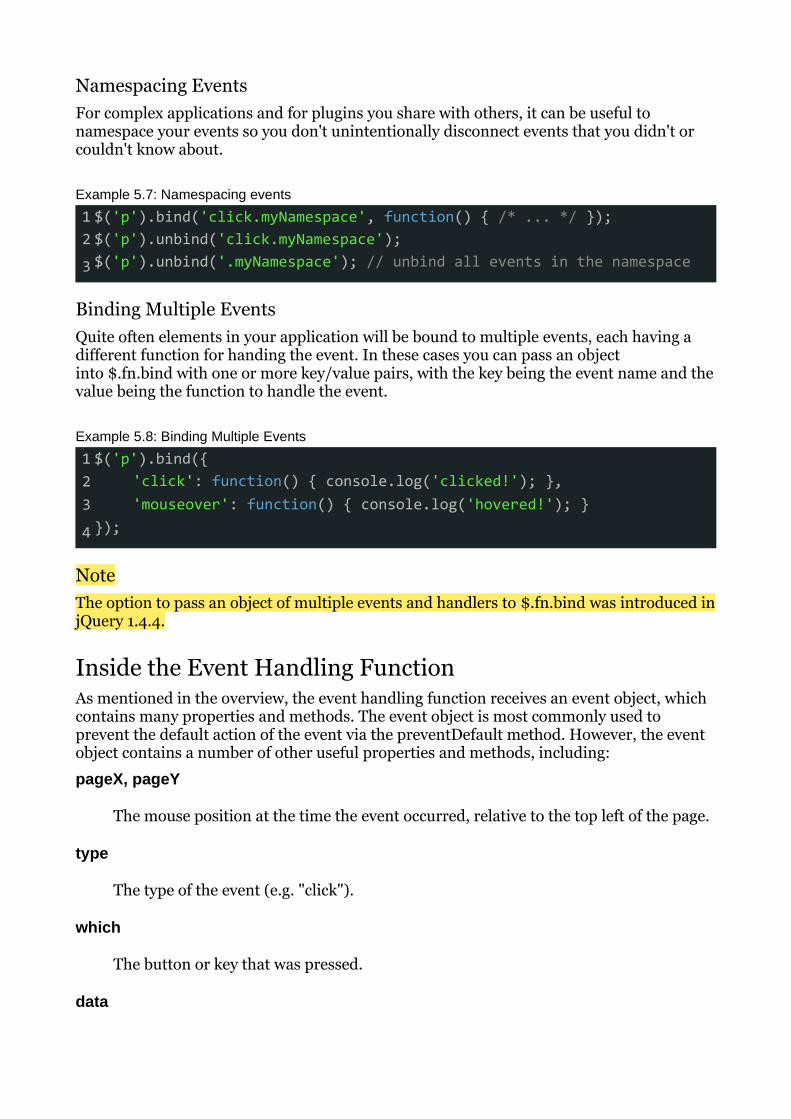
Namespacing EventsFor complex applications and for plugins you share with others, it can be useful to namespace your events so you don't unintentionally disconnect events that you didn't or couldn't know about.
Example 5.7: Namespacing events
1 $('p').bind('click.myNamespace', function() { /* ... */ });2 $('p').unbind('click.myNamespace');
3 $('p').unbind('.myNamespace'); // unbind all events in the namespace
Binding Multiple EventsQuite often elements in your application will be bound to multiple events, each having a different function for handing the event. In these cases you can pass an object into $.fn.bind with one or more key/value pairs, with the key being the event name and the value being the function to handle the event.
Example 5.8: Binding Multiple Events
1 $('p').bind({2 'click': function() { console.log('clicked!'); },3 'mouseover': function() { console.log('hovered!'); }4 });
NoteThe option to pass an object of multiple events and handlers to $.fn.bind was introduced in jQuery 1.4.4.
Inside the Event Handling FunctionAs mentioned in the overview, the event handling function receives an event object, which contains many properties and methods. The event object is most commonly used to prevent the default action of the event via the preventDefault method. However, the event object contains a number of other useful properties and methods, including:
pageX, pageY
The mouse position at the time the event occurred, relative to the top left of the page.
type
The type of the event (e.g. "click").
which
The button or key that was pressed.
data
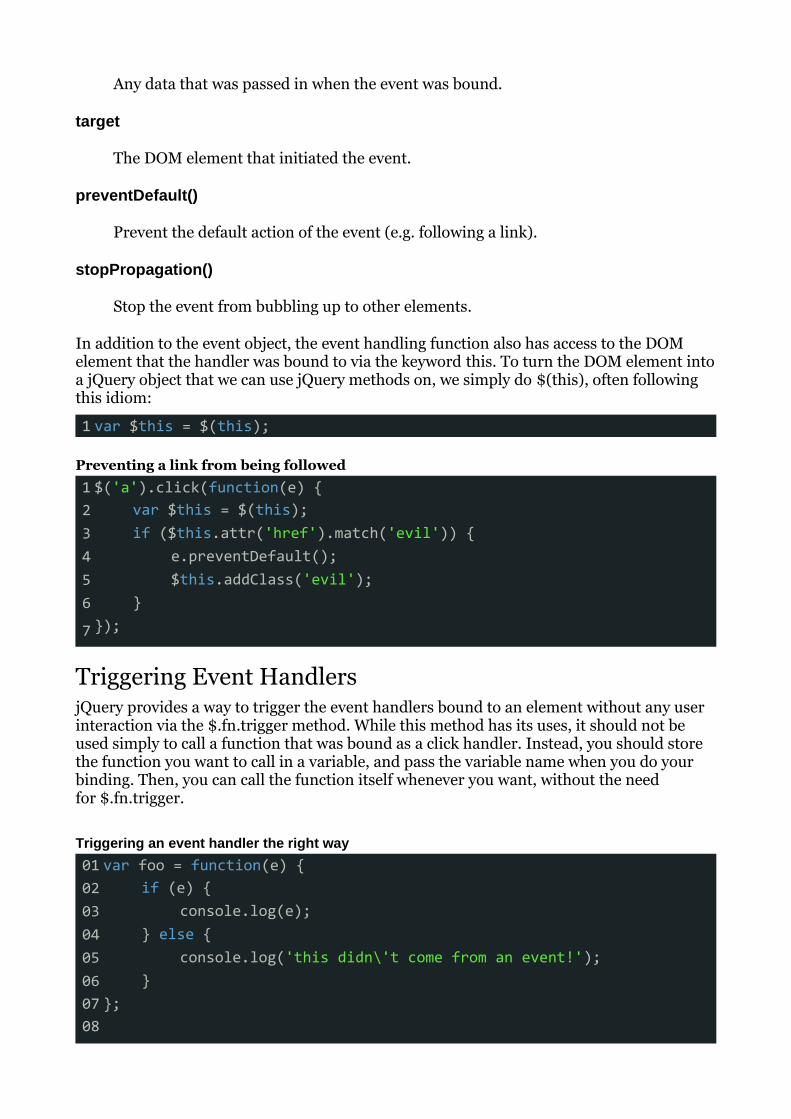
Any data that was passed in when the event was bound.
target
The DOM element that initiated the event.
preventDefault()
Prevent the default action of the event (e.g. following a link).
stopPropagation()
Stop the event from bubbling up to other elements.
In addition to the event object, the event handling function also has access to the DOM element that the handler was bound to via the keyword this. To turn the DOM element into a jQuery object that we can use jQuery methods on, we simply do $(this), often following this idiom:
1 var $this = $(this);
Preventing a link from being followed
1 $('a').click(function(e) {2 var $this = $(this);3 if ($this.attr('href').match('evil')) {4 e.preventDefault();5 $this.addClass('evil');6 }7 });
Triggering Event HandlersjQuery provides a way to trigger the event handlers bound to an element without any user interaction via the $.fn.trigger method. While this method has its uses, it should not be used simply to call a function that was bound as a click handler. Instead, you should store the function you want to call in a variable, and pass the variable name when you do your binding. Then, you can call the function itself whenever you want, without the need for $.fn.trigger.
Triggering an event handler the right way
01 var foo = function(e) {02 if (e) {03 console.log(e);04 } else {05 console.log('this didn\'t come from an event!');06 }07 };08

09 10 $('p').click(foo);11
12 foo(); // instead of $('p').trigger('click')
Increasing Performance with Event DelegationYou'll frequently use jQuery to add new elements to the page, and when you do, you may need to bind events to those new elements — events you already bound to similar elements that were on the page originally. Instead of repeating your event binding every time you add elements to the page, you can use event delegation. With event delegation, you bind your event to a container element, and then when the event occurs, you look to see which contained element it occurred on. If this sounds complicated, luckily jQuery makes it easy with its $.fn.live and $.fn.delegate methods.
While most people discover event delegation while dealing with elements added to the page later, it has some performance benefits even if you never add more elements to the page. The time required to bind event handlers to hundreds of individual elements is non-trivial; if you have a large set of elements, you should consider delegating related events to a container element.
NoteThe $.fn.live method was introduced in jQuery 1.3, and at that time only certain event types were supported. As of jQuery 1.4.2, the $.fn.delegate method is available, and is the preferred method.
Event delegation using $.fn.delegate
1 $('#myUnorderedList').delegate('li', 'click', function(e) {2 var $myListItem = $(this);3 // ...4 });
Event delegation using $.fn.live
1 $('#myUnorderedList li').live('click', function(e) {2 var $myListItem = $(this);3 // ...4 });
Unbinding Delegated EventsIf you need to remove delegated events, you can't simply unbind them. Instead, use $.fn.undelegate for events connected with $.fn.delegate, and $.fn.die for events connected with $.fn.live. As with bind, you can optionally pass in the name of the bound function.
Unbinding delegated events
1 $('#myUnorderedList').undelegate('li', 'click');
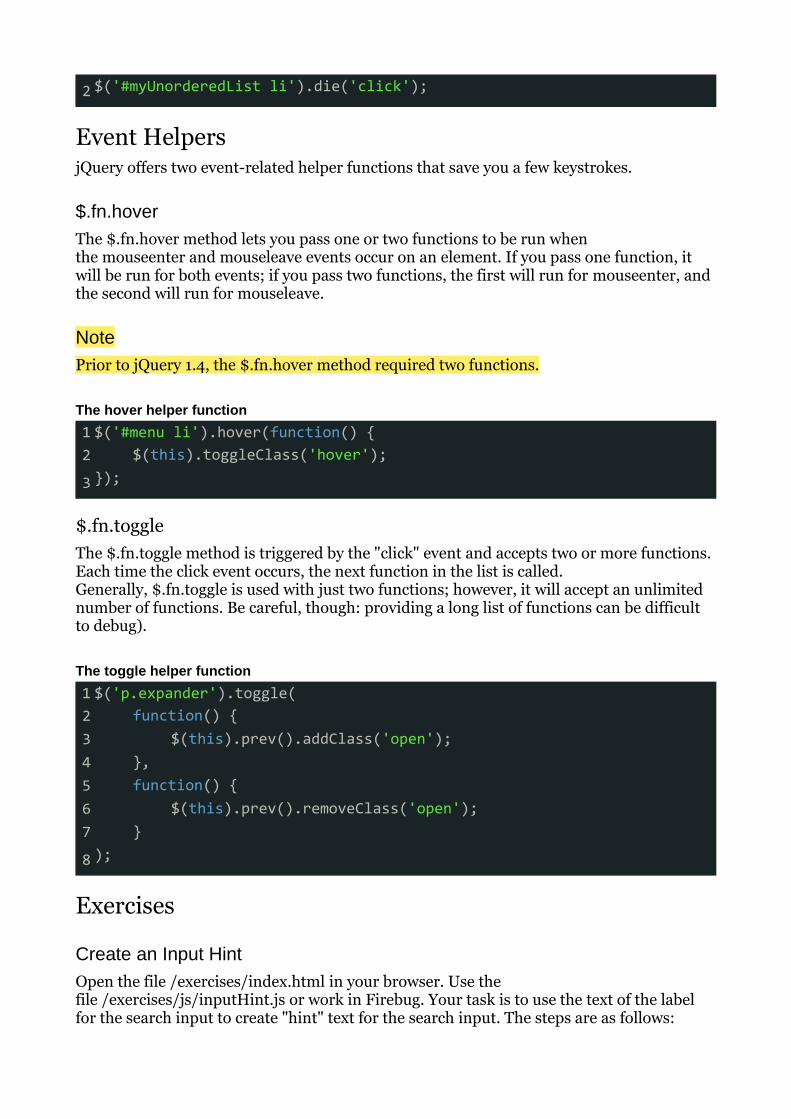
2 $('#myUnorderedList li').die('click');
Event HelpersjQuery offers two event-related helper functions that save you a few keystrokes.
$.fn.hoverThe $.fn.hover method lets you pass one or two functions to be run when the mouseenter and mouseleave events occur on an element. If you pass one function, it will be run for both events; if you pass two functions, the first will run for mouseenter, and the second will run for mouseleave.
NotePrior to jQuery 1.4, the $.fn.hover method required two functions.
The hover helper function
1 $('#menu li').hover(function() {2 $(this).toggleClass('hover');3 });
$.fn.toggleThe $.fn.toggle method is triggered by the "click" event and accepts two or more functions. Each time the click event occurs, the next function in the list is called. Generally, $.fn.toggle is used with just two functions; however, it will accept an unlimited number of functions. Be careful, though: providing a long list of functions can be difficult to debug).
The toggle helper function
1 $('p.expander').toggle(2 function() {3 $(this).prev().addClass('open');4 },5 function() {6 $(this).prev().removeClass('open');7 }8 );
Exercises
Create an Input HintOpen the file /exercises/index.html in your browser. Use the file /exercises/js/inputHint.js or work in Firebug. Your task is to use the text of the label for the search input to create "hint" text for the search input. The steps are as follows:
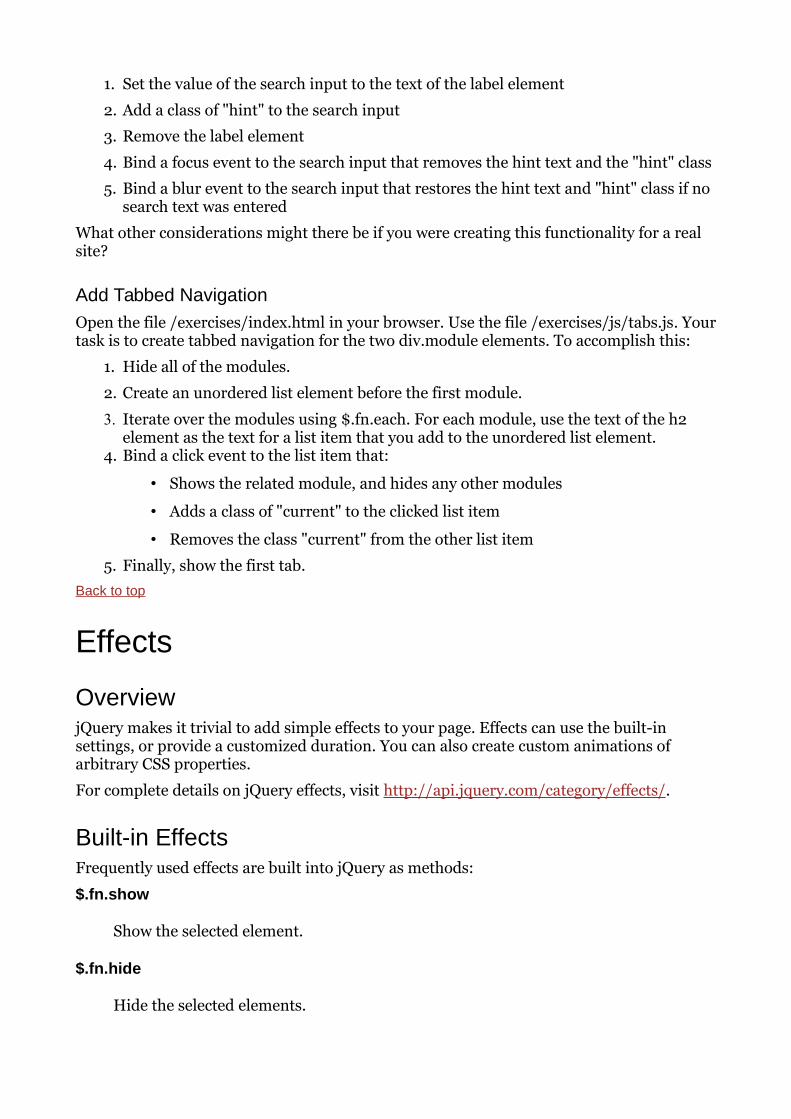
1. Set the value of the search input to the text of the label element
2. Add a class of "hint" to the search input
3. Remove the label element
4. Bind a focus event to the search input that removes the hint text and the "hint" class
5. Bind a blur event to the search input that restores the hint text and "hint" class if no search text was entered
What other considerations might there be if you were creating this functionality for a real site?
Add Tabbed NavigationOpen the file /exercises/index.html in your browser. Use the file /exercises/js/tabs.js. Your task is to create tabbed navigation for the two div.module elements. To accomplish this:
1. Hide all of the modules.
2. Create an unordered list element before the first module.
3. Iterate over the modules using $.fn.each. For each module, use the text of the h2 element as the text for a list item that you add to the unordered list element.
4. Bind a click event to the list item that:
• Shows the related module, and hides any other modules
• Adds a class of "current" to the clicked list item
• Removes the class "current" from the other list item
5. Finally, show the first tab.Back to top
Effects
OverviewjQuery makes it trivial to add simple effects to your page. Effects can use the built-in settings, or provide a customized duration. You can also create custom animations of arbitrary CSS properties.
For complete details on jQuery effects, visit http://api.jquery.com/category/effects/.
Built-in EffectsFrequently used effects are built into jQuery as methods:
$.fn.show
Show the selected element.
$.fn.hide
Hide the selected elements.
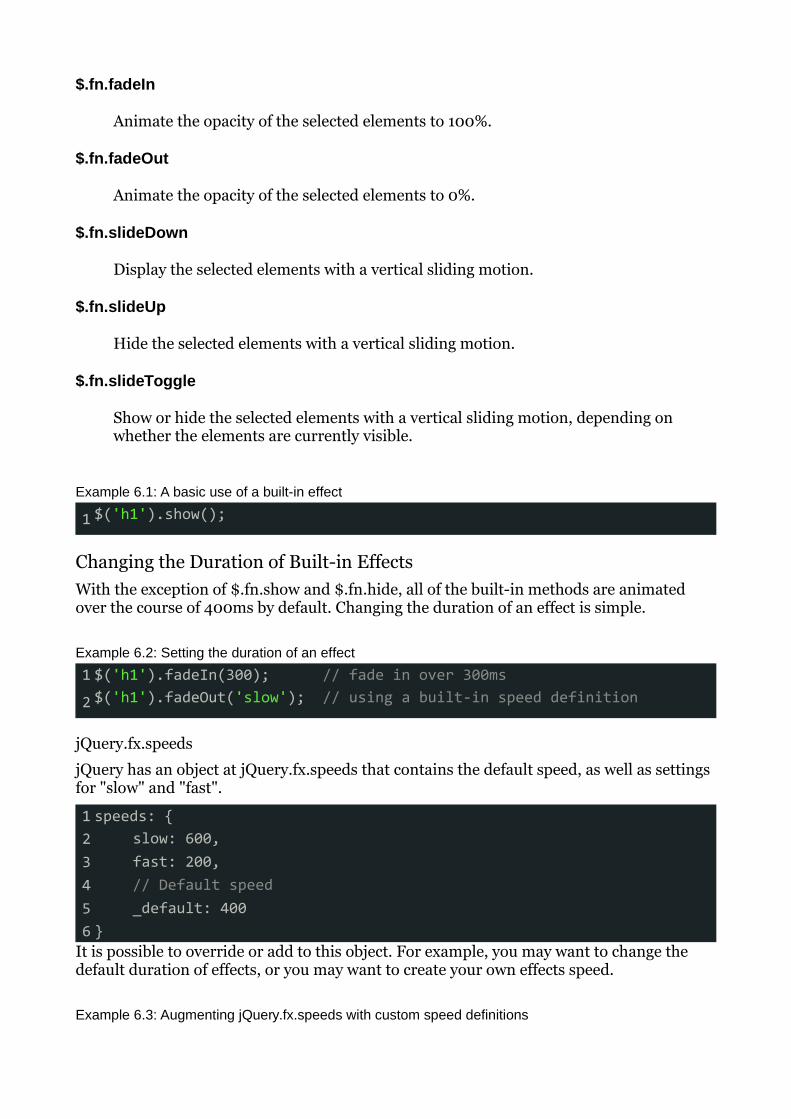
$.fn.fadeIn
Animate the opacity of the selected elements to 100%.
$.fn.fadeOut
Animate the opacity of the selected elements to 0%.
$.fn.slideDown
Display the selected elements with a vertical sliding motion.
$.fn.slideUp
Hide the selected elements with a vertical sliding motion.
$.fn.slideToggle
Show or hide the selected elements with a vertical sliding motion, depending on whether the elements are currently visible.
Example 6.1: A basic use of a built-in effect
1 $('h1').show();
Changing the Duration of Built-in EffectsWith the exception of $.fn.show and $.fn.hide, all of the built-in methods are animated over the course of 400ms by default. Changing the duration of an effect is simple.
Example 6.2: Setting the duration of an effect
1 $('h1').fadeIn(300); // fade in over 300ms
2 $('h1').fadeOut('slow'); // using a built-in speed definition
jQuery.fx.speeds
jQuery has an object at jQuery.fx.speeds that contains the default speed, as well as settings for "slow" and "fast".
1 speeds: {2 slow: 600,3 fast: 200,4 // Default speed5 _default: 4006 }
It is possible to override or add to this object. For example, you may want to change the default duration of effects, or you may want to create your own effects speed.
Example 6.3: Augmenting jQuery.fx.speeds with custom speed definitions
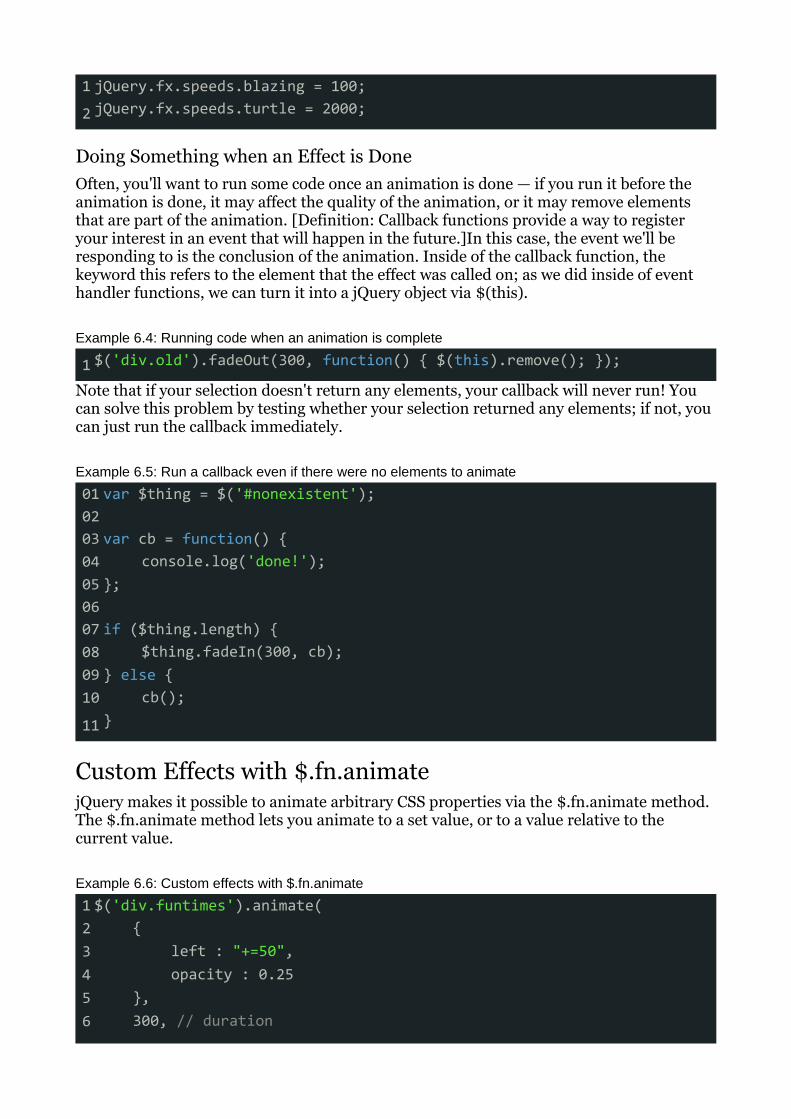
1 jQuery.fx.speeds.blazing = 100;
2 jQuery.fx.speeds.turtle = 2000;
Doing Something when an Effect is DoneOften, you'll want to run some code once an animation is done — if you run it before the animation is done, it may affect the quality of the animation, or it may remove elements that are part of the animation. [Definition: Callback functions provide a way to register your interest in an event that will happen in the future.]In this case, the event we'll be responding to is the conclusion of the animation. Inside of the callback function, the keyword this refers to the element that the effect was called on; as we did inside of event handler functions, we can turn it into a jQuery object via $(this).
Example 6.4: Running code when an animation is complete
1 $('div.old').fadeOut(300, function() { $(this).remove(); });
Note that if your selection doesn't return any elements, your callback will never run! You can solve this problem by testing whether your selection returned any elements; if not, you can just run the callback immediately.
Example 6.5: Run a callback even if there were no elements to animate
01 var $thing = $('#nonexistent');02 03 var cb = function() {04 console.log('done!');05 };06 07 if ($thing.length) {08 $thing.fadeIn(300, cb);09 } else {10 cb();11 }
Custom Effects with $.fn.animatejQuery makes it possible to animate arbitrary CSS properties via the $.fn.animate method. The $.fn.animate method lets you animate to a set value, or to a value relative to the current value.
Example 6.6: Custom effects with $.fn.animate
1 $('div.funtimes').animate(2 {3 left : "+=50",4 opacity : 0.255 },6 300, // duration
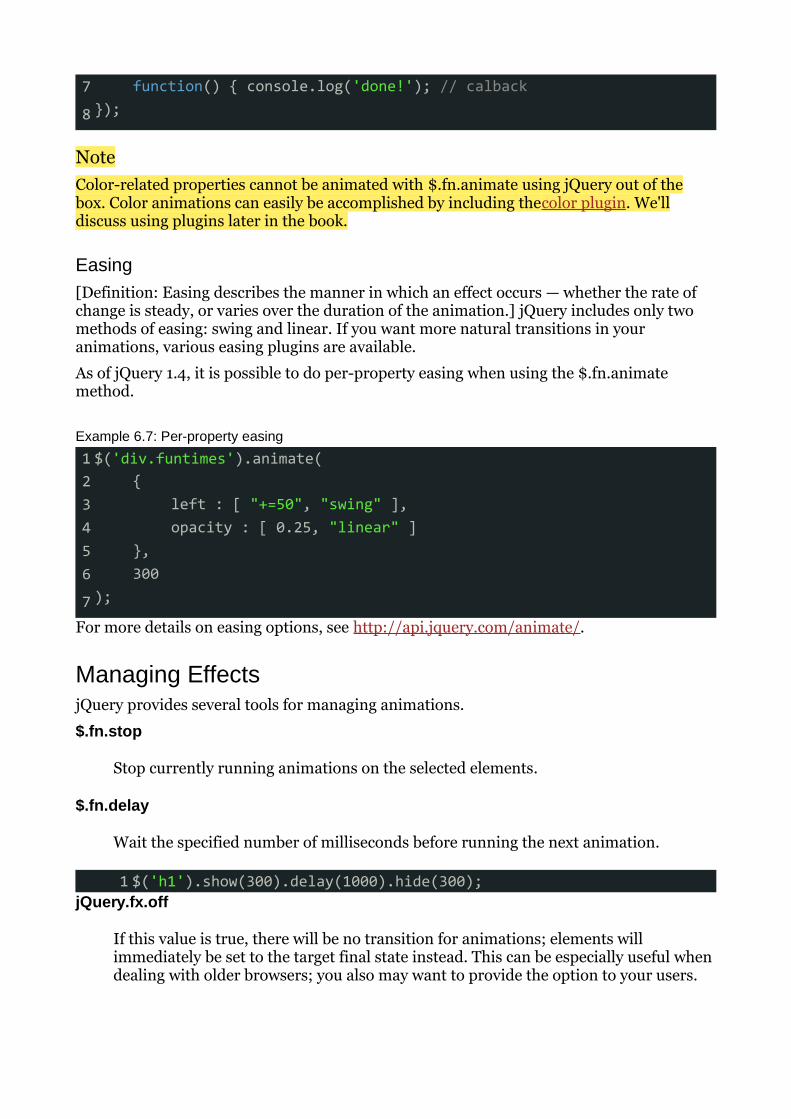
7 function() { console.log('done!'); // calback8 });
NoteColor-related properties cannot be animated with $.fn.animate using jQuery out of the box. Color animations can easily be accomplished by including thecolor plugin. We'll discuss using plugins later in the book.
Easing[Definition: Easing describes the manner in which an effect occurs — whether the rate of change is steady, or varies over the duration of the animation.] jQuery includes only two methods of easing: swing and linear. If you want more natural transitions in your animations, various easing plugins are available.
As of jQuery 1.4, it is possible to do per-property easing when using the $.fn.animate method.
Example 6.7: Per-property easing
1 $('div.funtimes').animate(2 {3 left : [ "+=50", "swing" ],4 opacity : [ 0.25, "linear" ]5 },6 3007 );
For more details on easing options, see http://api.jquery.com/animate/.
Managing EffectsjQuery provides several tools for managing animations.
$.fn.stop
Stop currently running animations on the selected elements.
$.fn.delay
Wait the specified number of milliseconds before running the next animation.
1 $('h1').show(300).delay(1000).hide(300);jQuery.fx.off
If this value is true, there will be no transition for animations; elements will immediately be set to the target final state instead. This can be especially useful when dealing with older browsers; you also may want to provide the option to your users.
Exercises
Reveal Hidden TextOpen the file /exercises/index.html in your browser. Use the file /exercises/js/blog.js. Your task is to add some interactivity to the blog section of the page. The spec for the feature is as follows:
• Clicking on a headline in the #blog div should slide down the excerpt paragraph
• Clicking on another headline should slide down its excerpt paragraph, and slide up any other currently showing excerpt paragraphs.
Hint: don't forget about the :visible selector!
Create Dropdown MenusOpen the file /exercises/index.html in your browser. Use the file /exercises/js/navigation.js. Your task is to add dropdowns to the main navigation at the top of the page.
• Hovering over an item in the main menu should show that item's submenu items, if any.
• Exiting an item should hide any submenu items.
To accomplish this, use the $.fn.hover method to add and remove a class from the submenu items to control whether they're visible or hidden. (The file at/exercises/css/styles.css includes the "hover" class for this purpose.)
Create a SlideshowOpen the file /exercises/index.html in your browser. Use the file /exercises/js/slideshow.js. Your task is to take a plain semantic HTML page and enhance it with JavaScript by adding a slideshow.
1. Move the #slideshow element to the top of the body.
2. Write code to cycle through the list items inside the element; fade one in, display it for a few seconds, then fade it out and fade in the next one.
3. When you get to the end of the list, start again at the beginning.
For an extra challenge, create a navigation area under the slideshow that shows how many images there are and which image you're currently viewing. (Hint: $.fn.prevAll will come in handy for this.)Back to top
Ajax
OverviewThe XMLHttpRequest method (XHR) allows browsers to communicate with the server without requiring a page reload. This method, also known as Ajax (Asynchronous JavaScript and XML), allows for web pages that provide rich, interactive experiences.

Ajax requests are triggered by JavaScript code; your code sends a request to a URL, and when it receives a response, a callback function can be triggered to handle the response. Because the request is asynchronous, the rest of your code continues to execute while the request is being processed, so it’s imperative that a callback be used to handle the response.
jQuery provides Ajax support that abstracts away painful browser differences. It offers both a full-featured $.ajax() method, and simple convenience methods such as $.get(), $.getScript(), $.getJSON(), $.post(), and $().load().
Most jQuery applications don’t in fact use XML, despite the name “Ajax”; instead, they transport data as plain HTML or JSON (JavaScript Object Notation).
In general, Ajax does not work across domains. Exceptions are services that provide JSONP (JSON with Padding) support, which allow limited cross-domain functionality.
Key ConceptsProper use of Ajax-related jQuery methods requires understanding some key concepts first.
GET vs. PostThe two most common “methods” for sending a request to a server are GET and POST. It’s important to understand the proper application of each.
The GET method should be used for non-destructive operations — that is, operations where you are only “getting” data from the server, not changing data on the server. For example, a query to a search service might be a GET request. GET requests may be cached by the browser, which can lead to unpredictable behavior if you are not expecting it. GET requests generally send all of their data in a query string.
The POST method should be used for destructive operations — that is, operations where you are changing data on the server. For example, a user saving a blog post should be a POST request. POST requests are generally not cached by the browser; a query string can be part of the URL, but the data tends to be sent separately as post data.
Data TypesjQuery generally requires some instruction as to the type of data you expect to get back from an Ajax request; in some cases the data type is specified by the method name, and in other cases it is provided as part of a configuration object. There are several options:
text
For transporting simple strings
html
For transporting blocks of HTML to be placed on the page
script
For adding a new script to the page
json
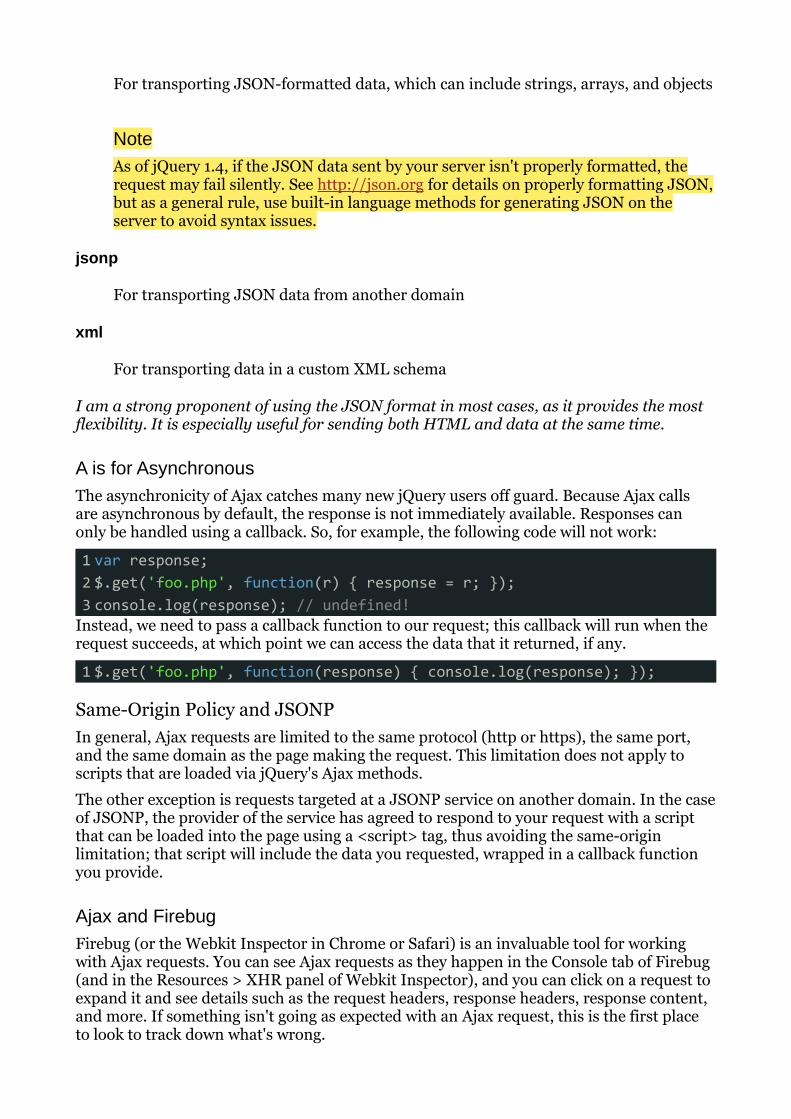
For transporting JSON-formatted data, which can include strings, arrays, and objects
NoteAs of jQuery 1.4, if the JSON data sent by your server isn't properly formatted, the request may fail silently. See http://json.org for details on properly formatting JSON, but as a general rule, use built-in language methods for generating JSON on the server to avoid syntax issues.
jsonp
For transporting JSON data from another domain
xml
For transporting data in a custom XML schema
I am a strong proponent of using the JSON format in most cases, as it provides the most flexibility. It is especially useful for sending both HTML and data at the same time.
A is for AsynchronousThe asynchronicity of Ajax catches many new jQuery users off guard. Because Ajax calls are asynchronous by default, the response is not immediately available. Responses can only be handled using a callback. So, for example, the following code will not work:
1 var response;2 $.get('foo.php', function(r) { response = r; });3 console.log(response); // undefined!
Instead, we need to pass a callback function to our request; this callback will run when the request succeeds, at which point we can access the data that it returned, if any.
1 $.get('foo.php', function(response) { console.log(response); });
Same-Origin Policy and JSONPIn general, Ajax requests are limited to the same protocol (http or https), the same port, and the same domain as the page making the request. This limitation does not apply to scripts that are loaded via jQuery's Ajax methods.
The other exception is requests targeted at a JSONP service on another domain. In the case of JSONP, the provider of the service has agreed to respond to your request with a script that can be loaded into the page using a <script> tag, thus avoiding the same-origin limitation; that script will include the data you requested, wrapped in a callback function you provide.
Ajax and FirebugFirebug (or the Webkit Inspector in Chrome or Safari) is an invaluable tool for working with Ajax requests. You can see Ajax requests as they happen in the Console tab of Firebug (and in the Resources > XHR panel of Webkit Inspector), and you can click on a request to expand it and see details such as the request headers, response headers, response content, and more. If something isn't going as expected with an Ajax request, this is the first place to look to track down what's wrong.
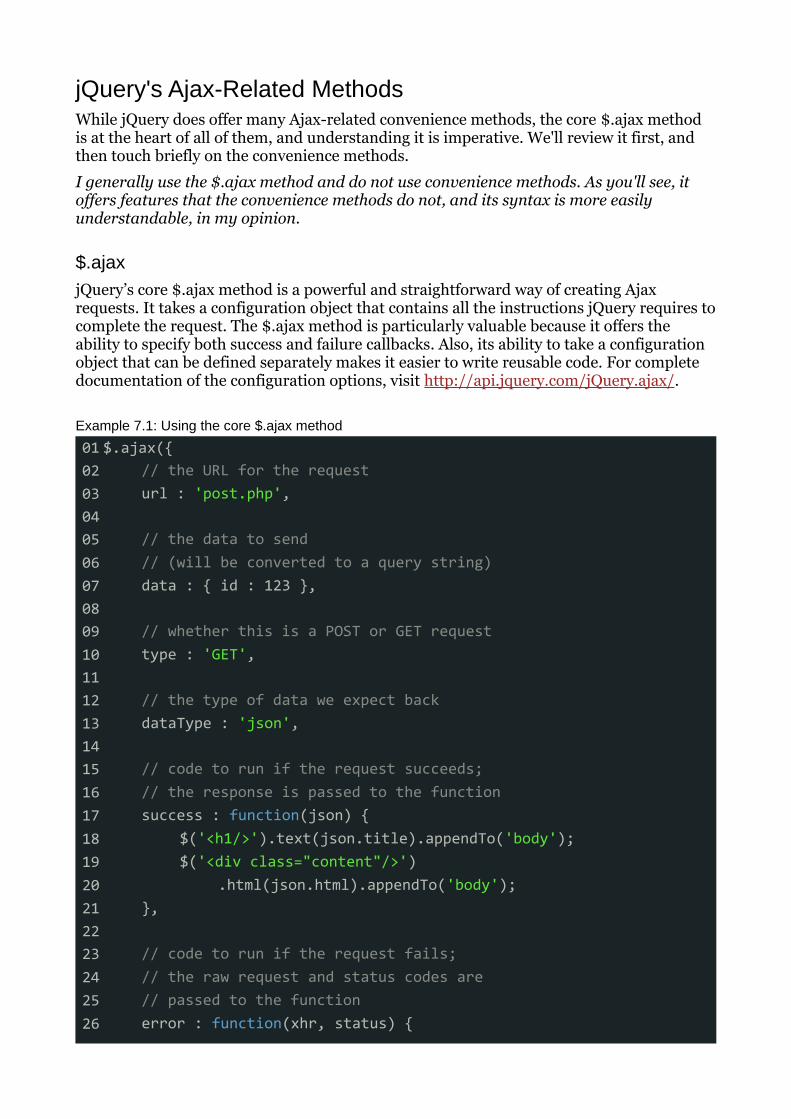
jQuery's Ajax-Related MethodsWhile jQuery does offer many Ajax-related convenience methods, the core $.ajax method is at the heart of all of them, and understanding it is imperative. We'll review it first, and then touch briefly on the convenience methods.
I generally use the $.ajax method and do not use convenience methods. As you'll see, it offers features that the convenience methods do not, and its syntax is more easily understandable, in my opinion.
$.ajaxjQuery’s core $.ajax method is a powerful and straightforward way of creating Ajax requests. It takes a configuration object that contains all the instructions jQuery requires to complete the request. The $.ajax method is particularly valuable because it offers the ability to specify both success and failure callbacks. Also, its ability to take a configuration object that can be defined separately makes it easier to write reusable code. For complete documentation of the configuration options, visit http://api.jquery.com/jQuery.ajax/.
Example 7.1: Using the core $.ajax method
01 $.ajax({02 // the URL for the request03 url : 'post.php',04 05 // the data to send06 // (will be converted to a query string)07 data : { id : 123 },08 09 // whether this is a POST or GET request10 type : 'GET',11 12 // the type of data we expect back13 dataType : 'json',14 15 // code to run if the request succeeds;16 // the response is passed to the function17 success : function(json) {18 $('<h1/>').text(json.title).appendTo('body');19 $('<div class="content"/>')20 .html(json.html).appendTo('body');21 },22 23 // code to run if the request fails;24 // the raw request and status codes are25 // passed to the function26 error : function(xhr, status) {
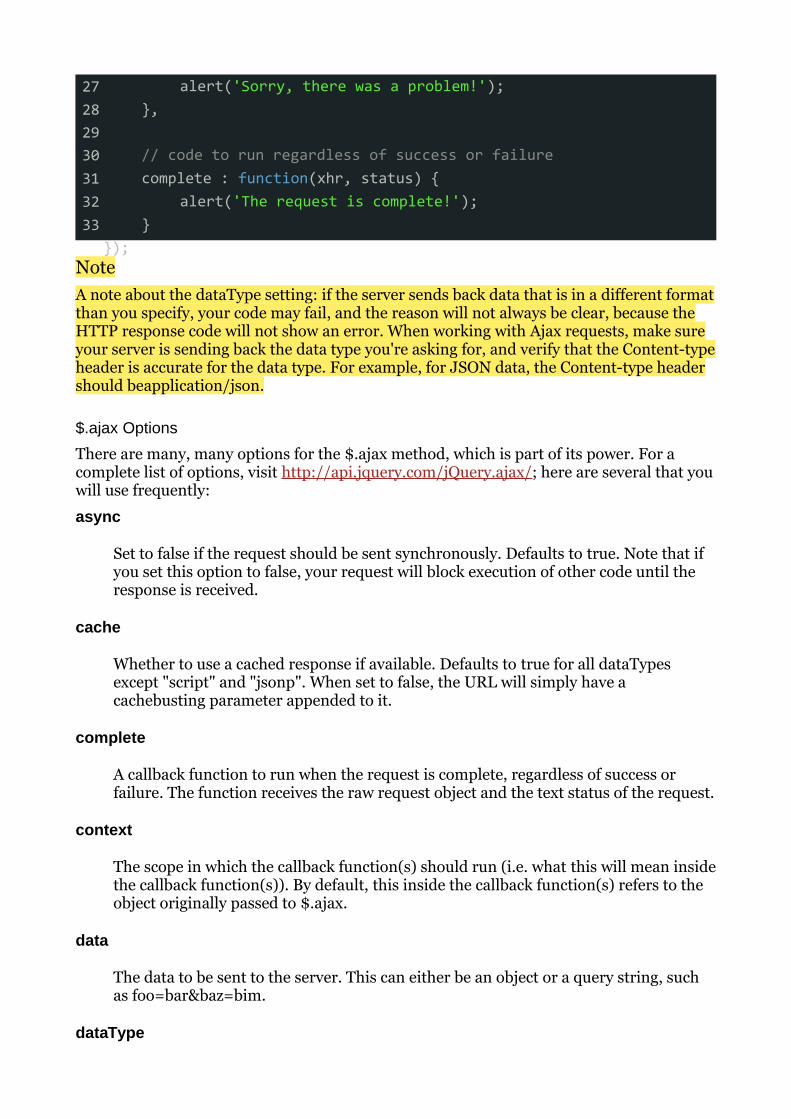
27 alert('Sorry, there was a problem!');28 },29 30 // code to run regardless of success or failure31 complete : function(xhr, status) {32 alert('The request is complete!');33 }
});NoteA note about the dataType setting: if the server sends back data that is in a different format than you specify, your code may fail, and the reason will not always be clear, because the HTTP response code will not show an error. When working with Ajax requests, make sure your server is sending back the data type you're asking for, and verify that the Content-type header is accurate for the data type. For example, for JSON data, the Content-type header should beapplication/json.
$.ajax Options
There are many, many options for the $.ajax method, which is part of its power. For a complete list of options, visit http://api.jquery.com/jQuery.ajax/; here are several that you will use frequently:
async
Set to false if the request should be sent synchronously. Defaults to true. Note that if you set this option to false, your request will block execution of other code until the response is received.
cache
Whether to use a cached response if available. Defaults to true for all dataTypes except "script" and "jsonp". When set to false, the URL will simply have a cachebusting parameter appended to it.
complete
A callback function to run when the request is complete, regardless of success or failure. The function receives the raw request object and the text status of the request.
context
The scope in which the callback function(s) should run (i.e. what this will mean inside the callback function(s)). By default, this inside the callback function(s) refers to the object originally passed to $.ajax.
data
The data to be sent to the server. This can either be an object or a query string, such as foo=bar&baz=bim.
dataType
The type of data you expect back from the server. By default, jQuery will look at the MIME type of the response if no dataType is specified.
error
A callback function to run if the request results in an error. The function receives the raw request object and the text status of the request.
jsonp
The callback name to send in a query string when making a JSONP request. Defaults to "callback".
success
A callback function to run if the request succeeds. The function receives the response data (converted to a JavaScript object if the dataType was JSON), as well as the text status of the request and the raw request object.
timeout
The time in milliseconds to wait before considering the request a failure.
traditional
Set to true to use the param serialization style in use prior to jQuery 1.4. For details, see http://api.jquery.com/jQuery.param/.
type
The type of the request, "POST" or "GET". Defaults to "GET". Other request types, such as "PUT" and "DELETE" can be used, but they may not be supported by all browsers.
url
The URL for the request.
The url option is the only required property of the $.ajax configuration object; all other properties are optional.
Convenience MethodsIf you don't need the extensive configurability of $.ajax, and you don't care about handling errors, the Ajax convenience functions provided by jQuery can be useful, terse ways to accomplish Ajax requests. These methods are just "wrappers" around the core $.ajax method, and simply pre-set some of the options on the$.ajax method.
The convenience methods provided by jQuery are:
$.get
Perform a GET request to the provided URL.
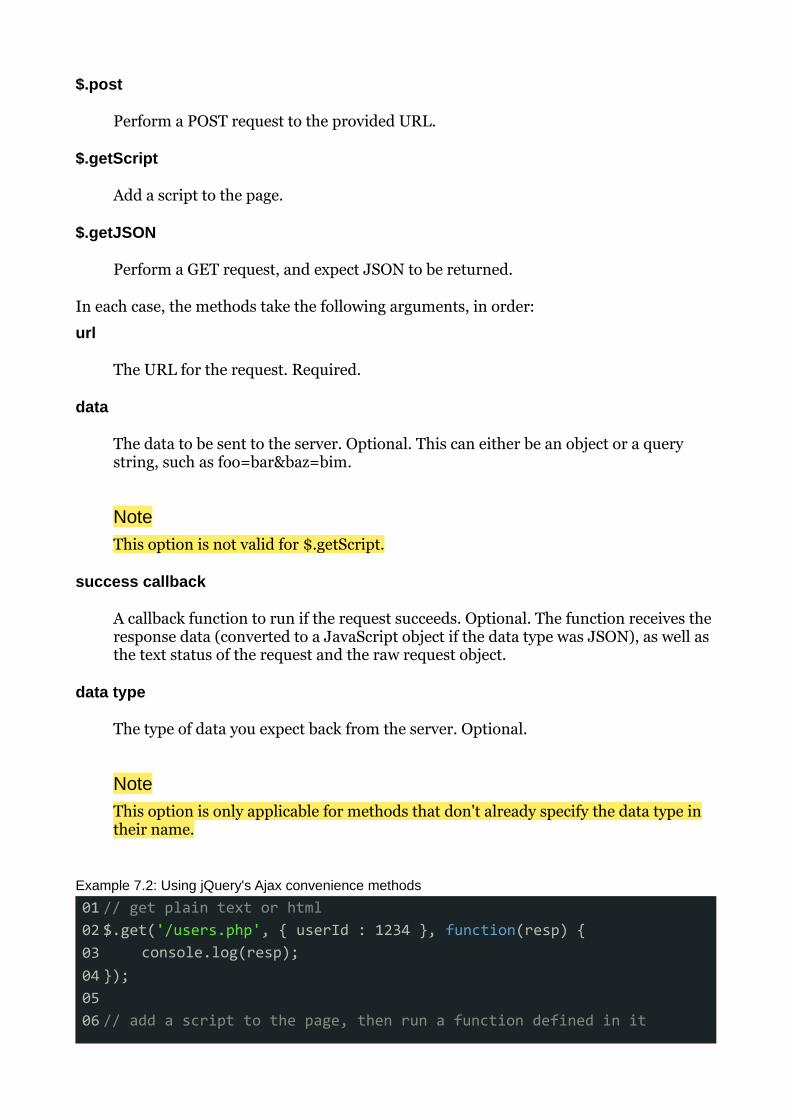
$.post
Perform a POST request to the provided URL.
$.getScript
Add a script to the page.
$.getJSON
Perform a GET request, and expect JSON to be returned.
In each case, the methods take the following arguments, in order:
url
The URL for the request. Required.
data
The data to be sent to the server. Optional. This can either be an object or a query string, such as foo=bar&baz=bim.
NoteThis option is not valid for $.getScript.
success callback
A callback function to run if the request succeeds. Optional. The function receives the response data (converted to a JavaScript object if the data type was JSON), as well as the text status of the request and the raw request object.
data type
The type of data you expect back from the server. Optional.
NoteThis option is only applicable for methods that don't already specify the data type in their name.
Example 7.2: Using jQuery's Ajax convenience methods
01 // get plain text or html02 $.get('/users.php', { userId : 1234 }, function(resp) {03 console.log(resp);04 });05 06 // add a script to the page, then run a function defined in it

07 $.getScript('/static/js/myScript.js', function() {08 functionFromMyScript();09 });10 11 // get JSON-formatted data from the server12 $.getJSON('/details.php', function(resp) {13 $.each(resp, function(k, v) {14 console.log(k + ' : ' + v);15 });16 });
$.fn.loadThe $.fn.load method is unique among jQuery’s Ajax methods in that it is called on a selection. The $.fn.load method fetches HTML from a URL, and uses the returned HTML to populate the selected element(s). In addition to providing a URL to the method, you can optionally provide a selector; jQuery will fetch only the matching content from the returned HTML.
Example 7.3: Using $.fn.load to populate an element
1 $('#newContent').load('/foo.html');
Example 7.4: Using $.fn.load to populate an element based on a selector
1 $('#newContent').load('/foo.html #myDiv h1:first', function(html) {2 alert('Content updated!');3 });
Ajax and FormsjQuery’s ajax capabilities can be especially useful when dealing with forms. The jQuery Form Plugin is a well-tested tool for adding Ajax capabilities to forms, and you should generally use it for handling forms with Ajax rather than trying to roll your own solution for anything remotely complex. That said, there are a two jQuery methods you should know that relate to form processing in jQuery: $.fn.serialize and $.fn.serializeArray.
Example 7.5: Turning form data into a query string
1 $('#myForm').serialize();
Example 7.6: Creating an array of objects containing form data
1 $('#myForm').serializeArray();2 3 // creates a structure like this:4 [5 { name : 'field1', value : 123 },6 { name : 'field2', value : 'hello world' }
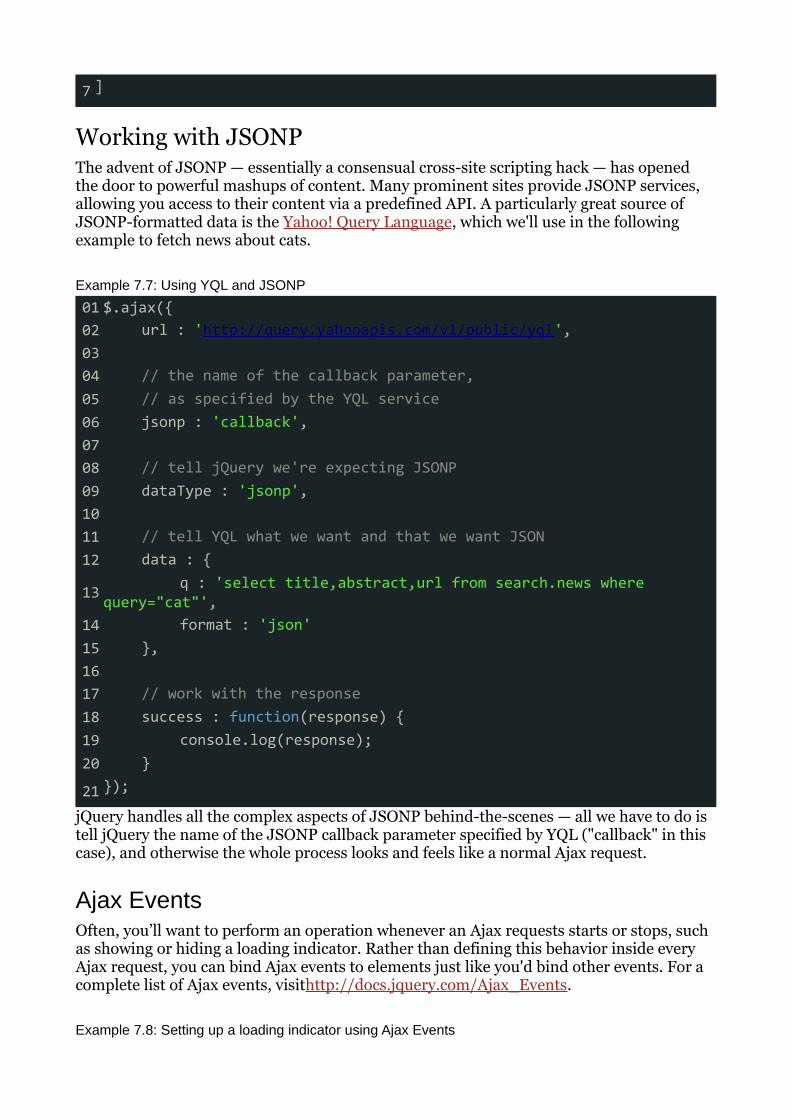
7 ]
Working with JSONPThe advent of JSONP — essentially a consensual cross-site scripting hack — has opened the door to powerful mashups of content. Many prominent sites provide JSONP services, allowing you access to their content via a predefined API. A particularly great source of JSONP-formatted data is the Yahoo! Query Language, which we'll use in the following example to fetch news about cats.
Example 7.7: Using YQL and JSONP
01 $.ajax({02 url : 'http://query.yahooapis.com/v1/public/yql',03 04 // the name of the callback parameter,05 // as specified by the YQL service06 jsonp : 'callback',07 08 // tell jQuery we're expecting JSONP09 dataType : 'jsonp',10 11 // tell YQL what we want and that we want JSON12 data : {13 q : 'select title,abstract,url from search.news where query="cat"',14 format : 'json'15 },16 17 // work with the response18 success : function(response) {19 console.log(response);20 }21 });
jQuery handles all the complex aspects of JSONP behind-the-scenes — all we have to do is tell jQuery the name of the JSONP callback parameter specified by YQL ("callback" in this case), and otherwise the whole process looks and feels like a normal Ajax request.
Ajax EventsOften, you’ll want to perform an operation whenever an Ajax requests starts or stops, such as showing or hiding a loading indicator. Rather than defining this behavior inside every Ajax request, you can bind Ajax events to elements just like you'd bind other events. For a complete list of Ajax events, visithttp://docs.jquery.com/Ajax_Events.
Example 7.8: Setting up a loading indicator using Ajax Events
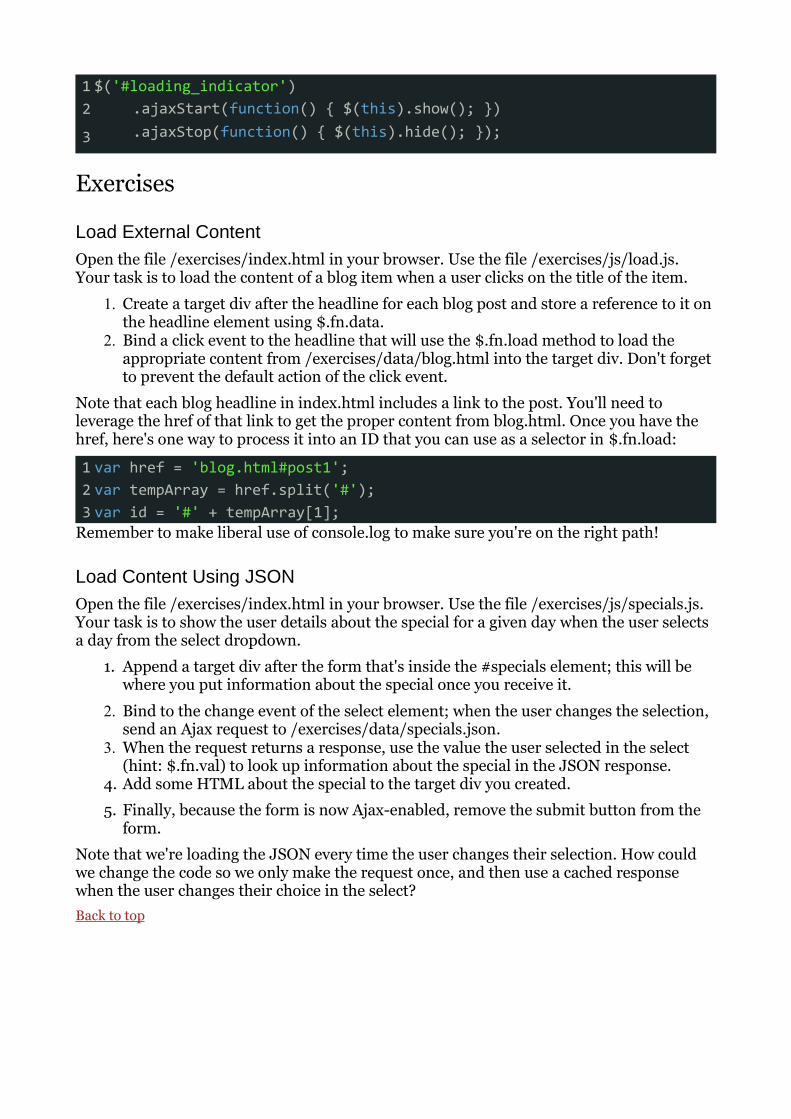
1 $('#loading_indicator')2 .ajaxStart(function() { $(this).show(); })3 .ajaxStop(function() { $(this).hide(); });
Exercises
Load External ContentOpen the file /exercises/index.html in your browser. Use the file /exercises/js/load.js. Your task is to load the content of a blog item when a user clicks on the title of the item.
1. Create a target div after the headline for each blog post and store a reference to it on the headline element using $.fn.data.
2. Bind a click event to the headline that will use the $.fn.load method to load the appropriate content from /exercises/data/blog.html into the target div. Don't forget to prevent the default action of the click event.
Note that each blog headline in index.html includes a link to the post. You'll need to leverage the href of that link to get the proper content from blog.html. Once you have the href, here's one way to process it into an ID that you can use as a selector in $.fn.load:
1 var href = 'blog.html#post1';2 var tempArray = href.split('#');3 var id = '#' + tempArray[1];
Remember to make liberal use of console.log to make sure you're on the right path!
Load Content Using JSONOpen the file /exercises/index.html in your browser. Use the file /exercises/js/specials.js. Your task is to show the user details about the special for a given day when the user selects a day from the select dropdown.
1. Append a target div after the form that's inside the #specials element; this will be where you put information about the special once you receive it.
2. Bind to the change event of the select element; when the user changes the selection, send an Ajax request to /exercises/data/specials.json.
3. When the request returns a response, use the value the user selected in the select (hint: $.fn.val) to look up information about the special in the JSON response.
4. Add some HTML about the special to the target div you created.
5. Finally, because the form is now Ajax-enabled, remove the submit button from the form.
Note that we're loading the JSON every time the user changes their selection. How could we change the code so we only make the request once, and then use a cached response when the user changes their choice in the select?Back to top
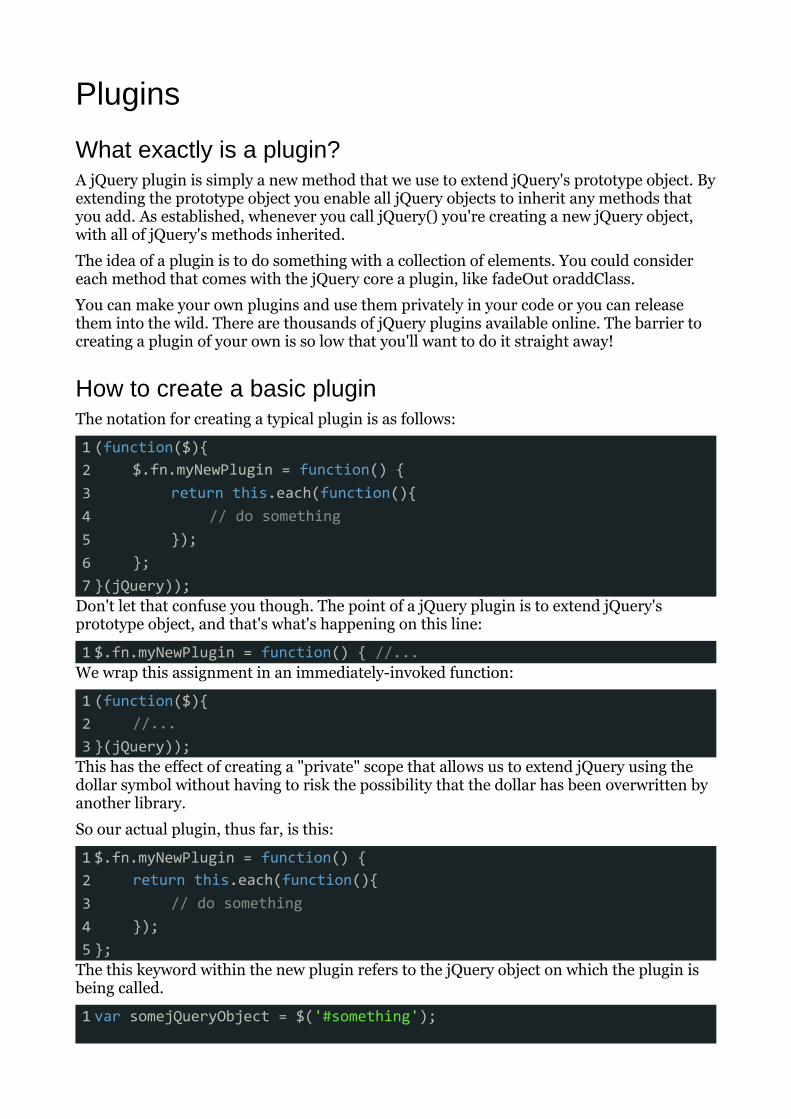
Plugins
What exactly is a plugin?A jQuery plugin is simply a new method that we use to extend jQuery's prototype object. By extending the prototype object you enable all jQuery objects to inherit any methods that you add. As established, whenever you call jQuery() you're creating a new jQuery object, with all of jQuery's methods inherited.
The idea of a plugin is to do something with a collection of elements. You could consider each method that comes with the jQuery core a plugin, like fadeOut oraddClass.
You can make your own plugins and use them privately in your code or you can release them into the wild. There are thousands of jQuery plugins available online. The barrier to creating a plugin of your own is so low that you'll want to do it straight away!
How to create a basic pluginThe notation for creating a typical plugin is as follows:
1 (function($){2 $.fn.myNewPlugin = function() {3 return this.each(function(){4 // do something5 });6 };7 }(jQuery));
Don't let that confuse you though. The point of a jQuery plugin is to extend jQuery's prototype object, and that's what's happening on this line:
1 $.fn.myNewPlugin = function() { //...We wrap this assignment in an immediately-invoked function:
1 (function($){2 //...3 }(jQuery));
This has the effect of creating a "private" scope that allows us to extend jQuery using the dollar symbol without having to risk the possibility that the dollar has been overwritten by another library.
So our actual plugin, thus far, is this:
1 $.fn.myNewPlugin = function() {2 return this.each(function(){3 // do something4 });5 };
The this keyword within the new plugin refers to the jQuery object on which the plugin is being called.
1 var somejQueryObject = $('#something');

2 3 $.fn.myNewPlugin = function() {4 alert(this === somejQueryObject);5 };6 7 somejQueryObject.myNewPlugin(); // alerts 'true'
Your typical jQuery object will contain references to any number of DOM elements, and that's why jQuery objects are often referred to as collections.
So, to do something with a collection we need to loop through it, which is most easily achieved using jQuery's each() method:
1 $.fn.myNewPlugin = function() {2 return this.each(function(){3 4 });5 };
jQuery's each() method, like most other jQuery methods, returns a jQuery object, thus enabling what we've all come to know and love as 'chaining' ($(...).css().attr()...). We wouldn't want to break this convention so we return the this object. Within this loop you can do whatever you want with each element. Here's an example of a small plugin using some of the techniques we've discussed:
01 (function($){02 $.fn.showLinkLocation = function() {03 return this.filter('a').each(function(){04 $(this).append(05 ' (' + $(this).attr('href') + ')'06 );07 });08 };09 }(jQuery));10 11 // Usage example:12 $('a').showLinkLocation();
This handy plugin goes through all anchors in the collection and appends the href attribute in brackets.
1 <!-- Before plugin is called: -->2 <a href="page.html">Foo</a>3 4 <!-- After plugin is called: -->5 <a href="page.html">Foo (page.html)</a>
Our plugin can be optimised though:
1 (function($){2 $.fn.showLinkLocation = function() {3 return this.filter('a').append(function(){
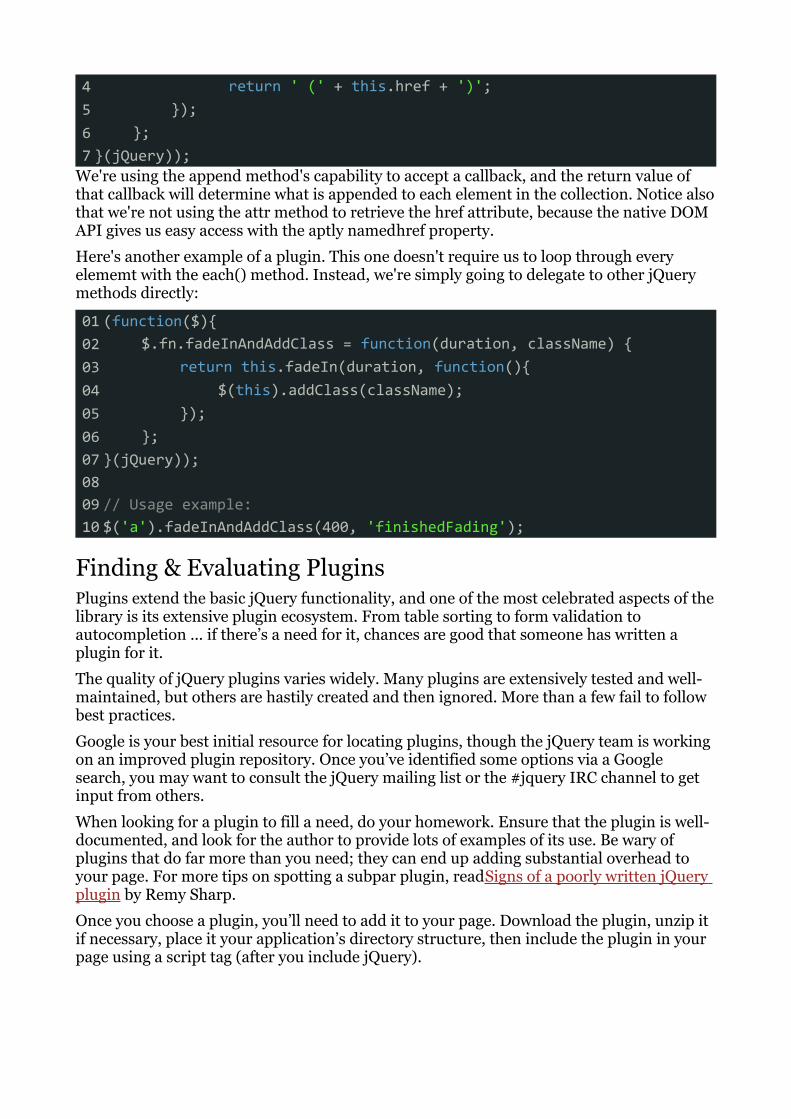
4 return ' (' + this.href + ')';5 });6 };7 }(jQuery));
We're using the append method's capability to accept a callback, and the return value of that callback will determine what is appended to each element in the collection. Notice also that we're not using the attr method to retrieve the href attribute, because the native DOM API gives us easy access with the aptly namedhref property.
Here's another example of a plugin. This one doesn't require us to loop through every elememt with the each() method. Instead, we're simply going to delegate to other jQuery methods directly:
01 (function($){02 $.fn.fadeInAndAddClass = function(duration, className) {03 return this.fadeIn(duration, function(){04 $(this).addClass(className);05 });06 };07 }(jQuery));08 09 // Usage example:10 $('a').fadeInAndAddClass(400, 'finishedFading');
Finding & Evaluating PluginsPlugins extend the basic jQuery functionality, and one of the most celebrated aspects of the library is its extensive plugin ecosystem. From table sorting to form validation to autocompletion ... if there’s a need for it, chances are good that someone has written a plugin for it.
The quality of jQuery plugins varies widely. Many plugins are extensively tested and well-maintained, but others are hastily created and then ignored. More than a few fail to follow best practices.
Google is your best initial resource for locating plugins, though the jQuery team is working on an improved plugin repository. Once you’ve identified some options via a Google search, you may want to consult the jQuery mailing list or the #jquery IRC channel to get input from others.
When looking for a plugin to fill a need, do your homework. Ensure that the plugin is well-documented, and look for the author to provide lots of examples of its use. Be wary of plugins that do far more than you need; they can end up adding substantial overhead to your page. For more tips on spotting a subpar plugin, readSigns of a poorly written jQuery plugin by Remy Sharp.
Once you choose a plugin, you’ll need to add it to your page. Download the plugin, unzip it if necessary, place it your application’s directory structure, then include the plugin in your page using a script tag (after you include jQuery).
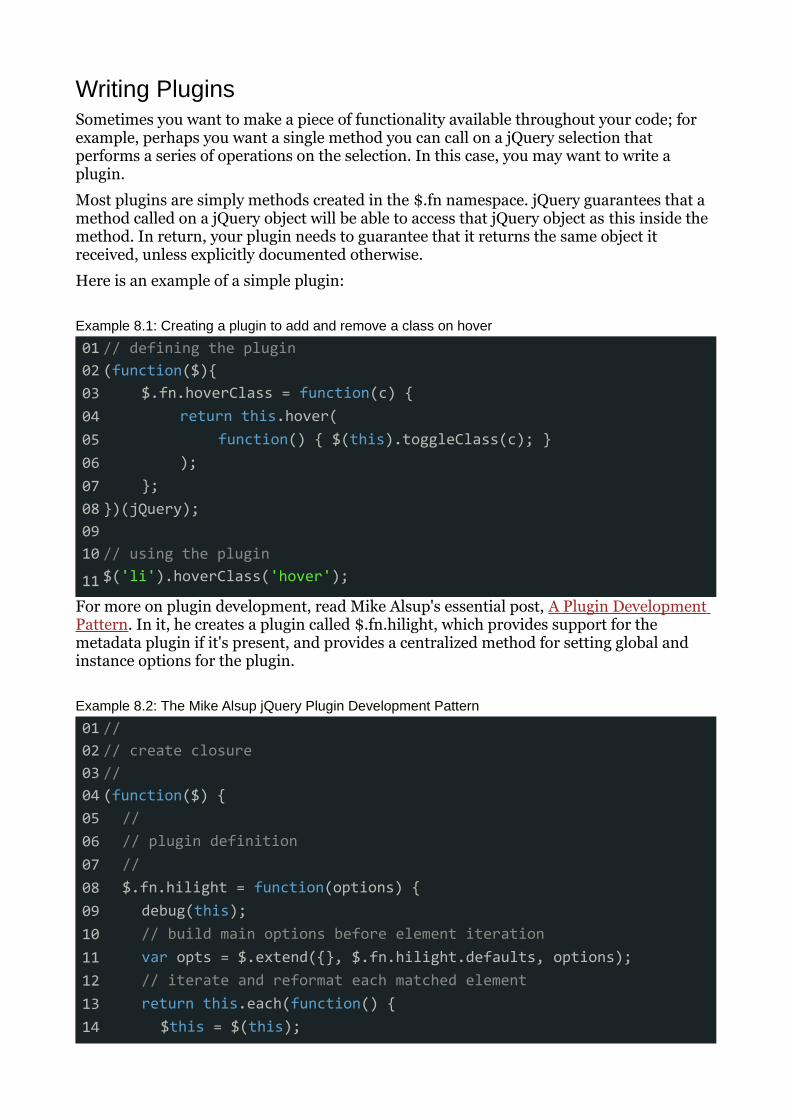
Writing PluginsSometimes you want to make a piece of functionality available throughout your code; for example, perhaps you want a single method you can call on a jQuery selection that performs a series of operations on the selection. In this case, you may want to write a plugin.
Most plugins are simply methods created in the $.fn namespace. jQuery guarantees that a method called on a jQuery object will be able to access that jQuery object as this inside the method. In return, your plugin needs to guarantee that it returns the same object it received, unless explicitly documented otherwise.
Here is an example of a simple plugin:
Example 8.1: Creating a plugin to add and remove a class on hover
01 // defining the plugin02 (function($){03 $.fn.hoverClass = function(c) {04 return this.hover(05 function() { $(this).toggleClass(c); }06 );07 };08 })(jQuery);09 10 // using the plugin
11 $('li').hoverClass('hover');
For more on plugin development, read Mike Alsup's essential post, A Plugin Development Pattern. In it, he creates a plugin called $.fn.hilight, which provides support for the metadata plugin if it's present, and provides a centralized method for setting global and instance options for the plugin.
Example 8.2: The Mike Alsup jQuery Plugin Development Pattern
01 //02 // create closure03 //04 (function($) {05 //06 // plugin definition07 //08 $.fn.hilight = function(options) {09 debug(this);10 // build main options before element iteration11 var opts = $.extend({}, $.fn.hilight.defaults, options);12 // iterate and reformat each matched element13 return this.each(function() {14 $this = $(this);

15 // build element specific options16 var o = $.meta ? $.extend({}, opts, $this.data()) : opts;17 // update element styles18 $this.css({19 backgroundColor: o.background,20 color: o.foreground21 });22 var markup = $this.html();23 // call our format function24 markup = $.fn.hilight.format(markup);25 $this.html(markup);26 });27 };28 //29 // private function for debugging30 //31 function debug($obj) {32 if (window.console && window.console.log)33 window.console.log('hilight selection count: ' + $obj.size());34 };35 //36 // define and expose our format function37 //38 $.fn.hilight.format = function(txt) {39 return '<strong>' + txt + '</strong>';40 };41 //42 // plugin defaults43 //44 $.fn.hilight.defaults = {45 foreground: 'red',46 background: 'yellow'47 };48 //49 // end of closure50 //
51 })(jQuery);
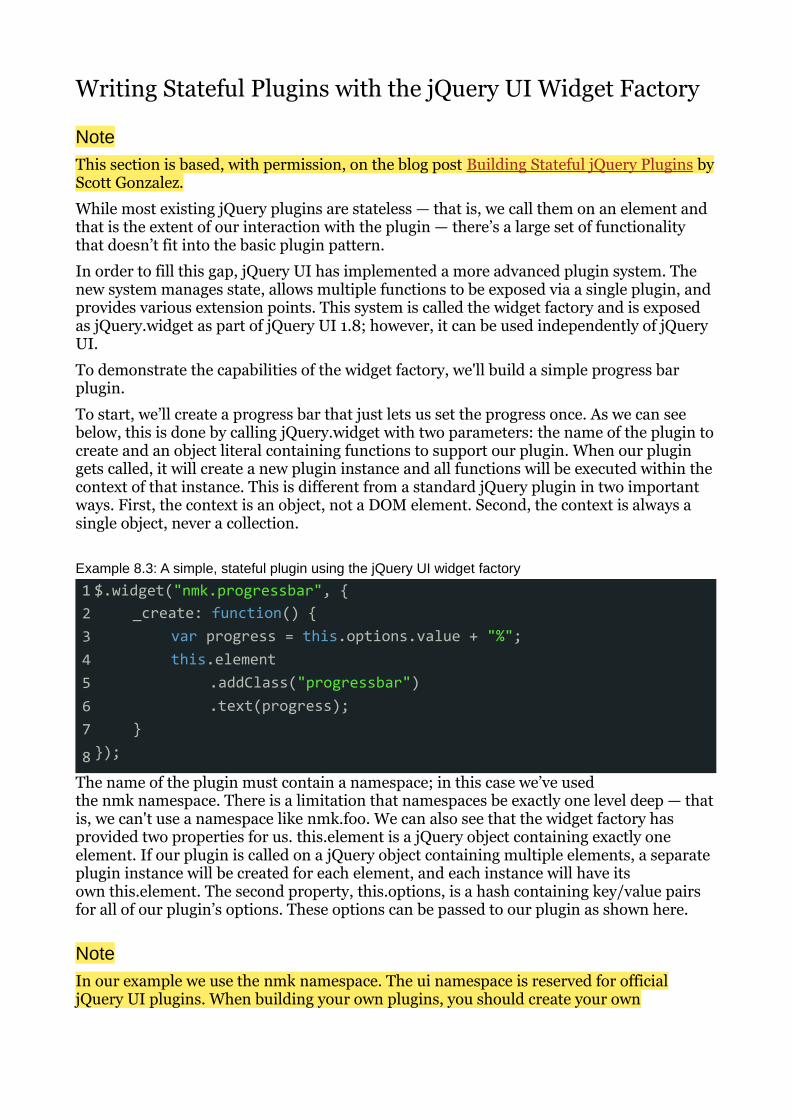
Writing Stateful Plugins with the jQuery UI Widget Factory
NoteThis section is based, with permission, on the blog post Building Stateful jQuery Plugins by Scott Gonzalez.
While most existing jQuery plugins are stateless — that is, we call them on an element and that is the extent of our interaction with the plugin — there’s a large set of functionality that doesn’t fit into the basic plugin pattern.
In order to fill this gap, jQuery UI has implemented a more advanced plugin system. The new system manages state, allows multiple functions to be exposed via a single plugin, and provides various extension points. This system is called the widget factory and is exposed as jQuery.widget as part of jQuery UI 1.8; however, it can be used independently of jQuery UI.
To demonstrate the capabilities of the widget factory, we'll build a simple progress bar plugin.
To start, we’ll create a progress bar that just lets us set the progress once. As we can see below, this is done by calling jQuery.widget with two parameters: the name of the plugin to create and an object literal containing functions to support our plugin. When our plugin gets called, it will create a new plugin instance and all functions will be executed within the context of that instance. This is different from a standard jQuery plugin in two important ways. First, the context is an object, not a DOM element. Second, the context is always a single object, never a collection.
Example 8.3: A simple, stateful plugin using the jQuery UI widget factory
1 $.widget("nmk.progressbar", {2 _create: function() {3 var progress = this.options.value + "%";4 this.element5 .addClass("progressbar")6 .text(progress);7 }8 });
The name of the plugin must contain a namespace; in this case we’ve used the nmk namespace. There is a limitation that namespaces be exactly one level deep — that is, we can't use a namespace like nmk.foo. We can also see that the widget factory has provided two properties for us. this.element is a jQuery object containing exactly one element. If our plugin is called on a jQuery object containing multiple elements, a separate plugin instance will be created for each element, and each instance will have its own this.element. The second property, this.options, is a hash containing key/value pairs for all of our plugin’s options. These options can be passed to our plugin as shown here.
NoteIn our example we use the nmk namespace. The ui namespace is reserved for official jQuery UI plugins. When building your own plugins, you should create your own
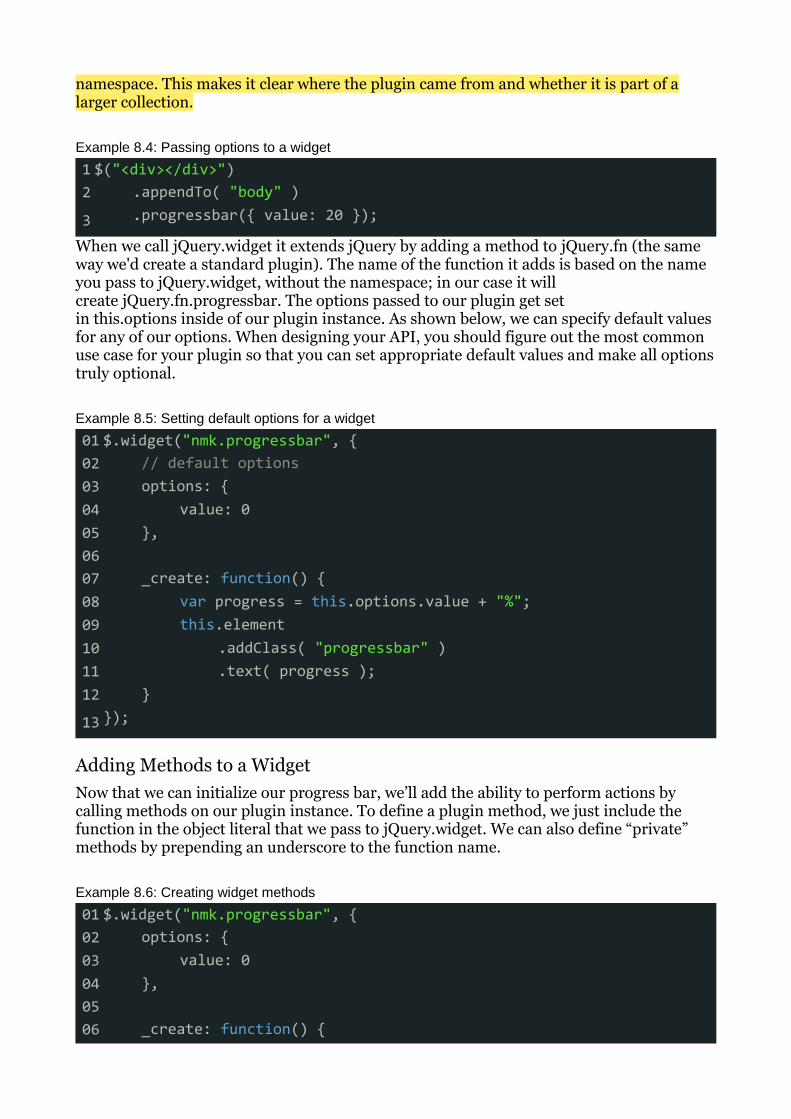
namespace. This makes it clear where the plugin came from and whether it is part of a larger collection.
Example 8.4: Passing options to a widget
1 $("<div></div>")2 .appendTo( "body" )3 .progressbar({ value: 20 });
When we call jQuery.widget it extends jQuery by adding a method to jQuery.fn (the same way we'd create a standard plugin). The name of the function it adds is based on the name you pass to jQuery.widget, without the namespace; in our case it will create jQuery.fn.progressbar. The options passed to our plugin get set in this.options inside of our plugin instance. As shown below, we can specify default values for any of our options. When designing your API, you should figure out the most common use case for your plugin so that you can set appropriate default values and make all options truly optional.
Example 8.5: Setting default options for a widget
01 $.widget("nmk.progressbar", {02 // default options03 options: {04 value: 005 },06 07 _create: function() {08 var progress = this.options.value + "%";09 this.element10 .addClass( "progressbar" )11 .text( progress );12 }13 });
Adding Methods to a WidgetNow that we can initialize our progress bar, we’ll add the ability to perform actions by calling methods on our plugin instance. To define a plugin method, we just include the function in the object literal that we pass to jQuery.widget. We can also define “private” methods by prepending an underscore to the function name.
Example 8.6: Creating widget methods
01 $.widget("nmk.progressbar", {02 options: {03 value: 004 },05 06 _create: function() {
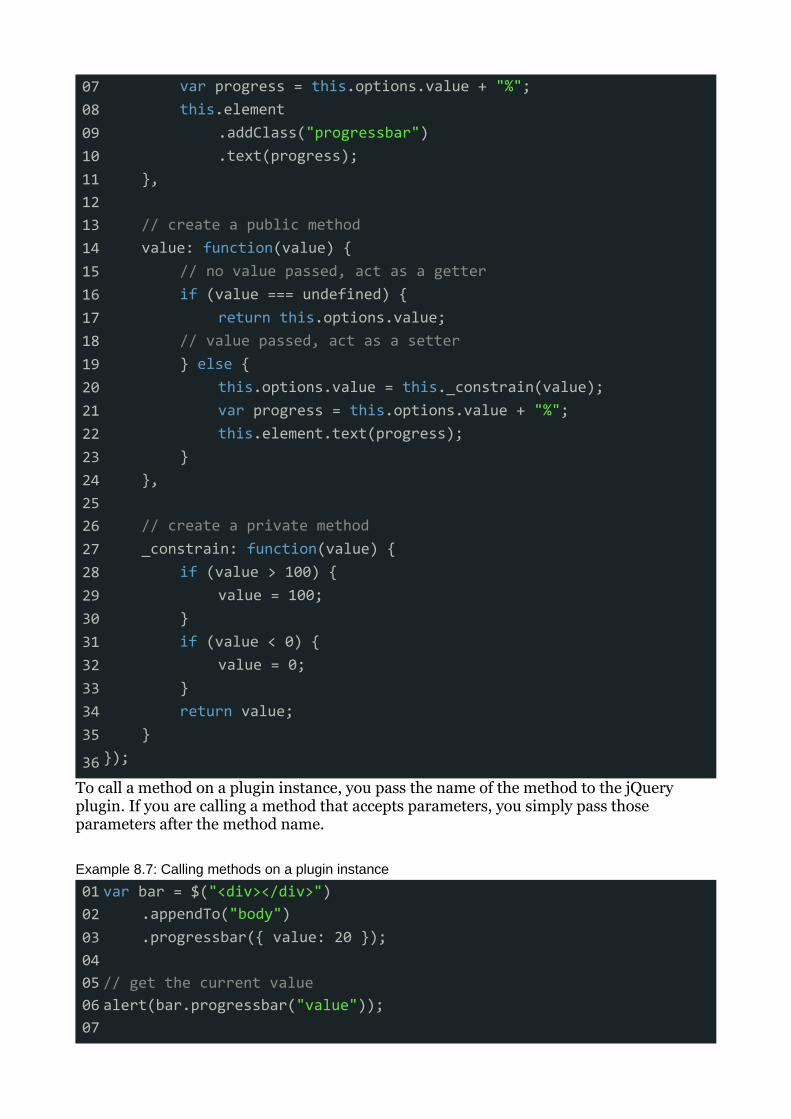
07 var progress = this.options.value + "%";08 this.element09 .addClass("progressbar")10 .text(progress);11 },12 13 // create a public method14 value: function(value) {15 // no value passed, act as a getter16 if (value === undefined) {17 return this.options.value;18 // value passed, act as a setter19 } else {20 this.options.value = this._constrain(value);21 var progress = this.options.value + "%";22 this.element.text(progress);23 }24 },25 26 // create a private method27 _constrain: function(value) {28 if (value > 100) {29 value = 100;30 }31 if (value < 0) {32 value = 0;33 }34 return value;35 }36 });
To call a method on a plugin instance, you pass the name of the method to the jQuery plugin. If you are calling a method that accepts parameters, you simply pass those parameters after the method name.
Example 8.7: Calling methods on a plugin instance
01 var bar = $("<div></div>")02 .appendTo("body")03 .progressbar({ value: 20 });04 05 // get the current value06 alert(bar.progressbar("value"));07

08 // update the value09 bar.progressbar("value", 50);10 11 // get the current value again
12 alert(bar.progressbar("value"));
NoteExecuting methods by passing the method name to the same jQuery function that was used to initialize the plugin may seem odd. This is done to prevent pollution of the jQuery namespace while maintaining the ability to chain method calls.
Working with Widget OptionsOne of the methods that is automatically available to our plugin is the option method. The option method allows you to get and set options after initialization. This method works exactly like jQuery’s css and attr methods: you can pass just a name to use it as a setter, a name and value to use it as a single setter, or a hash of name/value pairs to set multiple values. When used as a getter, the plugin will return the current value of the option that corresponds to the name that was passed in. When used as a setter, the plugin’s _setOption method will be called for each option that is being set. We can specify a _setOption method in our plugin to react to option changes.
Example 8.8: Responding when an option is set
01 $.widget("nmk.progressbar", {02 options: {03 value: 004 },05 06 _create: function() {07 this.element.addClass("progressbar");08 this._update();09 },10 11 _setOption: function(key, value) {12 this.options[key] = value;13 this._update();14 },15 16 _update: function() {17 var progress = this.options.value + "%";18 this.element.text(progress);19 }20 });

Adding CallbacksOne of the easiest ways to make your plugin extensible is to add callbacks so users can react when the state of your plugin changes. We can see below how to add a callback to our progress bar to signify when the progress has reached 100%. The _trigger method takes three parameters: the name of the callback, a native event object that initiated the callback, and a hash of data relevant to the event. The callback name is the only required parameter, but the others can be very useful for users who want to implement custom functionality on top of your plugin. For example, if we were building a draggable plugin, we could pass the native mousemove event when triggering a drag callback; this would allow users to react to the drag based on the x/y coordinates provided by the event object.
Example 8.9: Providing callbacks for user extension
01 $.widget("nmk.progressbar", {02 options: {03 value: 004 },05 06 _create: function() {07 this.element.addClass("progressbar");08 this._update();09 },10 11 _setOption: function(key, value) {12 this.options[key] = value;13 this._update();14 },15 16 _update: function() {17 var progress = this.options.value + "%";18 this.element.text(progress);19 if (this.options.value == 100) {20 this._trigger("complete", null, { value: 100 });21 }22 }23 });
Callback functions are essentially just additional options, so you can get and set them just like any other option. Whenever a callback is executed, a corresponding event is triggered as well. The event type is determined by concatenating the plugin name and the callback name. The callback and event both receive the same two parameters: an event object and a hash of data relevant to the event, as we’ll see below.
If your plugin has functionality that you want to allow the user to prevent, the best way to support this is by creating cancelable callbacks. Users can cancel a callback, or its associated event, the same way they cancel any native event: by calling event.preventDefault() or using return false. If the user cancels the callback,

the _trigger method will return false so you can implement the appropriate functionality within your plugin.
Example 8.10: Binding to widget events
01 var bar = $("<div></div>")02 .appendTo("body")03 .progressbar({04 complete: function(event, data) {05 alert( "Callbacks are great!" );06 }07 })08 .bind("progressbarcomplete", function(event, data) {09 alert("Events bubble and support many handlers for extreme flexibility.");10 alert("The progress bar value is " + data.value);11 });12
13 bar.progressbar("option", "value", 100);
The Widget Factory: Under the Hood
When you call jQuery.widget, it creates a constructor function for your plugin and sets the object literal that you pass in as the prototype for your plugin instances. All of the functionality that automatically gets added to your plugin comes from a base widget prototype, which is defined as jQuery.Widget.prototype. When a plugin instance is created, it is stored on the original DOM element using jQuery.data, with the plugin name as the key.
Because the plugin instance is directly linked to the DOM element, you can access the plugin instance directly instead of going through the exposed plugin method if you want. This will allow you to call methods directly on the plugin instance instead of passing method names as strings and will also give you direct access to the plugin’s properties.
01 var bar = $("<div></div>")02 .appendTo("body")03 .progressbar()04 .data("progressbar" );05 06 // call a method directly on the plugin instance07 bar.option("value", 50);08 09 // access properties on the plugin instance10 alert(bar.options.value);
One of the biggest benefits of having a constructor and prototype for a plugin is the ease of extending the plugin. By adding or modifying methods on the plugin’s prototype, we can modify the behavior of all instances of our plugin. For example, if we wanted to add a method to our progress bar to reset the progress to 0% we could add this method to the prototype and it would instantly be available to be called on any plugin instance.
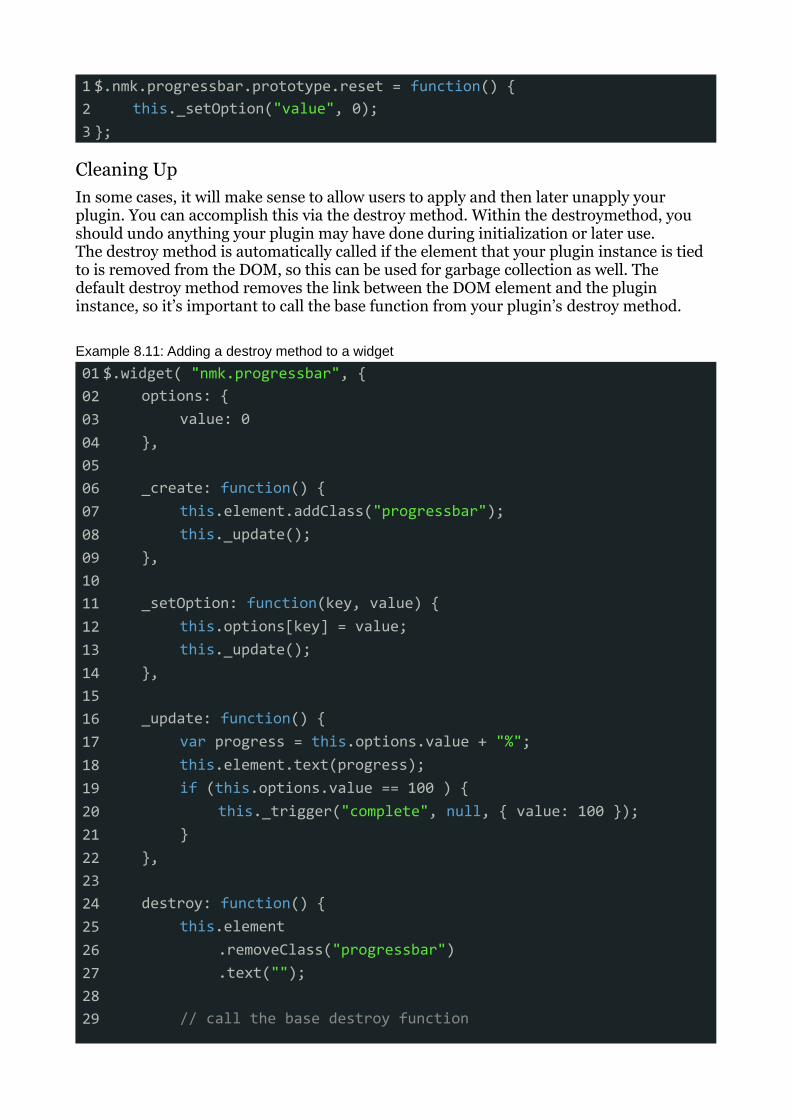
1 $.nmk.progressbar.prototype.reset = function() {2 this._setOption("value", 0);3 };
Cleaning UpIn some cases, it will make sense to allow users to apply and then later unapply your plugin. You can accomplish this via the destroy method. Within the destroymethod, you should undo anything your plugin may have done during initialization or later use. The destroy method is automatically called if the element that your plugin instance is tied to is removed from the DOM, so this can be used for garbage collection as well. The default destroy method removes the link between the DOM element and the plugin instance, so it’s important to call the base function from your plugin’s destroy method.
Example 8.11: Adding a destroy method to a widget
01 $.widget( "nmk.progressbar", {02 options: {03 value: 004 },05 06 _create: function() {07 this.element.addClass("progressbar");08 this._update();09 },10 11 _setOption: function(key, value) {12 this.options[key] = value;13 this._update();14 },15 16 _update: function() {17 var progress = this.options.value + "%";18 this.element.text(progress);19 if (this.options.value == 100 ) {20 this._trigger("complete", null, { value: 100 });21 }22 },23 24 destroy: function() {25 this.element26 .removeClass("progressbar")27 .text("");28 29 // call the base destroy function
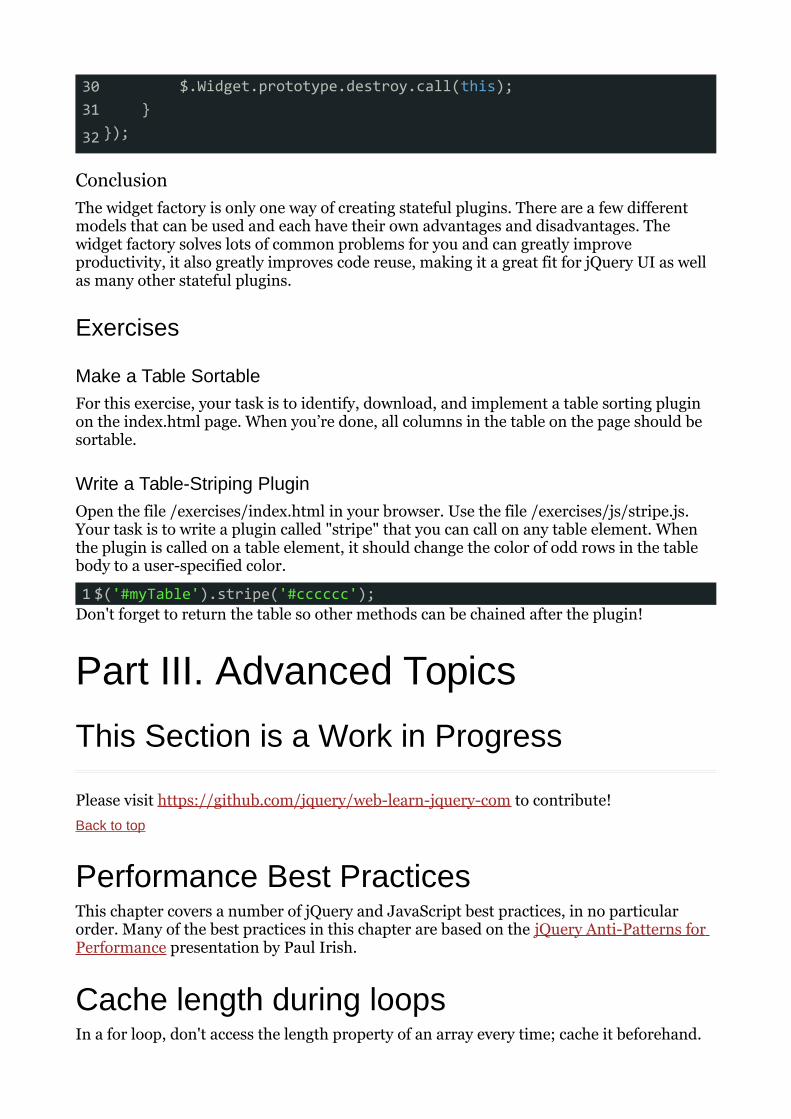
30 $.Widget.prototype.destroy.call(this);31 }32 });
ConclusionThe widget factory is only one way of creating stateful plugins. There are a few different models that can be used and each have their own advantages and disadvantages. The widget factory solves lots of common problems for you and can greatly improve productivity, it also greatly improves code reuse, making it a great fit for jQuery UI as well as many other stateful plugins.
Exercises
Make a Table SortableFor this exercise, your task is to identify, download, and implement a table sorting plugin on the index.html page. When you’re done, all columns in the table on the page should be sortable.
Write a Table-Striping PluginOpen the file /exercises/index.html in your browser. Use the file /exercises/js/stripe.js. Your task is to write a plugin called "stripe" that you can call on any table element. When the plugin is called on a table element, it should change the color of odd rows in the table body to a user-specified color.
1 $('#myTable').stripe('#cccccc');Don't forget to return the table so other methods can be chained after the plugin!
Part III. Advanced Topics
This Section is a Work in Progress
Please visit https://github.com/jquery/web-learn-jquery-com to contribute!Back to top
Performance Best PracticesThis chapter covers a number of jQuery and JavaScript best practices, in no particular order. Many of the best practices in this chapter are based on the jQuery Anti-Patterns for Performance presentation by Paul Irish.
Cache length during loopsIn a for loop, don't access the length property of an array every time; cache it beforehand.
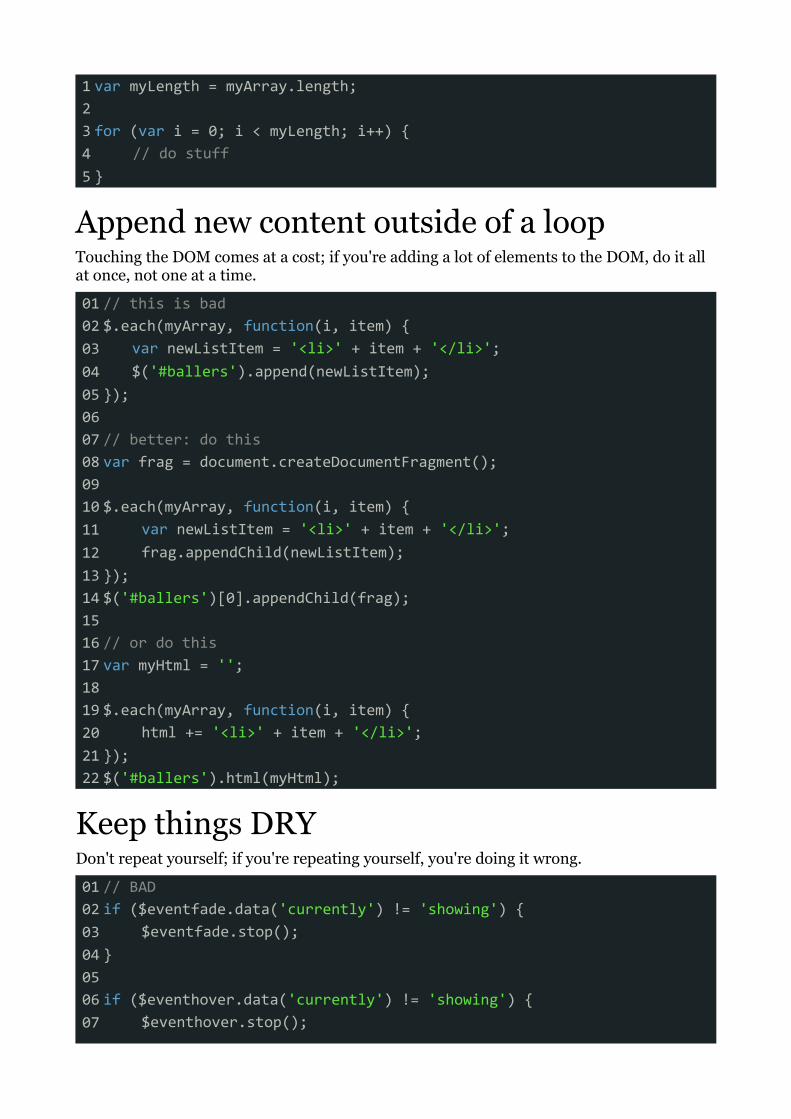
1 var myLength = myArray.length;2 3 for (var i = 0; i < myLength; i++) {4 // do stuff5 }
Append new content outside of a loopTouching the DOM comes at a cost; if you're adding a lot of elements to the DOM, do it all at once, not one at a time.
01 // this is bad02 $.each(myArray, function(i, item) {03 var newListItem = '<li>' + item + '</li>';04 $('#ballers').append(newListItem);05 });06 07 // better: do this08 var frag = document.createDocumentFragment();09 10 $.each(myArray, function(i, item) {11 var newListItem = '<li>' + item + '</li>';12 frag.appendChild(newListItem);13 });14 $('#ballers')[0].appendChild(frag);15 16 // or do this17 var myHtml = '';18 19 $.each(myArray, function(i, item) {20 html += '<li>' + item + '</li>';21 });22 $('#ballers').html(myHtml);
Keep things DRYDon't repeat yourself; if you're repeating yourself, you're doing it wrong.
01 // BAD02 if ($eventfade.data('currently') != 'showing') {03 $eventfade.stop();04 }05 06 if ($eventhover.data('currently') != 'showing') {07 $eventhover.stop();
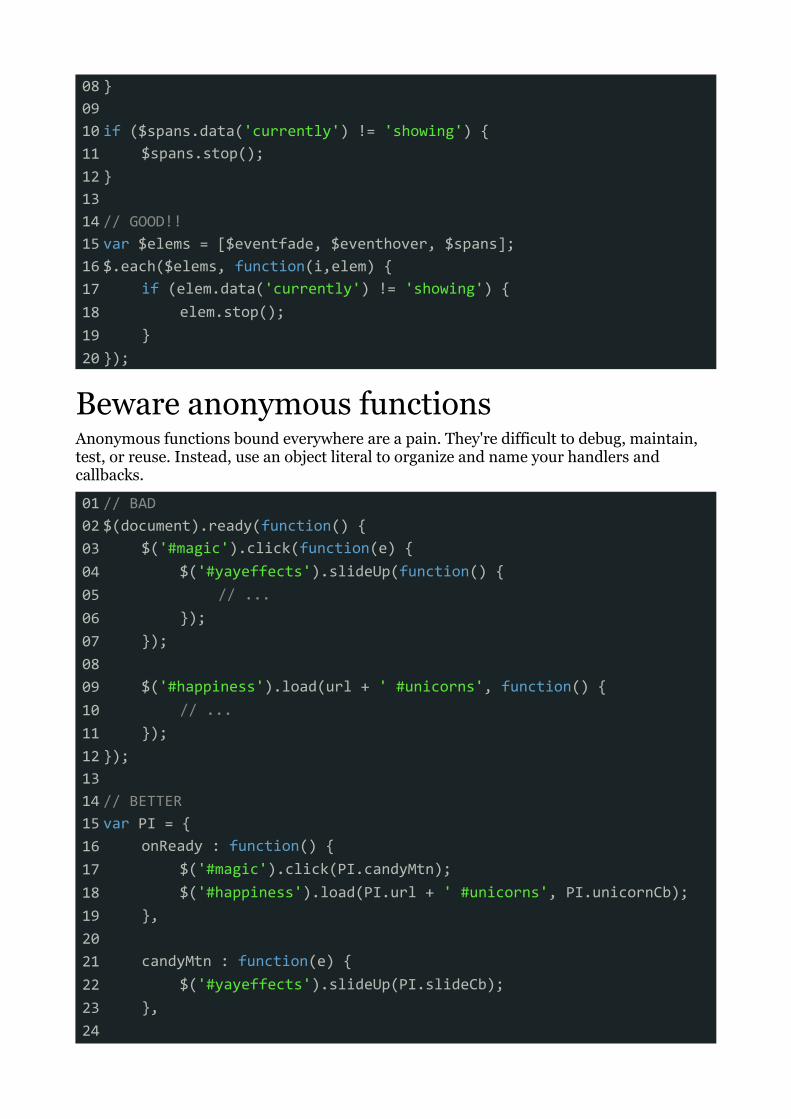
08 }09 10 if ($spans.data('currently') != 'showing') {11 $spans.stop();12 }13 14 // GOOD!!15 var $elems = [$eventfade, $eventhover, $spans];16 $.each($elems, function(i,elem) {17 if (elem.data('currently') != 'showing') {18 elem.stop();19 }20 });
Beware anonymous functionsAnonymous functions bound everywhere are a pain. They're difficult to debug, maintain, test, or reuse. Instead, use an object literal to organize and name your handlers and callbacks.
01 // BAD02 $(document).ready(function() {03 $('#magic').click(function(e) {04 $('#yayeffects').slideUp(function() {05 // ...06 });07 });08 09 $('#happiness').load(url + ' #unicorns', function() {10 // ...11 });12 });13 14 // BETTER15 var PI = {16 onReady : function() {17 $('#magic').click(PI.candyMtn);18 $('#happiness').load(PI.url + ' #unicorns', PI.unicornCb);19 },20 21 candyMtn : function(e) {22 $('#yayeffects').slideUp(PI.slideCb);23 },24
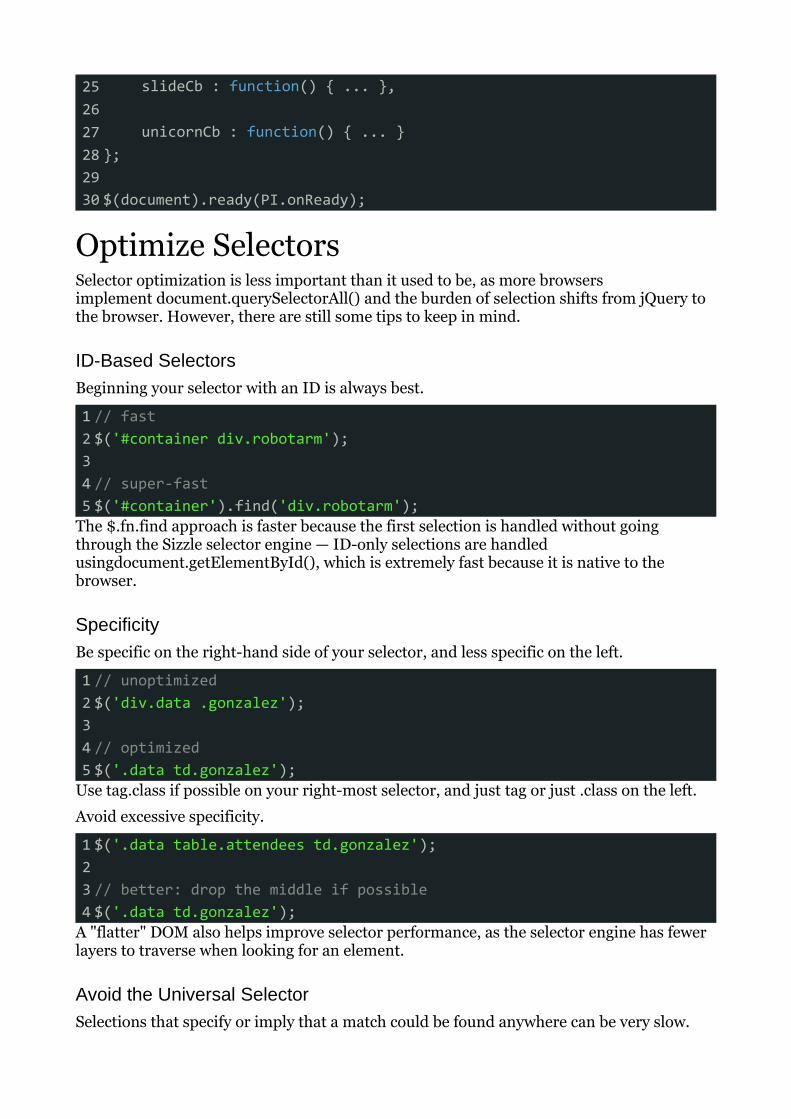
25 slideCb : function() { ... },26 27 unicornCb : function() { ... }28 };29 30 $(document).ready(PI.onReady);
Optimize SelectorsSelector optimization is less important than it used to be, as more browsers implement document.querySelectorAll() and the burden of selection shifts from jQuery to the browser. However, there are still some tips to keep in mind.
ID-Based SelectorsBeginning your selector with an ID is always best.
1 // fast2 $('#container div.robotarm');3 4 // super-fast5 $('#container').find('div.robotarm');
The $.fn.find approach is faster because the first selection is handled without going through the Sizzle selector engine — ID-only selections are handled usingdocument.getElementById(), which is extremely fast because it is native to the browser.
SpecificityBe specific on the right-hand side of your selector, and less specific on the left.
1 // unoptimized2 $('div.data .gonzalez');3 4 // optimized5 $('.data td.gonzalez');
Use tag.class if possible on your right-most selector, and just tag or just .class on the left.
Avoid excessive specificity.
1 $('.data table.attendees td.gonzalez');2 3 // better: drop the middle if possible4 $('.data td.gonzalez');
A "flatter" DOM also helps improve selector performance, as the selector engine has fewer layers to traverse when looking for an element.
Avoid the Universal SelectorSelections that specify or imply that a match could be found anywhere can be very slow.
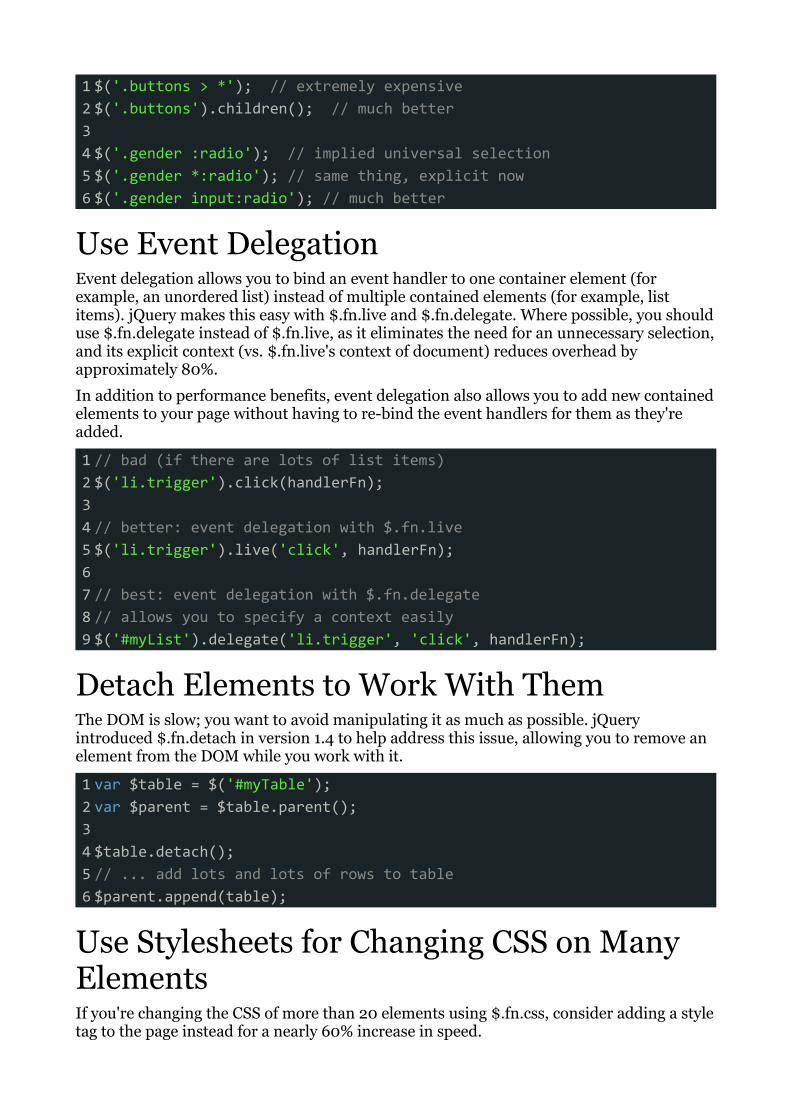
1 $('.buttons > *'); // extremely expensive2 $('.buttons').children(); // much better3 4 $('.gender :radio'); // implied universal selection5 $('.gender *:radio'); // same thing, explicit now6 $('.gender input:radio'); // much better
Use Event DelegationEvent delegation allows you to bind an event handler to one container element (for example, an unordered list) instead of multiple contained elements (for example, list items). jQuery makes this easy with $.fn.live and $.fn.delegate. Where possible, you should use $.fn.delegate instead of $.fn.live, as it eliminates the need for an unnecessary selection, and its explicit context (vs. $.fn.live's context of document) reduces overhead by approximately 80%.
In addition to performance benefits, event delegation also allows you to add new contained elements to your page without having to re-bind the event handlers for them as they're added.
1 // bad (if there are lots of list items)2 $('li.trigger').click(handlerFn);3 4 // better: event delegation with $.fn.live5 $('li.trigger').live('click', handlerFn);6 7 // best: event delegation with $.fn.delegate8 // allows you to specify a context easily9 $('#myList').delegate('li.trigger', 'click', handlerFn);
Detach Elements to Work With ThemThe DOM is slow; you want to avoid manipulating it as much as possible. jQuery introduced $.fn.detach in version 1.4 to help address this issue, allowing you to remove an element from the DOM while you work with it.
1 var $table = $('#myTable');2 var $parent = $table.parent();3 4 $table.detach();5 // ... add lots and lots of rows to table6 $parent.append(table);
Use Stylesheets for Changing CSS on Many ElementsIf you're changing the CSS of more than 20 elements using $.fn.css, consider adding a style tag to the page instead for a nearly 60% increase in speed.
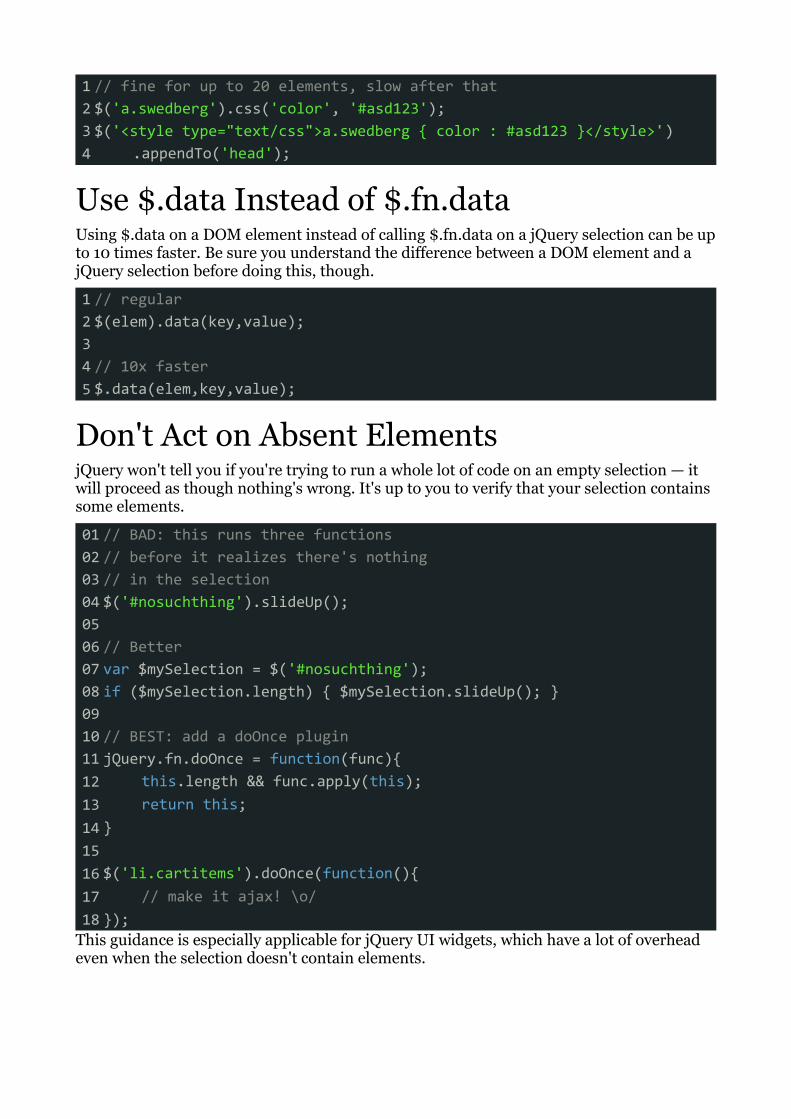
1 // fine for up to 20 elements, slow after that2 $('a.swedberg').css('color', '#asd123');3 $('<style type="text/css">a.swedberg { color : #asd123 }</style>')4 .appendTo('head');
Use $.data Instead of $.fn.dataUsing $.data on a DOM element instead of calling $.fn.data on a jQuery selection can be up to 10 times faster. Be sure you understand the difference between a DOM element and a jQuery selection before doing this, though.
1 // regular2 $(elem).data(key,value);3 4 // 10x faster5 $.data(elem,key,value);
Don't Act on Absent ElementsjQuery won't tell you if you're trying to run a whole lot of code on an empty selection — it will proceed as though nothing's wrong. It's up to you to verify that your selection contains some elements.
01 // BAD: this runs three functions02 // before it realizes there's nothing03 // in the selection04 $('#nosuchthing').slideUp();05 06 // Better07 var $mySelection = $('#nosuchthing');08 if ($mySelection.length) { $mySelection.slideUp(); }09 10 // BEST: add a doOnce plugin11 jQuery.fn.doOnce = function(func){12 this.length && func.apply(this);13 return this;14 }15 16 $('li.cartitems').doOnce(function(){17 // make it ajax! \o/18 });
This guidance is especially applicable for jQuery UI widgets, which have a lot of overhead even when the selection doesn't contain elements.

Variable DefinitionVariables can be defined in one statement instead of several.
1 // old & busted2 var test = 1;3 var test2 = function() { ... };4 var test3 = test2(test);5 6 // new hotness7 var test = 1,8 test2 = function() { ... },9 test3 = test2(test);
In self-executing functions, variable definition can be skipped all together.
1 (function(foo, bar) { ... })(1, 2);
Conditionals1 // old way2 if (type == 'foo' || type == 'bar') { ... }3 4 // better5 if (/^(foo|bar)$/.test(type)) { ... }6 7 // object literal lookup8 if (({ foo : 1, bar : 1 })[type]) { ... }
Don't Treat jQuery as a Black BoxUse the source as your documentation — bookmark http://bit.ly/jqsource and refer to it often.Back to top
Code Organization
OverviewWhen you move beyond adding simple enhancements to your website with jQuery and start developing full-blown client-side applications, you need to consider how to organize your code. In this chapter, we'll take a look at various code organization patterns you can use in your jQuery application and explore the RequireJS dependency management and build system.
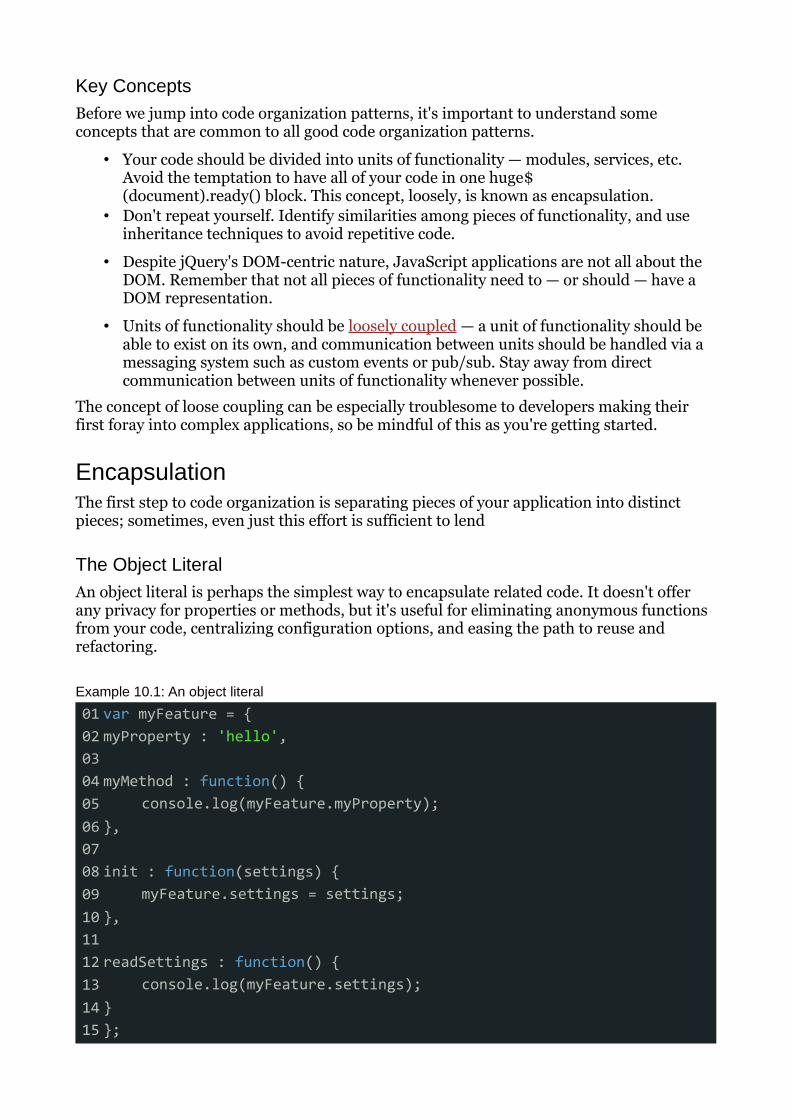
Key ConceptsBefore we jump into code organization patterns, it's important to understand some concepts that are common to all good code organization patterns.
• Your code should be divided into units of functionality — modules, services, etc. Avoid the temptation to have all of your code in one huge$(document).ready() block. This concept, loosely, is known as encapsulation.
• Don't repeat yourself. Identify similarities among pieces of functionality, and use inheritance techniques to avoid repetitive code.
• Despite jQuery's DOM-centric nature, JavaScript applications are not all about the DOM. Remember that not all pieces of functionality need to — or should — have a DOM representation.
• Units of functionality should be loosely coupled — a unit of functionality should be able to exist on its own, and communication between units should be handled via a messaging system such as custom events or pub/sub. Stay away from direct communication between units of functionality whenever possible.
The concept of loose coupling can be especially troublesome to developers making their first foray into complex applications, so be mindful of this as you're getting started.
EncapsulationThe first step to code organization is separating pieces of your application into distinct pieces; sometimes, even just this effort is sufficient to lend
The Object LiteralAn object literal is perhaps the simplest way to encapsulate related code. It doesn't offer any privacy for properties or methods, but it's useful for eliminating anonymous functions from your code, centralizing configuration options, and easing the path to reuse and refactoring.
Example 10.1: An object literal
01 var myFeature = {02 myProperty : 'hello',03 04 myMethod : function() {05 console.log(myFeature.myProperty);06 },07 08 init : function(settings) {09 myFeature.settings = settings;10 },11 12 readSettings : function() {13 console.log(myFeature.settings);14 }15 };
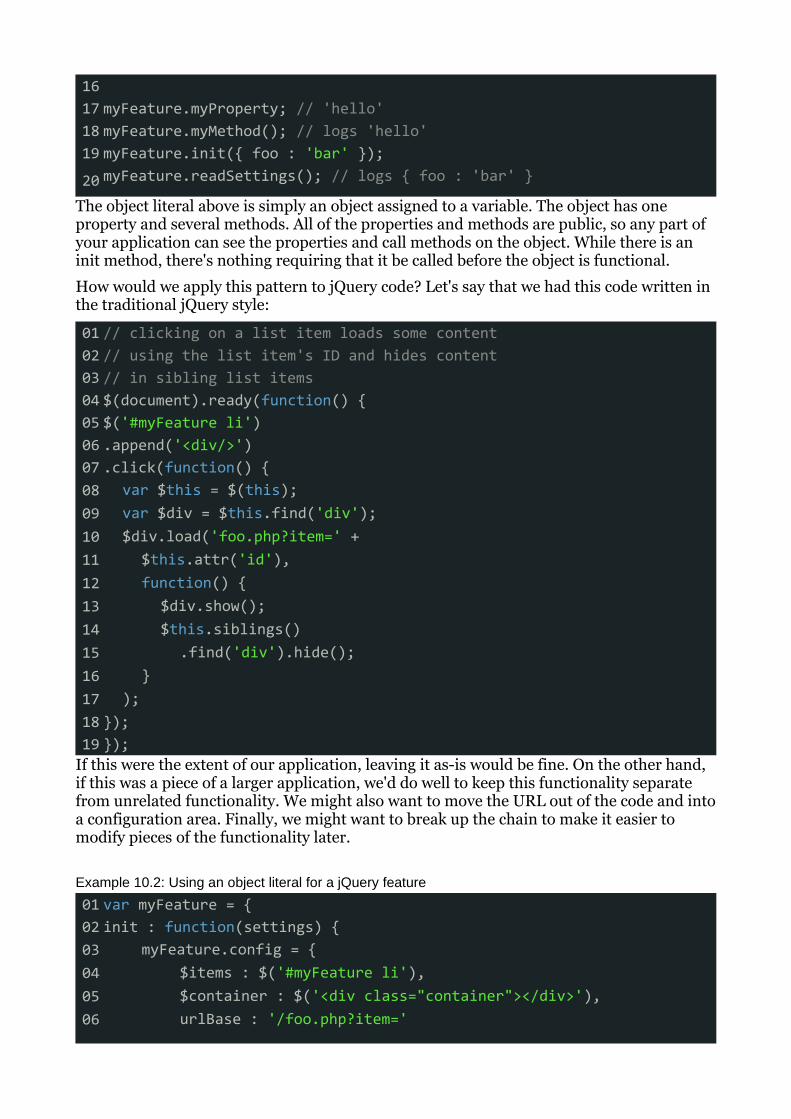
16 17 myFeature.myProperty; // 'hello'18 myFeature.myMethod(); // logs 'hello'19 myFeature.init({ foo : 'bar' });
20 myFeature.readSettings(); // logs { foo : 'bar' }
The object literal above is simply an object assigned to a variable. The object has one property and several methods. All of the properties and methods are public, so any part of your application can see the properties and call methods on the object. While there is an init method, there's nothing requiring that it be called before the object is functional.
How would we apply this pattern to jQuery code? Let's say that we had this code written in the traditional jQuery style:
01 // clicking on a list item loads some content02 // using the list item's ID and hides content03 // in sibling list items04 $(document).ready(function() {05 $('#myFeature li')06 .append('<div/>')07 .click(function() {08 var $this = $(this);09 var $div = $this.find('div');10 $div.load('foo.php?item=' +11 $this.attr('id'),12 function() {13 $div.show();14 $this.siblings()15 .find('div').hide();16 }17 );18 });19 });
If this were the extent of our application, leaving it as-is would be fine. On the other hand, if this was a piece of a larger application, we'd do well to keep this functionality separate from unrelated functionality. We might also want to move the URL out of the code and into a configuration area. Finally, we might want to break up the chain to make it easier to modify pieces of the functionality later.
Example 10.2: Using an object literal for a jQuery feature
01 var myFeature = {02 init : function(settings) {03 myFeature.config = {04 $items : $('#myFeature li'),05 $container : $('<div class="container"></div>'),06 urlBase : '/foo.php?item='
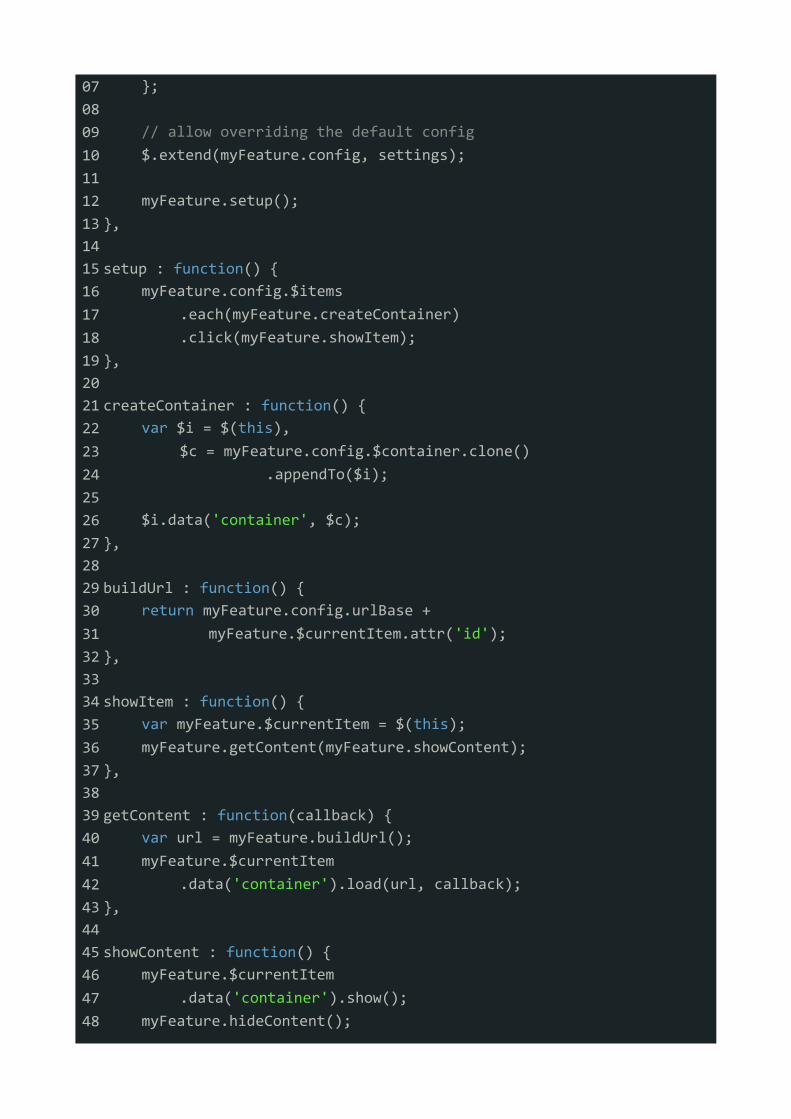
07 };08 09 // allow overriding the default config10 $.extend(myFeature.config, settings);11 12 myFeature.setup();13 },14 15 setup : function() {16 myFeature.config.$items17 .each(myFeature.createContainer)18 .click(myFeature.showItem);19 },20 21 createContainer : function() {22 var $i = $(this),23 $c = myFeature.config.$container.clone()24 .appendTo($i);25 26 $i.data('container', $c);27 },28 29 buildUrl : function() {30 return myFeature.config.urlBase +31 myFeature.$currentItem.attr('id');32 },33 34 showItem : function() {35 var myFeature.$currentItem = $(this);36 myFeature.getContent(myFeature.showContent);37 },38 39 getContent : function(callback) {40 var url = myFeature.buildUrl();41 myFeature.$currentItem42 .data('container').load(url, callback);43 },44 45 showContent : function() {46 myFeature.$currentItem47 .data('container').show();48 myFeature.hideContent();
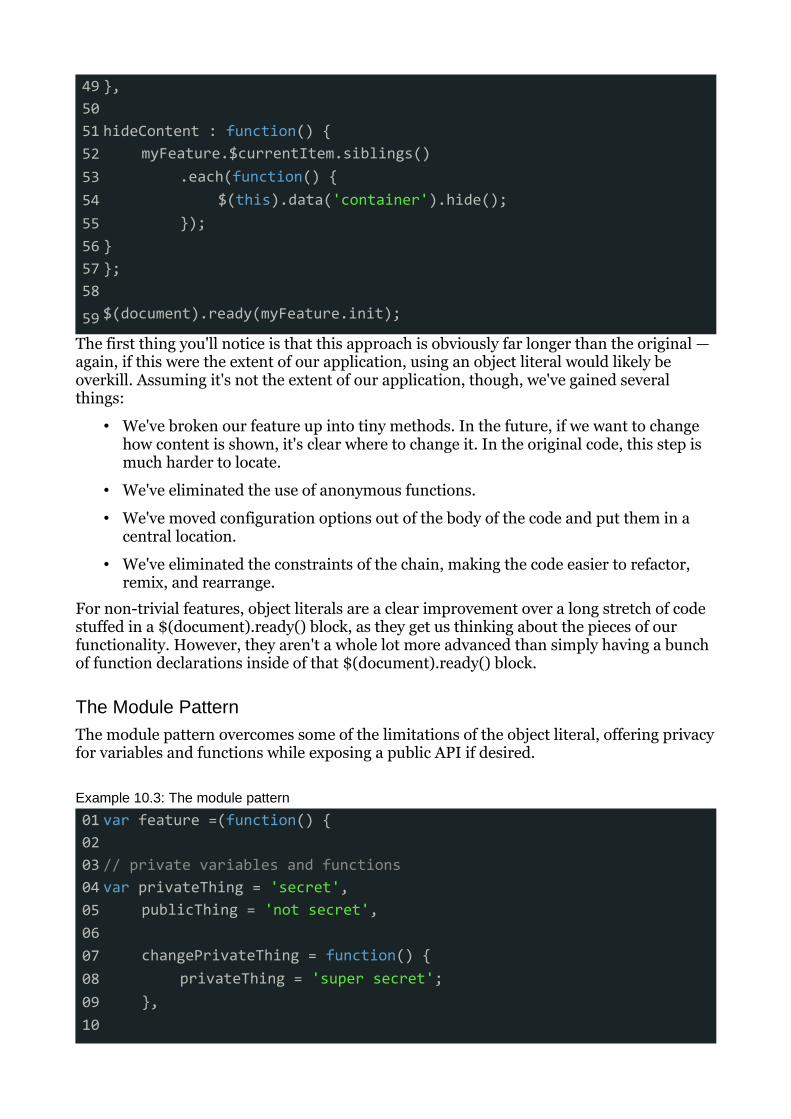
49 },50 51 hideContent : function() {52 myFeature.$currentItem.siblings()53 .each(function() {54 $(this).data('container').hide();55 });56 }57 };58
59 $(document).ready(myFeature.init);
The first thing you'll notice is that this approach is obviously far longer than the original — again, if this were the extent of our application, using an object literal would likely be overkill. Assuming it's not the extent of our application, though, we've gained several things:
• We've broken our feature up into tiny methods. In the future, if we want to change how content is shown, it's clear where to change it. In the original code, this step is much harder to locate.
• We've eliminated the use of anonymous functions.
• We've moved configuration options out of the body of the code and put them in a central location.
• We've eliminated the constraints of the chain, making the code easier to refactor, remix, and rearrange.
For non-trivial features, object literals are a clear improvement over a long stretch of code stuffed in a $(document).ready() block, as they get us thinking about the pieces of our functionality. However, they aren't a whole lot more advanced than simply having a bunch of function declarations inside of that $(document).ready() block.
The Module PatternThe module pattern overcomes some of the limitations of the object literal, offering privacy for variables and functions while exposing a public API if desired.
Example 10.3: The module pattern
01 var feature =(function() {02 03 // private variables and functions04 var privateThing = 'secret',05 publicThing = 'not secret',06 07 changePrivateThing = function() {08 privateThing = 'super secret';09 },10
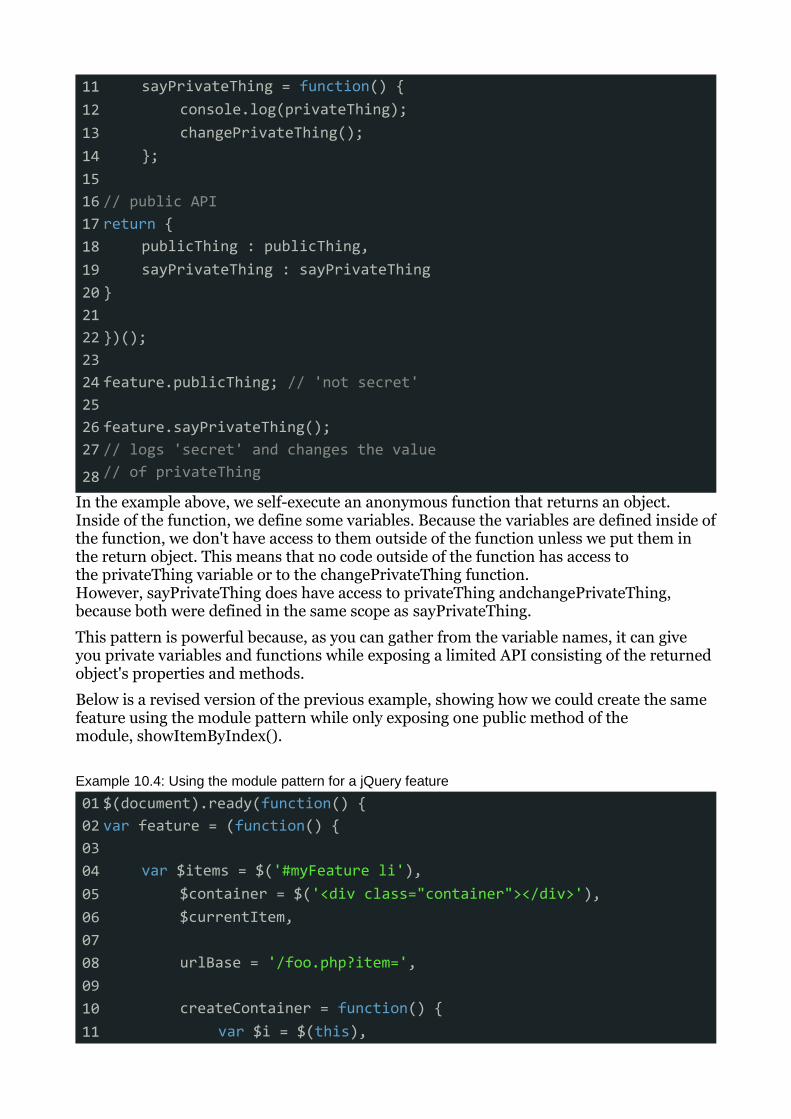
11 sayPrivateThing = function() {12 console.log(privateThing);13 changePrivateThing();14 };15 16 // public API17 return {18 publicThing : publicThing,19 sayPrivateThing : sayPrivateThing20 }21 22 })();23 24 feature.publicThing; // 'not secret'25 26 feature.sayPrivateThing();27 // logs 'secret' and changes the value
28 // of privateThing
In the example above, we self-execute an anonymous function that returns an object. Inside of the function, we define some variables. Because the variables are defined inside of the function, we don't have access to them outside of the function unless we put them in the return object. This means that no code outside of the function has access to the privateThing variable or to the changePrivateThing function. However, sayPrivateThing does have access to privateThing andchangePrivateThing, because both were defined in the same scope as sayPrivateThing.
This pattern is powerful because, as you can gather from the variable names, it can give you private variables and functions while exposing a limited API consisting of the returned object's properties and methods.
Below is a revised version of the previous example, showing how we could create the same feature using the module pattern while only exposing one public method of the module, showItemByIndex().
Example 10.4: Using the module pattern for a jQuery feature
01 $(document).ready(function() {02 var feature = (function() {03 04 var $items = $('#myFeature li'),05 $container = $('<div class="container"></div>'),06 $currentItem,07 08 urlBase = '/foo.php?item=',09 10 createContainer = function() {11 var $i = $(this),
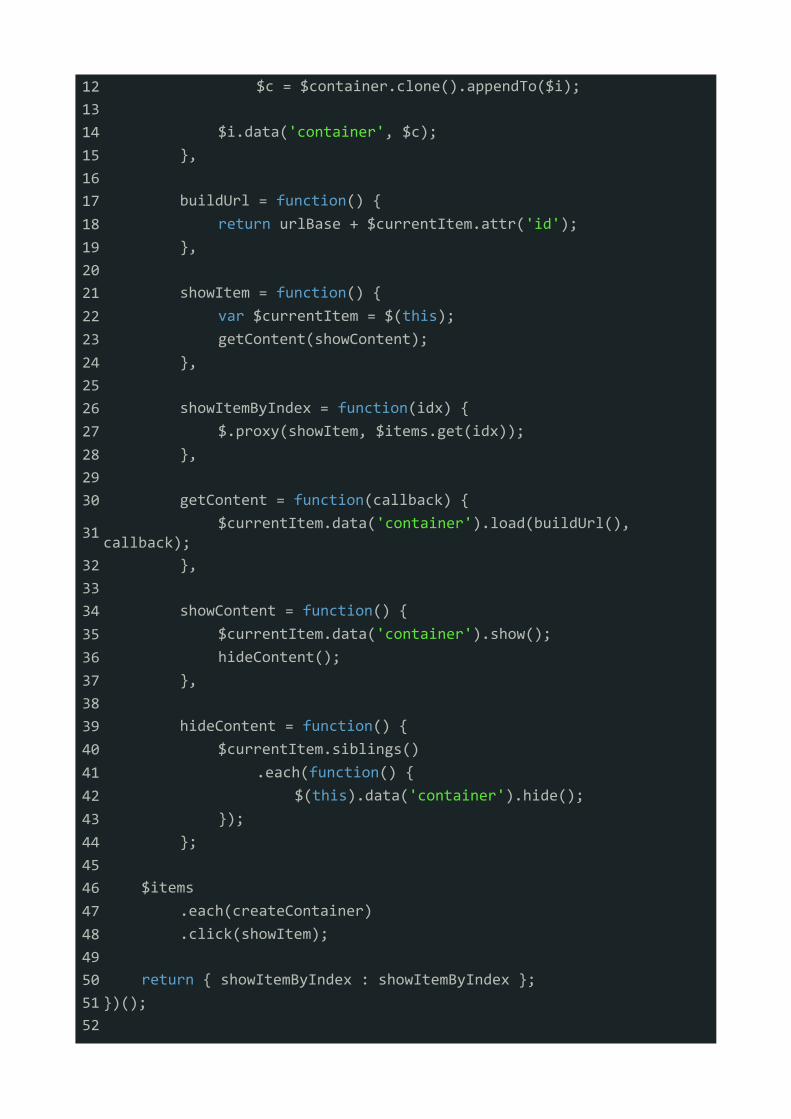
12 $c = $container.clone().appendTo($i);13 14 $i.data('container', $c);15 },16 17 buildUrl = function() {18 return urlBase + $currentItem.attr('id');19 },20 21 showItem = function() {22 var $currentItem = $(this);23 getContent(showContent);24 },25 26 showItemByIndex = function(idx) {27 $.proxy(showItem, $items.get(idx));28 },29 30 getContent = function(callback) {31 $currentItem.data('container').load(buildUrl(), callback);32 },33 34 showContent = function() {35 $currentItem.data('container').show();36 hideContent();37 },38 39 hideContent = function() {40 $currentItem.siblings()41 .each(function() {42 $(this).data('container').hide();43 });44 };45 46 $items47 .each(createContainer)48 .click(showItem);49 50 return { showItemByIndex : showItemByIndex };51 })();52
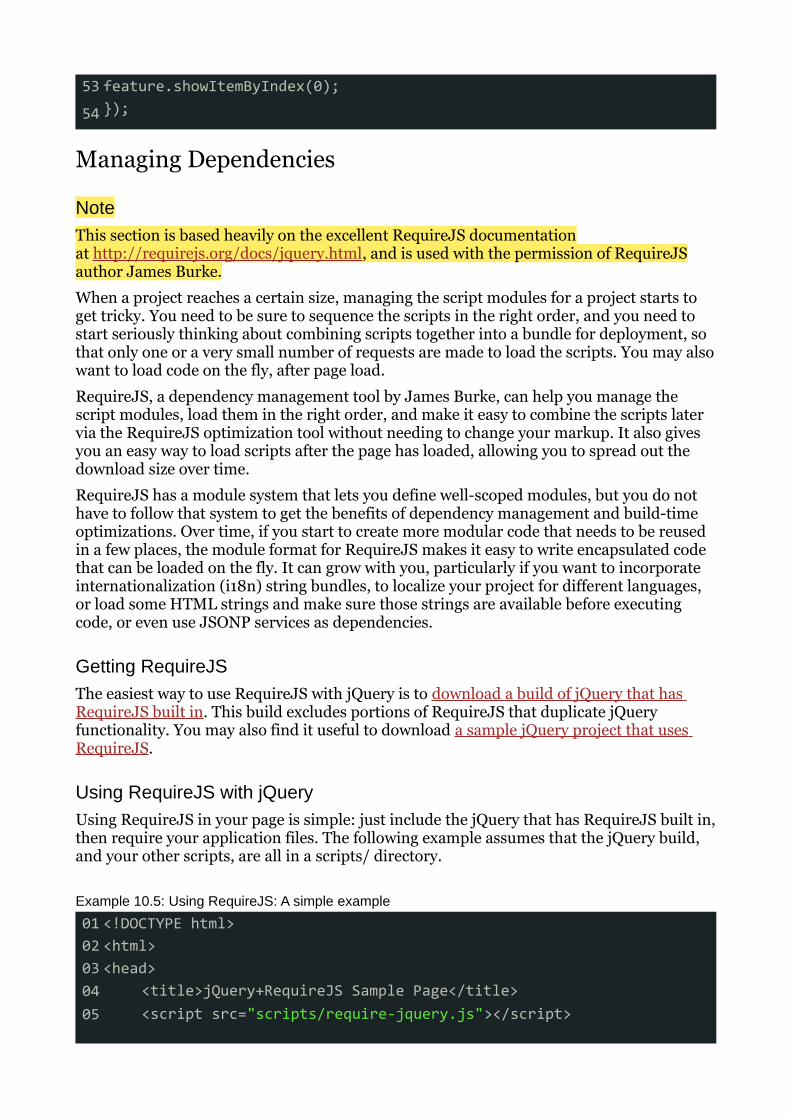
53 feature.showItemByIndex(0);
54 });
Managing Dependencies
NoteThis section is based heavily on the excellent RequireJS documentation at http://requirejs.org/docs/jquery.html, and is used with the permission of RequireJS author James Burke.
When a project reaches a certain size, managing the script modules for a project starts to get tricky. You need to be sure to sequence the scripts in the right order, and you need to start seriously thinking about combining scripts together into a bundle for deployment, so that only one or a very small number of requests are made to load the scripts. You may also want to load code on the fly, after page load.
RequireJS, a dependency management tool by James Burke, can help you manage the script modules, load them in the right order, and make it easy to combine the scripts later via the RequireJS optimization tool without needing to change your markup. It also gives you an easy way to load scripts after the page has loaded, allowing you to spread out the download size over time.
RequireJS has a module system that lets you define well-scoped modules, but you do not have to follow that system to get the benefits of dependency management and build-time optimizations. Over time, if you start to create more modular code that needs to be reused in a few places, the module format for RequireJS makes it easy to write encapsulated code that can be loaded on the fly. It can grow with you, particularly if you want to incorporate internationalization (i18n) string bundles, to localize your project for different languages, or load some HTML strings and make sure those strings are available before executing code, or even use JSONP services as dependencies.
Getting RequireJSThe easiest way to use RequireJS with jQuery is to download a build of jQuery that has RequireJS built in. This build excludes portions of RequireJS that duplicate jQuery functionality. You may also find it useful to download a sample jQuery project that uses RequireJS.
Using RequireJS with jQueryUsing RequireJS in your page is simple: just include the jQuery that has RequireJS built in, then require your application files. The following example assumes that the jQuery build, and your other scripts, are all in a scripts/ directory.
Example 10.5: Using RequireJS: A simple example
01 <!DOCTYPE html>02 <html>03 <head>04 <title>jQuery+RequireJS Sample Page</title>05 <script src="scripts/require-jquery.js"></script>
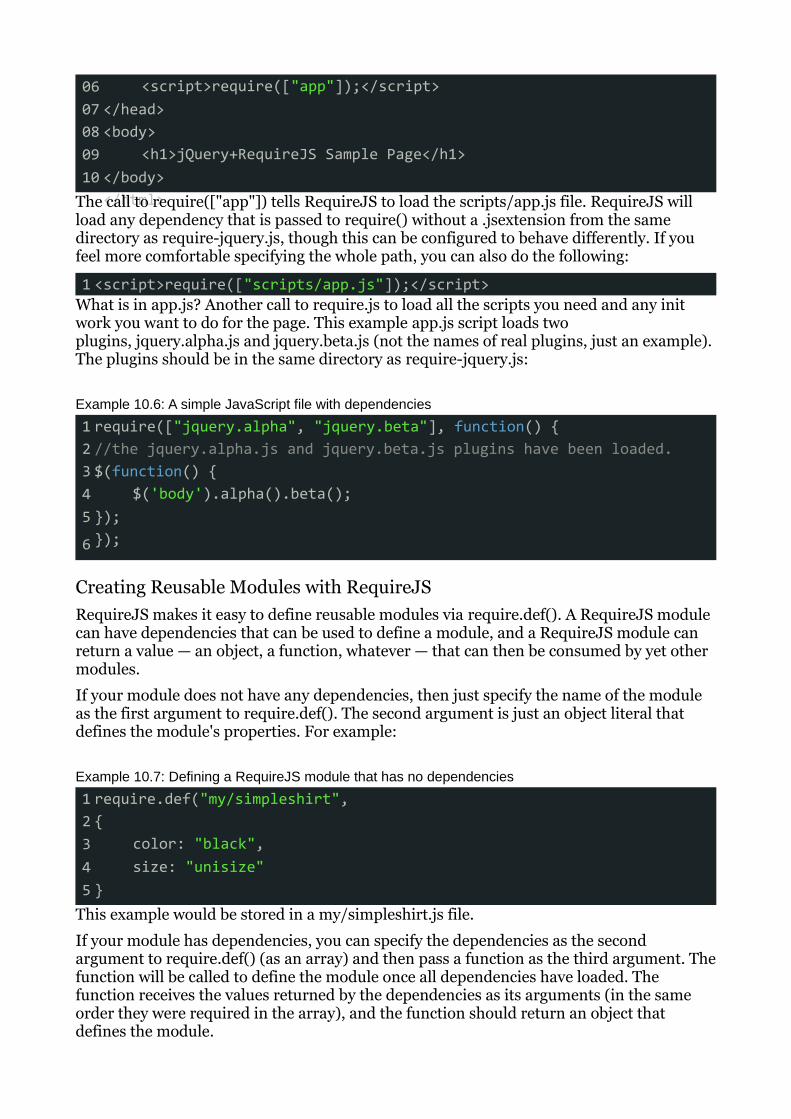
06 <script>require(["app"]);</script>07 </head>08 <body>09 <h1>jQuery+RequireJS Sample Page</h1>10 </body>
</html>The call to require(["app"]) tells RequireJS to load the scripts/app.js file. RequireJS will load any dependency that is passed to require() without a .jsextension from the same directory as require-jquery.js, though this can be configured to behave differently. If you feel more comfortable specifying the whole path, you can also do the following:
1 <script>require(["scripts/app.js"]);</script>What is in app.js? Another call to require.js to load all the scripts you need and any init work you want to do for the page. This example app.js script loads two plugins, jquery.alpha.js and jquery.beta.js (not the names of real plugins, just an example). The plugins should be in the same directory as require-jquery.js:
Example 10.6: A simple JavaScript file with dependencies
1 require(["jquery.alpha", "jquery.beta"], function() {2 //the jquery.alpha.js and jquery.beta.js plugins have been loaded.3 $(function() {4 $('body').alpha().beta();5 });
6 });
Creating Reusable Modules with RequireJSRequireJS makes it easy to define reusable modules via require.def(). A RequireJS module can have dependencies that can be used to define a module, and a RequireJS module can return a value — an object, a function, whatever — that can then be consumed by yet other modules.
If your module does not have any dependencies, then just specify the name of the module as the first argument to require.def(). The second argument is just an object literal that defines the module's properties. For example:
Example 10.7: Defining a RequireJS module that has no dependencies
1 require.def("my/simpleshirt",2 {3 color: "black",4 size: "unisize"5 }
This example would be stored in a my/simpleshirt.js file.
If your module has dependencies, you can specify the dependencies as the second argument to require.def() (as an array) and then pass a function as the third argument. The function will be called to define the module once all dependencies have loaded. The function receives the values returned by the dependencies as its arguments (in the same order they were required in the array), and the function should return an object that defines the module.
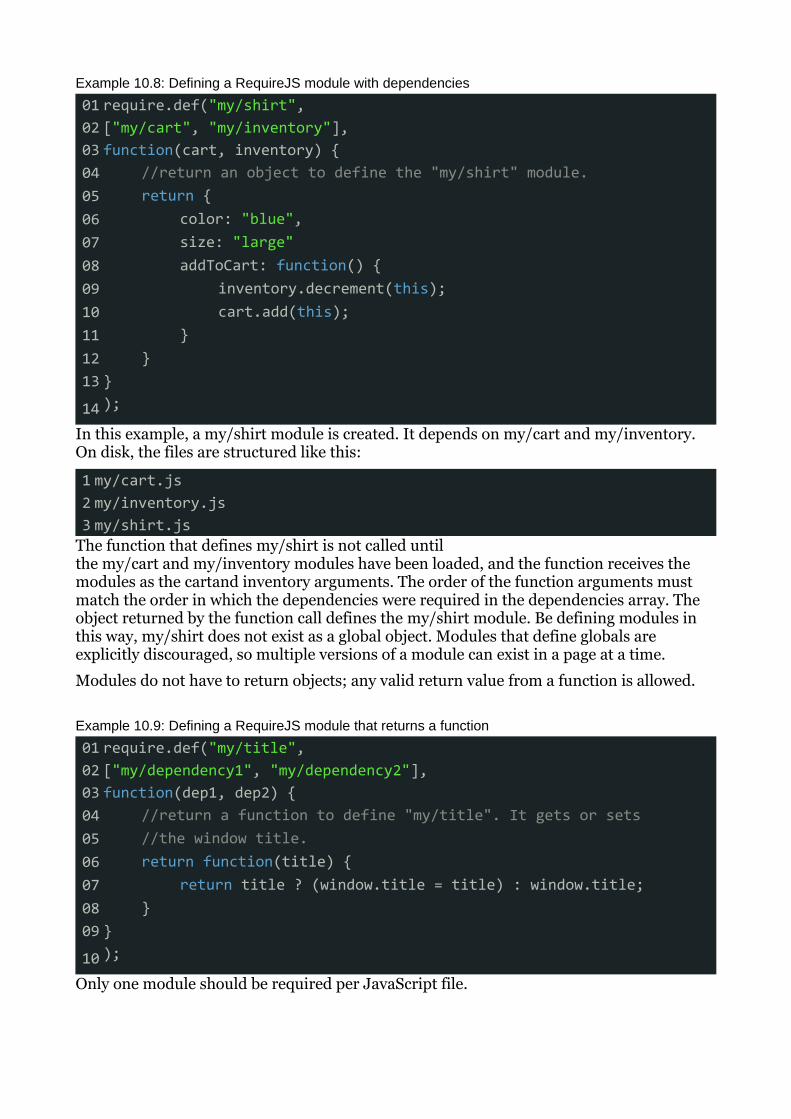
Example 10.8: Defining a RequireJS module with dependencies
01 require.def("my/shirt",02 ["my/cart", "my/inventory"],03 function(cart, inventory) {04 //return an object to define the "my/shirt" module.05 return {06 color: "blue",07 size: "large"08 addToCart: function() {09 inventory.decrement(this);10 cart.add(this);11 }12 }13 }
14 );
In this example, a my/shirt module is created. It depends on my/cart and my/inventory. On disk, the files are structured like this:
1 my/cart.js2 my/inventory.js3 my/shirt.js
The function that defines my/shirt is not called until the my/cart and my/inventory modules have been loaded, and the function receives the modules as the cartand inventory arguments. The order of the function arguments must match the order in which the dependencies were required in the dependencies array. The object returned by the function call defines the my/shirt module. Be defining modules in this way, my/shirt does not exist as a global object. Modules that define globals are explicitly discouraged, so multiple versions of a module can exist in a page at a time.
Modules do not have to return objects; any valid return value from a function is allowed.
Example 10.9: Defining a RequireJS module that returns a function
01 require.def("my/title",02 ["my/dependency1", "my/dependency2"],03 function(dep1, dep2) {04 //return a function to define "my/title". It gets or sets05 //the window title.06 return function(title) {07 return title ? (window.title = title) : window.title;08 }09 }
10 );
Only one module should be required per JavaScript file.
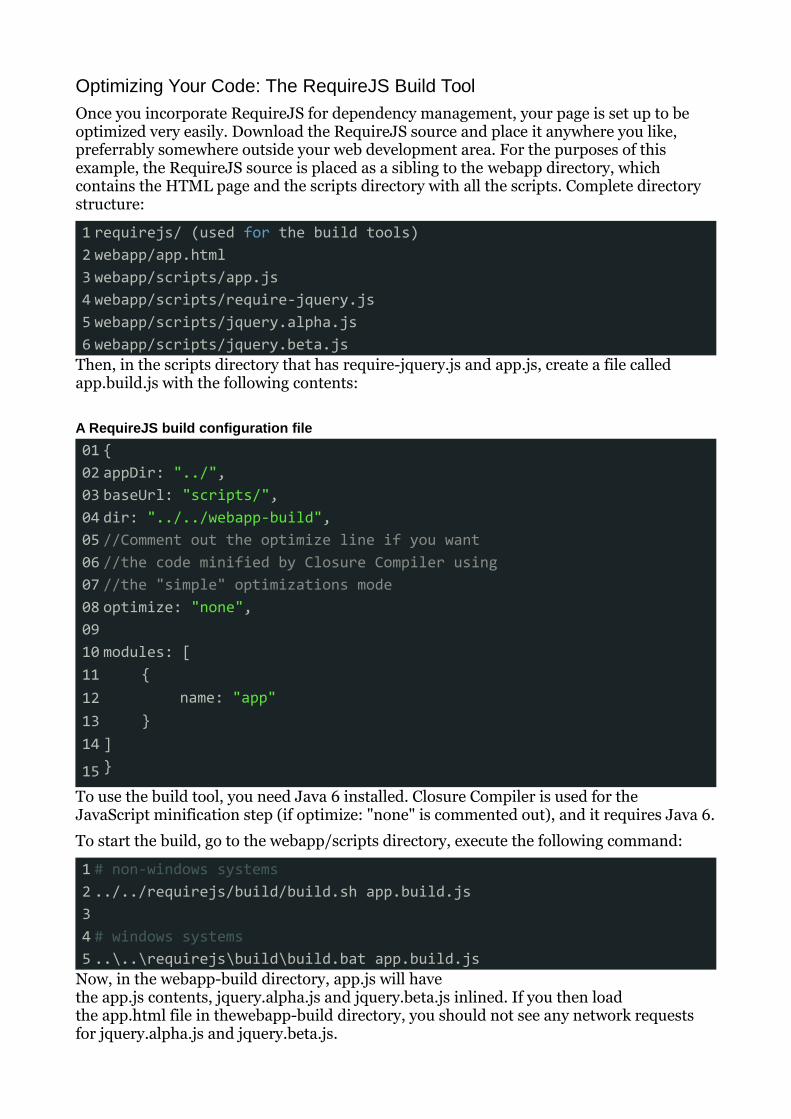
Optimizing Your Code: The RequireJS Build ToolOnce you incorporate RequireJS for dependency management, your page is set up to be optimized very easily. Download the RequireJS source and place it anywhere you like, preferrably somewhere outside your web development area. For the purposes of this example, the RequireJS source is placed as a sibling to the webapp directory, which contains the HTML page and the scripts directory with all the scripts. Complete directory structure:
1 requirejs/ (used for the build tools)2 webapp/app.html3 webapp/scripts/app.js4 webapp/scripts/require-jquery.js5 webapp/scripts/jquery.alpha.js6 webapp/scripts/jquery.beta.js
Then, in the scripts directory that has require-jquery.js and app.js, create a file called app.build.js with the following contents:
A RequireJS build configuration file
01 {02 appDir: "../",03 baseUrl: "scripts/",04 dir: "../../webapp-build",05 //Comment out the optimize line if you want06 //the code minified by Closure Compiler using07 //the "simple" optimizations mode08 optimize: "none",09 10 modules: [11 {12 name: "app"13 }14 ]
15 }
To use the build tool, you need Java 6 installed. Closure Compiler is used for the JavaScript minification step (if optimize: "none" is commented out), and it requires Java 6.
To start the build, go to the webapp/scripts directory, execute the following command:
1 # non-windows systems2 ../../requirejs/build/build.sh app.build.js3 4 # windows systems5 ..\..\requirejs\build\build.bat app.build.js
Now, in the webapp-build directory, app.js will have the app.js contents, jquery.alpha.js and jquery.beta.js inlined. If you then load the app.html file in thewebapp-build directory, you should not see any network requests for jquery.alpha.js and jquery.beta.js.
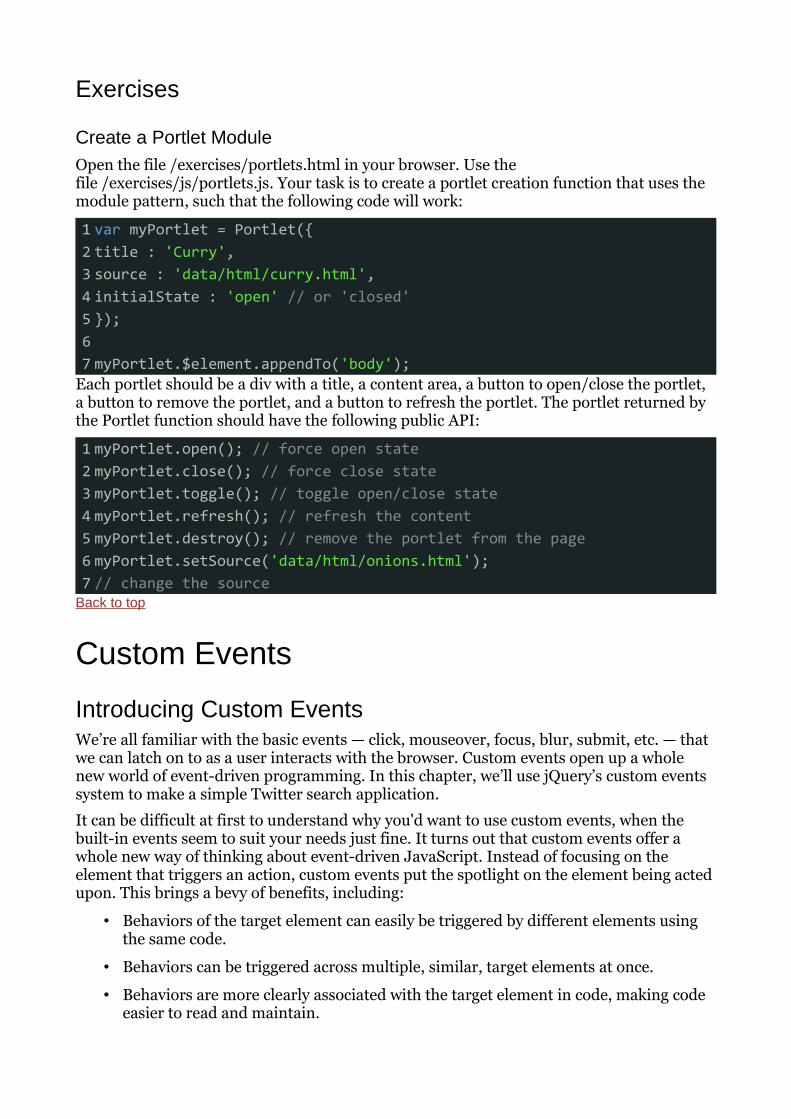
Exercises
Create a Portlet ModuleOpen the file /exercises/portlets.html in your browser. Use the file /exercises/js/portlets.js. Your task is to create a portlet creation function that uses the module pattern, such that the following code will work:
1 var myPortlet = Portlet({2 title : 'Curry',3 source : 'data/html/curry.html',4 initialState : 'open' // or 'closed'5 });6 7 myPortlet.$element.appendTo('body');
Each portlet should be a div with a title, a content area, a button to open/close the portlet, a button to remove the portlet, and a button to refresh the portlet. The portlet returned by the Portlet function should have the following public API:
1 myPortlet.open(); // force open state2 myPortlet.close(); // force close state3 myPortlet.toggle(); // toggle open/close state4 myPortlet.refresh(); // refresh the content5 myPortlet.destroy(); // remove the portlet from the page6 myPortlet.setSource('data/html/onions.html');7 // change the source
Back to top
Custom Events
Introducing Custom EventsWe’re all familiar with the basic events — click, mouseover, focus, blur, submit, etc. — that we can latch on to as a user interacts with the browser. Custom events open up a whole new world of event-driven programming. In this chapter, we’ll use jQuery’s custom events system to make a simple Twitter search application.
It can be difficult at first to understand why you'd want to use custom events, when the built-in events seem to suit your needs just fine. It turns out that custom events offer a whole new way of thinking about event-driven JavaScript. Instead of focusing on the element that triggers an action, custom events put the spotlight on the element being acted upon. This brings a bevy of benefits, including:
• Behaviors of the target element can easily be triggered by different elements using the same code.
• Behaviors can be triggered across multiple, similar, target elements at once.
• Behaviors are more clearly associated with the target element in code, making code easier to read and maintain.
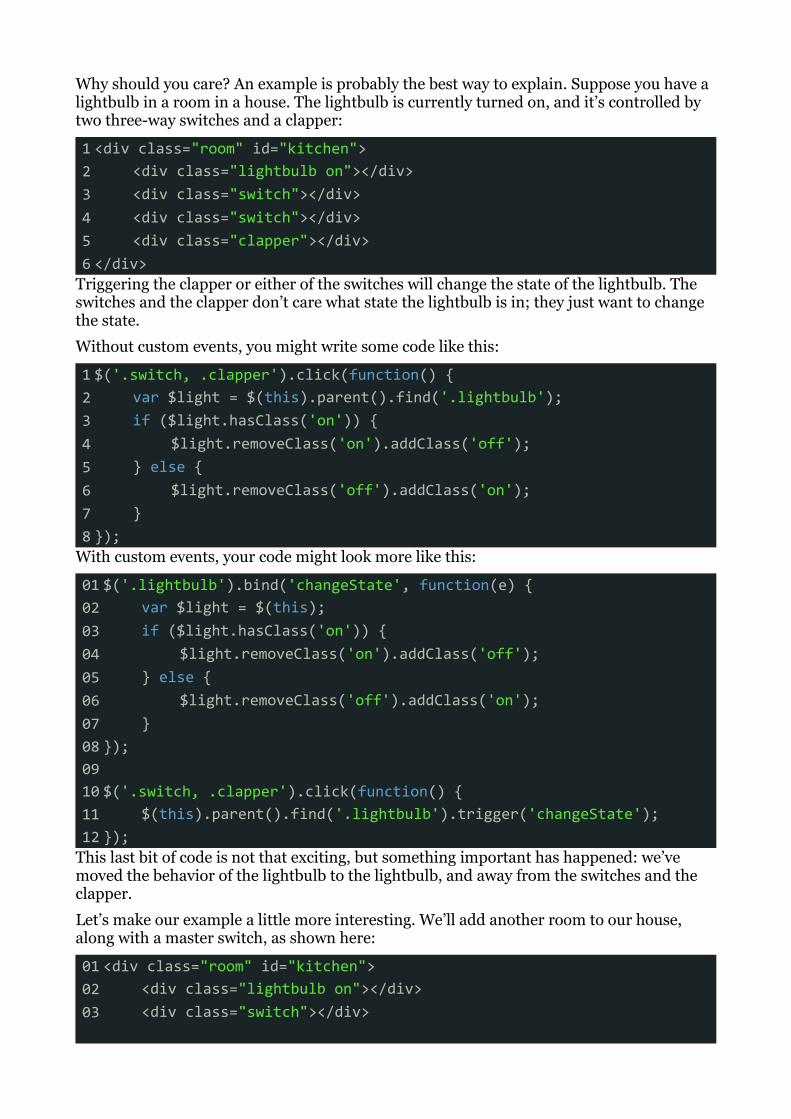
Why should you care? An example is probably the best way to explain. Suppose you have a lightbulb in a room in a house. The lightbulb is currently turned on, and it’s controlled by two three-way switches and a clapper:
1 <div class="room" id="kitchen">2 <div class="lightbulb on"></div>3 <div class="switch"></div>4 <div class="switch"></div>5 <div class="clapper"></div>6 </div>
Triggering the clapper or either of the switches will change the state of the lightbulb. The switches and the clapper don’t care what state the lightbulb is in; they just want to change the state.
Without custom events, you might write some code like this:
1 $('.switch, .clapper').click(function() {2 var $light = $(this).parent().find('.lightbulb');3 if ($light.hasClass('on')) {4 $light.removeClass('on').addClass('off');5 } else {6 $light.removeClass('off').addClass('on');7 }8 });
With custom events, your code might look more like this:
01 $('.lightbulb').bind('changeState', function(e) {02 var $light = $(this);03 if ($light.hasClass('on')) {04 $light.removeClass('on').addClass('off');05 } else {06 $light.removeClass('off').addClass('on');07 }08 });09 10 $('.switch, .clapper').click(function() {11 $(this).parent().find('.lightbulb').trigger('changeState');12 });
This last bit of code is not that exciting, but something important has happened: we’ve moved the behavior of the lightbulb to the lightbulb, and away from the switches and the clapper.
Let’s make our example a little more interesting. We’ll add another room to our house, along with a master switch, as shown here:
01 <div class="room" id="kitchen">02 <div class="lightbulb on"></div>03 <div class="switch"></div>
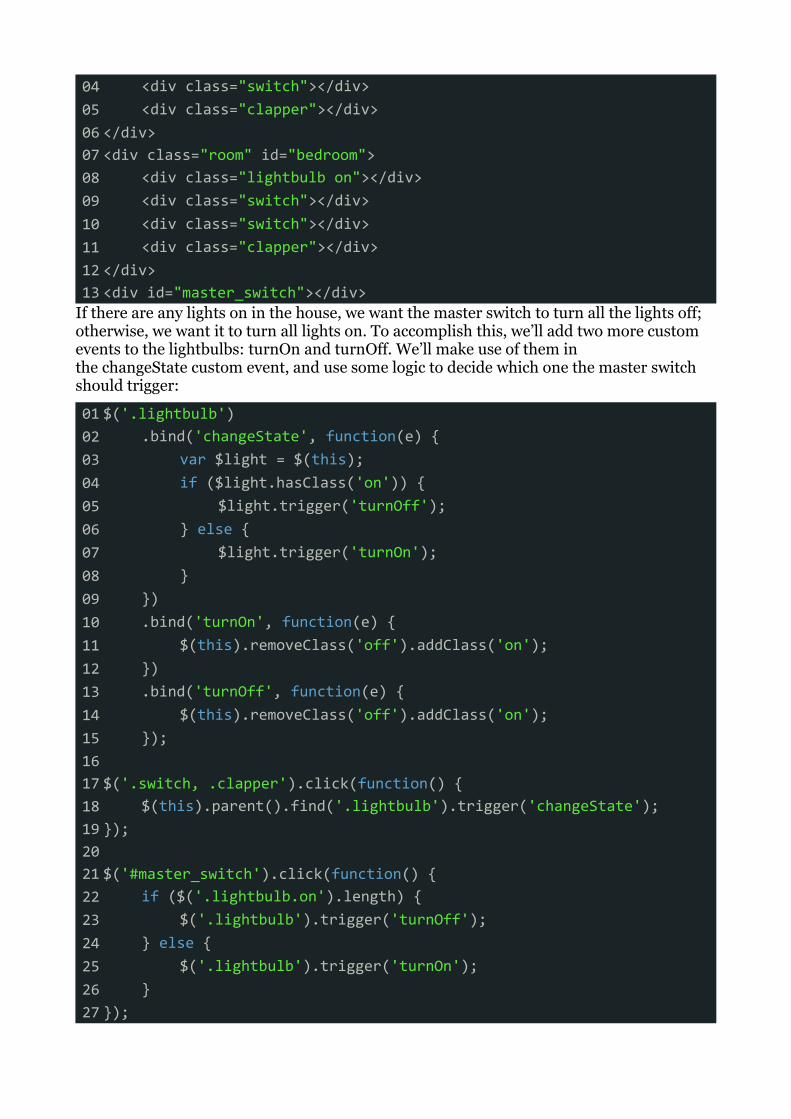
04 <div class="switch"></div>05 <div class="clapper"></div>06 </div>07 <div class="room" id="bedroom">08 <div class="lightbulb on"></div>09 <div class="switch"></div>10 <div class="switch"></div>11 <div class="clapper"></div>12 </div>13 <div id="master_switch"></div>
If there are any lights on in the house, we want the master switch to turn all the lights off; otherwise, we want it to turn all lights on. To accomplish this, we’ll add two more custom events to the lightbulbs: turnOn and turnOff. We’ll make use of them in the changeState custom event, and use some logic to decide which one the master switch should trigger:
01 $('.lightbulb')02 .bind('changeState', function(e) {03 var $light = $(this);04 if ($light.hasClass('on')) {05 $light.trigger('turnOff');06 } else {07 $light.trigger('turnOn');08 }09 })10 .bind('turnOn', function(e) {11 $(this).removeClass('off').addClass('on');12 })13 .bind('turnOff', function(e) {14 $(this).removeClass('off').addClass('on');15 });16 17 $('.switch, .clapper').click(function() {18 $(this).parent().find('.lightbulb').trigger('changeState');19 });20 21 $('#master_switch').click(function() {22 if ($('.lightbulb.on').length) {23 $('.lightbulb').trigger('turnOff');24 } else {25 $('.lightbulb').trigger('turnOn');26 }27 });
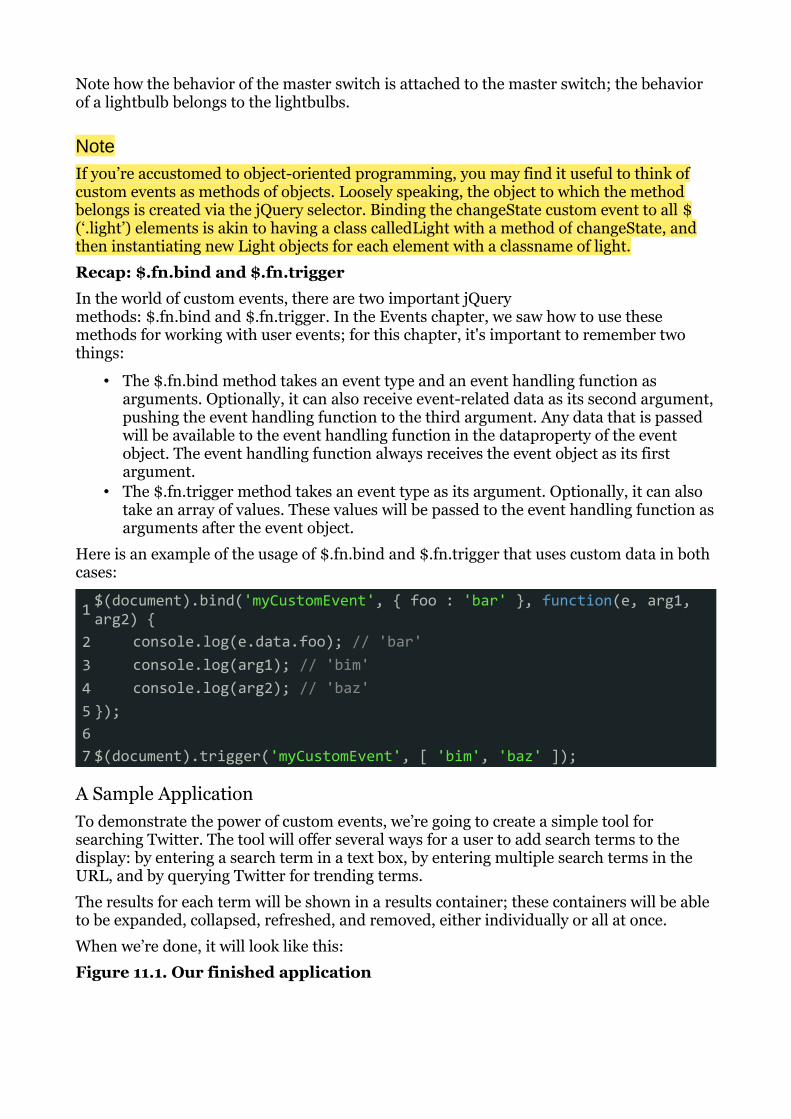
Note how the behavior of the master switch is attached to the master switch; the behavior of a lightbulb belongs to the lightbulbs.
NoteIf you’re accustomed to object-oriented programming, you may find it useful to think of custom events as methods of objects. Loosely speaking, the object to which the method belongs is created via the jQuery selector. Binding the changeState custom event to all $(‘.light’) elements is akin to having a class calledLight with a method of changeState, and then instantiating new Light objects for each element with a classname of light.
Recap: $.fn.bind and $.fn.trigger
In the world of custom events, there are two important jQuery methods: $.fn.bind and $.fn.trigger. In the Events chapter, we saw how to use these methods for working with user events; for this chapter, it's important to remember two things:
• The $.fn.bind method takes an event type and an event handling function as arguments. Optionally, it can also receive event-related data as its second argument, pushing the event handling function to the third argument. Any data that is passed will be available to the event handling function in the dataproperty of the event object. The event handling function always receives the event object as its first argument.
• The $.fn.trigger method takes an event type as its argument. Optionally, it can also take an array of values. These values will be passed to the event handling function as arguments after the event object.
Here is an example of the usage of $.fn.bind and $.fn.trigger that uses custom data in both cases:
1 $(document).bind('myCustomEvent', { foo : 'bar' }, function(e, arg1, arg2) {2 console.log(e.data.foo); // 'bar'3 console.log(arg1); // 'bim'4 console.log(arg2); // 'baz'5 });6 7 $(document).trigger('myCustomEvent', [ 'bim', 'baz' ]);
A Sample ApplicationTo demonstrate the power of custom events, we’re going to create a simple tool for searching Twitter. The tool will offer several ways for a user to add search terms to the display: by entering a search term in a text box, by entering multiple search terms in the URL, and by querying Twitter for trending terms.
The results for each term will be shown in a results container; these containers will be able to be expanded, collapsed, refreshed, and removed, either individually or all at once.
When we’re done, it will look like this:
Figure 11.1. Our finished application
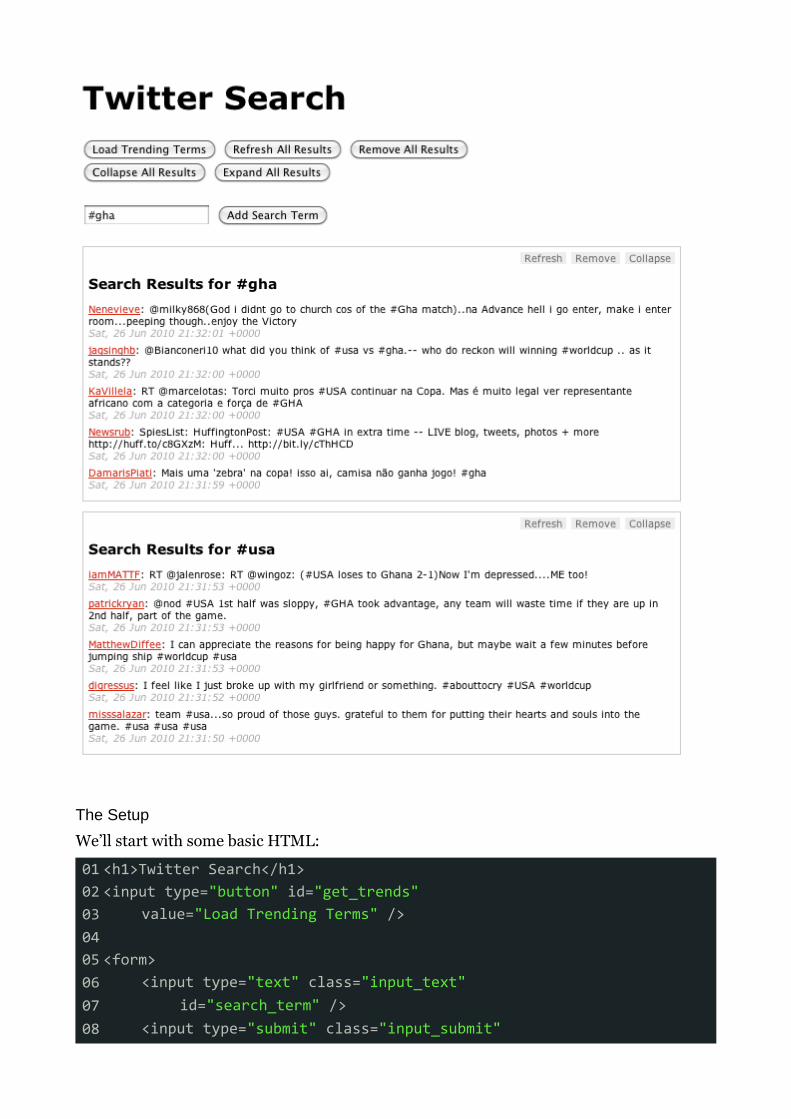
The Setup
We’ll start with some basic HTML:
01 <h1>Twitter Search</h1>02 <input type="button" id="get_trends"03 value="Load Trending Terms" />04 05 <form>06 <input type="text" class="input_text"07 id="search_term" />08 <input type="submit" class="input_submit"
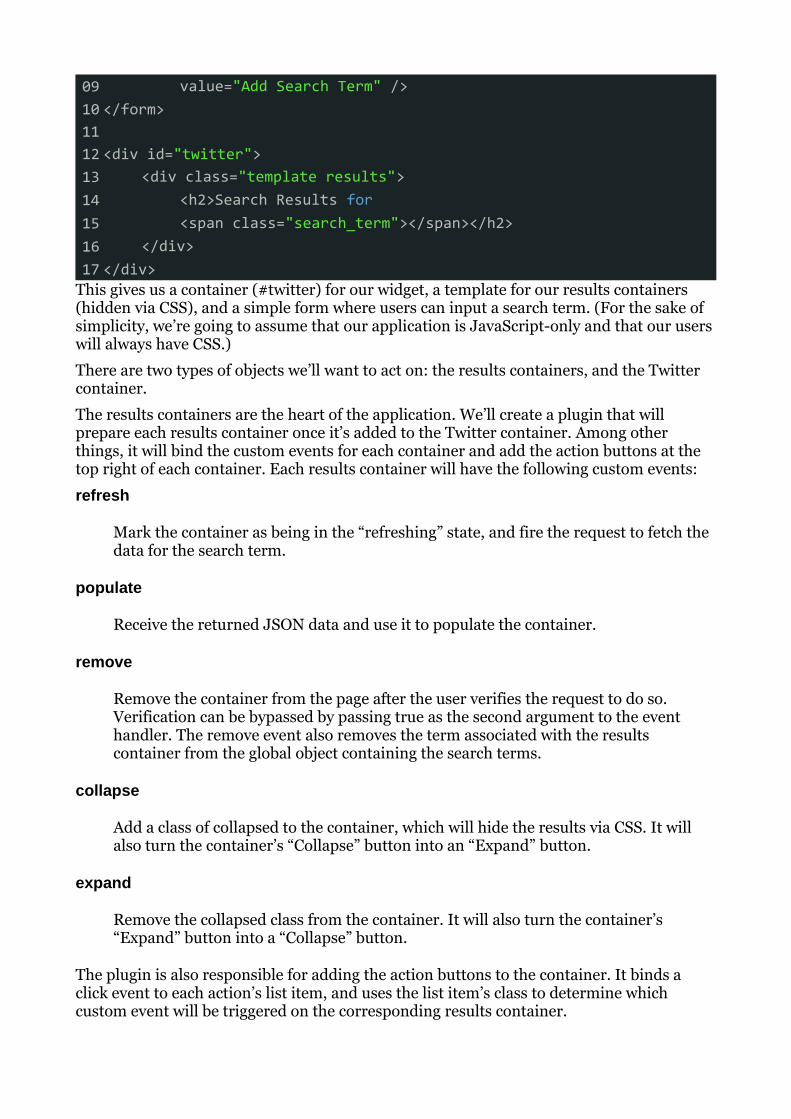
09 value="Add Search Term" />10 </form>11 12 <div id="twitter">13 <div class="template results">14 <h2>Search Results for15 <span class="search_term"></span></h2>16 </div>17 </div>
This gives us a container (#twitter) for our widget, a template for our results containers (hidden via CSS), and a simple form where users can input a search term. (For the sake of simplicity, we’re going to assume that our application is JavaScript-only and that our users will always have CSS.)
There are two types of objects we’ll want to act on: the results containers, and the Twitter container.
The results containers are the heart of the application. We’ll create a plugin that will prepare each results container once it’s added to the Twitter container. Among other things, it will bind the custom events for each container and add the action buttons at the top right of each container. Each results container will have the following custom events:
refresh
Mark the container as being in the “refreshing” state, and fire the request to fetch the data for the search term.
populate
Receive the returned JSON data and use it to populate the container.
remove
Remove the container from the page after the user verifies the request to do so. Verification can be bypassed by passing true as the second argument to the event handler. The remove event also removes the term associated with the results container from the global object containing the search terms.
collapse
Add a class of collapsed to the container, which will hide the results via CSS. It will also turn the container’s “Collapse” button into an “Expand” button.
expand
Remove the collapsed class from the container. It will also turn the container’s “Expand” button into a “Collapse” button.
The plugin is also responsible for adding the action buttons to the container. It binds a click event to each action’s list item, and uses the list item’s class to determine which custom event will be triggered on the corresponding results container.
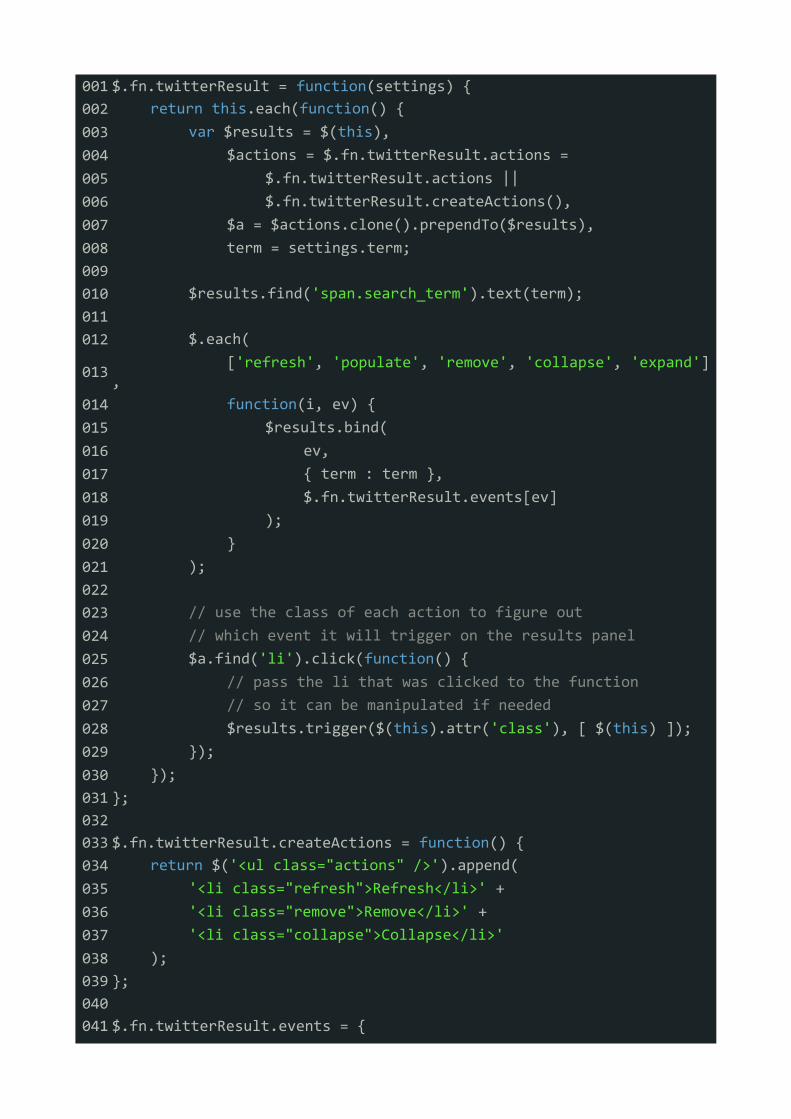
001 $.fn.twitterResult = function(settings) {002 return this.each(function() {003 var $results = $(this),004 $actions = $.fn.twitterResult.actions =005 $.fn.twitterResult.actions ||006 $.fn.twitterResult.createActions(),007 $a = $actions.clone().prependTo($results),008 term = settings.term;009 010 $results.find('span.search_term').text(term);011 012 $.each(013 ['refresh', 'populate', 'remove', 'collapse', 'expand'],014 function(i, ev) {015 $results.bind(016 ev,017 { term : term },018 $.fn.twitterResult.events[ev]019 );020 }021 );022 023 // use the class of each action to figure out024 // which event it will trigger on the results panel025 $a.find('li').click(function() {026 // pass the li that was clicked to the function027 // so it can be manipulated if needed028 $results.trigger($(this).attr('class'), [ $(this) ]);029 });030 });031 };032 033 $.fn.twitterResult.createActions = function() {034 return $('<ul class="actions" />').append(035 '<li class="refresh">Refresh</li>' +036 '<li class="remove">Remove</li>' +037 '<li class="collapse">Collapse</li>'038 );039 };040 041 $.fn.twitterResult.events = {
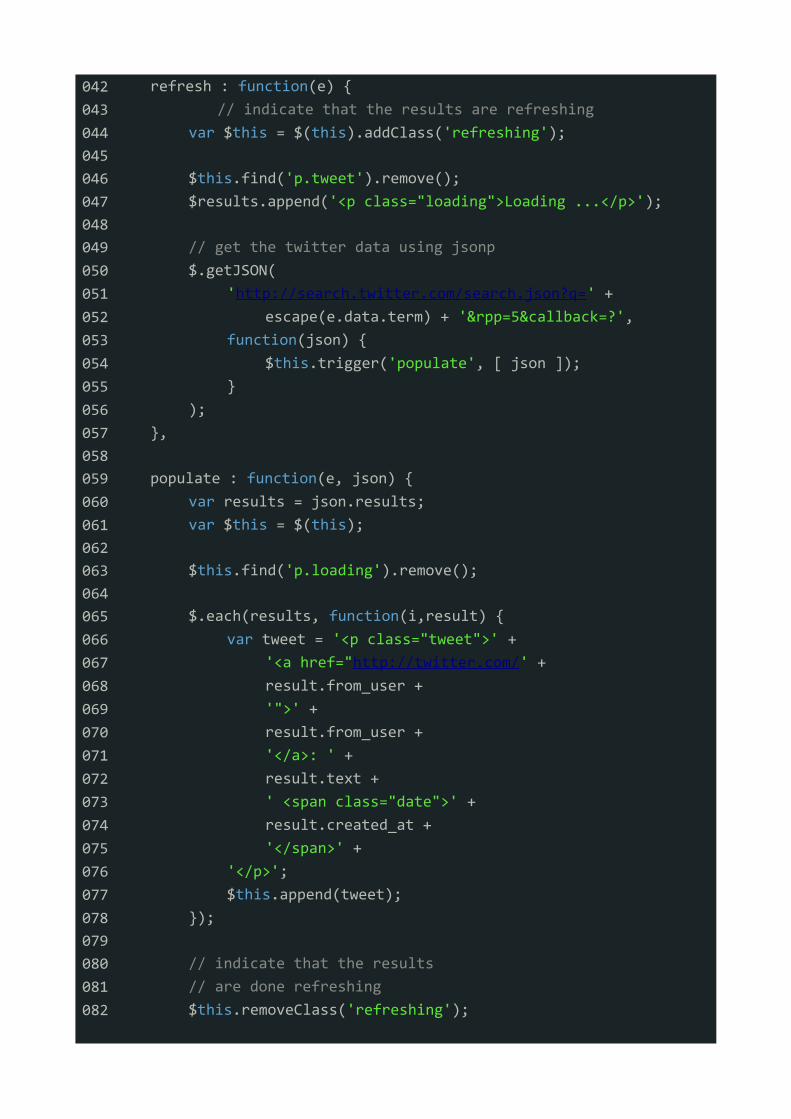
042 refresh : function(e) {043 // indicate that the results are refreshing044 var $this = $(this).addClass('refreshing');045 046 $this.find('p.tweet').remove();047 $results.append('<p class="loading">Loading ...</p>');048 049 // get the twitter data using jsonp050 $.getJSON(051 'http://search.twitter.com/search.json?q=' +052 escape(e.data.term) + '&rpp=5&callback=?',053 function(json) {054 $this.trigger('populate', [ json ]);055 }056 );057 },058 059 populate : function(e, json) {060 var results = json.results;061 var $this = $(this);062 063 $this.find('p.loading').remove();064 065 $.each(results, function(i,result) {066 var tweet = '<p class="tweet">' +067 '<a href="http://twitter.com/' +068 result.from_user +069 '">' +070 result.from_user +071 '</a>: ' +072 result.text +073 ' <span class="date">' +074 result.created_at +075 '</span>' +076 '</p>';077 $this.append(tweet);078 });079 080 // indicate that the results081 // are done refreshing082 $this.removeClass('refreshing');
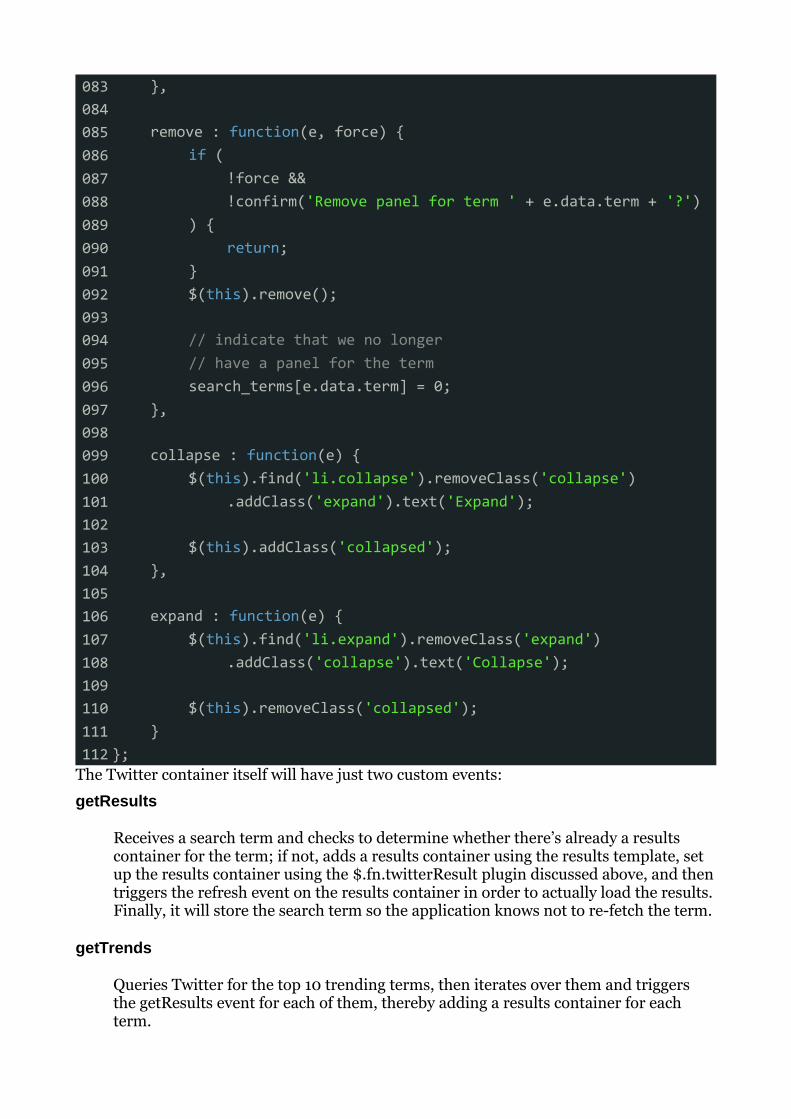
083 },084 085 remove : function(e, force) {086 if (087 !force &&088 !confirm('Remove panel for term ' + e.data.term + '?')089 ) {090 return;091 }092 $(this).remove();093 094 // indicate that we no longer095 // have a panel for the term096 search_terms[e.data.term] = 0;097 },098 099 collapse : function(e) {100 $(this).find('li.collapse').removeClass('collapse')101 .addClass('expand').text('Expand');102 103 $(this).addClass('collapsed');104 },105 106 expand : function(e) {107 $(this).find('li.expand').removeClass('expand')108 .addClass('collapse').text('Collapse');109 110 $(this).removeClass('collapsed');111 }112 };
The Twitter container itself will have just two custom events:
getResults
Receives a search term and checks to determine whether there’s already a results container for the term; if not, adds a results container using the results template, set up the results container using the $.fn.twitterResult plugin discussed above, and then triggers the refresh event on the results container in order to actually load the results. Finally, it will store the search term so the application knows not to re-fetch the term.
getTrends
Queries Twitter for the top 10 trending terms, then iterates over them and triggers the getResults event for each of them, thereby adding a results container for each term.
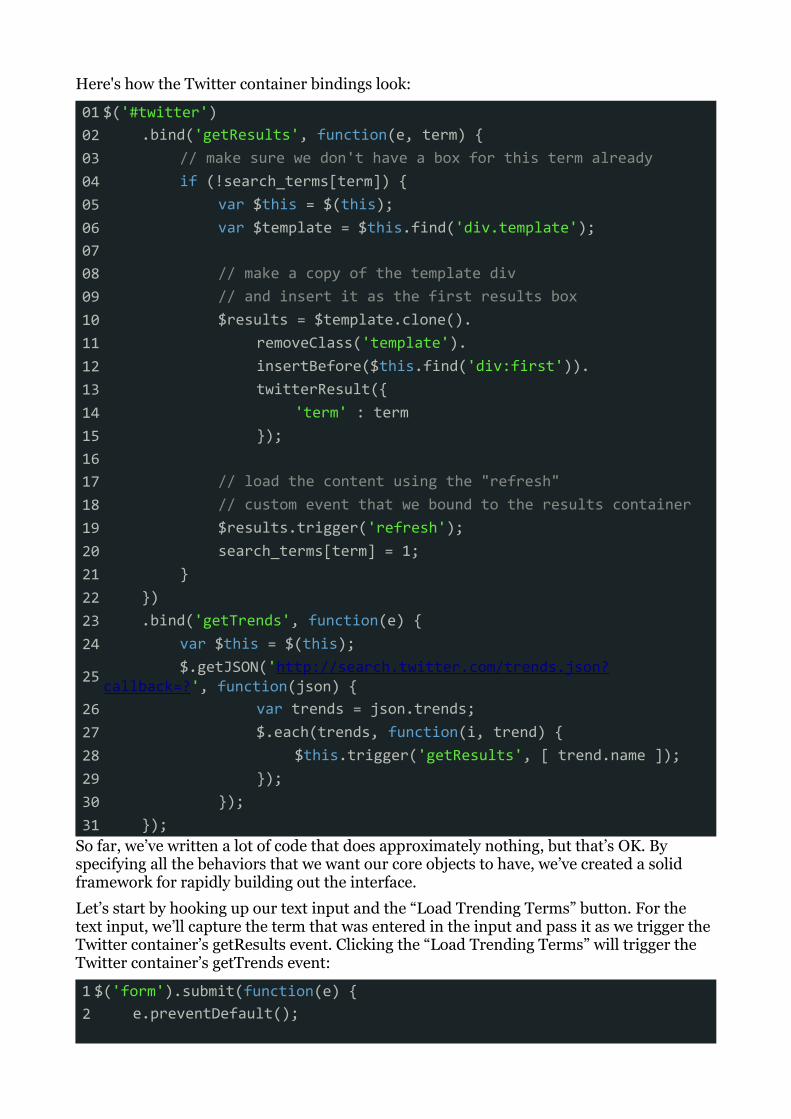
Here's how the Twitter container bindings look:
01 $('#twitter')02 .bind('getResults', function(e, term) {03 // make sure we don't have a box for this term already04 if (!search_terms[term]) {05 var $this = $(this);06 var $template = $this.find('div.template');07 08 // make a copy of the template div09 // and insert it as the first results box10 $results = $template.clone().11 removeClass('template').12 insertBefore($this.find('div:first')).13 twitterResult({14 'term' : term15 });16 17 // load the content using the "refresh"18 // custom event that we bound to the results container19 $results.trigger('refresh');20 search_terms[term] = 1;21 }22 })23 .bind('getTrends', function(e) {24 var $this = $(this);25 $.getJSON('http://search.twitter.com/trends.json?callback=?', function(json) {26 var trends = json.trends;27 $.each(trends, function(i, trend) {28 $this.trigger('getResults', [ trend.name ]);29 });30 });31 });
So far, we’ve written a lot of code that does approximately nothing, but that’s OK. By specifying all the behaviors that we want our core objects to have, we’ve created a solid framework for rapidly building out the interface.
Let’s start by hooking up our text input and the “Load Trending Terms” button. For the text input, we’ll capture the term that was entered in the input and pass it as we trigger the Twitter container’s getResults event. Clicking the “Load Trending Terms” will trigger the Twitter container’s getTrends event:
1 $('form').submit(function(e) {2 e.preventDefault();
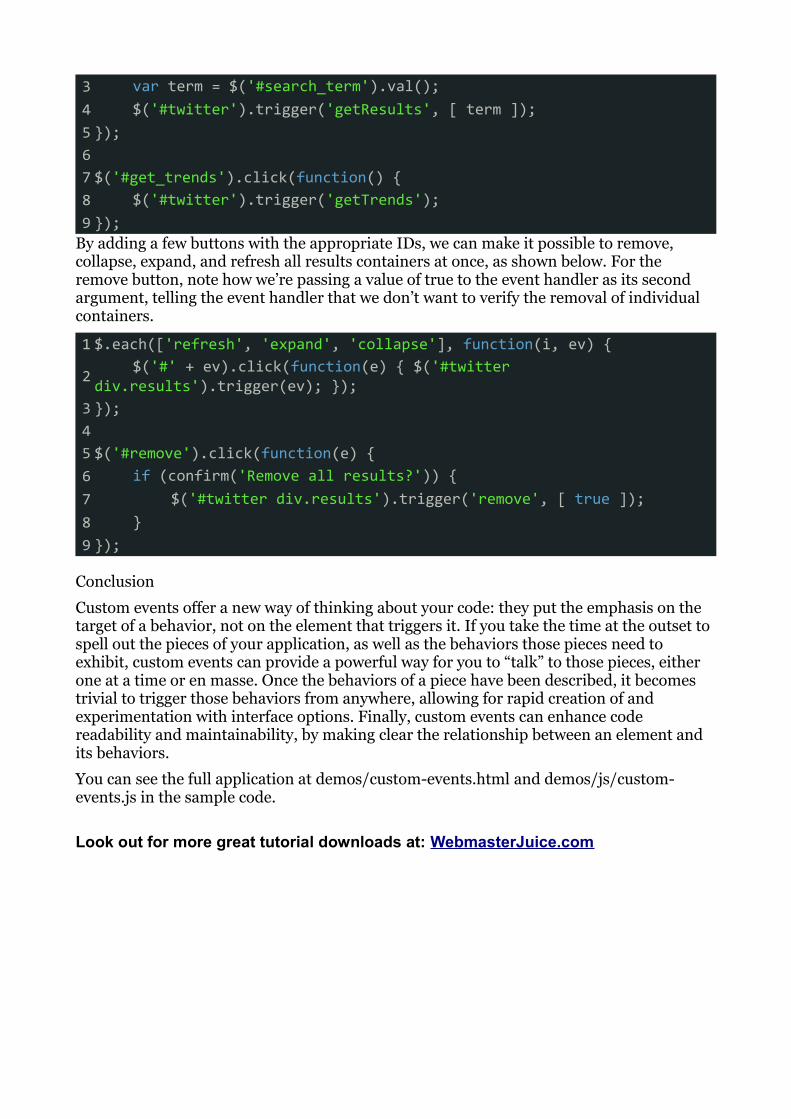
3 var term = $('#search_term').val();4 $('#twitter').trigger('getResults', [ term ]);5 });6 7 $('#get_trends').click(function() {8 $('#twitter').trigger('getTrends');9 });
By adding a few buttons with the appropriate IDs, we can make it possible to remove, collapse, expand, and refresh all results containers at once, as shown below. For the remove button, note how we’re passing a value of true to the event handler as its second argument, telling the event handler that we don’t want to verify the removal of individual containers.
1 $.each(['refresh', 'expand', 'collapse'], function(i, ev) {
2 $('#' + ev).click(function(e) { $('#twitter div.results').trigger(ev); });3 });4 5 $('#remove').click(function(e) {6 if (confirm('Remove all results?')) {7 $('#twitter div.results').trigger('remove', [ true ]);8 }9 });
Conclusion
Custom events offer a new way of thinking about your code: they put the emphasis on the target of a behavior, not on the element that triggers it. If you take the time at the outset to spell out the pieces of your application, as well as the behaviors those pieces need to exhibit, custom events can provide a powerful way for you to “talk” to those pieces, either one at a time or en masse. Once the behaviors of a piece have been described, it becomes trivial to trigger those behaviors from anywhere, allowing for rapid creation of and experimentation with interface options. Finally, custom events can enhance code readability and maintainability, by making clear the relationship between an element and its behaviors.
You can see the full application at demos/custom-events.html and demos/js/custom-events.js in the sample code.
Look out for more great tutorial downloads at: WebmasterJuice.com