installing moosefs step by step tutorial · installing moosefs step by step tutorial core...
TRANSCRIPT

Installing MooseFSStep by Step Tutorial
Core Technology Development & Support Team
January 7, 2017

c© 2013-2017 v. 1.5.1Piotr Robert Konopelko, Core Technology Development & Support Team.All rights reserved.
Proofread by Agata Kruszona-ZawadzkaCoordination & layout by Piotr Robert Konopelko.
Please send corrections to [email protected].
1
Contents
1 Introduction 31.1 Key differences between versions 1.6.2x and 2.0.x . . . . . . . . . . . . . . . . . . 31.2 Many Master Servers – how does it work? . . . . . . . . . . . . . . . . . . . . . . 3
2 Things to do before installation 52.1 Configuring Domain Name Service . . . . . . . . . . . . . . . . . . . . . . . . . . 52.2 Adding repository . . . . . . . . . . . . . . . . . . . . . . . . . . . . . . . . . . . 5
2.2.1 Repository branches . . . . . . . . . . . . . . . . . . . . . . . . . . . . . . 62.3 Differences in package names between MooseFS
and MooseFS Pro . . . . . . . . . . . . . . . . . . . . . . . . . . . . . . . . . . . . 6
3 MooseFS installation process on dedicated machines 73.1 Master Server(s) installation . . . . . . . . . . . . . . . . . . . . . . . . . . . . . . 73.2 MooseFS CGI and CGI Server installation . . . . . . . . . . . . . . . . . . . . . . 93.3 MooseFS CLI installation . . . . . . . . . . . . . . . . . . . . . . . . . . . . . . . 103.4 Metadata backup servers (Metaloggers) installation . . . . . . . . . . . . . . . . . 113.5 Chunkservers installation . . . . . . . . . . . . . . . . . . . . . . . . . . . . . . . 113.6 Users’ computers installation . . . . . . . . . . . . . . . . . . . . . . . . . . . . . 13
4 Basic MooseFS use 15
5 Stopping MooseFS 17
6 Supplement: Setting up DNS server on Debian/Ubuntu 186.1 Setting up DNS server . . . . . . . . . . . . . . . . . . . . . . . . . . . . . . . . . 186.2 Setting up revDNS server . . . . . . . . . . . . . . . . . . . . . . . . . . . . . . . 19
2

Chapter 1
Introduction
Notice: there is one dependency to resolve: users’ computers need FUSE package to mountMooseFS. It can be downloaded and installed from repositories.
1.1 Key differences between versions 1.6.2x and 2.0.x
1. Master host(s) configuration is done solely via DNS – it is no longer possible to listmaster(s) IP address(es) in clients’ and Chunkservers’ configuration; default name formaster domain is mfsmaster, it can be changed in configuration files;
2. In Pro version Metaloggers become optional, they can be replaced by additional MasterServers; in Community Edition it is still strongly recommended to set up Metaloggers.
3. Mfsmetarestore tool is no longer present in the system; instead, it is enough to start themaster process with -a switch;
4. Configuration files now sit in mfs subdirectory inside the /etc directory (this change wasintroduced in 1.6.27).
1.2 Many Master Servers – how does it work?
In previous MooseFS versions you had only one master process and any number of Metaloggers.In the event of master failure, system administrator was able to retrieve ”metadata” informationfrom the Metalogger and start a new master (on a new machine, if necessary), so the file systemwas up and running again. But this was always causing the system to be unavailable to clientsfor a period of time and required manual work to bring it back up.
New MooseFS Pro version introduces many Master Servers working together in multiple roles.One role is ”leader”. The Leader Master is acting as it used to for the Chunkservers and clients.There is never more than one leader in any working system.
The other role is ”follower”. The follower master is doing what Metaloggers used to do – itdownloads metadata from the leader master and keeps it. But unlike a Metalogger, if a leadermaster stops working, a follower master is immediately ready to take on the role of leader. Ifthe leader master fails, a new candidate for leader is chosen from the followers. The candidate
3
assumes a role of ”elect”, that automatically converts to ”leader” as soon as more than half ofthe Chunkservers connect to elect. There can be more than one follower in the system.
The whole switching operation is almost invisible to the system users, as it usually takes betweena couple to a dozen or so seconds. When/if the former leader master starts working again, itassumes the role of follower. If a follower master fails, it has no effect on the whole system. Ifsuch a master starts working again, it again assumes the role of follower.
4
Chapter 2
Things to do before installation
For the sake of this document, it’s assumed that your machines have following IP addresses:
• Master Servers: 192.168.1.1, 192.168.1.2
• Chunkservers: 192.168.1.101, 192.168.1.102 and 192.168.1.103
• Users’ computers (clients): 192.168.2.x
2.1 Configuring Domain Name Service
Before you start installing MooseFS, you need to have working DNS. It’s needed for MooseFSto work properly with several Master Servers, because DNS can resolve one host name as morethan one IP address.
All IPs of machines, which will be Master Servers, must be included in DNS configuration fileand resolved as ”mfsmaster” (or any other selected name), e.g.:
Listing 2.1: DNS entriesmfsmaster IN A 192.168.1.1 ; address of first Master Server
mfsmaster IN A 192.168.1.2 ; address of second Master Server
More information about configuring DNS server is included in a supplement to this manual.
2.2 Adding repository
To install MooseFS you need to add MooseFS Official Supported Repositories to your system.This process, both with detailed instructions for specific operating systems, is described athttp://get.moosefs.com (please select your distribution in menu on the left).
At this time there are repositories available for Ubuntu/Debian, RHEL/CentOS/Fedora, FreeBSDand MacOS X.
5

2.2.1 Repository branches
Our repository contains two branches: moosefs-3 and moosefs-2. Both branches contain stableand production-ready MooseFS version.
At the time of writing this guide, moosefs-3 branch contains version 3.0.86-1, and moosefs-2
branch contains version 2.0.91-1.
moosefs-3 branch is a default and you don’t need to make any changes in default URL(http://ppa.moosefs.com/moosefs-3/).
If you want to use moosefs-2 branch, you just need to replace moosefs-3 with moosefs-2 afterhttp://ppa.moosefs.com/ and before apt, yum, freebsd or osx, so URL will look like:
http://ppa.moosefs.com/moosefs-2/[rest of url]
It is also possible to use version number instead of ”branch” if you want to upgrade to a specificversion of MooseFS (e.g. 3.0.81-1):
http://ppa.moosefs.com/3.0.81/[rest of url]
Notice: If you want to use the last option, please remember you need to manuallychange version number on each server to the selected one before doing an upgrade.
2.3 Differences in package names between MooseFSand MooseFS Pro
MooseFS and MooseFS Pro packages are named according to the following pattern:
MooseFS module MooseFS Pro MooseFS
Master Server moosefs-pro-master moosefs-master
Chunkserver moosefs-pro-chunkserver moosefs-chunkserver
Metalogger moosefs-pro-metalogger moosefs-metalogger
Client moosefs-pro-client moosefs-client
CLI Interface moosefs-pro-cli moosefs-cli
CGI Interface moosefs-pro-cgi moosefs-cgi
CGI Server moosefs-pro-cgiserv moosefs-cgiserv
Netdump moosefs-pro-netdump moosefs-netdump
Supervisor moosefs-pro-supervisor n/a
6
Chapter 3
MooseFS installation process ondedicated machines
Notice: In this tutorial it is assumed, that you have MooseFS Community Edi-tion. If you want to install MooseFS Pro, please use ’pro’ in package names, e.g.:moosefs-pro-master instead of moosefs-master.
In this tutorial it is also assumed, that you have Ubuntu/Debian installed on your machines. Ifyou have another distribution, please use appropriate package manager instead of apt.
Notice, that most of commands below are preceded by # sign, which means, that you have torun such command as root ($ sign means normal user). The easiest way to become root is torun:
Listing 3.1: Becoming root$ sudo su -
3.1 Master Server(s) installation
Warning: Configuration files on all Master Servers must be consistent!
In MooseFS 2.0 Master Server (and also other modules) installation can be accomplished byrunning the command listed below:
Listing 3.2: Installing Master Server# apt -get install moosefs -master
Sample configuration files will be created in /etc/mfs with the extension *.sample (MooseFS3.0+) or *.dist (MooseFS 2.0). Use these files as your target configuration files:
Listing 3.3: Copying default config files as target configuration files (MooseFS 3.0)# cd /etc/mfs
# cp mfsmaster.cfg.sample mfsmaster.cfg
# cp mfsexports.cfg.sample mfsexports.cfg
7
If you would like to change any of the settings you should uncomment the appropriate line andset a different value. For the lines which are commented the system will use built-in defaultvalues, i.e. those listed in commented lines.
File mfsmaster.cfg contains Master Server settings. You can find out more informationabout this file in the man pages (man mfsmaster.cfg or at https://moosefs.com/manpages/mfsmaster-cfg.html).
File mfsexports.cfg specifies which users’ computers can mount the file system and with whatprivileges. For example, to specify that only machines addressed as 192.168.2.x can use thewhole structure of MooseFS resources (/) in read/write mode, in the first line which is notcommented out change the asterisk (*) to 192.168.2.0/24, so that you’ll have:
Listing 3.4: Changes to mfsexports.cfg192.168.2.0/24 / rw,alldirs ,maproot =0
If you are setting up MooseFS Pro, at this point place proper mfslicence.bin file into /etc/mfs
directory:
Listing 3.5: Instaling mfslicence.bin file# cp /path/to/mfslicence.bin /etc/mfs
The mfslicence.bin file must be installed on all Master Servers.mfslicence.bin file is not necessary to be present on Community Edition Master Server.
If you want MooseFS Master Server to start automatically during system boot,edit /etc/default/moosefs-master and set MFSMASTER ENABLE variable to true):
Listing 3.6: Configuring mfsmaster autostartMFSMASTER_ENABLE=true
At this point it is possible to run the Master Server (using the standard way to run services):
Listing 3.7: Starting MooseFS Master Server# service moosefs -master start
or:
Listing 3.8: Starting MooseFS Master Server# mfsmaster start
To install second (third, etc.) Master Server just repeat steps listed above on another machine(Pro only).
8
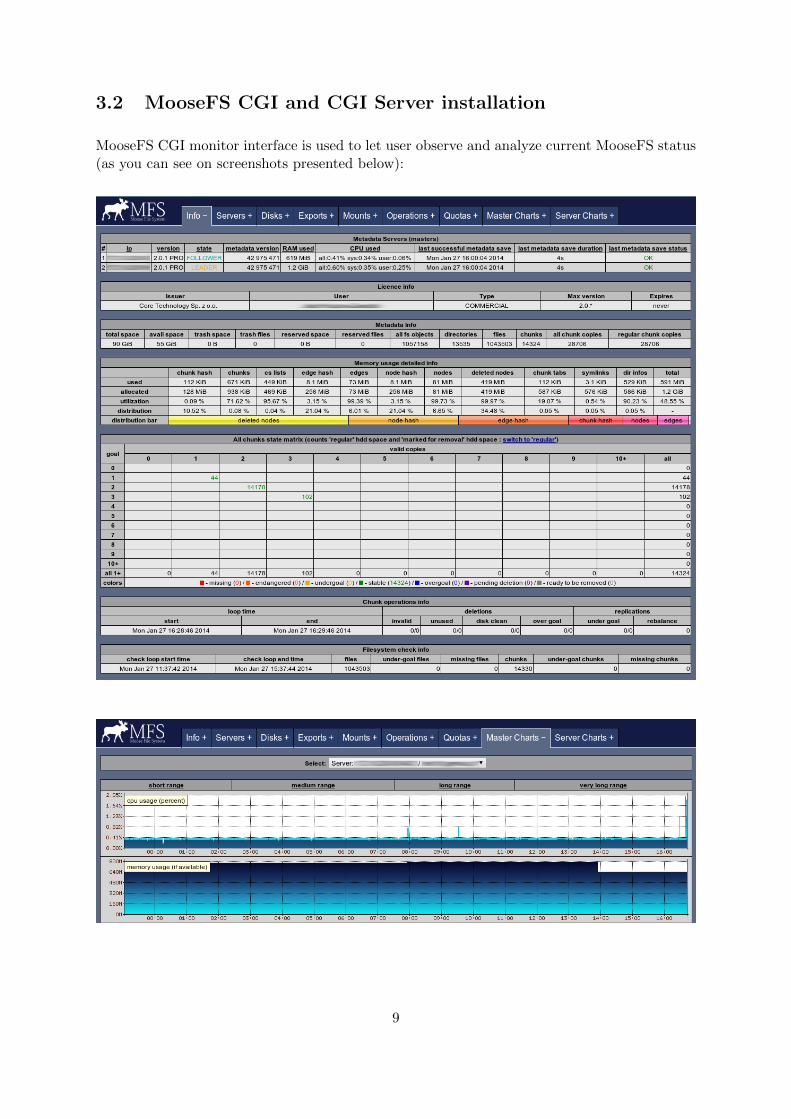
3.2 MooseFS CGI and CGI Server installation
MooseFS CGI monitor interface is used to let user observe and analyze current MooseFS status(as you can see on screenshots presented below):
9
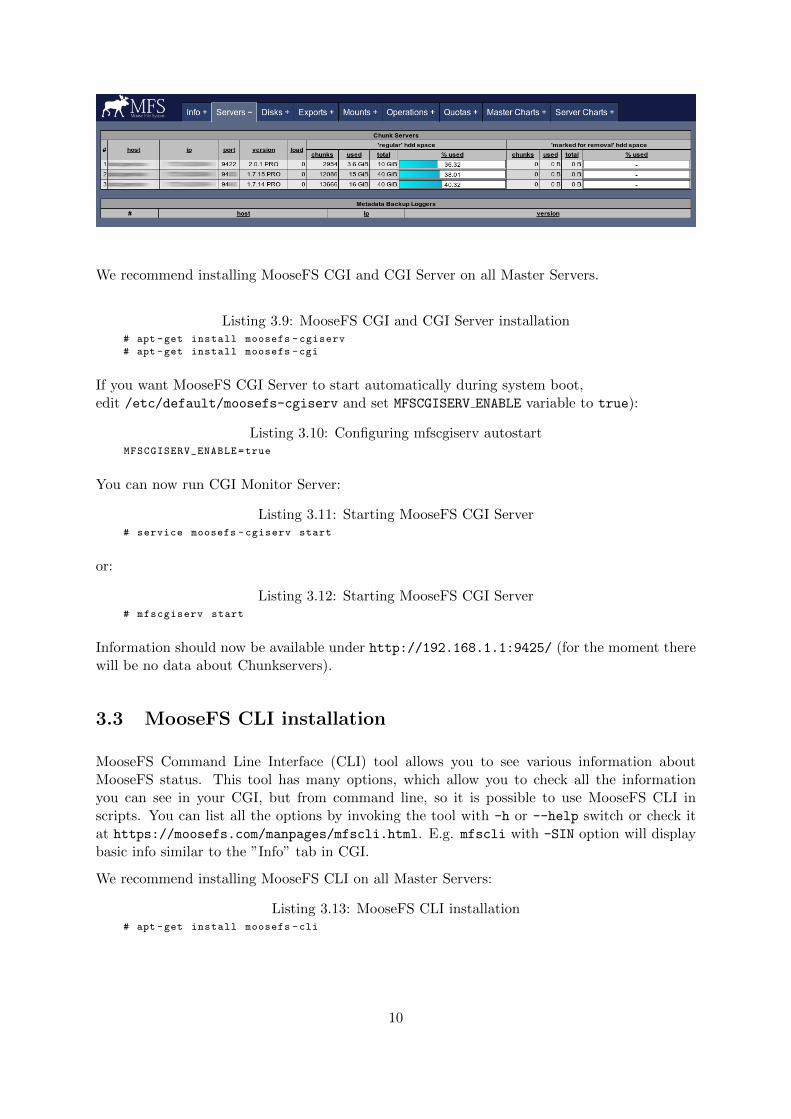
We recommend installing MooseFS CGI and CGI Server on all Master Servers.
Listing 3.9: MooseFS CGI and CGI Server installation# apt -get install moosefs -cgiserv
# apt -get install moosefs -cgi
If you want MooseFS CGI Server to start automatically during system boot,edit /etc/default/moosefs-cgiserv and set MFSCGISERV ENABLE variable to true):
Listing 3.10: Configuring mfscgiserv autostartMFSCGISERV_ENABLE=true
You can now run CGI Monitor Server:
Listing 3.11: Starting MooseFS CGI Server# service moosefs -cgiserv start
or:
Listing 3.12: Starting MooseFS CGI Server# mfscgiserv start
Information should now be available under http://192.168.1.1:9425/ (for the moment therewill be no data about Chunkservers).
3.3 MooseFS CLI installation
MooseFS Command Line Interface (CLI) tool allows you to see various information aboutMooseFS status. This tool has many options, which allow you to check all the informationyou can see in your CGI, but from command line, so it is possible to use MooseFS CLI inscripts. You can list all the options by invoking the tool with -h or --help switch or check itat https://moosefs.com/manpages/mfscli.html. E.g. mfscli with -SIN option will displaybasic info similar to the ”Info” tab in CGI.
We recommend installing MooseFS CLI on all Master Servers:
Listing 3.13: MooseFS CLI installation# apt -get install moosefs -cli
10
3.4 Metadata backup servers (Metaloggers) installation
In MooseFS Pro, when there are at least two Master Servers present, Metalogger is optional,because when leader master fails, another one takes over its work.
In MooseFS (non-Pro) we strongly recommend to set up at least one Metalogger.
It is recommended, that the machine used to install the backup server is as strong as the MasterServer (at least in regards to the amount of RAM). In case of the Master Server failure, afterimporting changelogs to the metadata file, the Metalogger server can be easily set up to takeover functions of the managing server.
Issue the following commands to install and configure MooseFS Metalogger with default settings:
Listing 3.14: Installing and configuring Metalogger# apt -get install moosefs -metalogger
# cd /etc/mfs
# cp mfsmetalogger.cfg.sample mfsmetalogger.cfg
For our test installation you’ll leave mfsmetalogger.cfg unchanged. You can find out more infor-mation about this file in the man pages (man mfsmetalogger.cfg or at https://moosefs.com/manpages/mfsmetalogger-cfg.html). In case you have changed the default name mfsmaster
to a different one, you need to uncomment and change the MASTER HOST variable in mfsmetalogger.cfg
file.
If you want MooseFS Metalogger to start automatically during system boot,edit /etc/default/moosefs-metalogger and set MFSMETALOGGER ENABLE variable to true):
Listing 3.15: Configuring mfsmetalogger autostartMFSMETALOGGER_ENABLE=true
Now you are ready to start the backup server process:
Listing 3.16: Starting MooseFS Metalogger# service moosefs -metalogger start
or
Listing 3.17: Starting MooseFS Metalogger# mfsmetalogger start
To install second (third, etc.) Metalogger just repeat steps listed above on another machine.
3.5 Chunkservers installation
Issue the following commands on the machines which are to be Chunkservers:
Listing 3.18: Installing MooseFS Chunkserver# apt -get install moosefs -chunkserver
Now prepare configuration files of the Chunkservers:
11
Listing 3.19: Preparing configuration files# cd /etc/mfs
# cp mfschunkserver.cfg.sample mfschunkserver.cfg
# cp mfshdd.cfg.sample mfshdd.cfg
For our test installation you’ll leave mfschunkserver.cfg unchanged. You can find out more in-formation about this file in the man pages (man mfschunkserver.cfg or at https://moosefs.com/manpages/mfschunkserver-cfg.html). In case you have changed the default name mfsmasterto a different one, you also need to uncomment and change the MASTER HOST variable inmfschunkserver.cfg file.
It is recommended that they are used exclusively for the MooseFS – this is necessary to managethe free space properly.
Let’s assume, that /dev/sdb and /dev/sdc devices are designated to store chunks. First of all,create a partition table and partition on these devices.
Listing 3.20: Creating a partition on /dev/sdb# parted --align optimal /dev/sdb
(parted) mklabel gpt
(parted) mkpart mfschunks1 0% 100%
(parted) q
Listing 3.21: Creating a partition on /dev/sdc# parted --align optimal /dev/sdc
(parted) mklabel gpt
(parted) mkpart mfschunks2 0% 100%
(parted) q
Install XFS Progs:
Listing 3.22: Installing xfsprogs (on Debian/Ubuntu)# apt -get install xfsprogs
Then, format newly created partition with XFS filesystem:
Listing 3.23: Formatting partitions# mkfs.xfs /dev/sdb1
# mkfs.xfs /dev/sdc1
If you have drives with 4k physical sector size (most of 2 and 4 TiB modern HDDs have 4kphysical sector size), instead of the command above, issue:
Listing 3.24: Formatting partitions with 4k block size# mkfs.xfs -s size=4k /dev/sdb1
# mkfs.xfs -s size=4k /dev/sdc1
Then, add appropriate entries into /etc/fstab:
/dev/sdb1 /mnt/mfschunks1 xfs defaults 0 0
/dev/sdc1 /mnt/mfschunks2 xfs defaults 0 0
Create directories for mounting newly created partitions:
Listing 3.25: Creating directories# mkdir /mnt/mfschunks1
# mkdir /mnt/mfschunks2
12
Mount newly created partitions:
Listing 3.26: Mounting partitions# mount /mnt/mfschunks1
# mount /mnt/mfschunks2
Change ownership and access rights to mountpoints to let MooseFS Chunkserver write to them:
Listing 3.27: Changing ownership# chown mfs:mfs /mnt/mfschunks1
# chown mfs:mfs /mnt/mfschunks2
# chmod 770 /mnt/mfschunks1
# chmod 770 /mnt/mfschunks2
At this point enter mountpoints in mfshdd.cfg file:
Listing 3.28: Contents of mfshdd.cfg file/mnt/mfschunks1
/mnt/mfschunks2
If you want MooseFS Chunkserver to start automatically during system boot,edit /etc/default/moosefs-chunkserver and set MFSCHUNKSERVER ENABLE variable to true).
Listing 3.29: Configuring autostart of MooseFS ChunkserverMFSCHUNKSERVER_ENABLE=true
Now you are ready to start the Chunkserver:
Listing 3.30: Starting MooseFS Chunkserver# service moosefs -chunkserver start
or:
Listing 3.31: Starting MooseFS Chunkserver# mfschunkserver start
Repeat the same steps for each Chunkserver you want to use for storing data in MooseFSsystem.
At this point, at http://192.168.1.1:9425, you should be able to see full information aboutthe system including the Master Server and Chunkservers.
3.6 Users’ computers installation
In order to mount a file system based on MooseFS, it is necessary that users’ computers haveFUSE package (at least in version 2.6, recommended ≥ 2.7.2). If it is not present, you have toinstall it. One of the options is to compile it from sources, or you can install it from repositorieson Debian-based systems with following command:
Listing 3.32: Installing FUSE# apt -get install fuse libfuse2
mfsmount can be installed in the same way as other MooseFS components:
13

Listing 3.33: Installing mfsmount# apt -get install moosefs -client
Let’s assume that you’ll mount the system in a /mnt/mfs folder on a client’s machine. Issuethe following commands:
Listing 3.34: Mounting the Moose File System# mkdir -p /mnt/mfs
# mfsmount /mnt/mfs -H mfsmaster.host.name
Now after issuing the df -h | grep mfs command you should get information similar to this:
Listing 3.35: Result of df -h | grep mfs/dev/sdb 2.0G 69M 1.9G 4% /mnt/mfschunks1
/dev/sdc 2.0G 69M 1.9G 4% /mnt/mfschunks2
mfsmaster :9421 3.2G 0 3.2G 0% /mnt/mfs
14
Chapter 4
Basic MooseFS use
To create folder1 in /mnt/mfs, in which you will store files in one copy (setting goal=1), issuethe following command:
Listing 4.1: Making directory #1mkdir -p /mnt/mfs/folder1
To create folder2, in which you will store files in two copies (setting goal=2), issue the followingcommand:
Listing 4.2: Making directory #2mkdir -p /mnt/mfs/folder2
The number of copies for the folder is set with the mfssetgoal -r command:
Listing 4.3: mfssetgoal -r command# mfssetgoal -r 1 /mnt/mfs/folder1
/mnt/mfs/folder1:
inodes with goal changed: 0
inodes with goal not changed: 1
inodes with permission denied: 0
# mfssetgoal -r 2 /mnt/mfs/folder2
/mnt/mfs/folder2:
inodes with goal changed: 1
inodes with goal not changed: 0
inodes with permission denied: 0
Create and copy a file to both folders:
Listing 4.4: Creating and copying a file to newly created foldersecho "test" > testmfs
cp testmfs /mnt/mfs/folder1
cp testmfs /mnt/mfs/folder2
To check in how many copies a file is stored, use the mfscheckfile command. In folder1 youhave one copy stored in one chunk:
Listing 4.5: Checking amount of copies# mfscheckfile /mnt/mfs/folder1/testmfs
/mnt/mfs/folder1/testmfs:
chunks with 1 copy: 1
15
And in the folder2 the file testmfs is stored in two copies:
Listing 4.6: Checking amount of copies# mfscheckfile /mnt/mfs/folder2/testmfs
/mnt/mfs/folder2/testmfs:
chunks with 2 copies: 1
Note, that if you set a goal for a file higher than the total number of working Chunkservers,this file will be saved in only as many copies as there are Chunkservers. This is because oneChunkserver will store no more than one copy of any chunk/file.
You can find more information about MooseFS usage and commands on this website:
• https://moosefs.com/documentation.html
It is also recommended to read Best practices, Frequntly Asked Questions and Manpages:
• https://moosefs.com/documentation/best-practices.html
• https://moosefs.com/documentation/faq.html
• https://moosefs.com/manpages.html
16
Chapter 5
Stopping MooseFS
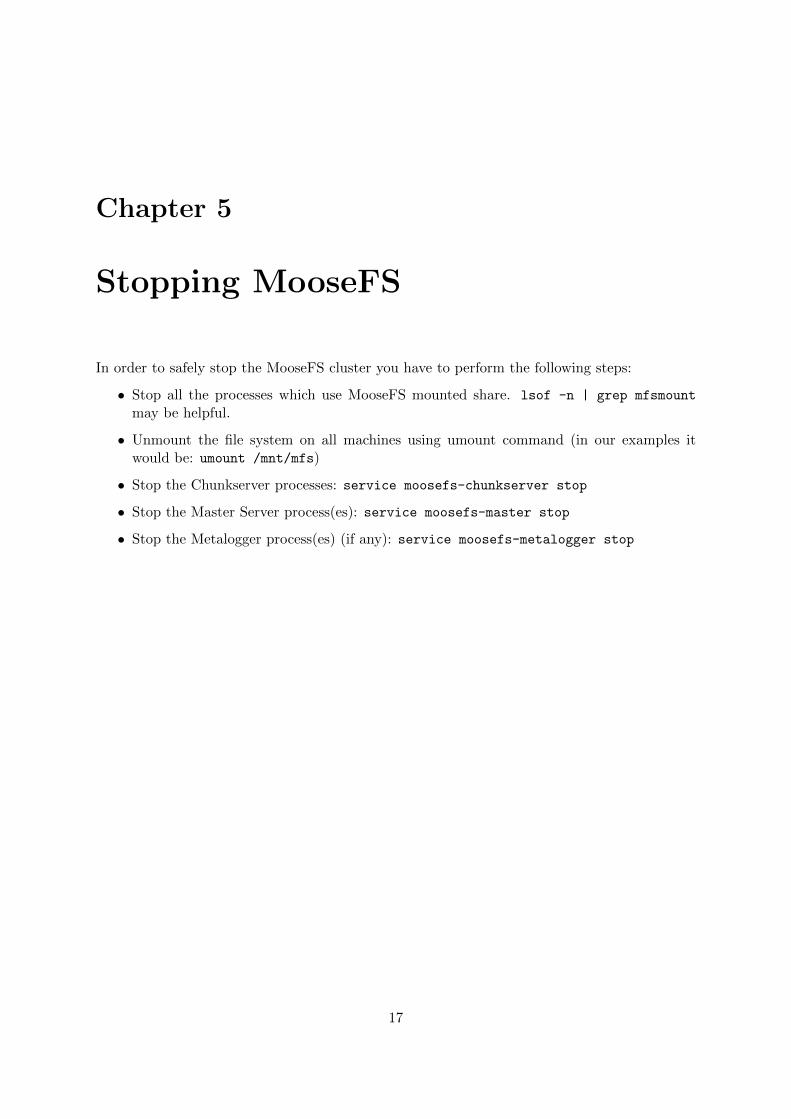
In order to safely stop the MooseFS cluster you have to perform the following steps:
• Stop all the processes which use MooseFS mounted share. lsof -n | grep mfsmount
may be helpful.
• Unmount the file system on all machines using umount command (in our examples itwould be: umount /mnt/mfs)
• Stop the Chunkserver processes: service moosefs-chunkserver stop
• Stop the Master Server process(es): service moosefs-master stop
• Stop the Metalogger process(es) (if any): service moosefs-metalogger stop
17
Chapter 6
Supplement: Setting up DNS serveron Debian/Ubuntu
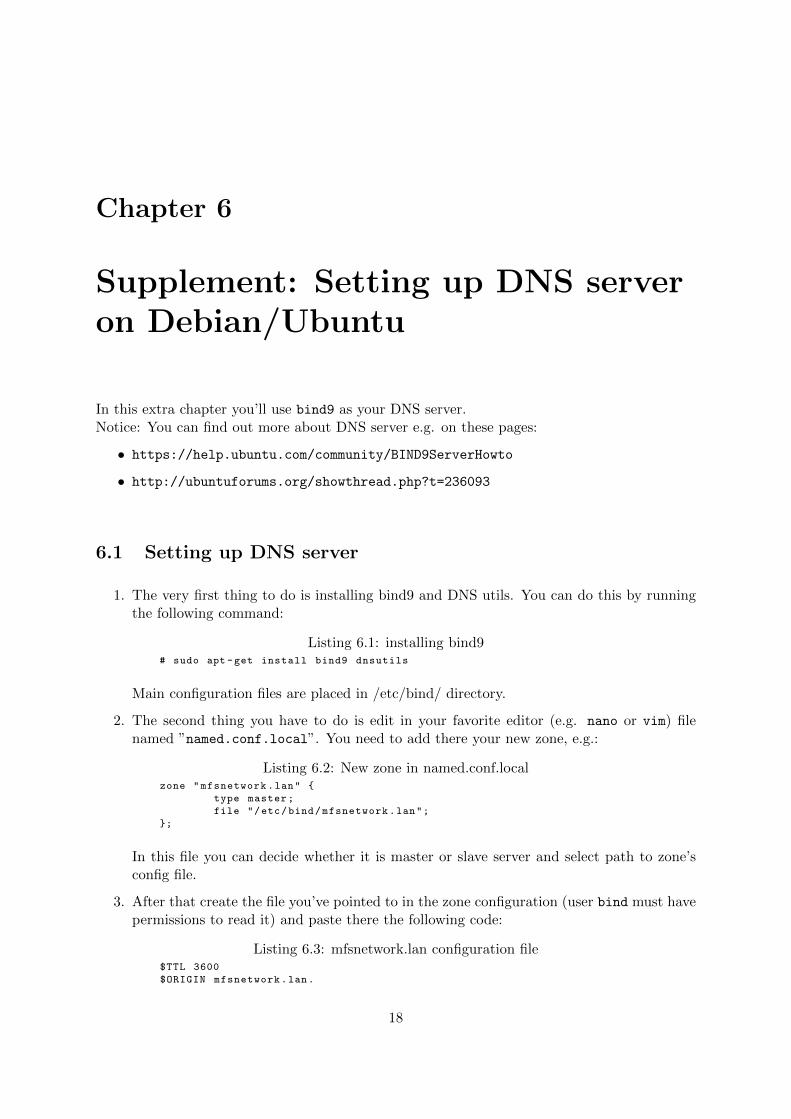
In this extra chapter you’ll use bind9 as your DNS server.Notice: You can find out more about DNS server e.g. on these pages:
• https://help.ubuntu.com/community/BIND9ServerHowto
• http://ubuntuforums.org/showthread.php?t=236093
6.1 Setting up DNS server
1. The very first thing to do is installing bind9 and DNS utils. You can do this by runningthe following command:
Listing 6.1: installing bind9# sudo apt -get install bind9 dnsutils
Main configuration files are placed in /etc/bind/ directory.
2. The second thing you have to do is edit in your favorite editor (e.g. nano or vim) filenamed ”named.conf.local”. You need to add there your new zone, e.g.:
Listing 6.2: New zone in named.conf.localzone "mfsnetwork.lan" {
type master;
file "/etc/bind/mfsnetwork.lan";
};
In this file you can decide whether it is master or slave server and select path to zone’sconfig file.
3. After that create the file you’ve pointed to in the zone configuration (user bind must havepermissions to read it) and paste there the following code:
Listing 6.3: mfsnetwork.lan configuration file$TTL 3600
$ORIGIN mfsnetwork.lan.
18
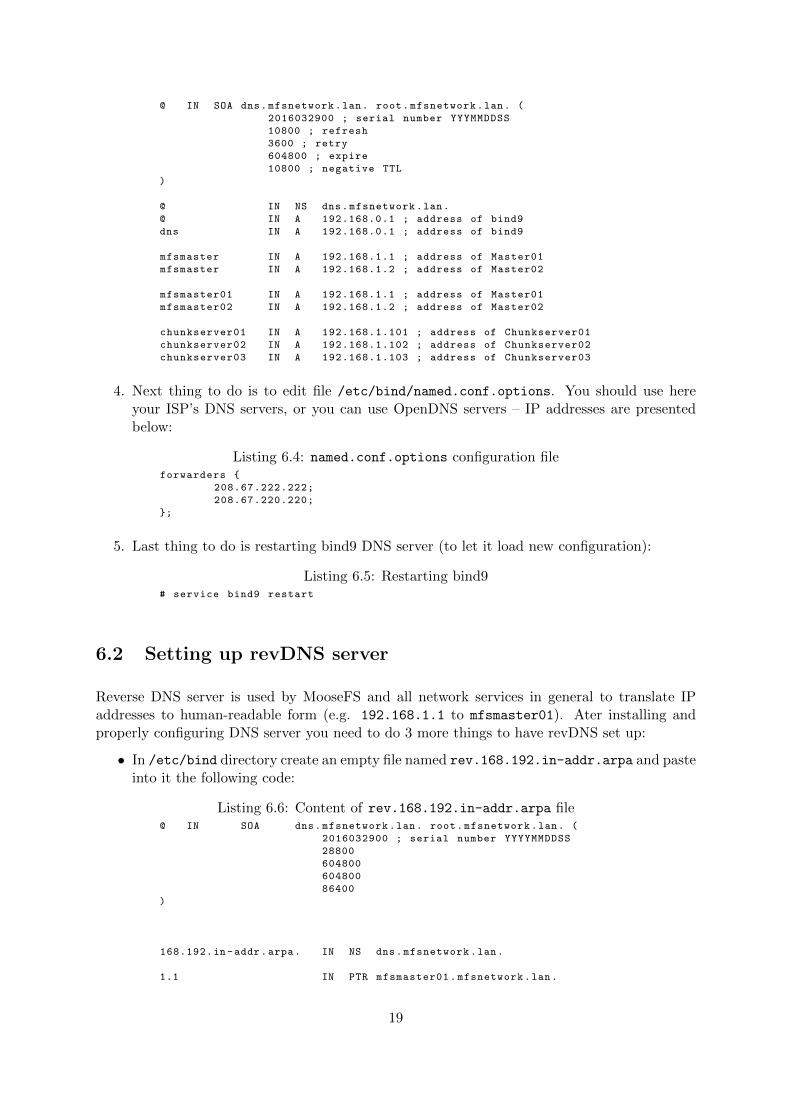
@ IN SOA dns.mfsnetwork.lan. root.mfsnetwork.lan. (
2016032900 ; serial number YYYMMDDSS
10800 ; refresh
3600 ; retry
604800 ; expire
10800 ; negative TTL
)
@ IN NS dns.mfsnetwork.lan.
@ IN A 192.168.0.1 ; address of bind9
dns IN A 192.168.0.1 ; address of bind9
mfsmaster IN A 192.168.1.1 ; address of Master01
mfsmaster IN A 192.168.1.2 ; address of Master02
mfsmaster01 IN A 192.168.1.1 ; address of Master01
mfsmaster02 IN A 192.168.1.2 ; address of Master02
chunkserver01 IN A 192.168.1.101 ; address of Chunkserver01
chunkserver02 IN A 192.168.1.102 ; address of Chunkserver02
chunkserver03 IN A 192.168.1.103 ; address of Chunkserver03
4. Next thing to do is to edit file /etc/bind/named.conf.options. You should use hereyour ISP’s DNS servers, or you can use OpenDNS servers – IP addresses are presentedbelow:
Listing 6.4: named.conf.options configuration fileforwarders {
208.67.222.222;
208.67.220.220;
};
5. Last thing to do is restarting bind9 DNS server (to let it load new configuration):
Listing 6.5: Restarting bind9# service bind9 restart
6.2 Setting up revDNS server
Reverse DNS server is used by MooseFS and all network services in general to translate IPaddresses to human-readable form (e.g. 192.168.1.1 to mfsmaster01). Ater installing andproperly configuring DNS server you need to do 3 more things to have revDNS set up:
• In /etc/bind directory create an empty file named rev.168.192.in-addr.arpa and pasteinto it the following code:
Listing 6.6: Content of rev.168.192.in-addr.arpa file@ IN SOA dns.mfsnetwork.lan. root.mfsnetwork.lan. (
2016032900 ; serial number YYYYMMDDSS
28800
604800
604800
86400
)
168.192.in -addr.arpa. IN NS dns.mfsnetwork.lan.
1.1 IN PTR mfsmaster01.mfsnetwork.lan.
19
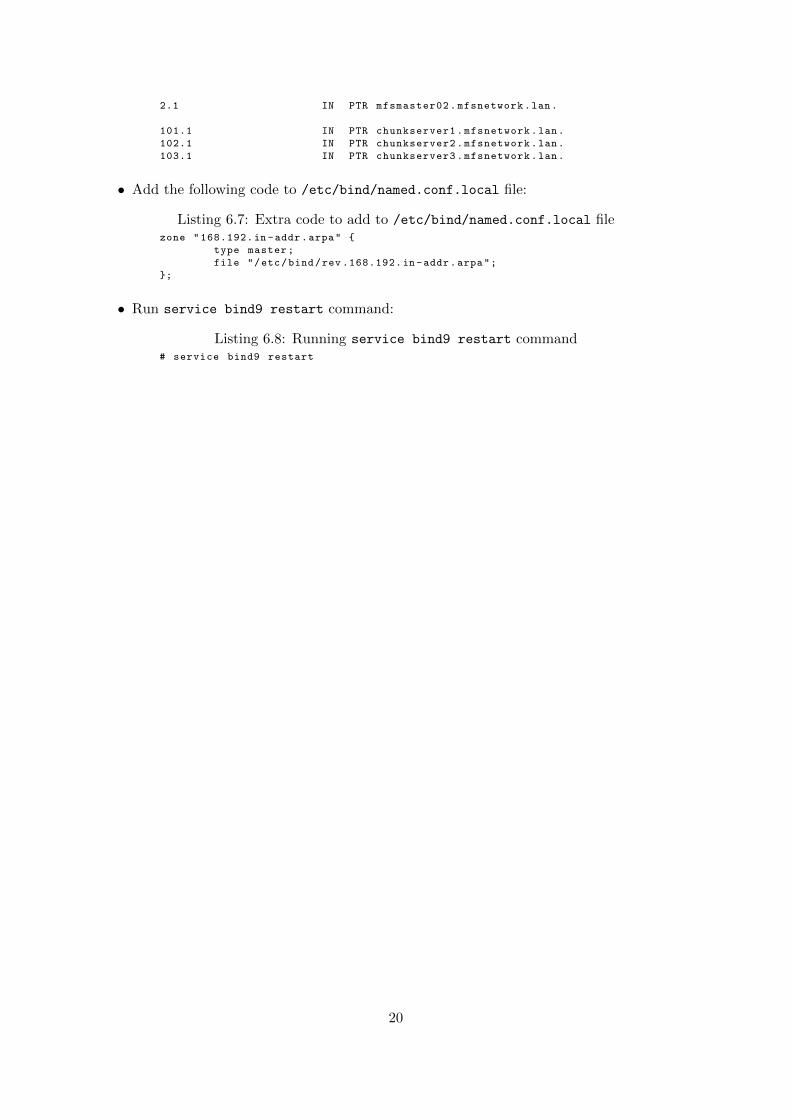
2.1 IN PTR mfsmaster02.mfsnetwork.lan.
101.1 IN PTR chunkserver1.mfsnetwork.lan.
102.1 IN PTR chunkserver2.mfsnetwork.lan.
103.1 IN PTR chunkserver3.mfsnetwork.lan.
• Add the following code to /etc/bind/named.conf.local file:
Listing 6.7: Extra code to add to /etc/bind/named.conf.local filezone "168.192.in -addr.arpa" {
type master;
file "/etc/bind/rev .168.192.in-addr.arpa";
};
• Run service bind9 restart command:
Listing 6.8: Running service bind9 restart command# service bind9 restart
20