installation and introduction to autocad 2010. to understand installation steps to understand...
TRANSCRIPT
PRACTICAL # 03INSTALLATION AND INTRODUCTION
TO AUTOCAD 2010
OBJECTIVE To Understand Installation Steps To Understand AutoCAD 2010
INSTALLATION STEPS OF AUTOCAD 2010 In General Steps are start the setup from hard disk or Beckup install with the following serial: 000-
00000000 copy adlmint.dll your installation
directory and overwrite the existing file
INTRODUCTION TO AUTOCAD 2010 Before you begin creating drawings, you
should familiarize yourself with the interface.
After completing this lesson, you will be able to start the application, activate the appropriate
workspace, and identify key parts of the interface.
The following image identifies key interface elements in Fig 01
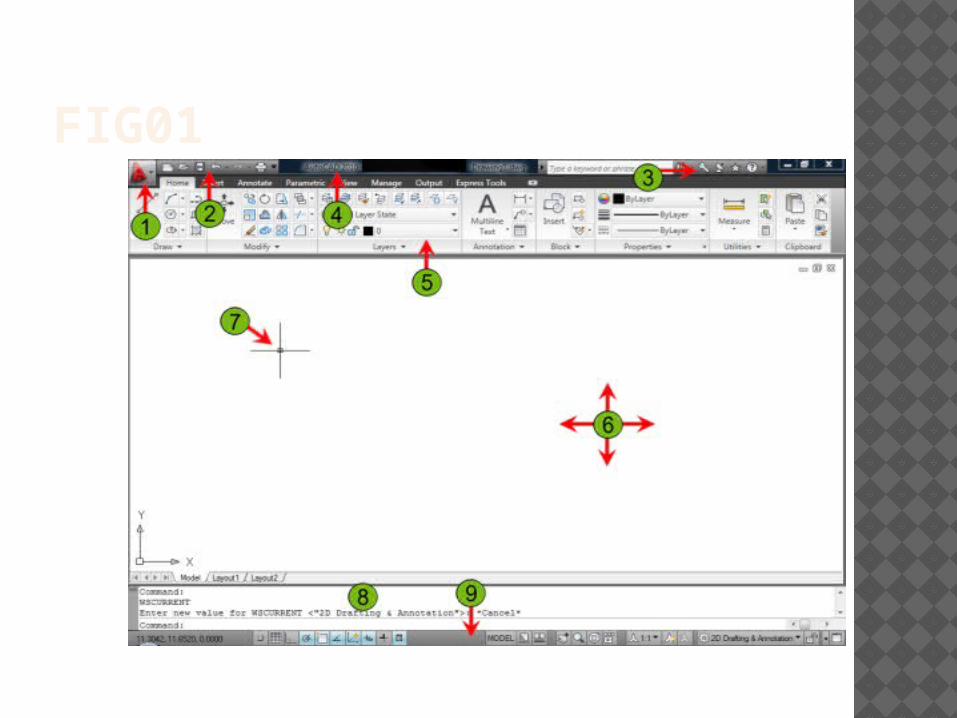
FIG01
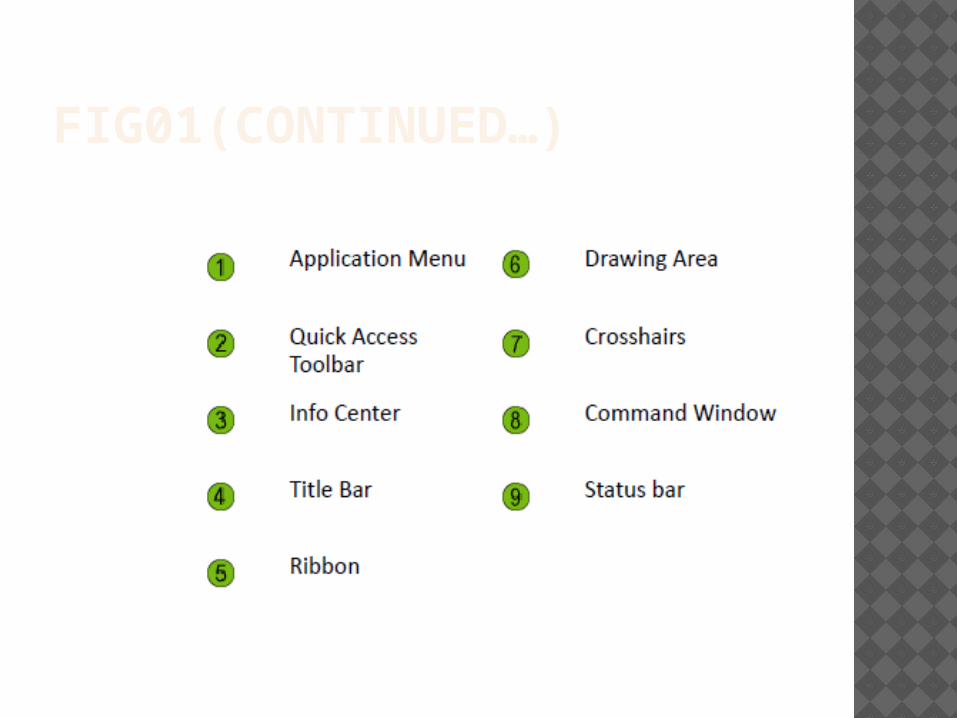
FIG01(CONTINUED…)
CONTINUED… You launch AutoCAD in the same way
you launch other Windows applications, using one of the
following two methods: n Double-click the AutoCAD 2010 icon
on the Windows desktop. n Click Start > All Programs (or
Programs) > Autodesk > AutoCAD 2010 > AutoCAD 2010.
WORKSPACES DEFINED When you launch the application, the
interface elements displayed are only those associated with the active workspace.
A workspace is a task-oriented drawing environment oriented in such a way as to provide you with only the tools and interface elements necessary to accomplish the tasks relevant to that environment.
CONTINUED…By default, AutoCAD has four workspace
configurations: 2D Drafting & Annotation 3D Modeling AutoCAD Classic Initial Setup Workspace
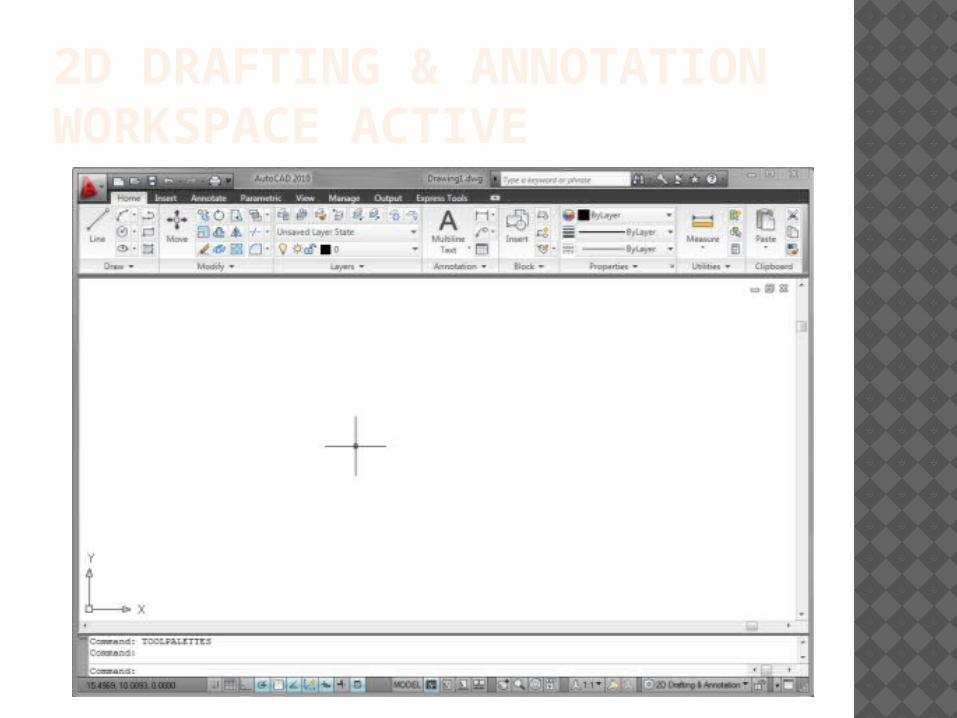
2D DRAFTING & ANNOTATIONWORKSPACE ACTIVE
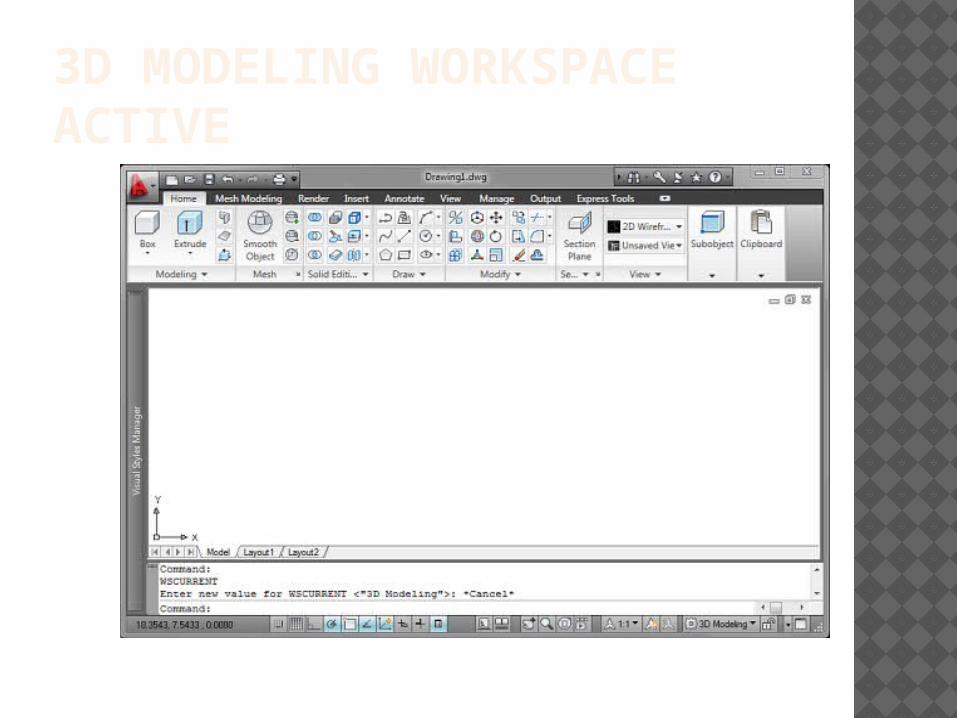
3D MODELING WORKSPACE ACTIVE
CONTINUED… After you start the program you can
switch to the desired workspace. The application will open with the last
workspace used. The Workspace Switching dropdown list
is accessed in the lower right corner of the AutoCAD window on the Status Bar shown in fig02
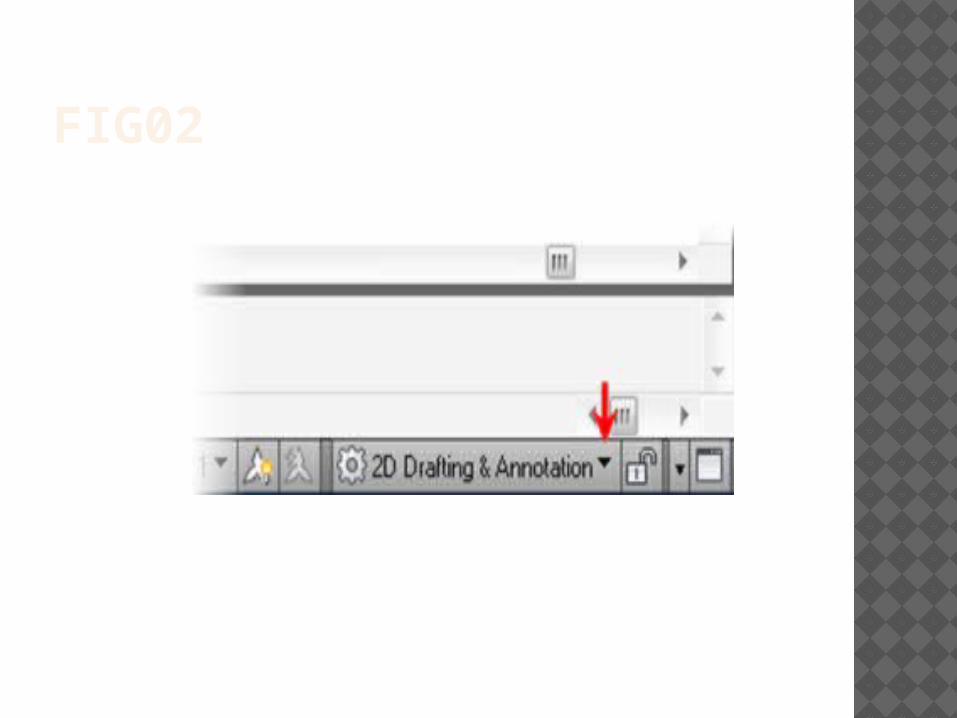
FIG02
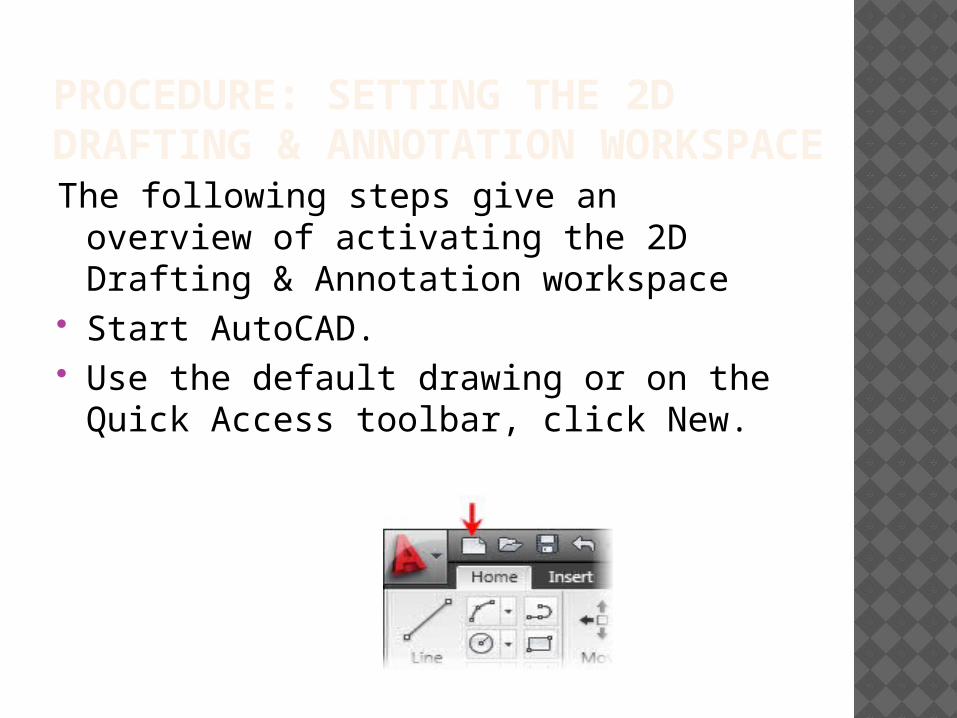
PROCEDURE: SETTING THE 2D DRAFTING & ANNOTATION WORKSPACEThe following steps give an overview of
activating the 2D Drafting & Annotation workspace
Start AutoCAD. Use the default drawing or on the Quick
Access toolbar, click New.

CONTINUED…. Select acad.dwt(imperial) oracadiso.dwt
(metric)as the template file. Click the Workspaces settings icon, located
at the bottom right corner of the AutoCAD window. Select 2D Drafting & Annotation.
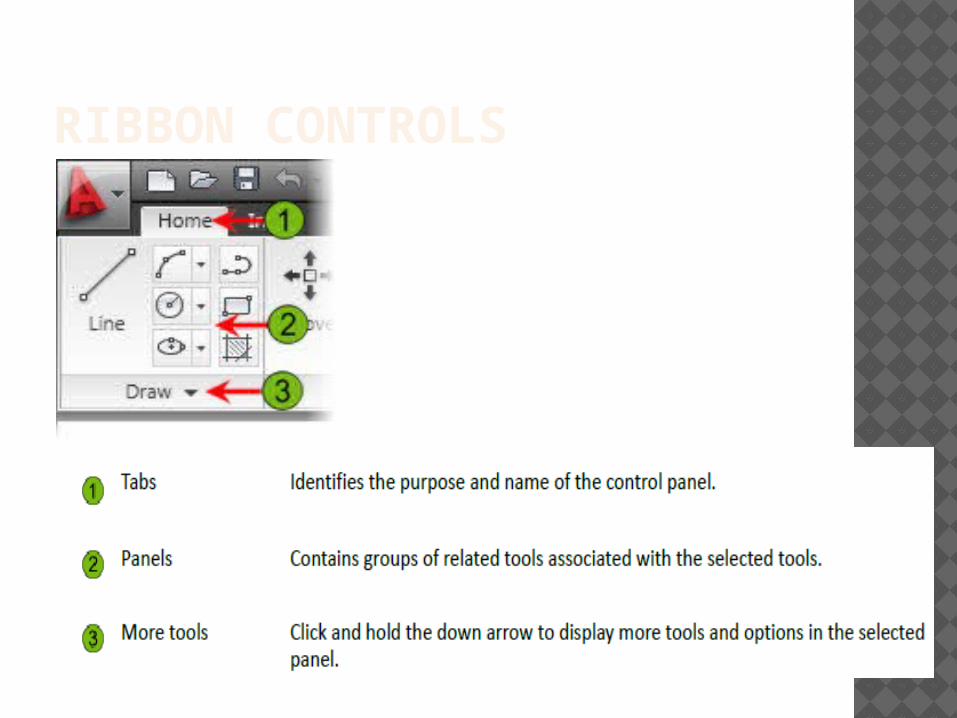
RIBBON CONTROLS
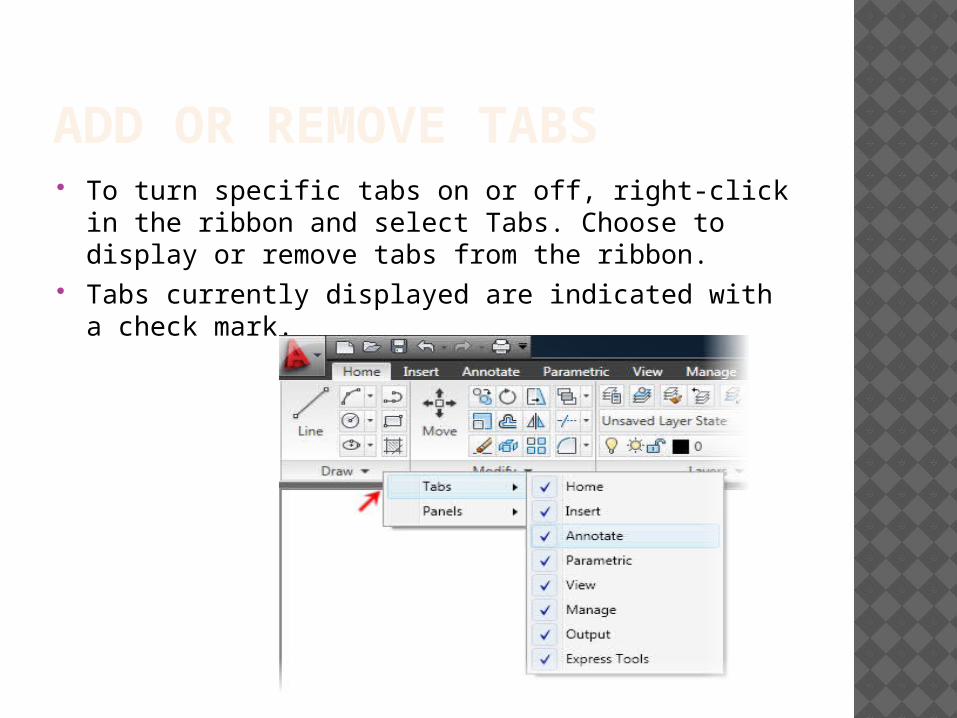
ADD OR REMOVE TABS To turn specific tabs on or off, right-click in the
ribbon and select Tabs. Choose to display or remove tabs from the ribbon.
Tabs currently displayed are indicated with a check mark.
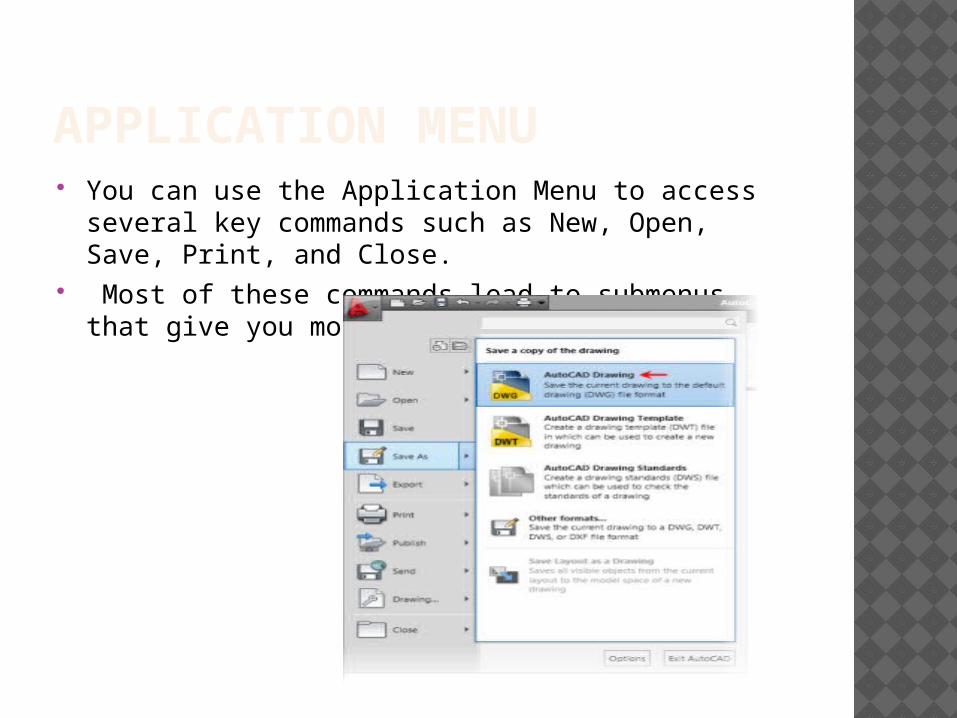
APPLICATION MENU You can use the Application Menu to access several
key commands such as New, Open, Save, Print, and Close.
Most of these commands lead to submenus that give you more detailed options
CONTINUED… Axis: Axis is the configuration / View of the Working
Area, Normally it is in 2D (i.e. X-Axis & Y-Axis) but it can be rotated according to the view of object on the Screen. “3dorbit” command is used to make is rotate and to view its 3D figure (i.e. X-Axis, Y-Axis & Z-Axis).
Command Line: It is bottom portion of Autodesk's AutoCAD
2010. It is a Command Line, which is mostly used for Drafting means for Accurate Measurements to check out Errors or Defects before Assembling.
CONTINUED…. Drawing Area: The Area / Space at which all work is to
be performed. It is a Platform for all drawing and drafting work. In this Area 2D and 3D shapes can be creating / viewed.

LAYOUTS (DRAWING SHEETS)
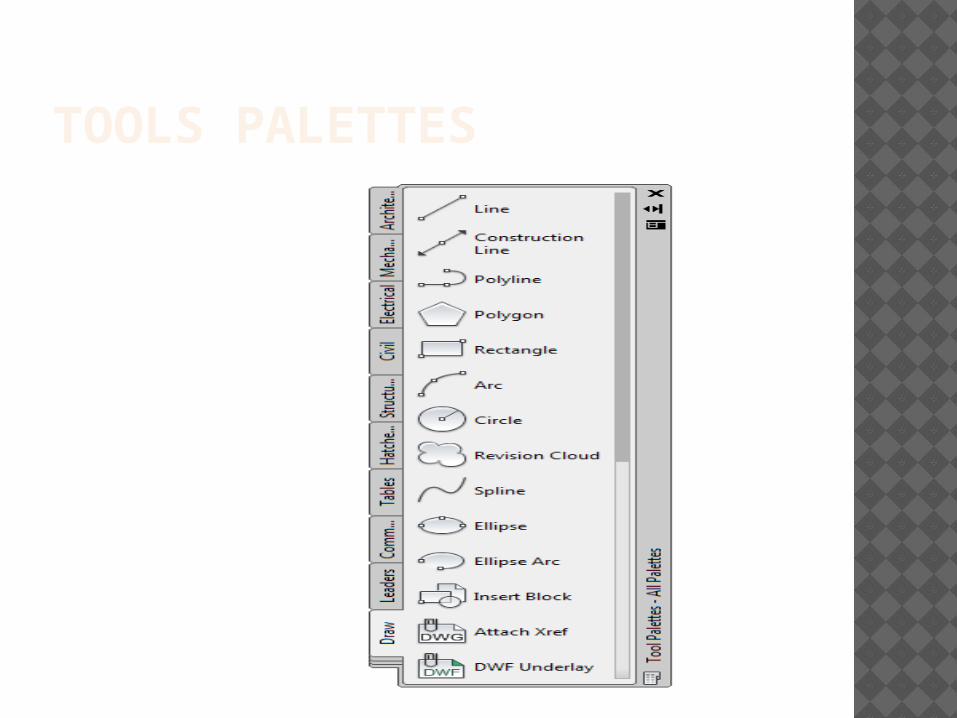
TOOLS PALETTES

ANY QUERY

THANKS