impression in fpd
TRANSCRIPT
Impression in FPDDeepak Kumar Gupta
facebook.com/notesdental
An impression is an imprint or negative likeness
facebook.com/notesdental

Ideal Requirements of cast restoration Impression
• exact duplication of the prepared tooth, adjacent tooth and tissues.
• enough uncut tooth surface beyond the preparation - location and configuration of the finish line
• free of bubbles
facebook.com/notesdental
Classification of Impression Material
1. Hydrocolloid impression material
A) Irreversible
B) Reversible
2. Elastomeric Impression Material
a) Polysulphide
b) Addition Silicone
c) Condensation Sillicone
d) Polyether Dimethacrylate
facebook.com/notesdental
Impression Technique
1. Reversible Hydrocolloid technique
2. Stock tray technique – Double mix or single mix
3. Custom tray technique
4. Double Arch technique
5. Copper Band technique
6. Matrix System
facebook.com/notesdental
Comparison of Impression Materials
• There are compared on the basis of three characteristics
– Wettablity
– Viscosity
– cost
facebook.com/notesdental
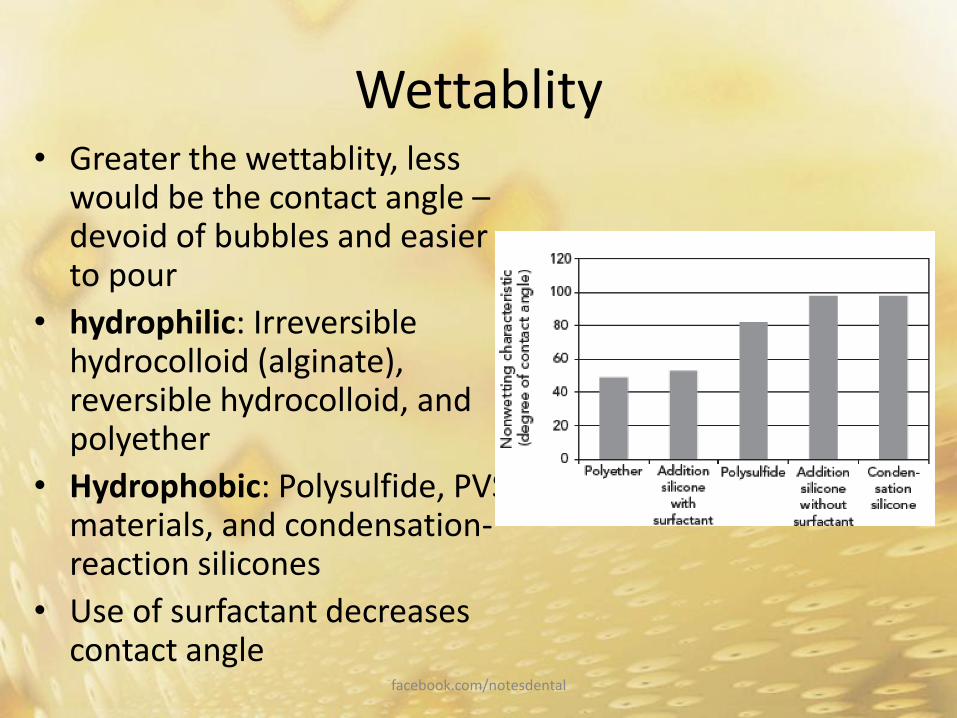
Wettablity• Greater the wettablity, less
would be the contact angle –devoid of bubbles and easier to pour
• hydrophilic: Irreversible hydrocolloid (alginate), reversible hydrocolloid, and polyether
• Hydrophobic: Polysulfide, PVS materials, and condensation-reaction silicones
• Use of surfactant decreases contact angle
facebook.com/notesdental
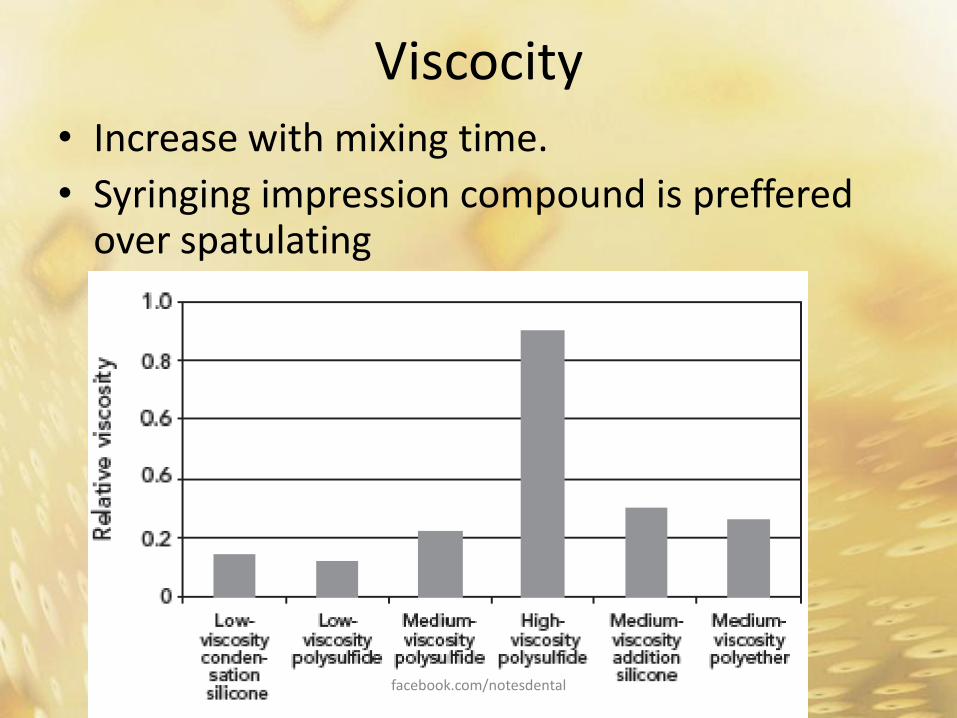
Viscocity• Increase with mixing time.
• Syringing impression compound is prefferedover spatulating
facebook.com/notesdental
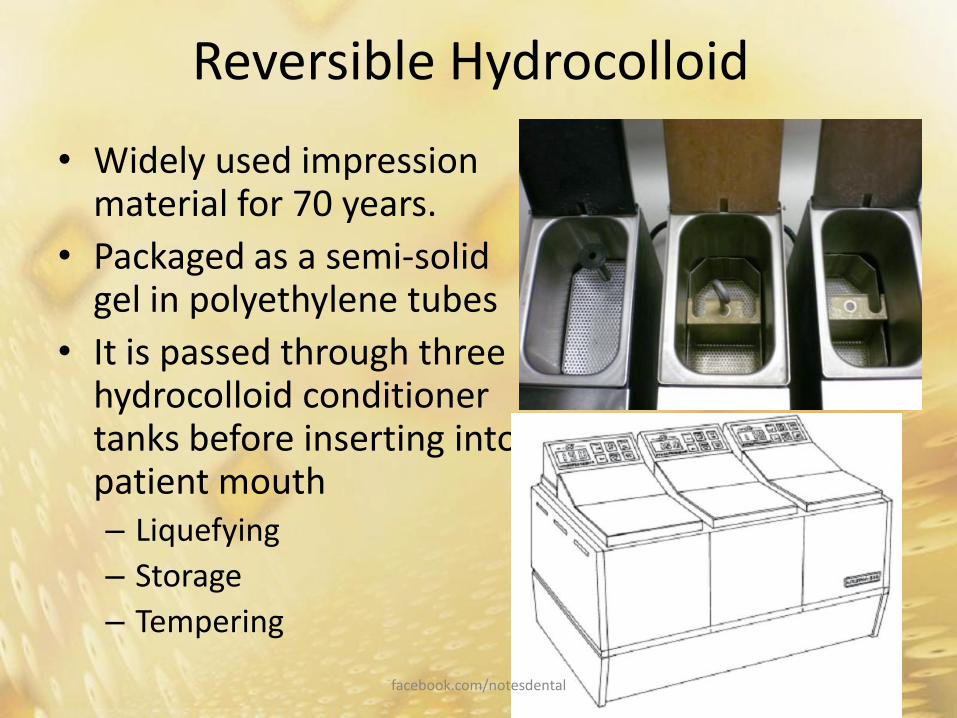
Reversible Hydrocolloid
• Widely used impression material for 70 years.
• Packaged as a semi-solid gel in polyethylene tubes
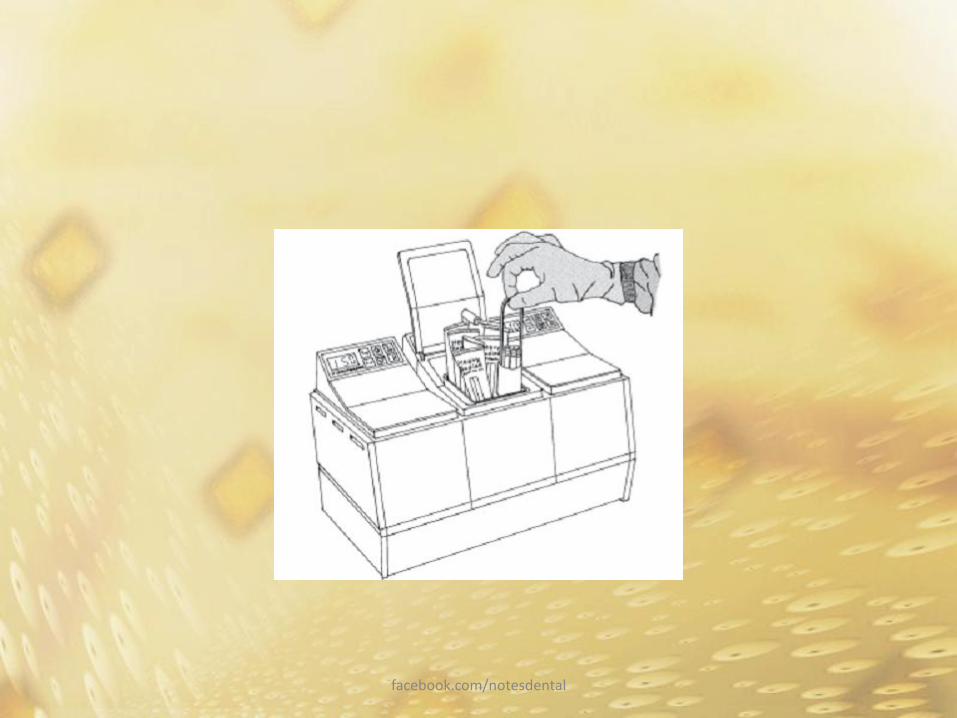
• It is passed through three hydrocolloid conditioner tanks before inserting into patient mouth– Liquefying
– Storage
– Tempering
facebook.com/notesdental
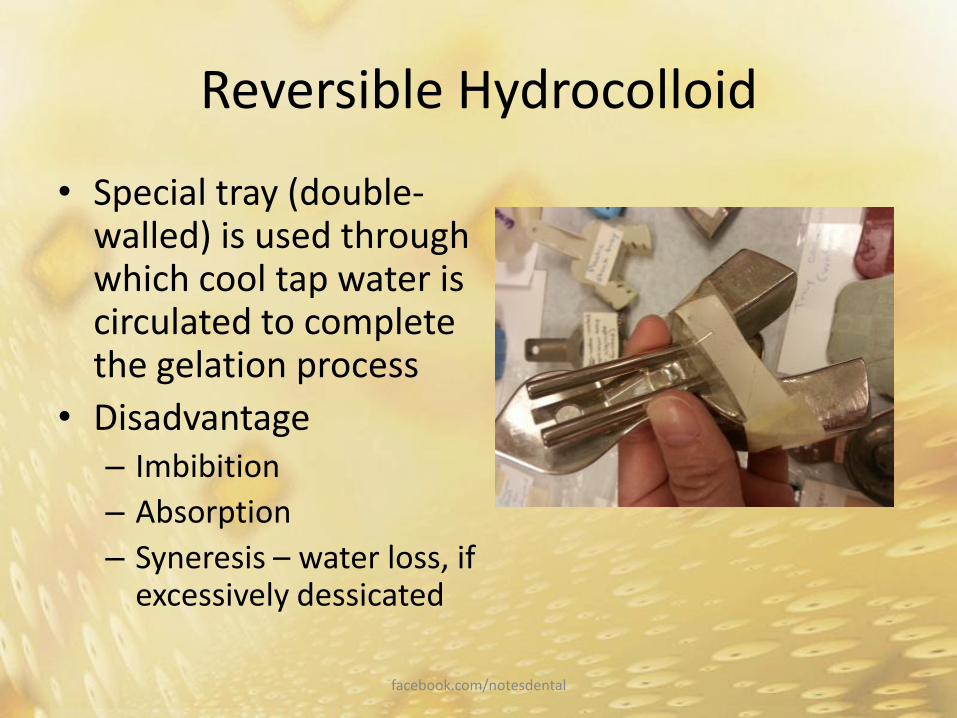
Reversible Hydrocolloid
• Special tray (double-walled) is used through which cool tap water is circulated to complete the gelation process
• Disadvantage– Imbibition
– Absorption
– Syneresis – water loss, if excessively dessicated
facebook.com/notesdental
Steps for reversible hydrocolloid impression
• Tooth preparation is done
• GTR is placed in the sulcus area
• RHC is liquiefied in sol conditioner and then placed in storage tank
• The liquified RHC syringe cartridge is loaded in the syringe
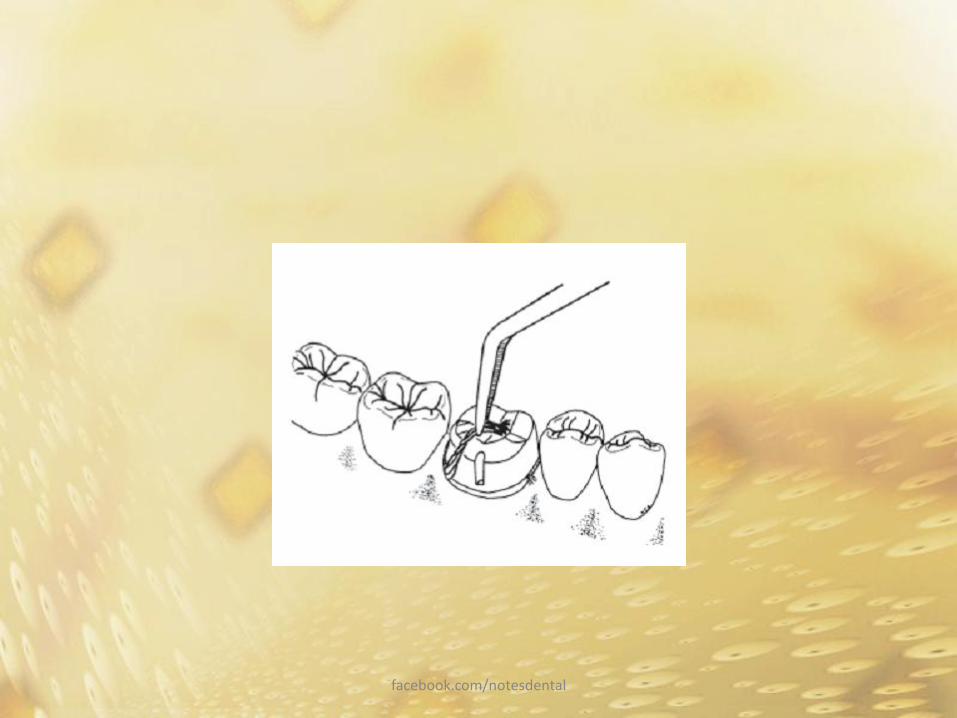
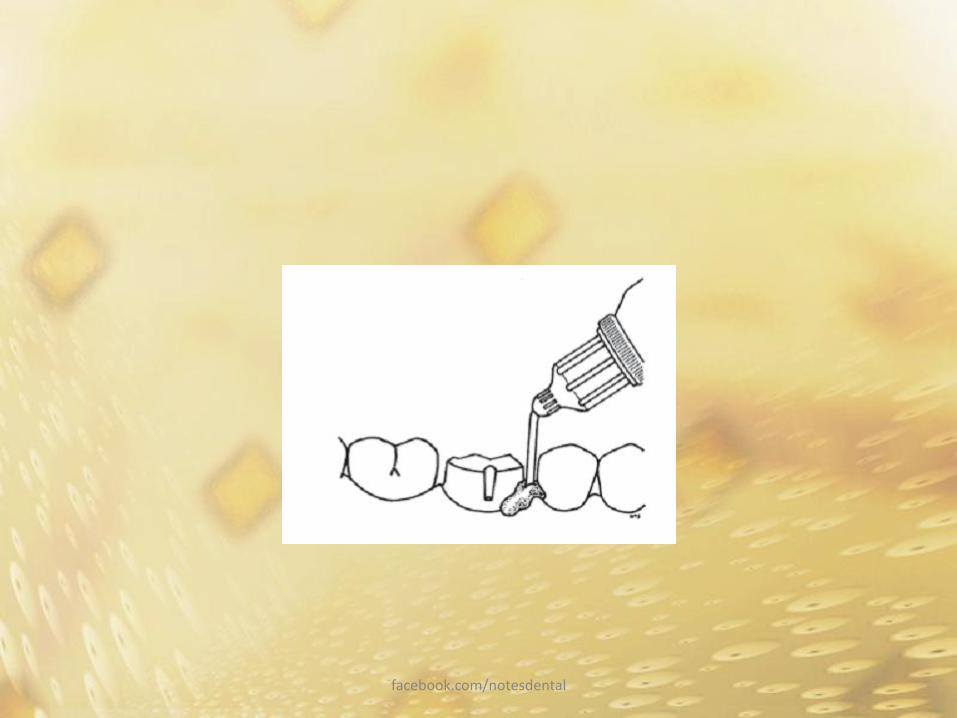
• GTR is removed and impression material from syringe is poured into sulcus
facebook.com/notesdental
Steps for reversible hydrocolloid impression
• Now quadrant loaded with tempered RHC is placed over the prepared quadrant and allowed to cool for 10 min
• As the quadrant impression cools, full arch impression is made using tempered RHC
• Opposite arch impression can be made with irreversible hydrocolloid (alginates)
facebook.com/notesdental
facebook.com/notesdental
facebook.com/notesdental
facebook.com/notesdental
facebook.com/notesdental
facebook.com/notesdental
Other modification
• Laminates technique– Use of reversible hydrocolloid for prepared section
and then irreversible hydrocolloid for full arch
• wet field technique• The prepared teeth are bathed in warm water, and syringe
material is deposited in generous quantities only on the occlusal surfaces of the teeth
• The relatively viscous tray material is counted on to force the lighter-body syringe material into the sulcus as the tray is seated
• Contraindicated in grooves, boxes, or isthmuses
facebook.com/notesdental
Elastomeric Impression
Polysulphide
Addition Silicone
Condensation Silicone
Polyether
facebook.com/notesdental
Custom Resin Trays
• Accurate impression - elastomeric impression techniques.
• One unit prosthesis – stock tray is adequate
• 3 or more unit interpreparation and crossarchdiscrepancies could have a significant impact on the fit of the restoration – cutom tray reduces discrepancies to much extent.
facebook.com/notesdental
Requirements of Custom tray
• Rigid
• stops on the occlusal surfaces of the teeth to orient the tray properly when it is seated in the mouth
• Impression material should adhere firmly to tray – rubber adhesive is used. Beside this
– Perforation
– Roughening the inner surface of tray
facebook.com/notesdental
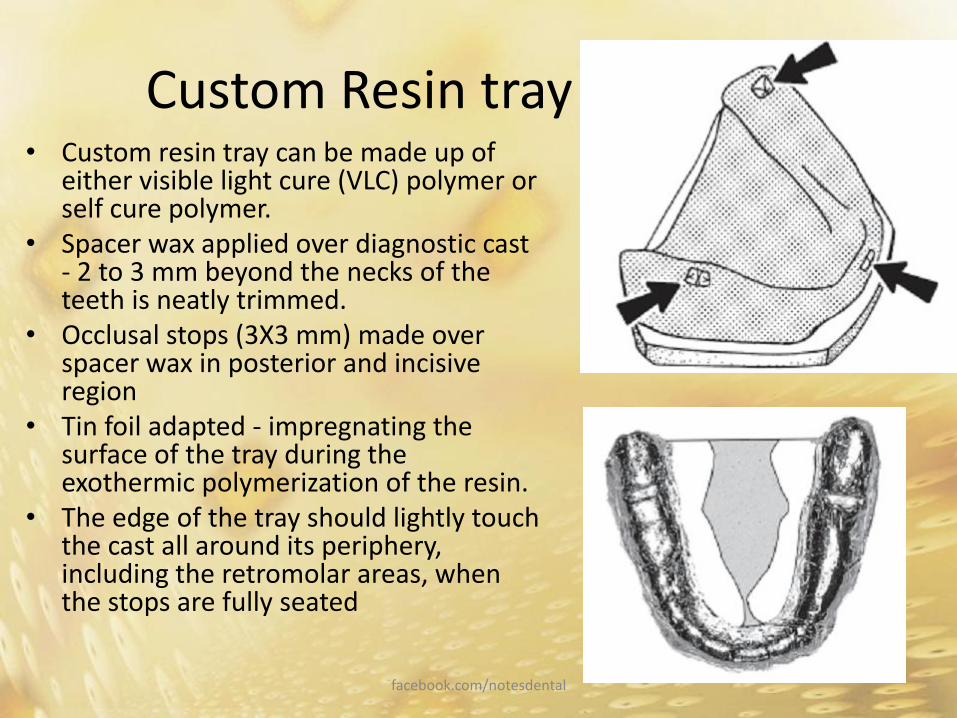
Custom Resin tray• Custom resin tray can be made up of
either visible light cure (VLC) polymer or self cure polymer.
• Spacer wax applied over diagnostic cast - 2 to 3 mm beyond the necks of the teeth is neatly trimmed.
• Occlusal stops (3X3 mm) made over spacer wax in posterior and incisive region
• Tin foil adapted - impregnating the surface of the tray during the exothermic polymerization of the resin.
• The edge of the tray should lightly touch the cast all around its periphery, including the retromolar areas, when the stops are fully seated
facebook.com/notesdental
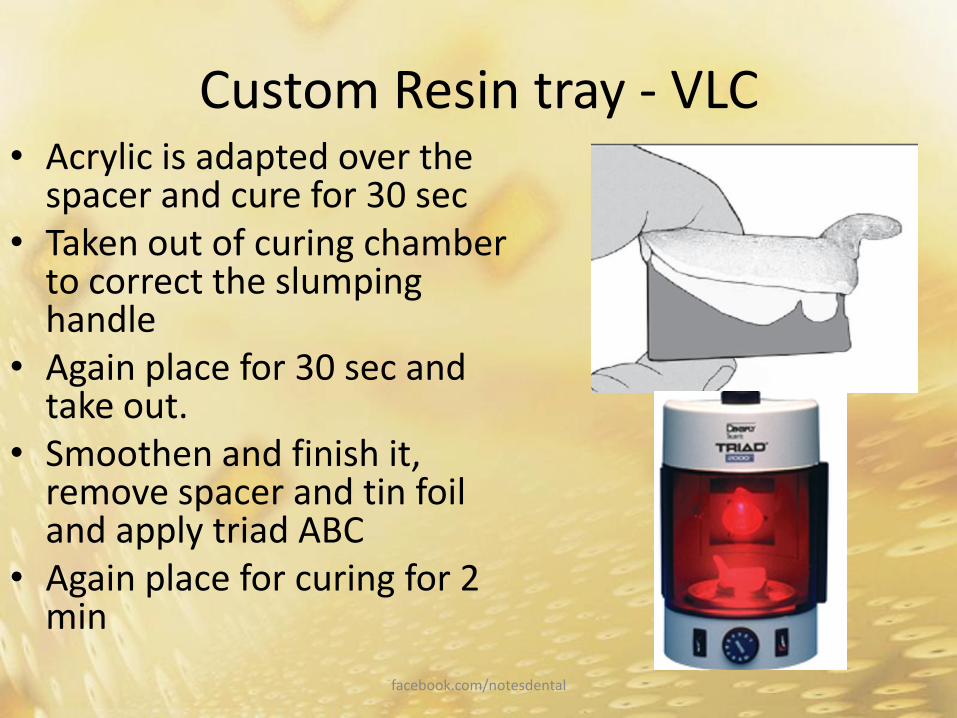
Custom Resin tray - VLC• Acrylic is adapted over the
spacer and cure for 30 sec• Taken out of curing chamber
to correct the slumping handle
• Again place for 30 sec and take out.
• Smoothen and finish it, remove spacer and tin foil and apply triad ABC
• Again place for curing for 2 min
facebook.com/notesdental
Custom resin tray - Autopolymer
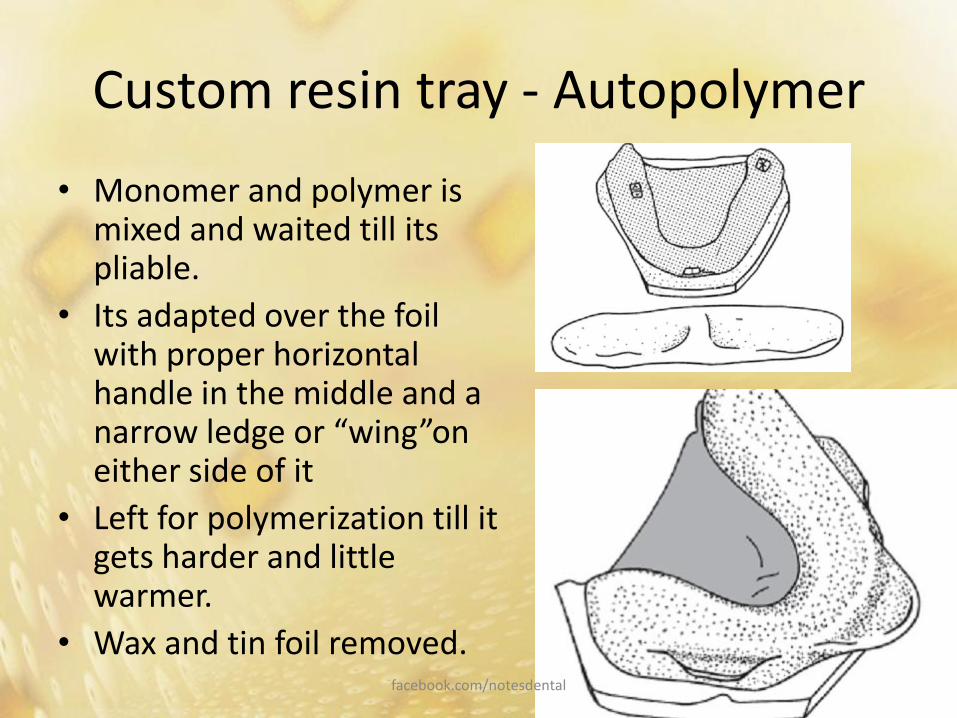
• Monomer and polymer is mixed and waited till its pliable.
• Its adapted over the foil with proper horizontal handle in the middle and a narrow ledge or “wing”oneither side of it
• Left for polymerization till it gets harder and little warmer.
• Wax and tin foil removed.facebook.com/notesdental
Custom Resin tray - Autopolymer
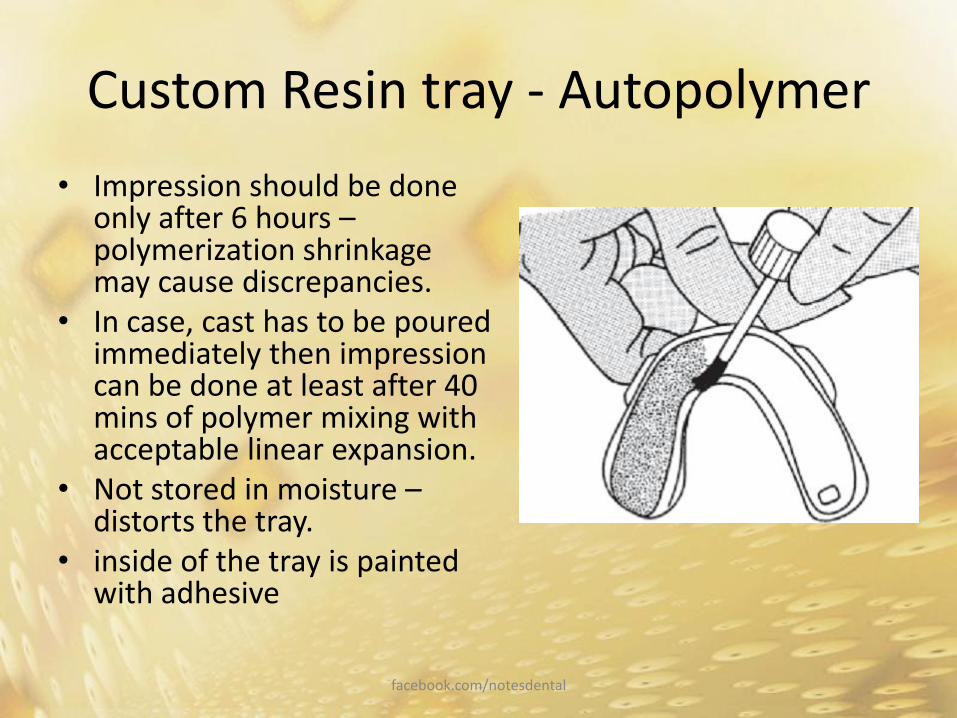
• Impression should be done only after 6 hours –polymerization shrinkage may cause discrepancies.
• In case, cast has to be poured immediately then impression can be done at least after 40 mins of polymer mixing with acceptable linear expansion.
• Not stored in moisture –distorts the tray.
• inside of the tray is painted with adhesive
facebook.com/notesdental
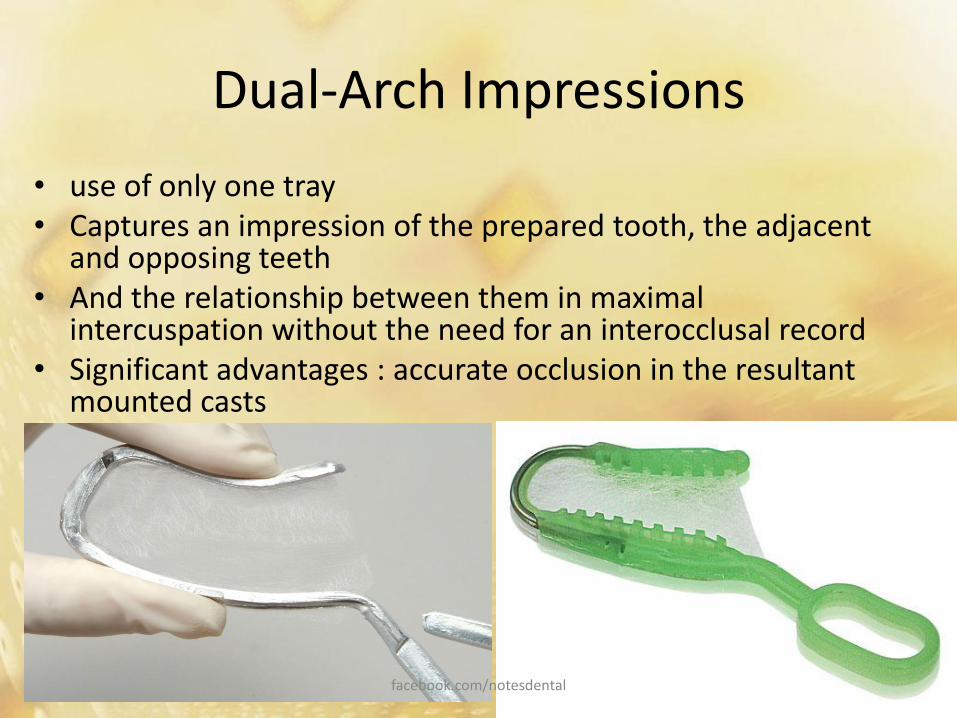
Dual-Arch Impressions
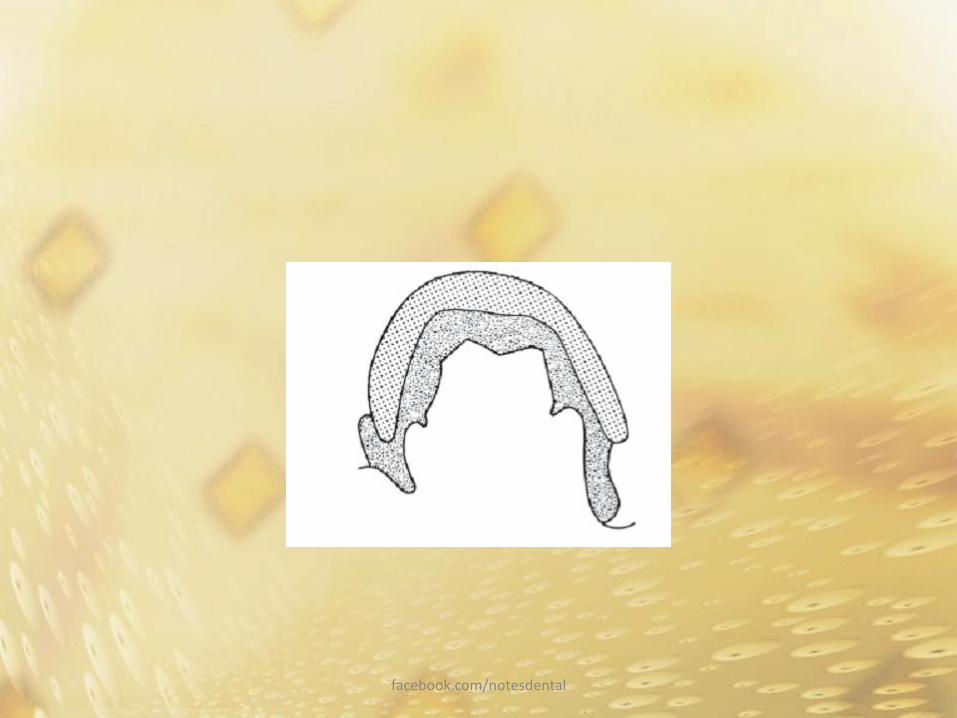
• use of only one tray• Captures an impression of the prepared tooth, the adjacent
and opposing teeth• And the relationship between them in maximal
intercuspation without the need for an interocclusal record• Significant advantages : accurate occlusion in the resultant
mounted casts
facebook.com/notesdental
Dual-Arch Impressions
• Indication
– single tooth with intact adjacent and opposing teeth
– intact, mutually protected Angle Class I occlusion
• 2 types short sidewalls or taller sidewalls.
• Adequate GTR and moisture control is done.
facebook.com/notesdental
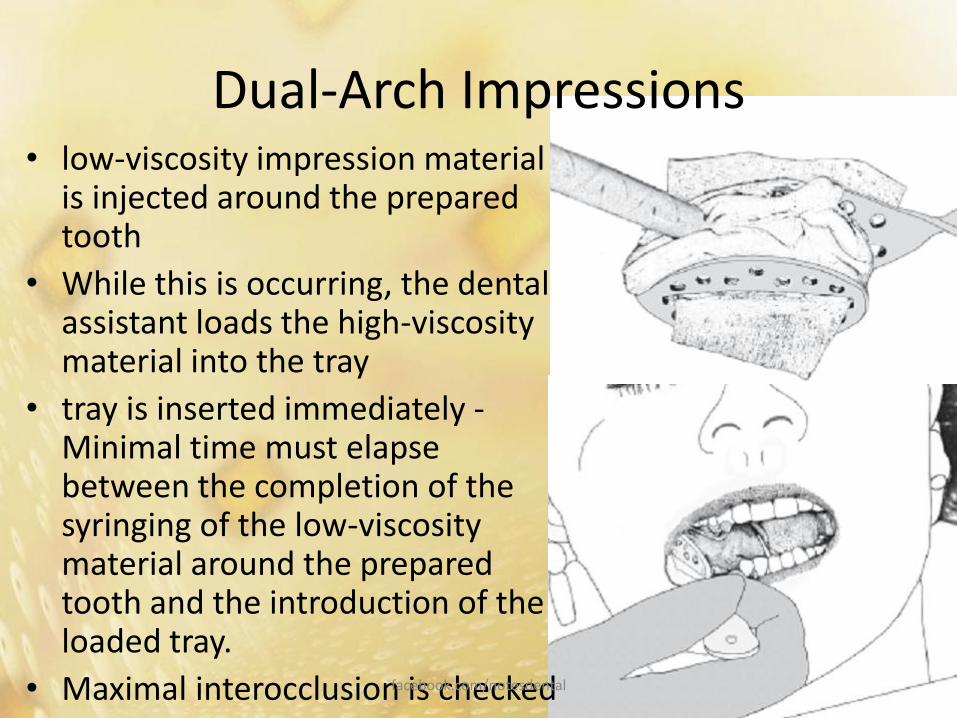
Dual-Arch Impressions• low-viscosity impression material
is injected around the prepared tooth
• While this is occurring, the dental assistant loads the high-viscosity material into the tray
• tray is inserted immediately -Minimal time must elapse between the completion of the syringing of the low-viscosity material around the prepared tooth and the introduction of the loaded tray.
• Maximal interocclusion is checkedfacebook.com/notesdental
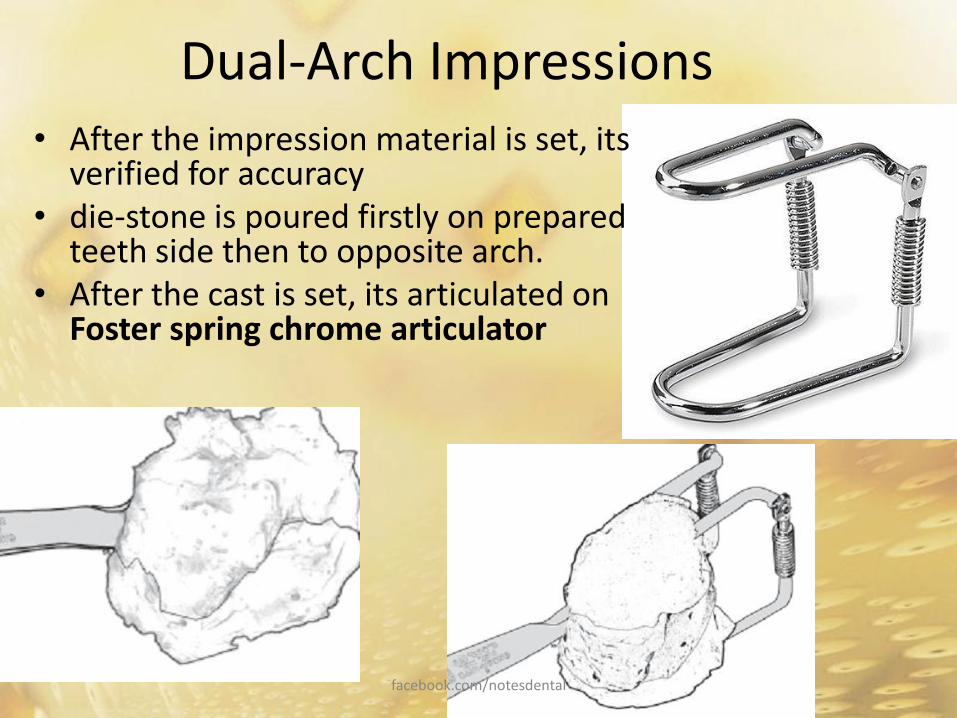
Dual-Arch Impressions• After the impression material is set, its
verified for accuracy• die-stone is poured firstly on prepared
teeth side then to opposite arch.• After the cast is set, its articulated on
Foster spring chrome articulator
facebook.com/notesdental
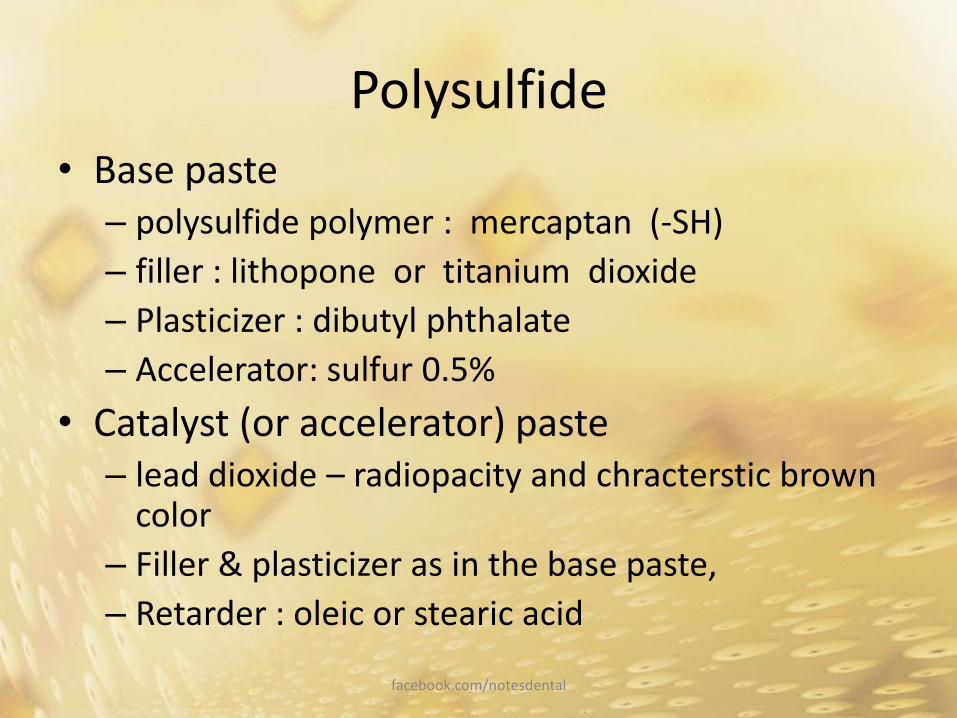
Polysulfide
• Base paste – polysulfide polymer : mercaptan (-SH)
– filler : lithopone or titanium dioxide
– Plasticizer : dibutyl phthalate
– Accelerator: sulfur 0.5%
• Catalyst (or accelerator) paste– lead dioxide – radiopacity and chracterstic brown
color
– Filler & plasticizer as in the base paste,
– Retarder : oleic or stearic acid
facebook.com/notesdental

Polysulfide
• Maximum accuracy is to be obtained, a polysulfide impression should be poured within approximately 1 hour of removal from the mouth or less
• hydrophobic nature - no moisture on the preparation when the impression is made
– cast slightly larger
– folds, creases, and voids in the impression
facebook.com/notesdental
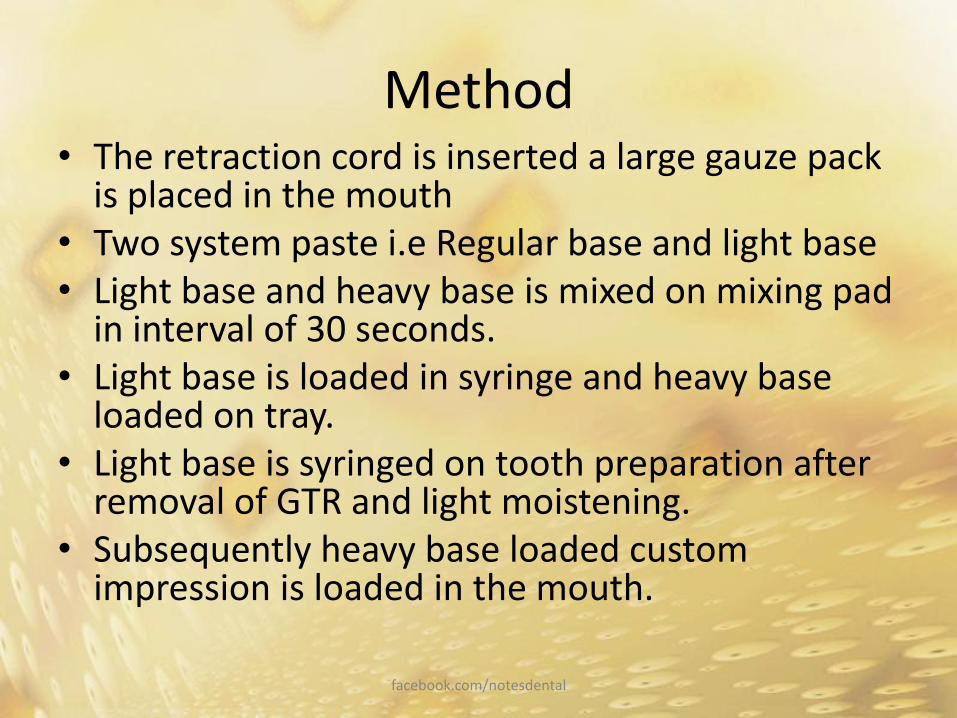
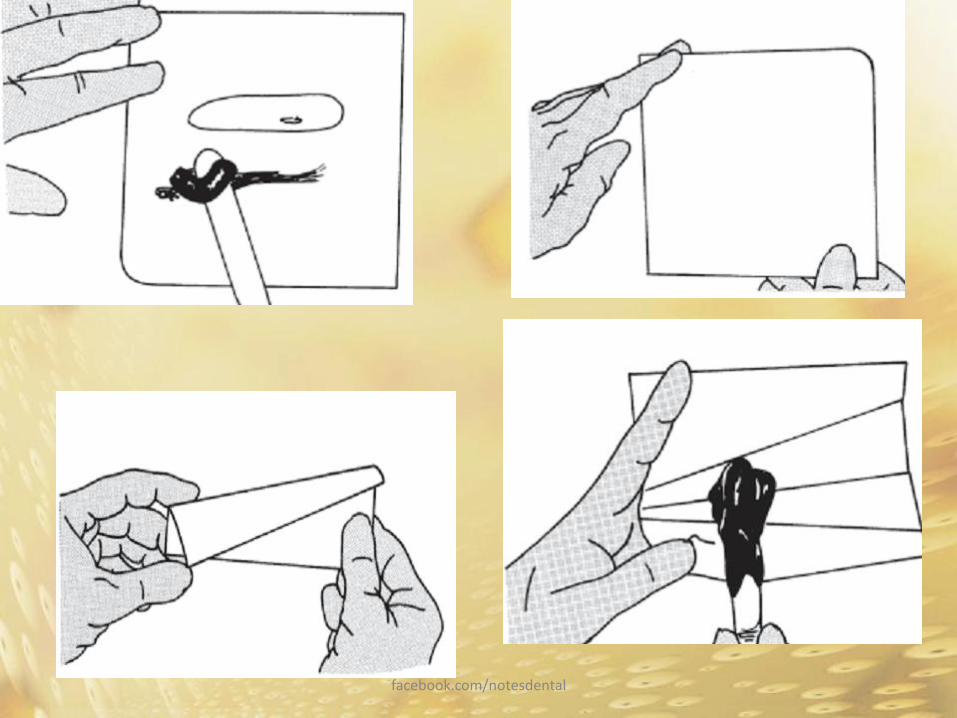
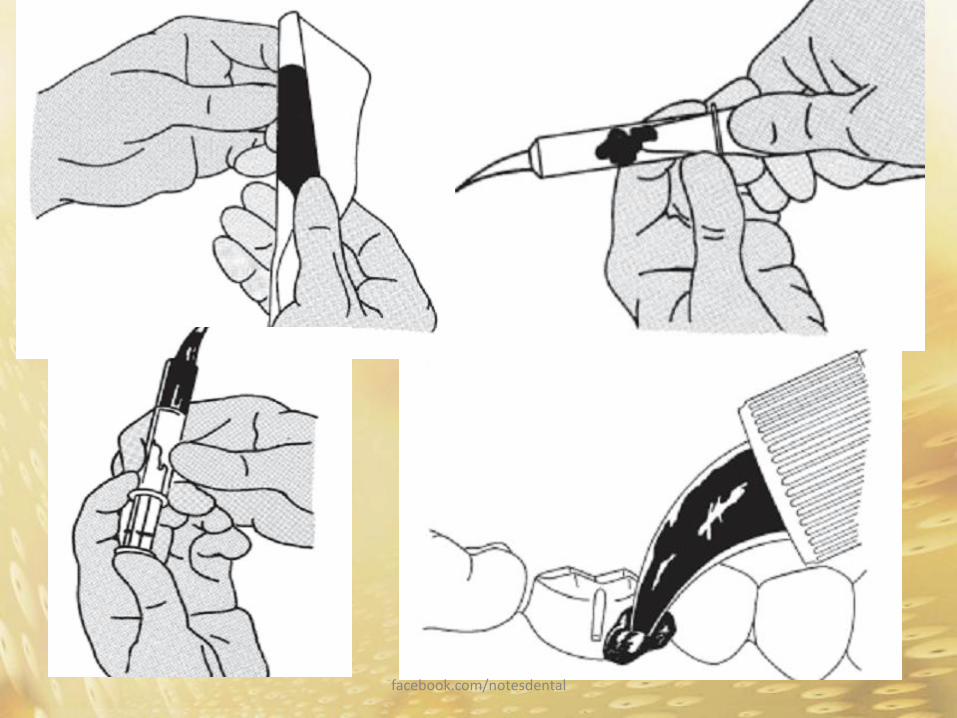
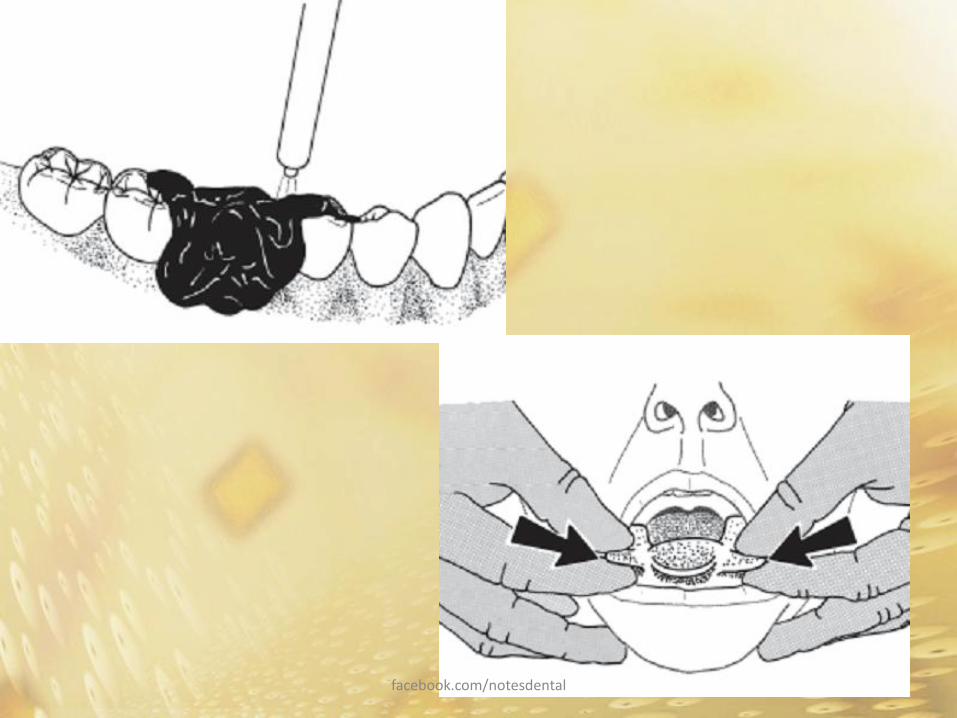
Method• The retraction cord is inserted a large gauze pack
is placed in the mouth• Two system paste i.e Regular base and light base• Light base and heavy base is mixed on mixing pad
in interval of 30 seconds.• Light base is loaded in syringe and heavy base
loaded on tray.• Light base is syringed on tooth preparation after
removal of GTR and light moistening.• Subsequently heavy base loaded custom
impression is loaded in the mouth.
facebook.com/notesdental
facebook.com/notesdental
facebook.com/notesdental
facebook.com/notesdental
Condensation Silicone
• Two paste system
– base paste : α-ω-hydroxyl-terminated polydimethylsiloxane and fillers
– Catalyst Paste : organo-tin silicones
• two-putty system
• condensation reaction occurs by the elimination of ethyl or methyl alcohol.
• evaporation of this alcohol – shrinkage of the material and resultant poor dimensional stability
facebook.com/notesdental
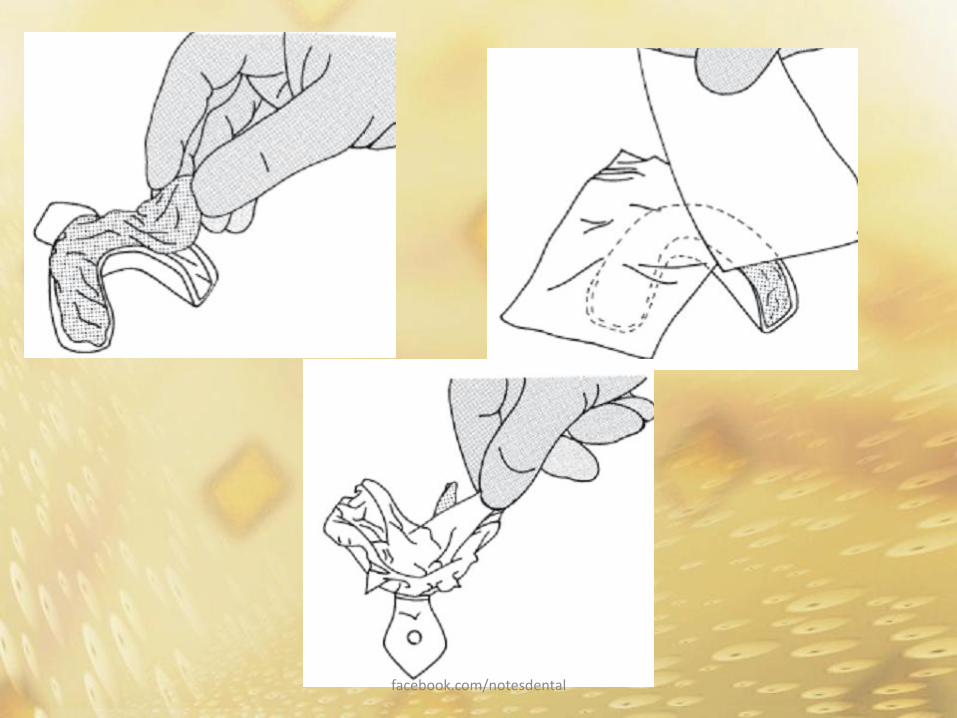
Method : Before the preparation 1. a stock tray that fits the arch is selected
2. Tray adhesive applied on tray
3. two scoops of putty (base) are placed on the pad
4. 6 drops of accelerator are added for each scoop of base
5. Mixed on pad with spatula for few second and then kneaded in palm for 30 second - free of streaks
6. Rolled in cigar shape and placed in stock tray
7. covered with a polyethylene spacer,
8. the tray is seated in the mouth
9. After initial set has occurred (about 2 minutes)
10. spacer is peeled off and impresion is examined for error if any
11. extra impression material is removed with sharp knifefacebook.com/notesdental
facebook.com/notesdental

Method : after the preparation1. Anaesthesia, GTR and placement gauze piece into mouth2. 8 inches of the thin-wash silicone base are squeezed out onto the
disposable mixing pad3. One drop of accelerator is added per inch of base and mixed for 30 second4. One-third of the wash material is placed into the back end of the syringe5. And rest of the material into the tray6. Removal of GTR as gentle as possible7. Syringe material is immediately injected into the sulcus and around
prepared teeth8. tray is seated slowly until it is firmly in place with no downward pressure
for 6 minutes9. As the impression is set, its removed as quickly and in as straight a path as
possible to prevent plastic deformation of the material10. rinsed to remove blood and saliva, blown dry , and inspected and
disinfected and poured11. opposing arch can be made with alginate
facebook.com/notesdental
Polyvinyl Siloxane
• Also known as addition silicone or vinyl polysiloxane (VPS) or vinyl silicone
• addition polymerization• Available in 3 forms i.e light body, medium body
and heavy body• 2 paste system
– base paste : polymethylhydrosiloxane, as well as divinylpolysiloxane and fillers
– Catalyst (or accelerator) paste: divinylpolysiloxane a platinum (catalyst) and palladium(H2 scavenger) salt and fillers
facebook.com/notesdental
Polyvinyl Siloxane
• No reaction by-products are formed as long as the correct proportions and its impurity free
• Residual polymethylhydrosiloxane in the material can lead to a secondary reaction with each other or with moisture, to produce hydrogen gas– pinpoint voids in the gypsum casts poured soon
after removal of the impression from the mouth
• left overnight if epoxy will be used for pouring models
facebook.com/notesdental
Polyvinyl Siloxane
• Hydrophobic nature
• nonionic surfactant is added
– Surfactant migrates toward the surface of the impression material and has its hydrophilic segment oriented toward the surface
• Dry field for impression making is required.
• Sulfur contamination from natural latex gloves or vinyl gloves - inhibits the setting of addition silicone.
facebook.com/notesdental
Polyvinyl Siloxane
• least affected by pouring delays or by second pours
• still accurate, even when poured 1 week after removal from the mouth
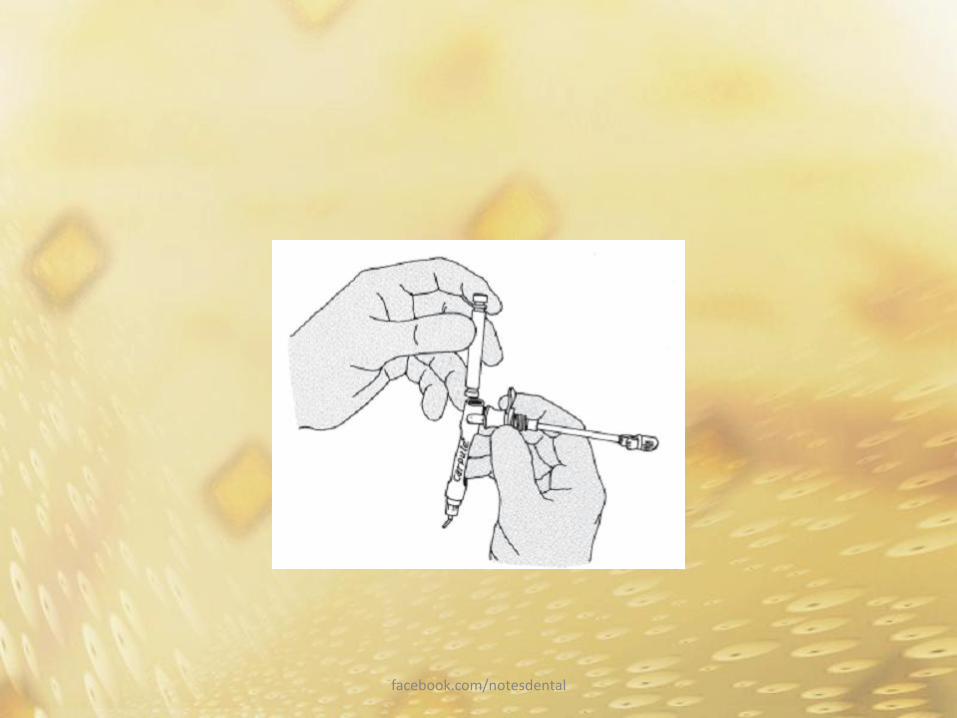
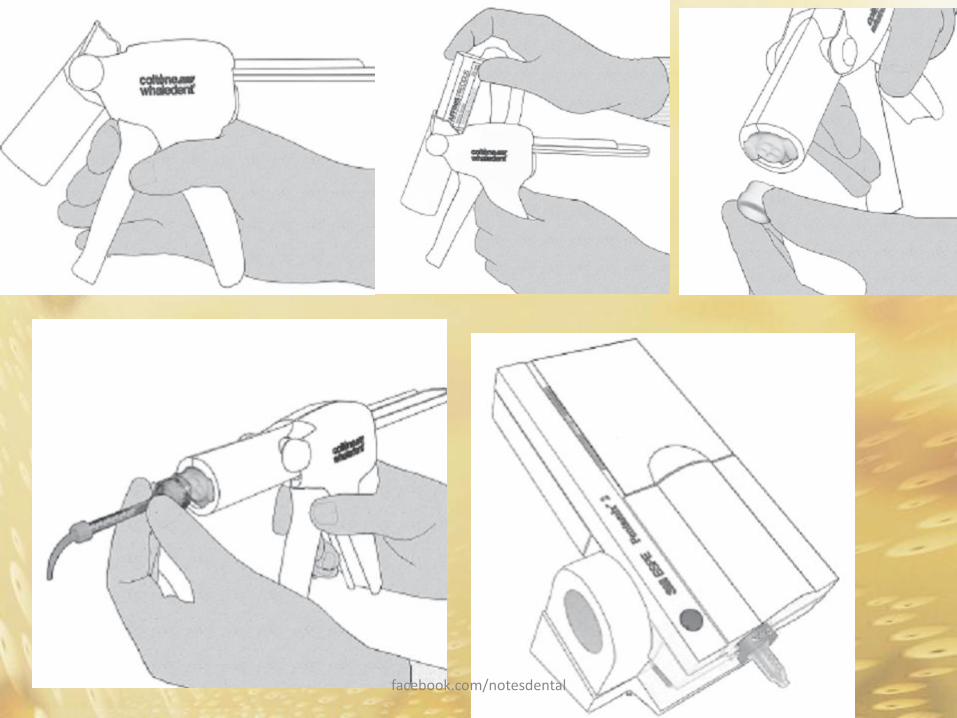
• Available as Single barreled or twin-barreled cartridge with either automixing and manual mixing.
facebook.com/notesdental
facebook.com/notesdental