how to transfer magento project from one server to another server
TRANSCRIPT
KAUSHAL MEWAR
Connecting Dots Technology Systems
HOW TO MIGRATE MAGENTO PROJECT FROM ONE SERVER TO
ANOTHER SERVER
P a g e | 1
Kaushal Mewar | Connecting Dots Technology Systems
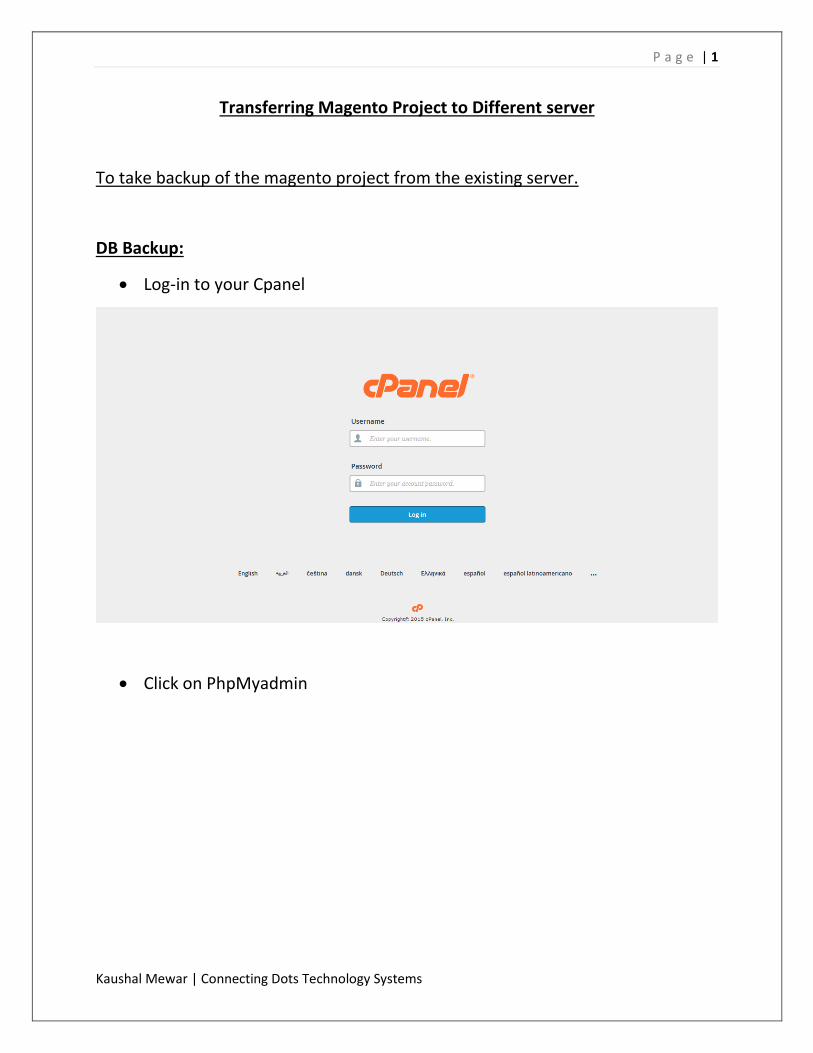
Transferring Magento Project to Different server
To take backup of the magento project from the existing server.
DB Backup:
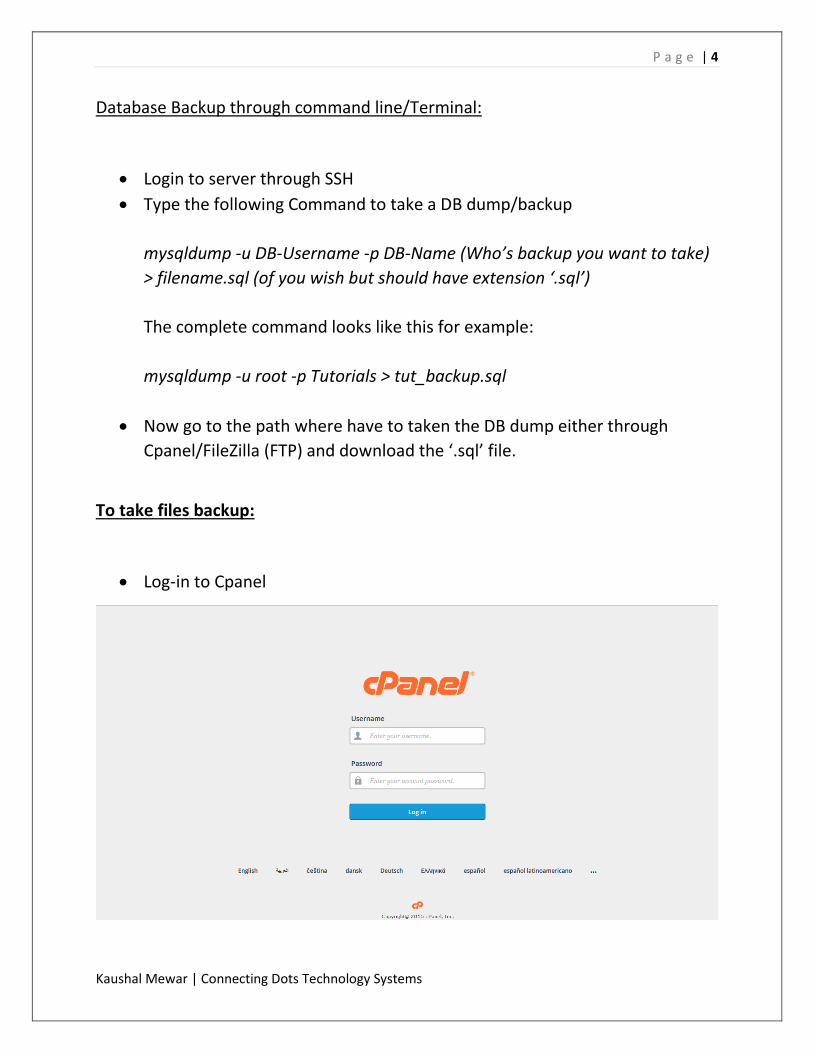
Log-in to your Cpanel
Click on PhpMyadmin
P a g e | 2
Kaushal Mewar | Connecting Dots Technology Systems
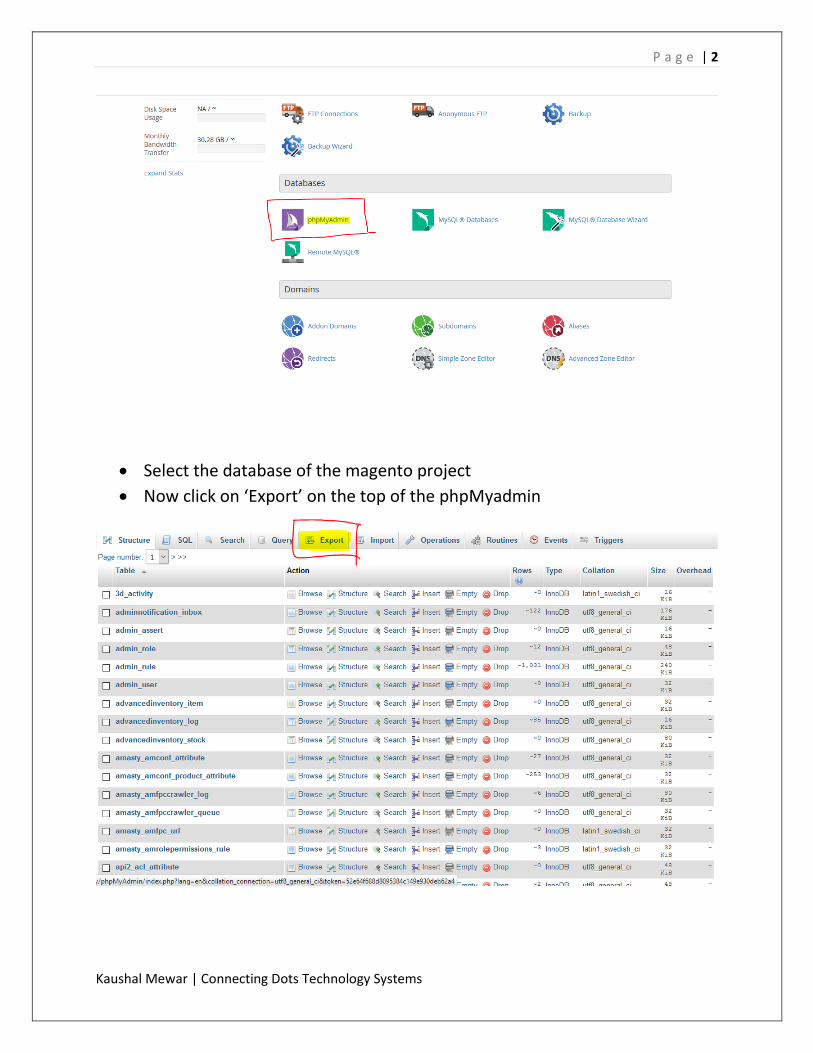
Select the database of the magento project
Now click on ‘Export’ on the top of the phpMyadmin
P a g e | 3
Kaushal Mewar | Connecting Dots Technology Systems
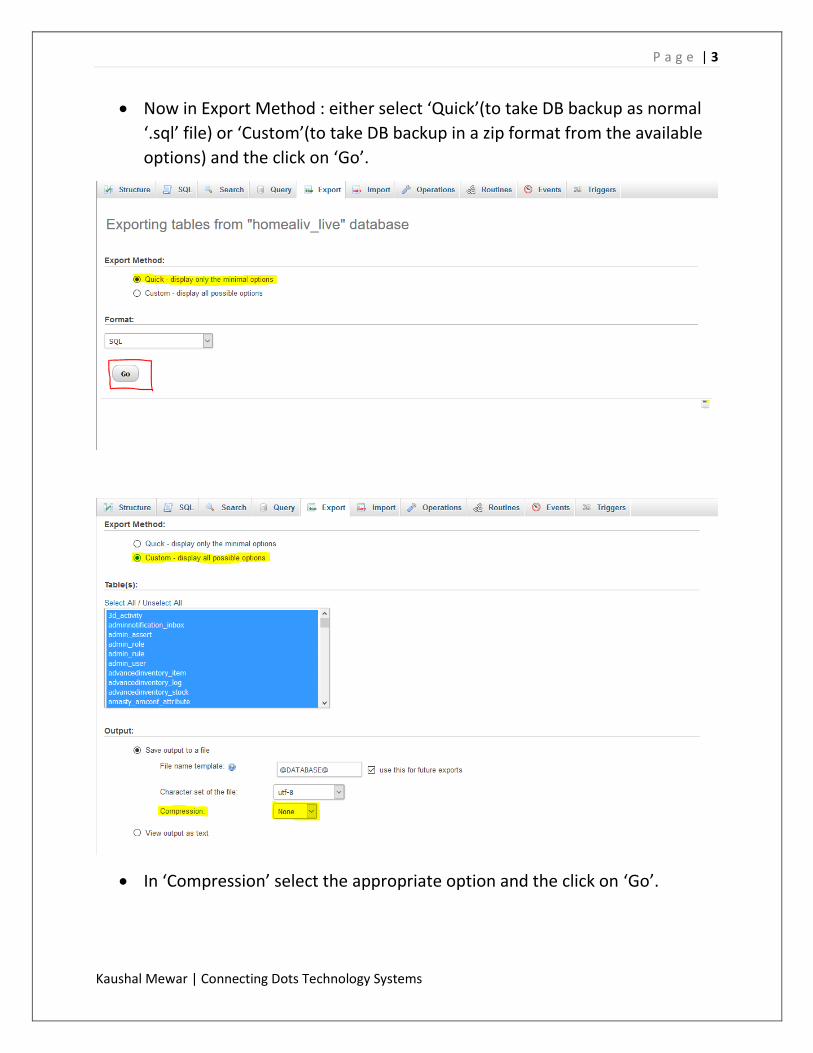
Now in Export Method : either select ‘Quick’(to take DB backup as normal
‘.sql’ file) or ‘Custom’(to take DB backup in a zip format from the available
options) and the click on ‘Go’.
In ‘Compression’ select the appropriate option and the click on ‘Go’.
P a g e | 4
Kaushal Mewar | Connecting Dots Technology Systems
Database Backup through command line/Terminal:
Login to server through SSH
Type the following Command to take a DB dump/backup
mysqldump -u DB-Username -p DB-Name (Who’s backup you want to take)
> filename.sql (of you wish but should have extension ‘.sql’)
The complete command looks like this for example:
mysqldump -u root -p Tutorials > tut_backup.sql
Now go to the path where have to taken the DB dump either through
Cpanel/FileZilla (FTP) and download the ‘.sql’ file.
To take files backup:
Log-in to Cpanel

P a g e | 5
Kaushal Mewar | Connecting Dots Technology Systems
Click on ‘File Manager’ and then select ‘Web Root (public_html/www)‘ and
click ‘Go’
P a g e | 6
Kaushal Mewar | Connecting Dots Technology Systems
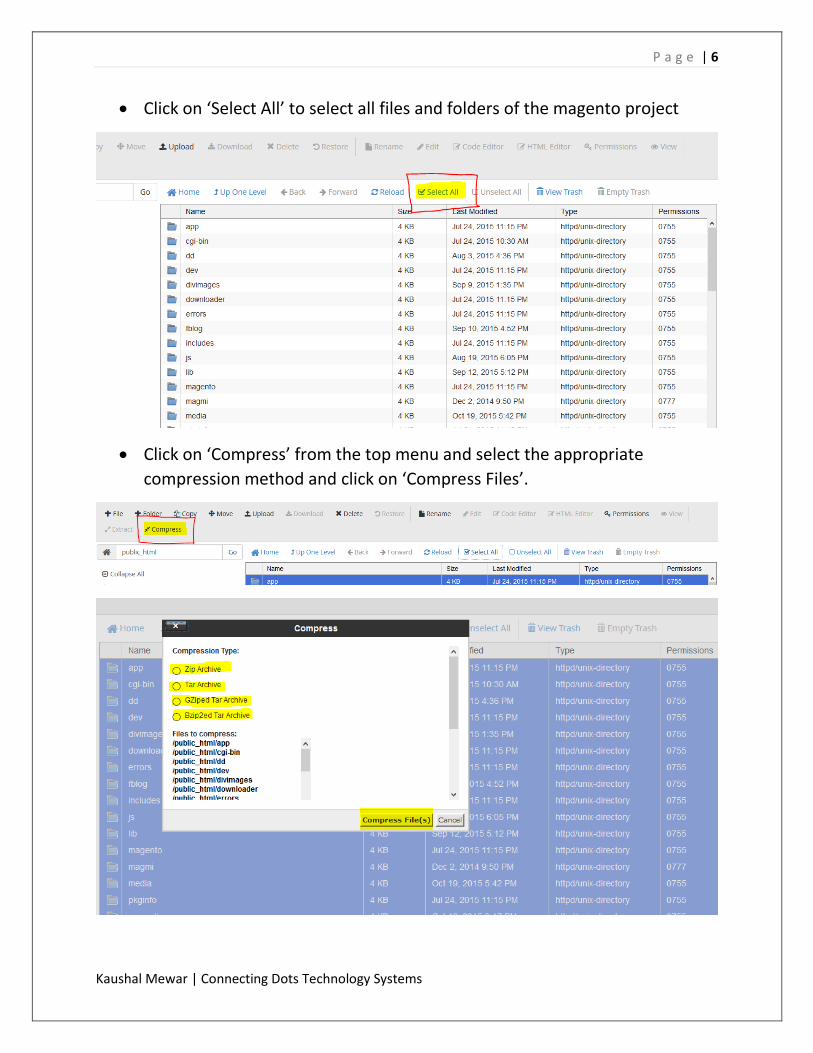
Click on ‘Select All’ to select all files and folders of the magento project
Click on ‘Compress’ from the top menu and select the appropriate
compression method and click on ‘Compress Files’.
P a g e | 7
Kaushal Mewar | Connecting Dots Technology Systems
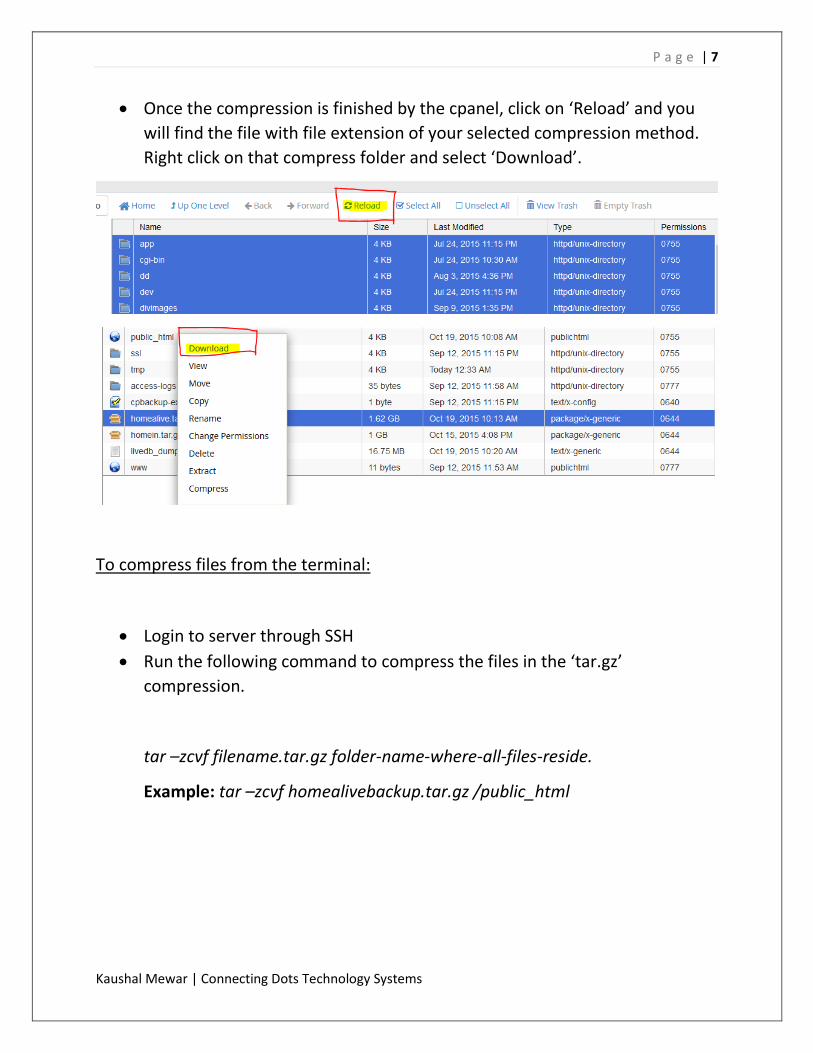
Once the compression is finished by the cpanel, click on ‘Reload’ and you
will find the file with file extension of your selected compression method.
Right click on that compress folder and select ‘Download’.
To compress files from the terminal:
Login to server through SSH
Run the following command to compress the files in the ‘tar.gz’
compression.
tar –zcvf filename.tar.gz folder-name-where-all-files-reside.
Example: tar –zcvf homealivebackup.tar.gz /public_html
P a g e | 8
Kaushal Mewar | Connecting Dots Technology Systems
To Setup backup magento project in new server
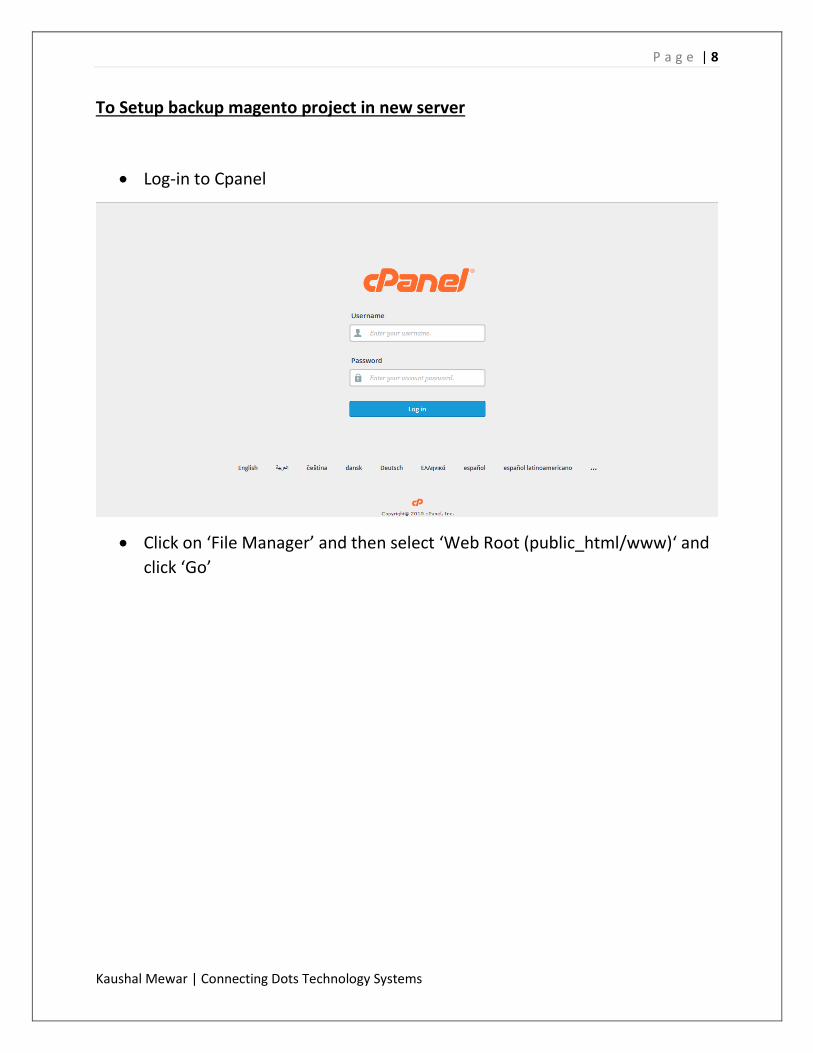
Log-in to Cpanel
Click on ‘File Manager’ and then select ‘Web Root (public_html/www)‘ and
click ‘Go’

P a g e | 9
Kaushal Mewar | Connecting Dots Technology Systems
P a g e | 10
Kaushal Mewar | Connecting Dots Technology Systems
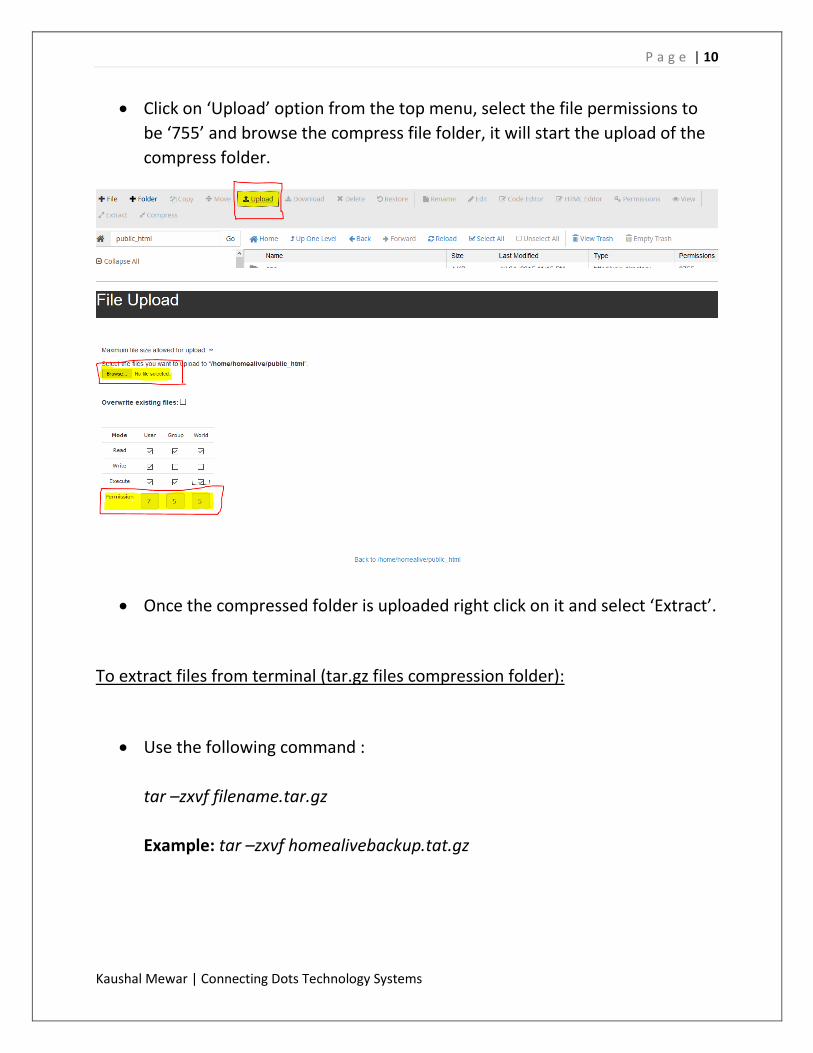
Click on ‘Upload’ option from the top menu, select the file permissions to
be ‘755’ and browse the compress file folder, it will start the upload of the
compress folder.
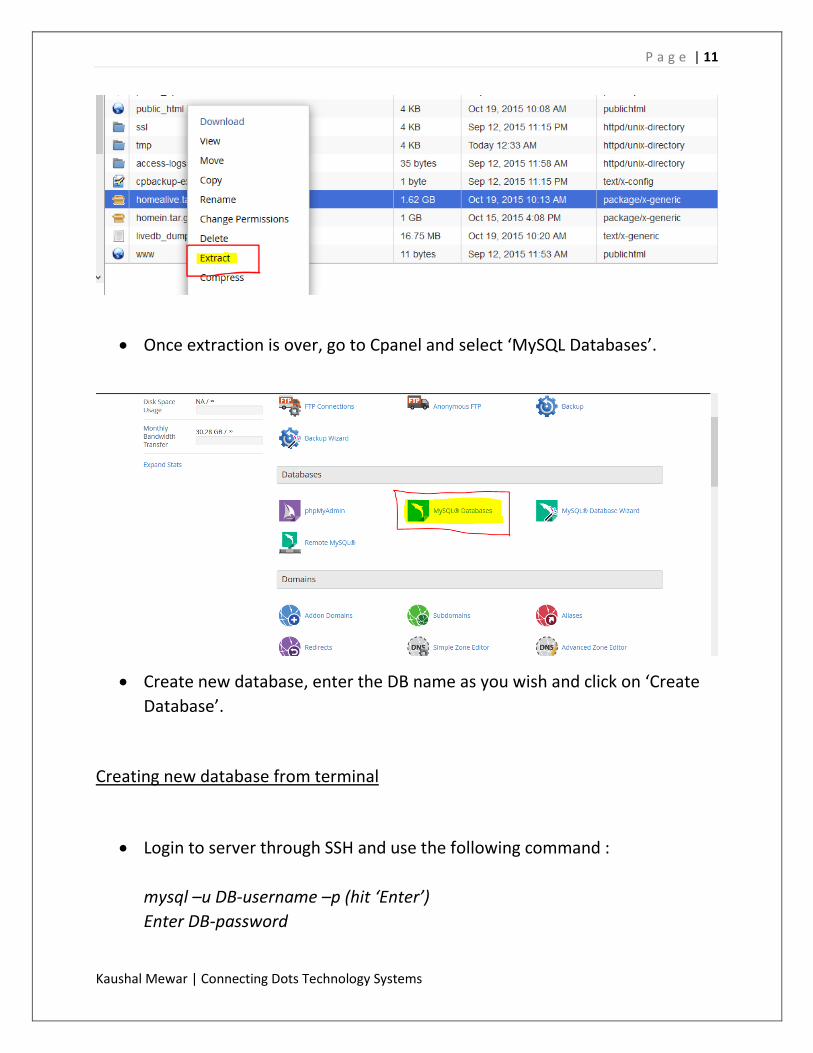
Once the compressed folder is uploaded right click on it and select ‘Extract’.
To extract files from terminal (tar.gz files compression folder):
Use the following command :
tar –zxvf filename.tar.gz
Example: tar –zxvf homealivebackup.tat.gz
P a g e | 11
Kaushal Mewar | Connecting Dots Technology Systems
Once extraction is over, go to Cpanel and select ‘MySQL Databases’.
Create new database, enter the DB name as you wish and click on ‘Create
Database’.
Creating new database from terminal
Login to server through SSH and use the following command :
mysql –u DB-username –p (hit ‘Enter’)
Enter DB-password
P a g e | 12
Kaushal Mewar | Connecting Dots Technology Systems
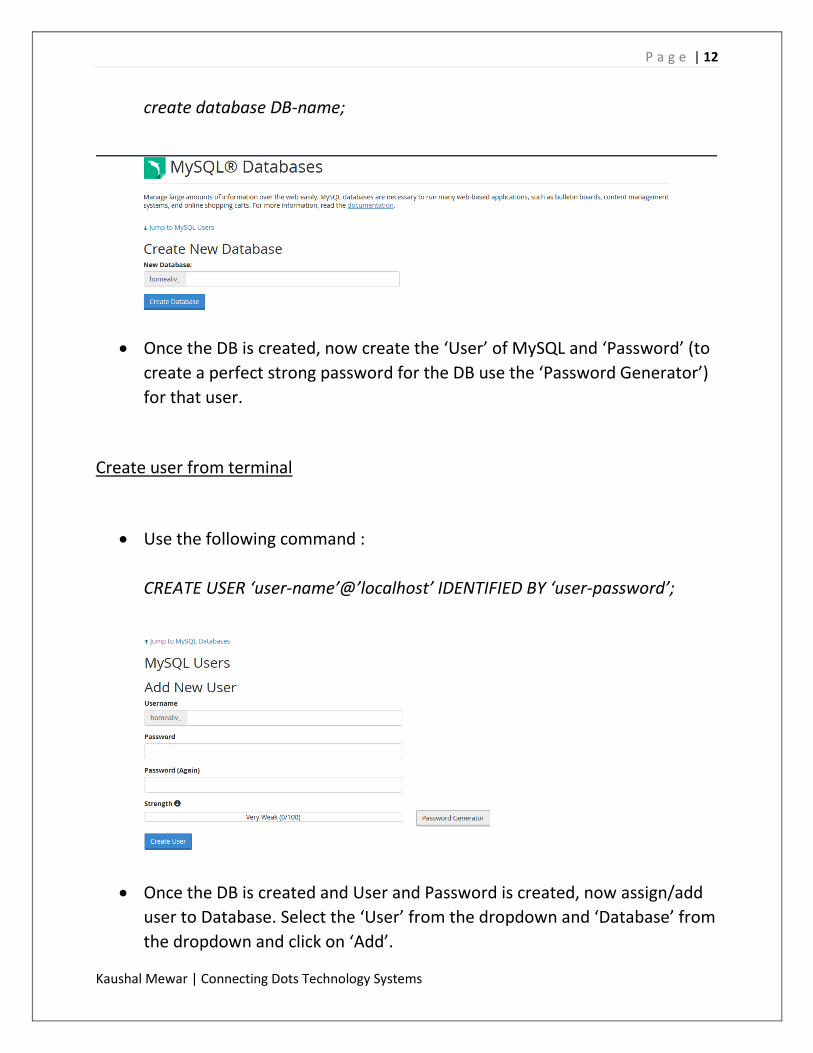
create database DB-name;
Once the DB is created, now create the ‘User’ of MySQL and ‘Password’ (to
create a perfect strong password for the DB use the ‘Password Generator’)
for that user.
Create user from terminal
Use the following command :
CREATE USER ‘user-name’@’localhost’ IDENTIFIED BY ‘user-password’;
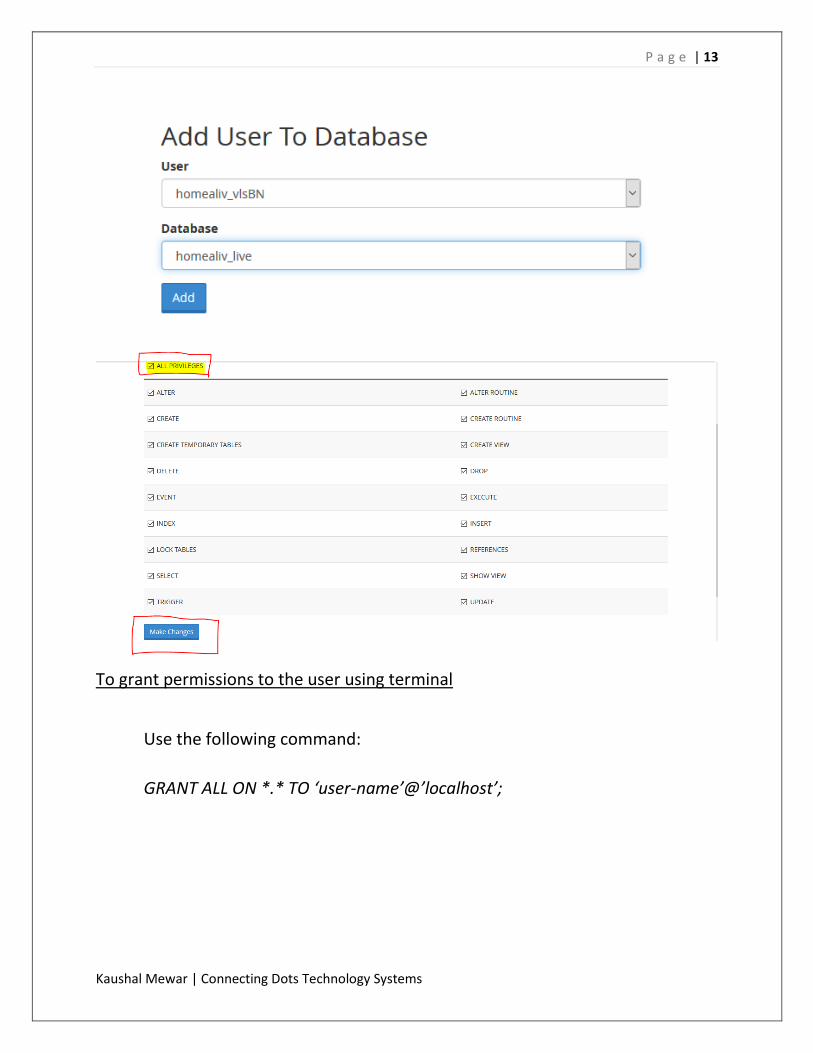
Once the DB is created and User and Password is created, now assign/add
user to Database. Select the ‘User’ from the dropdown and ‘Database’ from
the dropdown and click on ‘Add’.
P a g e | 13
Kaushal Mewar | Connecting Dots Technology Systems
To grant permissions to the user using terminal
Use the following command:
GRANT ALL ON *.* TO ‘user-name’@’localhost’;

P a g e | 14
Kaushal Mewar | Connecting Dots Technology Systems
Now go to Cpanel and click on ‘PhpMyadmin’.
Select the Database from the left side listing of the database.
To do the same through the terminal use the following command:
use DB-name;
P a g e | 15
Kaushal Mewar | Connecting Dots Technology Systems
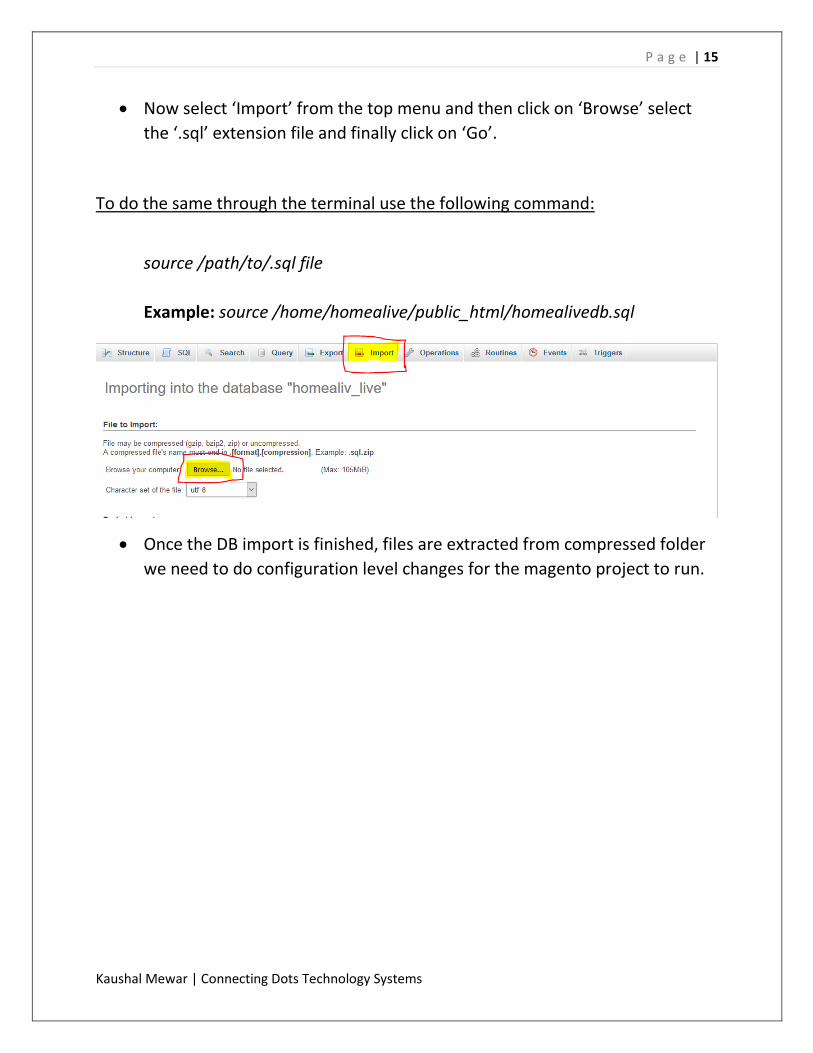
Now select ‘Import’ from the top menu and then click on ‘Browse’ select
the ‘.sql’ extension file and finally click on ‘Go’.
To do the same through the terminal use the following command:
source /path/to/.sql file
Example: source /home/homealive/public_html/homealivedb.sql
Once the DB import is finished, files are extracted from compressed folder
we need to do configuration level changes for the magento project to run.
P a g e | 16
Kaushal Mewar | Connecting Dots Technology Systems
Configuration Setups for magento project:
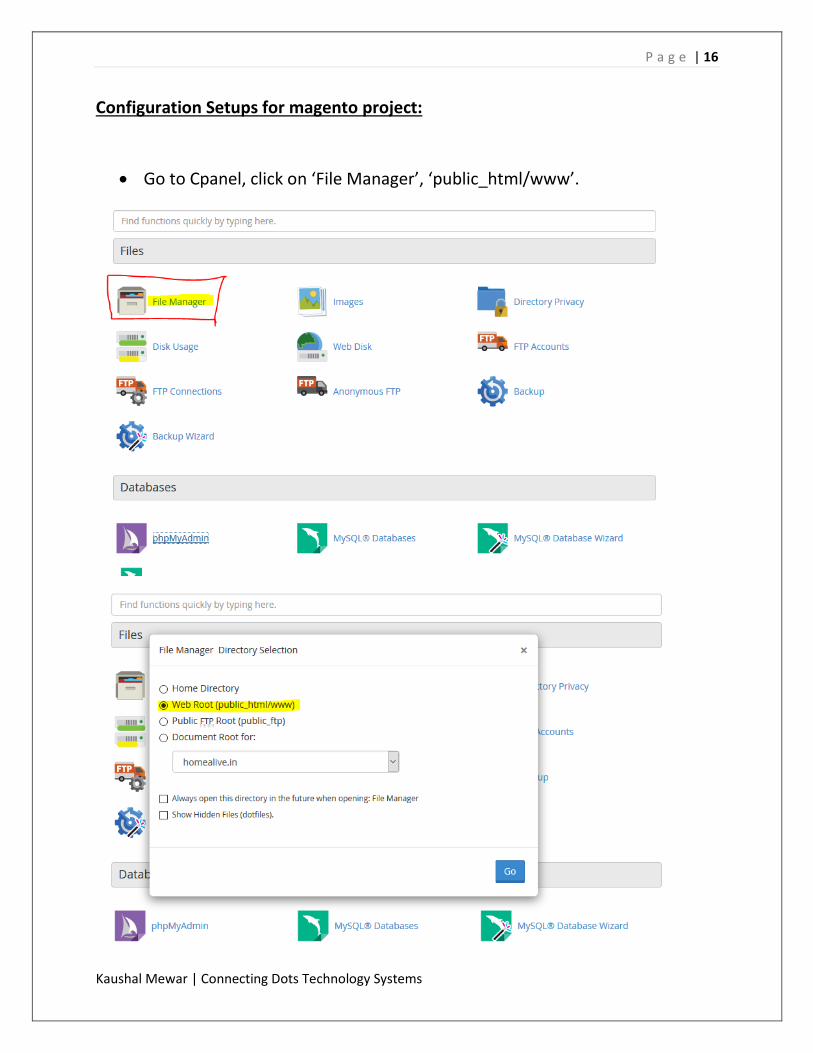
Go to Cpanel, click on ‘File Manager’, ‘public_html/www’.
P a g e | 17
Kaushal Mewar | Connecting Dots Technology Systems
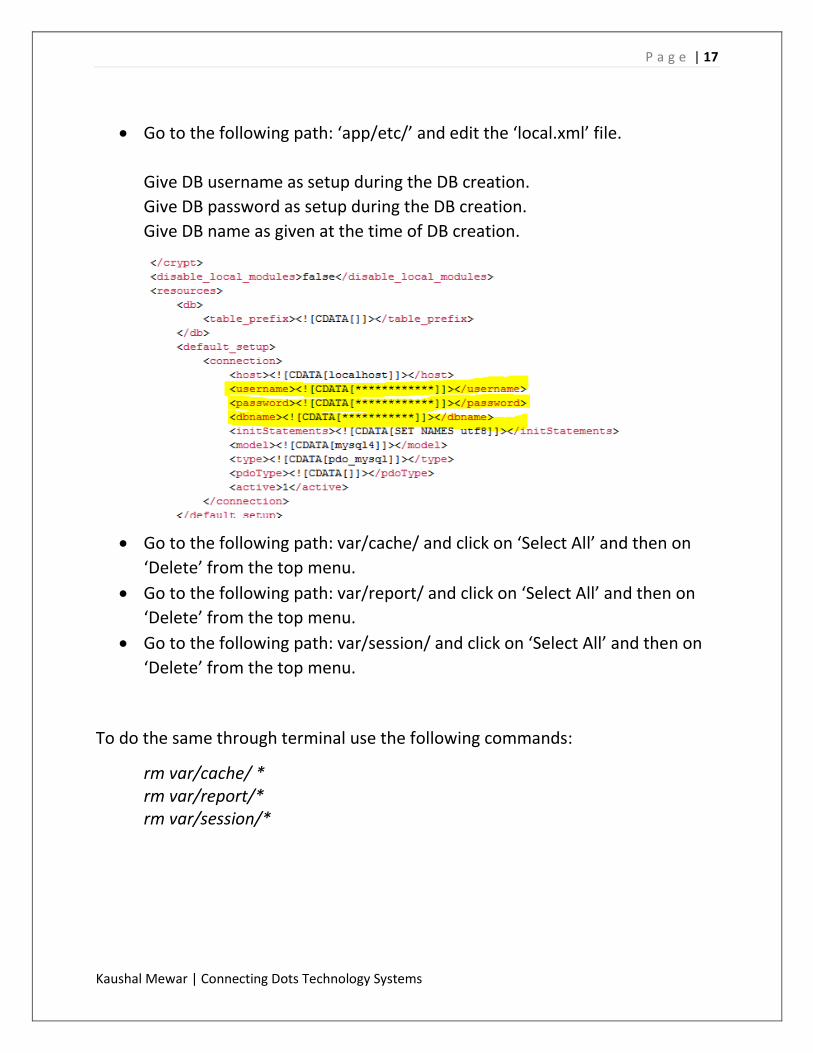
Go to the following path: ‘app/etc/’ and edit the ‘local.xml’ file.
Give DB username as setup during the DB creation.
Give DB password as setup during the DB creation.
Give DB name as given at the time of DB creation.
Go to the following path: var/cache/ and click on ‘Select All’ and then on
‘Delete’ from the top menu.
Go to the following path: var/report/ and click on ‘Select All’ and then on
‘Delete’ from the top menu.
Go to the following path: var/session/ and click on ‘Select All’ and then on
‘Delete’ from the top menu.
To do the same through terminal use the following commands:
rm var/cache/ * rm var/report/* rm var/session/*
P a g e | 18
Kaushal Mewar | Connecting Dots Technology Systems
The below step is required only if you are changing the ‘domain name’ also:
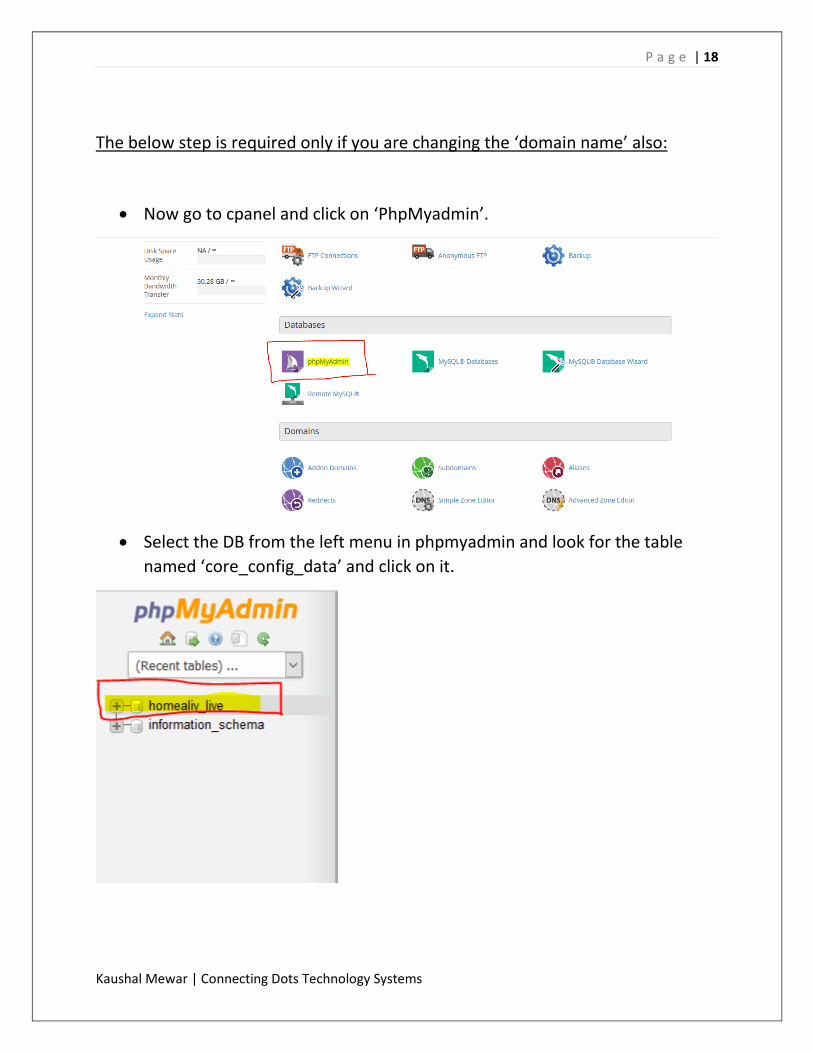
Now go to cpanel and click on ‘PhpMyadmin’.
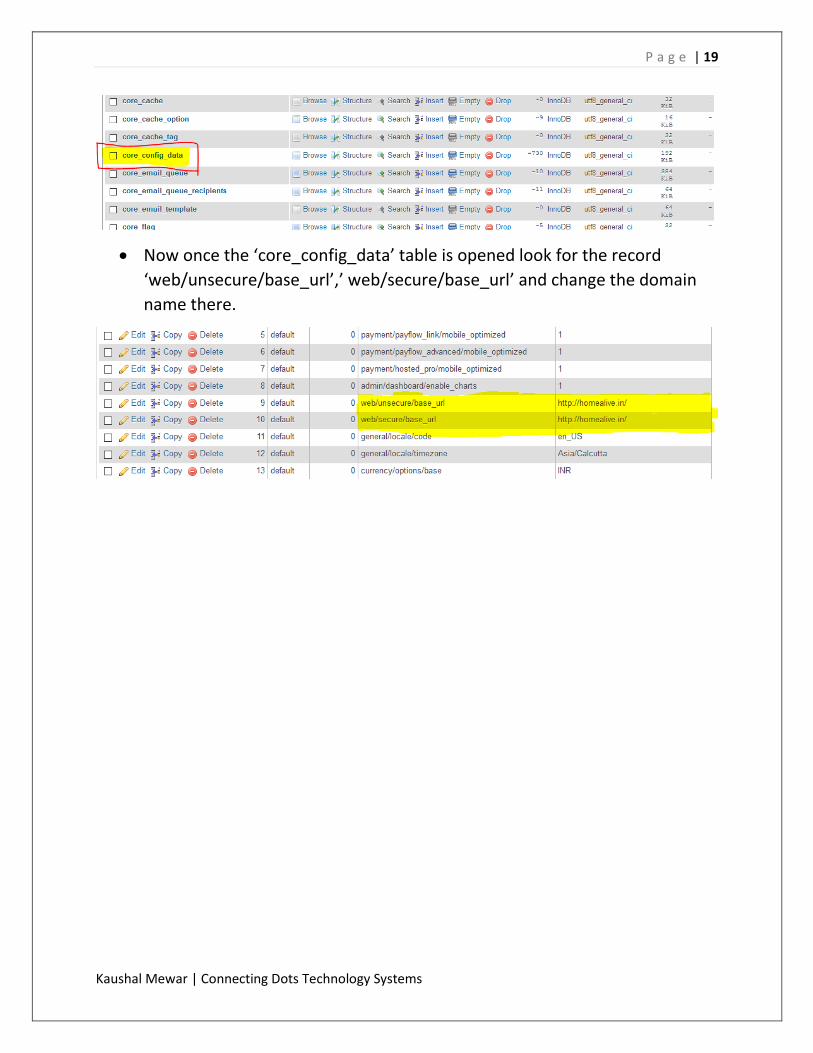
Select the DB from the left menu in phpmyadmin and look for the table
named ‘core_config_data’ and click on it.
P a g e | 19
Kaushal Mewar | Connecting Dots Technology Systems
Now once the ‘core_config_data’ table is opened look for the record
‘web/unsecure/base_url’,’ web/secure/base_url’ and change the domain
name there.
P a g e | 20
Kaushal Mewar | Connecting Dots Technology Systems
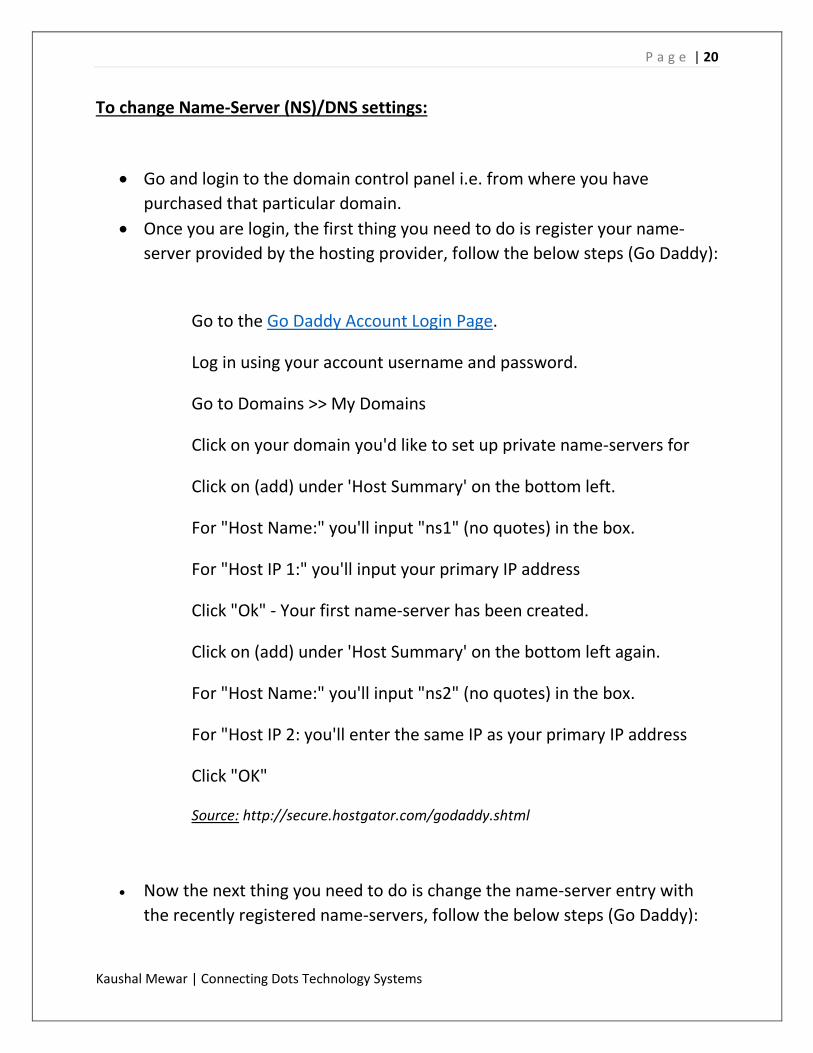
To change Name-Server (NS)/DNS settings:
Go and login to the domain control panel i.e. from where you have
purchased that particular domain.
Once you are login, the first thing you need to do is register your name-
server provided by the hosting provider, follow the below steps (Go Daddy):
Go to the Go Daddy Account Login Page.
Log in using your account username and password.
Go to Domains >> My Domains
Click on your domain you'd like to set up private name-servers for
Click on (add) under 'Host Summary' on the bottom left.
For "Host Name:" you'll input "ns1" (no quotes) in the box.
For "Host IP 1:" you'll input your primary IP address
Click "Ok" - Your first name-server has been created.
Click on (add) under 'Host Summary' on the bottom left again.
For "Host Name:" you'll input "ns2" (no quotes) in the box.
For "Host IP 2: you'll enter the same IP as your primary IP address
Click "OK"
Source: http://secure.hostgator.com/godaddy.shtml
Now the next thing you need to do is change the name-server entry with
the recently registered name-servers, follow the below steps (Go Daddy):
P a g e | 21
Kaushal Mewar | Connecting Dots Technology Systems
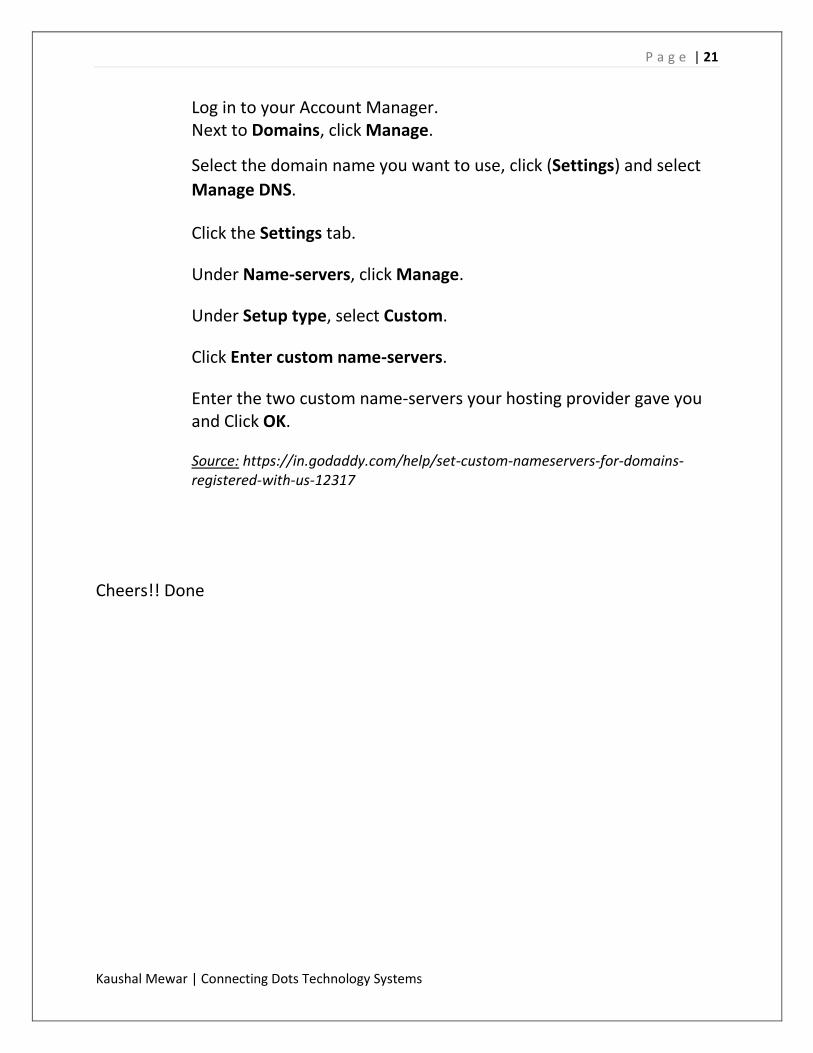
Log in to your Account Manager. Next to Domains, click Manage.
Select the domain name you want to use, click (Settings) and select
Manage DNS.
Click the Settings tab.
Under Name-servers, click Manage.
Under Setup type, select Custom.
Click Enter custom name-servers.
Enter the two custom name-servers your hosting provider gave you and Click OK.
Source: https://in.godaddy.com/help/set-custom-nameservers-for-domains-registered-with-us-12317
Cheers!! Done