how to create a hydrodesktop plugin in five easy steps
TRANSCRIPT

How to Create a
HydroDesktop Plugin in Five
Easy Steps

Prerequisites:
Install Visual Studio
www.visualstudio.com

Prerequisites:
Install the Latest Version
of HydroDesktop
hydrodesktop.codeplex.com
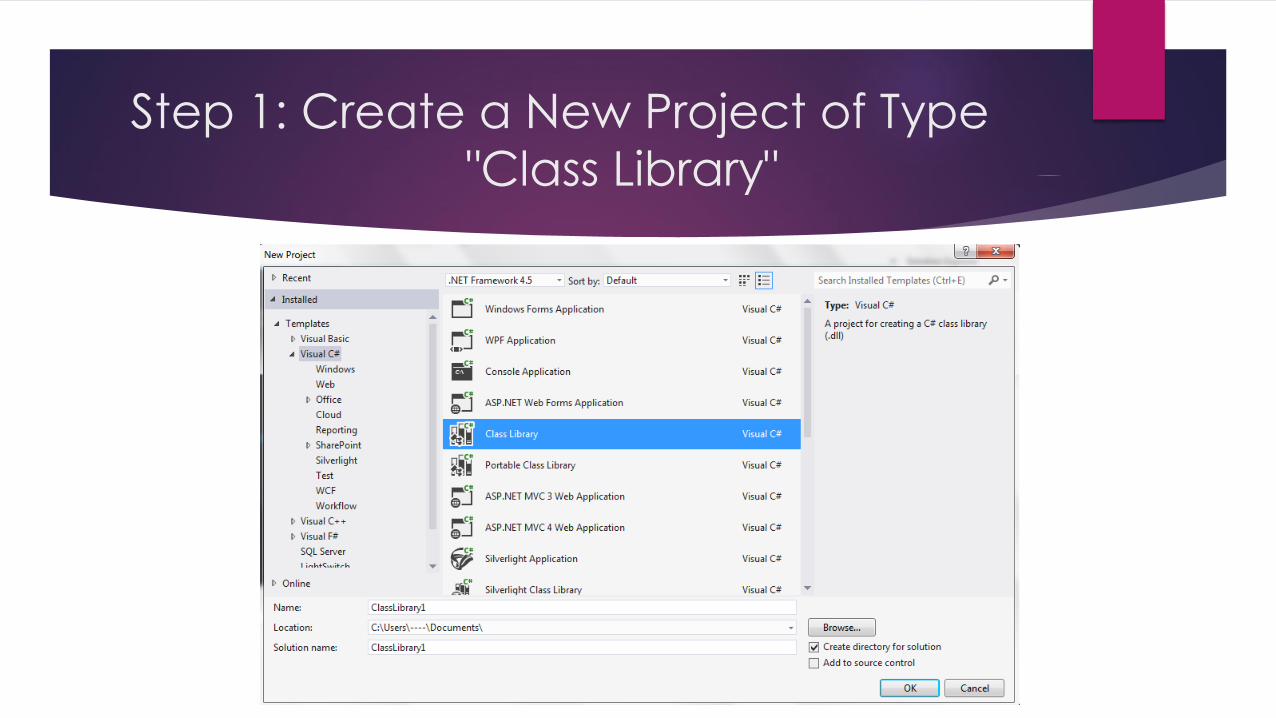
Step 1: Create a New Project of Type
"Class Library"

Right Click the Project -> Properties
Build -> Output -> Output Path
Navigate to Plugins Folder:
e.g. C:\Program Files\CUAHSI HIS\
HydroDesktop 1.6.13\Plugins
Step 2: Set the Output Build Path to
the HydroDesktop Plugin Folder

Right Click References -> Add Reference… -> Browse
e.g. C:\Program Files\CUAHSI HIS\
HydroDesktop 1.6.13
Essential References:
DotSpatial.Extensions &
DotSpatial.Controls
Step 3: Add References to the
DotSpatial GIS libraries

Step 4: Implement the Class, 'Extension'
in the Main Class of Your Plugin
Add using statements
DotSpatial.Extensions
DotSpatial.Controls
Implement Extension

Step 5: Add code to the "Activate"
and "Deactivate" methods
Allows you to initialize
your plugin when
activated
Perform cleanup upon
deactivation

Finished! Do something cool.
Add buttons to a Menu:
using DotSpatial.Controls.Header;
Place in Activate()
var action = new SimpleActionItem(“Button", Button_Click);
action.RootKey = HeaderControl.HomeRootItemKey;
App.HeaderControl.Add(action);
Place in Deactivate()
App.HeaderControl.RemoveAll();

Finished! Do something cool.
Add a Menu:
Place in Activate()
Var rootItem = new RootItem(Key, “Caption”);
App.HeaderControl.Add(rootItem);
Add a Dockable Panel:
using DotSpatial.Controls.Docking;
Place in Activate()
var dockablePanel = new DockablePanel(Key, “Caption”, UserControl, DockStyle.Fill);
App.DockManager.Add(dp);