how to bake: the art and science of baking ch. 5
DESCRIPTION
Hi, I’m Dennis Weaver and I would like to share my baking book with you, How to Bake. It’s free. It’s illustrated. It’s 300 pages. It’s the most comprehensive downloadable home baking guide you'll ever see. If you study the material in this book, you won’t just be a better baker; you’ll be an expert baker. I’m going to teach you what I know—what you would learn in a culinary school—and not charge you a dime. That's a pretty good trade I'd say, since culinary school would cost you thousands of dollars. I want to share what I’ve learned over the years and in my training. I want to make you a better baker. I’ll explain things in a way that you’ll understand and learn even if you’re a beginner. And even if you’re an expert, I promise you’ll still learn. Save it, print it, add it to your kitchen library. Share it with your children and pass on your culinary knowledge to future generations.TRANSCRIPT

Chapter 5
Fresh from the Dairy
Milk, Cream, Buttermilk, and Other Dairy Products
© 2006-2012 The Prepared Pantry 167
Chapter 5
Fresh from the Dairy
Milk, Cream, Buttermilk, and Other Dairy Products
Part 1: Dairy Products and How They Work ................................................................ 169
Composition and Why it Matters ............................................................................. 169
Milk ......................................................................................................................... 170
Dry Milk ................................................................................................................... 171
Cream ..................................................................................................................... 171
Buttermilk ................................................................................................................ 172
Sour Cream and Yogurt .......................................................................................... 173
Cream Cheese and Cheese .................................................................................... 173
Evaporated and Condensed Milk ............................................................................ 173
How to Make Homemade Sweetened Condensed Milk ........................................... 174
Part 2: Using Dairy Products ....................................................................................... 175
How to Make Cheesecakes ..................................................................................... 175
How to Make Cream Pies ........................................................................................ 181
Part 3: Recipes—Applying What You Learned ............................................................ 186
Making Cream Pies ................................................................................................. 186
Basic Cream Pie Recipe ...................................................................................... 187
Double Chocolate Cream Pie ............................................................................... 189
Making Cheesecakes .............................................................................................. 192
German Chocolate Cheesecake .......................................................................... 192
Pumpkin Cheesecake in a Gingersnap Crust ....................................................... 194
Chocolate Cheesecake ........................................................................................ 196
Bonus: How to Make Stuffed Bread ......................................................................... 201
Stuffed Bread: Italian Filled Bread (with recipes) ................................................. 202
Stuffed Bread: Homemade Hot Pockets .............................................................. 204
Stuffed Bread: Mushroom Cheddar Oat Bread .................................................... 205
Stuffed Bread: Calzones ...................................................................................... 207
Creamy Ricotta and Sausage Calzone Recipe ..................................................... 209
Stuffed Bread: Pigs in a blanket ........................................................................... 210
Copyright 2005, The Prepared Pantry. All rights reserved. The material herein is published by The Prepared Pantry for the private use of individuals and may not be used for commercial purposes without the express consent of the publisher. The information contained

© 2006-2012 The Prepared Pantry 168
herein is believed accurate but the publisher makes no warranties, express or implied, and the recipient is using this information at his or her own risk.

© 2006-2012 The Prepared Pantry 169
Milk, Cream, Buttermilk, and Other Dairy Products
Chapter Objectives: In this chapter you will:
Understand how the various dairy products work in baking.
Understand the composition of various baking products and how that composition affects your baked goods.
Understand how to use and make whipped cream.
Use cream cheese to make a cheesecake.
Make a cream pie.
Make a whipped cream topping. .
Part 1: Dairy Products and How They Work
We have a lot to cover in this chapter—the entire spectrum of dairy products that we use in our baking: milk, sour cream, yogurt, buttermilk, and more. We will keep the discussion of each brief, highlighting what is important, and hurrying onto the practice lessons where we get to bake some real goodies this week.
You will learn about the composition of each of these dairy products we just mentioned and how to use them in your baking. In the practice lessons, you will learn how to use cream cheese to make a cheese cake, how to make whipped cream, how to use cheese in bread baking, and how to make a cream pie filling. But first, we’ve got to talk about principles and techniques.
Composition and Why it Matters
Dairy products are made of three components: water, fat, and nonfat solids. Each plays a role in a recipe. The water provides required moisture. The fat gives the product richness, a pleasing “mouth feel,” and in some cases—shortening for a more tender product. The nonfat solids include lactose, or milk sugar. Not only does lactose
© 2006-2012 The Prepared Pantry 170
add sweetness to the baked goods, lactose caramelizes at high heat to give products a rich, golden brown hue.
The composition is important in designing recipes or making substitutions in recipes. When making substitutions, acidity and flavor are other considerations.
Milk
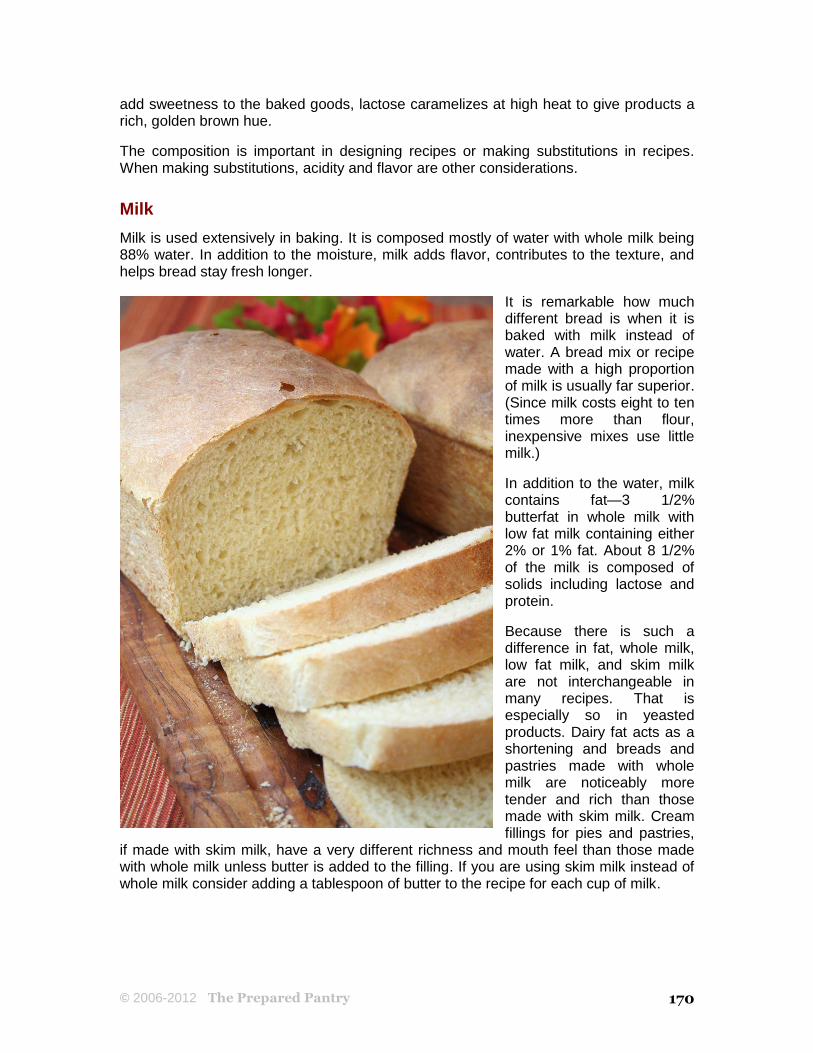
Milk is used extensively in baking. It is composed mostly of water with whole milk being 88% water. In addition to the moisture, milk adds flavor, contributes to the texture, and helps bread stay fresh longer.
It is remarkable how much different bread is when it is baked with milk instead of water. A bread mix or recipe made with a high proportion of milk is usually far superior. (Since milk costs eight to ten times more than flour, inexpensive mixes use little milk.)
In addition to the water, milk contains fat—3 1/2% butterfat in whole milk with low fat milk containing either 2% or 1% fat. About 8 1/2% of the milk is composed of solids including lactose and protein.
Because there is such a difference in fat, whole milk, low fat milk, and skim milk are not interchangeable in many recipes. That is especially so in yeasted products. Dairy fat acts as a shortening and breads and pastries made with whole milk are noticeably more tender and rich than those made with skim milk. Cream fillings for pies and pastries,
if made with skim milk, have a very different richness and mouth feel than those made with whole milk unless butter is added to the filling. If you are using skim milk instead of whole milk consider adding a tablespoon of butter to the recipe for each cup of milk.

© 2006-2012 The Prepared Pantry 171
Dry Milk
Dry milk products substitute wonderfully for liquid milk in baking and they do not have to be reconstituted before use. Simply add the water and milk solids according to the producer’s directions directly to the batter or dough.
You should be aware that there are three kinds of dry milk:
Nonfat dry milk is typically what consumers purchase in stores. It is sometimes referred to as low-heat treated milk and may be mixed as a beverage. Use this in pastries, quick breads, and cakes. Since this is a nonfat product, if you use it in place of whole milk, add butter to the recipe.
High-heat treated dry milk is also a nonfat product but it has been produced at much higher temperatures to destroy certain enzymes naturally found in milk. These enzymes in milk will degrade the gluten structure in bread dough. Because of this, commercial bakeries nearly always use high-heat treated dry milk in their yeasted products.
If you bake bread, consider using high-heat treated dry milk in place of both the nonfat dry milk you buy in the stores and liquid milk.
Whole dry milk includes the fat and is therefore quite perishable. It is not generally available because it will not keep long without refrigeration.
Cream
You can purchase cream in several types with the amount of fat in the composition being the varying characteristic. The most popular cream products follow:
Whipping cream can be purchased in a light whipping cream and a heavy whipping cream. Light whipping cream has a fat content of 30 to 35% while heavy whipping cream has a fat content of 36 to 40%.
The higher the fat content, the richer the baked product is. Also, the higher the fat content, the easier the cream is to whip and the more stable whipped cream produced. When shopping for whipping cream, read the labels to determine which brand has the highest fat content.
© 2006-2012 The Prepared Pantry 172
Ultra-pasteurized whipping cream has a longer shelf life but does not whip as well.
Light or table cream contains from 16 to 22% fat and is not suitable for whipping. It can be used in baking.
Half-and-half has a fat content of 10 to 12%—about three times that of whole milk but only a third of light whipping cream.
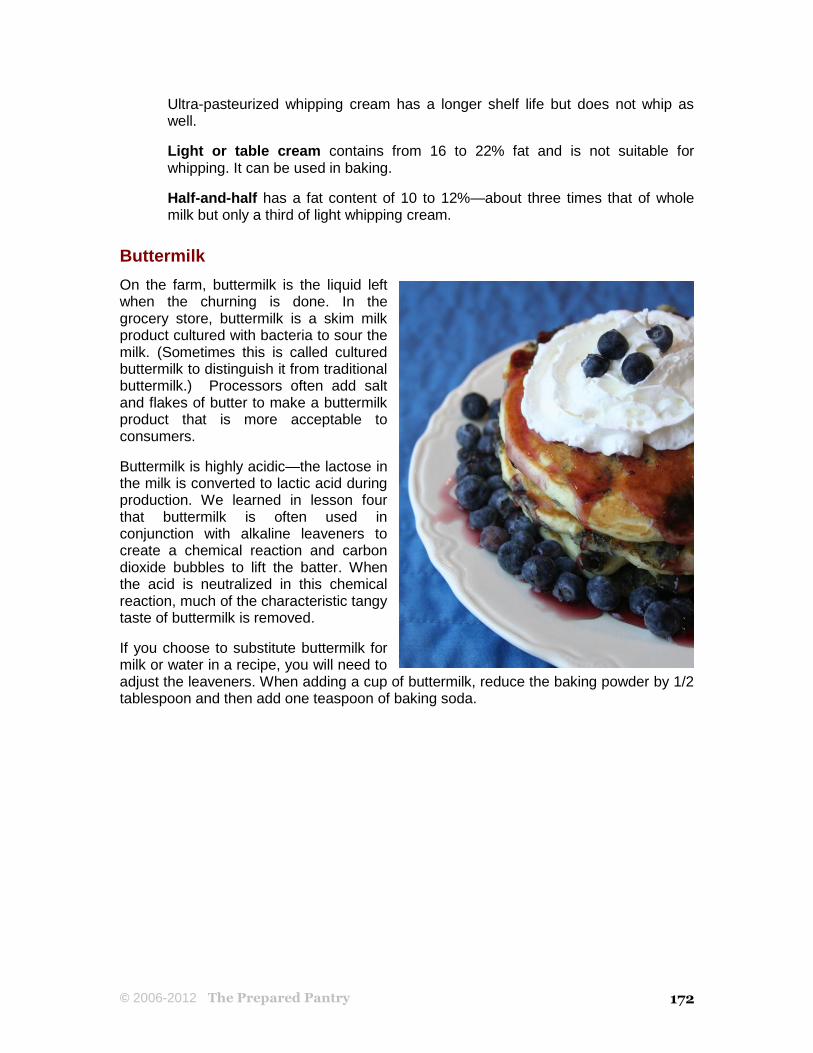
Buttermilk
On the farm, buttermilk is the liquid left when the churning is done. In the grocery store, buttermilk is a skim milk product cultured with bacteria to sour the milk. (Sometimes this is called cultured buttermilk to distinguish it from traditional buttermilk.) Processors often add salt and flakes of butter to make a buttermilk product that is more acceptable to consumers.
Buttermilk is highly acidic—the lactose in the milk is converted to lactic acid during production. We learned in lesson four that buttermilk is often used in conjunction with alkaline leaveners to create a chemical reaction and carbon dioxide bubbles to lift the batter. When the acid is neutralized in this chemical reaction, much of the characteristic tangy taste of buttermilk is removed.
If you choose to substitute buttermilk for milk or water in a recipe, you will need to adjust the leaveners. When adding a cup of buttermilk, reduce the baking powder by 1/2 tablespoon and then add one teaspoon of baking soda.
© 2006-2012 The Prepared Pantry 173
Sour Cream and Yogurt
Sour cream and yogurt are cultured products as is buttermilk. Sour cream has a fat content of about 18%. Bacteria are added to make sour cream thick and slightly tangy.
Yogurt is only occasionally used in baking. It is cultured with different bacteria than sour cream. You can purchase yogurt in either whole or low fat varieties.
Cream Cheese and Cheese
Cream cheese is a soft, unaged cheese with a fat content of 33 to 35%. Neufchatel is a similar cheese that is slightly lower in fat content. Cream cheese is used for cheesecakes and occasionally, cream fillings, but not often otherwise.
We love to use cheese—mozzarella to aged cheddar—in our baking in breads, biscuits, corn breads, and muffins. In addition to flavor, cheeses bring a richness and moisture to baked goods. If you want a pronounced cheese flavor, use a strongly-flavored cheese. A sharp cheddar or Swiss are among our favorites.
Evaporated and Condensed Milk
Evaporated milk can be purchased in either a whole milk or a skim milk. To produce evaporated milk, about 60% of the water is removed and it is then sterilized and canned.
Evaporated milk can be used as a substitute for whole milk by reconstituting the milk with water as directed on the can. Typically, recipes calling for evaporated milk intend for the milk to be used straight from the can without reconstituting. Evaporated milk has a different, somewhat cooked flavor, that you should consider when substituting evaporated milk for whole milk.
Sweetened condensed milk is evaporated milk with a heavy addition of sugar. It is called for in many desserts and has the cooked flavor of evaporated milk. You should not substitute other milk products for sweetened condensed milk.
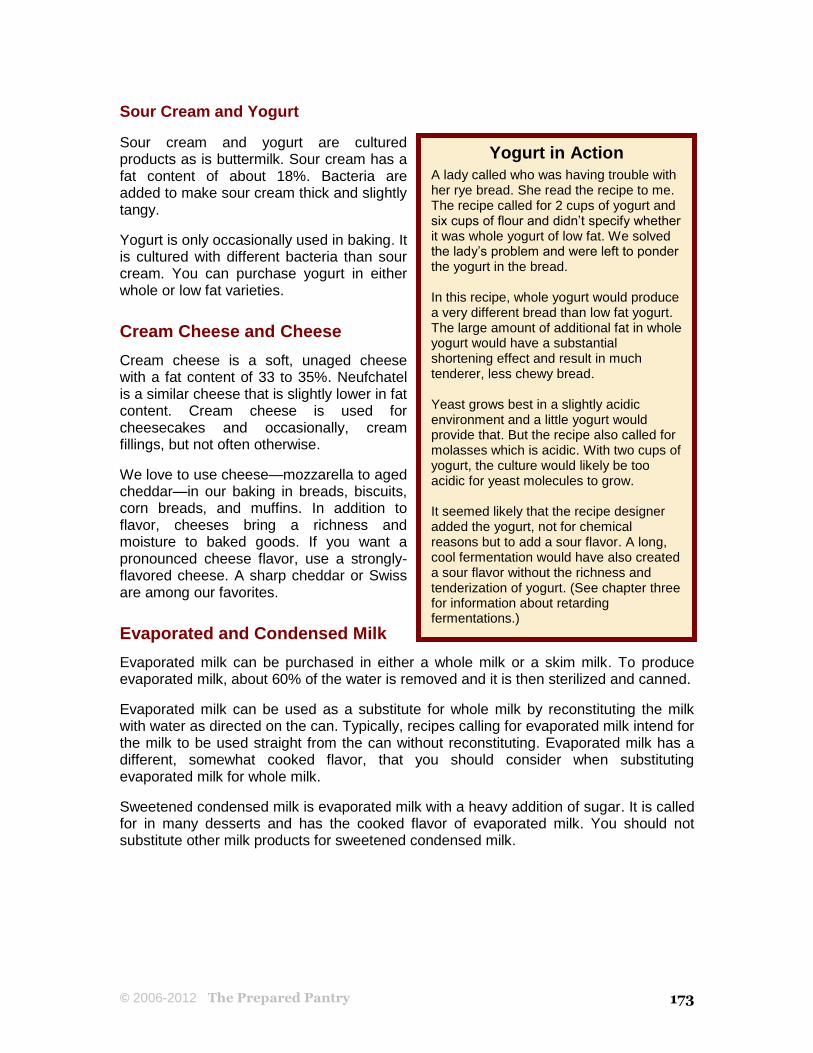
Yogurt in Action
A lady called who was having trouble with her rye bread. She read the recipe to me. The recipe called for 2 cups of yogurt and six cups of flour and didn’t specify whether it was whole yogurt of low fat. We solved the lady’s problem and were left to ponder the yogurt in the bread. In this recipe, whole yogurt would produce a very different bread than low fat yogurt. The large amount of additional fat in whole yogurt would have a substantial shortening effect and result in much tenderer, less chewy bread. Yeast grows best in a slightly acidic environment and a little yogurt would provide that. But the recipe also called for molasses which is acidic. With two cups of yogurt, the culture would likely be too acidic for yeast molecules to grow. It seemed likely that the recipe designer added the yogurt, not for chemical reasons but to add a sour flavor. A long, cool fermentation would have also created a sour flavor without the richness and tenderization of yogurt. (See chapter three for information about retarding fermentations.)

© 2006-2012 The Prepared Pantry 174
How to Make Homemade Sweetened Condensed Milk
What if your recipe calls for sweetened condensed milk and you’re out? You can make your own. Homemade sweetened condensed milk is acceptable whenever called for in a recipe and you can make it for a lot less than you would buy it for. Just follow this recipe:
Yield: The equivalent of one 14-ounce can of sweetened condensed milk.
Ingredients
1/3 cup water 2/3 cup sugar 1 cup dry milk powder 3 tablespoons butter
Directions
1. Heat a bowl of water in the microwave until it is very hot (or use tap water if you can get it steaming hot).
2. Combine the remaining ingredients in a small bowl. Add the hot water and beat with an electric mixer or wire whisk until smooth.
Note: This should be made as you need it and will not store well. One recipe equals one can of store bought sweetened condensed milk.
© 2006-2012 The Prepared Pantry 175
Part 2: Using Dairy Products
How to Make Cheesecakes
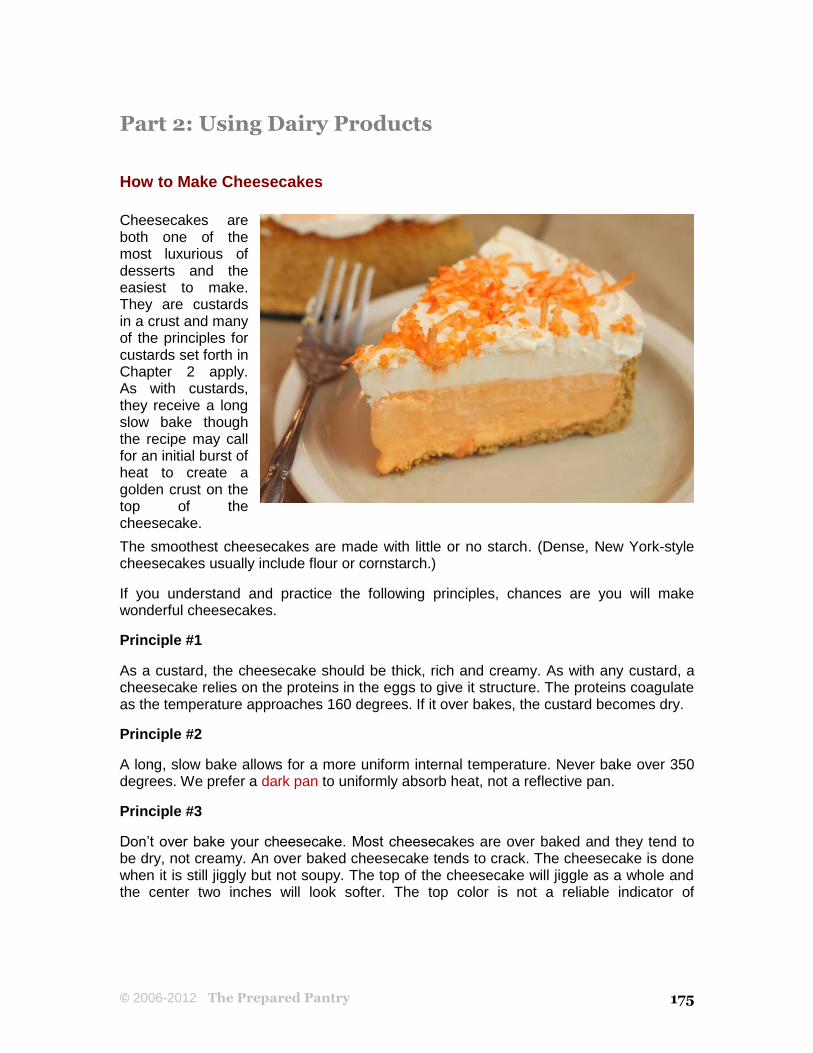
Cheesecakes are both one of the most luxurious of desserts and the easiest to make. They are custards in a crust and many of the principles for custards set forth in Chapter 2 apply. As with custards, they receive a long slow bake though the recipe may call for an initial burst of heat to create a golden crust on the top of the cheesecake.
The smoothest cheesecakes are made with little or no starch. (Dense, New York-style cheesecakes usually include flour or cornstarch.)
If you understand and practice the following principles, chances are you will make wonderful cheesecakes.
Principle #1
As a custard, the cheesecake should be thick, rich and creamy. As with any custard, a cheesecake relies on the proteins in the eggs to give it structure. The proteins coagulate as the temperature approaches 160 degrees. If it over bakes, the custard becomes dry.
Principle #2
A long, slow bake allows for a more uniform internal temperature. Never bake over 350 degrees. We prefer a dark pan to uniformly absorb heat, not a reflective pan.
Principle #3
Don’t over bake your cheesecake. Most cheesecakes are over baked and they tend to be dry, not creamy. An over baked cheesecake tends to crack. The cheesecake is done when it is still jiggly but not soupy. The top of the cheesecake will jiggle as a whole and the center two inches will look softer. The top color is not a reliable indicator of
© 2006-2012 The Prepared Pantry 176
doneness. Do not stick a knife or a toothpick in the center. It is not a reliable test and it may start a crack.
Principle #4
Beat the cream cheese until it is soft and smooth. It’s easier to make a smooth mixture of the cream cheese if you start with softened cheese. Take the cream cheese from the refrigerator at least an hour before mixing. Beat the cheese with the paddle attachment, not the whip.
Principle #5
Mix the ingredients into the cream cheese; don’t whip the ingredients. If too much air is incorporated into the filling, the cheesecake will puff when baked and sink as it cools. When this happens, cracks are likely to develop.
Principle #6
Custards tend to be soft and may weep especially if they are over baked. To give your cheesecake more structure, consider adding one to two tablespoons of cornstarch or flour. For a creamier cheesecake, leave the starch out.
Principle #7
Cheesecakes rely primarily on eggs for the structure. Not only does the egg mixture have to reach 160 to 170 degrees to coagulate but will become dry and tough if baked beyond 185 degrees.
Tips and tricks for springform pans
1. Don't let them leak. If your batter is especially thin or there is a great deal of sugar in your recipe, your pan may leak through the seam along the base of the pan. To protect against a leak, wrap the base of the pan with aluminum foil. Please note that with aluminum foil shielding the heat, you may have to increase your bake time.
2. Let the cake sit in the pan for about five minutes before removing the ring. In a good nonstick or well-greased springform pan, the ring should fall away without needing to free it with a knife or spatula. To protect a nonstick finish, avoid using a metal edge against the finish.
3. If you do need to free the cake from the ring, use a cake or frosting spatula without a sharp edge.
4. Wash your pans with warm, soapy water and a soft cloth. While most pans are dishwasher safe, they take up a lot of room and in our experience, tend not to come clean.
5. Most springform pans are made of lighter gauge metal. Store them carefully where they will not get knocked around and possibly bent.
6. Consider using a silicone springform pan. The silicone pan has a double edge seal so it won’t leak. The nonstick flexible pan peels off easily without destroying the crust, and it lays flat for easy storage.
© 2006-2012 The Prepared Pantry 177
Principle #8
The filling must have enough eggs to set properly. In our experience, one egg per eight-ounce package of cream cheese plus a little milk or cream is about right.
Principle #9
Cheesecakes are easier to remove from a pan after they have cooled slightly, so let the cheesecake cool for ten minutes before attempting to remove it from the pan. If you let the cheesecake cool for any longer than that, it may start to contract and, with the edge stuck to the pan, crack. A nonstick springform pan not only makes the release easier but may help keep the cheesecake from cracking.
Storing Your Cheesecake
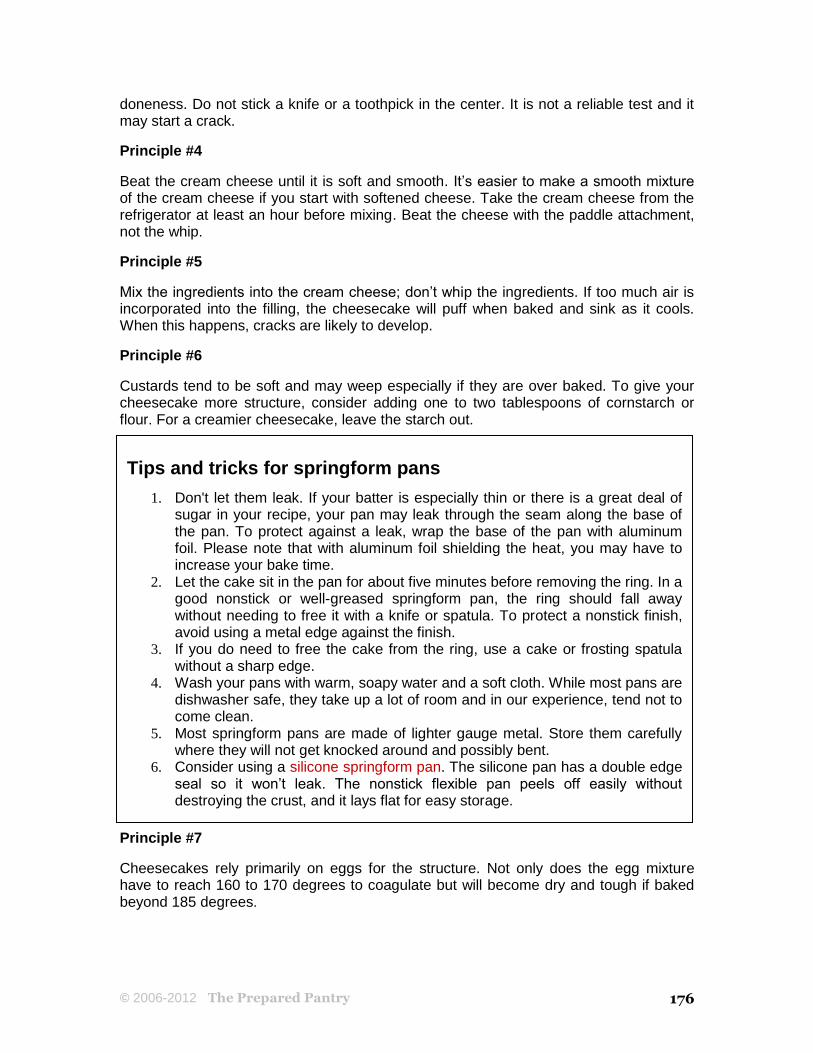
Cheesecakes are so good but so rich. Unless you are baking for a party, there’s likely to be some left over. Here’s what you can do with that too-good-to-waste cheesecake.
To refrigerate your cheesecake:
Wrapped in plastic, your cheesecake will last three days in the refrigerator. If you have an airtight container that you can put it in, it’ll last five days.
To freeze your cheesecake:
Freeze individual slices and then wrap them in foil or plastic and place them in heavy freezer-type plastic bags. Slices will last for three weeks. You can freeze an entire cheesecake and it will last four to six weeks. Always store your frozen cheesecake in the freezer, not in the freezing compartment of your refrigerator where it is not as cold.
To unthaw your cheesecake:
Thaw your cheesecake overnight in the refrigerator. In a rush, individual slices can be thawed on the counter in thirty minutes.
© 2006-2012 The Prepared Pantry 178
Mixing and Matching for Creative Cheesecakes
Cheesecakes consist of three basic parts: the crust, the filling, and the topping. Knowing that, you can mix and match to make wonderful combinations. Using a vanilla filling, consider these combinations:
A cherry vanilla cheesecake with a graham cracker crust
A raspberry vanilla cheesecake with a chocolate crust
A blueberry vanilla cheesecake with a gingersnap crust
A strawberry vanilla cheesecake with a vanilla wafer crust
An apple cinnamon cheesecake with a walnut crust
Of course, cheesecakes don’t have to be made with vanilla filling. Chocolate and pumpkin fillings are favorites. And of course, you can top your cheesecake with whatever you please. Consider the following toppings:
Whipped cream
Flavored whipped cream such as chocolate or strawberry
Chocolate ice cream topping
Caramel ice cream topping
Fruit syrups made by heating jams or jellies
Fruit pie filling
Fresh fruits
Fruit compotes made with fresh or frozen fruit
© 2006-2012 The Prepared Pantry 179
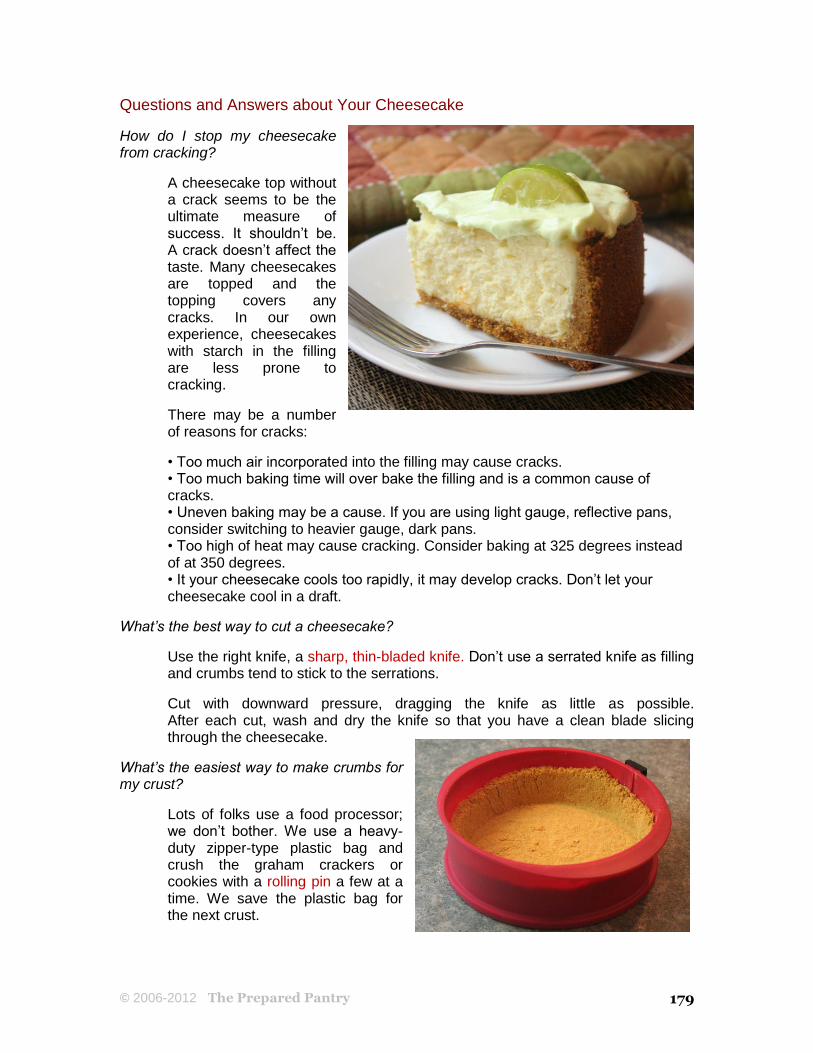
Questions and Answers about Your Cheesecake
How do I stop my cheesecake from cracking?
A cheesecake top without a crack seems to be the ultimate measure of success. It shouldn’t be. A crack doesn’t affect the taste. Many cheesecakes are topped and the topping covers any cracks. In our own experience, cheesecakes with starch in the filling are less prone to cracking.
There may be a number of reasons for cracks:
• Too much air incorporated into the filling may cause cracks. • Too much baking time will over bake the filling and is a common cause of cracks. • Uneven baking may be a cause. If you are using light gauge, reflective pans, consider switching to heavier gauge, dark pans. • Too high of heat may cause cracking. Consider baking at 325 degrees instead of at 350 degrees. • It your cheesecake cools too rapidly, it may develop cracks. Don’t let your cheesecake cool in a draft.
What’s the best way to cut a cheesecake?
Use the right knife, a sharp, thin-bladed knife. Don’t use a serrated knife as filling and crumbs tend to stick to the serrations.
Cut with downward pressure, dragging the knife as little as possible. After each cut, wash and dry the knife so that you have a clean blade slicing through the cheesecake.
What’s the easiest way to make crumbs for my crust?
Lots of folks use a food processor; we don’t bother. We use a heavy-duty zipper-type plastic bag and crush the graham crackers or cookies with a rolling pin a few at a time. We save the plastic bag for the next crust.

© 2006-2012 The Prepared Pantry 180
Is there an easy way to form the crust?
Yes. Use a straight-sided drinking glass with a smooth or nearly smooth base. By pressing the base of the glass into the crumbs, you can make a nice uniform bottom crust. By pressing the side of the glass against the wall of the pan with a slight rolling action, you can make a wonderful side crust.
My slices seem to stick to the base and it’s hard to remove them. Is there an easy way to neatly remove my slices?
Yes. Take a wet dish towel and heat it in the microwave. Set the base with the cheesecake on the hot towel. The hot towel will soften the butter in the crust and allow the slices to slide off without sticking. It helps to have a springform pan with a smooth base.

© 2006-2012 The Prepared Pantry 181
How to Make Cream Pies
Cool, creamy pies go well with summer. They are easy to make, don’t take a lot of baking, and are often smooth and light. Can you think of anything that you would rather take to a family reunion than a pair of cream pies? Everyone loves them.
What’s the difference between a custard pie and cream pie? A custard pie is baked in a shell. A cream pie is cooked on the stovetop and then placed in a baked shell. The trick in a cream pie is to get the filling thick enough that it holds its shape when cut. That is usually done with a combination of starch, which gelatinizes when heated, and egg proteins, which coagulate when heated.
Pastry creams, used to fill pastries, are made with the same methods. You can use pie filling recipes to make pastry creams although pastry creams do not need to be as thick for pie fillings. For a softer cream, just reduce the starch in the recipe.
In this section, we will go through the steps for making cream pies. Since cream pies are made with and without meringue toppings, we will include directions for meringue toppings.
Step 1:
Cream pies are made in pre-baked single pie shells. Make the pastry dough from a mix or the recipe of your choice. Roll the dough to a thickness of about 1/8-inch thick. You can use a toothpick to gauge how thick the dough is in various spots.
Place the dough in the pie pan. For cream pies, we prefer to use a dark, metal pan to get a crisper crust than from a light-colored or glass pan. There are several ways to place the dough in the pan without tearing it. A simple way is to fold the dough in half and then in quarters, place the folded dough in the pan with the point in the center of the pan, and then unfold the dough. The disadvantage of this method is that the crease marks will remain.
The dough can also be placed using the rolling pin method. Roll the dough partially around the rolling pin, lift the dough and move it to the pie pan, then unroll the dough (it’s easier than it sounds).
© 2006-2012 The Prepared Pantry 182
Trim the dough about 1 inch beyond the edges of the pie pan. Turn the edges under and flute the edges for an attractive finish.
For cream pies, use a fork to prick the surface of the pie crust. The holes will allow steam to escape as the shell bakes instead of creating bubbles.
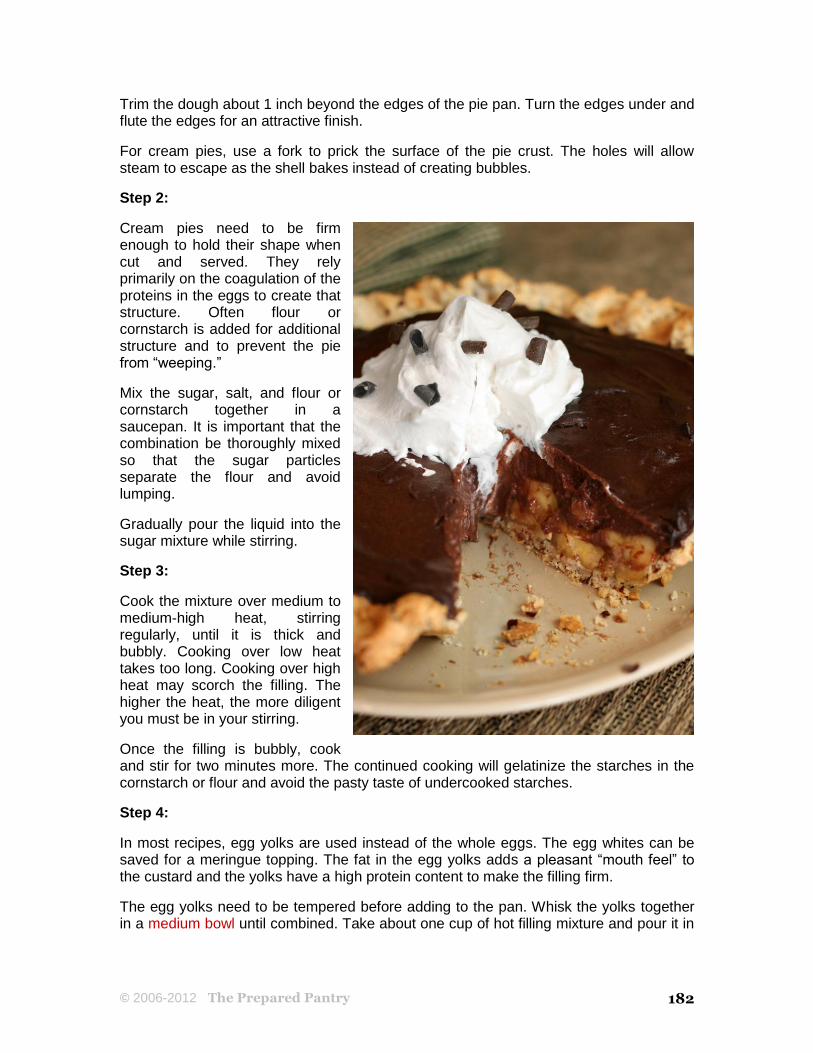
Step 2:
Cream pies need to be firm enough to hold their shape when cut and served. They rely primarily on the coagulation of the proteins in the eggs to create that structure. Often flour or cornstarch is added for additional structure and to prevent the pie from “weeping.”
Mix the sugar, salt, and flour or cornstarch together in a saucepan. It is important that the combination be thoroughly mixed so that the sugar particles separate the flour and avoid lumping.
Gradually pour the liquid into the sugar mixture while stirring.
Step 3:
Cook the mixture over medium to medium-high heat, stirring regularly, until it is thick and bubbly. Cooking over low heat takes too long. Cooking over high heat may scorch the filling. The higher the heat, the more diligent you must be in your stirring.
Once the filling is bubbly, cook and stir for two minutes more. The continued cooking will gelatinize the starches in the cornstarch or flour and avoid the pasty taste of undercooked starches.
Step 4:
In most recipes, egg yolks are used instead of the whole eggs. The egg whites can be saved for a meringue topping. The fat in the egg yolks adds a pleasant “mouth feel” to the custard and the yolks have a high protein content to make the filling firm.
The egg yolks need to be tempered before adding to the pan. Whisk the yolks together in a medium bowl until combined. Take about one cup of hot filling mixture and pour it in

© 2006-2012 The Prepared Pantry 183
a stream into the egg yolks while stirring constantly. This will warm the egg yolks so that they will not curdle and lump as they are poured into the hot mixture.
Pour the egg yolk mixture into the rest of the hot filling while stirring constantly.
Immediately return the saucepan to the heat and cook for two more minutes. This cooking will cause the proteins in the egg yolks to coagulate—they coagulate at about 160 degrees—and create a firm pie filling. Do not overcook. Overcooking will weaken the protein structure.
Step 5:
Preheat the oven to 350 degrees.
Stir the butter into the hot filling along with any extract that the recipe may call for. Use a rubber or silicone spatula to scrape the pie filling into the cooled pastry shell.
If you are not topping the pie with meringue, cover the filling with plastic pressed against the surface. This will keep the filling from developing a tough skin. If you are going to top the pie with meringue, make it now.
Step 6: (Optional Meringue Topping)
Place the egg whites in a medium bowl, one with deep, straight sides works best. Four large egg whites will make enough meringue to cover a nine-inch pie. For a larger, more generous topping, use five or six egg whites.
Add 1 to 1 1/2 teaspoons vanilla and 1/2 teaspoon cream of tartar. Do not add the sugar yet. Beat for about 1 1/2 minutes or until soft peaks form. Do not over-beat.
Add 1/2 cup granulated sugar gradually to the mixture as you beat. Beat for another four minutes or until stiff peaks form. Rub a little of the meringue between your fingers to make sure that the sugar is dissolved. You should not feel any grains of sugar between your fingers.
With a spatula, spread the meringue topping on the pie. Push the meringue against the crust to seal the edges. (If the meringue is not anchored on the crust, it will tend to pull away from the crust in baking.)
Bake the pie for 12 to 16 minutes or until the topping is a golden brown.
Store the pie in the refrigerator. To cut the pie, first dip the knife in cold water; the meringue will not stick to a wet knife.

© 2006-2012 The Prepared Pantry 184
How to Make Whipped Cream
Whipped cream is the coup de grace of so many desserts, from pies to cakes to pastries. It should be silky smooth and luxurious and may be flavored with extracts, syrups, caramel, or chocolate.
It’s easy to whip cream. The following tips and techniques will assure the best whipped cream.
Principle #1:
Cream whips better when it is ice cold. Not only use very cold cream but chill the bowl and beaters before starting. A ceramic, glass, or stainless steel bowl works better than plastic bowls for beating cream.
Principle #2:
Use powdered sugar instead of granulated sugar for sweetening. The finer powdered sugar dissolves more readily and the small amount of cornstarch gives the cream a little more body.
Principle #3:
Do not use very fresh cream. Cream whips better if it is a couple days old. Ultra-pasteurized cream does not whip to the same volume as regularly pasteurized cream.
Principle #4:
Beat at medium speed with an electric mixer or use a wire whisk. When the cream forms soft peaks when you lift the whisk, it is perfect for serving alongside a dessert. Beat to stiffer peaks for folding into another mixture or for garnishes.
© 2006-2012 The Prepared Pantry 185
Principle #5:
Do not over whip your cream. As cream is over whipped, it separates into fat globules and liquid, eventually turning into butter. Over whipped cream looks rough and craggy and does not have the volume of perfectly whipped cream.
Principle #6:
Add other ingredients such as syrups, extracts, and fruit at the end of the whipping.
Principle #7:
Extra cream should be stored in the refrigerator. Dollops of cream can be frozen on waxed paper.
© 2006-2012 The Prepared Pantry 186
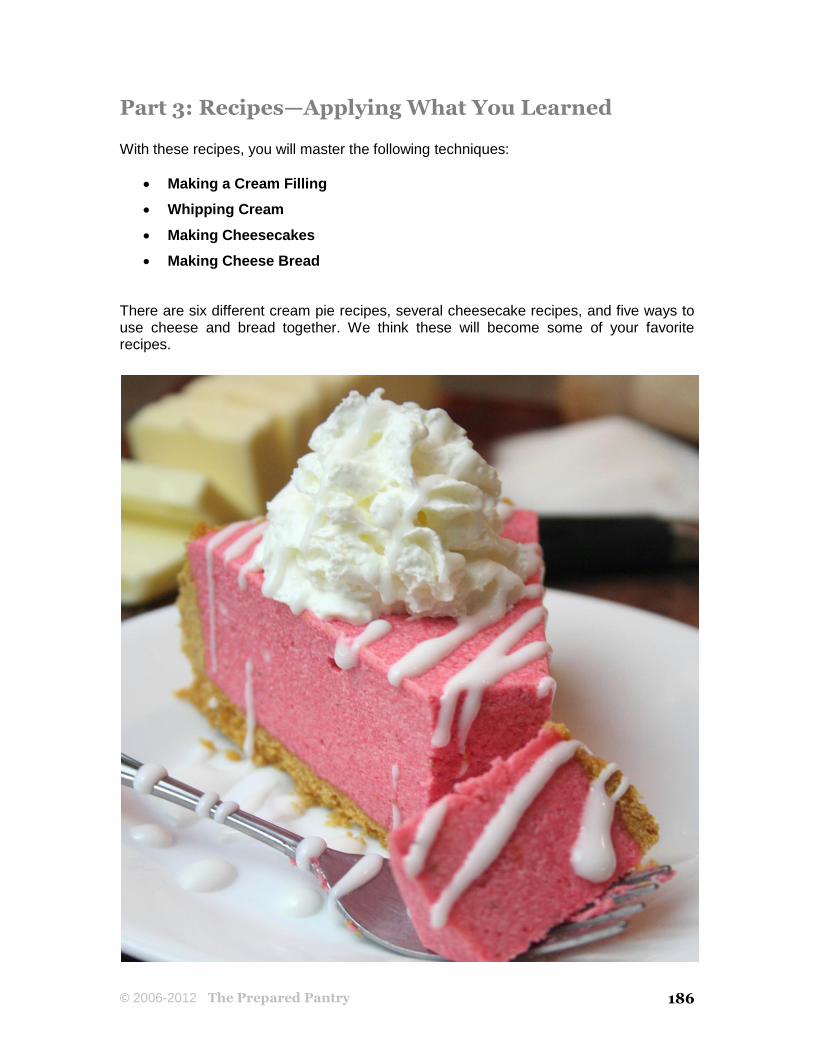
Part 3: Recipes—Applying What You Learned With these recipes, you will master the following techniques:
Making a Cream Filling
Whipping Cream
Making Cheesecakes
Making Cheese Bread
There are six different cream pie recipes, several cheesecake recipes, and five ways to use cheese and bread together. We think these will become some of your favorite recipes.

© 2006-2012 The Prepared Pantry 187
Making Cream Pies
In this part, we will explore some very good cream pies. The first is a basic cream pie recipe that you can use for a variety of pies from chocolate to banana cream.
Basic Cream Pie Recipe
It's handy to have a basic cream pie recipe available. From it you can make vanilla, chocolate, coconut, banana cream pie, and more.
We've used this recipe for over 20 years to make everything from coconut cream to strawberry cream pies. We'll give you the basic cream pie recipe and then tell you how to make other scrumptious pies with the basic recipe.
Ingredients
2/3 cup sugar 4 tablespoons flour 1 1/2 tablespoons cornstarch 1/4 teaspoons salt 2 cups milk 4 large egg yolks 1 teaspoon vanilla 2 tablespoon butter 1 baked nine-inch pie shell 1 cup whipped cream for topping sugar for whipped cream (3 tablespoons or to taste) 1/2 teaspoon vanilla extract for whipped cream
Directions
1. Place the dry ingredients in a saucepan.
2. Whisk the egg yolks with the milk. Add the egg mixture to the dry ingredients in the saucepan, stirring after each addition.
3. Heat over low heat, stirring regularly, until the mixture is thick and just begins to bubble.
4. Add the butter and vanilla and stir.
5. Let the mixture cool for fifteen minutes and then remove the filling to the baked pie shell. Chill for several hours.

© 2006-2012 The Prepared Pantry 188
Banana Cream Pie
Use the basic cream pie recipe. Cover the bottom of the pie shell with sliced ripe bananas. Pour the cream filling over the bananas.
Chocolate Cream Pie
Use the basic cream pie recipe. Add one cup semi-sweet chocolate chips to the mixture when you begin to heat the filling.
Double-Decker Cherry Cream Pie
Use the basic cream pie recipe. Spread a can of cherry pie filling over the vanilla cream filling after the pie has cooled.
Coconut Cream Pie
Use the basic cream pie recipe. If you have coconut flavor, substitute the coconut for vanilla in the base recipe.
Toast one cup of sweetened, flaked coconut. Mix one half cup into the filling just before adding the filling to the pie shell. Sprinkle the other one half cup over the whipped cream topping.
© 2006-2012 The Prepared Pantry 189
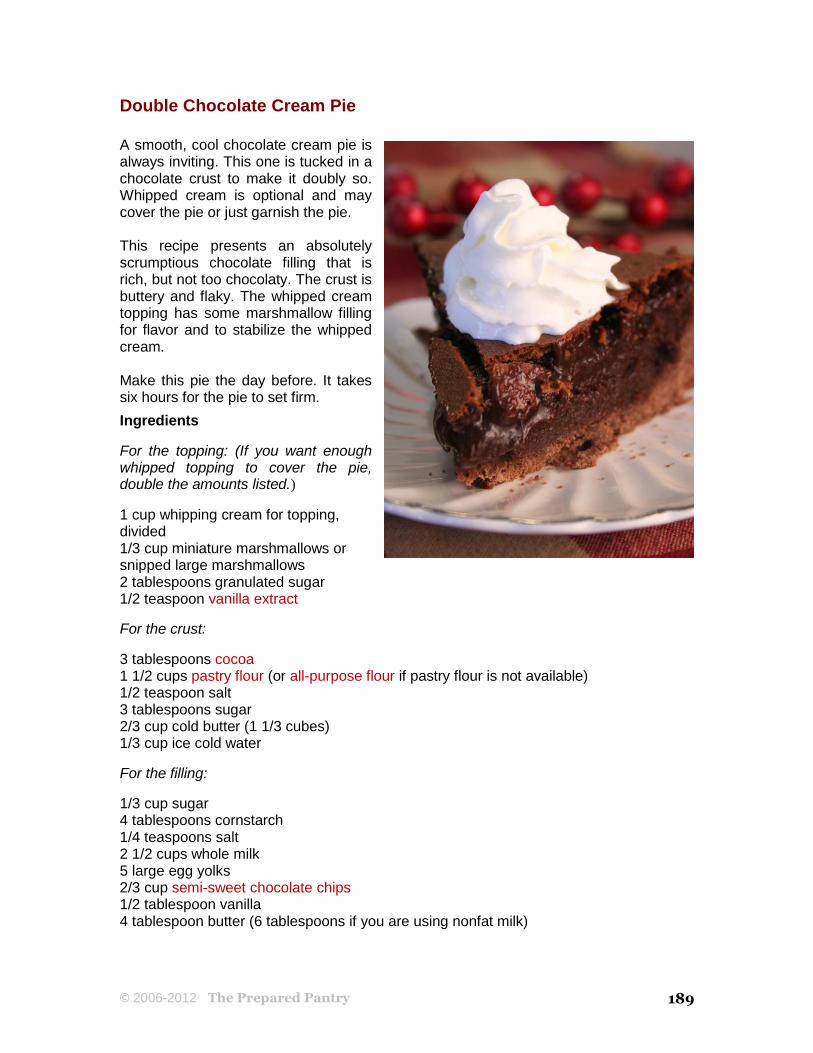
Double Chocolate Cream Pie
A smooth, cool chocolate cream pie is always inviting. This one is tucked in a chocolate crust to make it doubly so. Whipped cream is optional and may cover the pie or just garnish the pie. This recipe presents an absolutely scrumptious chocolate filling that is rich, but not too chocolaty. The crust is buttery and flaky. The whipped cream topping has some marshmallow filling for flavor and to stabilize the whipped cream. Make this pie the day before. It takes six hours for the pie to set firm.
Ingredients
For the topping: (If you want enough whipped topping to cover the pie, double the amounts listed.)
1 cup whipping cream for topping, divided 1/3 cup miniature marshmallows or snipped large marshmallows 2 tablespoons granulated sugar 1/2 teaspoon vanilla extract
For the crust:
3 tablespoons cocoa 1 1/2 cups pastry flour (or all-purpose flour if pastry flour is not available) 1/2 teaspoon salt 3 tablespoons sugar 2/3 cup cold butter (1 1/3 cubes) 1/3 cup ice cold water
For the filling:
1/3 cup sugar 4 tablespoons cornstarch 1/4 teaspoons salt 2 1/2 cups whole milk 5 large egg yolks 2/3 cup semi-sweet chocolate chips 1/2 tablespoon vanilla 4 tablespoon butter (6 tablespoons if you are using nonfat milk)
© 2006-2012 The Prepared Pantry 190
Directions
For the topping
1. Place 1/4 cup of the whipping cream in a small saucepan. Add the marshmallows and heat, stirring often, until the marshmallows are melted.
2. Pour the marshmallow mixture into a medium glass, ceramic, or steel bowl suitable for whipping the cream. Add the remainder of the whipping cream and refrigerate until well-chilled. Chill the mixer attachments that you will use for whipping.
3. To top the pie, whip the cream at medium speed until soft peaks form. Add the sugar and vanilla and continue beating until firm peaks form. Spread the topping on the pie as desired.
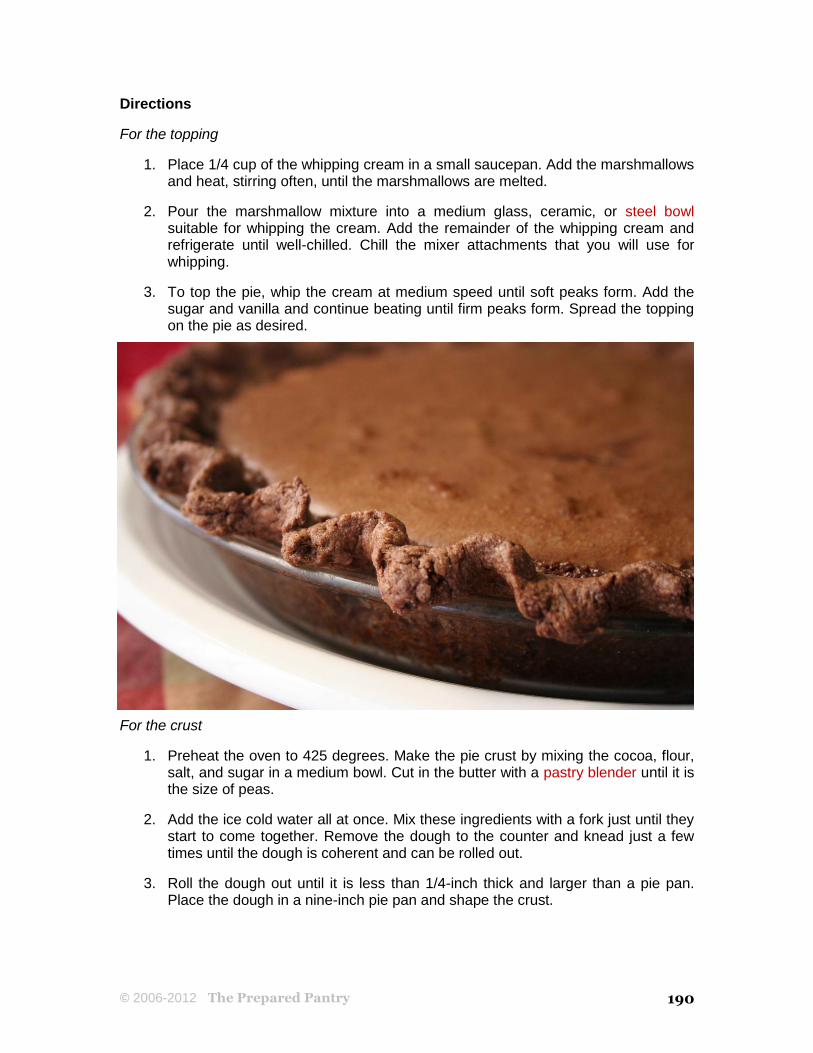
For the crust
1. Preheat the oven to 425 degrees. Make the pie crust by mixing the cocoa, flour, salt, and sugar in a medium bowl. Cut in the butter with a pastry blender until it is the size of peas.
2. Add the ice cold water all at once. Mix these ingredients with a fork just until they start to come together. Remove the dough to the counter and knead just a few times until the dough is coherent and can be rolled out.
3. Roll the dough out until it is less than 1/4-inch thick and larger than a pie pan. Place the dough in a nine-inch pie pan and shape the crust.
© 2006-2012 The Prepared Pantry 191
4. Fill the pie with pie weights and bake the shell for 8 minutes at 450 degrees then reduce the heat to 350 degrees and bake for another 25 minutes. (Baking times will vary depending on the type of pie weights that you use. See “How to use pie weights” below.)
For the filling
1. Mix the sugar, cornstarch, and salt in a medium sauce pan. Add the milk and egg yolks to the pan and. Stir the contents until smooth.
2. Heat over medium heat, stirring frequently, until the contents are bubbly and thick. Cook for another 30 seconds or so, stirring constantly.
3. Remove the pan from the stove and add the vanilla and butter. Set the filling aside to cool for fifteen minutes.
4. Pour the filling into the baked pie crust and smooth top. To prevent a crust on the top of the filling, cover the pie with plastic wrap and press the plastic against the filling.
5. Refrigerate the pie for at least six hours to set the filling,
Baker’s Note: Make certain that the filling is cooked enough. Amylose is the primary thickener in starch. Eggs contain enzymes that will attack and destroy amylose. This enzyme in eggs is destroyed with high heat, nearly boiling. If this enzyme is not destroyed, the pie that looks perfect this evening will be a runny mess in the morning.
How to use pie weights
Pie crusts are made with water or milk and then baked. In the hot oven, the liquid turns to steam and bubbles form in the crust. Where the bubbles collapse, the pie filling ends up leaking through the crust. One way to avoid bubbles is to prick the crust with the tines of a fork to vent the steam. However, this is often only partially effective. There is a better way—pie weights.
Over the years, we have used rice or beans for pie weights to stop bubbles and cracks in our pre-baked shells. However, the beans act as a heat sink and we're always guessing when the bottom crust is done. Recently, we’ve tried out a few other weights and found them immensely useful. For instance, the pie weight chain won't interfere with the crust baking, it’s easy to remove, and it’s dishwasher safe. Ceramic weights are easy too—just cover your unbaked shell with aluminum foil, wax paper, or cooking paper and fill with the pie weights before baking to prevent uneven rising. Remove weights after baking, wash, and store them in their container for reuse.

© 2006-2012 The Prepared Pantry 192
Making Cheesecakes
We debated on whether to put these recipes in the dairy section or the egg section of the book. In the end, we decided that it didn’t matter since it relies on both dairy and eggs. A cheesecake is really a type of custard. It relies primarily on the coagulation of egg proteins to set the batter and secondarily, on the starches in any added flour. The cream cheese in the batter makes cheesecakes rich and decadent.
German Chocolate Cheesecake
This spectacular-looking dessert is really an everyday cheesecake dressed up with caramel and chocolate topping sauces and a sprinkle of walnuts. But it makes a splashing presentation that will impress your family and friends. Though this cheesecake may look complicated, it is an easy recipe to put together. You can make the caramel topping from melted caramels but caramel ice cream topping works just as well and saves a little time. This recipe can be made a day or two in advance of the dinner.
Ingredients
For the crust:
2 cups chocolate graham cracker crumbs (about two inner packages of graham crackers). Chocolate cookie crumbs may be substituted. 6 tablespoons butter, melted
For the filling:
2 1/2 eight-ounce packages of cream cheese 1 cup granulated sugar 2 tablespoons all-purpose flour 1/4 teaspoon salt 3 large eggs 1 teaspoon vanilla 2 tablespoons milk

© 2006-2012 The Prepared Pantry 193
For the toppings:
1 cup chopped pecans or walnuts
For the chocolate topping, combine four ounces of sweet German chocolate with two tablespoons whipping cream and one tablespoon butter. Melt in a small saucepan and stir until smooth.
For the caramel topping, melt 12 caramels with 1/3 cup cream in a small saucepan, stirring until smooth. Or use ice cream topping.
Directions
Preheat the oven to 450 degrees.
1. In a nine-inch springform pan, mix the cracker crumbs and the melted butter. Press the crumb mixture into a crust across the bottom and about one inch up the sides. Bake the crust for eight minutes.
2. In a large bowl, cream the cream cheese with the sugar. Add the flour and salt. Add the eggs, vanilla, and milk all at once. Mix until just combined, scraping down the sides of the bowl. Pour the filling mix into the crust.
3. Bake for ten minutes at 450 degrees. Lower the temperature to 200 degrees and bake for an additional 35 to 40 minutes or until the cheesecake filling is set.
4. After the cheesecake has cooled for ten minutes, with a sharp knife, loosen the edges of the cheesecake from the pan so that the cake will pull away from the pan as it cools. Remove the rim of the pan after it has cooled for about forty-five minutes.
5. Drizzle the cheesecake with caramel and then with chocolate. Sprinkle nuts on the cake. Refrigerate until completely cool before serving.
© 2006-2012 The Prepared Pantry 194
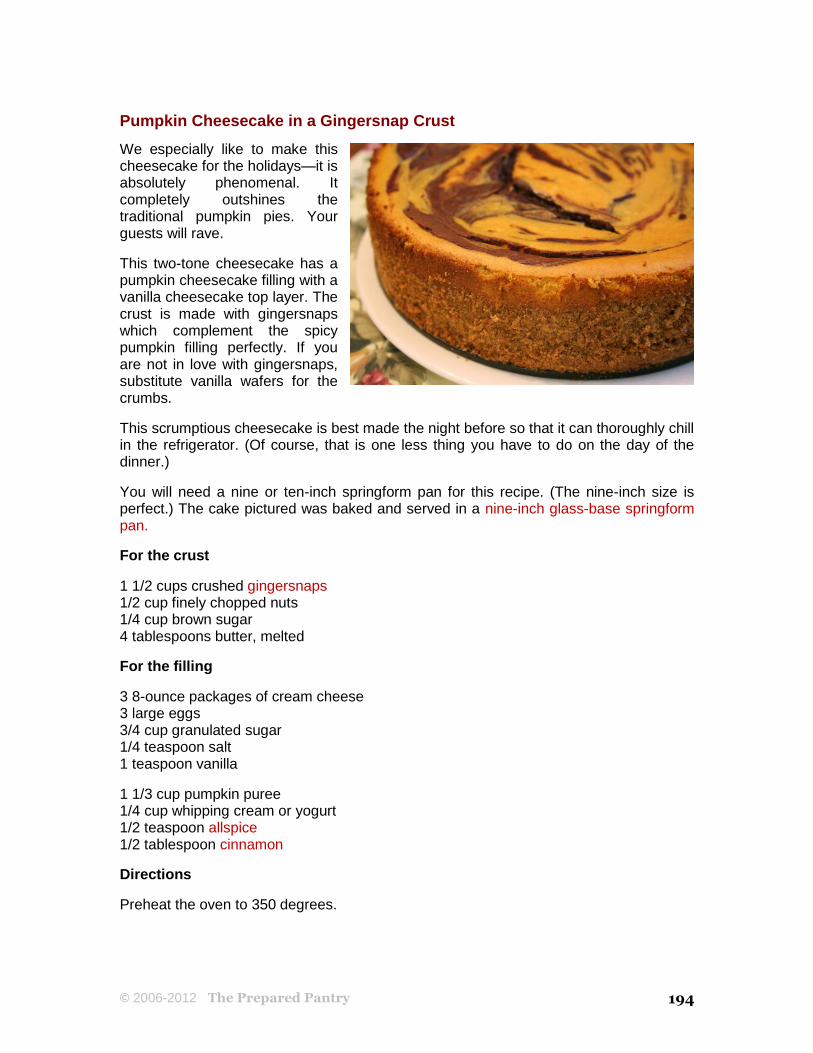
Pumpkin Cheesecake in a Gingersnap Crust
We especially like to make this cheesecake for the holidays—it is absolutely phenomenal. It completely outshines the traditional pumpkin pies. Your guests will rave.
This two-tone cheesecake has a pumpkin cheesecake filling with a vanilla cheesecake top layer. The crust is made with gingersnaps which complement the spicy pumpkin filling perfectly. If you are not in love with gingersnaps, substitute vanilla wafers for the crumbs.
This scrumptious cheesecake is best made the night before so that it can thoroughly chill in the refrigerator. (Of course, that is one less thing you have to do on the day of the dinner.)
You will need a nine or ten-inch springform pan for this recipe. (The nine-inch size is perfect.) The cake pictured was baked and served in a nine-inch glass-base springform pan.
For the crust
1 1/2 cups crushed gingersnaps 1/2 cup finely chopped nuts 1/4 cup brown sugar 4 tablespoons butter, melted
For the filling
3 8-ounce packages of cream cheese 3 large eggs 3/4 cup granulated sugar 1/4 teaspoon salt 1 teaspoon vanilla
1 1/3 cup pumpkin puree 1/4 cup whipping cream or yogurt 1/2 teaspoon allspice 1/2 tablespoon cinnamon
Directions
Preheat the oven to 350 degrees.

© 2006-2012 The Prepared Pantry 195
1. Crush the gingersnaps. Mix the crumbs with the nuts, brown sugar, and melted butter in a nine or ten-inch springform pan. Press the mixture into a crust across the bottom of the pan and up the sides. Put the crust in the refrigerator to set up while you prepare the filling.
2. Mix the cream cheese, eggs, granulated sugar, salt, and vanilla together with your stand-type mixer using the whisk attachment. Beat until smooth and fluffy, six to eight minutes. Set about 1 1/2 cups of the mixture aside for the topping.
3. To the remaining filling, add the pumpkin, whipping cream or yogurt, and spices. Beat until well-mixed. Pour the filling into the prepared crust. Carefully spoon the set-aside topping over the top of the pumpkin-cheesecake filling.
4. Bake for 70 to 80 minutes or until the top starts to brown and the center of the cake is just barely jiggly.
5. Let the cake cool in the pan on a wire rack for ten minutes. Run a knife around the edge of the pan to loosen. Remove the ring and let the cheesecake cool completely. Refrigerate for several hours before serving.
© 2006-2012 The Prepared Pantry 196
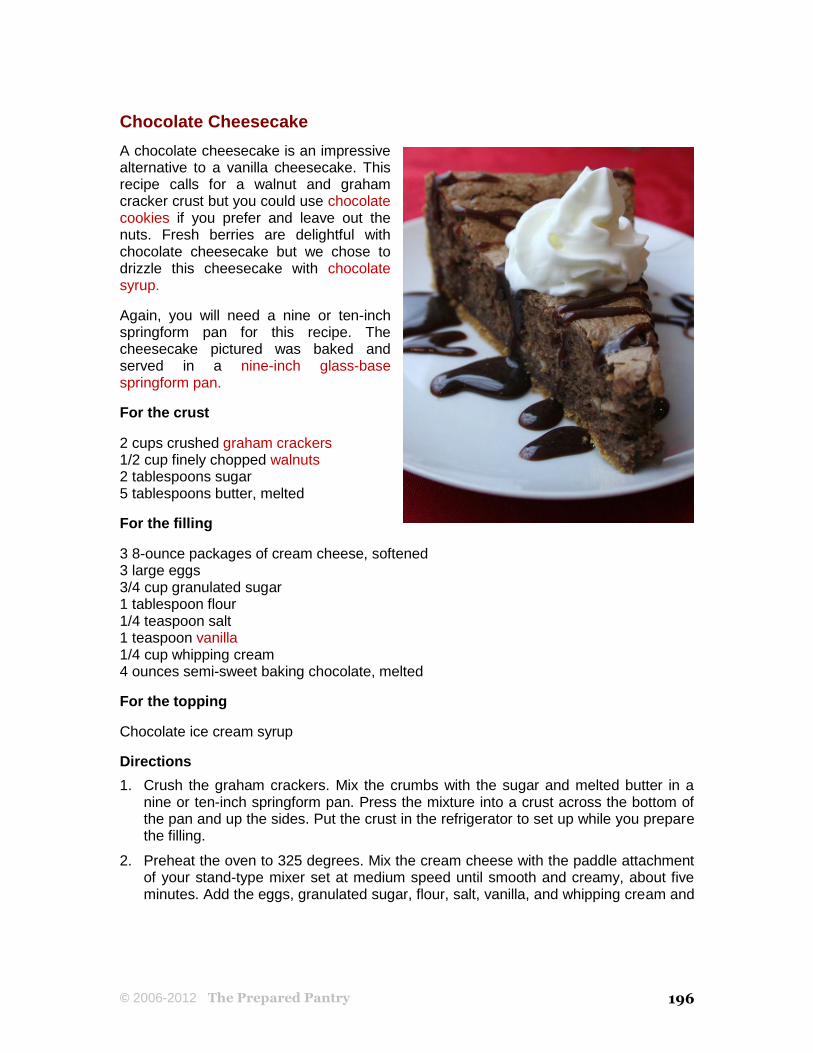
Chocolate Cheesecake
A chocolate cheesecake is an impressive alternative to a vanilla cheesecake. This recipe calls for a walnut and graham cracker crust but you could use chocolate cookies if you prefer and leave out the nuts. Fresh berries are delightful with chocolate cheesecake but we chose to drizzle this cheesecake with chocolate syrup.
Again, you will need a nine or ten-inch springform pan for this recipe. The cheesecake pictured was baked and served in a nine-inch glass-base springform pan.
For the crust
2 cups crushed graham crackers 1/2 cup finely chopped walnuts 2 tablespoons sugar 5 tablespoons butter, melted
For the filling
3 8-ounce packages of cream cheese, softened 3 large eggs 3/4 cup granulated sugar 1 tablespoon flour 1/4 teaspoon salt 1 teaspoon vanilla 1/4 cup whipping cream 4 ounces semi-sweet baking chocolate, melted
For the topping
Chocolate ice cream syrup
Directions
1. Crush the graham crackers. Mix the crumbs with the sugar and melted butter in a nine or ten-inch springform pan. Press the mixture into a crust across the bottom of the pan and up the sides. Put the crust in the refrigerator to set up while you prepare the filling.
2. Preheat the oven to 325 degrees. Mix the cream cheese with the paddle attachment of your stand-type mixer set at medium speed until smooth and creamy, about five minutes. Add the eggs, granulated sugar, flour, salt, vanilla, and whipping cream and

© 2006-2012 The Prepared Pantry 197
gently cream together until smooth. Do not over beat. Too much air in the filling will cause the cake to sink and crack.
3. With your mixer on the low setting, drizzle in the melted chocolate and mix until combined. (If your filling is too cold, some of the chocolate may set up, leaving chocolate flecks in the filling. That’s okay; the cheesecake will not be compromised and the flecks are actually quite attractive.)
4. Poor the cream cheese filling into the crust. Bake for 40 to 50 minutes or until the top starts to turn golden and the center of the cake is just barely jiggly. Because it is not as thick, a ten-inch cheesecake will bake more quickly than a nine.
5. Let the cake cool in the pan on a wire rack for ten minutes. Run a knife around the edge of the pan to loosen. Remove the ring and let the cheesecake cool completely. Refrigerate for several hours.
6. Prior to serving, drizzle the cheesecake with chocolate syrup.
© 2006-2012 The Prepared Pantry 198
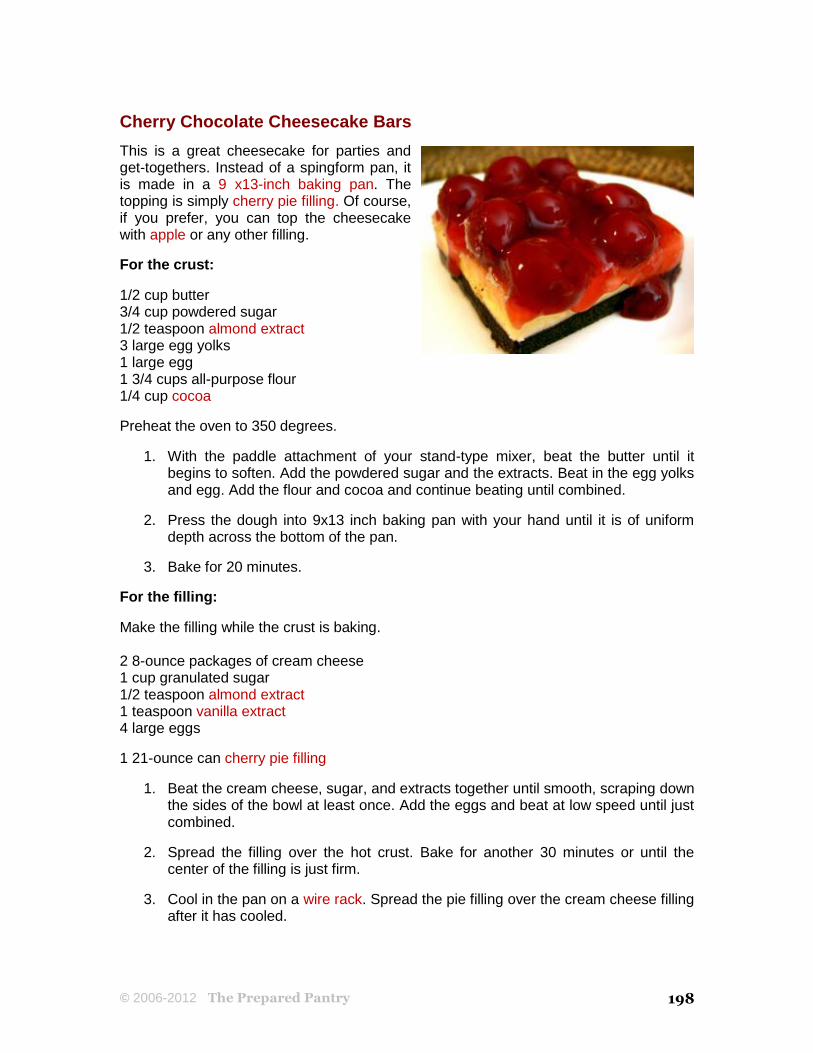
Cherry Chocolate Cheesecake Bars
This is a great cheesecake for parties and get-togethers. Instead of a spingform pan, it is made in a 9 x13-inch baking pan. The topping is simply cherry pie filling. Of course, if you prefer, you can top the cheesecake with apple or any other filling.
For the crust:
1/2 cup butter 3/4 cup powdered sugar 1/2 teaspoon almond extract 3 large egg yolks 1 large egg 1 3/4 cups all-purpose flour 1/4 cup cocoa
Preheat the oven to 350 degrees.
1. With the paddle attachment of your stand-type mixer, beat the butter until it begins to soften. Add the powdered sugar and the extracts. Beat in the egg yolks and egg. Add the flour and cocoa and continue beating until combined.
2. Press the dough into 9x13 inch baking pan with your hand until it is of uniform depth across the bottom of the pan.
3. Bake for 20 minutes.
For the filling:
Make the filling while the crust is baking. 2 8-ounce packages of cream cheese 1 cup granulated sugar 1/2 teaspoon almond extract 1 teaspoon vanilla extract 4 large eggs
1 21-ounce can cherry pie filling
1. Beat the cream cheese, sugar, and extracts together until smooth, scraping down the sides of the bowl at least once. Add the eggs and beat at low speed until just combined.
2. Spread the filling over the hot crust. Bake for another 30 minutes or until the center of the filling is just firm.
3. Cool in the pan on a wire rack. Spread the pie filling over the cream cheese filling after it has cooled.

© 2006-2012 The Prepared Pantry 199
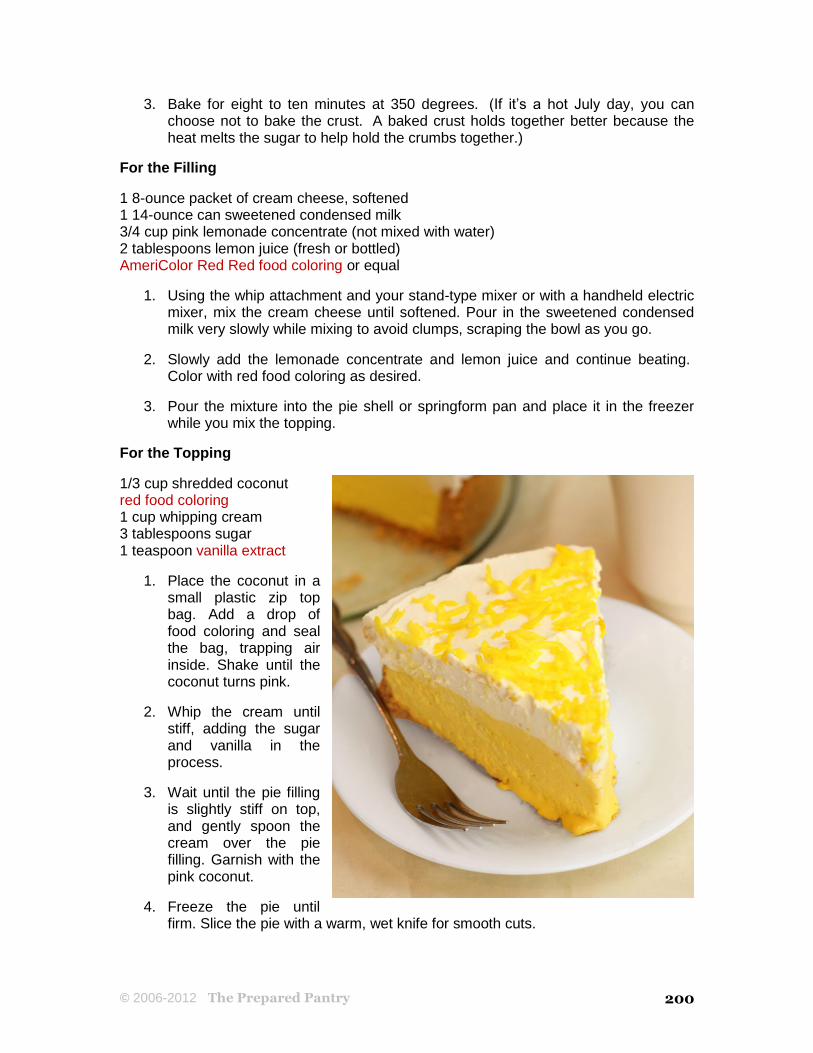
Pink Lemonade Pie
Our pink lemonade pie is one of our most popular recipes. It’s a refreshing cheesecake-like dessert that is perfect year-round.
This is a versatile dessert, as you can really use any lemonade or fruit juice from concentrate. Try a cranberry apple in the fall, a cherry version at Valentine’s Day, and the green Leprechaun Pie version for Saint Patrick’s Day. These pies are absolutely scrumptious. They are frozen, almost ice cream pies, and don’t require baking (unless you choose to bake the crust for eight to ten minutes) so they are perfect for summer. Since everyone loves them, they’re great for guests or a family occasion. They can be made ahead. This pie can be made in a deep dish pie pan or a springform pan. We nearly always use our Candy Apple Red Silicone Springform Pan. It doesn’t leak. You peel the outer ring off like a candy wrapper. The dessert is left sitting on the
tempered glass base. Set the base on a platter to cut and serve. It’s much neater than digging servings out of a pie pan. This pie is made in three parts: a graham cracker crust, a lemonade and cream cheese filling, and a whipped cream topping. If you prefer, you can use a commercial whipped topping or whipped cream from an aerosol can for the topping.
For the Crust
1 1/2 cups graham cracker crumbs 1/4 cup sugar 4 tablespoons butter
1. Mix the crumbs, sugar, and butter in a nine-inch pie pan or spring form pan. Mix until the crumbs have absorbed the butter and the mixture is uniform.
2. Press the crumbs across the bottom of the pan and up the sides. We've found using a drinking glass to press the crumbs up the sides works well.
© 2006-2012 The Prepared Pantry 200
3. Bake for eight to ten minutes at 350 degrees. (If it’s a hot July day, you can choose not to bake the crust. A baked crust holds together better because the heat melts the sugar to help hold the crumbs together.)
For the Filling
1 8-ounce packet of cream cheese, softened 1 14-ounce can sweetened condensed milk 3/4 cup pink lemonade concentrate (not mixed with water) 2 tablespoons lemon juice (fresh or bottled) AmeriColor Red Red food coloring or equal
1. Using the whip attachment and your stand-type mixer or with a handheld electric mixer, mix the cream cheese until softened. Pour in the sweetened condensed milk very slowly while mixing to avoid clumps, scraping the bowl as you go.
2. Slowly add the lemonade concentrate and lemon juice and continue beating. Color with red food coloring as desired.
3. Pour the mixture into the pie shell or springform pan and place it in the freezer while you mix the topping.
For the Topping
1/3 cup shredded coconut red food coloring 1 cup whipping cream 3 tablespoons sugar 1 teaspoon vanilla extract
1. Place the coconut in a small plastic zip top bag. Add a drop of food coloring and seal the bag, trapping air inside. Shake until the coconut turns pink.
2. Whip the cream until stiff, adding the sugar and vanilla in the process.
3. Wait until the pie filling is slightly stiff on top, and gently spoon the cream over the pie filling. Garnish with the pink coconut.
4. Freeze the pie until firm. Slice the pie with a warm, wet knife for smooth cuts.
© 2006-2012 The Prepared Pantry 201
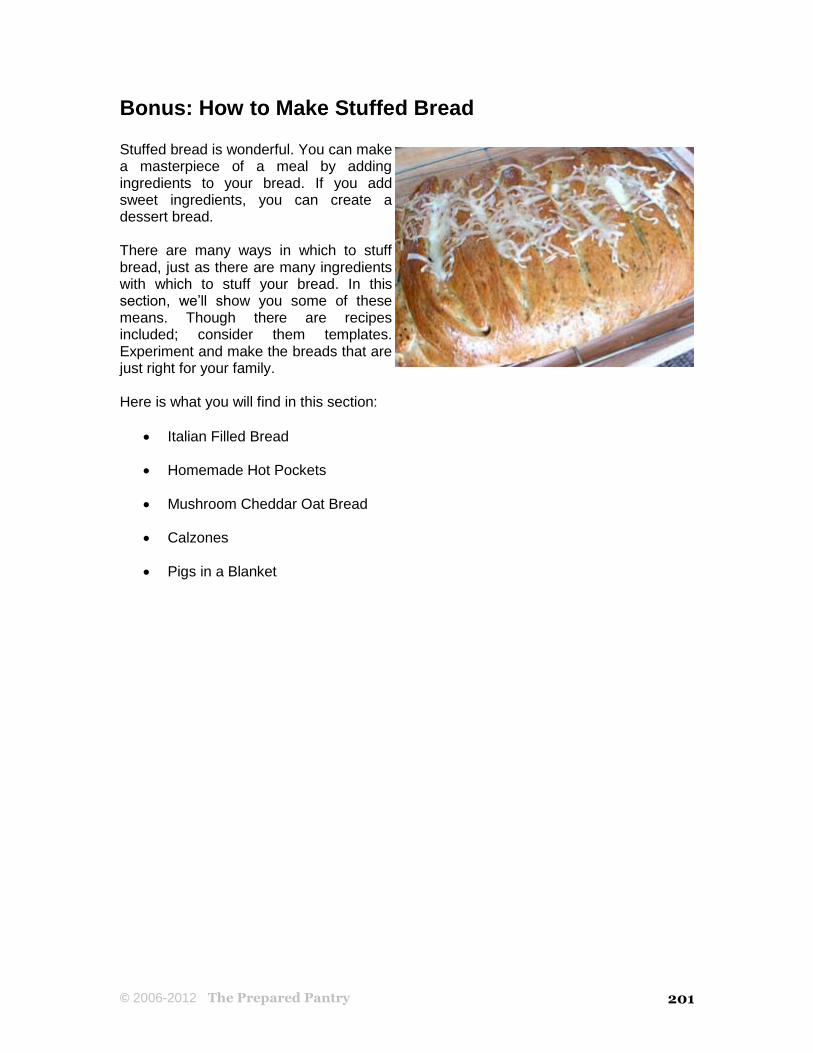
Bonus: How to Make Stuffed Bread Stuffed bread is wonderful. You can make a masterpiece of a meal by adding ingredients to your bread. If you add sweet ingredients, you can create a dessert bread. There are many ways in which to stuff bread, just as there are many ingredients with which to stuff your bread. In this section, we’ll show you some of these means. Though there are recipes included; consider them templates. Experiment and make the breads that are just right for your family. Here is what you will find in this section:
Italian Filled Bread
Homemade Hot Pockets
Mushroom Cheddar Oat Bread
Calzones
Pigs in a Blanket
© 2006-2012 The Prepared Pantry 202
Stuffed Bread: Italian Filled Bread
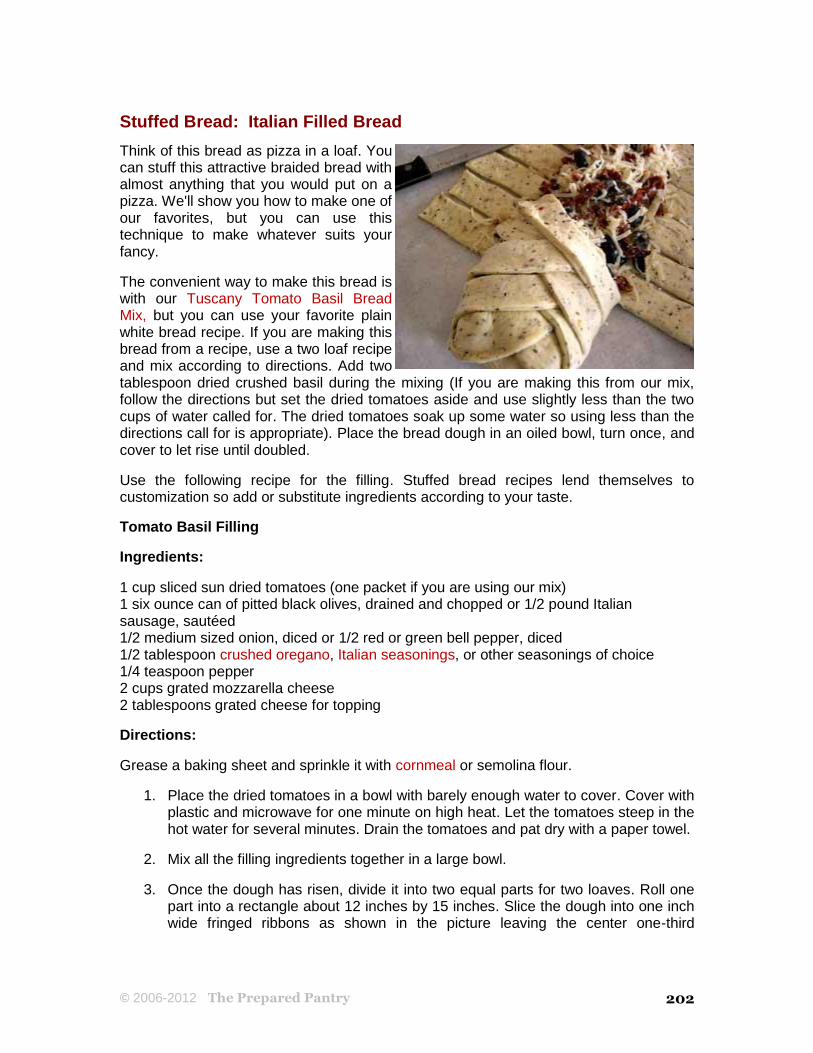
Think of this bread as pizza in a loaf. You can stuff this attractive braided bread with almost anything that you would put on a pizza. We'll show you how to make one of our favorites, but you can use this technique to make whatever suits your fancy.
The convenient way to make this bread is with our Tuscany Tomato Basil Bread Mix, but you can use your favorite plain white bread recipe. If you are making this bread from a recipe, use a two loaf recipe and mix according to directions. Add two tablespoon dried crushed basil during the mixing (If you are making this from our mix, follow the directions but set the dried tomatoes aside and use slightly less than the two cups of water called for. The dried tomatoes soak up some water so using less than the directions call for is appropriate). Place the bread dough in an oiled bowl, turn once, and cover to let rise until doubled.
Use the following recipe for the filling. Stuffed bread recipes lend themselves to customization so add or substitute ingredients according to your taste.
Tomato Basil Filling
Ingredients:
1 cup sliced sun dried tomatoes (one packet if you are using our mix) 1 six ounce can of pitted black olives, drained and chopped or 1/2 pound Italian sausage, sautéed 1/2 medium sized onion, diced or 1/2 red or green bell pepper, diced 1/2 tablespoon crushed oregano, Italian seasonings, or other seasonings of choice 1/4 teaspoon pepper 2 cups grated mozzarella cheese 2 tablespoons grated cheese for topping
Directions:
Grease a baking sheet and sprinkle it with cornmeal or semolina flour.
1. Place the dried tomatoes in a bowl with barely enough water to cover. Cover with plastic and microwave for one minute on high heat. Let the tomatoes steep in the hot water for several minutes. Drain the tomatoes and pat dry with a paper towel.
2. Mix all the filling ingredients together in a large bowl.
3. Once the dough has risen, divide it into two equal parts for two loaves. Roll one part into a rectangle about 12 inches by 15 inches. Slice the dough into one inch wide fringed ribbons as shown in the picture leaving the center one-third
© 2006-2012 The Prepared Pantry 203
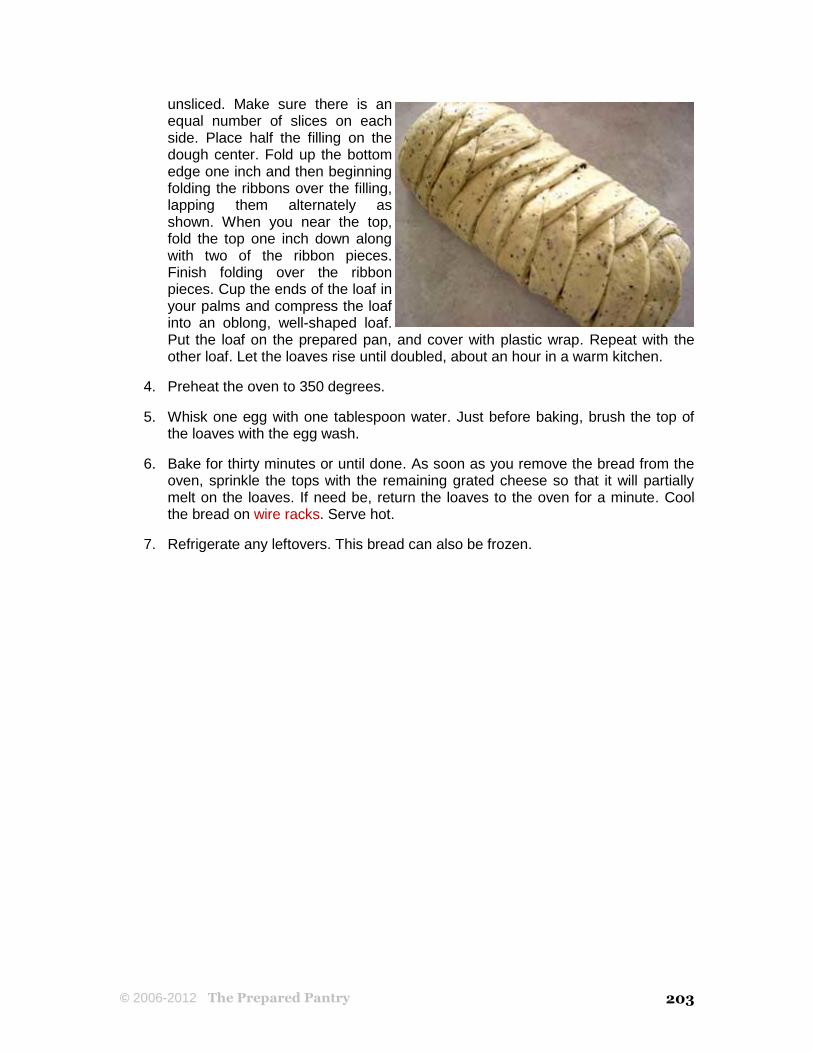
unsliced. Make sure there is an equal number of slices on each side. Place half the filling on the dough center. Fold up the bottom edge one inch and then beginning folding the ribbons over the filling, lapping them alternately as shown. When you near the top, fold the top one inch down along with two of the ribbon pieces. Finish folding over the ribbon pieces. Cup the ends of the loaf in your palms and compress the loaf into an oblong, well-shaped loaf. Put the loaf on the prepared pan, and cover with plastic wrap. Repeat with the other loaf. Let the loaves rise until doubled, about an hour in a warm kitchen.
4. Preheat the oven to 350 degrees.
5. Whisk one egg with one tablespoon water. Just before baking, brush the top of the loaves with the egg wash.
6. Bake for thirty minutes or until done. As soon as you remove the bread from the oven, sprinkle the tops with the remaining grated cheese so that it will partially melt on the loaves. If need be, return the loaves to the oven for a minute. Cool the bread on wire racks. Serve hot.
7. Refrigerate any leftovers. This bread can also be frozen.

© 2006-2012 The Prepared Pantry 204
Stuffed Bread: Homemade Hot Pockets
Homemade Hot Pockets are simple in concept and to make. Just put the sandwich fixings into the bun before you bake it. You can use simple ingredients such as a brat, cheddar cheese, and mustard. These are great for picnics and box lunches. Because they have fillings that may spoil, protect them as you would any other meat or cheese sandwich.
Here's how to make them.
Directions:
1. Mix the bread according to package instructions. We used an Irish Potato White Mix for bread machines, but any mix or recipe will do. If you are using your bread machine, set the machine for “dough” so that it will rise but not bake.
2. After the dough has risen, divide it into bun-sized pieces—eight pieces for a bread machine mix or sixteen for a double loaf mix is about right.
3. Roll each piece flat with a rolling pin. Place the meat, cheese, and condiments in the center of the bread pieces. Pull the dough around the filling, pinching the seams closed. The dough will tend to pull apart on the seams as it rises again so pinch the seams tightly together making sure that they are bound and sealed well. A dough press makes this really easy. Place the buns seam side down on a greased baking sheet. Let the dough rise until puffy and doubled. It will take longer to rise than dough alone because of the cool filling in the dough.
4. Bake for eighteen minutes or until the bread is done. Serve hot. Refrigerate leftovers.
© 2006-2012 The Prepared Pantry 205
Stuffed Bread: Mushroom Cheddar Oat Bread
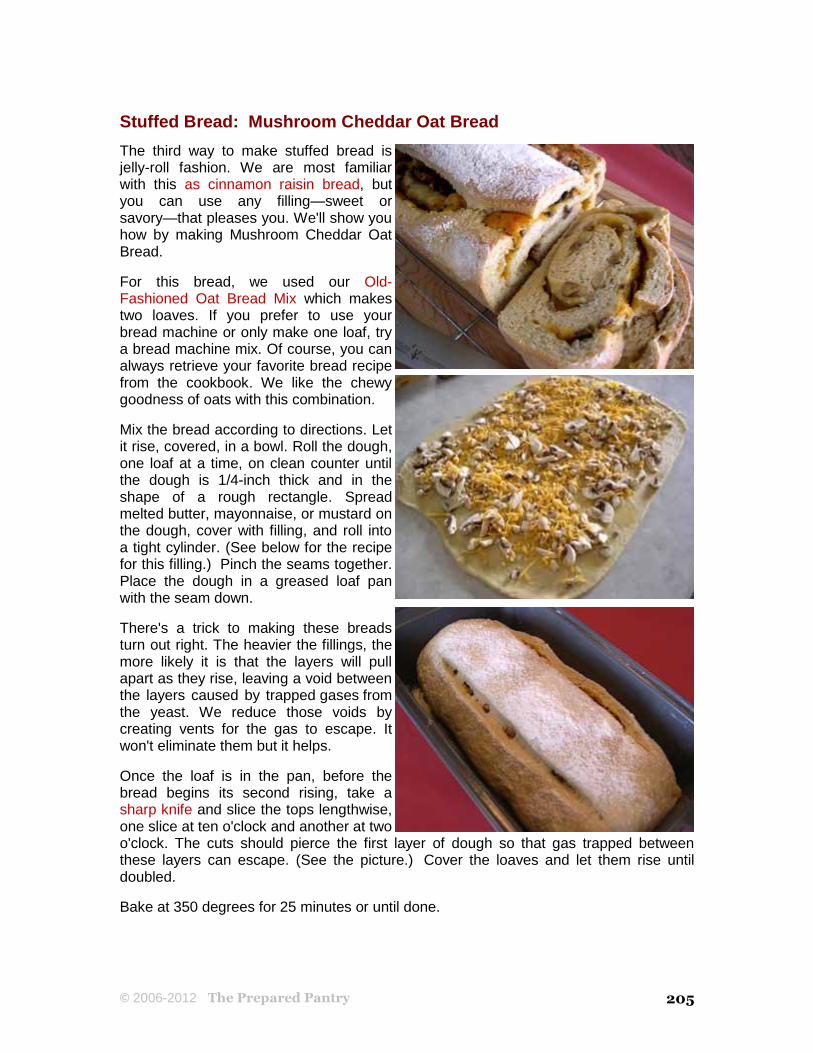
The third way to make stuffed bread is jelly-roll fashion. We are most familiar with this as cinnamon raisin bread, but you can use any filling—sweet or savory—that pleases you. We'll show you how by making Mushroom Cheddar Oat Bread.
For this bread, we used our Old-Fashioned Oat Bread Mix which makes two loaves. If you prefer to use your bread machine or only make one loaf, try a bread machine mix. Of course, you can always retrieve your favorite bread recipe from the cookbook. We like the chewy goodness of oats with this combination.
Mix the bread according to directions. Let it rise, covered, in a bowl. Roll the dough, one loaf at a time, on clean counter until the dough is 1/4-inch thick and in the shape of a rough rectangle. Spread melted butter, mayonnaise, or mustard on the dough, cover with filling, and roll into a tight cylinder. (See below for the recipe for this filling.) Pinch the seams together. Place the dough in a greased loaf pan with the seam down.
There's a trick to making these breads turn out right. The heavier the fillings, the more likely it is that the layers will pull apart as they rise, leaving a void between the layers caused by trapped gases from the yeast. We reduce those voids by creating vents for the gas to escape. It won't eliminate them but it helps.
Once the loaf is in the pan, before the bread begins its second rising, take a sharp knife and slice the tops lengthwise, one slice at ten o'clock and another at two o'clock. The cuts should pierce the first layer of dough so that gas trapped between these layers can escape. (See the picture.) Cover the loaves and let them rise until doubled.
Bake at 350 degrees for 25 minutes or until done.

© 2006-2012 The Prepared Pantry 206
Mushroom Cheddar Filling
Prepared mustard to spread on the dough according to taste 2 cups grated cheddar cheese 8 ounces mushroom pieces, coarsely chopped 1/4 teaspoon pepper
After the bread is rolled into a 1/4-inch thick rectangle, spread the mustard on the surface of the dough. Mix the remaining ingredients and spread them on the dough.

© 2006-2012 The Prepared Pantry 207
Stuffed Bread: Calzones
Calzones are closely related to pizzas, sort of a folded over pizza. Somehow though, cutting into the crisp, golden crust of a calzone to reveal a luscious filling is a different experience than eating a pizza. But if you can make a pizza, you can make a calzone.
You can use nearly any pizza crust recipe to make calzones. The fillings are usually different than the toppings on a pizza; use ricotta instead of hard cheese for the filling base (Although you can make calzones without any cheese in the filling).
Keep the following principles in mind as you build your calzones:
1. For the filling, simple combinations work best. Less is truly better.
2. Calzones take longer to cook than pizza and require a lower temperature in order to crisp the crust and to penetrate the filling. They generally take 15 to 20 minutes to bake at 400 degrees.
3. Smaller is better. Make calzones that are 6 to 12 inches long.
Most calzones are made in the traditional half-moon shape that is achieved by rolling or pressing out the dough ball into a circle. The filling is mounded into the bottom half of the circle and the top part is folded over and crimped by hand or with a fork.
Here are the steps to making a perfect calzone:
1. Mix the dough according to the package or recipe instructions. Cover and let the dough rise until doubled.
2. Roll out a small dough ball (about 8 ounces) into a round 1/4 inch thick. The gluten in the dough may try to make the dough spring back into shape. It’s often easier to roll the dough partially, let it sit for a few minutes to relax, and then roll
© 2006-2012 The Prepared Pantry 208
the dough again. Try to roll the dough uniformly. Thin spots lead to leaks.
3. Place a small handful of mozzarella on the lower half of the circle. On top of the cheese, place about three quarters of a cup of filling materials. On top of the filling, add 1/2 to 2/3 cup ricotta. Thick, creamy ricotta—not low-fat—works best. Season with salt and pepper and sprinkle with parmesan. (Of course, you can vary the filling ingredients greatly. Often an egg is mixed with the ricotta to make the filling less runny.)
4. Fold the top of the calzone crust over the bottom into the traditional half-moon shape. Seal the edges by crimping them with a fork. Be sure to press firmly enough to seal the edges and keep the fillings from leaking. Use the edge of a knife or fork to shape the crust edge into a uniform border. You may want to use a dough press to make this easier.
5. Just before baking, brush the crust with an egg white wash or olive oil. An egg white wash will give the calzones a satiny finish. Olive oil will make the crust browner and crisper. If you brush with olive oil before baking, brush the crust again with olive oil immediately after coming from the oven. The second brushing will add sheen and flavor to the crust.
6. Bake the calzones on a dark pan on the lowest shelf of the oven to provide enough bottom heat to bake the bottom crust. Better yet, place the pan directly on a preheated baking stone. (If you are using a rectangular pan, a rectangular baking stone works best.)
Using a baking stone Get the perfect pizza crust with a large rectangular pizza stone. We prefer a large rectangular stone to a round stone because it is easier to slip the pizza onto the larger target and easier to handle.
Tired of soggy-bottomed pizzas? Your pizza pan deflects the heat away from the bottom of the crust while the toppings insulate it from above, resulting in underbaked, soggy crusts. A preheated pizza stone helps solve these problems. By placing the dough or pan on a preheated stone, the crust bakes quickly without overbaking the toppings for that perfect crisp crust.
Baker's note: Always preheat your baking stone. Slip the pizza or the pizza pan onto the hot stone without taking the stone from the oven. We prefer a large rectangular stone to a round stone because it is easier to slip the pizza onto the larger target and easier to handle.
© 2006-2012 The Prepared Pantry 209
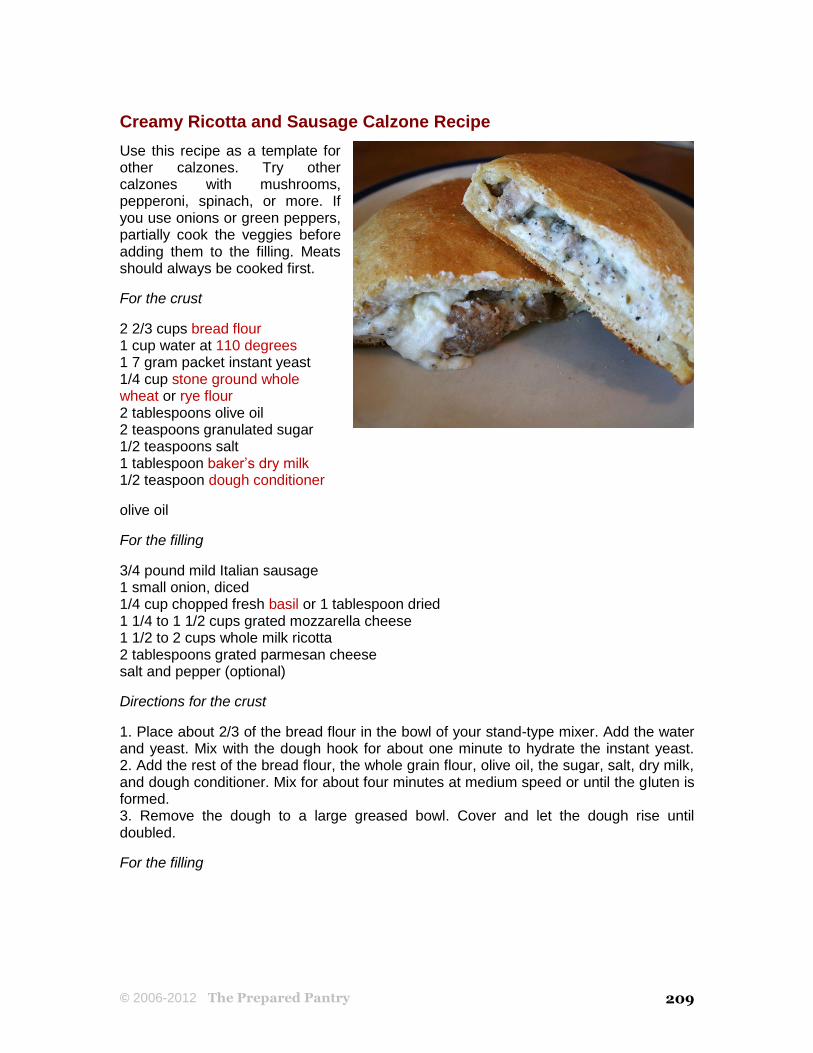
Creamy Ricotta and Sausage Calzone Recipe
Use this recipe as a template for other calzones. Try other calzones with mushrooms, pepperoni, spinach, or more. If you use onions or green peppers, partially cook the veggies before adding them to the filling. Meats should always be cooked first.
For the crust
2 2/3 cups bread flour 1 cup water at 110 degrees 1 7 gram packet instant yeast 1/4 cup stone ground whole wheat or rye flour 2 tablespoons olive oil 2 teaspoons granulated sugar 1/2 teaspoons salt 1 tablespoon baker’s dry milk 1/2 teaspoon dough conditioner
olive oil
For the filling
3/4 pound mild Italian sausage 1 small onion, diced 1/4 cup chopped fresh basil or 1 tablespoon dried 1 1/4 to 1 1/2 cups grated mozzarella cheese 1 1/2 to 2 cups whole milk ricotta 2 tablespoons grated parmesan cheese salt and pepper (optional)
Directions for the crust
1. Place about 2/3 of the bread flour in the bowl of your stand-type mixer. Add the water and yeast. Mix with the dough hook for about one minute to hydrate the instant yeast. 2. Add the rest of the bread flour, the whole grain flour, olive oil, the sugar, salt, dry milk, and dough conditioner. Mix for about four minutes at medium speed or until the gluten is formed. 3. Remove the dough to a large greased bowl. Cover and let the dough rise until doubled.
For the filling

© 2006-2012 The Prepared Pantry 210
1. Sauté the sausage and onion together until cooked but not over-cooked. (The meat will cook just a bit more in the heat of the oven.) Stir in the basil. Crumble the meat into smaller pieces.
Putting the calzone together
Preheat the oven to 400 degrees.
1. Once the dough has risen, divide it into three equal parts with a sharp knife. Roll out each into a nine-inch round. Avoid any thin spots that might leak.
2. Divide the mozzarella, meat and onion filling, and ricotta into three equal parts. Add to each individual calzone crust. Sprinkle each with a portion of the parmesan. Salt and pepper if desired.
3. Fold the top of the calzone crust over the bottom into the traditional half-moon shape. Seal the edges by crimping with a fork. Use a sharp knife or pizza wheel to trim the crimped edges smoothly.
4. Grease a large baking sheet and dust it with cornmeal or semolina flour. With a pastry brush, brush the crust of each of the calzones with olive oil. Bake the calzones for 15 to 20 minutes or until browned. Remove from the oven and turn to a wire rack. Brush the crust again with olive oil. Serve hot.
Baker’s Notes: In filling the calzones, you don’t need to measure the ingredients; just use what looks right. Unless your sausage is well-seasoned, you will probably want to sprinkle the fillings with salt and pepper.
The benefits of dough conditioner Dough conditioner (or dough enhancer) is indispensable to the baking of great breads. Use this professional grade conditioner for all of your yeast baking—pastries and breads. It creates an enhanced environment for the growth of yeast helping to make your breads and pastries more uniform and lighter. It also strengthens the gluten structure in the dough to create a better crumb to your loaves. This dough conditioner also retards staling and helps your bread stay fresher longer.
This is a concentrated professional product. Use one-half teaspoon per loaf. One cup of professional dough conditioner should be enough for 48 loaves.

© 2006-2012 The Prepared Pantry 211
Stuffed Bread: Pigs in a Blanket
Pigs in a Blanket are easy, fun, and quite versatile. They make a great meal, or if you use mini sausages, they’re perfect for a snack or party appetizer. Pigs in a blanket are simply hot dogs, brats, or sausages wrapped in pizza or biscuit dough. We like to add a slice of cheddar cheese and a gourmet spread to fancy them up a little bit.
To make it easy, we like to use a pizza crust mix, or a biscuit mix, but feel free to use your favorite from-scratch recipe.
How to make pigs in a blanket:
1. Mix the dough per package instructions. (With a stand type mixer and a dough hook, add the water and yeast and mix for four minutes.)
2. Roll the dough to 1/4-inch thickness and cut out the shapes. For little sausages, we used 2-inch diameter circles. For hot dogs—because they are longer—you’ll want rectangles or ovals.
3. Spread mustard or another condiment on the dough. Do not spread mustard where the two edges will overlap. Our favorite is the Elki Maple Bacon Whipped Mustard Spread.
4. If you are using brats or hotdogs, consider splitting them and placing a strip of cheese in the split.
5. Wrap the dough around the meat pressing the two dough edges together where they overlap. Let rest for 30 to 45 minutes or until the dough doubles in volume.
6. Bake at 350 degrees for 7 minutes or until the dough starts to brown. Serve hot.