hog 4 & hog visualizer connectivity driver...
TRANSCRIPT
1
HOG 4 & HOG Visualizer Connectivity Driver Guide
This guide uses a HOG 4 Console and a dedicated Windows Computer running visualizer
software.
This guide shows the basic console and PC setup procedures for console to visualizer
networking and communication.
NOTE: If running Hog 4PC on the same computer as the visualizer, one IP address is set on the
computer. Hog 4PC and the visualizer work in tandem on that PC via the Hog Connectivity
Driver.
Download & install the current Visualizer Connectivity Driver on to the computer running the
visualizer.
This can be found on any of the Hog 4 Console support pages.
https://www.highend.com/support/controllers/
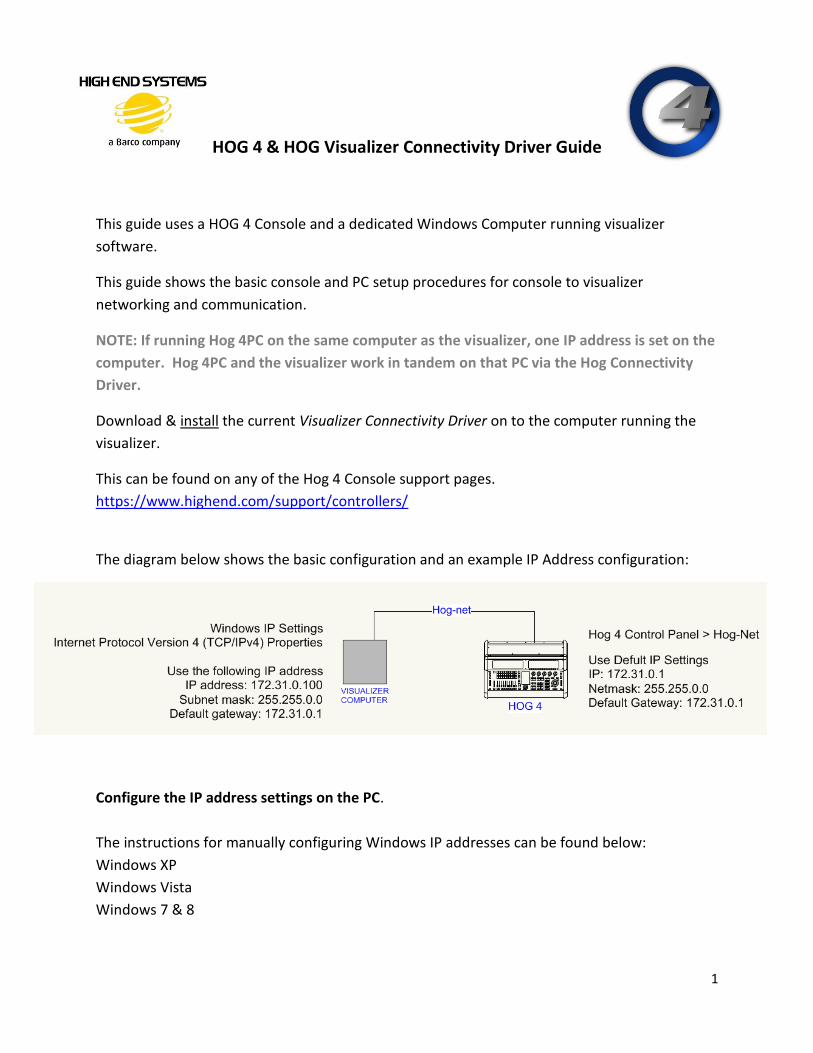
The diagram below shows the basic configuration and an example IP Address configuration:
Configure the IP address settings on the PC.
The instructions for manually configuring Windows IP addresses can be found below:
Windows XP
Windows Vista
Windows 7 & 8
2
EXAMPLE: Windows XP
In this example we’re using XP SP3 Media Center Edition and changing the IP address of the
Wireless adapter.
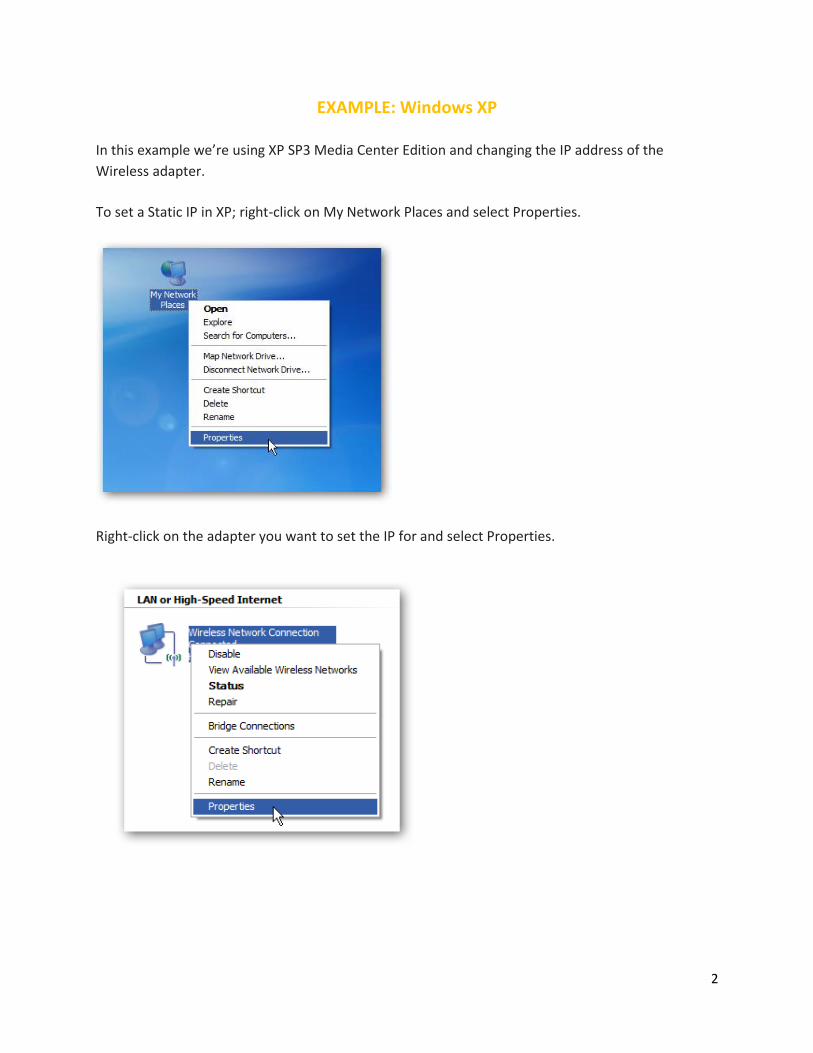
To set a Static IP in XP; right-click on My Network Places and select Properties.
Right-click on the adapter you want to set the IP for and select Properties.
3
EXAMPLE: Windows XP
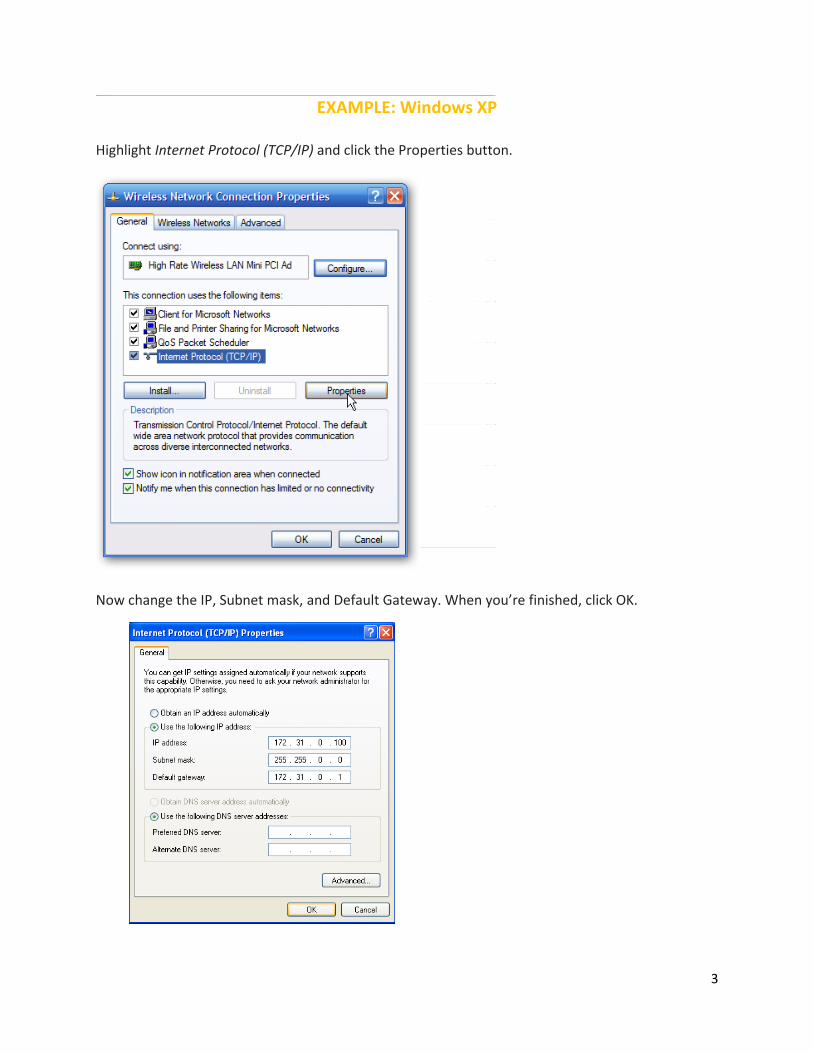
Highlight Internet Protocol (TCP/IP) and click the Properties button.
Now change the IP, Subnet mask, and Default Gateway. When you’re finished, click OK.
4
EXAMPLE: Windows XP
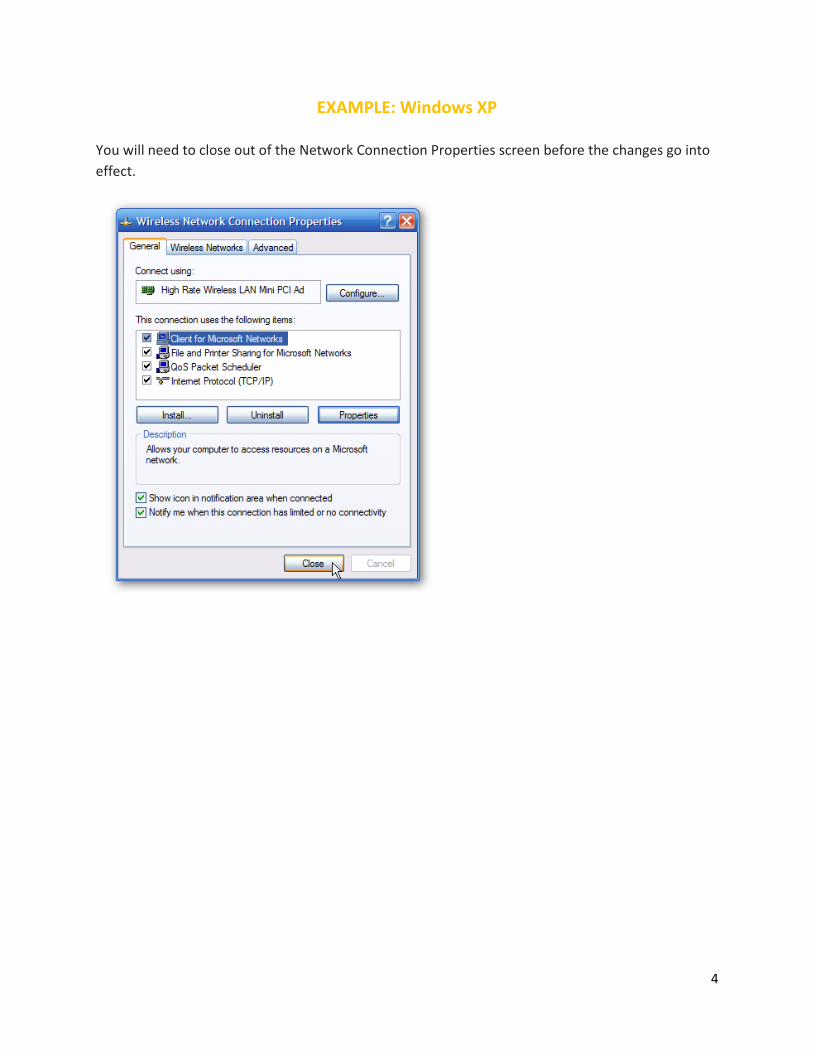
You will need to close out of the Network Connection Properties screen before the changes go into
effect.
5
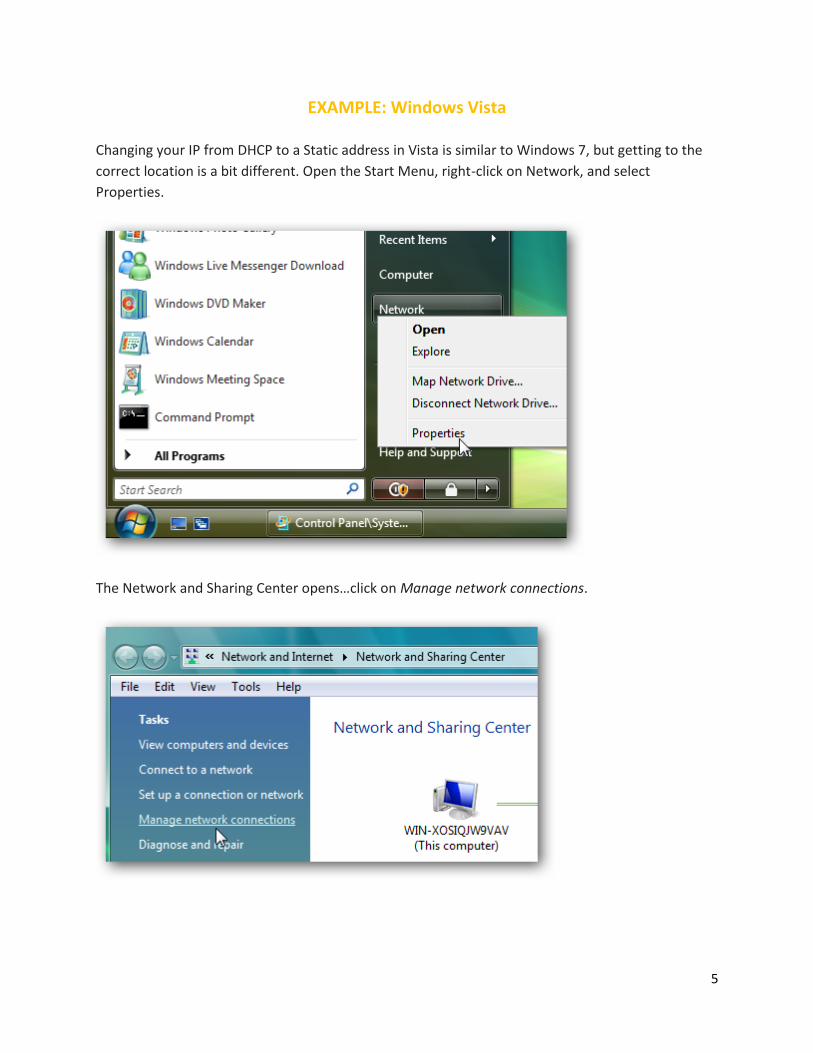
EXAMPLE: Windows Vista
Changing your IP from DHCP to a Static address in Vista is similar to Windows 7, but getting to the
correct location is a bit different. Open the Start Menu, right-click on Network, and select
Properties.
The Network and Sharing Center opens…click on Manage network connections.
6
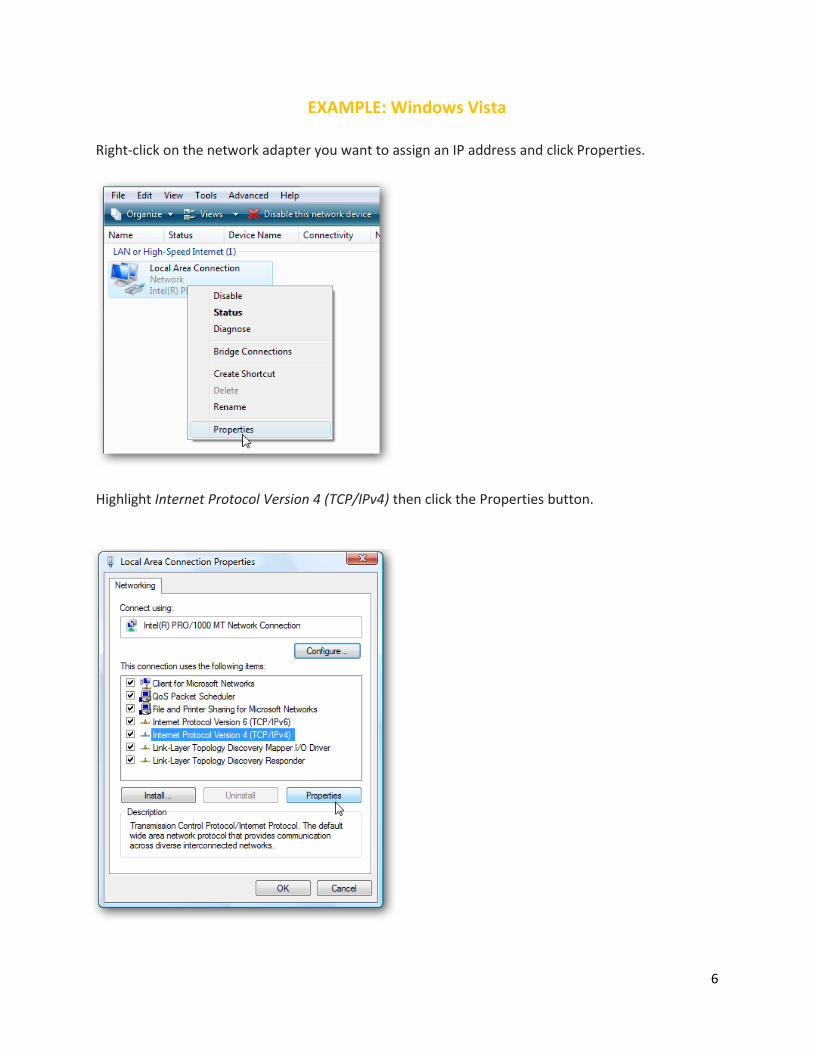
EXAMPLE: Windows Vista
Right-click on the network adapter you want to assign an IP address and click Properties.
Highlight Internet Protocol Version 4 (TCP/IPv4) then click the Properties button.
7
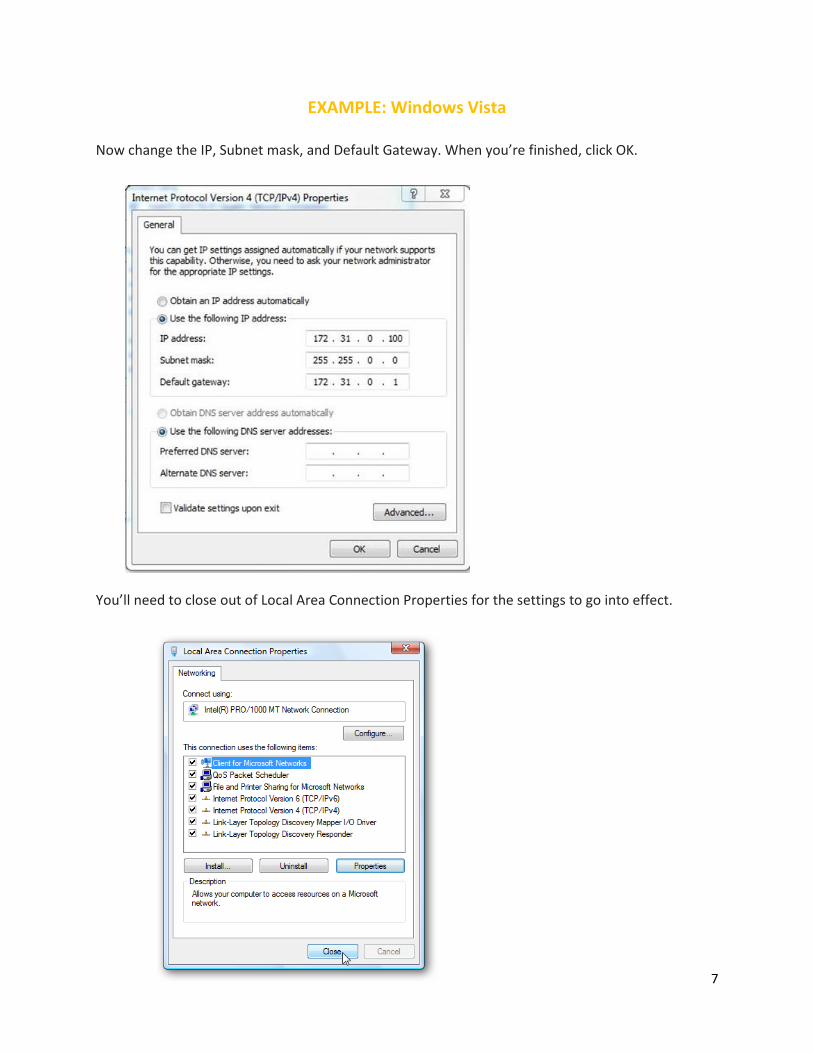
EXAMPLE: Windows Vista
Now change the IP, Subnet mask, and Default Gateway. When you’re finished, click OK.
You’ll need to close out of Local Area Connection Properties for the settings to go into effect.
8
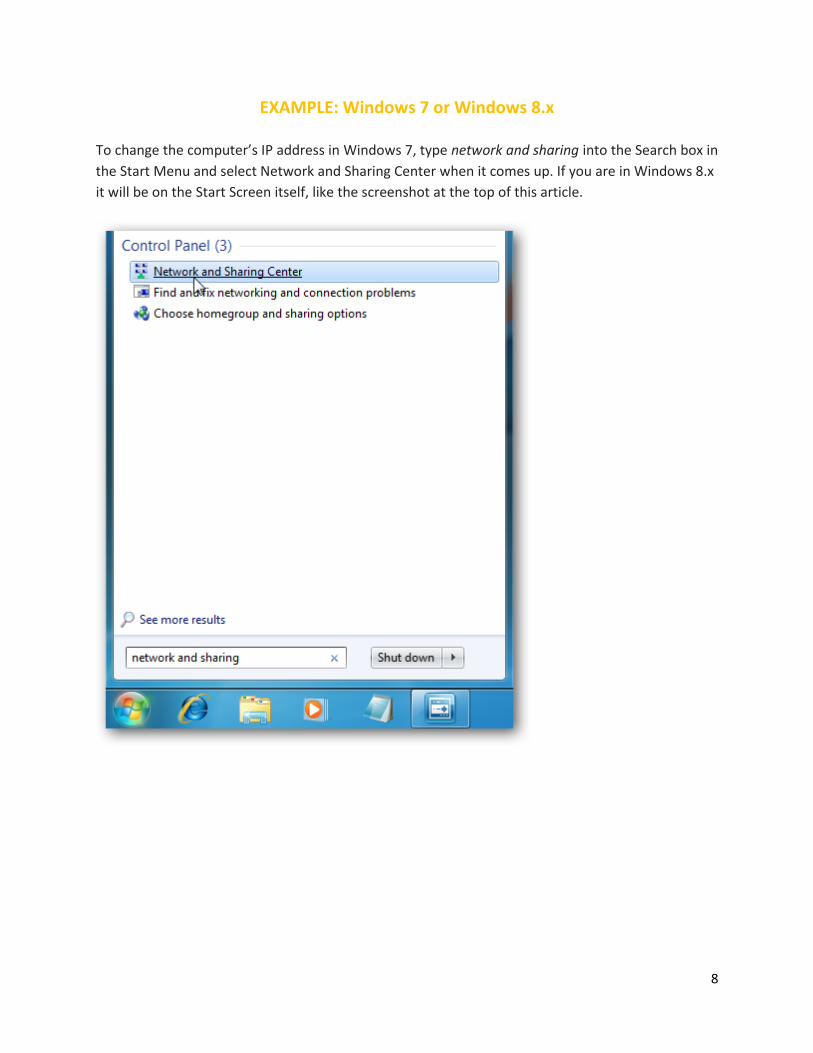
EXAMPLE: Windows 7 or Windows 8.x
To change the computer’s IP address in Windows 7, type network and sharing into the Search box in
the Start Menu and select Network and Sharing Center when it comes up. If you are in Windows 8.x
it will be on the Start Screen itself, like the screenshot at the top of this article.
9
EXAMPLE: Windows 7 or Windows 8.x
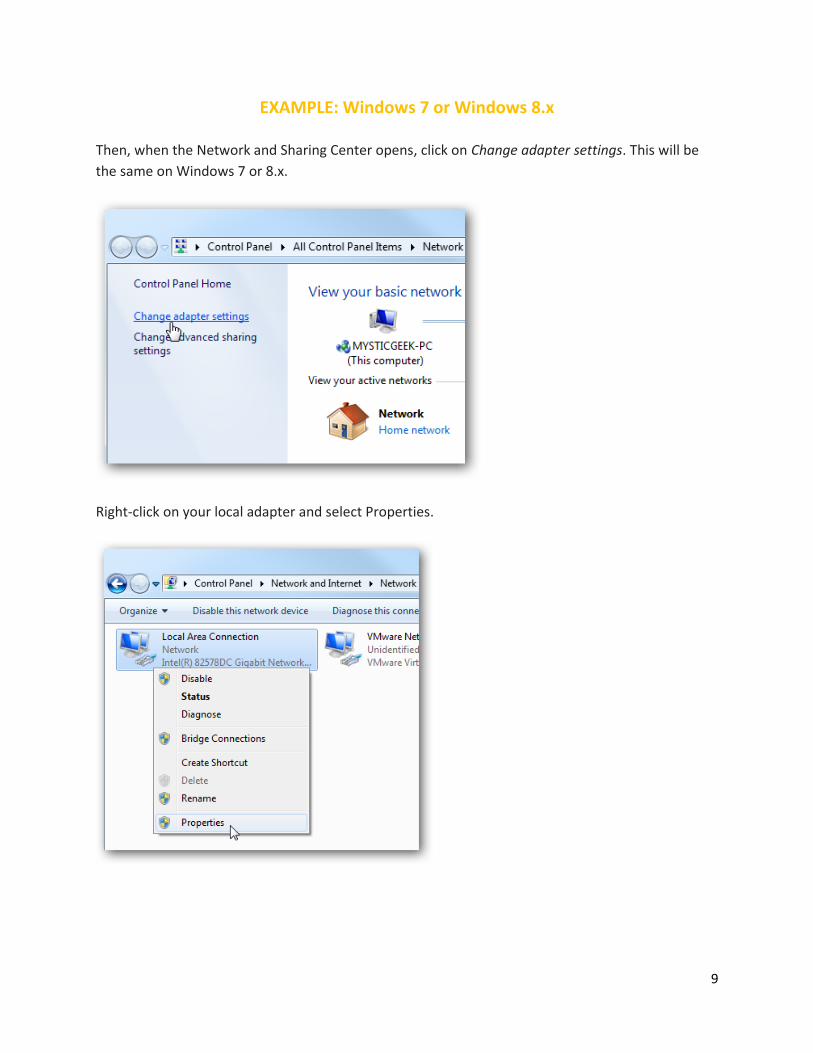
Then, when the Network and Sharing Center opens, click on Change adapter settings. This will be
the same on Windows 7 or 8.x.
Right-click on your local adapter and select Properties.
10
EXAMPLE: Windows 7 or Windows 8.x
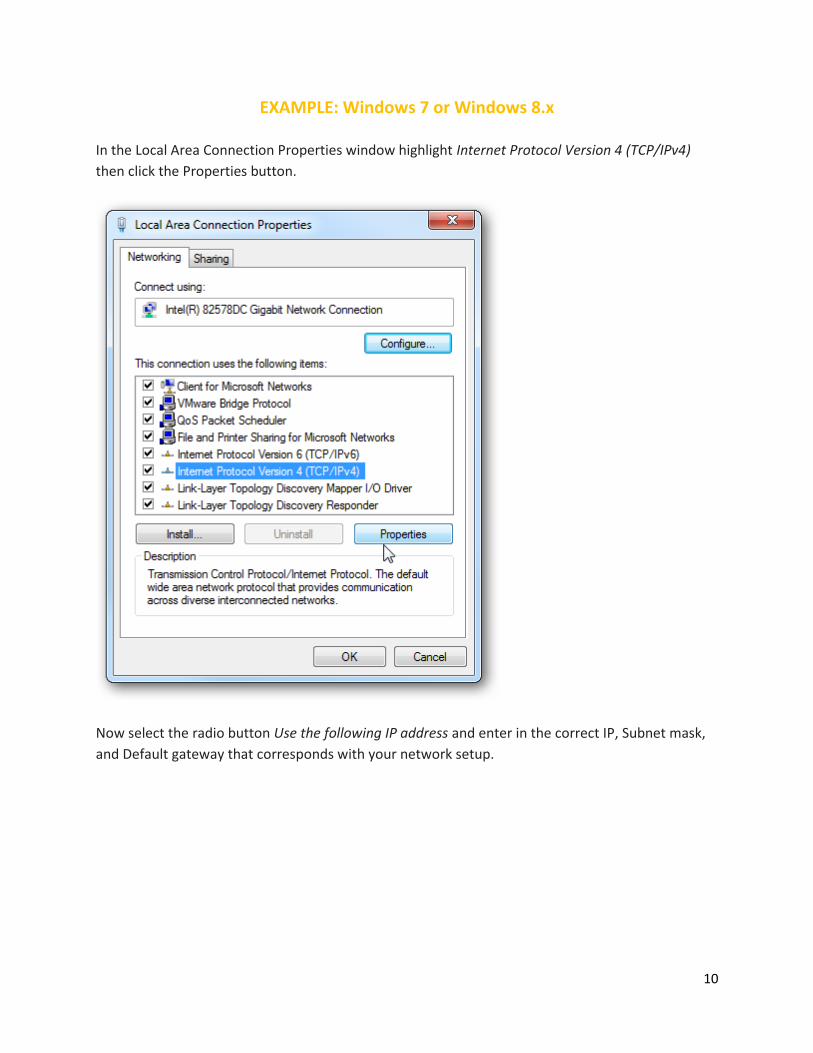
In the Local Area Connection Properties window highlight Internet Protocol Version 4 (TCP/IPv4)
then click the Properties button.
Now select the radio button Use the following IP address and enter in the correct IP, Subnet mask,
and Default gateway that corresponds with your network setup.

11
EXAMPLE: Windows 7 or Windows 8.x
Check Validate settings upon exit so Windows can find any problems with the addresses you
entered. When you’re finished, click OK.

12
EXAMPLE: Windows 7 or Windows 8.x
Now close out of the Local Area Connections Properties window.
13
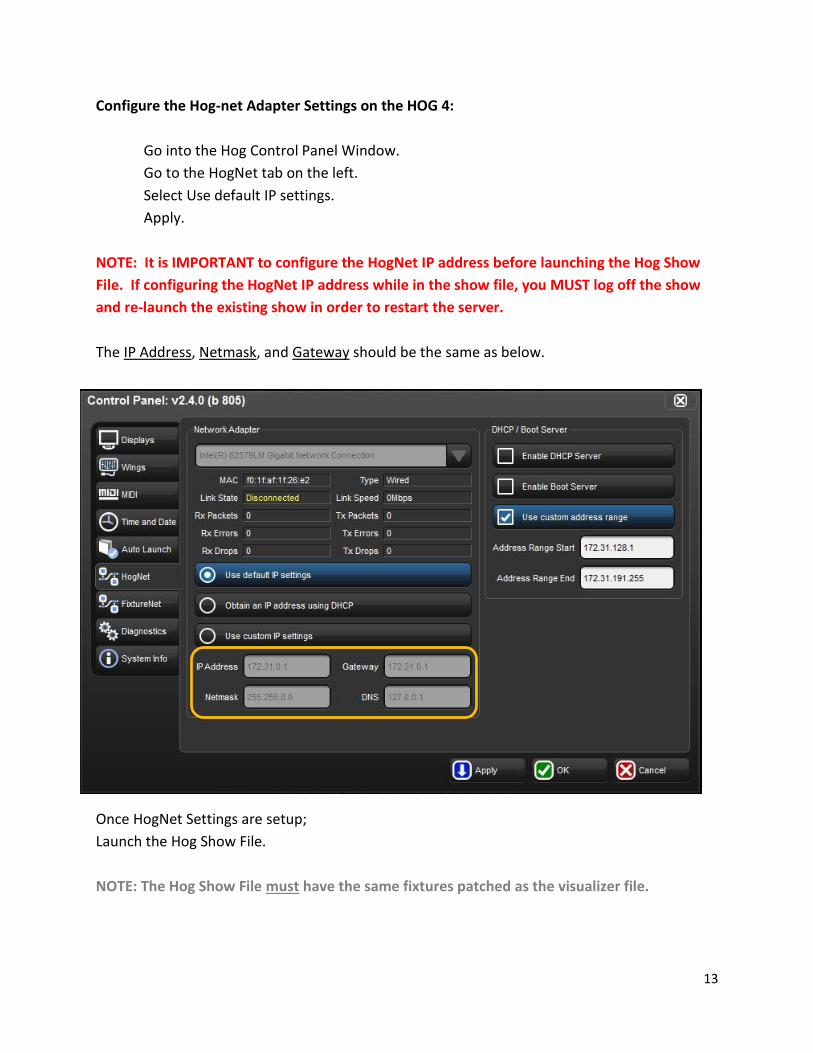
Configure the Hog-net Adapter Settings on the HOG 4:
Go into the Hog Control Panel Window.
Go to the HogNet tab on the left.
Select Use default IP settings.
Apply.
NOTE: It is IMPORTANT to configure the HogNet IP address before launching the Hog Show
File. If configuring the HogNet IP address while in the show file, you MUST log off the show
and re-launch the existing show in order to restart the server.
The IP Address, Netmask, and Gateway should be the same as below.
Once HogNet Settings are setup;
Launch the Hog Show File.
NOTE: The Hog Show File must have the same fixtures patched as the visualizer file.
14
There are multiple visualizers which HOG 4 is compatible with using the Visualizer Connectivity
Driver. For specific instructions on configuring the visualizer component to work with the Hog
Visualizer Connectivity Driver please visit the manufacturer’s websites:
Light Converse: www.lightconverse.net
ESP Vision: www.espvision.com
WYSIWYG/Cast: www.castlighting.com
MSD: www.martin.com
Capture: www.capturesweden.com
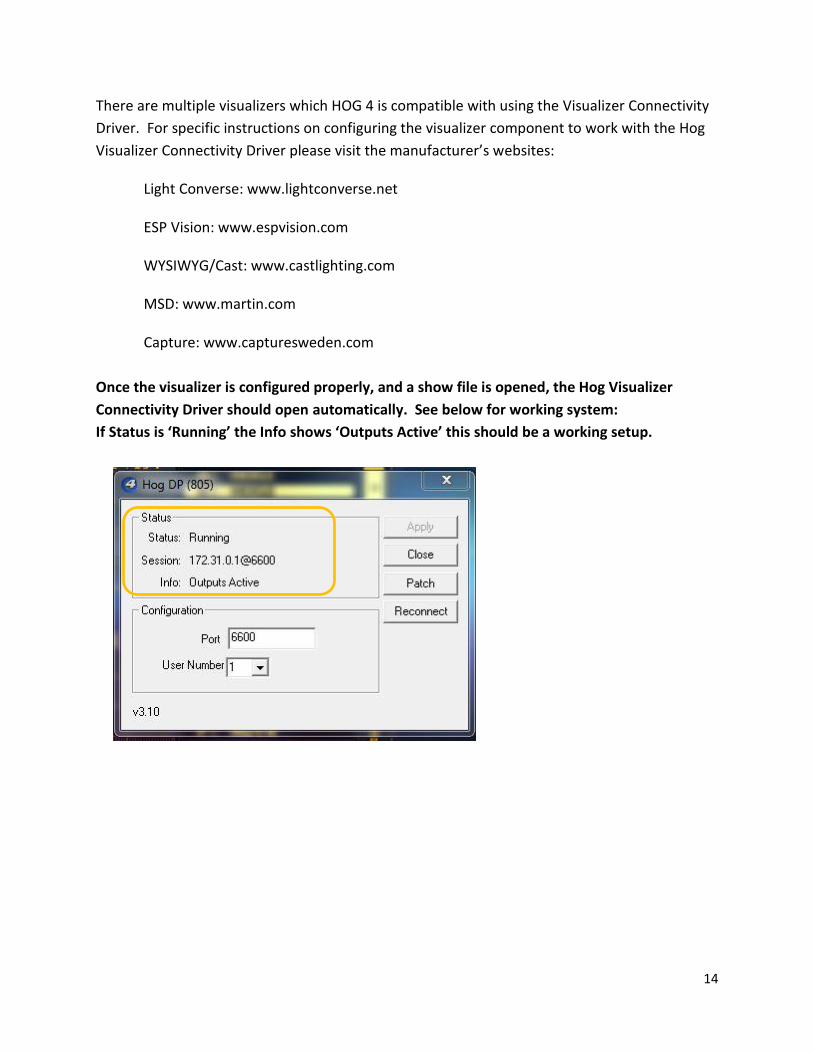
Once the visualizer is configured properly, and a show file is opened, the Hog Visualizer
Connectivity Driver should open automatically. See below for working system:
If Status is ‘Running’ the Info shows ‘Outputs Active’ this should be a working setup.