high performance driver education (hpde) - newsthscc.com/track-program/nonhtml/notes for high...
TRANSCRIPT
Page 1 of 29
High Performance Driver Education (HPDE) Version 1.25
By Glenn Mead
The following information on High Performance Driver Education (HPDE) has been gathered from
many sources. I started writing this when I first got started in HPDE to help me remember the things I
learned along the way. Although much of the information is based on personal experience, some of the
information should be attributed to the many instructors and friends that have helped me in my driving
development. Some of the information goes back to when I was pit crew for an IMSA / SCCA race team in
the early seventies. The information and presentation is intended for people new to the sport, but even
experienced drivers may find something new, or re-discover something they forgot.
Please send any comments, suggestions or additional content you may have. This has always been a
'living' document and I plan to keep it that way.
NOTES:
1. Most of the overview section was taken from Wikipedia, which included content added by me. I
also made a few more changes that I have not updated to Wikipedia.
2. The Handling Adjustments chart came from: http://www.club4ag.com/technical_main.htm, which
claims they got it from Yokohama. I could not find a reference for it on the Yokohama web site.
Glenn Mead
Page 2 of 29
Table of Contents
Overview ........................................................................................................................................................... 3
Terminology ...................................................................................................................................................... 4
Flags ................................................................................................................................................................ 11
Safety .............................................................................................................................................................. 13
Driving Position .............................................................................................................................................. 15
Keep it fun! ..................................................................................................................................................... 15
Driving ............................................................................................................................................................ 16
Driving in the Rain .......................................................................................................................................... 18
How Fast is Fast Enough? ................................................................................................................................ 19
Traction ........................................................................................................................................................... 19
Shifting ............................................................................................................................................................ 21
Brakes and Braking ......................................................................................................................................... 22
Tires ................................................................................................................................................................ 23
Modifications .................................................................................................................................................. 24
Are you ready to solo? ..................................................................................................................................... 25
Handling Adjustments ..................................................................................................................................... 26
Car Prep .......................................................................................................................................................... 27
Necessary Things to Bring ............................................................................................................................... 28
Good Things To Bring ..................................................................................................................................... 28
Websites .......................................................................................................................................................... 29
Contributors..................................................................................................................................................... 29
Page 3 of 29
Overview
High Performance Driver Education (HPDE) refers to driving schools held on dedicated race tracks
designed to teach drivers proper high speed driving techniques. HPDE events are held by various
automobile enthusiasts' clubs at some of the most renowned road-course tracks around the world. Students
are grouped according to their ability and experience, with "Novice Group" students being the least
experienced, "Intermediate Group" being more experienced and "Advanced Group" drivers being the most
experienced and capable of driving the racetrack without a ride-along instructor. Mandatory classroom
instruction contributes to the overall learning experience and allows peer-group discussions of on-track
performance and analysis of track characteristics. A day at one of these events will usually include one or
two classroom sessions and three 30 minute track sessions. Many events also include a chance to drive your
car on a skid pad.
HPDE events are not racing events. Cars on-track operate under strict "rules of engagement" which
minimize the likelihood of dangerous encounters with other cars. Passing among participants is allowed
only within defined "passing zones", and then only with clear hand signals and instructor confirmation.
Because of this, car to car incidents are very rare. Most off-track excursions end with no damage other than
a slightly bruised ego. It is important to realize that there is always the risk of doing serious damage to your
car or yourself. If you damage track equipment such as guard rails or walls, you will likely be charged for
the repairs.
HPDE events encourage participants to drive within their ability and improve their car-control skills
with each event. Instructors and staff evaluate each student's progress throughout the weekend, and make
recommendations on the student's advancement through successively higher driver groups.
Students are allowed to drive virtually any passenger car that has been deemed safe by a qualified
mechanic and is known to have adequate handling characteristics for track use. SUV's, vans and full sized
trucks are usually not allowed. Most schools require convertibles to have an approved roll bar. Some
factory installed roll bars are not approved for track use. Factory installed 3-point seat belts and approved
helmets are the minimum safety restraint system allowed. Safety Helmets with a Snell rating of "M"
(motorcycle - not fire retardant) are allowed at some schools but most will require "SA" (specialty
application - fire retardant and blunt impact tested) ratings, with the helmet specification being no older
than 10 years (example: Rating SA-2005 helmets would normally be valid for HPDE events through the
year 2015). The Snell Foundation normally releases upgraded helmet standards every five years.
Some HPDE events also include a "Time Trial" segment, usually conducted at the end of the day,
where advanced students who have been "signed off" to drive without an instructor compete for fastest lap
times. Time Trial events sometimes use a more strict set of rules than HPDE to maximize track safety.
Page 4 of 29
Terminology
Items in bold are related to safety should be understood before ever going on the track. In many cases
the terms marked in bold could be used by your instructor as a command to you. Doing the wrong thing
could result in losing control of the car.
Anti-sway bar A bar or tube that runs from one side of the car to the other that controls the
rate of weight transfer when cornering. They are sometimes adjustable, and
can have a significant effect on how a car handles.
Apex This is the point of the turn where you are closest to the inside edge of the
turn. The racing apex of a corner is NOT the geometric apex of the corner.
Balance Usually referring to the balance between under steer and over steer, or the
balance between front and back braking.
Blend line A line painted on the track starting at pit exit and extending down the track.
Cars leaving the pits are not allowed to cross the line. This keeps cars
entering the track from crossing out in to traffic until they have had a chance
to get up to speed.
Both feet in Any time you lose control of the car, push the brake and the clutch.
Brake fade Brake fade is caused by the brakes getting too hot. A reduction in brake force,
even with good pedal pressure indicates the pads are too hot and that you
need to lighten up on your braking, add brake ducts for cooling, or switch to a
more heat tolerant pad. If the brake pedal gets soft or mushy, it is usually
caused by the brake fluid getting so hot that it is boiling. The air bubbles
caused by the boiling make the pedal feel soft.
Brake point The place in a brake zone where you apply the brakes.
Braking zone A section of the track where you are braking to make the next turn. The turn
in usually marks the end of the braking zone. Tracks put brake markers out
for corners that require significant braking.
Camber Measured in degrees, how much a tire tilts toward the center line of the car.
Negative camber is when the top of the tire leans in towards the center line of
the car. Track cars are set up to have negative camber to increase their
cornering ability.
Chauffeur braking Firm initial brake pressure held at a constant pressure with a gradual release
of brake pressure at the end of the braking zone so that the weight balance of
the car is not disturbed. The primary goal is to not increase brake pressure at
the end of a brake zone.
Chicane A series of left and right turns used to reduce high speeds.
Corner station See 'Flag station'.
Corner weight The amount of weight on each tire.
Corner worker Person manning a flag station.
Page 5 of 29
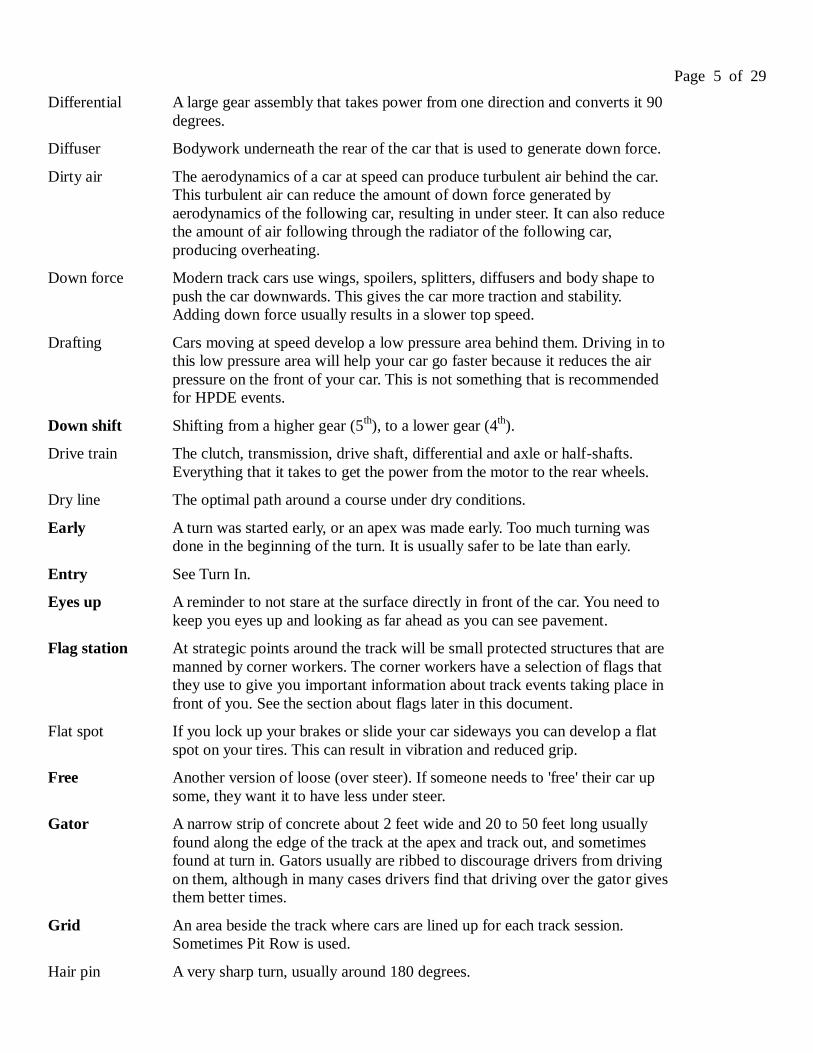
Differential A large gear assembly that takes power from one direction and converts it 90
degrees.
Diffuser Bodywork underneath the rear of the car that is used to generate down force.
Dirty air The aerodynamics of a car at speed can produce turbulent air behind the car.
This turbulent air can reduce the amount of down force generated by
aerodynamics of the following car, resulting in under steer. It can also reduce
the amount of air following through the radiator of the following car,
producing overheating.
Down force Modern track cars use wings, spoilers, splitters, diffusers and body shape to
push the car downwards. This gives the car more traction and stability.
Adding down force usually results in a slower top speed.
Drafting Cars moving at speed develop a low pressure area behind them. Driving in to
this low pressure area will help your car go faster because it reduces the air
pressure on the front of your car. This is not something that is recommended
for HPDE events.
Down shift Shifting from a higher gear (5th), to a lower gear (4
th).
Drive train The clutch, transmission, drive shaft, differential and axle or half-shafts.
Everything that it takes to get the power from the motor to the rear wheels.
Dry line The optimal path around a course under dry conditions.
Early A turn was started early, or an apex was made early. Too much turning was
done in the beginning of the turn. It is usually safer to be late than early.
Entry See Turn In.
Eyes up A reminder to not stare at the surface directly in front of the car. You need to
keep you eyes up and looking as far ahead as you can see pavement.
Flag station At strategic points around the track will be small protected structures that are
manned by corner workers. The corner workers have a selection of flags that
they use to give you important information about track events taking place in
front of you. See the section about flags later in this document.
Flat spot If you lock up your brakes or slide your car sideways you can develop a flat
spot on your tires. This can result in vibration and reduced grip.
Free Another version of loose (over steer). If someone needs to 'free' their car up
some, they want it to have less under steer.
Gator A narrow strip of concrete about 2 feet wide and 20 to 50 feet long usually
found along the edge of the track at the apex and track out, and sometimes
found at turn in. Gators usually are ribbed to discourage drivers from driving
on them, although in many cases drivers find that driving over the gator gives
them better times.
Grid An area beside the track where cars are lined up for each track session.
Sometimes Pit Row is used.
Hair pin A very sharp turn, usually around 180 degrees.
Page 6 of 29
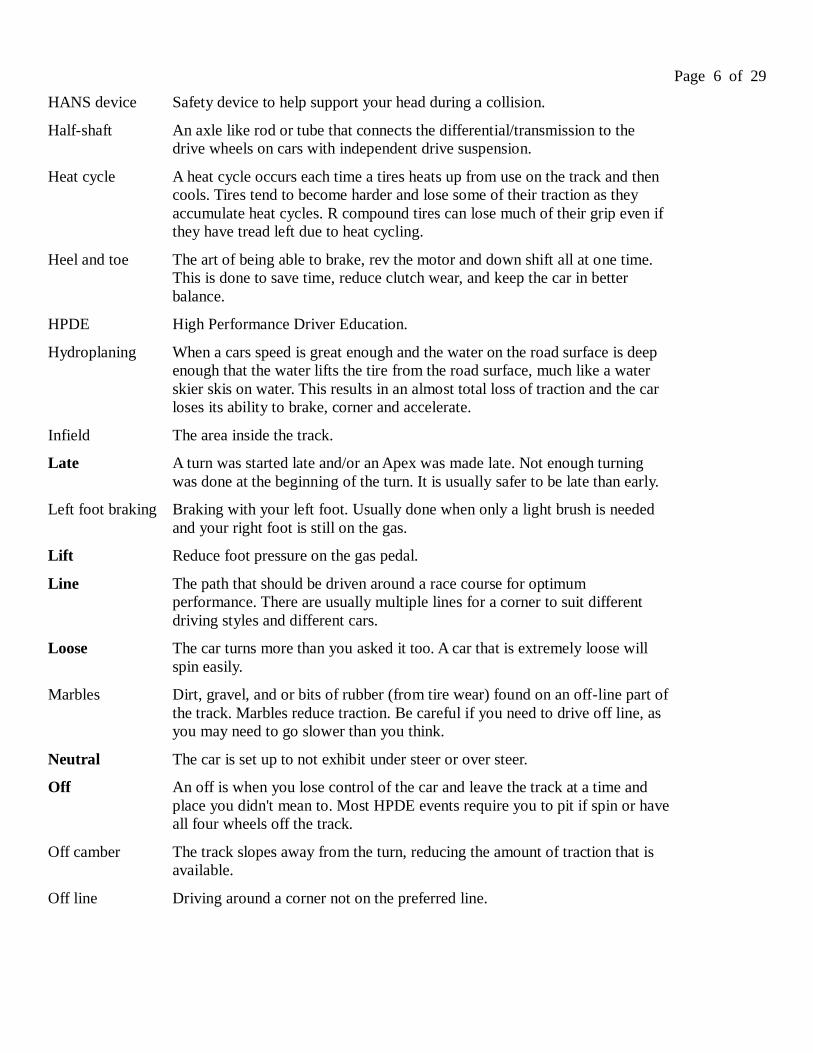
HANS device Safety device to help support your head during a collision.
Half-shaft An axle like rod or tube that connects the differential/transmission to the
drive wheels on cars with independent drive suspension.
Heat cycle A heat cycle occurs each time a tires heats up from use on the track and then
cools. Tires tend to become harder and lose some of their traction as they
accumulate heat cycles. R compound tires can lose much of their grip even if
they have tread left due to heat cycling.
Heel and toe The art of being able to brake, rev the motor and down shift all at one time.
This is done to save time, reduce clutch wear, and keep the car in better
balance.
HPDE High Performance Driver Education.
Hydroplaning When a cars speed is great enough and the water on the road surface is deep
enough that the water lifts the tire from the road surface, much like a water
skier skis on water. This results in an almost total loss of traction and the car
loses its ability to brake, corner and accelerate.
Infield The area inside the track.
Late A turn was started late and/or an Apex was made late. Not enough turning
was done at the beginning of the turn. It is usually safer to be late than early.
Left foot braking Braking with your left foot. Usually done when only a light brush is needed
and your right foot is still on the gas.
Lift Reduce foot pressure on the gas pedal.
Line The path that should be driven around a race course for optimum
performance. There are usually multiple lines for a corner to suit different
driving styles and different cars.
Loose The car turns more than you asked it too. A car that is extremely loose will
spin easily.
Marbles Dirt, gravel, and or bits of rubber (from tire wear) found on an off-line part of
the track. Marbles reduce traction. Be careful if you need to drive off line, as
you may need to go slower than you think.
Neutral The car is set up to not exhibit under steer or over steer.
Off An off is when you lose control of the car and leave the track at a time and
place you didn't mean to. Most HPDE events require you to pit if spin or have
all four wheels off the track.
Off camber The track slopes away from the turn, reducing the amount of traction that is
available.
Off line Driving around a corner not on the preferred line.
Page 7 of 29
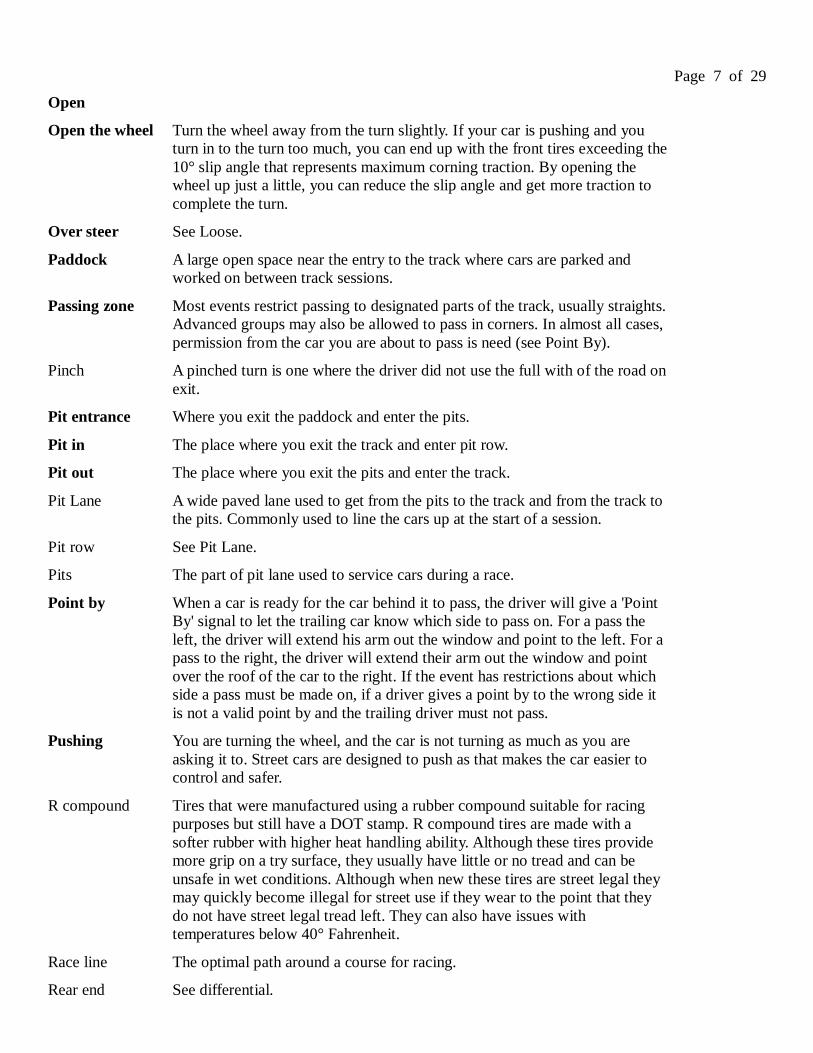
Open
Open the wheel Turn the wheel away from the turn slightly. If your car is pushing and you
turn in to the turn too much, you can end up with the front tires exceeding the
10° slip angle that represents maximum corning traction. By opening the
wheel up just a little, you can reduce the slip angle and get more traction to
complete the turn.
Over steer See Loose.
Paddock A large open space near the entry to the track where cars are parked and
worked on between track sessions.
Passing zone Most events restrict passing to designated parts of the track, usually straights.
Advanced groups may also be allowed to pass in corners. In almost all cases,
permission from the car you are about to pass is need (see Point By).
Pinch A pinched turn is one where the driver did not use the full with of the road on
exit.
Pit entrance Where you exit the paddock and enter the pits.
Pit in The place where you exit the track and enter pit row.
Pit out The place where you exit the pits and enter the track.
Pit Lane A wide paved lane used to get from the pits to the track and from the track to
the pits. Commonly used to line the cars up at the start of a session.
Pit row See Pit Lane.
Pits The part of pit lane used to service cars during a race.
Point by When a car is ready for the car behind it to pass, the driver will give a 'Point
By' signal to let the trailing car know which side to pass on. For a pass the
left, the driver will extend his arm out the window and point to the left. For a
pass to the right, the driver will extend their arm out the window and point
over the roof of the car to the right. If the event has restrictions about which
side a pass must be made on, if a driver gives a point by to the wrong side it
is not a valid point by and the trailing driver must not pass.
Pushing You are turning the wheel, and the car is not turning as much as you are
asking it to. Street cars are designed to push as that makes the car easier to
control and safer.
R compound Tires that were manufactured using a rubber compound suitable for racing
purposes but still have a DOT stamp. R compound tires are made with a
softer rubber with higher heat handling ability. Although these tires provide
more grip on a try surface, they usually have little or no tread and can be
unsafe in wet conditions. Although when new these tires are street legal they
may quickly become illegal for street use if they wear to the point that they
do not have street legal tread left. They can also have issues with
temperatures below 40° Fahrenheit.
Race line The optimal path around a course for racing.
Rear end See differential.
Page 8 of 29
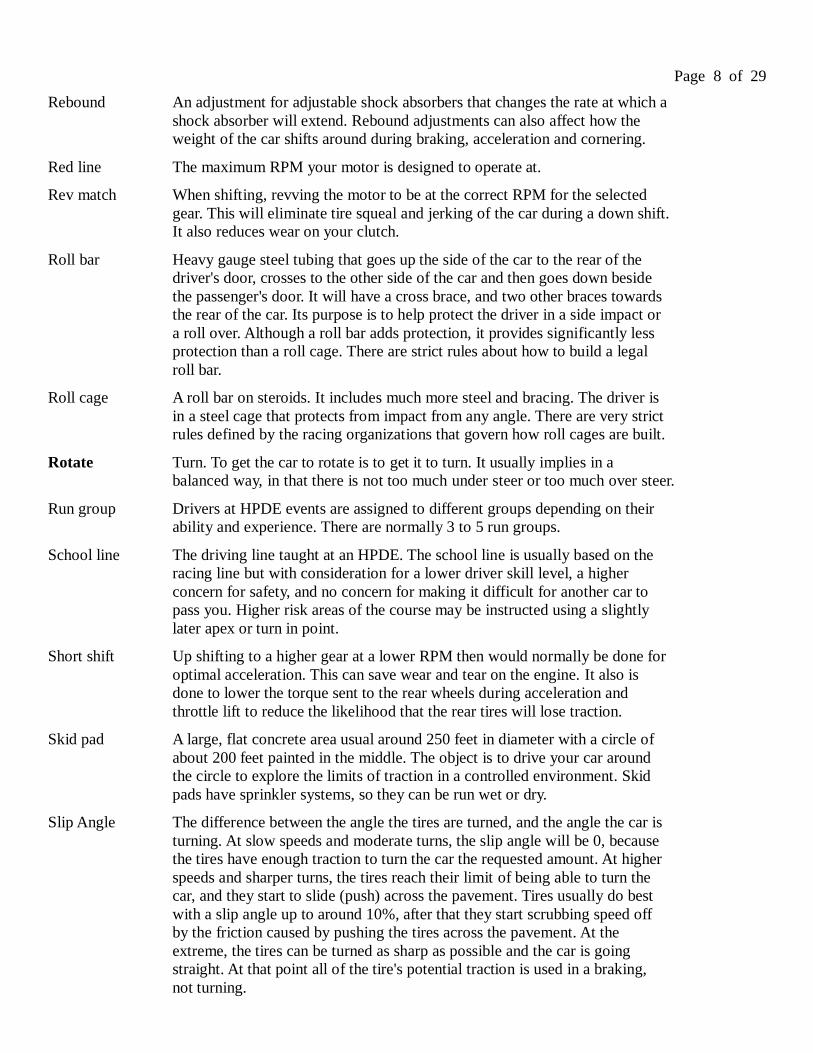
Rebound An adjustment for adjustable shock absorbers that changes the rate at which a
shock absorber will extend. Rebound adjustments can also affect how the
weight of the car shifts around during braking, acceleration and cornering.
Red line The maximum RPM your motor is designed to operate at.
Rev match When shifting, revving the motor to be at the correct RPM for the selected
gear. This will eliminate tire squeal and jerking of the car during a down shift.
It also reduces wear on your clutch.
Roll bar Heavy gauge steel tubing that goes up the side of the car to the rear of the
driver's door, crosses to the other side of the car and then goes down beside
the passenger's door. It will have a cross brace, and two other braces towards
the rear of the car. Its purpose is to help protect the driver in a side impact or
a roll over. Although a roll bar adds protection, it provides significantly less
protection than a roll cage. There are strict rules about how to build a legal
roll bar.
Roll cage A roll bar on steroids. It includes much more steel and bracing. The driver is
in a steel cage that protects from impact from any angle. There are very strict
rules defined by the racing organizations that govern how roll cages are built.
Rotate Turn. To get the car to rotate is to get it to turn. It usually implies in a
balanced way, in that there is not too much under steer or too much over steer.
Run group Drivers at HPDE events are assigned to different groups depending on their
ability and experience. There are normally 3 to 5 run groups.
School line The driving line taught at an HPDE. The school line is usually based on the
racing line but with consideration for a lower driver skill level, a higher
concern for safety, and no concern for making it difficult for another car to
pass you. Higher risk areas of the course may be instructed using a slightly
later apex or turn in point.
Short shift Up shifting to a higher gear at a lower RPM then would normally be done for
optimal acceleration. This can save wear and tear on the engine. It also is
done to lower the torque sent to the rear wheels during acceleration and
throttle lift to reduce the likelihood that the rear tires will lose traction.
Skid pad A large, flat concrete area usual around 250 feet in diameter with a circle of
about 200 feet painted in the middle. The object is to drive your car around
the circle to explore the limits of traction in a controlled environment. Skid
pads have sprinkler systems, so they can be run wet or dry.
Slip Angle The difference between the angle the tires are turned, and the angle the car is
turning. At slow speeds and moderate turns, the slip angle will be 0, because
the tires have enough traction to turn the car the requested amount. At higher
speeds and sharper turns, the tires reach their limit of being able to turn the
car, and they start to slide (push) across the pavement. Tires usually do best
with a slip angle up to around 10%, after that they start scrubbing speed off
by the friction caused by pushing the tires across the pavement. At the
extreme, the tires can be turned as sharp as possible and the car is going
straight. At that point all of the tire's potential traction is used in a braking,
not turning.
Page 9 of 29
Snap over steer See 'Trailing throttle over steer'
Splitter A flat extension of the front bottom of a car that keeps the high pressure air
from the front of the car from going underneath the car. This helps produce
down force on the front of the car.
Spoiler Spoilers are generally found on the rear of cars and are used to disrupt the
airflow as it passes over the vehicle. The goal is to reduce drag.
Squirrelly See unsettled.
Standing flag A flag that is being displayed, but not waved or being used to point to a
particular car. The most common standing flag is a standing yellow, used to
indicate there is no passing.
Standing water Water that has enough depth to possibly cause hydroplaning. The water may
be flowing or not.
Sway bar See 'Anti-sway bar'
Threshold braking
Braking as late as possible using near maximum braking effort until the end
of the braking zone.
Throttle induced over steer
Accelerating too hard while in a turn can exceed the rear tires ability to grip
the track and result in over steer, and in sever cases, a spin.
Tight See Pushing
Timing tower Usually the tallest building at the course located on or near the straight close
to the finish line.
Traction circle A plotting of the G forces during a track session. See 'The Line' section of
this document for more information.
Track in see Turn In.
Track left Refers to the left side of the track. Often used as a command to move the car
to the left side of the track.
Track out This is the point where you have exited the turn. This is usually on the
outside edge of the track. The steering wheel will be straight.
Track right Refers to the right side of the track. Often used as a command to move the car
to the right side of the track
Trail braking The act of light braking in to a corner to help transfer some weight to the
front wheels to gain traction to turn.
Trailing throttle over steer
If the throttle is lifted in a turn, a transfer of weight occurs from the rear of
the car to the front of the car that can cause the car to over steer, and in severe
cases, spin.
Turn in The point at which you start to turn the car to enter the corner. This is usually
on the outside edge of the turn. Also referred to as Track In or Entry.
Page 10 of 29
Under steer See Pushing.
Unsettled Under heavy braking, the rear of the car will move slightly left and right.
Usually the car continues in a relatively straight line. Most of the time this is
not a significant problem. It can often be fixed by using a less aggressive rear
pad, adjusting the brake bias, or adding more down force to the rear.
Up shifting Shifting from a lower gear (4th) to a higher gear (5
th).
Weight transfer As a car turns, accelerates or breaks the weight of the car is shifted. Learning
how to take advantage of weight transfer will help you be a better driver.
Wet line The optimal path around a course under wet conditions.
Wing An airfoil used to produce down force.
Page 11 of 29
Flags
Race tracks have flag stations strategically located around the track to give the corner workers in the
flag station a clear view of the track. The job of the flag station workers (corner workers) is to signal
drivers of the track condition or events that they may not be able to see. The flag stations should be
considered as important as stop lights. In the same way that you have to look at a stop light before you
enter an intersection, you must look at the flag station to make sure the track is clear ahead. Being able to
spot each flag station and any flag it may be displaying is a very important safety skill that you must master
quickly. The faster you go, the more dependent you are on the flag stations. Many tracks have one or more
blind sections that drivers can not see in advance well enough to react to events taking place on that part of
the track. The flag stations act as your spotter to the blind sections and can give you information about what
to expect down the track. Missing a flag at a flag station endangers you and the cars and people around you.
You must look at every flag station as you approach it.
NOTES:
1. The more significant the event, the more vigorously the flag will be waved.
2. A flag rolled up and pointed at a car is intended for that car, not the other cars.
3. Any time you see any flag displayed other than green or blue, it is a good idea to wave your hand to
signal the driver(s) behind you to check the flags.
The green flag signals a clear track. Normal passing is allowed.
The yellow flag means caution. Passing is not allowed except to pass a disabled car, stopped
car, or a car that is off the track. The more animated the flag is waved, the more you need to
slow down and prepare to maneuver or stop to avoid an obstacle. The flag is in effect until
you a different flag is displayed.
The red and yellow striped flag indicates there is something on or near the track and that you
should proceed cautiously at a reduced speed. If fluid is on the track, some tracks will rock
the flag from side to side. The flag may be removed after a couple of laps even if the problem
exists. This is so they can re-show it for a new problem.
Page 12 of 29
You must come to a full stop in sight of a flag station. Do not make a panic stop. Check your
mirrors to make sure it is safe to brake and wave your hand to make sure any driver behind
you understands a flag was displayed. Pull to the right edge of the track and remain in your
car with helmet and seatbelt on. Shut your car off only if you need to. Wait until a black flag
is displayed and proceed to the pits.
The white flag signals that a slower car is on the track. Be prepared to maneuver to avoid the
slower traffic. It could be a car with mechanical problems, or a safety vehicle.
A standing black flag is used to signal all drivers to reduce speed and proceed to pit lane. No
passing is allowed. If the flag is rolled and is being pointed at a specific car, the flag is meant
for that car only. It is best to reduce speed and be careful, as the black flag could have been
caused by a safety issue with your car.
The „Meatball‟ flag indicates a mechanical problem or hazard with your car. Proceed to pit
lane. It is best to reduce speed and be careful, as there may be a safety issue with your car.
The „Passing‟ flag is a warning to check your mirrors and let any faster cars pass as soon as
possible. Failure to let others pass may lead to a black flag and a forced visit to the pits
The checkered flag means the session is over. Reduce speed and pit. Slow down enough to be
able to go easy on your brakes so they have a chance to cool before you park your car.
Page 13 of 29
Safety
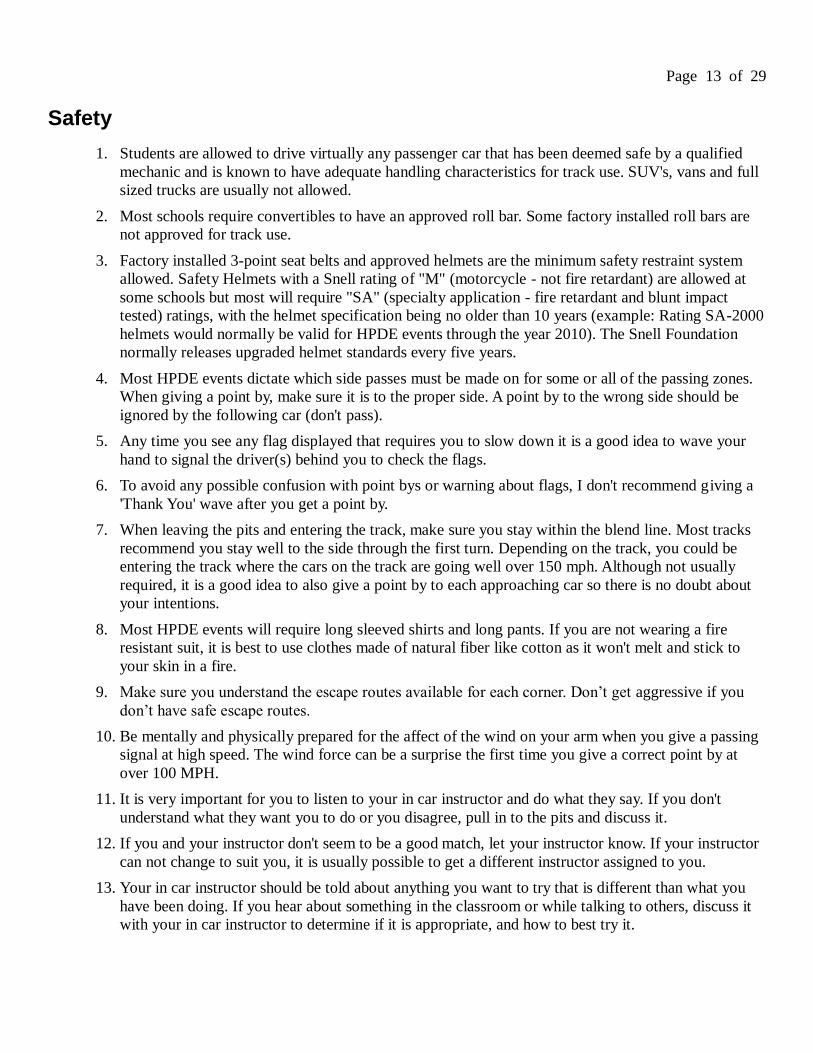
1. Students are allowed to drive virtually any passenger car that has been deemed safe by a qualified
mechanic and is known to have adequate handling characteristics for track use. SUV's, vans and full
sized trucks are usually not allowed.
2. Most schools require convertibles to have an approved roll bar. Some factory installed roll bars are
not approved for track use.
3. Factory installed 3-point seat belts and approved helmets are the minimum safety restraint system
allowed. Safety Helmets with a Snell rating of "M" (motorcycle - not fire retardant) are allowed at
some schools but most will require "SA" (specialty application - fire retardant and blunt impact
tested) ratings, with the helmet specification being no older than 10 years (example: Rating SA-2000
helmets would normally be valid for HPDE events through the year 2010). The Snell Foundation
normally releases upgraded helmet standards every five years.
4. Most HPDE events dictate which side passes must be made on for some or all of the passing zones.
When giving a point by, make sure it is to the proper side. A point by to the wrong side should be
ignored by the following car (don't pass).
5. Any time you see any flag displayed that requires you to slow down it is a good idea to wave your
hand to signal the driver(s) behind you to check the flags.
6. To avoid any possible confusion with point bys or warning about flags, I don't recommend giving a
'Thank You' wave after you get a point by.
7. When leaving the pits and entering the track, make sure you stay within the blend line. Most tracks
recommend you stay well to the side through the first turn. Depending on the track, you could be
entering the track where the cars on the track are going well over 150 mph. Although not usually
required, it is a good idea to also give a point by to each approaching car so there is no doubt about
your intentions.
8. Most HPDE events will require long sleeved shirts and long pants. If you are not wearing a fire
resistant suit, it is best to use clothes made of natural fiber like cotton as it won't melt and stick to
your skin in a fire.
9. Make sure you understand the escape routes available for each corner. Don‟t get aggressive if you
don‟t have safe escape routes.
10. Be mentally and physically prepared for the affect of the wind on your arm when you give a passing
signal at high speed. The wind force can be a surprise the first time you give a correct point by at
over 100 MPH.
11. It is very important for you to listen to your in car instructor and do what they say. If you don't
understand what they want you to do or you disagree, pull in to the pits and discuss it.
12. If you and your instructor don't seem to be a good match, let your instructor know. If your instructor
can not change to suit you, it is usually possible to get a different instructor assigned to you.
13. Your in car instructor should be told about anything you want to try that is different than what you
have been doing. If you hear about something in the classroom or while talking to others, discuss it
with your in car instructor to determine if it is appropriate, and how to best try it.
Page 14 of 29
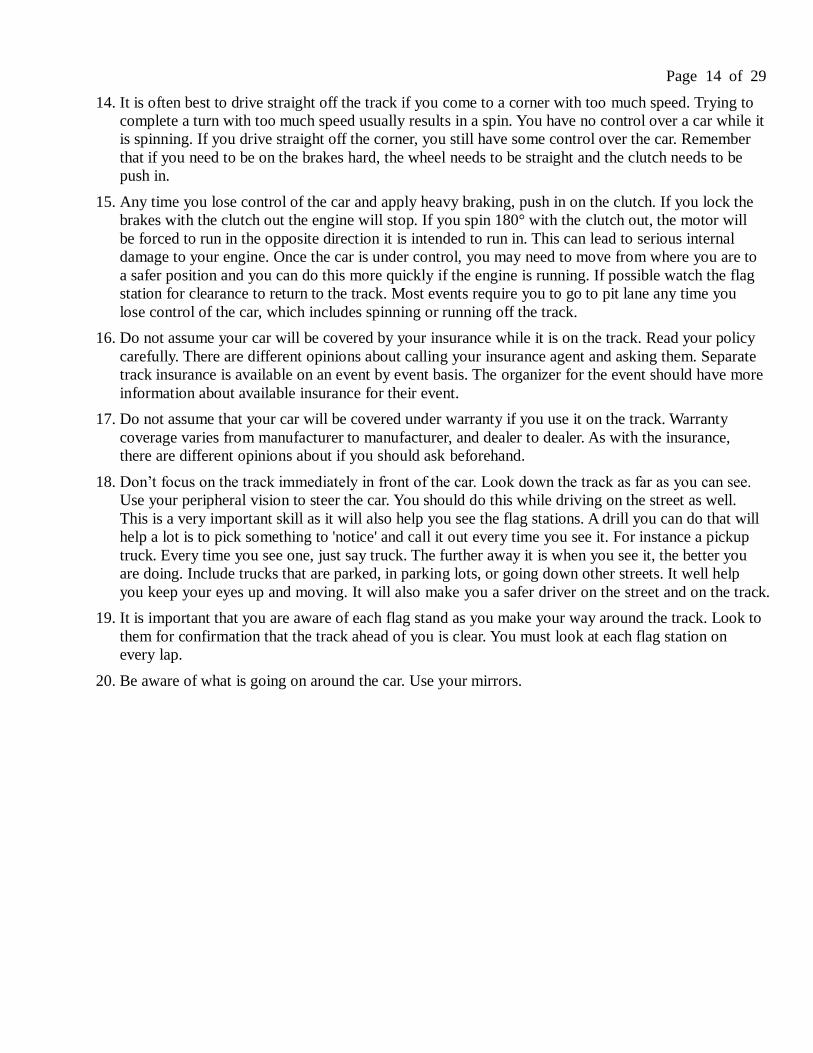
14. It is often best to drive straight off the track if you come to a corner with too much speed. Trying to
complete a turn with too much speed usually results in a spin. You have no control over a car while it
is spinning. If you drive straight off the corner, you still have some control over the car. Remember
that if you need to be on the brakes hard, the wheel needs to be straight and the clutch needs to be
push in.
15. Any time you lose control of the car and apply heavy braking, push in on the clutch. If you lock the
brakes with the clutch out the engine will stop. If you spin 180° with the clutch out, the motor will
be forced to run in the opposite direction it is intended to run in. This can lead to serious internal
damage to your engine. Once the car is under control, you may need to move from where you are to
a safer position and you can do this more quickly if the engine is running. If possible watch the flag
station for clearance to return to the track. Most events require you to go to pit lane any time you
lose control of the car, which includes spinning or running off the track.
16. Do not assume your car will be covered by your insurance while it is on the track. Read your policy
carefully. There are different opinions about calling your insurance agent and asking them. Separate
track insurance is available on an event by event basis. The organizer for the event should have more
information about available insurance for their event.
17. Do not assume that your car will be covered under warranty if you use it on the track. Warranty
coverage varies from manufacturer to manufacturer, and dealer to dealer. As with the insurance,
there are different opinions about if you should ask beforehand.
18. Don‟t focus on the track immediately in front of the car. Look down the track as far as you can see.
Use your peripheral vision to steer the car. You should do this while driving on the street as well.
This is a very important skill as it will also help you see the flag stations. A drill you can do that will
help a lot is to pick something to 'notice' and call it out every time you see it. For instance a pickup
truck. Every time you see one, just say truck. The further away it is when you see it, the better you
are doing. Include trucks that are parked, in parking lots, or going down other streets. It well help
you keep your eyes up and moving. It will also make you a safer driver on the street and on the track.
19. It is important that you are aware of each flag stand as you make your way around the track. Look to
them for confirmation that the track ahead of you is clear. You must look at each flag station on
every lap.
20. Be aware of what is going on around the car. Use your mirrors.
Page 15 of 29
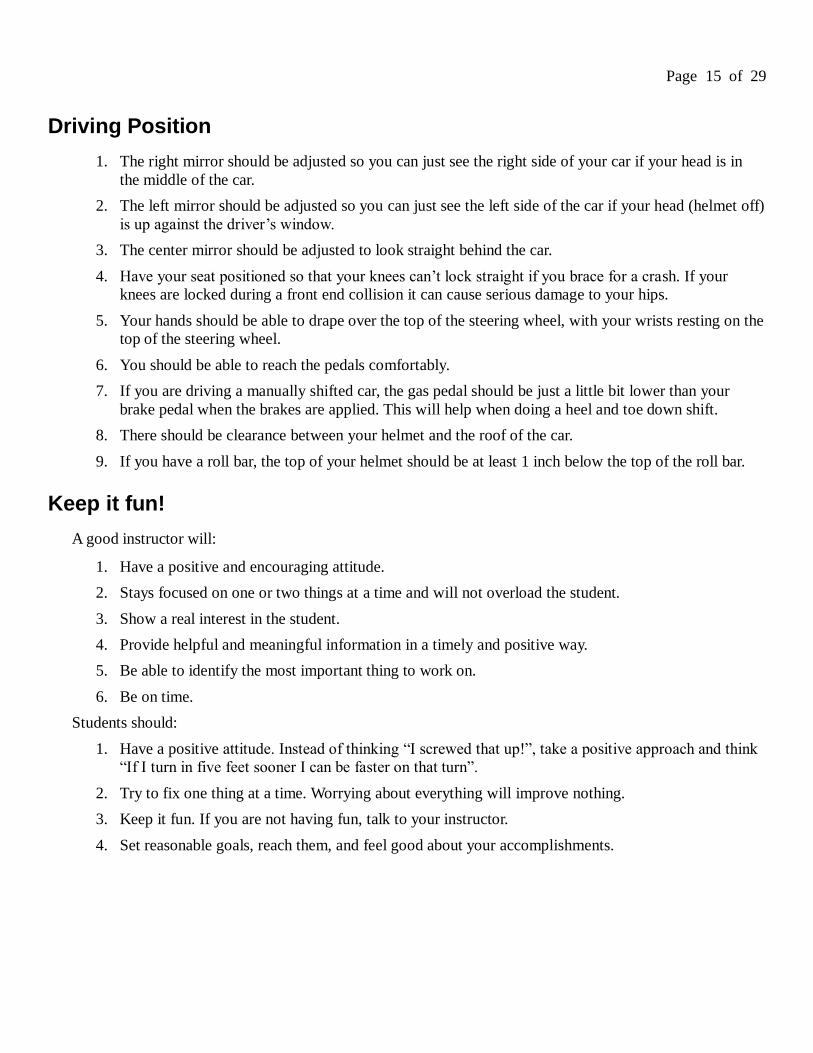
Driving Position
1. The right mirror should be adjusted so you can just see the right side of your car if your head is in
the middle of the car.
2. The left mirror should be adjusted so you can just see the left side of the car if your head (helmet off)
is up against the driver‟s window.
3. The center mirror should be adjusted to look straight behind the car.
4. Have your seat positioned so that your knees can‟t lock straight if you brace for a crash. If your
knees are locked during a front end collision it can cause serious damage to your hips.
5. Your hands should be able to drape over the top of the steering wheel, with your wrists resting on the
top of the steering wheel.
6. You should be able to reach the pedals comfortably.
7. If you are driving a manually shifted car, the gas pedal should be just a little bit lower than your
brake pedal when the brakes are applied. This will help when doing a heel and toe down shift.
8. There should be clearance between your helmet and the roof of the car.
9. If you have a roll bar, the top of your helmet should be at least 1 inch below the top of the roll bar.
Keep it fun!
A good instructor will:
1. Have a positive and encouraging attitude.
2. Stays focused on one or two things at a time and will not overload the student.
3. Show a real interest in the student.
4. Provide helpful and meaningful information in a timely and positive way.
5. Be able to identify the most important thing to work on.
6. Be on time.
Students should:
1. Have a positive attitude. Instead of thinking “I screwed that up!”, take a positive approach and think
“If I turn in five feet sooner I can be faster on that turn”.
2. Try to fix one thing at a time. Worrying about everything will improve nothing.
3. Keep it fun. If you are not having fun, talk to your instructor.
4. Set reasonable goals, reach them, and feel good about your accomplishments.
Page 16 of 29
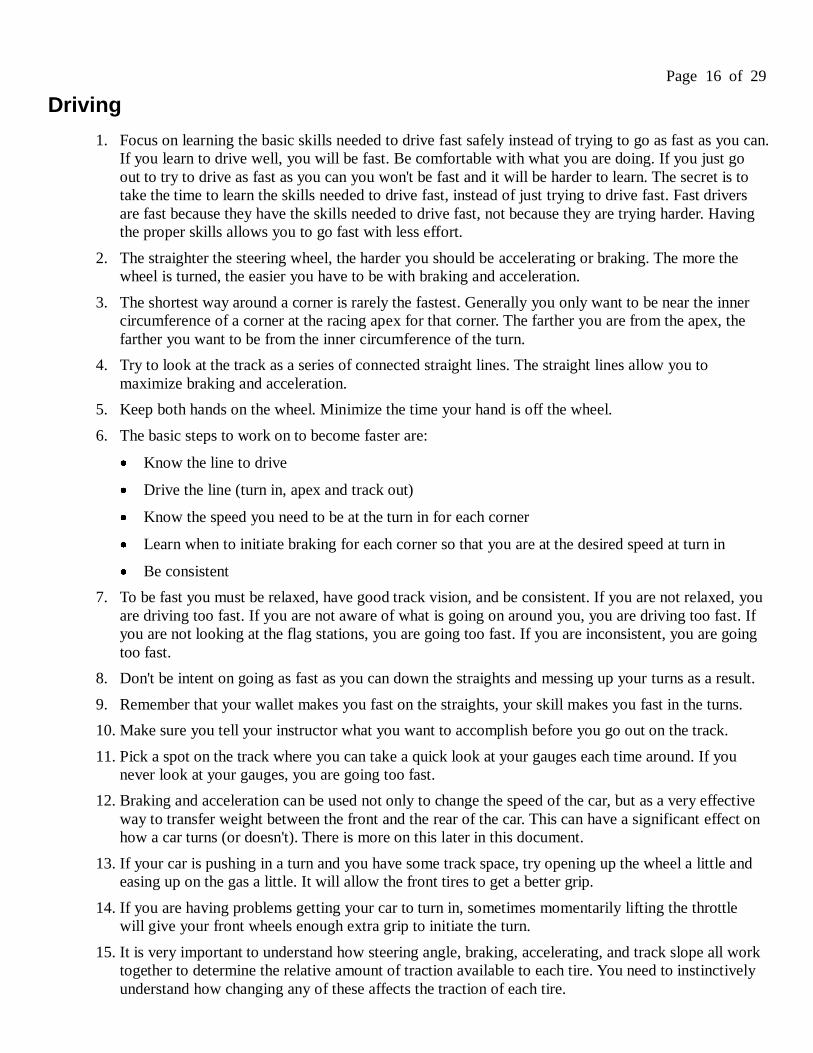
Driving
1. Focus on learning the basic skills needed to drive fast safely instead of trying to go as fast as you can.
If you learn to drive well, you will be fast. Be comfortable with what you are doing. If you just go
out to try to drive as fast as you can you won't be fast and it will be harder to learn. The secret is to
take the time to learn the skills needed to drive fast, instead of just trying to drive fast. Fast drivers
are fast because they have the skills needed to drive fast, not because they are trying harder. Having
the proper skills allows you to go fast with less effort.
2. The straighter the steering wheel, the harder you should be accelerating or braking. The more the
wheel is turned, the easier you have to be with braking and acceleration.
3. The shortest way around a corner is rarely the fastest. Generally you only want to be near the inner
circumference of a corner at the racing apex for that corner. The farther you are from the apex, the
farther you want to be from the inner circumference of the turn.
4. Try to look at the track as a series of connected straight lines. The straight lines allow you to
maximize braking and acceleration.
5. Keep both hands on the wheel. Minimize the time your hand is off the wheel.
6. The basic steps to work on to become faster are:
Know the line to drive
Drive the line (turn in, apex and track out)
Know the speed you need to be at the turn in for each corner
Learn when to initiate braking for each corner so that you are at the desired speed at turn in
Be consistent
7. To be fast you must be relaxed, have good track vision, and be consistent. If you are not relaxed, you
are driving too fast. If you are not aware of what is going on around you, you are driving too fast. If
you are not looking at the flag stations, you are going too fast. If you are inconsistent, you are going
too fast.
8. Don't be intent on going as fast as you can down the straights and messing up your turns as a result.
9. Remember that your wallet makes you fast on the straights, your skill makes you fast in the turns.
10. Make sure you tell your instructor what you want to accomplish before you go out on the track.
11. Pick a spot on the track where you can take a quick look at your gauges each time around. If you
never look at your gauges, you are going too fast.
12. Braking and acceleration can be used not only to change the speed of the car, but as a very effective
way to transfer weight between the front and the rear of the car. This can have a significant effect on
how a car turns (or doesn't). There is more on this later in this document.
13. If your car is pushing in a turn and you have some track space, try opening up the wheel a little and
easing up on the gas a little. It will allow the front tires to get a better grip.
14. If you are having problems getting your car to turn in, sometimes momentarily lifting the throttle
will give your front wheels enough extra grip to initiate the turn.
15. It is very important to understand how steering angle, braking, accelerating, and track slope all work
together to determine the relative amount of traction available to each tire. You need to instinctively
understand how changing any of these affects the traction of each tire.
Page 17 of 29
16. If you get held up in slower traffic, take advantage of it. This is a good time to try a different line, or
even to purposely drive off-line to get experience for when you need to drive off-line.
17. Make sure that any advice you get about driving is based on the car you are driving and your ability.
Even cars that are the same model can vary tremendously on their best line based on how they are
setup and the experience level of the driver.
18. If you want to be fast, stay focused on being safe, having fun, and working on your skills. If you
focus on going faster, you will go slower. Trying to go fast does not make you faster, learning and
using good driving skills will make you faster.
19. Relax! Tunnel vision not only severely limits your ability to see and process visual data, it also has a
negative effect on all of your other senses. Your ability to hear and feel what the car is doing are
greatly decreased if you have slipped into tunnel vision mode. One of the biggest reasons really fast
drivers are fast is because they are very relaxed behind the wheel. This allows them to easily process
the feedback from all their senses. If you are not relaxed behind the wheel, you are driving over your
limit and should slow down.
20. Get a map of the track and review each corner before going out on the track. Determine on which
turns the exit speed is most important. If possible, walk the track or do a slow lap and pick marks
that will help you make your entry, apex and exit points. Have a clear mental picture of how you
want to drive the track. Go to YouTube and watch some video of the track so you can start
visualizing the track before you get there. A good practice is to watch videos until you think you
know the track, then turn your head away or close your eyes for a random amount of time, then look
back at the screen and see how quickly you can determine where you are on the track.
21. When driving a track for the first time, take note of skid marks on the track and impact marks on
walls and fences. These are a warning indicating that part of the track is more difficult than other
drivers expected.
22. It is better to apex a little late than early. If you apex a corner too early it can get you in trouble
quickly. Any time you think you have hit the apex of a corner early, you should immediately take
corrective action by reducing speed.
23. If at any point on the track you see the same car behind you that was behind you a few turns ago,
give them a point by at the next passing zone. You may be faster on the straights, but their overall lap
times may be faster than yours. You might learn something by following them. THIS IS NOT
RACING. Any time you give a point by, lift until the car has passed you.
24. Many beginners have a difficult time with shifting, especially down shifting. Get your instructor to
tell you which gear you need to be in for each part of the track. Many times instructors will have a
student do the whole track using only one or two gears so they can concentrate on learning the track
and getting a feel for high speed driving.
25. Don't forget to turn your air conditioning off. The motor will run cooler and be able to put more
power to the tires.
26. To be fast, you must be consistent. One of the reasons experienced drivers can push their cars to the
limit is they are consistent. The less consistent you are, the slower you have to go to give yourself
the safety margin you need to make up for a mistake.
27. Be careful about following the line of the car ahead of you. They may be driving a car that handles
differently, or they may not know what they are doing.
28. Be careful about trying to keep up with the car in front of you. The driver may have a lot more
experience, and their car may have a much better track setup.
Page 18 of 29
29. Learn to recognize when you are off line or too fast. The earlier you can recognize there is a problem,
the more time you will have to make corrections. With experience, you will learn to judge how your
are doing all through the turn, and make throttle and steering adjustments accordingly.
30. Be aware that as a beginner, things tend to change quickly. When you finally get a turn figured out,
all of a sudden you'll find yourself going 5 to 10 MPH faster at the beginning of the next brake zone.
You have to constantly adjust your brake points as your speed increases.
31. Remember to take in to account the weight reduction when you get to solo. Without your instructor
in the car, you can accelerate more quickly which will raise your speed at the brake points, and you
may lose some cornering ability in right hand turns.
32. Slow corners, fast hands. Fast corners, slow hands. You can move the steering wheel quickly when
you are going slow, but not when you are going fast. The faster you are going, the slower you need
to give steering input.
33. Don‟t focus on the track immediately in front of the car. Look down the track as far as you can see.
Use your peripheral vision to steer the car. You should do this while driving on the street as well.
This is a very important skill as it will also help you see the flag stations. A drill you can do that will
help a lot is to pick something to 'notice' and call it out every time you see it. For instance a pickup
truck. Every time you see one, just say truck. The further away it is when you see it, the better you
are doing. Include trucks that are parked, in parking lots, or going down other streets. It well help
you keep your eyes up and moving. Looking ahead and keeping your eyes moving will make you a
safer driver on the street and on the track.
34. It is important that you are aware of each flag stand as you make your way around the track. Look to
them for confirmation that the track ahead of you is clear. You must look at each flag station on
every lap.
35. Be aware of what is going on around the car. Use your mirrors.
36. Note: Yes, I know the last three items have been repeated, but they are worth repeating.
Driving in the Rain
1. Consider increasing your tire pressures by 4 to 8 PSI when driving in the rain. This will make the tire
profile more round, allowing it to displace water more readily to get a better contact patch with the
road surface. The more standing water there is, the more important this is. The more tread you have,
the less important this is.
2. If the track surface is just wet, with no standing water, R compound slick track tires may be as fast as
rain tires. If you run tires with no tread in the rain, be careful about standing water. Although the tires
can still give you reasonable grip while they have contact with the track, once they hydroplane on
deeper water, they effectively lose all grip. The transition from having grip to having no grip can
come suddenly and without warning. If your are using R compound tires and the track is cool and
damp, try lowering your tire pressure to get the tires to heat up more for optimum grip.
3. When it is wet, stay off of the gators. They can offer a different grip level than the track, and cause a
limited slip differential to suddenly transfer power to the wheel with the most grip. In wet conditions
this can cause a spin.
4. Experiment with driving off line. The fastest line in the wet is often not the same as the dry line.
5. Apex corners a little latter than normal. This will help give you extra track space if you need it when
exiting the corner.
Page 19 of 29
6. Treat the car more gently. Be 'softer' with steering inputs, especially at track in. Don't jam on the
brakes. Be 'softer' with brake application and brake earlier. Accelerate more slowly.
7. Do more of your braking and accelerating while in a straight line.
8. Short shift and use higher gears to reduce the power you are sending to the wheels. Accelerating in a
turn using 4th
gear will not put as much power to the wheel as accelerating in 3rd
gear. Lifting in 4th
gear will not have as much braking effect as lifting in 3rd
gear.
How Fast is Fast Enough?
So, how can you tell when you are going as fast as you can through a corner? Do you have to go too
fast and run off the track? No. It is actually fairly easy to determine how much of your car's potential you
are using in a turn.
1. You have to be able to consistently brake to the proper speed for the turn in.
2. You have to consistently turn in at the proper spot with the proper amount of steering.
3. You have to consistently hit the apex.
4. You must be going fast enough that the front tires are operating at their optimum slip angle.
Once you have mastered these steps, start paying attention to how close you come to where you want
to be at track out. Usually this is the edge of the track. If you are where you want to be, you've done all you
can. If you have room to spare, you can take the corner faster. Taking the corner faster can mean entering
the corner at a higher speed, or accelerating more through the turn. Increasing radius turns favor more
acceleration. Momentum cars favor a faster speed on entering.
It is important to learn to continually evaluate how you are doing in the turn. This allows you to make
minor throttle and steering adjustments to correct things before they become a problem.
Traction
There are whole books written about this topic, but here are the highlights. It is not in depth, and is
simplified, but the basics are here. You need to spend time thinking about traction and becoming very
comfortable with the physics of what is going on. Understanding weight shift and how it affects traction
will give you a very important tool to correct a problem before it gets out of control.
There is a fixed amount of traction available, and you have significant control over how it is used. The
amount of traction available is determined by the track surface, track slope, tire temperature, tread design,
tire compound and corner weight. You may have a little control over track slope by where you place your
car on the track, but the primary focus here is on weight transfer and steering angle.
There are three primary ways you can affect how your traction is used: Steering angle; Braking; and
Accelerating.
You affect the corner weighting by turning the car, which shifts the weight from side to side, and by
braking or accelerating, which shifts the weight from front to back. Accelerating shifts weight to the back
tires, braking shifts weight to the front tires. Where the weight is shifted to gains traction, where the weight
is shifted from loses traction. The steering angle affects traction in two ways. It shifts weight from side to
side in the car, and it determines how much of your front wheel traction is used for steering, and how much
is used for braking. The more you turn the wheel, the more front steering traction is lost due to a braking
affect caused by pushing your front tires sideways in an effort to turn. Once you exceed the desired slip
angle for your tires (about 10 degrees), your steering traction drops as the tire is just being pushed sideways
Page 20 of 29
which results in braking. If you turn too far past the slip angle of your tire, you risk spinning. As the tires
scrub off speed, you will reach the point that the tires regain grip. When they do they will cause the front of
the car to turn quickly in the direction the tires are pointed. This sudden movement will often result in spin.
If you feel the car pushing, turning the wheel further will not help you turn more. You must do some
combination of lift, light braking, or opening the wheel until the tires regain grip. Braking and accelerating
share a common trait. While small amounts of either can help traction, large amounts of either can cause
you to lose traction. A small application of power can transfer weight to the back of the car and give it some
extra traction if it is starting to slide. Large amounts of throttle could cause the rear wheels to use so much
of their traction to provide acceleration that the tires will lose grip completely and the car will spin. A lift,
light braking or opening the wheel slightly can help a car that is pushing. If you lift and/or brake lightly you
will transfer some weight to the front wheels which will help them turn. Conversely if you hit the brakes
too hard, so much of the traction will be used in an effort to brake that the tires will lose steering traction
and you will go straight. To further complicate things, rear engine high horsepower cars can suffer
significant under steer by accelerating too quickly. With the engine weight in the back over the rear wheels
and the front weight being transferred to the back because of acceleration, the front wheels do not have
enough grip to cause the car to turn.
Driving a FWD (Front Wheel Drive) vehicle typically requires some degree of trail braking into a
Corner. The braking zone is usually extended further in a FWD vehicle in order to create down force on the
front tires to facilitate corner turn in, as well as getting on the throttle early to pull the car through the apex
of the corner. If you lift off the brake just before turn in, the weight will come off the front and transfer to
the rear, the front of the car will lose grip and the car will under steer. This same technique would also be
used driving a RWD (Rear Wheel Drive) vehicle approaching a slow corner where the tendency is to under
steer. The slow in fast out approach is key. One of the benefits of FWD is the vehicles natural ability to
avoid a spin with power application, and the ability to induce rotation by lifting the throttle. However, the
fastest lap time will be achieved by braking into the corner to plant the nose and applying throttle as soon
as the car turns in. Carrying too much speed into the corner and having to lift to rotate will scrub too much
speed, and result in the car slowing down when the driver should be accelerating. Long radius or double
apex turns can be very enjoyable with a FWD vehicle as the second part of the turn can be accomplished
with a quick momentary throttle lift without moving the steering wheel. Crisis Management in FWD: If the
back end steps out open the wheel and apply power, the amount of power proportionate to the amount the
back end stepped out (slid). The wheel is opened to the neutral or straight ahead position but not opposite
lock. The power on the front wheels will literally pull the car out of the slide. The rear tires will always take
one to two laps longer to come up to temp. For heavy under steer when the car refused to turn, it can be
forced to rotate by lifting throttle, slightly tapping the brake or both and getting right back on hard power
on the onset of rotation. The car can be “forced” to turn with this technique.
Techniques with AWD are more related to FWD than RWD because the vehicles natural tendency is to
under steer, however the ability to accelerate with both front and rear tires allows enhanced acceleration
capabilities, and more power application sooner is possible. Recovery techniques are same as FWD, apply
power if the rear steps out and open the wheel. Lift throttle to induce rotation.
Page 21 of 29
Shifting
It is surprising to most people how difficult shifting seems to be, and how much it affects their ability
to do well in a corner. There are a few simple things that can be done to make shifting less of an issue, but
advanced skills like 'heel and toe' require a lot of practice on and off the track. If you have any experience
with shifting a manual transmission, you should find that up shifting is easy. One thing to keep in mind
when up shifting is to not let out on the clutch too quickly and jerk the car. This puts unneeded strain on the
drive drain and can also upset the balance of the car.
Although up shifting is fairly straight forward and very much like how you shift on the street, down
shifting on the track can be much more difficult to get right. As you gain more experience you will need to
work on rev matching and then becoming proficient at doing a proper heel and toe to make your braking
and down shifting smoother and faster.
Here are some simple tips to help you get going.
Phase One:
1. Don't shift any more than necessary until you are comfortable with the track and your car. I often
have new students drive the entire track using only one or two gears. This allows you to concentrate
on braking and driving the correct line.
2. Once you decide to add some shifts, get help from your instructor about which gear to use and when
to shift. At this stage you should not be experimenting and trying to figure out which gear to use.
3. Don't rev your motor to the max on each shift. You are not racing, and the extra revs won't really
help. Shift about 500 RPM under your engines red line.
4. When you need to down shift in a brake zone, let the clutch out slowly. You should take about a
second to release the clutch pedal. This will help keep the car stable, and it will also help protect
your motor from over-revving if you select the wrong gear. You should be able to do this while you
are braking.
Phase Two:
Start trying to rev match when you down shift. If you are in a braking zone, wait to do your rev
matching down shift until after you have completed your braking. To rev match, just give the throttle a little
'blip' to rev the motor as you down shift. When done properly, the engine should be revved to be at the
proper RPM for the gear you are shifting to. When rev matching, you will need to get off the clutch pedal
more quickly than you did in Phase One. If you do it properly, the car will not lurch when you take your
foot off the clutch. This skill can and should be practiced on the street before trying it on the track. You
might want to ask an instructor to take you for a short drive on the street to demonstrate this technique. Rev
matching is basically ½ of a heel and toe, so once you get it mastered, you've now learned ½ of the heel and
toe. The other ½ is braking, which you already know how to do.
Phase Three:
Learn to Heel and Toe. To heel and toe you are going to do the rev matching you learned in Phase Two,
and add braking to it. Again, get an instructor or friend to show you the technique on the street or in a
parking. Get comfortable doing this on the street before attempting it at speed on the track.
Page 22 of 29
Brakes and Braking
1. Installing stainless steel brake lines is a good idea for three reasons:
Less likely to break
More resistant to abrasion
Less expansion, so your brake peddle will feel more firm
If they fail, it is usually not a complete failure as the stainless braid will help slow the leak
enough that you should be able to get the car to a safe stop before all brake fluid is gone.
2. Switch to a better grade of brake fluid, like ATE Blue or ATE Gold. Note: They are the same fluid
with different color dye so you can be sure you have entirely purged the system when it is time to do
a full flush.
3. Work up to the limits of your brakes gradually. If you abuse your brakes they can overheat and work
much less effectively. It is rare for brakes to be able to be used at 100% on every corner. Even if they
can, it could cause the pads and rotors to wear faster than you want. What you want to do is
determine how much braking effort your car is comfortable with, and consistently use that much
brake effort.
4. You should not slam on the brakes at the beginning of the brake zone. The initial application of the
brakes should be a smooth, deliberate pressing of the peddle, but not an immediate, panic like full
application of your brakes. It is better to brake hard at the beginning of the braking zone, maintain
consistent pressure through the middle of the braking zone, and then ease up at the end. This will
help make the turn in more controllable. It also gives you a little more room for error.
5. Brake fade is caused by the brakes getting too hot. A reduction in brake force, even with good pedal
pressure indicates the pads are too hot and that you need to lighten up on your braking, add brake
ducts for cooling, or switch to a more heat tolerant pad. If the brake pedal gets soft or mushy, it is
usually caused by the brake fluid getting so hot that it is boiling. The air bubbles caused by the
boiling make the pedal feel soft.
6. Do not under estimate how quickly you can go through a set of brake pads. It is possible to wear out
a new set of stock brake pads in as little as three hours of track use.
7. When a track session ends, slow down and let your brakes cool off as much as possible. Consider
taking a slow drive around the paddock after a track session before parking your car. This gives the
brakes and engines a chance to cool off. Open you hood once parked to help heat escape from the
engine compartment. When you first get off the track it is a bad idea to use you parking brake, or to
sit with your brakes on. The brakes are so hot that sitting with your brakes on can cause damage to
your rotors and or pads. Leave the car in gear (or Park) when you shut the motor off and let the
motor and transmission act like a parking braking brake (assuming you are on fairly level ground).
This is especially true if you have to stop on the track for a red flag, or pull in to the pits and stop for
a black flag. If your parking spot in the paddock is slopped, use wheel chocks.
8. It is important to understand the concept of heel and toe early on, even if you don't do it to start with.
You want to determine how you think you will cover the brake and gas pedals with one foot to
accomplish a heel and toe. You want to give thought to it now so that you can start out covering the
brake pedal with your right foot the same way you will when you heel and toe. This way, your foot
gets used to the needed position, without having to to actually do a heel and toe. When you actually
start doing heel and toe shifting/braking, your foot will already be used to how it needs to cover the
brake pedal.
Page 23 of 29
9. Don't try to get the most out of your brake pads and use them till almost all of the brake pad material
is gone. The pad material acts as an insulator and helps keep the calipers from getting too hot.
10. To determine where the brake point is for a turn, start braking at or before the first marker. If you
have to get off the brakes before the turn in because you have slowed too much, the next time wait to
brake until about ½ a marker later. Keep doing this until you are at the proper speed for the turn in.
The goal is to be able to consistently start your braking at the same point, and achieve a consistent
speed at turn in.
Tires
1. Because your tires will heat up more on the track then on the street, most of the time you will need to
start your track event with tire pressures about two pounds lower than your street temperatures.
2. Watch the shoulder of your tires. If you are getting wear too far around the tire on to the sidewall,
you need to increase tire temperatures. Most tires have a wear indicator to show how far on to the
sidewall the tire manufacturer intended the tire to wear. The wear indicator is sometimes a small
raised rib (line) around the edge of the tire. Most often is is a small triangle of arrow where the tip
represents the maximum amount of roll a tire should have. If the wear is far away from the wear
indicator, you should probably reduce the air pressure in that tire. If the wear indicator is being
rubbed, you should increase pressure in the tire.
3. If the center of your tread seems to be wearing the most, decrease your tire pressures.
4. Learn to pay attention to what your tires are trying to tell you. Street tires usually give useful audible
feedback. When they approach their traction limit they start to squeal. The louder the squeal, the
more you are over driving the tire. R-Compound tires are usually quieter and give feedback by feel.
If you are pushing them too hard in a turn they will start to feel 'rough' as they approach their limit,
kind of like it might feel if you were driving over small rocks.
5. Tires are expensive and one of the major costs for tracking your car. A good tire pressure gauge and
an infrared pyrometer will help you get the most out of your tires.
6. Tire temps should be progressive or equal when measuring the inside, middle and outside of the tire
tread. Generally, the inside temp should be 10 to 20 degrees higher then the outside temp.
7. Temperatures for street tires should be in the 110 to 140 range (IR, in the pits), depending on the tire,
the track, cool down lap, and the ambient temperature.
8. Temperatures for R compound tires should be in the 140 to 200 degree range (IR, in the pits),
depending on the tire, the track, cool down lap, and the ambient temperature.
9. Front tire temperatures may be higher by 10 to 20 degrees than the rear tires even on a car that is
balanced. This is due to engine heat and brake heat (the front brakes work harder than the rear
brakes). Front wheel drive cars will also have higher temps on the front.
10. Temperatures on the front that are more than 20° hotter than the rears are an indication that the car
has under steer.
11. Higher temps in the rear indicate the car has over steer.
12. The rule of thumb is for every 10° Fahrenheit change in air temperature, your tire's inflation pressure
will change by about 1 psi (up with higher temperatures and down with lower).
13. If the inside tread temperature is too high compared to the outside tread temperature, it is an
indication that you have too much negative camber.
Page 24 of 29
14. If the temperature of the center of the tire is too high compared to the edges, it is an indication that
you are running too much air pressure.
15. Take in to account the track layout and how the car was being driven just before temps are taken
when evaluating your temperature readings.
16. If your tire temperatures are consistently low, consider getting narrower tires the next time you get
tires.
17. If your tire temperatures are consistently high, consider getting widder tires the next time you get
tires.
18. Maximum traction on a dry surface actually occurs with a slight amount of tire slippage against the
rough asphalt surface. Maximum braking occurs at 10 to 15% slippage, and maximum cornering
occurs at 5 to 10% slippage.
19. A racing tire can produce up to 1.5G with no down force, and up to 5.0G when aerodynamic down
force is added (F1 cars).
20. As a basic guideline when adjusting tire pressure to equalize tire temp across the face of the tire,
adjust by 1 psi for each 5° F delta.
21. Tires have a limited useful life which is determined by the tread and the rubber compound.
Measuring the tread is the easiest thing to watch, but tires can lose much of their grip before the
tread is gone through a process called heat cycling. Each time a tire gets hot, its rubber compound
changes and the rubber becomes harder and less sticky. Depending on the tire, there can easily be a
second a lap difference between its best lap, and what you have after a few heat cycles. A tire that
has heat cycled past its prime can be three to five seconds a lap slower than when it was at its best.
22. If you are curious about how hot your tires are getting, and you don't have a pyrometer, you can do a
rough calculation using tire pressure. Measure the tire pressure while it is at ambient temperature (in
the shade, not having been driven on for a while). After your track session, measure the pressures
again. Each pound of air pressure change represents about ten degrees of tire temperature change. So
if your tires were inflated to 32 psi at 80 degrees, and they were at 40 psi after you come off the track,
your tire temperatures were about 160 degrees.
23. The softer the tire compound, the more important that the tire be heat cycled before its first use on
the track. Some tire suppliers offer heat cycling for a small fee. You can also heat cycle the tires
yourself by driving them for about 100 miles or until they get over 120 degrees, and then letting
them sit for 24 hrs. It is very important that they are not used for 24 hours after the first heat cycle.
Tire life can be increased significantly (25% to 40%) by proper heat cycling before first track use.
Modifications
Remember that everything in a car is related, and that anything you change will have an effect on other
aspects of your car. The art in getting a car set up properly is having everything work within the limits
imposed by other parts of the car. It doesn't make sense to add 50 horsepower if your brakes are already
overheating. It is important to understand the relationships and make good choices about modifications you
make. For example switching to R-Compound tires can have a negative effect on your brakes. The extra
grip provided by the tires allows the brakes to work harder, so they get hotter. The extra grip can also cause
more body roll that can result in tire rubbing.
Page 25 of 29
There is nothing that can make a bigger difference in how fast your car goes than your ability to drive
it. Spending money on your skills makes you faster. Spending money on your car makes your car faster. Do
you want to be known as a fast driver, or the driver of a fast car? Wallets makes cars faster on the straights,
skill makes cars faster in the corners. If you are asking other people what modifications you should make to
your car to make it faster, you probably should wait and get more experience. With experience you will
know what needs to be done to your car, you won't need to ask. Once you know what you need to improve,
then talk to others that drive the same car as you and find out what works and what doesn't.
The one class of modifications that help every aspect of tracking a car is making it lighter. It makes
acceleration, braking and cornering better. There are no negative aspects of making a car lighter unless you
do something that weakens the structural integrity of the car.
Remember that modifying your car may create problems with warranty.
Are you ready to solo?
The requirements vary from organization to organization, and in fact from instructor to instructor.
Don't be in a big hurry to solo. Having an instructor in the car benefits you in three ways:
1. You can get more instruction. Even professional racers rely on driving coaches to enhance their skills,
even after years of driving.
2. Your instructor adds safety to your session. They can warn you about impending trouble that you
might not be aware of.
3. Some people find it more fun to have an instructor in the car with them. They enjoy getting feedback
when they do something well.
Of all the factors that are considered in making a decision as to if you should solo or not, safety is by
far the biggest. At a minimum you should be able to demonstrate the following skills:
1. Be able to safely give or take a point by.
2. Have a complete understanding of all the flags and what action is required by you for each flag.
3. Be able to drive the car at a reasonable speed that is appropriate for the run group you are in.
4. Show a demonstrated ability to be calm and patient with other drivers. Aggressive driving is not
tolerated.
5. Show your instructor that you are listening by following their instructions. If you don't follow their
instructions while they are in the car, I doubt they will feel like you will follow instructions without
them in the car.
6. Show some level of consistency in cornering and braking.
7. Check you mirrors before each passing zone to give timely point bys.
8. Be able to check each flag station every time you come to one. Tell your instructor you want to call
out the flag stations as you pass them. If you can do this for two laps without missing a flag station
and without it affecting your driving, you are probably ready to solo. It is amazing how much your
driving will be affected by this simple exercise if you are not ready to solo.
Page 26 of 29
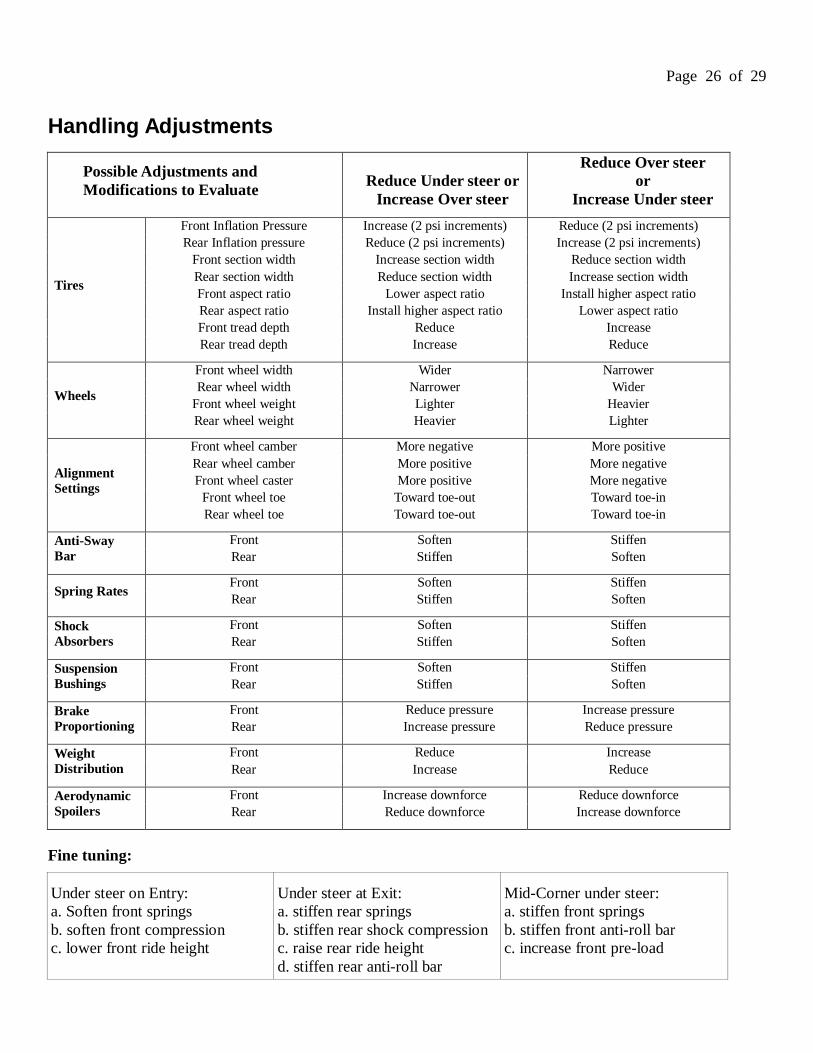
Handling Adjustments
Possible Adjustments and
Modifications to Evaluate Reduce Under steer or
Increase Over steer
Reduce Over steer
or
Increase Under steer
Tires
Front Inflation Pressure Increase (2 psi increments) Reduce (2 psi increments)
Rear Inflation pressure Reduce (2 psi increments) Increase (2 psi increments)
Front section width Increase section width Reduce section width
Rear section width Reduce section width Increase section width
Front aspect ratio Lower aspect ratio Install higher aspect ratio
Rear aspect ratio Install higher aspect ratio Lower aspect ratio
Front tread depth Reduce Increase
Rear tread depth Increase Reduce
Wheels
Front wheel width Wider Narrower
Rear wheel width Narrower Wider
Front wheel weight Lighter Heavier
Rear wheel weight Heavier Lighter
Alignment
Settings
Front wheel camber More negative More positive
Rear wheel camber More positive More negative
Front wheel caster More positive More negative
Front wheel toe Toward toe-out Toward toe-in
Rear wheel toe Toward toe-out Toward toe-in
Anti-Sway
Bar
Front Soften Stiffen
Rear Stiffen Soften
Spring Rates Front Soften Stiffen
Rear Stiffen Soften
Shock
Absorbers
Front Soften Stiffen
Rear Stiffen Soften
Suspension
Bushings
Front Soften Stiffen
Rear Stiffen Soften
Brake
Proportioning
Front Reduce pressure Increase pressure
Rear Increase pressure Reduce pressure
Weight
Distribution
Front Reduce Increase
Rear Increase Reduce
Aerodynamic
Spoilers
Front Increase downforce Reduce downforce
Rear Reduce downforce Increase downforce
Fine tuning:
Under steer on Entry:
a. Soften front springs
b. soften front compression
c. lower front ride height
Under steer at Exit:
a. stiffen rear springs
b. stiffen rear shock compression
c. raise rear ride height
d. stiffen rear anti-roll bar
Mid-Corner under steer:
a. stiffen front springs
b. stiffen front anti-roll bar
c. increase front pre-load
Page 27 of 29
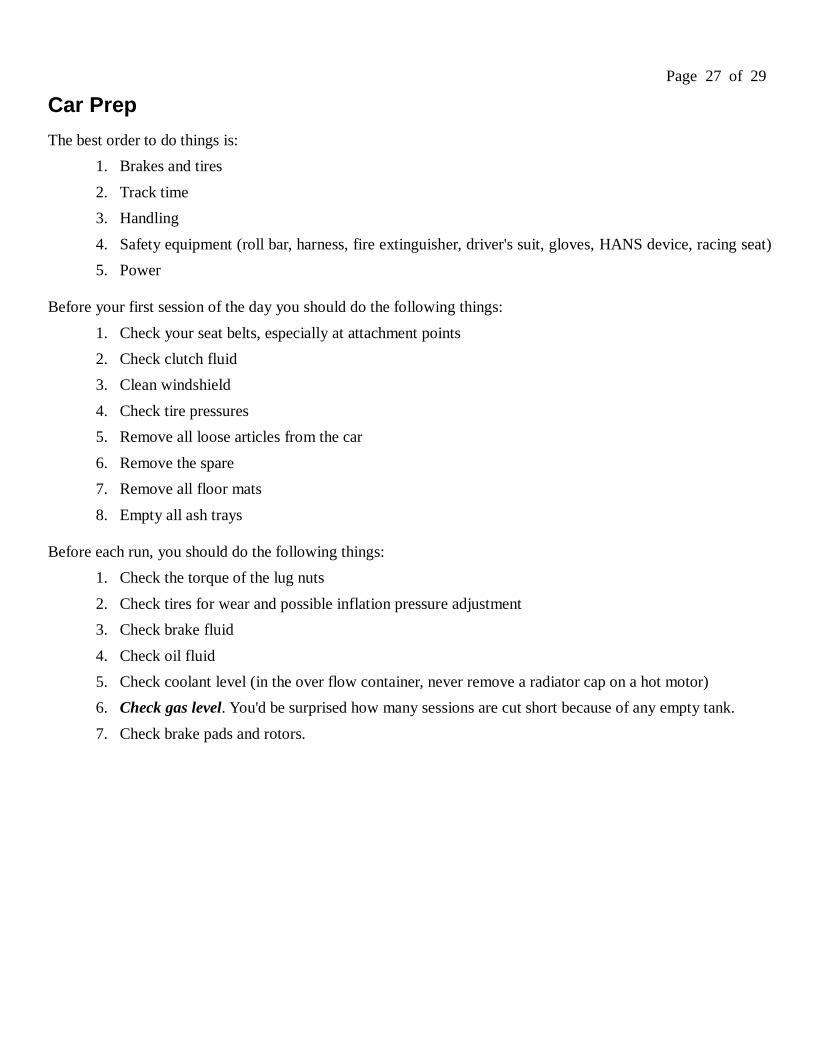
Car Prep
The best order to do things is:
1. Brakes and tires
2. Track time
3. Handling
4. Safety equipment (roll bar, harness, fire extinguisher, driver's suit, gloves, HANS device, racing seat)
5. Power
Before your first session of the day you should do the following things:
1. Check your seat belts, especially at attachment points
2. Check clutch fluid
3. Clean windshield
4. Check tire pressures
5. Remove all loose articles from the car
6. Remove the spare
7. Remove all floor mats
8. Empty all ash trays
Before each run, you should do the following things:
1. Check the torque of the lug nuts
2. Check tires for wear and possible inflation pressure adjustment
3. Check brake fluid
4. Check oil fluid
5. Check coolant level (in the over flow container, never remove a radiator cap on a hot motor)
6. Check gas level. You'd be surprised how many sessions are cut short because of any empty tank.
7. Check brake pads and rotors.
Page 28 of 29
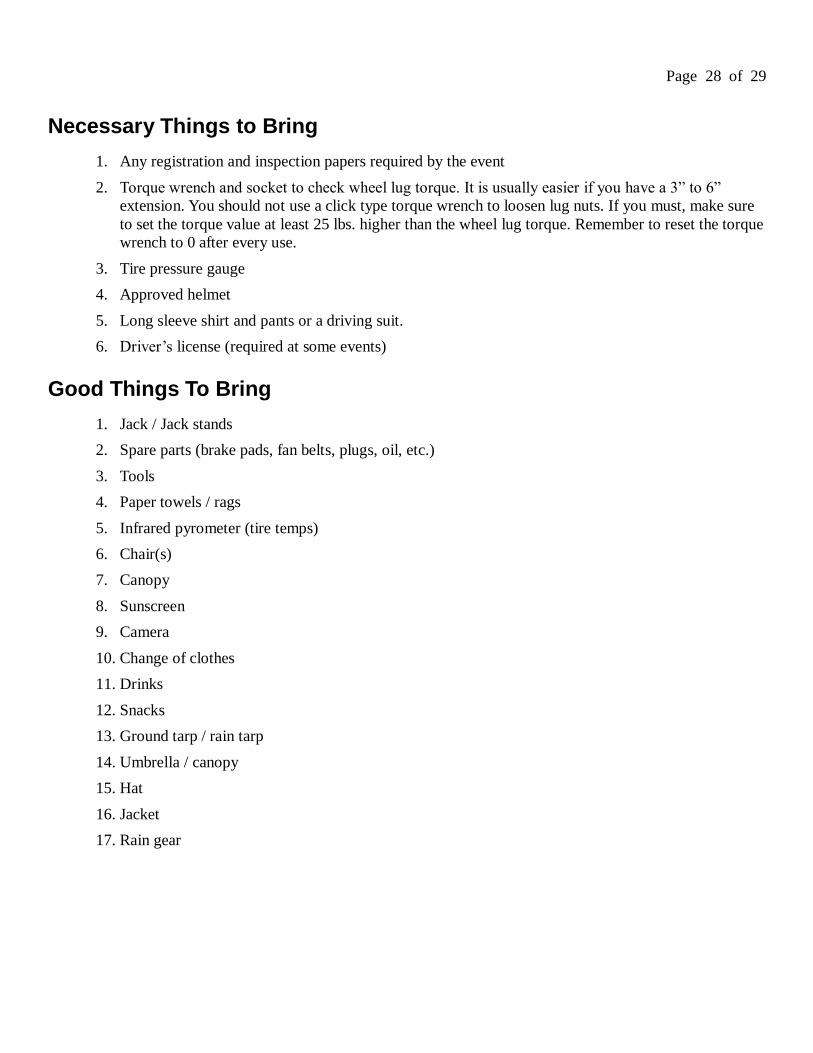
Necessary Things to Bring
1. Any registration and inspection papers required by the event
2. Torque wrench and socket to check wheel lug torque. It is usually easier if you have a 3” to 6”
extension. You should not use a click type torque wrench to loosen lug nuts. If you must, make sure
to set the torque value at least 25 lbs. higher than the wheel lug torque. Remember to reset the torque
wrench to 0 after every use.
3. Tire pressure gauge
4. Approved helmet
5. Long sleeve shirt and pants or a driving suit.
6. Driver‟s license (required at some events)
Good Things To Bring
1. Jack / Jack stands
2. Spare parts (brake pads, fan belts, plugs, oil, etc.)
3. Tools
4. Paper towels / rags
5. Infrared pyrometer (tire temps)
6. Chair(s)
7. Canopy
8. Sunscreen
9. Camera
10. Change of clothes
11. Drinks
12. Snacks
13. Ground tarp / rain tarp
14. Umbrella / canopy
15. Hat
16. Jacket
17. Rain gear
Page 29 of 29
Websites
Asphalt Ventures - Track events https://asphaltventures.com/Home_Page.html
Chin MotorSports - Track events http://www.chinmotorsports.com
MotorsportReg - Track events http://motorsportreg.com/
MVP Track Time - Track events http://www.mvptracktime.com/
TheTrackSchedule - Track events http://www.thetrackschedule.com/index.php
TrackSchedule – Track events http://www.trackschedule.com/sched.html
TrackDaze - Track events https://www.trackdaze.com
Tarheel Sports Car Club http://thscc.com/
Triangle Z Club http://www.trianglezclub.com/
VIR – Track http://www.virclub.com/
Roebling Road – Track http://www.roeblingroad.com/schedule.html
Carolina Motorsports Park – Track http://www.carolinamotorsportspark.com/
Road Atlanta – Track http://www.roadatlanta.com/
NJ Motorsports Park - Track http://www.njmotorsportspark.com/
NCCAR – Track http://www.nccar.us/
Summit Point – Track http://www.summitpoint-raceway.com/
Latest version of this document http://dl.dropbox.com/u/10691472/HPDE.pdf
Contributors
Thanks to the following people that have contributed to this document. They have done so by
reviewing it, adding content to it, and teaching me. They are listed in alphabetical order.
Robert Bouknight
Steve Coleman
Mark Vitacco
Copyright © 2011 - Glenn Mead