hadoop: setting up hadoop 2.7.3 (single node) on aws ec2...
TRANSCRIPT
(** Changed from https://sagarruchandani.wordpress.com/2015/08/01/hadoop-setting-up-hadoop-2-6-0-single-node-on-aws-ec2-ubuntu-ami/)
This kind of highlighted commands (or strings) in the following note would be changed in your case.
PART 1: Creating an EC2 Instance on AWS
(Some of the following steps may not be essential, but I did not check all possible cases!)
1. From services, select “EC2”.
2. Set the region.
3. To create a new Instance, click on “Launch Instance”.
4. To choose an Amazon Machine Image (AMI), Select “Ubuntu Server 14.04 LTS (HVM)”.
5. To choose an Instance type, select “t2.medium”.
6. Click “Next: Configure Instance Details”.
7. From IAM role drop down box, select “admin”. Select “Prevention against accidental termination” check box. Then hit “Next: Add Storage ”.
8. If you don’t have admin role. Go to Dashboard and click IAM. Create a new role. Under AWS service role select Amazon EC2. It will show different policy templates. Choose “administrator access” and save.
9. Click “Next: Tag Instance” again in Storage device settings. (default settings)
10. Select “Create a new security group” checkbox. > Security Group name -> “open ports”.
11. (May not be needed!) To enable ping, select “All ICMP” in the Create a new rule drop-down and click on “Add Rule.” Do the same to enable HTTP (port 80 & 8000) accesses, then click “Continue.”
12. (May not be needed!) To allow Hadoop to communicate and expose various web interfaces, we need to open a number of ports: 22, 9000, 9001, 50070, 50030, 50075, 50060. Again click on “Add Rule” and enable these ports. Optionally you can enable all traffic. But be careful and don’t share your PEM key or aws credentials with anyone or
Hadoop: Setting up Hadoop 2.7.3 (single node) on AWS EC2 Ubuntu AMISaturday, February 11, 2017 2:05 PM
Linux Page 1
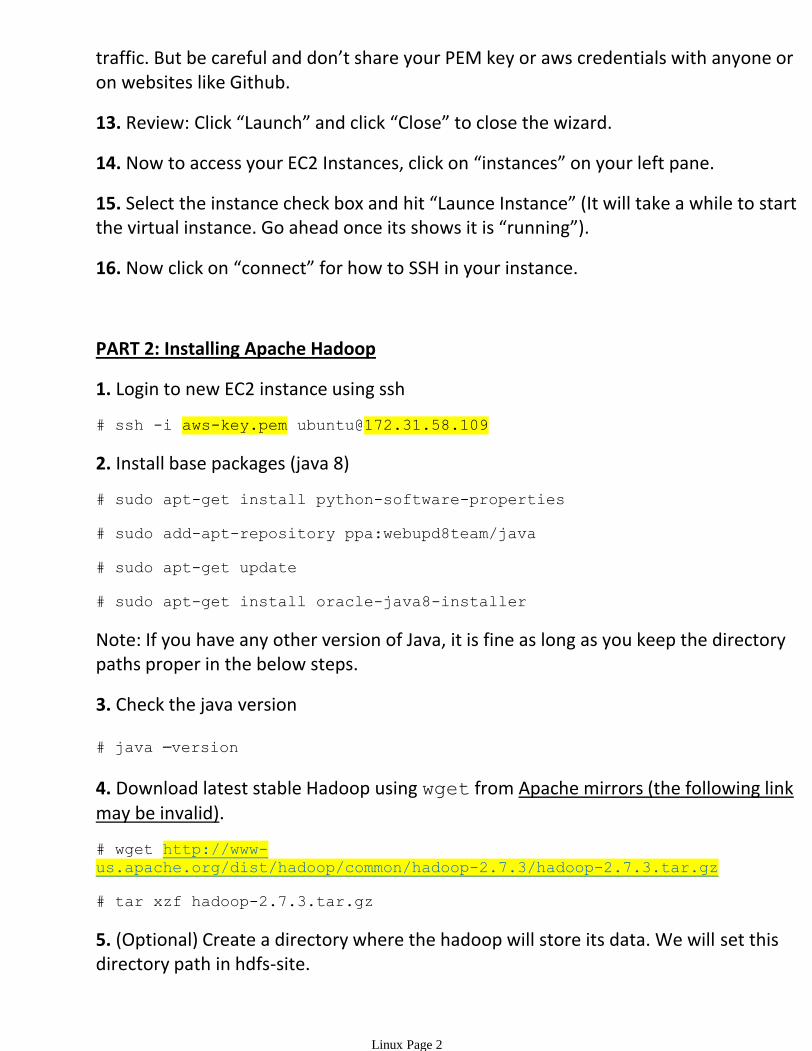
traffic. But be careful and don’t share your PEM key or aws credentials with anyone or on websites like Github.
13. Review: Click “Launch” and click “Close” to close the wizard.
14. Now to access your EC2 Instances, click on “instances” on your left pane.
15. Select the instance check box and hit “Launce Instance” (It will take a while to start the virtual instance. Go ahead once its shows it is “running”).
16. Now click on “connect” for how to SSH in your instance.
PART 2: Installing Apache Hadoop
1. Login to new EC2 instance using ssh
# ssh -i aws-key.pem [email protected]
2. Install base packages (java 8)
# sudo apt-get install python-software-properties
# sudo add-apt-repository ppa:webupd8team/java
# sudo apt-get update
# sudo apt-get install oracle-java8-installer
Note: If you have any other version of Java, it is fine as long as you keep the directory paths proper in the below steps.
3. Check the java version
# java –version
4. Download latest stable Hadoop using wget from Apache mirrors (the following link may be invalid).
# wget http://www-
us.apache.org/dist/hadoop/common/hadoop-2.7.3/hadoop-2.7.3.tar.gz
# tar xzf hadoop-2.7.3.tar.gz
5. (Optional) Create a directory where the hadoop will store its data. We will set this directory path in hdfs-site.
# mkdir hadoopdata
Linux Page 2
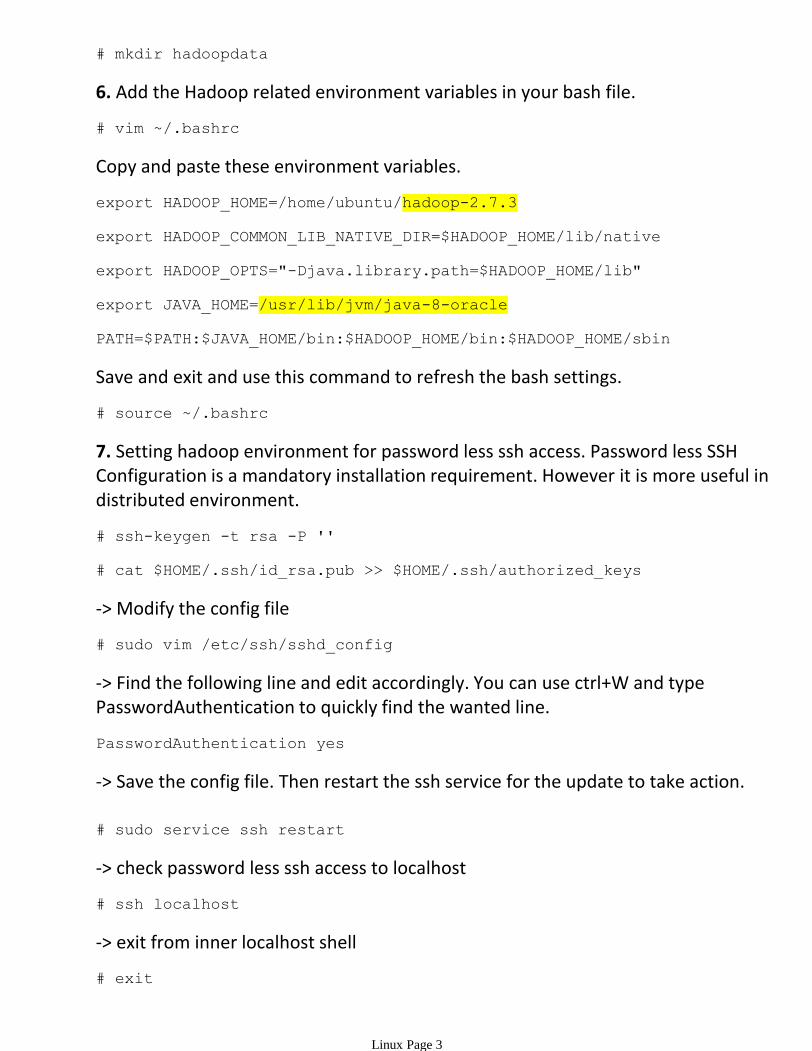
# mkdir hadoopdata
6. Add the Hadoop related environment variables in your bash file.
# vim ~/.bashrc
Copy and paste these environment variables.
export HADOOP_HOME=/home/ubuntu/hadoop-2.7.3
export HADOOP_COMMON_LIB_NATIVE_DIR=$HADOOP_HOME/lib/native
export HADOOP_OPTS="-Djava.library.path=$HADOOP_HOME/lib"
export JAVA_HOME=/usr/lib/jvm/java-8-oracle
PATH=$PATH:$JAVA_HOME/bin:$HADOOP_HOME/bin:$HADOOP_HOME/sbin
Save and exit and use this command to refresh the bash settings.
# source ~/.bashrc
7. Setting hadoop environment for password less ssh access. Password less SSH Configuration is a mandatory installation requirement. However it is more useful in distributed environment.
# ssh-keygen -t rsa -P ''
# cat $HOME/.ssh/id_rsa.pub >> $HOME/.ssh/authorized_keys
-> Modify the config file
# sudo vim /etc/ssh/sshd_config
-> Find the following line and edit accordingly. You can use ctrl+W and type PasswordAuthentication to quickly find the wanted line.
PasswordAuthentication yes
-> Save the config file. Then restart the ssh service for the update to take action.
# sudo service ssh restart
-> check password less ssh access to localhost
# ssh localhost
-> exit from inner localhost shell
# exit
8. Set the hadoop config files. We need to set the below files in order for hadoop to
Linux Page 3

core-site.xml•
hadoop-env.sh•
yarn-site.xml•
hdfs-site.xml•
mapred-site.xml•
8. Set the hadoop config files. We need to set the below files in order for hadoop to function properly.
Copy and paste the below configurations in core-site.xml•
-> go to directory where all the config files are present (cd /home/ubuntu/hadoop-2.7.3/etc/hadoop)
-> Add the following text between the configuration tabs.
<property>
<name>hadoop.tmp.dir</name>
<value>/home/ubuntu/hadooptmp/hadoop-${user.name}</value>
<description>A base for other temporary directories.</description>
</property>
<property>
<name>fs.defaultFS</name>
<value>hdfs://localhost:9000</value>
Copy and paste the below configurations in hadoop-env.sh•
</property>
-> get the java home directory using:
# readlink -f `which java`
Example output: /usr/lib/jvm/java-8-oracle/jre/bin/java (NOTE THE JAVA_HOME PATH. JUST GIVE THE BASE DIRECTORY PATH)
-> Need to set JAVA_HOME in hadoop-env.sh
Copy and paste the below configurations in mapred-site.xml
export JAVA_HOME=/usr/lib/jvm/java-8-oracle
Linux Page 4
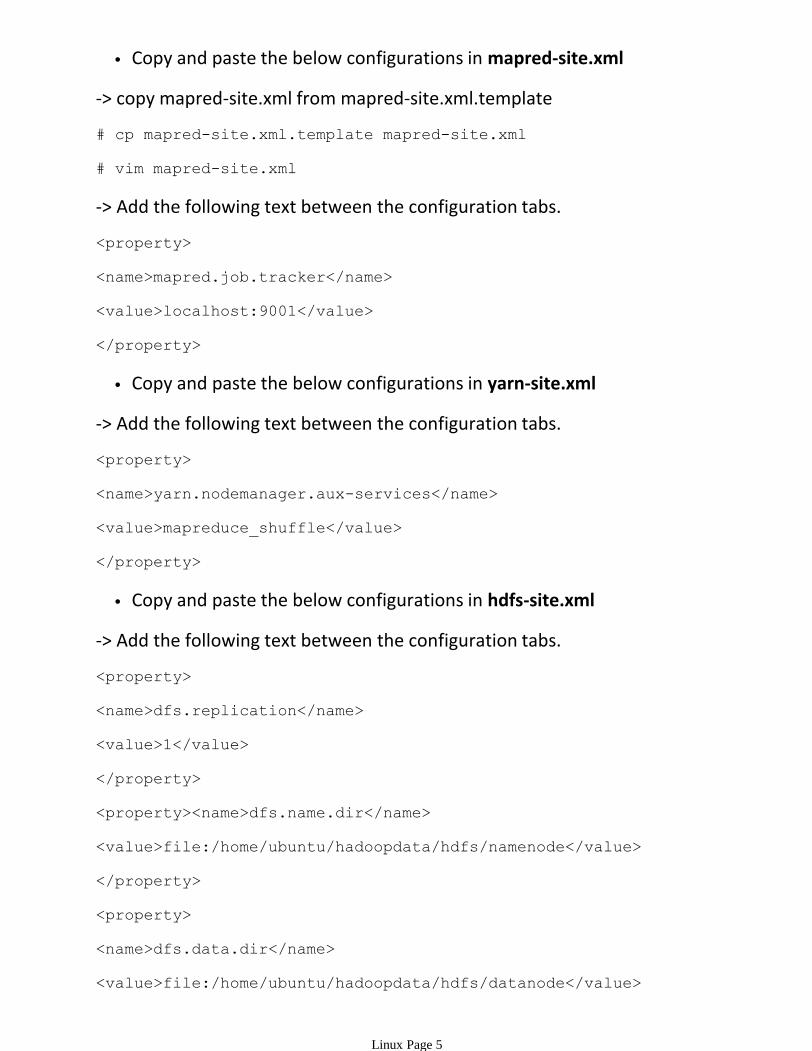
Copy and paste the below configurations in mapred-site.xml•
-> copy mapred-site.xml from mapred-site.xml.template
# cp mapred-site.xml.template mapred-site.xml
# vim mapred-site.xml
-> Add the following text between the configuration tabs.
<property>
<name>mapred.job.tracker</name>
<value>localhost:9001</value>
Copy and paste the below configurations in yarn-site.xml•
</property>
-> Add the following text between the configuration tabs.
<property>
<name>yarn.nodemanager.aux-services</name>
<value>mapreduce_shuffle</value>
Copy and paste the below configurations in hdfs-site.xml•
</property>
-> Add the following text between the configuration tabs.
<property>
<name>dfs.replication</name>
<value>1</value>
</property>
<property><name>dfs.name.dir</name>
<value>file:/home/ubuntu/hadoopdata/hdfs/namenode</value>
</property>
<property>
<name>dfs.data.dir</name>
<value>file:/home/ubuntu/hadoopdata/hdfs/datanode</value>
Linux Page 5
</property>
9. Formatting the HDFS file system via NameNode (after installing hadoop, for the first time we have to format the HDFS file system to make it work)
# hdfs namenode -format
10. Issue the following commands to start hadoop
# start-dfs.sh
# start-yarn.sh
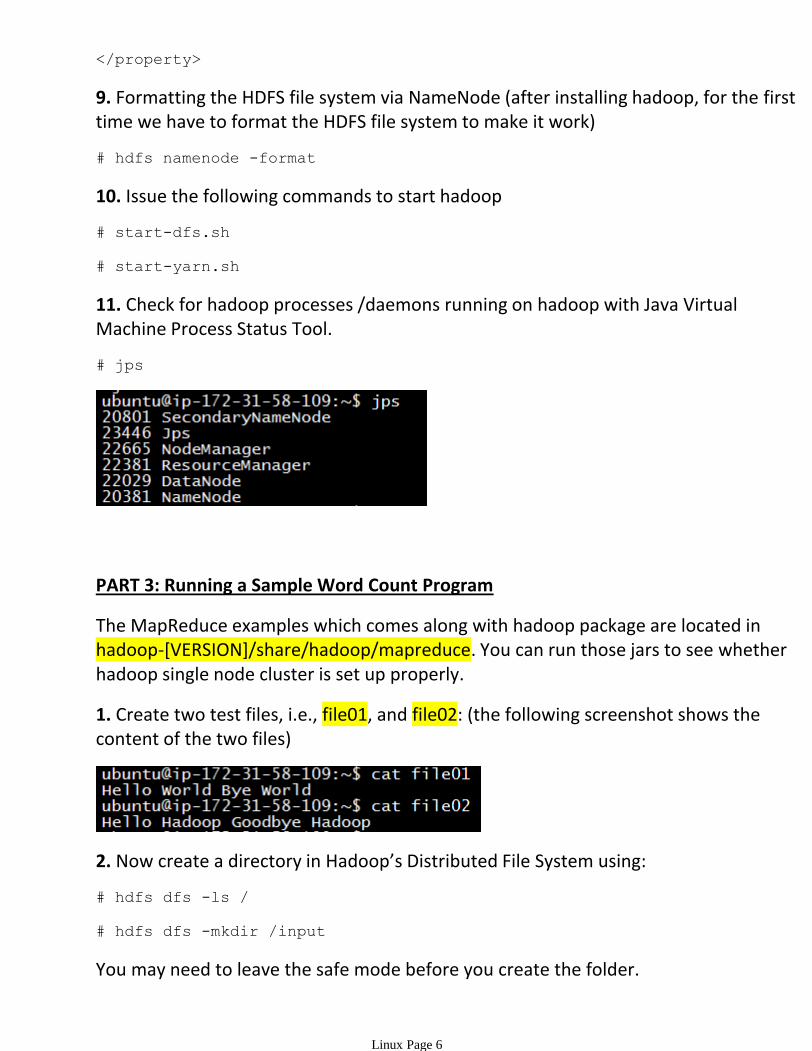
11. Check for hadoop processes /daemons running on hadoop with Java Virtual Machine Process Status Tool.
# jps
PART 3: Running a Sample Word Count Program
The MapReduce examples which comes along with hadoop package are located in hadoop-[VERSION]/share/hadoop/mapreduce. You can run those jars to see whether hadoop single node cluster is set up properly.
1. Create two test files, i.e., file01, and file02: (the following screenshot shows the content of the two files)
2. Now create a directory in Hadoop’s Distributed File System using:
# hdfs dfs -ls /
# hdfs dfs -mkdir /input
You may need to leave the safe mode before you create the folder.
Linux Page 6
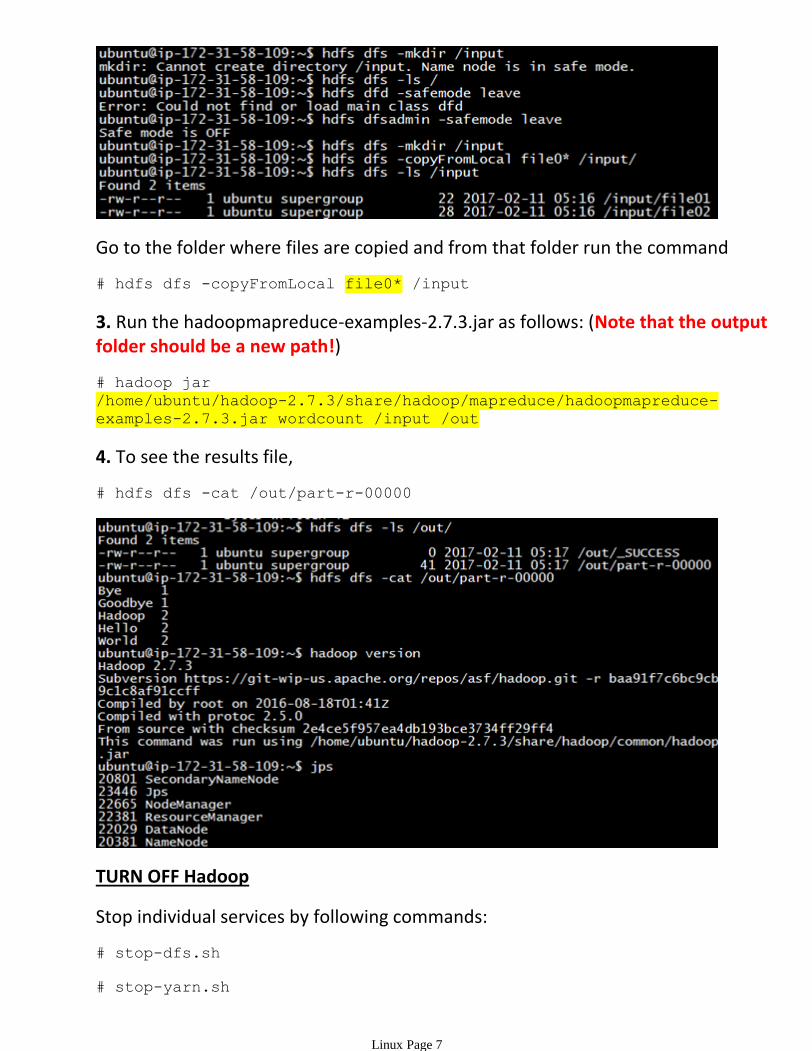
Go to the folder where files are copied and from that folder run the command
# hdfs dfs -copyFromLocal file0* /input
3. Run the hadoopmapreduce-examples-2.7.3.jar as follows: (Note that the output folder should be a new path!)
# hadoop jar
/home/ubuntu/hadoop-2.7.3/share/hadoop/mapreduce/hadoopmapreduce-
examples-2.7.3.jar wordcount /input /out
4. To see the results file,
# hdfs dfs -cat /out/part-r-00000
TURN OFF Hadoop
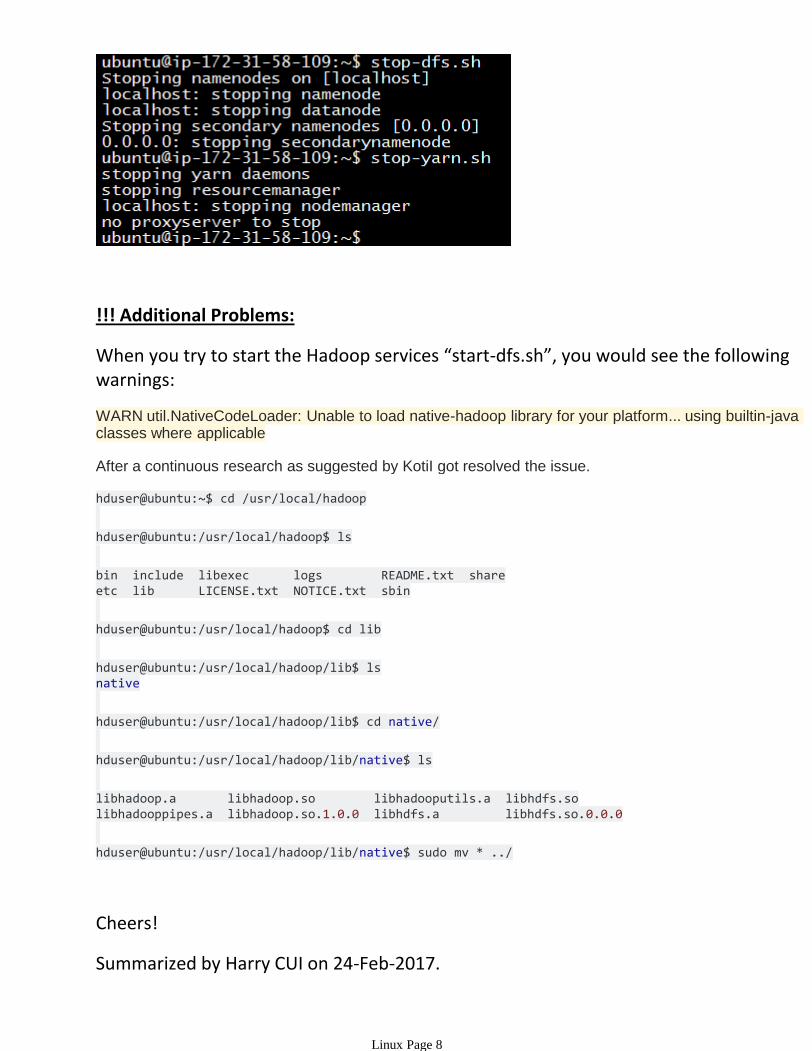
Stop individual services by following commands:
# stop-dfs.sh
# stop-yarn.sh
Linux Page 7
!!! Additional Problems:
When you try to start the Hadoop services “start-dfs.sh”, you would see the following warnings:
WARN util.NativeCodeLoader: Unable to load native-hadoop library for your platform... using builtin-java classes where applicable
After a continuous research as suggested by KotiI got resolved the issue.
hduser@ubuntu:~$ cd /usr/local/hadoop
hduser@ubuntu:/usr/local/hadoop$ ls
bin include libexec logs README.txt shareetc lib LICENSE.txt NOTICE.txt sbin
hduser@ubuntu:/usr/local/hadoop$ cd lib
hduser@ubuntu:/usr/local/hadoop/lib$ lsnative
hduser@ubuntu:/usr/local/hadoop/lib$ cd native/
hduser@ubuntu:/usr/local/hadoop/lib/native$ ls
libhadoop.a libhadoop.so libhadooputils.a libhdfs.solibhadooppipes.a libhadoop.so.1.0.0 libhdfs.a libhdfs.so.0.0.0
hduser@ubuntu:/usr/local/hadoop/lib/native$ sudo mv * ../
Cheers!
Summarized by Harry CUI on 24-Feb-2017.
Linux Page 8