fortress security store - zendesk · pdf file ©2014 fortress security store gsm v1.3.1...
TRANSCRIPT

©2014 Fortress Security Store GSM v1.3.1 Page 1
Table of Contents
Foreword .....................5
Copyright Information 6
Safety Precautions .......7
Description of the
Alarm System ..............8
Major features .............8
Front Panel - Fortress
Security Store GSM ..10
Main Panel Display ... 11
Main Panel Status
Indicators ...................12
Keypad ......................13
Back Panel - Fortress
Security Store GSM ..15
Main Panel Physical
Connections ...............16
Quick Start ................18
Step 1 Unpack .......................................................................................................................................... 19
www.FortressSecurityStore.com
©2014 Fortress Security Store GSM v1.3.1 Page 2
Step 2 Connect Phones and/or SIM card ................................................................................................. 20
Step 3 Connect Power and Monitor Startup............................................................................................. 22
Step 4 Check your system’s sensors and accessories ............................................................................... 24
Glass break sensor – Plug in glass break sensor and tap sensor with your finger ................................... 24
Step 5 – Enter the phone numbers the Main Panel will call when a sensor has been triggered .............. 25
Step 6 – Enter the phone numbers the Main Panel will text when a sensor has been triggered .............. 26
Step 7 – (Optional) Record a message to be distributed by phone in case of an emergency ................... 27
Step 8 – Test Operation of the Main Panel .............................................................................................. 28
Step 9 – Use Remote Access to control the Main Panel from a cellphone or landline ............................ 29
Step 10 – Change the Operating (4-digit) and the Programming [SET] Password (6-digit) ................... 31
Slow Start – Starting/Programming Your System .................................................................................... 33
Starting/Programming Your System – Main Panel Startup Procedure .................................................... 34
Starting/Programming Your System – How Programming Works .......................................................... 35
Add/Delete Remote Control (Key Fob) ................................................................................................... 39
Add Sensor or Detector in a Zone ............................................................................................................ 40
Move/Delete Sensor or Detector in a Zone .............................................................................................. 41
Enter Characteristics of a Zone ................................................................................................................ 42
Add/Delete Phones to Call on Alarm Trigger .......................................................................................... 43
Add/Delete SMS to Text Message on Alarm Trigger .............................................................................. 44
Record/Play a 10 second voice message .................................................................................................. 45
www.FortressSecurityStore.com
©2014 Fortress Security Store GSM v1.3.1 Page 3
Set System Date and Time ....................................................................................................................... 46
Set/Disable Time for System Arming/Disarming .................................................................................... 47
Black Wireless Siren Coding/Pairing ....................................................................................................... 49
Settings – Change Password .................................................................................................................... 51
Settings – Set Arm Delay Time ................................................................................................................ 52
Settings – Alarm & Call Delay Time ....................................................................................................... 53
Settings – Voice Prompt ........................................................................................................................... 54
Settings – Siren Prompt............................................................................................................................ 55
Settings – Remote Siren ........................................................................................................................... 56
Settings – Arm disarm SMS ..................................................................................................................... 57
Settings – Language ................................................................................................................................. 58
Settings – Line Rings ............................................................................................................................... 59
Settings – Alarm mode ............................................................................................................................. 60
Settings – Siren Time ............................................................................................................................... 61
Settings – Delay Beep .............................................................................................................................. 62
Settings – Factory Reset ........................................................................................................................... 63
Slow Start - Testing and Using Your System ........................................................................................... 64
Password Reset/Lost Password ................................................................................................................ 65
Arming the System – Away Arm ............................................................................................................. 66
Arming the System – Home Arm ............................................................................................................. 67

www.FortressSecurityStore.com
©2014 Fortress Security Store GSM v1.3.1 Page 4
Arming the System – Disarm ................................................................................................................... 68
Answering an Alarm Call from Main Panel ............................................................................................. 69
Calling the Main Panel ............................................................................................................................. 71
Emergency (Panic Button) Alarm Call .................................................................................................... 72
Making a Call from the Main Panel ......................................................................................................... 73
Alarm History .......................................................................................................................................... 74
System Maintenance ................................................................................................................................ 75
Slow Start - Appendices of Technical Information .................................................................................. 77
Appendix A: Technical and Product Specifications ................................................................................. 78
Product Specifications.............................................................................................................................. 78
Default Settings ........................................................................................................................................ 79
Support ..................................................................................................................................................... 81

www.FortressSecurityStore.com
©2014 Fortress Security Store GSM v1.3.1 Page 5
Foreword
Thank you for choosing the GSM series alarm system from Fortress Security Store. For your safety, please read the operations manual before using the system. This manual gives detailed steps for common operations. The reference section of the manual will be most helpful if you need to make changes to your pre-programmed system. If you are familiar with alarm systems, you should go directly to the Quick Start section.

www.FortressSecurityStore.com
©2014 Fortress Security Store GSM v1.3.1 Page 6
Copyright Information
This manual is copyrighted under the laws of the United States of America, 2014.

www.FortressSecurityStore.com
©2014 Fortress Security Store GSM v1.3.1 Page 7
Safety Precautions
Use the power supply that is shipped with the product. Use of a power supply greater than 12V, 1.2A may damage the alarm.
Maintain air flow around all surfaces of the system.
Keep the surfaces of the product clean and dry
Do not operate the alarm in a damp environment
Do not operate the alarm in areas where combustible materials and flammable gasses are located.
Use the minimum finger pressure needed to activate keys. Extreme pressure will shorten the life of the keypad and alarm.

www.FortressSecurityStore.com
©2014 Fortress Security Store GSM v1.3.1 Page 8
Description of the Alarm System
Major features
Tactile keypad with physical and audible feedback
Large LCD display with visual cues
A system clock for display purposes and automating the arming and disarming of the system
All functions available from the Main Panel and operating features accessible from a remote control (key fob) or phone
100 detectors supported - 4 wired and 10 wireless zones, each supporting a maximum of 10 detectors
8 remote controls supported
Intercom mic/speaker for remote monitoring and communication (intercom requires use of SIM card)
Backup battery which recharges when power is available
Versatile alarm programming and features ◦ 2 arming modes: Out Mode and Home Mode

www.FortressSecurityStore.com
©2014 Fortress Security Store GSM v1.3.1 Page 9
◦ 8 name options (SOS, door, window, etc.) available per zone
Versatile alarm notifications ◦ Siren and remote siren ◦ Main Panel display ◦ Phone (up to 6 numbers notified) and SMS text messaging (up to 3 numbers)
Please read the rest of the documentation for additional features.

www.FortressSecurityStore.com
©2014 Fortress Security Store GSM v1.3.1 Page 10
Front Panel - Fortress Security Store GSM

www.FortressSecurityStore.com
©2014 Fortress Security Store GSM v1.3.1 Page 11
Main Panel display
Main Panel status indicator
Tactile keypad

www.FortressSecurityStore.com
©2014 Fortress Security Store GSM v1.3.1 Page 12
Main Panel Display
The display shows the status of the alarm system during operation and provides visual information during the programming process. Operational status markers are
1-GSM (cell) Signal Strength 2-Telephone (landline) connectivity 3-Armed (Lock icon) 4-Sending alerts via GSM or telephone 5-No SIM card present 6-Power Monitor (battery or power plug symbol for power source) 7-System Status (system armed, home armed, disarmed) 8-Current triggered, uncleared alarm 9-System Date & Time
Note: Not all of these will be active at once. The illustration shows the position in

www.FortressSecurityStore.com
©2014 Fortress Security Store GSM v1.3.1 Page 13
which they appear when they are active.
www.FortressSecurityStore.com
©2014 Fortress Security Store GSM v1.3.1 Page 14
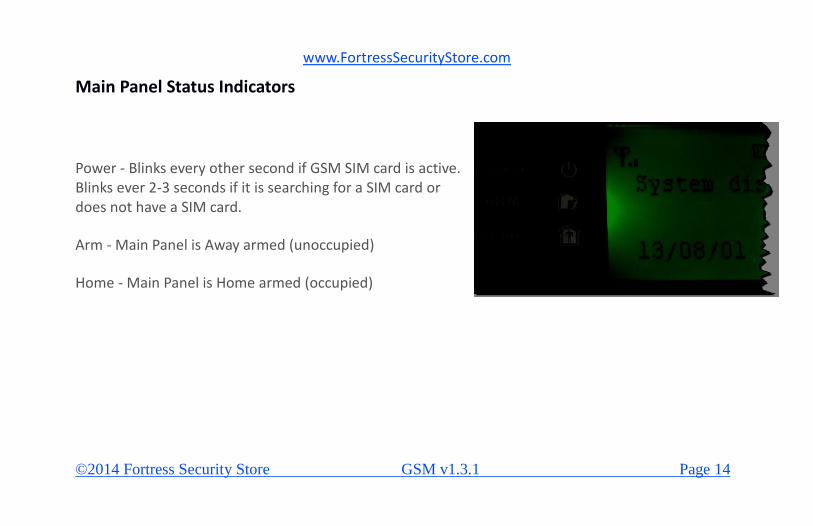
Main Panel Status Indicators
Power - Blinks every other second if GSM SIM card is active. Blinks ever 2-3 seconds if it is searching for a SIM card or does not have a SIM card.
Arm - Main Panel is Away armed (unoccupied)
Home - Main Panel is Home armed (occupied)
www.FortressSecurityStore.com
©2014 Fortress Security Store GSM v1.3.1 Page 15
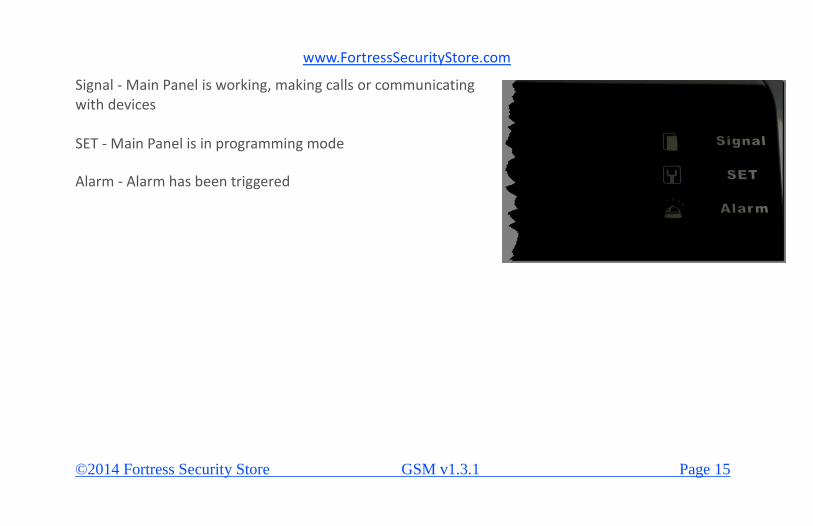
Signal - Main Panel is working, making calls or communicating with devices
SET - Main Panel is in programming mode
Alarm - Alarm has been triggered

www.FortressSecurityStore.com
©2014 Fortress Security Store GSM v1.3.1 Page 16
Keypad

www.FortressSecurityStore.com
©2014 Fortress Security Store GSM v1.3.1 Page 17

www.FortressSecurityStore.com
©2014 Fortress Security Store GSM v1.3.1 Page 18
Tactile Keypad Action Icons 1- Arms the system for unoccupied premises [Away Arm] 2- Arms the system for occupied premises [Home Arm] 3- Calls the phone number manually input on keypad [Call] (SIM card only)
Navigation Keys [Arrows] - When programming (SET mode) these become navigation keys
2-Up ˄ 4-Left ˂ 6-Right ˃ 8-Down ˅ Action/Programming Buttons SOS- Panic button – Activates alarm even if system is disarmed
ESC- Back Button
Enter- Completes action, sometimes is shown as “Save” on display
www.FortressSecurityStore.com
©2014 Fortress Security Store GSM v1.3.1 Page 19
1-9- Used to input numbers

www.FortressSecurityStore.com
©2014 Fortress Security Store GSM v1.3.1 Page 20
Back Panel - Fortress Security Store GSM
1-Power and Data Connections 2-BUS Bar 3-Backup Battery 4-GSM SIM Card slot

www.FortressSecurityStore.com
©2014 Fortress Security Store GSM v1.3.1 Page 21
Main Panel Physical Connections
1-Off/On Backup Battery On/Off Switch 2-Power In 12 volt power (use the power adapter that ships with the unit) 3-SP Wired siren input (use included siren) 4-Tel Line to an external telephone 5-Line Line from a telephone wall jack or from phone box

www.FortressSecurityStore.com
©2014 Fortress Security Store GSM v1.3.1 Page 22
Main Panel Physical Connections
6-BUS Bar Physical connections for wired sensors. To use a wired sensor, simply connect one wire from the sensor to zone terminal (Z1 – Z4) and then the other wire from the sensor to 14/GND.

www.FortressSecurityStore.com
©2014 Fortress Security Store GSM v1.3.1 Page 23
Quick Start
Everything in your Fortress Security Store system is already programmed. This section is here so you can “plug and play” if you do not want to do a lot of reading first. Feel free to visit www.FortressSecurityStore.com/support for lots of videos, answers to frequently asked questions, support articles, and the latest version of this user manual.
Remember: The Default Program Password is 888888 The Default Operation Password is 1234
You should change these either after setting up your system. The Operation Password is the password used to turn off sirens and alarms at the Main Panel, so it should be something that can be remembered under pressure, but not something an intruder can guess.
www.FortressSecurityStore.com
©2014 Fortress Security Store GSM v1.3.1 Page 24
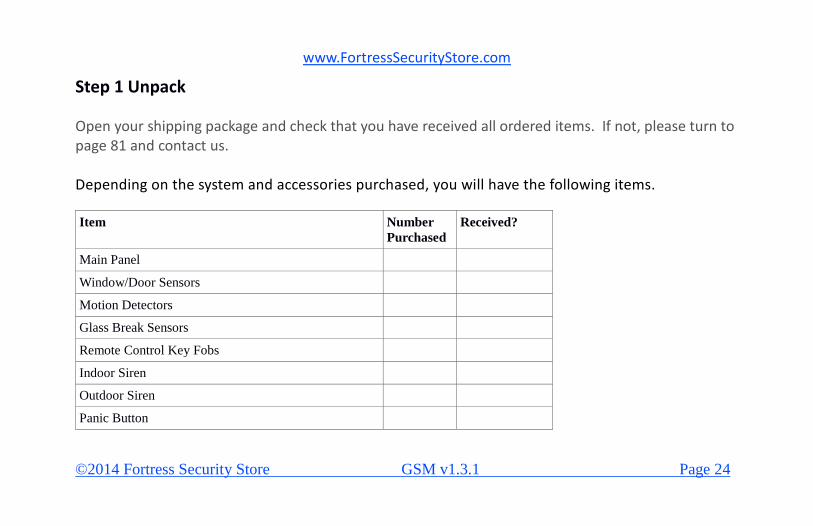
Step 1 Unpack
Open your shipping package and check that you have received all ordered items. If not, please turn to page 81 and contact us. Depending on the system and accessories purchased, you will have the following items.
Item Number
Purchased
Received?
Main Panel
Window/Door Sensors
Motion Detectors
Glass Break Sensors
Remote Control Key Fobs
Indoor Siren
Outdoor Siren
Panic Button

www.FortressSecurityStore.com
©2014 Fortress Security Store GSM v1.3.1 Page 25
Outdoor Siren with Strobe Light
Smoke Detector
Step 2 Connect Phones and/or SIM card
If you are planning to use a SIM card, install it now. It fits inside the small door on the back of the Main Panel inside a small plastic swing. Match the cut out portions on the SIM card and SIM holder. Fitted correctly, the gold contacts will not be visible and the cut out portion will be on your lower right. To lock the swinging gate in place, lower the gate so the SIM card is lying flat, apply gentle pressure to the gate, and pull gently toward the outer edge of the Main Panel.
www.FortressSecurityStore.com
©2014 Fortress Security Store GSM v1.3.1 Page 26
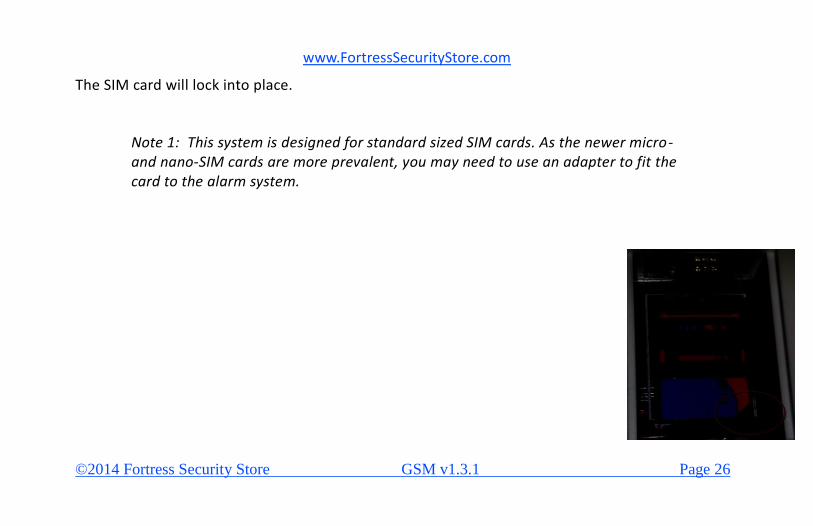
The SIM card will lock into place.
Note 1: This system is designed for standard sized SIM cards. As the newer micro- and nano-SIM cards are more prevalent, you may need to use an adapter to fit the card to the alarm system.

www.FortressSecurityStore.com
©2014 Fortress Security Store GSM v1.3.1 Page 27
Note 2: If you need an IMEI number to activate your SIM card, you can press 01 ENTER on the Main Panel to read your IMEI number. Your SIM card provider may refer to the IMEI number as ESN, MEID, or serial number. If you tell them it is the 15 digit ID, they will know what you are talking about.
If you are using a landline, connect a phone cable from the wall jack to the LINE port on the Main
Panel. If you want to keep a phone near the Main Panel, connect a phone cable from the TEL
port to the phone.

www.FortressSecurityStore.com
©2014 Fortress Security Store GSM v1.3.1 Page 28
Step 3 Connect Power and Monitor Startup
Attach the included 12v power plug to the Main Panel “Power In” jack, then plug the other end
of the power cable into a 120v electrical outlet. The included power adapter also works with up
to 240v. You should:
1-Hear a long beep
2-See “FORTRESS VER: 005” or similar on the display for two seconds, then
3-See a GSM symbol (SIM card icon) blink on the screen every two seconds
As the symbol flashes on the screen, the display’s signal strength indicator will show a number
of bars. If you have a SIM card inserted, within 10-20 seconds you should hear a short beep and
the GSM symbol should go away. This means your SIM card has connected to a network.
If you are using a SIM card and do not hear the beep and the GSM symbol continues to blink,
you should turn off the device, check the orientation of your SIM card, and/or call your SIM
www.FortressSecurityStore.com
©2014 Fortress Security Store GSM v1.3.1 Page 29
provider to troubleshoot.
www.FortressSecurityStore.com
©2014 Fortress Security Store GSM v1.3.1 Page 30
If no bars appear, troubleshoot your SIM card as described above or call your SIM card/cell
phone provider to see if there is service in your area.
Note: When this step has been completed, you may should turn on the battery
switch so it will be charging. Later you will test sensors and the Main Panel. If you
have already mounted the sensors, it is easier to take the Main Panel to the
sensors and work while on battery power until all sensors are accounted for.

www.FortressSecurityStore.com
©2014 Fortress Security Store GSM v1.3.1 Page 31
Step 4 Check your system’s sensors and accessories
Once again, sensors and accessories have already been programmed for your Fortress Security
Store System. If you wish to make any changes or add any devices, see the programming section
later. To test the sensors and accessories, first arm the system in Out Mode and then perform the
steps below. You must disarm and re-arm between each sensor.
Door/Window sensor - Separate the magnet from wireless unit on side opposite the antenna until
you see a red light, then move the parts close to each other so they don't interfere with the coding of
other sensors.
Motion detector - Switch on until you see a red light, then switch off
Remote control (key fob) - Press any of the buttons until you see a red light
Glass break sensor – Plug in glass break sensor and tap sensor with your finger

www.FortressSecurityStore.com
©2014 Fortress Security Store GSM v1.3.1 Page 32

www.FortressSecurityStore.com
©2014 Fortress Security Store GSM v1.3.1 Page 33
Step 5 – Enter the phone numbers the Main Panel will call when a sensor has been triggered
1-Type the programming password (default 888888) then press Enter
2-You will see the Remote control screen. Press Right [6 key] until you get to the Phone number
screen.
3-Press Enter and you will see the Phone 1 screen display “No number”
4-Press Enter again and “Input phone number” will appear
5-Type in the phone number and press Enter to save the number. You may need to enter a 1 before
the area code of the phone number for the unit to dial out correctly. If you are calling a local
number and do not have long distance service, you may need to enter the number without the
area code.
To add more numbers, press the Right key and you will see Phone 2. Repeat the steps above.
Note: If you have made an errant keystroke, pressing the ESC key will backspace digits. Pressing
ESC multiple times will exit SET mode and allow you to start over. Any changes you saved with the
www.FortressSecurityStore.com
©2014 Fortress Security Store GSM v1.3.1 Page 34
Enter key before you started pressing (ESC) will be retained.

www.FortressSecurityStore.com
©2014 Fortress Security Store GSM v1.3.1 Page 35
Step 6 – Enter the phone numbers the Main Panel will text when a sensor has been triggered
1-Type the programming password [default 888888] then press Enter
2-You will see the Remote control screen. Press Right until you get to the SMS number screen
3-Press Enter and you will see the SMS 1 screen with “No number”
4-Press Enter again and “Input phone number” will appear.
5-Type in the phone number and press Enter to save the entry. You may need to enter a 1 before
the area code of the phone number for the unit to send the text message correctly. If you are
texting a local number and do not have long distance service, you may need to enter the number
without the area code.
If you have more numbers, press the Right key and you will see SMS 2. Repeat the steps above.
Note: SMS / text message notification functionality requires the use of a SIM card
inside the system. You can add up to three SMS numbers.

www.FortressSecurityStore.com
©2014 Fortress Security Store GSM v1.3.1 Page 36
Step 7 – (Optional) Record a message to be distributed by phone in case of an emergency
Note: When an alarm is triggered and the Main Panel calls the listed phone
numbers, a pre-recorded voice message will be played for anyone who answers.
The message can be up to 10 seconds long and can be as descriptive as “Alarm”
repeated twice or “This is Bob’s alarm system saying there has been an alarm
triggered at 1234 Stone St., Smalltown, Wisconsin. Please call 911.”
1-Type the programming password [default 888888] then press Enter 2-You will see the Remote control screen. Press Right [6 key] until you get to the Recording screen
3-Press Enter and you will see the Start Recording screen
4-Press Enter and record your message. Speak into the back of the panel in a clear voice.
The countdown timer will continue until 10 seconds are up and then will beep once. If you are
happy with your message, press Back [ESC] until the SET light goes off. If you are not satisfied,
repeat the steps above and your new message will overwrite the old one.

www.FortressSecurityStore.com
©2014 Fortress Security Store GSM v1.3.1 Page 37
Step 8 – Test Operation of the Main Panel
1-Use any of the remote controls (key fobs) and press the Out Mode button (lock button).
On the Main Panel you should
a-Hear the panel beeping to countdown the exit delay (default 30 seconds)
b-Hear a beep (optionally a voice saying “System Armed”)
c-See a Lock icon and “System armed” on the display
d-See the ARM light
2-Trigger a door/window sensor or motion detector. The Main Panel will make an
outbound call and send a text message (if SMS numbers set up and SIM card inserted) to
the numbers you have programmed in previous steps. The Alarm light will come on and the
Signal light will blink as it sends out wireless signals. Any connected sirens will make a loud
alarm sound.
3-Answer the phone call to hear the voice recording if you recorded one earlier.

www.FortressSecurityStore.com
©2014 Fortress Security Store GSM v1.3.1 Page 38
4-Press the disarm button (open lock button) on the remote to clear the alarm and disarm the Main
Panel.
www.FortressSecurityStore.com
©2014 Fortress Security Store GSM v1.3.1 Page 39
Step 9 – Use Remote Access to control the Main Panel from a cellphone or landline
1-Dial the landline or SIM card phone number from an external phone
The Main Panel will answer after a certain number of rings with “Please
enter password”
2-Enter the Operating Password, pausing for a voice repeating the number after each digit
except the last. If you do not hear a beep/voice in one second, press the key again.
Note: This is a 4-digit password, default is 1234.
3-After entering the password successfully, the system will respond with “Please enter
instruction.” You may enter any of the numbers 1, 2, 3, 4.
1 Arm system
2 Disarm system
3-Listen to sound in the room where the Main Panel sits
4-Turn the Main Panel into an intercom to converse with anyone near it. This

www.FortressSecurityStore.com
©2014 Fortress Security Store GSM v1.3.1 Page 40
function requires a SIM card to be inserted.
Note: Once you have entered the password successfully, you may
make any series of commands you wish. For example, you may
press 3 to see if you hear any noise. You hear someone, so you
press 4 to talk with them. After the conversation, you decide to
disarm the alarm. You enter 2 and the alarm is disarmed. But
then you reconsider, and press 1 to arm it. Any time you are done
with commands, hang up the phone.
www.FortressSecurityStore.com
©2014 Fortress Security Store GSM v1.3.1 Page 41
Step 10 – Change the Operating (4-digit) and the Programming [SET] Password (6-digit)
If you did not change your passwords earlier, please do so here.
1-Type the programming password [default 888888] then press Enter
2-You will be at the Remote control screen. Press Right [6 key] until you get to the Settings screen.
Press ENTER
3-Press LEFT/RIGHT until you reach the “Operate password” screen.
4-Press ENTER and input the 4 digit password.
5-Press ENTER to Save
The Programming Password is a 6 digit code that allows you to navigate and change system
parameters. It is changed by the same procedure as the Operation Password (see steps above)
except Step 3 should say “Program password” screen.
www.FortressSecurityStore.com
©2014 Fortress Security Store GSM v1.3.1 Page 42

www.FortressSecurityStore.com
©2014 Fortress Security Store GSM v1.3.1 Page 43
Note: Both passwords should be memorable to you and also
recorded in a secure location. The Operating Password is the
password you will use if you want to manually disarm the Main
Panel. It should be easily recalled and typed under the pressure
of sirens and beeps, but not easy for an intruder to guess. If you
forget your password, please see the section Password Reset/Lost
Password.

www.FortressSecurityStore.com
©2014 Fortress Security Store GSM v1.3.1 Page 44
Slow Start – Starting/Programming Your System
This section covers the setup, starting, and programming of your Fortress Security Store GSM alarm
system in detail. If you are ready to get started with your system, go straight to the Quick Start
section and use this section as a resource when needed.

www.FortressSecurityStore.com
©2014 Fortress Security Store GSM v1.3.1 Page 45
Starting/Programming Your System – Main Panel Startup Procedure
Main Panel startup must be done carefully to avoid damaging any components.
1- Make sure the power supply is not connected to the Main Panel.
2-Install the SIM card if you are planning to use one, phone lines, and wired siren
3-Insert the 12V power supply adapter into the “Power In” jack of the Main Panel. Then connect the other end of the power cord into an electrical wall jack.
4-The Power LED on the face of the Main Panel will blink approximately every second unless the SIM card is attached to the cell network. Then it will blink every 2-3 seconds. If you are not using a SIM card or the SIM card cannot attach to a network, the Power LED will continue to blink every second.
Note: If you have a SIM card inserted and it does not attach to a network, check the signal strength indicator on the display. Fewer than 3 bars may indicate you do not have adequate signal strength.
www.FortressSecurityStore.com
©2014 Fortress Security Store GSM v1.3.1 Page 46
5-Turn on the battery switch located on the back of the unit.

www.FortressSecurityStore.com
©2014 Fortress Security Store GSM v1.3.1 Page 47
Starting/Programming Your System – How Programming Works
Programming is performed to add remote sensors and devices to the system, change or change
system options. All programming is done in the same fashion.
1-Type the programming password. The default password is 888888.
2-Press Enter. At this point the SET LED lights up. While the SET LED is lit, you are in SET mode and
most normal operations are suspended, e.g. you cannot arm or disarm the system.
3-In SET mode, the 2, 4, 6, 8 keys become navigational arrow keys, with 2=Up, 4=Left, 6=Right,
8=Down. These keys move you from option to option.
4-The Enter and ESC keys allow toggling options and “backing out,” respectively.
www.FortressSecurityStore.com
©2014 Fortress Security Store GSM v1.3.1 Page 48
5-When you need to type in information, the word “input” appears on the screen and the number
keys, including 2/4/6/8, function as number keys until the typing is finished and the Enter or ESC
key is pressed.
6-You may change as many options as you wish as long as the SET LED is on. When you are finished
with all options you wish to change, press ESC several times until the SET LED is not lit. You can
then use the Main Panel normally.
Programming Hints:
When you are programming functions, you will often see Enable, Disable, or other ON/OFF words
as options. The word you see is the current state of the setting. If a setting shows “Enable,” it
means it is currently enabled. If a setting shows “Disable,” it means it is currently disabled.

www.FortressSecurityStore.com
©2014 Fortress Security Store GSM v1.3.1 Page 49
The beeps you hear let you know what's going on. The four basic beep patterns are:
1-one long beep
2-one short beep
3-two beeps
4-four beeps
The rule of thumb is one beep means a positive response, four beeps mean an operation cannot be
completed, and two beeps means a reversal of state, such as a system being disarmed.
Your system has already been pre-programmed, so it may not be necessary to change anything
except those items that are specific to you, such as phone number.
You do not have to exit and re-enter SET mode for each operation. As long as the SET light is visible
on the Main Panel, you may change as many options as you wish. It is, however, sometimes a good
policy to make a few changes, exit SET, and test operation to ensure you have programmed the
functions as you intended.

www.FortressSecurityStore.com
©2014 Fortress Security Store GSM v1.3.1 Page 50
Note: In the programming options that follow, “Enter SET
mode” means type in the SET (Programming) password and
press ENTER. It will always be Step 1 in programming.

www.FortressSecurityStore.com
©2014 Fortress Security Store GSM v1.3.1 Page 51
Add/Delete Remote Control (Key Fob)
The Main Panel supports up to 8 remote controls, each with a unique and protected coding. Menu
options exist to add or delete a remote control. Below are the steps to add a remote control. To
delete a remote, just choose the DELETE option.
1-Enter SET mode
2-Use Left-Right arrow keys if necessary to navigate to the screen Remote control.
3-Press ENTER
4-Screen Remote control 1 is visible. If needed, navigate to a different remote control
5-Highlight Coding and press ENTER
6-”Trigger remote” is shown. Press a button on the remote control and a unique number will appear
on the screen. Press Save (ENTER key) and the remote control is added.
Note: If you try to add a remote control and get the message “Repeated Code,” the
remote control is already added to the Main Panel.

www.FortressSecurityStore.com
©2014 Fortress Security Store GSM v1.3.1 Page 52
Add Sensor or Detector in a Zone
The GSM system provides 10 alarm zones, each of which can have up to 10 sensors/detectors. See
Appendix: Terms and Concepts for information on zones. Your system comes pre-programmed in
an effective configuration. To see which zone a sensor is in, arm the system and trigger the sensor.
The Main Panel display will show the zone information. To add a sensor:
1-Enter SET mode
2-Use Left-Right arrow keys if necessary to navigate to the screen “Zone”
3-Press ENTER
4-Screen “Zone 1” is visible. If needed, navigate to a different zone.
5-Select Coding and press ENTER, then trigger the sensor/detector
6-The detector is now assigned to that zone and inherits the zone characteristics
7-Set the zone characteristics [See Starting/Programming Your System – Enter Characteristics of a
Zone]
Note: When adding any sensor, make sure motion detectors are turned off so they
www.FortressSecurityStore.com
©2014 Fortress Security Store GSM v1.3.1 Page 53
do not inadvertently become a part of another zone.

www.FortressSecurityStore.com
©2014 Fortress Security Store GSM v1.3.1 Page 54
Move/Delete Sensor or Detector in a Zone To permanently delete a sensor or detector, take it out of service and remove the battery.
To move a sensor or detector from one zone to another, you must delete the entire zone, then add sensors back
to the desired zones. For example, say Zone 3 has five sensors . One of them needs to be in a separate zone (say
Zone 7) to change its operating characteristics. You must delete Zone 3, then add the other four sensors back
to Zone 3 and the fifth sensor to Zone 7.
1-Enter SET mode
2-Use Left-Right arrow keys if necessary to navigate to the screen “Zone”
3-Press ENTER
4-Screen Zone 1 is visible. If needed, navigate to a different zone.
5-Select Delete and press ENTER. The zone and all sensors in it are deleted.
6-To add the deleted sensors to a zone, use the steps in Add Sensor or Detector in a Zone.

www.FortressSecurityStore.com
©2014 Fortress Security Store GSM v1.3.1 Page 55
Enter Characteristics of a Zone
All these settings are found in Zone 1 through Zone 10 and can be changed when in SET mode as
described in Add Sensor or Detector in a Zone. Pressing ENTER rotates among the choices for each
setting. All devices – sensors, detectors, etc – in the zone share the same settings.
1-Place (Refers to the Location field. The content of this field is sent out if you have SMS enabled
to send a text message when an alarm is triggered.) Choices are Balcony, Boundary, SOS, Fire, GAS,
Door, Hall, Window.
2-Armed State (Sensor response to an alarm trigger while in a certain mode) The Enable/Disable
value can be set in Away Arm/Out Mode, Home Arm, and Disarmed fields. An example of enabling an
alarm to be triggered when the main panel is Disarmed is if the zone contains fire alarms. Fire alarms
should be active even if the Main Panel is set to disarmed.
3-Siren (Siren response to an alarm trigger in this zone) Usually the siren is enabled, but if you have a
zone you would like to trigger the alarm, but silently, the siren may be disabled.
www.FortressSecurityStore.com
©2014 Fortress Security Store GSM v1.3.1 Page 56
4-Delay (When the sensor is triggered, gives you time to disarm the system before the alarm sounds)
www.FortressSecurityStore.com
©2014 Fortress Security Store GSM v1.3.1 Page 57
Add/Delete Phones to Call on Alarm Trigger
You can enter up to six phone numbers for the Main Panel to dial when an alarm is triggered. The
system will dial them in order three times or until someone answers and disarms the system. Keep
in mind most municipalities do not allow auto-dialing 911 or public safety numbers from an alarm
system.
1-Enter SET mode
2-Use Left-Right arrow keys if necessary to navigate to the screen “Phone number”
3-Press ENTER
4-Screen “Phone 1” is visible. If needed, navigate to a different phone number.
5-Highlight “No number” and press ENTER.
6-Input the phone number and press ENTER (Save). You may need to enter a 1 before the area code
of the phone number for the unit to dial out correctly. If you are calling a local number and do not
have long distance service, you may need to enter the number without the area code.

www.FortressSecurityStore.com
©2014 Fortress Security Store GSM v1.3.1 Page 58
Add/Delete SMS to Text Message on Alarm Trigger
You can enter up to three cell phone numbers for the Main Panel
to text message when an alarm is triggered. The system will text
all phone numbers at once.
1-Enter SET mode
2-Use Left-Right arrow keys if necessary to navigate to the screen
“SMS number”
3-Press ENTER
4-Screen SMS 1 is visible. If needed, navigate to a different SMS number.
5-Highlight “No number” and press ENTER.
6-Input the phone number and press ENTER (Save). You may need to enter a 1 before the area code
of the phone number for the unit to send the text message correctly. If you are texting a local
number and do not have long distance service, you may need to enter the number without the
area code.

www.FortressSecurityStore.com
©2014 Fortress Security Store GSM v1.3.1 Page 59
Record/Play a 10 second voice message
When an alarm is triggered and the Main Panel calls the programmed phone numbers, a voice
message will be played to anyone who answers. The message can be up to 10 seconds long.
1-Enter SET mode 2-Use Left-Right arrow keys if necessary to navigate to the screen “Recording”
3-Press ENTER
4-You will see the “Start Recording” screen. 5-Press Enter and record your message. Speak into the back of the panel in a clear voice.
The countdown timer will continue until 10 seconds are up and then will beep
once. If you are not happy with your message, you may start the process again
and the new message will overwrite the old.
To play back your message rather than record a new one, when you see Step 4 “Start
Recording” screen,

www.FortressSecurityStore.com
©2014 Fortress Security Store GSM v1.3.1 Page 60
5-Press RIGHT.
6-Press ENTER with Play highlighted

www.FortressSecurityStore.com
©2014 Fortress Security Store GSM v1.3.1 Page 61
Set System Date and Time
The system date and time are shown on the display during normal operation. Not only is it a
convenient clock, but this system time is used to determine when to perform certain timed delay
functions, so it is important that it be accurate. Be aware every time power is disrupted, the
date/time function will return to its default and will need to be reset. However, with the backup
battery in the Main Panel, this is unlikely to happen often.
1-Enter SET mode 2-Use Left-Right arrow keys if necessary to navigate to the screen “Time”
3-Press ENTER
4-The Date Screen is shown. Press ENTER again.
5-The input screen appears. Enter the date by typing the year+month+day – for example 130517
for May 17, 2013. Then press ENTER (Save).
6-Press RIGHT. You will see the Time screen.
7-Press ENTER and the input screen appears. Enter the time in 24-hour format - for example, 0530
for 5:30AM and 1835 for 6:35PM.

www.FortressSecurityStore.com
©2014 Fortress Security Store GSM v1.3.1 Page 62
8-Press ENTER (Save).
9-Press ESC until you are out of SET mode and check the date and time on the display.

www.FortressSecurityStore.com
©2014 Fortress Security Store GSM v1.3.1 Page 63
Set/Disable Time for System Arming/Disarming
Once the system date/time is set, you can program the Main Panel to arm and disarm the alarm
system automatically. For example, a house is empty from 6am until 3:30pm when children and
their sitter arrive home from school. The alarm could be set to automatically arm at 6:10am
and disarm at 3:15pm.
The arming mode is Away Arm (not Home Arm), so it is not appropriate for automatic setting
while people are on premises.
1-Enter SET mode 2-Use Left-Right arrow keys if necessary to navigate to the screen “Time”
3-Press ENTER and then RIGHT until the “Timely arm” screen appears
4-Press ENTER and then type in the time, in 24-hour format, you want the system to arm itself.
Then press ENTER (Save)
5-Use RIGHT or LEFT until the “Timely disarm” screen appears. Press ENTER and then type in the
time, in 24-hour format, you want the system to disarm itself. Then press
www.FortressSecurityStore.com
©2014 Fortress Security Store GSM v1.3.1 Page 64
6-Press ESC until the SET LED is not lit.
To disable automatic arming/disarming, follow the steps above, but enter a time of 24:01 through
24.59. Since this is an “illegal” time, the display will return to Disable when you press ENTER
(Save).
Note: You cannot use other illegal times to disable the function; the time must be
24:01 through 24:59.

www.FortressSecurityStore.com
©2014 Fortress Security Store GSM v1.3.1 Page 65
Black Wireless Siren Coding/Pairing
The video Outside Alarm is easiest way to lear how to register a black wireless siren with the Main
Panel. If it is not available, read through these steps and then perform them.
1-Ensure Main Panel is powered and press Disarm (open lock symbol) on a remote control 2-Unplug the Main Panel’s attached siren (to avoid noise) 3-Press the Alarm button (speaker icon) on the remote control The Main Panel LCD display shows the remote control’s zone and the alarm LED is on 4-Power on the remote siren The siren will make a two-toned chirp then beep twice after a couple of seconds. The siren is now powered up correctly. 5-Disconnect the siren power cable, wait 1 second, then reconnect it The siren emits one beep Disconnect the siren power cable, wait 1 second, then reconnect it The siren emits one beep Disconnect the siren power cable, wait 1 second, then reconnect it The siren emits three beeps

www.FortressSecurityStore.com
©2014 Fortress Security Store GSM v1.3.1 Page 66
6-Press the Disarm (open lock symbol) on the remote and wait 5 seconds The remote siren emits several beeps 7-Immediately disconnect the siren’s power cable for 3 seconds then reconnect The remote siren emits two beeps

www.FortressSecurityStore.com
©2014 Fortress Security Store GSM v1.3.1 Page 67
Settings – Change Password
The Operation Password is a 4 digit code that allows you to manage the day-to-day operation of
the Main Panel. This password is also used to disarm directly at the Main Panel. It should be
something memorable but not easy to guess by anyone else.
1-Enter SET mode 2-Use Left-Right arrow keys if necessary to navigate to the screen “Settings”
3-Press LEFT/RIGHT until you reach the “Operate password” screen.
4-Press ENTER and input the 4 digit password.
5-Press ENTER (Save)
The Programming Password is a 6 digit code that allows navigating and changing system
parameters. It is changed the same way as the Operation Password (see steps above) except at
Step 3 go to the “Program password” screen.
www.FortressSecurityStore.com
©2014 Fortress Security Store GSM v1.3.1 Page 68
Settings – Set Arm Delay Time
Setting Away Arm usually means you are allowing all sensors to trigger alarms. If you are in a
building and Away Arm the system, you will certainly set off a sensor before getting out of the
building. You can set the Arm Delay Time from 1-99 seconds to give yourself time to leave
before the sensors trigger an alarm. The system will beep every second during the delay. Your
system is pre-programmed with a 30-second delay for Away Arming.
1-Enter SET mode 2-Use Left-Right arrow keys if necessary to navigate to the Settings screen
3-Press LEFT/RIGHT until you reach the Delay Arm screen.
4-Press ENTER and input the seconds to delay Away Arming.
5-Press ENTER (Save)

www.FortressSecurityStore.com
©2014 Fortress Security Store GSM v1.3.1 Page 69
Settings – Alarm & Call Delay Time
This feature sets the time delay, from 1-99 seconds, before a triggered alarm causes the main
panel to activate the alarm, start sirens, and begin calling numbers on the phone and SMS list.
The main panel beeps every second until the alarm is activated. The default is 40 seconds.
Note: This setting is only applied to zones that have the Delay field set to “Enable.” If the Delay
field of a zone is set to Disable, the Delay Alarm Time is 0 seconds regardless of this setting.
1-Enter SET mode 2-Use Left-Right arrow keys if necessary to navigate to the Settings screen
3-Press LEFT/RIGHT until you reach the Delay Alarm screen
4-Press ENTER and input the seconds to delay the alarm
5-Press ENTER (Save)

www.FortressSecurityStore.com
©2014 Fortress Security Store GSM v1.3.1 Page 70
Settings – Voice Prompt
By default when you press keys and arm or disarm the system, a voice from the Main Panel
provides feedback. When you enter your password, the Voice Prompt speaks the digits as you
press them. This feature can be disabled if you prefer not to hear the voice.
1-Enter SET mode 2-Use Left-Right arrow keys if necessary to navigate to the Settings screen
3-Press LEFT/RIGHT until you reach the Voice prompt screen.
4-Press ENTER to toggle between Enable and Disable

www.FortressSecurityStore.com
©2014 Fortress Security Store GSM v1.3.1 Page 71
Settings – Siren Prompt
When you are arming/disarming a system with the remote control, you cannot hear the beeps
of the Main Panel to know if the operation was successful. By default, the Siren Prompt is
disabled, but if you enable it, the siren will produce a short blast which lets you know the
arming was successful (Away Arm only) and two short blasts to let you know the disarming was
successful (disarming from both Away Arm and Away Home).
1-Enter SET mode 2-Use Left-Right arrow keys if necessary to navigate to the Settings screen
3-Press LEFT/RIGHT until you reach the Siren prompt screen
4-Press ENTER to toggle between Enable and Disable

www.FortressSecurityStore.com
©2014 Fortress Security Store GSM v1.3.1 Page 72
Settings – Remote Siren
By default, when the SOS on the main panel or “Panic” key (speaker symbol) on the remote fob
is pressed, both the wired or remote siren(s) sound. If Remote Siren is disabled, only the wired
siren will sound when the SOS or “Panic” key is pressed.
If the SOS button is used as an attention getting or intruder warning device, the siren should be
enabled. If the intent is to send out a “silent” alarm via the Main Panel’s phone/SMS numbers,
the Remote Siren should be disabled.
1-Enter SET mode 2-Use Left-Right arrow keys if necessary to navigate to the Settings screen
3-Press LEFT/RIGHT until you reach the Remote siren screen
4-Press ENTER to toggle between Enable and Disable

www.FortressSecurityStore.com
©2014 Fortress Security Store GSM v1.3.1 Page 73
Settings – Arm disarm SMS
If this feature is enabled, a text message is sent to all numbers listed in the SMS list whenever an
arm/disarm event occurs. This allows everyone on that list to know the current state of the
system. If your SMS phones and/or the SIM card in the Main Panel are on a pay as you go plan,
each arm/disarm event will be charged to your wireless plan. By default, this feature is off.
1-Enter SET mode 2-Use Left-Right arrow keys if necessary to navigate to the Settings screen
3-Press LEFT/RIGHT until you reach the Arm disarm SMS screen
4-Press ENTER to toggle between Enable and Disable

www.FortressSecurityStore.com
©2014 Fortress Security Store GSM v1.3.1 Page 74
Settings – Language
Chinese or English can be chosen as the Main Panel’s display language. The default for your
system is English.
1-Enter SET mode 2-Use Left-Right arrow keys if necessary to navigate to the Settings screen
3-Press LEFT/RIGHT until you reach the Language screen.
4-Press ENTER to toggle between English and Chinese

www.FortressSecurityStore.com
©2014 Fortress Security Store GSM v1.3.1 Page 75
Settings – Line Rings
This setting allows you to use a landline for both voice and alarm system control by specifying
the alarm system will not answer the phone until after a certain number of rings. Six rings is
the default.
This setting and feature will not work well for you if you also have an answering machine or fax
machine on the same line. Those devices (with the exception of smart fax machines) also
expect to answer a call on a certain ring. The device with the shortest ring setting will always
pick up.
This setting does not affect the SIM card— if you call the SIM card's phone number it will pick
up on the first ring.
1-Enter SET mode 2-Use Left-Right arrow keys if necessary to navigate to the Settings screen
3-Press LEFT/RIGHT until you reach the Line Rings screen.

www.FortressSecurityStore.com
©2014 Fortress Security Store GSM v1.3.1 Page 76
4-Press ENTER to toggle between Enable and Disable

www.FortressSecurityStore.com
©2014 Fortress Security Store GSM v1.3.1 Page 77
Settings – Alarm mode
You can select if the system will use the phone line, SIM card, or both. If a calling method is not
available, the main panel still attempts to make the call without giving any sort of error
message.
GSM means the system will only make calls with the SIM card. Line means the system will only
make calls with the phone line. GSM/Line means the system will use both. If both are present
they will make calls at the same time.
The pre-recorded voice message will always be played over the phone.
1-Enter SET mode 2-Use Left-Right arrow keys if necessary to navigate to the Settings screen
3-Press LEFT/RIGHT until you reach the Alarm mode screen.
4-Press ENTER to toggle between GSM, Line, and GSM/Line

www.FortressSecurityStore.com
©2014 Fortress Security Store GSM v1.3.1 Page 78
Settings – Siren Time
You can select the time in minutes the wired siren will sound when the alarm is triggered. You can adjust the time from 1 – 10 minutes. The default time is 1 minute. This settings does not affect wireless sirens. Wireless sirens will sound for a fixed time of three minutes.
1-Enter SET mode 2-Use Left-Right arrow keys if necessary to navigate to the Settings screen
3-Press LEFT/RIGHT until you reach the Siren Time screen
4-Press ENTER to toggle the time through 1 – 10 minutes
www.FortressSecurityStore.com
©2014 Fortress Security Store GSM v1.3.1 Page 79
Settings – Delay Beep
Normally the system will make a series of beeps if you trigger a delayed zone. The beeps will continue for the amount of time specified in Delay alarm until the delay has finished or the system is disarmed. You may enable or disable the beeps. 1-Enter SET mode 2-Use Left-Right arrow keys if necessary to navigate to the Settings screen
3-Press LEFT/RIGHT until you reach the Delay Beep screen.
4-Press ENTER to toggle between Enable and Disable

www.FortressSecurityStore.com
©2014 Fortress Security Store GSM v1.3.1 Page 80
Settings – Factory Reset
If your system does not function correctly, has become misconfigured, requires major
sensor/hardware/SMS changes, etc., you may have to perform a factory reset. This resets all
settings. Any sensors/detectors/sirens, etc. will no longer be programmed to the system.
THIS IS A LAST RESORT AND CLEARS ALL SETTINGS.
1-Enter SET mode 2-Use Left-Right arrow keys if necessary to navigate to the Settings screen
3-Press LEFT/RIGHT until you reach the Factory setting screen.
4-Highlight Restore and press ENTER
www.FortressSecurityStore.com
©2014 Fortress Security Store GSM v1.3.1 Page 81
Slow Start - Testing and Using Your System This section covers the daily use of your system as well as the maintenance and testing. This section should be read thoroughly to get the best results with your GSM system.

www.FortressSecurityStore.com
©2014 Fortress Security Store GSM v1.3.1 Page 82
Password Reset/Lost Password
If you should forget either of your passwords, you can reset both passwords to the system default.
After than you can use the instructions in Starting/Programming Your System – Settings – Change
Password or Quick Start to change them to secure passwords.
1-Make sure the system is disarmed. If it is armed and you no longer know the Operation Password, you use a Remote Control (Key Fob) to disarm the system or completely power down the system and then turn it back on. 2-Type in 95175308246 and press ENTER
The passwords have now been reset to the system defaults
Operations Password 1234
Programming Password 888888

www.FortressSecurityStore.com
©2014 Fortress Security Store GSM v1.3.1 Page 83
Arming the System – Away Arm
Away Arm is the type of arming you should use when no one will be in the building. By default it
allows all sensors/detectors, etc. to trigger an alarm and start the notification process. In other
words, it allows coverage inside and on the boundary. By default you have 30 seconds to leave the
building after using Away Arm.
You can Away Arm by four methods
1-Remote Control (Key Fob) – Lock icon
2-ARM key on the Main Panel – Depicts figure leaving house – top left button on keypad
3-Remote Access telephone call to the Main Panel (Enter 1 after entering password)
4-Send a text message to the SIM card phone number with your password and a 1 . For
example, if your password is 1234, the message would be

www.FortressSecurityStore.com
©2014 Fortress Security Store GSM v1.3.1 Page 84
Arming the System – Home Arm
Home Arm is the type of arming you should use when you are in the building and moving around.
By default it deactivates motion sensors and allows boundary sensors, such as door/window
sensors, to trigger an alarm and start the notification process. In other words, it allows coverage
on the boundary but allows free movement inside.
You can Home Arm by two methods
1-Remote Control (Key Fob) – House icon
2-Home key on the Main Panel – Depicts figure inside house – under top left button on
keypad

www.FortressSecurityStore.com
©2014 Fortress Security Store GSM v1.3.1 Page 85
Arming the System – Disarm
Disarm deactives all sensors except for emergency detectors. SOS, panic buttons, smoke detectors,
or any other 24-hour devices will still trigger the alarm and begin the notification process.
You can Disarm by four methods
1-Remote Control (Key Fob) – Unlock icon
2-Entering Operations password and pressing ENTER on the Main Panel
3-Remote Access telephone call to the Main Panel (Enter 2 after entering password)
4-Send a text message to the SIM card phone number with your password and a 2 . For
example, if your password is 1234, the message would be

www.FortressSecurityStore.com
©2014 Fortress Security Store GSM v1.3.1 Page 86
Answering an Alarm Call from Main Panel
If you have programmed the Main Panel to call out when an alarm is triggered, it calls the first
phone on the list. If no one answers and resets or disarms the system, the second phone on the list
is called. If no one answers and resets or disarms the system from the second phone number, the
remaining phones are called.
If no one answers and resets or disarms the system the first time through the list, the Main Panel
calls the list two more times. If no one answers any of the calls and resets or disarms the system,
the Main Panel stops dialing and no further attempt is made. If the alarm is triggered again, the
system will begin the calling again.
If a phone is answered, the person answering the phone first hears a 10 second recorded message,
if one has been recorded. Four keys can be used to give commands to the Main Panel at this point
(see next page). If the answerer hangs up without pressing any of the four buttons, the Main Panel
continues its phone calls.

www.FortressSecurityStore.com
©2014 Fortress Security Store GSM v1.3.1 Page 87
Key Presses and Results when Answering a Call from the Main Panel
Key Press Results
S0S key (00) Enable
1 The Main Panel clears the alarm and re-arms in Away Arm state. It stops calling other numbers.
2 The Main Panel clears the alarm and disarms itself. It stops calling other numbers.
3 Sirens are turned off and audio monitoring of the area around the Main Panel occurs for 30 seconds. Additional key presses allow another 30 seconds of monitoring.
4 The Main Panel allows a 30-second intercom session. This function is only available through use of a SIM card.

www.FortressSecurityStore.com
©2014 Fortress Security Store GSM v1.3.1 Page 88
Calling the Main Panel
If you call the number of the Main Panel (either the landline number or cell phone number
associated with the SIM card) you can use the same telephone key presses to control the Main
Panel. Simply dial and make key presses when you hear the Main Panel answer. You will be
required to input your passcode before giving commands.
Key Presses and Results when Answering a Call from the Main Panel
Key Press Results
1 The Main Panel clears the alarm and re-arms in Away Arm state. It stops calling other numbers.
2 The Main Panel clears the alarm and disarms itself. It stops calling other numbers.
3 Sirens are turned off and audio monitoring of the area around the Main Panel occurs for 30 seconds. Additional key presses allow another 30 seconds of monitoring.

www.FortressSecurityStore.com
©2014 Fortress Security Store GSM v1.3.1 Page 89
4 The Main Panel allows a 30-second intercom session. This function is only available through use of a SIM card.

www.FortressSecurityStore.com
©2014 Fortress Security Store GSM v1.3.1 Page 90
Emergency (Panic Button) Alarm Call
Sometimes it is necessary to send out an immediate alarm. Perhaps there is an intruder or an
accident. The Emergency, or panic, alarm call works in all modes (Away Arm, Home Arm,
Disarmed) and can be initiated in three ways. In addition to making the automatic phone calls, any
sirens connected to the system will sound.
1-The SOS button on the Main Panel
2-The “speaker” icon on the remote control
3-The optional panic button that you may have purchased with the system
Note: The alarm zone of an Emergency Alarm is 00.

www.FortressSecurityStore.com
©2014 Fortress Security Store GSM v1.3.1 Page 91
Making a Call from the Main Panel
If the Main Panel has a SIM card inside, it can make a call just as if it were a typical speakerphone.
1-The Main Panel must be disarmed
2-Use the keypad to input the phone number you wish to call. You may need to input a 1
before the area code.
2-Press the [Call] button.
When the person answers you can converse at length. When you are ready to hang up, press the
[Call] button again.

www.FortressSecurityStore.com
©2014 Fortress Security Store GSM v1.3.1 Page 92
Alarm History
A log of the last 30 alarms is kept in alarm history, newest alarm first. The 31st alarm overwrites
the oldest alarm in the history.
1- Use the keypad to input 00, then press ENTER
2-Use the LEFT and RIGHT keys to navigate through the alarm history.

www.FortressSecurityStore.com
©2014 Fortress Security Store GSM v1.3.1 Page 93
System Maintenance
Both the Main Panel and the sensors, detectors, remote controls, and other devices need to be
checked periodically to test complete functionality.
While there is no hard and fast rule, it is wise to check every device at least once in a three month
period. For greater safety and reliability, check more often.
Much of the periodic maintenance is satisfied by the normal operation schedule. For example, if
you use the arming timer, you will be able to see if the arm and disarm function is working at the
Main Panel.

www.FortressSecurityStore.com
©2014 Fortress Security Store GSM v1.3.1 Page 94
The following table lists periodic maintenance tests.
Maintenance Tasks and Suggested Frequency
Task Frequency What/How
Arm/Disarm Quarterly Arm in all modes (Away Arm, Home Arm) and disarm
Triggered Alarm Notification
Quarterly Trigger an alarm and see if the Main Panel dials all the phones in its list and sends SMS data
Main Panel-Sensor Communication
Quarterly Trigger all or a rotating subset of sensors/detectors to make sure they can communicate with the Main Panel
Main Panel Battery Quarterly Remove electrical power for 1-2 hours to see if backup battery power works
Detectors/Sensors/Remote Controls batteries
Monthly Check that batteries are working by testing batteries or triggering sensors/remotes

www.FortressSecurityStore.com
©2014 Fortress Security Store GSM v1.3.1 Page 95

www.FortressSecurityStore.com
©2014 Fortress Security Store GSM v1.3.1 Page 96
Slow Start - Appendices of Technical Information
The Appendices contain background information about your GSM alarm system. Besides technical
specifications and information, this section is a living document that will grow as needed. Check back
periodically as this section of the manual may change frequently.
www.FortressSecurityStore.com
©2014 Fortress Security Store GSM v1.3.1 Page 97
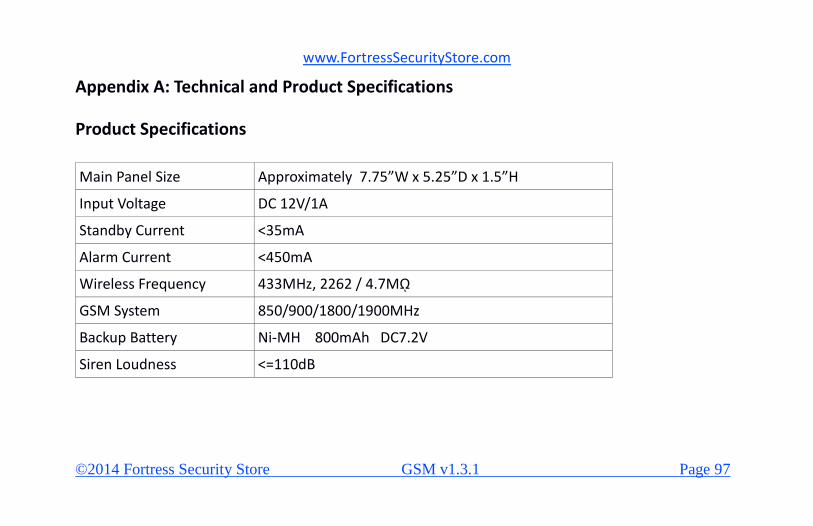
Appendix A: Technical and Product Specifications
Product Specifications
Main Panel Size Approximately 7.75”W x 5.25”D x 1.5”H
Input Voltage DC 12V/1A
Standby Current <35mA
Alarm Current <450mA
Wireless Frequency 433MHz, 2262 / 4.7Mῼ
GSM System 850/900/1800/1900MHz
Backup Battery Ni-MH 800mAh DC7.2V
Siren Loudness <=110dB

www.FortressSecurityStore.com
©2014 Fortress Security Store GSM v1.3.1 Page 98
Default Settings
Zone Away Arm Home Arm Disarmed “Place” Label Siren Delay
Zone1 Enable Enable Disable Door Enable Disable
Zone2 Enable Disable Disable Hall Enable Disable
Zone3 Enable Enable Disable Window Enable Enable
Zone4 Enable Disable Disable Balcony Enable Disable
Zone5 Enable Disable Enable Fire Enable Disable
Zone6 Enable Disable Enable Gas Enable Disable
Zones 7-9 Enable Disable Disable SOS Enable Disable
Zone 0 Enable Enable Enable SOS Enable Disable
S0S key (00) Enable Enable Enable S0S Enable Disable
Selected Parameters
SET password
888888
www.FortressSecurityStore.com
©2014 Fortress Security Store GSM v1.3.1 Page 99
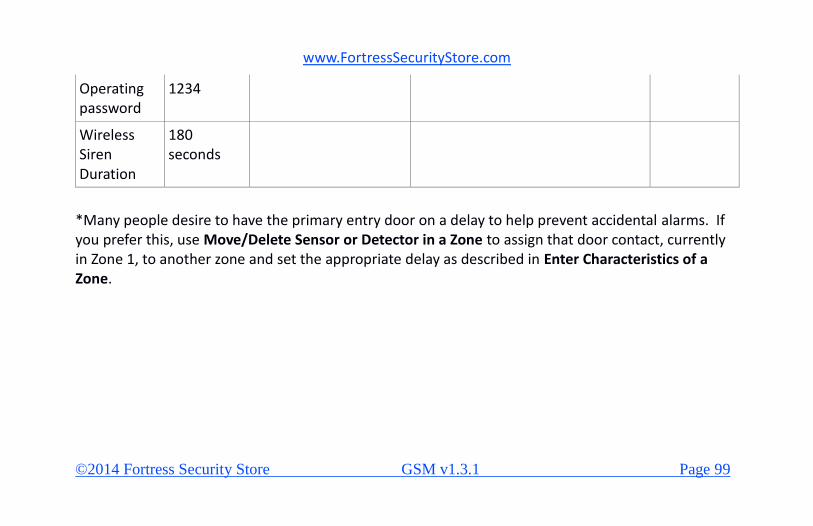
Operating password
1234
Wireless Siren Duration
180 seconds
*Many people desire to have the primary entry door on a delay to help prevent accidental alarms. If you prefer this, use Move/Delete Sensor or Detector in a Zone to assign that door contact, currently in Zone 1, to another zone and set the appropriate delay as described in Enter Characteristics of a Zone.

www.FortressSecurityStore.com
©2014 Fortress Security Store GSM v1.3.1 Page 100
Support Please visit www.FortressSecurityStore.com/support for lots of videos, answers to frequently asked questions, support articles, and the latest version of this user manual. If you still have questions or problems, we are happy to help! If you have an idea for improving the manual, please share it us!
Phone (206) 981-5371 Email [email protected]