fashion and garment making
TRANSCRIPT
Intermediate Vocational CourseFirst Year Practical Manual
FASHION AND APPAREL DESIGNING Fashion and Garment Making
State Institute of Vocational EducationDirectorate of Intermediate Education
Govt of Andhra PradeshHyderabad
2005
Fashion and Apparel Designing
Editor
Dr. A. Sharada DeviUniv. Professor & Head
Department of Apparel & TextilesCollege of Home Science
ANGRAU, Hyderabad
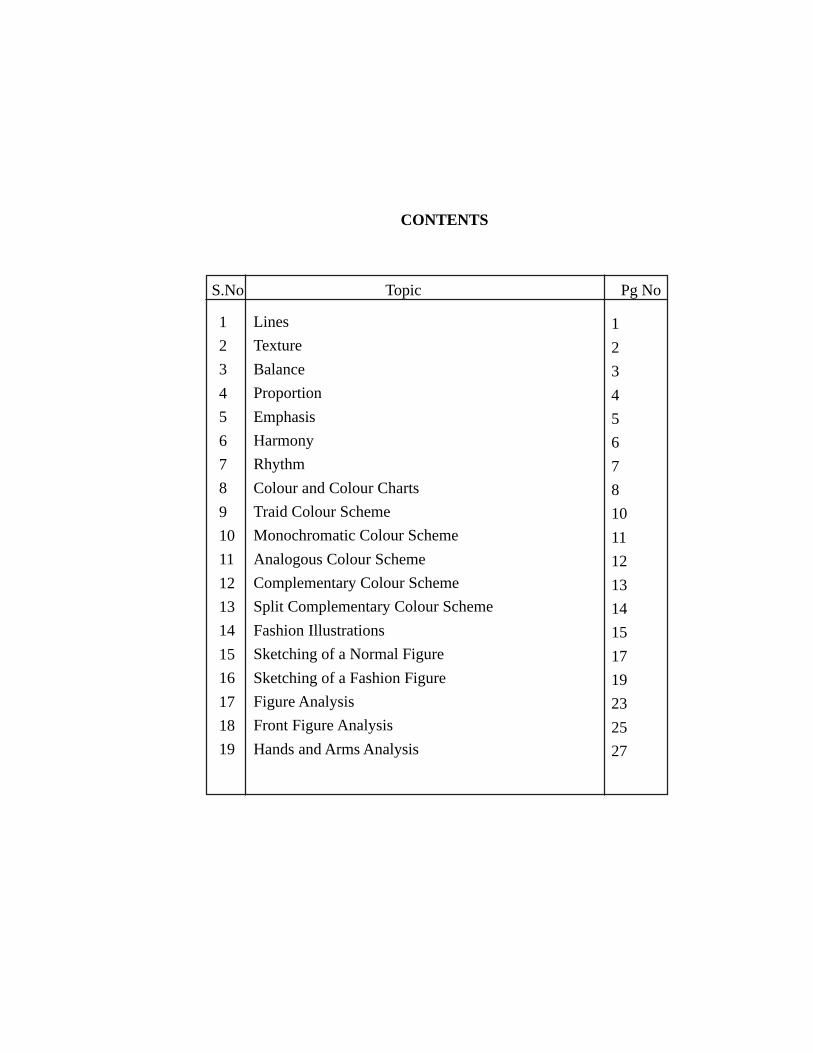
CONTENTS
S.No Topic Pg No
LinesTextureBalanceProportionEmphasisHarmonyRhythmColour and Colour ChartsTraid Colour SchemeMonochromatic Colour SchemeAnalogous Colour SchemeComplementary Colour SchemeSplit Complementary Colour SchemeFashion IllustrationsSketching of a Normal FigureSketching of a Fashion FigureFigure AnalysisFront Figure AnalysisHands and Arms Analysis
123456781011121314151719232527
12345678910111213141516171819
Fashion and Apparel Designing
1. Lines
Expt:
Aim: To understand the types of lines and their effect on dress
Materials required:Paper, Pencils, Sharpener, Eraser, Ruler, few dresses figures
Method:1. Draw different types of lines & Line transitions – Straight, Full
curve, Restrained curve, Jazzed line2. Select any dressed figure and identify the types of lines present in
them both structurally and decoratively 3. Discuss the usage of lines in terms of advantages and disadvantages to the style of garment 4. Change some restrained curves into full curves and discuss their effect.
5. Draw the same styles with change in lines type, and direction.6. Create designs combining lines in the form of letters T, I, Y7. Experience the effect of colour on different lines8. Analyse the new designs for lines and write the inference about:
a. Which variations are advancing?b. Which variations are receding?c. What is the over all effect of the change in line type and
line direction?
1
2. Texture
Expt:
Aim: To understand the types of textures and visualize their effect inclothing
Materials required:
Paper, Pencil, Eraser, Ruler, Sample fabrics of various textures,weights and colours.
Method:1. Separate the fabric samples collected according to weight,
texture, luster and colour2. Compare the samples of the following and write inferences for
each. Same luster but different in colour Same colour but different in luster Same texture but different in colour and the like.3. Draw the outline of a simple garment style and paste the fabric
samples (cut in the same style) on it4. Observe the different effects created and note them5. Imitate the fabric texture with various media on paper.
2
Fashion and Apparel Designing
3. Balance
Expt:
Aim: To understand the balance in garments and the method ofachieving perfect balance in garments
Materials required:
Paper, Pencil, Eraser, Ruler, Pictures/ Photographs of variousGarment design
Method:1. Draw dress designs with perfect formal and informal balance2. Change the formal balance of a garment design to informal
balance by changing the position, size, colour, texture of fewgarment parts until a pleasing balance is created
3. Study the collected designs and indicate the types of balanceeach has in terms of
· Shape, size and space· Balance of colour· Balance of pattern· Balance in texture
4. Write the observations and verify the results
3
4. Proportion
Expt:
Aim: To understand the effect of proportion in garments
Materials required:
Paper, Pencil, Eraser, Ruler, Pictures/ Photographs of variousGarment design
Method:1. Draw a garment with golden mean proportion and compare
with other proportions2. Draw a two piece garment style with clear upper and lower
garments. Keep changing the upper garment length (eitherlow or high) and observe the effect of proportion
3. Analyze the overall effect of each in terms of proportion andcompare it with golden mean and write the inference
4. Try with various other garments by decreasing or increasingtheir proportions
5. From the collection select a garment with problematicproportions and give solution to overcome it.
4
Fashion and Apparel Designing
5. Emphasis
Expt:
Aim: To understand the effect of emphasis in garments
Materials required:
Paper, Pencil, Eraser, Ruler, colour pencils
Method:1. Collect few dressed figures with different degrees of
emphasis and identify the objects of emphasis andobserve their placement and representing media
2. Draw a simple dress design and copy the same on sixsheets
3. Create a decorative design and place it at various focalpoints
4. Find out which gives the maximum attraction among alland why?
· Try using emphasis using colour, line, shape, andtexture
· Structural details as rows of stripes, tucks,gathers, ruffles, buttons
· By unusual shapes of collars, sleeves, pockets,
5
6. Harmony
Expt:
Aim: To understand the effect of harmony in garments
Materials required:
Paper, Pencil, Eraser, Ruler, Pictures/ Photographs of variousGarment design
Method:1. Collect few pictures of dressed figures and study the ways in
which harmony was achieved 2. Draw a dress design and create harmony in terms of
· Colour· Texture· Structure and decoration
3. Select a design, which you feel lacks harmony. Analyse where thedisharmony is created. Redraw the design creating harmony.
6
Fashion and Apparel Designing
7. Rhythm
Expt:
Aim: To understand the effect of rhythm in garments
Materials required:
Paper, Pencil, Eraser, Ruler, Pictures/ Photographs of variousGarment design
Method 1. Collect few pictures of dressed figures and study the ways in
which rhythm was achieved
2. Draw a dress design and try creating rhythm througho Repetition of design, shapes, size, colour, line and
texture.o Using colour that go from light to darko Textures from fine to coarseo Progression of sizeso Radiation
7
8. Colour and Colour charts
Expt:Aim: To make a prang colour wheel, intensity and value charts
Materials required:
Paper, Pencils, Sharpener, Eraser, Ruler, Water colours/ othercolouring media
Method:
a. Prang colour chart:1. Make a round template suitable to accommodate 12 such pieces
in a circle2. Draw a big circle and trace the template around the circle twelve
times3. Colour the three circles with primary colours- red, blue, and
yellow maintaining equidistance from each other on the wheel4. Mix two primaries in equal proportion to make three intermediate
hues5. Mix two intermediate hues and make 6 tertiary hues to complete
the colour wheel.
b. Saturation chart: Make a stepped scale that goes from one hue to it’sexact complement. Any set of complements can be used for your valuescale.
1. Make seven empty squares of equal size in a step fashion2. Two complementary colors will be the only paints used to make
the scale.3. Start with one color, in the first step.4. Add a little of the complement, and paint a new square5. Add some more of the complement and paint another, continuing
in this manner until you reach middle.6. Keep doing the same thing until you reach the end where pure second
complementary color is visible.
8

Fashion and Apparel Designing
c. Tint and Shade Chart:1. Make nine empty squares of equal size in a step fashion
2.Choose one color which will be the only paints used to make the chart. 3. Start with pure color, in the first step. 4. Add a little of the white and paint a new square 5. Add some more of white and paint another; continuing in this manner until you reach the ninth square which will be in complete white colour. The tint chart is ready.
6. Similarly, mix black of increasing proportions to a pure hue to obtain the shade chart.
9
9. Triad Color Scheme
Expt:
Aim: To make Traid colour scheme in a dress design
Materials required:
Paper, Pencils, Eraser, Ruler, Water colours/ other colouring media,Sketch of a simple styled garment
Method:1. This consists of any three colours that are equidistant on the colour
wheel.2. Draw the out line of the garment on a paper using a pencil3. Yellow-orange, red-violet, and blue-green can be used or colour s
that are equidistance on the colour wheel.4. Plan the position and location of colours on the sketch5. Paint the sketch as planned with the colours selected.
10
Fashion and Apparel Designing
10. Monochromatic Colour Scheme
Expt:
Aim: To make a monochromatic colour scheme in a dress
Materials required:
Paper, Pencils, Eraser, Ruler, Water colours/other colouring media,Sketch of a simple styled garment
Method:1. One hue is used in shade and tint variations for achieving this colour
scheme.2. Draw the out line of the garment on a paper using a pencil3. Choose one colour from the prepared colour wheel4. Mix white little by little to make some tint variations of the colour
choosen5. Keep them separately in a colour palette6. Determine the location of the colours on the sketch drawn7. Start paining the dress sketch as planned8. See that the colours merge from one to another without isolation
11
11. Analogous Colour Scheme
Expt:
Aim: To make an analogous colour scheme in a dress design
Materials required:
Paper, Pencils, Eraser, Ruler, Water colours/ other colouring media,Sketch of a simple styled garment
Method:1.This is a two to four hue format where colours next to each other are
used to create this scheme.2. Draw the out line of the garment on a paper using a pencil3. Choose one colour from the colour wheel4. Select two analogous colours next to the first selected colour on the
colour wheel5. For example for a design with two hues select a scheme with dark
red-violet and violet and for three colour series, include yellow,yellow-green and green which are the neighboring colours in thecolour wheel
6. Determine the location of the colours on the sketch drawn7. Start painting the sketched dress as planned with the colours selected.
12
Fashion and Apparel Designing
12. Complementary Colour Scheme
Expt:
Aim: To make complementary colour scheme in a dress design
Materials required:
Paper, Pencils, Eraser, Ruler, Water colours/other colouring media,Sketch of a simple styled garment
Method:1. This consists of two hues that are directly opposite on the colour
wheel2. Draw the outline of the garment on a paper using a pencil3. Choose one colour from the colour wheel4. Select an exactly opposite colour on the colour wheel eg. yellow and
violet; green and red etc. A combination of complements in variousproportions can be tried
5. Plan the position and location of colours on the sketch6. Paint the sketch as planned with the colours selected.
5. For eg. if blue-green is selected, the complement of this is red-orange.Colours on either side of red-orange are red and orange. So thescheme is selected with blue-green, red and orange.
6 .Plan the position and location of colours on the sketch7. Paint the sketch as planned with the colours selected.
13
13. Split-complementary Colour Scheme
Expt:
Aim: To make Split-complementary colour scheme in a dress design
Materials required:
Paper, Pencils, Eraser, Ruler, Water colours/ other colouring media,Sketch of a simple styled garment
Method:1. This consists of any hue plus the two colours lying on either side of
its direct complement2. Draw the out line of the garment on a paper using a pencil3. Choose one colour from the colour wheel4. Select an exactly opposite colour on the colour wheel and two adjacent
colour on both the sides of the complement
14
Fashion and Apparel Designing
14. Fashion Illustrations
Expt:
Aim: To get acquainted with the various materials used in fashionillustration
Tools used for illustration:Pads - 9" x 12" or 11" x 14"
Paper:Choice of paper depends on the media being used. A3 size paper
is usually the best size.Tracing paper – transparent and inexpensiveLitho or bond paper - is suitable for practicing sketches because it is
cheaper and, being semi-transparent, is usefulfor reworking sketches.
Coloured and textured papers - provide background and textural interestwhich enhance the quality of a drawing.
Pencils:
For fashion drawing, 2B or 4B pencil, for darker line. Hard Hpencils are to be avoided as they create a mark on the page, which aredifficult to cover with further pencil lines or shading. A wider range ofdark and thick lines are possible from the same pencil by exerting variouspressures.
Pens
Any fine point marker may be used for a sharp outline. Any colormay be used as required. The other types used are -
Felt Pens
Felt pens are quick and easy to use, and work best with a boldapproach. They are not as suitable for large flat areas but are great forquick rendering of floral, stripes, checks and plaids, or for textured fabricslike tweed. Fine black writing pens with a 0.4-millimeter felt tip are usefulfor defining outlines.
15
Coloured Pencils, Charcoal, Chalk, Crayons And Pastels
These media are soft-textured and may be dry like chalk andcharcoal, waxy like crayons or greasy like pastels. They are ideal for soft,shadowy effects, can be used flat for broad swathes of strong colour, orwith a sharpened tip for clearer outlines. Water based coloured pencils(STAEDLIER) and wax pencils are good for quick sketches or detaileddrawings and give soft, delicate effects with subtle blends of colour, toneand shading.
16
Fashion and Apparel Designing
15. Sketching of a normal figure
Expt:
Aim: To draw a fashion figure with proper proportions using a simplemedia
Materials required: Paper, 2B soft pencil, eraser, ruler
Method:1. Plan the page
Place a mark on your page where you want the top of the head tobe, and another mark where you want the toes to finish. Leave somespace above and below these lines so that the figure is away form theedges of the page and is centered vertically. Draw an 8-inch line torepresent the full height of a figure2. Plan the proportion
Divide the space between these lines into eight equal sections.Each one of these sections equals one head length and body is brokeninto:
- Head- Shoulder- Chest- Base of rib cage- Waist line- Hip line- Knee level- Ankles
1. Rule a horizontal line across the shoulder level 1 ½ headlengths wide.
2. Rule another line across the hip level 1 ¼ head lengths wide.3. Rule a line across the waist line ¾ head lengths wide4. Rule a line across the knee level 2/3 head lengths wide5. Mark the ankle width.6. Draw the figure contour by connecting the points marked
17
3. Geometric body shapesDraw the masses of the body using simplified geometric shapes.
Head - egg shapedShoulders – wedges Neck – cylinderUpper and lower torsos - tapered rectanglesArms and legs – cylindersHands and feet - wedge shapedJoints - circles.
A correct proportion for the width of female hips and shouldersis approximately two times the length of the head.
4. Flesh out the figureFlesh out the figure by adding bone and muscle details.
18
Fashion and Apparel Designing
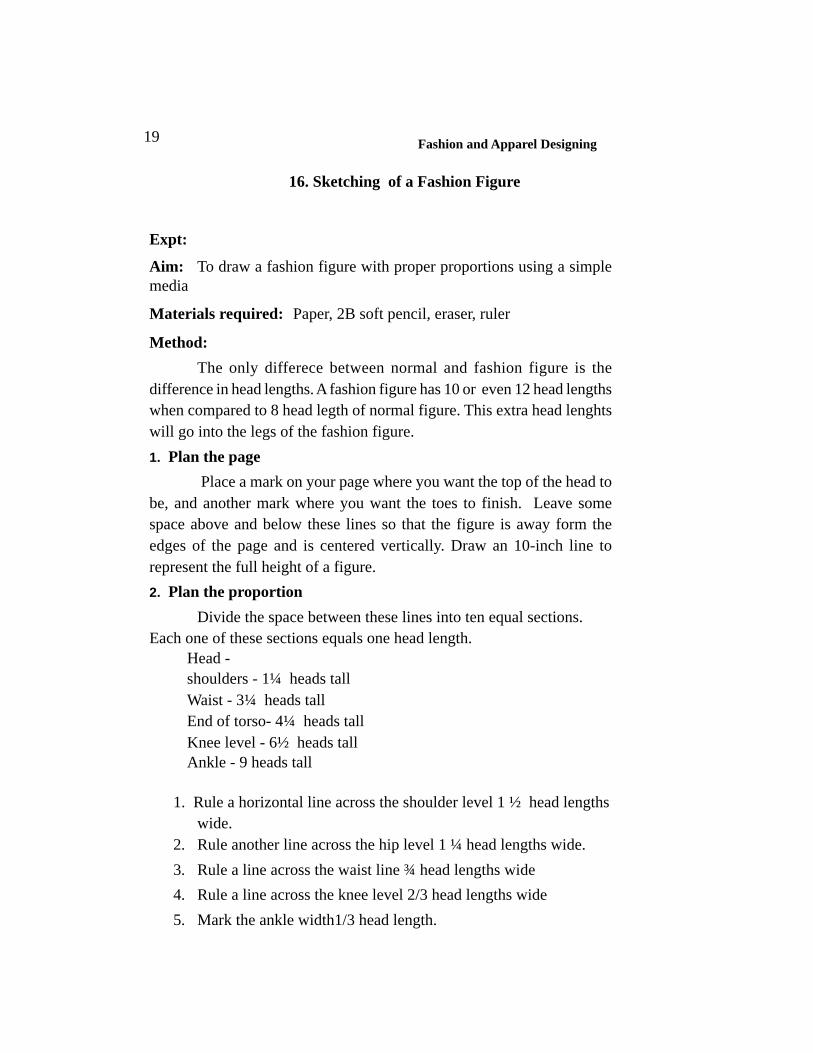
16. Sketching of a Fashion Figure
Expt:
Aim: To draw a fashion figure with proper proportions using a simplemedia
Materials required: Paper, 2B soft pencil, eraser, ruler
Method:The only differece between normal and fashion figure is the
difference in head lengths. A fashion figure has 10 or even 12 head lengthswhen compared to 8 head legth of normal figure. This extra head lenghtswill go into the legs of the fashion figure.1. Plan the page
Place a mark on your page where you want the top of the head tobe, and another mark where you want the toes to finish. Leave somespace above and below these lines so that the figure is away form theedges of the page and is centered vertically. Draw an 10-inch line torepresent the full height of a figure.2. Plan the proportion
Divide the space between these lines into ten equal sections.Each one of these sections equals one head length.
Head -shoulders - 1¼ heads tallWaist - 3¼ heads tallEnd of torso- 4¼ heads tallKnee level - 6½ heads tallAnkle - 9 heads tall
1. Rule a horizontal line across the shoulder level 1 ½ head lengthswide.
2. Rule another line across the hip level 1 ¼ head lengths wide.3. Rule a line across the waist line ¾ head lengths wide4. Rule a line across the knee level 2/3 head lengths wide5. Mark the ankle width1/3 head length.
19
6. Draw the figure contour by connecting the points marked
3. Geometric body shapesDraw the masses of the body using simplified geometric shapes.A correct proportion of female hips and shoulders is approximately two times the length of the head.
4. Flesh out the figureFlesh out the figure by adding bone and muscle details.
20

Fashion and Apparel Designing
Planning & Proportionating the Body Parts
21
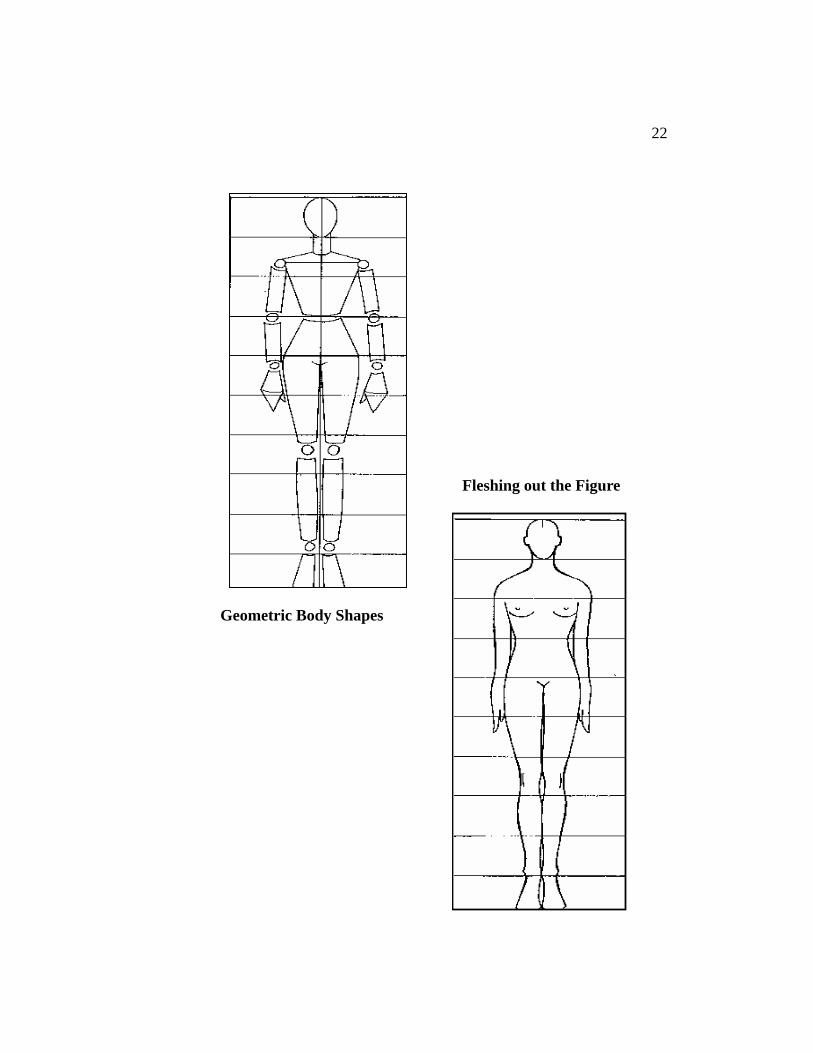
Geometric Body Shapes
Fleshing out the Figure
22
Fashion and Apparel Designing
17. Figure Analysis
Expt:
Aim: To study the figure and analyze its overall appearance and tocorrect any figure imbalance
Materials required:
Sketches of various figure types, pencil, eraser, colour pencils
Method:
Try the following methods on the sketched figure types:Long Waist
Draw an empire style or high-waisted dresses for the figure withlong body and shorter legs. Stockings and shoes that colour-match theskirt will elongate the legs. Draw wide belts, short jackets, vests, and long,full skirts.Short waist
This makes the body look short and the legs too long. Create anillusion of more body length and shorter legs through Princess line garments,belt less styles, dropped waistlines, and low-slung belts.Narrow shoulders
Extended or padded shoulders, cap or puff sleeves add width tonarrow shoulders. Add either wide lapels, yokes, wide necklines, smallcollars.Broad/square shoulders
These make the figure look taller because the width is high on thebody. Halter necks, narrow lapels, full skirts will correct this fault. Raglansleeve seams give a downward slant, which softens square shoulders.Sloping shoulders
A V-line at the top of a vertical line gives shoulders a lift. Yokes,set-in sleeves and shoulder pads are other correctional devices.Long neck
Turtlenecks, high collars, scarves, ascots, cowls, ruffles, bows, andscarves at the neckline will modify this feature.
23
Short neck
Uncluttered necklines, V- or U-necklines, and open collars shouldbe used in this case.Flat chest
Try gathers, shirring, tucks, yokes, cowls, bibs, pockets, scarves,bows and buttons, empire waistlines which add fullness to this figure.Straight hips
Add curves with pleated and gathered skirts, bold and bright pantsand skirts. Avoid straight skirts.
24
Fashion and Apparel Designing
18. Front Figure Analysis
Expt:Aim: To analyse a figure with change in positionMaterials required:
Paper, Pencils 2B, Sharpener, Eraser, RulerMethod:There are four basic steps to move a figure.
1. Firstly, proportion the page.2. Draw the head, then draw the curve of the spine from neck to
crotch.3. Mark the position of the feet.4. Draw the angle of the shoulders hips and knees.
Balancing the figure:· The centre of balance of the moving figure is in the pit of the
neck and this should always lie directly in line with the footor feet supporting the weight.
· If the weight is balanced with 50 per cent over each leg, thebalance point is centered evenly between the two.
· If the weight is balanced 100 per cent over one leg, the balancepoint is directly over that leg.
· If the weight is 25 per cent over one 1eg and 75 per cent overthe other, the balance point moves 75 per cent towards theweight-bearing leg.
25
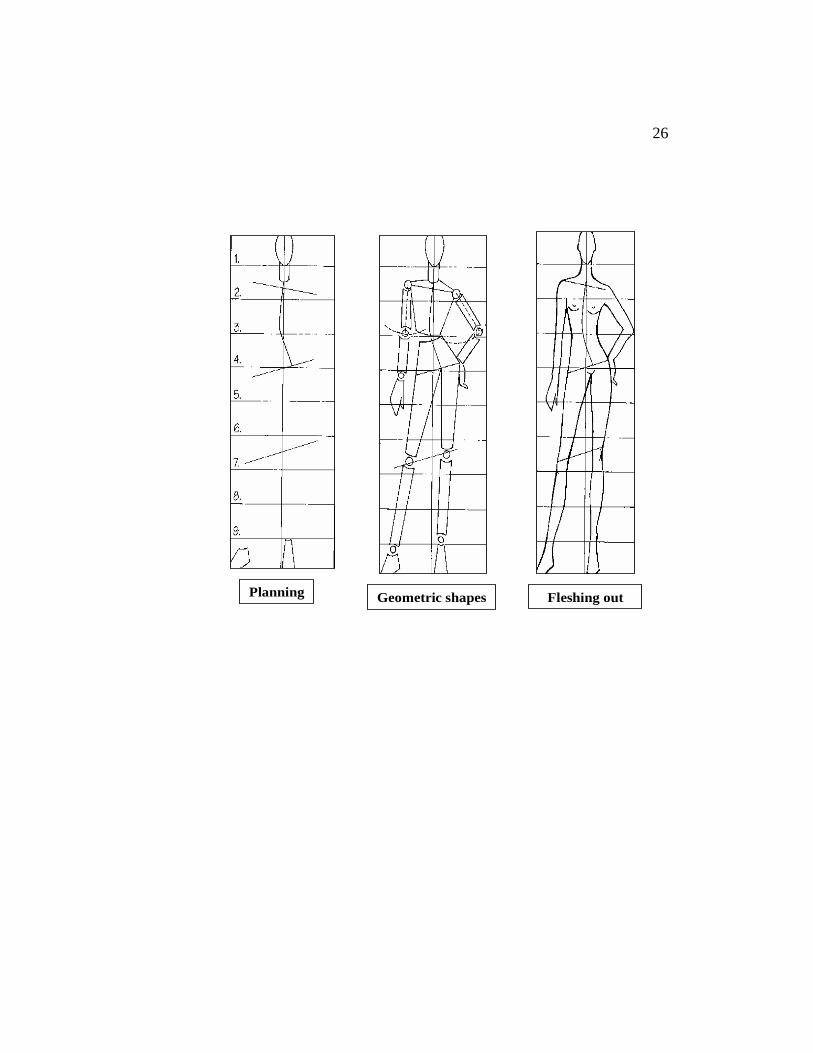
Planning Geometric shapes Fleshing out
26
Fashion and Apparel Designing
19. Hands and Arms Analysis
Expt:Aim: To make a hands and arms on rectangle formulaMaterials required:
Paper, Pencils 2B, Sharpener, Eraser, RulerMethod:a. Hands
Rectangle Formula
1. The length of palm & fingers are equal.
2. Make three dots for the finger base by the knuckles withequal spacing between the dots.
3. Divide the fingers into the knuckle sections into one-half,then again into half, creating three areas
4. Draw in the middle finger, tapering all other fingers towardit. Notice the larger arrow. It shows, where the thumb begins.Follow that to the smaller arrow where the thumb ends.
5. The middle finger is longer than all other fingers.
b. Arms
When the figure is standing erect-perfectly and straight forward-the elbows will line up directly with the waist. The wrists will line upwith the end of the torso or panty line.
· The pivot point of the arms is from the shoulder.· The upper and lower arms are the same length. The upper
arm should be drawn wide in geometric or barrel shape.· Fill in the arms with ovals, and the shoulder ball with a
circle (as illustrated).· The upper arm moves away from the body as the lower arm
moves closer.
27
28
Fashion and Apparel Designing
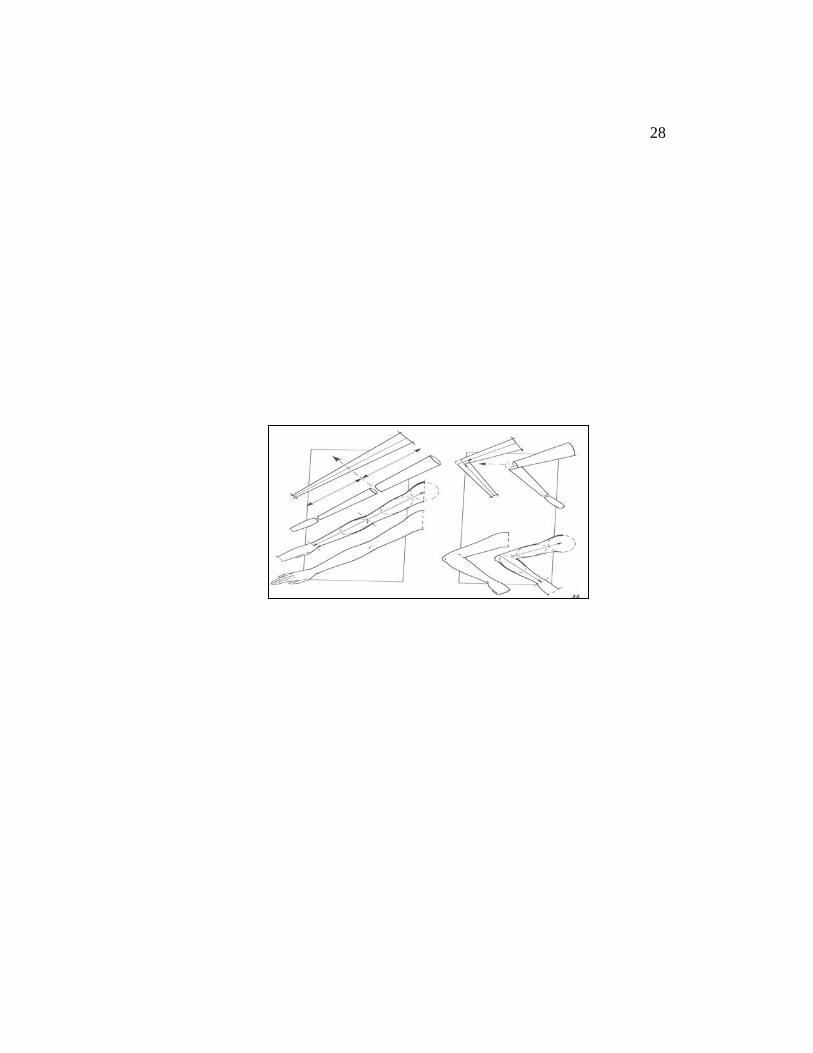
LEGSAND FEET ANALYSIS
Expt:Aim: To analyse legs and feet analysisMaterials required:
Paper, Pencils 2B, Sharpener, Eraser, RulerMethod:
The rounded version of straight, frontal legs help in placement of
the curves. The knee cap is smaller on the outside of the leg, wider on
the inside. The calf curve is fuller, higher on the outside than on the
inside of the leg. The ankle is given slight acknowledgment on the higher
inside angle only.
Front view of leg
This is the full front leg. Pay attention to the dotted line down the center
of the full front leg. This line is the center front. It flows gently, curving
with the leg. Observe how this line moves in the direction of the leg’s turn.
Three quarter view
The 3/4 turned leg is not quite full front not totally in profile.
Profile view of leg
The knee cap has its own importance in the profile leg. Its fullness
change as the leg turns. .Notice that the knee cap curve is drawn wider on
the inside of the leg and narrower on the outside. It will always touch the
outside contour line in the direction the leg turns.
FEET FORMULAE
The foot is basically wedge-shaped, tapering from the ankle and
over the arch of the instep to the toes which sit flat on the ground. From
behind, the back calf muscle tapers down in a long tendon to the heel, and
the foot forms an angle with the anklebones jutting out each side. Shoes
are easier if the foot is drawn first and the shoe drawn on to it. Make sure
the feet are big enough, line about one head height in length. Practice the
full front, ¾ turn and the profile foot. Plan shoes in different styles – flats,
heels, sandals and boots.