WWW.AUDIO-ISSUES.COM1
Simple Tricks to Improve Your Recordings
ARE YOU FOLLOWING THESE SIMPLE RECORDING TIPS FOR A STUDIO QUALITY SOUND?
For a few quick recording tips to get started, this eBook lays out some simple guidelines on improving your recordings.
From simple recording mistakes in the digital world to simple-to-use tips on finding the sweet spot of an instrument, the following eBook covers the most important subjects of audio recording.
WWW.AUDIO-ISSUES.COM
Simple Tricks to Improve Your Recordings
2
THE #1 MISTAKE WITH DIGITAL AUDIO RECORDING
Everybody wants to record audio like the great engineers of history. You might read interviews and books about their warm sound and smoothly saturated tape. And then you try to apply those same ideas to your recordings.
“Big Mistake”
Digital audio recording is a bit different than what you read about in the history books about tape saturation and overloading your pre-amplifiers.
Today, digital audio is not so lenient towards overload. Digital clipping is one of the worst sounds an audio engineer can hear. In the old days, engineers liked pushing their levels to saturation to get that warm tape sound.
But now, the only thing you accomplish by pushing digital audio to the max is horrible digital clipping.
No Clipping Please
Now, with digital audio recording we have to record at an optimum level without distorting our preamps, causing that horrible clipping.
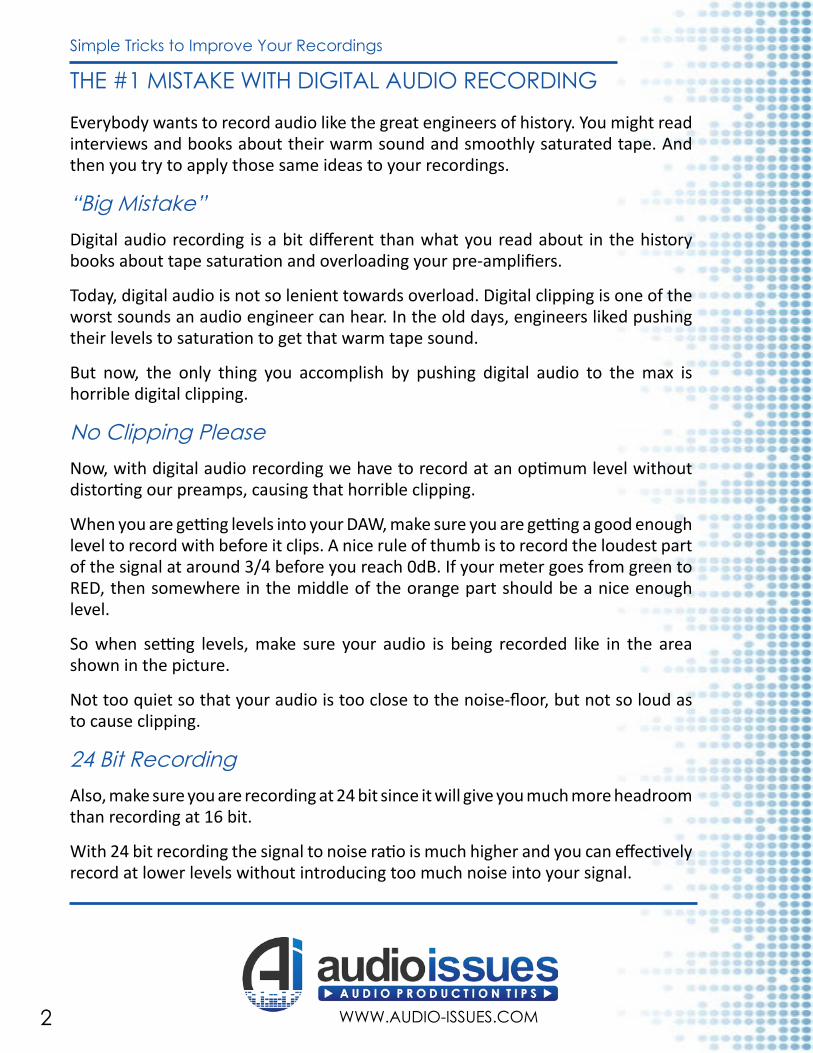
When you are getting levels into your DAW, make sure you are getting a good enough level to record with before it clips. A nice rule of thumb is to record the loudest part of the signal at around 3/4 before you reach 0dB. If your meter goes from green to RED, then somewhere in the middle of the orange part should be a nice enough level.
So when setting levels, make sure your audio is being recorded like in the area shown in the picture.
Not too quiet so that your audio is too close to the noise-floor, but not so loud as to cause clipping.
24 Bit Recording
Also, make sure you are recording at 24 bit since it will give you much more headroom than recording at 16 bit.
With 24 bit recording the signal to noise ratio is much higher and you can effectively record at lower levels without introducing too much noise into your signal.
WWW.AUDIO-ISSUES.COM
Simple Tricks to Improve Your Recordings
3
Conclusion
By setting your levels correctly you can avoid a few problems in the mixing phase.
You avoid that pesky digital clipping that ruins your audio completely, and by recording at 24 bit you have enough volume and headroom to play around with without the noise floor posing a problem to your recordings.
Keeping simple things like this in mind helps smooth out any kinks you might have later. Get it great without digital clipping and your audio will be saved.
WWW.AUDIO-ISSUES.COM
Simple Tricks to Improve Your Recordings
4
21 RECORDING STUDIO TIPS FOR A SMOOTHER SESSIONThere are many ways to screw up your recording session. Whether you are the artist or the engineer there are certain practices you can adhere to when you are recording. If you are working in a commercial studio or recording at your friend’s home recording studio then try not to screw up your studio time in any of the following ways.
1. Being late – If you are the engineer show up early to make sure everything is working properly. If you’re the musician don’t make the engineer wait around for you.
2. Not changing the strings of your guitar – Scummy strings can’t be fixed in the mix.
3. Not knowing your parts – It’s a waste of time and money to come unprepared.
4. Singing with a cold – Reschedule your vocal session if you know you can’t perform.
5. Giving a lackluster performance – Not everything can be fixed in the mix.
6. Being disrespectful – It goes without saying, the engineer is your best friend. So treat him well.
7. Recording for recording’s sake – Similar to not knowing your parts. If you are just piling on parts without a clear direction, it’s still a waste of time and money.
8. Recording a badly sounding drum-kit – Replace the drum heads and tune your drums. It’ll be worth it.
9. Not having a plan – Make sure you know what you are going to do during the session. A good plan goes a long way.
10. Don’t cram too much into one session – Don’t try to record drums, bass and orchestra in the same three hour session. Recording takes time, so plan accordingly.
11. Skipping the warm-up – Singing first thing in the morning is hard isn’t it? So is nailing a 200 bpm solo without warming up your fingers.
12. Recording too hot – Better be safe than sorry. Record at lower digital levels to avoid clipping.
WWW.AUDIO-ISSUES.COM
Simple Tricks to Improve Your Recordings
5
13. Not being in tune – I’m sorry. It’s a pet peeve, but people are prone to forget to tune their instruments.
14. Not having enough cables – Say you’re doing a location recording and you didn’t bring enough cables. It’s not only a huge waste of time to go and get what you forgot, but it also reflects poorly on you as a professional.
15. Not being familiar with how things work – If you are working with a new piece of equipment, or working at a new studio then it’s imperative you don’t look stupid when you’re trying to figure out how things work.
16. Fix it in the mix?- If you know you can(and will) fix it in the mix, then use this sentence. If you know you can’t fix it, don’t lie. It’s one of the more common lines in the audio industry.
17. Communicate – Even though engineers and artists are a closely bred species they do not share all the lingo that’s inherent to them. If the engineer isn’t a musician then getting too musical will be confusing. Likewise with an engineer getting to “audio-engineer-y.
18. Don’t do drugs – I know what Bill Hicks said about drugs and music, but it’s usually not a good idea to be stoned or drunk during a recording session.
19. Bring extras – Extra strings, extra picks and extra drum sticks for instance. Some things break and it’s better to be prepared when(not if) that happens.
20. Break the session into chunks – It’s better to record two energetic four sessions than one long eight hour one where the last two hours people are tired and uninspired.
21. Not being comfortable – As an artist, much of your performance is based on how you are feeling when you are recording. If you don’t feel comfortable then your playing will suffer.
Conclusion
Think about it, there are just as many things you need to NOT do in order to get that great recording down on “tape”.
Just like it’s all about following the right guidelines for recording, engineering and musicianship; there are also some pitfalls you need to avoid.

WWW.AUDIO-ISSUES.COM
Simple Tricks to Improve Your Recordings
6
THE SIMPLE TRUTH ABOUT A KILLER DRUM RECORDING
It’s simple: a great sounding drum kit will sound better and need less mixing than an out-of-tune, worn out drum kit.
Getting a great drum recording is so much easier if you devote the time to getting the drum kit sounding its best.
Drums Need Tuning Too
I was recording drums recently at Allusion Studios and we spent a long time making sure each drum was tuned correctly.
We used a drum dial to get each drum sounding its best. Just like you would tune a guitar or bass you should make sure each of your drums are tuned as well.
A few quick tips on drum tuning
• Stretch the heads out. The heads will go out of tune fast if the heads aren’t stretched out.
• In order to choke the tom sound tune the bottom head a little higher than the top head.
• On the floor tom, tune the bottom head lower than the top head to get that “falling” floor tom sound
• Use the drum dial to get the drum sounding good all around, but use your ears for the final fine-tune.
A Great Sound With a Great Instrument
Once we had the drum sounding as good as possible we proceeded to mic things up.
To get a more natural drum recording we used large condensers on all of the toms. The condensers were much more sensitive to everything around them but the bleed actually created a very natural, earthy sound.
We were looking for an “old-school” but modern sounding drum sound so I think with the condensers we added an extra element dynamic microphones wouldn’t have had.
WWW.AUDIO-ISSUES.COM
Simple Tricks to Improve Your Recordings
7
Conclusion
Finally, by taking the time to get the instrument sounding as good as possible, using great microphones into pristine sounding pre-amps we were able to get a kick ass drum recording.
It just makes you feel better that you have a great sound recorded; a drum sound that doesn’t need every mixing trick in the book to sound great because it’s already 80% there.
WWW.AUDIO-ISSUES.COM
Simple Tricks to Improve Your Recordings
8
TOP TEN METHODS FOR RECORDING ACOUSTIC GUITAR
Recording acoustic guitar requires a totally different method than recording the electric guitar.
Since it’s an acoustic instrument – as opposed to a plugged in electric one – there are a few different techniques that you need to keep in mind when tracking an acoustic.
Read on for my top ten recording tips for an easier acoustic experience
1. Use a condenser microphoneCondenser microphones are more suitable for recording acoustic guitar than the dynamic microphone. The sensitivity of the condenser helps capture the sound of the acoustic guitar as accurately as possible.
2. Avoid too much bassIt’s a common misconception that the best sound from the acoustic guitar is captured at the sound-hole. Normally, a microphone pointed at the sound-hole results in too much bass.
3. Be aware of the sweet spotThe sweet spot is at the 12th fret, normally where the neck joins the body of the acoustic guitar.
Recording acoustic guitar with a microphone pointed at the sweet spot usually captures a good blend of highs, lows and mids.
4. Use New StringsNew strings are a must if you want to record a clear and brilliant acoustic guitar. No amount of mixing is going to fix an acoustic guitar with old and worn strings.
5. Record DirectIf you are looking for an alternative sound and your acoustic guitar has a plug, it might be a good idea to record direct.
Just plug your guitar into a DI box and use some of the great guitar recording software that’s available to spice up your acoustic guitar sound.

WWW.AUDIO-ISSUES.COM
Simple Tricks to Improve Your Recordings
9
6. First Fret BrillianceIn order to capture the delicate sound of the string a microphone placed at the first fret can pick up the intricacies of the strings. This can bring a whole new dimension to your acoustic guitar sound.
Check out the First Fret Trick When Recording Acoustic Guitar for more information.
7. Record in StereoRecording acoustic guitar in stereo will capture a much fuller and wider sound than only using one microphone.
8. Double-track with different mic techniquesIf you are double tracking the same guitar part for added depth, try experimenting with different microphone techniques.
Not only will it give your guitar parts added depth by double-tracking but the difference in sound might create some interesting textures.
9. Use ribbons for a different soundRibbon microphones, if you have access to them, can give your acoustic guitar sound a smoother and different sound than recording with a condenser.
10. Subtle position changes nail that perfect soundThe way recording works is that even the slightest microphone change can affect the sound.
By just subtly changing the position or direction of the microphone you can find that perfect acoustic guitar sound you are looking for.
WWW.AUDIO-ISSUES.COM
Simple Tricks to Improve Your Recordings
10
AN EASY WAY TO FIND THE SWEET SPOT ON AN INSTRUMENTEngineers spend a lot of time talking about the sweet spot when recording.
“Gotta find the sweet spot” or “this is where the sweet spot is” is often heard(or some combination of the same meaning) and it can make the novice engineer wonder what the hell they are talking about.
Luckily, finding the sweet spot on instruments isn’t as hard as finding the other, more elusive sweet spots. But what do people mean when they talk about the sweet spot on an instrument?
Balance
The sweet spot on an instrument is where the complete sound of the particular instrument is represented as well as possible. The area where the microphone picks up both the highs, lows and everything in between.
You want to capture the fullness, brightness and whatever other-ness that particular instrument has in abundance. So by finding that sweet spot you can make your job easier since that’s where the instrument shines.
One Microphone
When you are working with only one microphone it’s all the more important to find the sweet spot. If you mike up an instrument and it’s lacking a certain character you can’t really fix that in the mixing phase.
By finding the sweet spot you can be certain that you have the best balance you can get from one microphone.
Multiple Microphone Techniques
When you are working with multiple microphones you might not face the same challenge in finding the sweet spot. You can devote more time to capturing a few different characteristics of an instruments and then blending them together to get a nice balance. Alternatively, you could use one microphone for the sweet spot and another either for ambience or to accent a certain area of the instrument.
• For example: Recording an acoustic guitar with one microphone at the sweet spot by the 12th fret and the other by the 1st fret picking up the strings.

WWW.AUDIO-ISSUES.COM
Simple Tricks to Improve Your Recordings
11
How Does Balance Sound?
The acoustic guitar has a sweet spot at the 12th fret, or where the neck joins the body.
When you are looking for the sweet spot it’s a good idea to grab a pair of headphones, set your microphone to record and then just strum away around the microphone until you find the desired balance from your guitar.
WWW.AUDIO-ISSUES.COM
Simple Tricks to Improve Your Recordings
12
10 WAYS NOT TO RECORD YOUR AUDIO
Beginners make newbie mistakes, and it is up to those who know better to offer them some solid audio recording tips.
But to some experienced sound engineers it’s not always so apparent what is easy to follow and what isn’t.
Like a teacher that is so familiar with a subject he expects the students to see how easy it is immediately.
Well, sometimes the most common mistakes are the simplest to overlook and the ones engineers don’t bother to tell you. They just expect you to know why that’s wrong and how to do it right.
So without further ado, here are a few recording tips on how to NOT to record your audio.
1. Don’t Record At 16 BitsWe have 24 bits now, and we want all the headroom we can get. Use 24 bit audio and record at lower levels, that way you don’t have to worry about putting your recording into the “red”.
2. Don’t Record In The RedBack in the analog days people used to overload their pre-amps a little. Just to get that sweet sound you know?
Well, there is nothing sweet about digital clipping. Don’t record in the red when you are recording digitally; digital clipping sounds horrible and you can’t fix it.
Like I said, record at 24 bit and enjoy recording at lower levels.
3. Don’t Record With Shoddy CablesCables matter. They might not matter as much as the microphone or type of pre-amp, but they certainly have a say in the overall sound.
Don’t use a shoddy “the cheapest I can get from Radioshack” type cable.
WWW.AUDIO-ISSUES.COM
Simple Tricks to Improve Your Recordings
13
4. Don’t Record Your Guitar With ReverbIf it’s absolutely crucial to the sound and you know 100% that you won’t want to change it during mixdown then go ahead.
But if you are not sure if that specific reverb works, or if you don’t think it will fit with the arrangement then consider recording it dry.
If the guitarist can’t play without it then add some to his headphones from your software to compromise.
5. Use The Right MicrophoneDon’t use a cheap dynamic to record vocals and then wonder why the vocal track sounds so bad.
Even though dynamic microphones might work for some vocals and styles chances are you need a decent condenser instead.
Use the right microphone for the job, and if you have access to a few, try them out.
6. Position Yourself CorrectlyBefore I knew anything about recording I stood in the middle of my bedroom and sang into a cheap dynamic microphone I held in my hand.
Not the most ideal situation for a great vocal performance, since not only was the microphone wrong(and bad) but standing in the middle of the room AND holding the microphone was a recipe for disaster. But I still wondered why my vocals sounded so bad.
Well, now I know! Acoustic treatment and a great sounding room are a must, as well as positioning the microphone correctly.
7. Waves of PhaseAre you recording with two microphones? Make sure they are not causing extreme phase problems.
Phase cancelations weaken the audio signal and make your signal sound thin and well….bad. If you did this mistake already most DAWs have an “inverse” setting where you can flip one of the tracks 180°.
WWW.AUDIO-ISSUES.COM
Simple Tricks to Improve Your Recordings
14
Try that to see if the signal gets stronger. If it does then you were having some phase problems during recording and should probably try to get better at recording with two microphones in the future.
8. Don’t Record Tracks In A HurrySome artists work well under pressure. Most don’t. Don’t expect a singer to be able to belt out all the vocal tracks to an album in 2 hours.
Don’t plan for efficiency, it never works. Things will go wrong, people will show up late and you won’t be able to record everything you wanted. Get used to it and don’t record in a hurry.
9. Don’t Record To The Highest Possible Sample RateRather, record to the one you can handle. Higher sample rates mean more space and the difference between 30 tracks at 48kHz or 30 tracks at 192 kHz is a whole lot of hard disk space.
With many people recording to their laptops the highest sample rate and the most ideal sample rate might not be the same.
10. Don’t record bad instrumentsIf an instrument is faulty, out of tune or needs new strings or heads then replace them before you record. Drums that have old heads sound worse.
Replace them and tune them before you track your drums. Old guitar strings, at least to me, sound bad. Restring your guitars to get a more vibrant sound. Trust me, it will shine through on the recordings.
WWW.AUDIO-ISSUES.COM
Simple Tricks to Improve Your Recordings
15
THINK! DO YOU WANT QUICK MICROPHONE TECHNIQUES FOR A GREAT STEREO RECORDING?
Many instruments are in need of more than one microphone during recording. Sometimes it’s just not possible for one microphone to capture the fullness, body, attack and brilliance of an instrument.
By using a stereo pair you pick up the different characteristics of the instrument and mix them together.
The X/Y stereo microphone technique is a popular recording technique. It is also one of the simpler ones to use. It involves two cardioid microphones, normally condensers, pointed in such a way as to capture the whole instrument.
You want the full tonal spectrum of an instrument in a proper stereo recording. The X/Y technique is one of the fastest, most simple and easy to use in your bag of tricks.
How to Use?
This microphone technique involves two mono microphones to capture a stereo image of (usually) one instrument. Many portable recorders have built-in X/Y microphones that work really well if you want to capture an idea on the fly.
We must position the microphones correctly, or as close as possible to each other so that they are facing each other in an angle of 90° to 110°.
I recommend having the microphones as close to 90° as possible, but if you are close-miking a large instrument, you might need to open the angle a little more.
Any more than 120° and you risk losing the stereo image of the instrument by neither microphone picking up the center.
Advantage of the X/Y Technique
• Since it’s a stereo recording technique, panning both microphones to each side will result in a wide stereo image.
• Converting the recorded tracks to mono result in a fuller sound that you wouldn’t get with one microphone.
• Since the microphones are so close to each other, there is almost no chance of having phase issues.
WWW.AUDIO-ISSUES.COM
Simple Tricks to Improve Your Recordings
16
Some Tips for Using an X/Y Pair
Today, we record every single drum with at least one microphone if not more. When the time comes to mix your drum-kit, many mixing engineers tell you they always start from the overheads.
• The overhead microphones are the ones that pick up every single thing the drummer does. They are the most valuable microphones in the mix. So an X/Y pair is a good choice for drum overheads. It automatically has the advantages of being a great stereo technique and doesn’t have problems with phase.
• If you can’t position an X/Y pair as overheads try using the technique for capturing the room sound. Not only if you are recording drums, but also for whatever you have that sounds good in a room.
• X/Y can work well on acoustic guitar. Positioning them a foot(30cm) or so from the 12th fret will pick up the whole instrument perfectly.
• If you have a percussion player playing assorted percussion instruments such as congas, bongos and such you can position a X/Y pair a few feet above the instruments, capturing the group of instruments as a whole.
Stereo Sound – Impressive Sound
Knowledge of a few stereo microphone techniques is a good thing to have in your utility belt.
Being able to whip out two condensers and get a wide stereo sound in minutes is impressive to your clients.
Just follow the above guidelines for setting it up, and use some of the advice I’ve given and you’re up and running in minutes spreading stereo all over the place.
WWW.AUDIO-ISSUES.COM
Simple Tricks to Improve Your Recordings
17
5 WAYS TO CONSISTENTLY RECORD GREAT AUDIO
Recording can be a stressful task if you’ve just started. There are so many techniques and things to think about that it can quickly overload your brain before you even press that REC button.
In order for you to quickly and consistently record great audio, all you have to do is follow a few simple guidelines to success. Don’t overload your brain, just keep it simple.
1. Have A PlanEverybody stresses out more when there’s no plan to follow. It’s like when work builds up. There are so many tasks that you don’t know which one to start and you end up doing none of them.
Make sure your recording session has a plan of action.
• What’s being recorded?
• How songs are you working on?
• How much stuff do you need to bring if you’re recording on location?
• What’s the room like and what problems can you predict?
2. Make Sure Everybody Is Tuned UpOne time the intonation wasn’t working right on my guitar. This caused a major tuning issue when I was using a capo on the higher frets.
To avoid serious issues like that make sure everybody is tuned correctly, capo or otherwise. And make sure everybody checks their instruments every few takes or between songs.
3. Use Tried And Tested TechniquesThere are a lot of different microphone techniques and recording methods out there. If you are stressing yourself out because you don’t know which method to use just keep it simple.
Don’t try complicated techniques like the Glyn Johns method or a Decca Tree when you can keep to simple tricks like an X/Y technique.
Stick to things you know you can handle and make the most of it.
WWW.AUDIO-ISSUES.COM
Simple Tricks to Improve Your Recordings
18
4. Don’t Overload Your InputsYou’ve got your plan in order and decided which technique to use. Then you better not screw up a great pre-production by overloading your inputs and causing digital distortion. Make sure you don’t overload the inputs of your interface.
If you record to 24 bit you can allow yourself to record a little quieter due to the added headroom you gain with 24 bit recording.
5. Get a Great PerformanceLastly, make sure the performance you’re recording is worth the hard disk space it’s recorded on. If the performance is lackluster then all your preparation didn’t do you any good.
A sub-par sounding recording will sound better if the performance behind it is amazing. But a great sounding recording with an out-of-tune vocalist will always sound awful.
WWW.AUDIO-ISSUES.COM
Simple Tricks to Improve Your Recordings
19
THE WORLD’S BEST VOCAL RECORDING MICROPHONES YOU CAN ACTUALLY AFFORD!
When it comes down to it, it’s all about the vocal. And to get a great vocal sound, you need a decent vocal microphone.
Great vocal mics are a necessary part of your studio, regardless of its size.
But the home studio might have a smaller budget than the big commercial facility. And therefore, a home studio doesn’t have the luxury to splurge on microphones like their wealthier counterparts.
However, re-mortgaging your house is unnecessary with the following microphones.
A budget of around than $500 is easily enough money for some great vocal microphones, and some of the options below cost even less.
Alternatively, if you’re really strapped for cash you might be interested in these 4 Cheap-Ass Condensers for the Frugal Engineer.
1. Rode NT2A Vocal CondenserWhen you have a noisy home studio you want a quiet microphone. This one is extremely quiet, has multiple patterns to choose from and a high-pass filter to cut all that rumbling traffic noise.
2. Audio Technica AT2050Like I’ve said before, The AT2020 is an absolutely stellar budget microphone. The 2050 is more of the same great sound but with a few extra switches.
3. AKG Perception 420The Perfection series include a plethora of great budget mics. The 420 is the most expensive of their budget mics but it offers the most amount of features such as multiple polar patterns.
4. Neumann TLM 102This one is a bit pricier than the aforementioned $500, but you can’t go wrong with a Neumann condenser microphone.
WWW.AUDIO-ISSUES.COM
Simple Tricks to Improve Your Recordings
20
5. AKG C214The little brother of the AKG C-414, the 214 is the perfect substitute for the home recording studio. Buy a microphone but also pay rent. That’s the best of both worlds in the home recording industry.
6. SE Electronics 2200AThe vocals to this song were recorded with the 2200A and they sound pretty good to me. What do you think?
Conclusion
Don’t get infected with a case of analysis paralysis. Choosing a microphone when you’re starting out can be overwhelming.
It’s probably not the only microphone you’re going to buy, so you don’t need to worry about buyer’s remorse.
WWW.AUDIO-ISSUES.COM
Simple Tricks to Improve Your Recordings
21
HOW TO GET THE BEST VOCAL PERFORMANCE FROM YOUR SINGER
Getting a great take from a singer often takes more than just choosing the right microphone or preamp. In the end, it is the great vocal performance that will define the song and its impact.
Engineers use a series of simple techniques to get a great recording, making the singer most comfortable and using psychology on top of their engineering knowledge to craft the sound they’re looking for.
Who’s In The Room?
The first and most important consideration is who will be present for the recording.
In general, singers are more comfortable with fewer people in the room, which can be a departure from their bandmates who may like to record in large groups.
Other factors, including what the singer hears in their headphones and the vibe of the room will greatly affect the performance’s energy level. It is your job to shape this energy to fit the mood of the song for the perfect take.
Lights
Lowering the lights in the room or booth will generally quiet a vocalist and bring the energy level down.
Some musicians prefer this lighting, as it is easier on the eyes. However, be aware that for long sessions, a dark room might also make your singer tired.
Lamps give the singer ultimate control, especially if they can be pointed and/or moved to enable music and lyric reading without making anyone uncomfortable.
They are also a solution for buzzing overhead fluorescent light fixtures. Singers do not usually know what is best, or how the light is affecting them, so have it set when they come in.
Headphone Mix
Creating a good mix for the singer to listen to while they track is crucial. Chordal rhythm instruments are the most important thing to hear.
WWW.AUDIO-ISSUES.COM
Simple Tricks to Improve Your Recordings
22
They should be panned center and be heard clearly of the rest of the rhythm. This keeps singers in tune and on pitch throughout a take.
Other rhythm instruments are only necessary to give your singer a sense of what they are used to hearing, for the balance of the band and to help them keep the form.
Other melody instruments can either act as a crutch for your singer or be a source of confusion. Add them in selectively.
The overall headphone volume can have a similar effect on your singer to the lighting.
Loud headphones will make them sing louder over the music, which can add a boost, but sometimes at the cost of a straining voice or reduced stamina.
Always check to see if your headphones are bleeding too much into the microphone.
If the volume is not loud enough, many vocalists will end up singing flat, “under” what they hear.
Again, these are not conscious changes to the singer, and it is your job to make the headphones just right for your singer.
First Timers
Singers going into the studio for the first time often have a hard time adjusting from how they sing at live performances. The stage and the studio have a completely different approach, and your singer may need time to adjust when he arrives.
Microphone technique should be discussed before you begin. Give tips on how close they should be to the mic and where to aim their voice.
I have engineered few sessions where a singer complained of a “delay effect” in the headphones.
This is often not a software issue, but a discomfort that the singer has with hearing himself live in the headphones.
If he still has trouble after a few takes, try having him sing with only one earpiece. That way he’ll hear himself in the room with the open ear alongside his headphone mix.
WWW.AUDIO-ISSUES.COM
Simple Tricks to Improve Your Recordings
23
Tips For A Smooth Vocal Performance
Just like every musician, singers usually need time to warm up before they are recording their strongest performances in the studio.
Arranging a “set list” is usually a good idea. Start with the easiest tune, and once you know the singer is warm, go after the hardest ones.
Songs with a wide range or complicated arrangement won’t get their full attention at the end of a long session.
Even if the singer knows all the words to a song, printing the lyrics for both the performer and the engineer can be beneficial. It helps them keep their place while tracking, and makes finding overdub spots go faster.
When starting on a new song, always always always track the first take! You can scrap it later if nothing comes out, but singers often exhibit raw energy and emotion that is lost as they go over the song multiple times.
Lastly, the most important thing you must do while engineering a session is to respond to the singer. Listen for problems and strengths, make changes if things aren’t working, and make sure they are comfortable throughout the session.


