Download - Lighting ( ebook photography )
TableofContentsIntroductionChapter1:WhatareContinuousLightSources?Chapter2:WhatareMonolights?Chapter3:WhatareACandDCPacksandHeads?Chapter4:UsingBankLightsChapter5:TriggerYourStudioStrobesWirelesslyOnASmallBudgetChapter6:Single‐LightPortraitsChapter7:PortraitsWithoutaStudioChapter8:StudioBackdropsBuyingGuideChapter9:WhatColorIsYourSeamlessBackground?
Introduction Many photographers—from hobbyists to weekend warriors to full-time pro shooters—dream of building a studio, and with good reason: It gives you the ultimate in control over your photographs. Every element in the picture—from the camera and lens you choose to the position, intensity and shape of the lights you use and what goes in the background—is under your complete control. But building a studio can be a daunting task, and decisions must be made: What kind of lights should I buy? How much space do I need? Light stands, tripods, cameras, lenses, backdrops and much more need to be carefully considered when in the set-up phase. That’s where this eBook comes in. In this book you’ll get good basic information for setting up a photographic studio, along with some basic studio picture-taking tips and techniques. While sophisticated lighting setups, outdoor lighting, marketing a studio business and choosing a camera for your studio work are beyond the scope of this book (but might be the subject of a future publication), I believe this book will answer a lot of questions about studio lighting and backgrounds, and will give you a good basis to make the best decisions for your studio. And once you’ve made those decisions and are ready to get started, the rest is up to you and your creativity! -Mason Resnick Editor, Adorama Learning Center
Chapter 1: What are Continuous Lighting Sources? There is a lot of confusion about studio lighting equipment. Some photographers think it is too complicated and too expensive, but in reality it can be neither. Part of this misunderstanding is created by a seemingly bewildering array of product types and their accompanying buzzwords. Let's take the mystery out of studio lighting. When photographing people, I've never been 100 percent comfortable using studio flash units. They are a necessary evil for making portraits when available light isn't available. I prefer continuous light sources, especially for portraits. Instead of the subject being distracted (and blinking) thanks to the repeated pop of electronic flash, continuous light sources let them relax. 1.1 HOT LIGHTS For years, photographers have used photoflood, tungsten, quartz, and all kinds of continuous light sources that fall under the general heading of hot lights. Hot lights have many advantages over flash:
• They can be inexpensive; • They let you see the light as captured, allowing you to use your camera's in-
camera meter; • They are generally smaller and lighter than electronic flash units.
On the downside, working with hot lights often creates problems because of their color temperature, and they are—waddaya know—hot. White Balancing Act For digital photographers, dealing with mismatched color temperatures is a thing of the past. Most digital SLRs include settings for tungsten light and some will even let you dial in a specific color temperature in Kelvin. For the first shot, don't forget to try the camera's Auto White Balance (AWB) setting. Many times this setting will produce perfect color the first time without any color temperature gymnastics. If all else fails, you can use the camera's built in controls to create a custom white balance for a specific lighting set-up. The key for doing this is having a dependable white color source that can be used to calibrate your camera. Hint: My favorite white source for custom white balance is the flip side of the redoubtable Gray Card. Many manufactuers make gray cards, including Novoflex. One side of the card has the infamous 18-percent gray and the other has 90-percent reflection, A.K.A, white.” Hot lights come is several flavors, including Photofloods, HMI, and Quartz. Each system has its own unique characteristics as well as pros and cons.
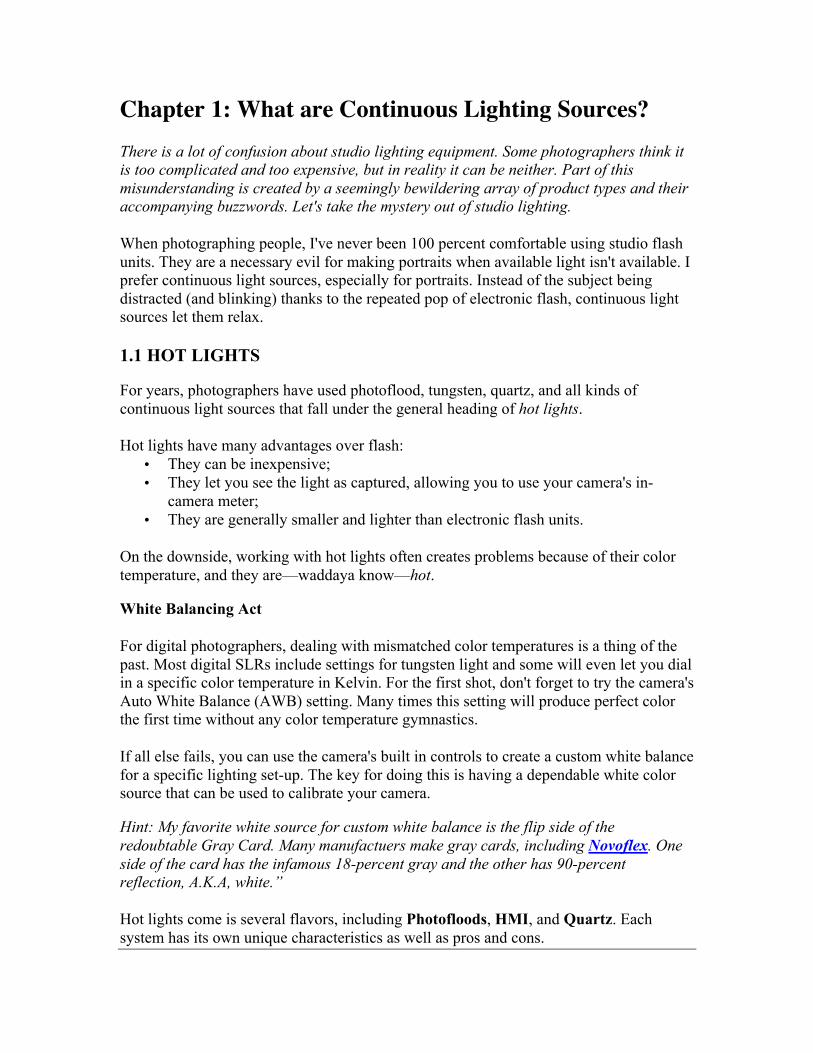
1.1.1 Photofloods Photofloods are physically a simple combination of a housing, light stand bracket, and reflector. They use incandescent bulbs that are not all that different from the bulbs in your lamps at home, and are almost as inexpensive. As with all bulbs used in hot light systems, they are relatively fragile and should be handled with care. Always have a few back-up bulbs in case one breaks before or during a photo session.
Studio lighting doesn't get much cheaper than this Smith Victor Adapta-Light that has a 10-inch reflector. It costs around $35 and that includes the bulb. Extra bulbs cost approximately $4 so when you buy an Adapta-Light, be sure to buy a few spares. 1.1.2 HMI HMI (Hydrargyrum Medium-arc Iodide) lights have several advantages over standard incandescent or quartz lights:
• They deliver five times the light output per watt and generate less heat than incandescent lights
• The color temperature of HMI lights is the same as sunlight • Doesn't require an on-lens filter or a tungsten color balance setting inside the
camera. • HMI is a flicker-free light source that's also recommended for video and digital
still photographs that require long exposures. The bad news? HMI lights are pricey.
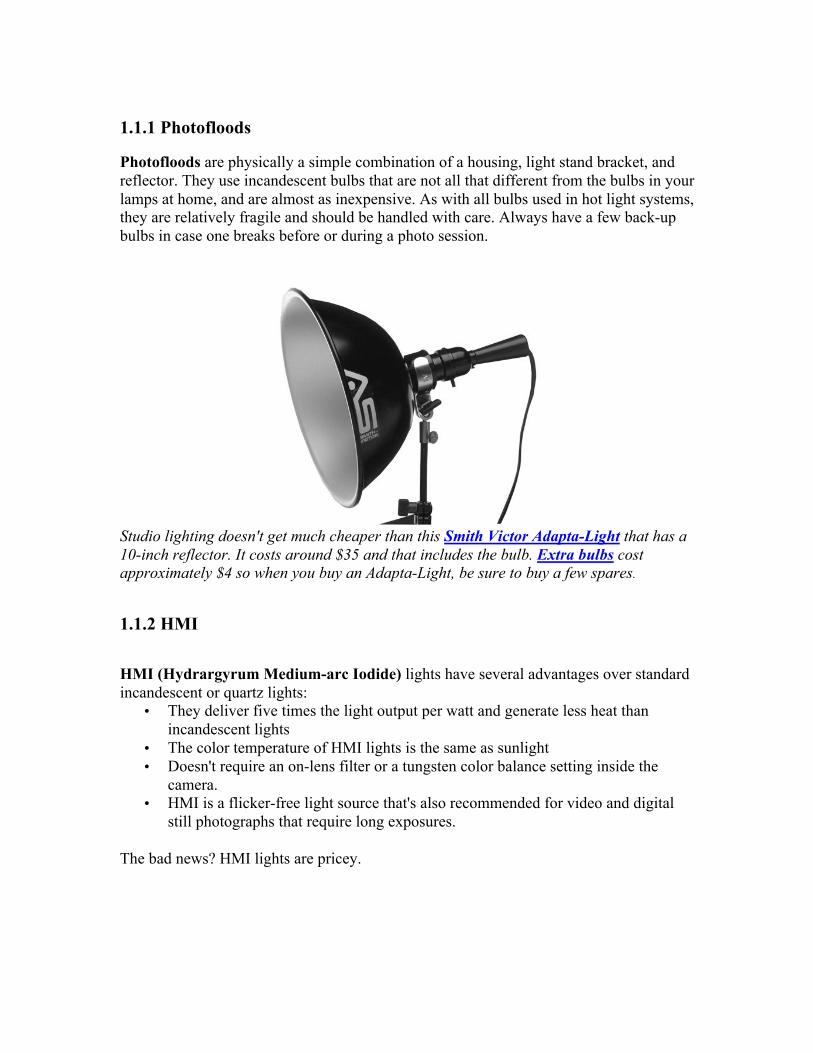
The Arri Compact 2500 HMI Fresnel Light with 6.89-inch Lens, 1,200 Watt, 115 Volt Supply Voltage, 6000-K output. 1.1.3 Quartz Lights In between Photofloods and HMI is the Goldilocks of continuous lighting, the quartz light. Key features and advantages of Quartz Lights:
• Available in sizes, shapes, and prices to suit almost everyone's lighting budget. • Quartz lighting fixtures use high-pressure incandescent lamps containing halogen
gases whose filaments burn at higher temperatures with higher efficiency, producing more lumens per watt than an incandescent lamp.
• Quartz does not darken with age The downside: Quartz lights get extremely hot, so be careful to avoid burnt fingers and let them cool off before touching one of them.
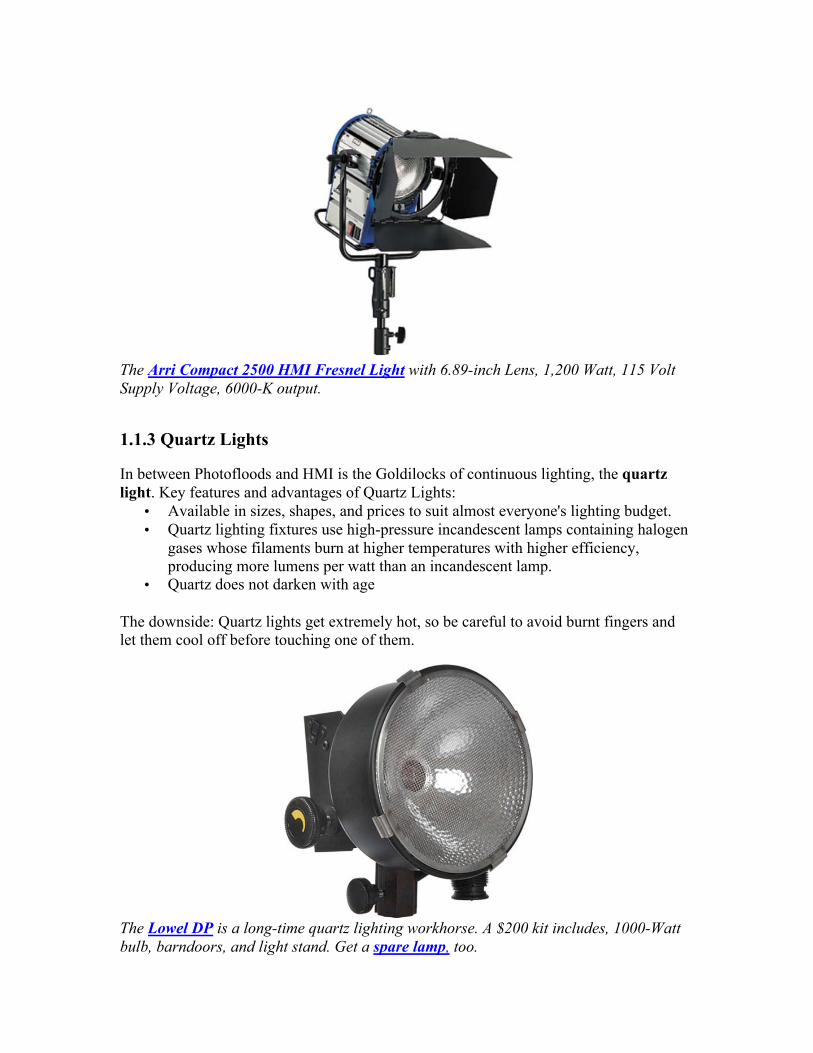
The Lowel DP is a long-time quartz lighting workhorse. A $200 kit includes, 1000-Watt bulb, barndoors, and light stand. Get a spare lamp, too.
1.2 Cold Lights The only problem with traditional hot lights is that they are, well, hot. They're not all that comfortable to work under for subject and photographer alike. Fortunately, there's a new alternative: continuous light sources powered by fluorescent bulbs. I know what you're thinking: Aren't fluorescent lights those thingies that produce horrible green light when shooting slide film? Here are the key points in favor of cold lights:
1. Daylight-balanced fluorescents also happen to be the perfect light source for digital photography. Tungsten lights produce 93 percent heat and only seven percent red light.
2. By comparison, fluorescent light is cooler, brighter, and comes out the winner for color balance.
A technical explanation (skip if you're not technical): Fluorescent-based lights used for photography are daylight-balanced and their RGB output spikes closely match the receptive RGB spikes of a CCD or CMOS imaging chip. A CCD is least sensitive in its blue channel and tungsten light has the least output in the blue and when combined with infrared output (that's the heat) it can overcome the chip's spectral response.
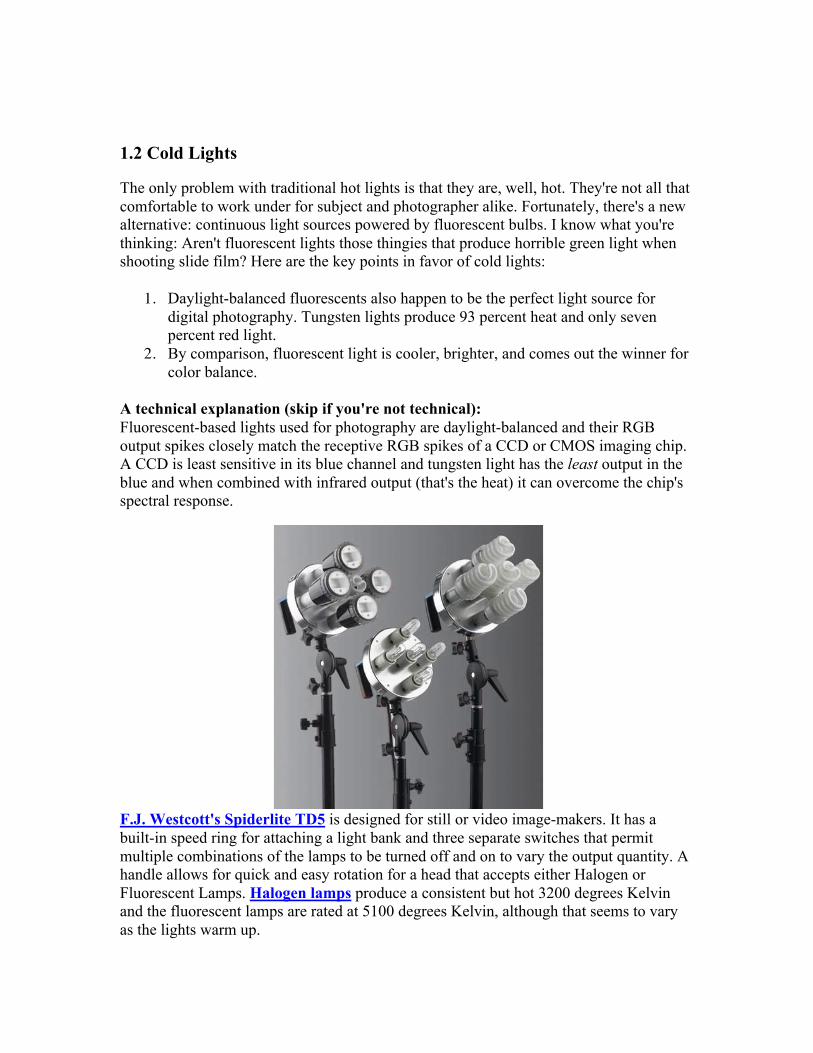
F.J. Westcott's Spiderlite TD5 is designed for still or video image-makers. It has a built-in speed ring for attaching a light bank and three separate switches that permit multiple combinations of the lamps to be turned off and on to vary the output quantity. A handle allows for quick and easy rotation for a head that accepts either Halogen or Fluorescent Lamps. Halogen lamps produce a consistent but hot 3200 degrees Kelvin and the fluorescent lamps are rated at 5100 degrees Kelvin, although that seems to vary as the lights warm up.
Tip: The Spiderlite and similar cold lights fluorescent lamps provide smooth continuous light. By looking at each image file's histogram, you can use your digital SLR's Exposure Compensation feature to gradually increase exposure in one-third stop increments to make sure exposure is balanced.
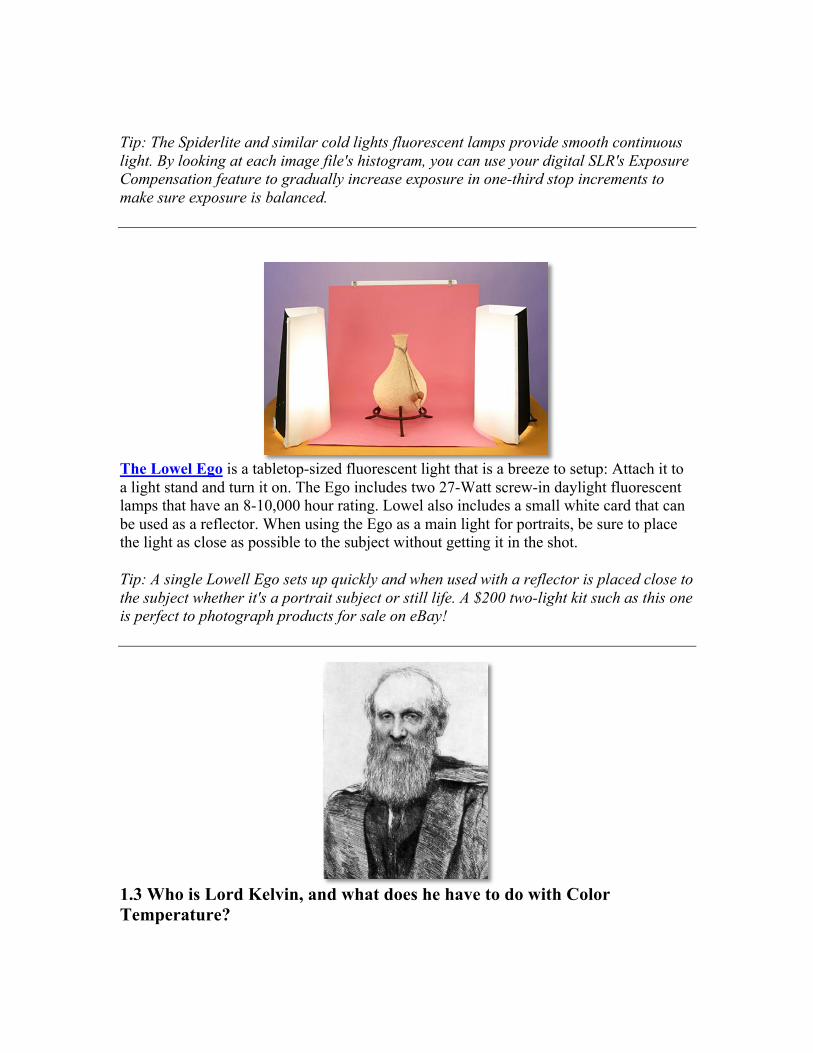
The Lowel Ego is a tabletop-sized fluorescent light that is a breeze to setup: Attach it to a light stand and turn it on. The Ego includes two 27-Watt screw-in daylight fluorescent lamps that have an 8-10,000 hour rating. Lowel also includes a small white card that can be used as a reflector. When using the Ego as a main light for portraits, be sure to place the light as close as possible to the subject without getting it in the shot. Tip: A single Lowell Ego sets up quickly and when used with a reflector is placed close to the subject whether it's a portrait subject or still life. A $200 two-light kit such as this one is perfect to photograph products for sale on eBay!
1.3 Who is Lord Kelvin, and what does he have to do with Color Temperature?
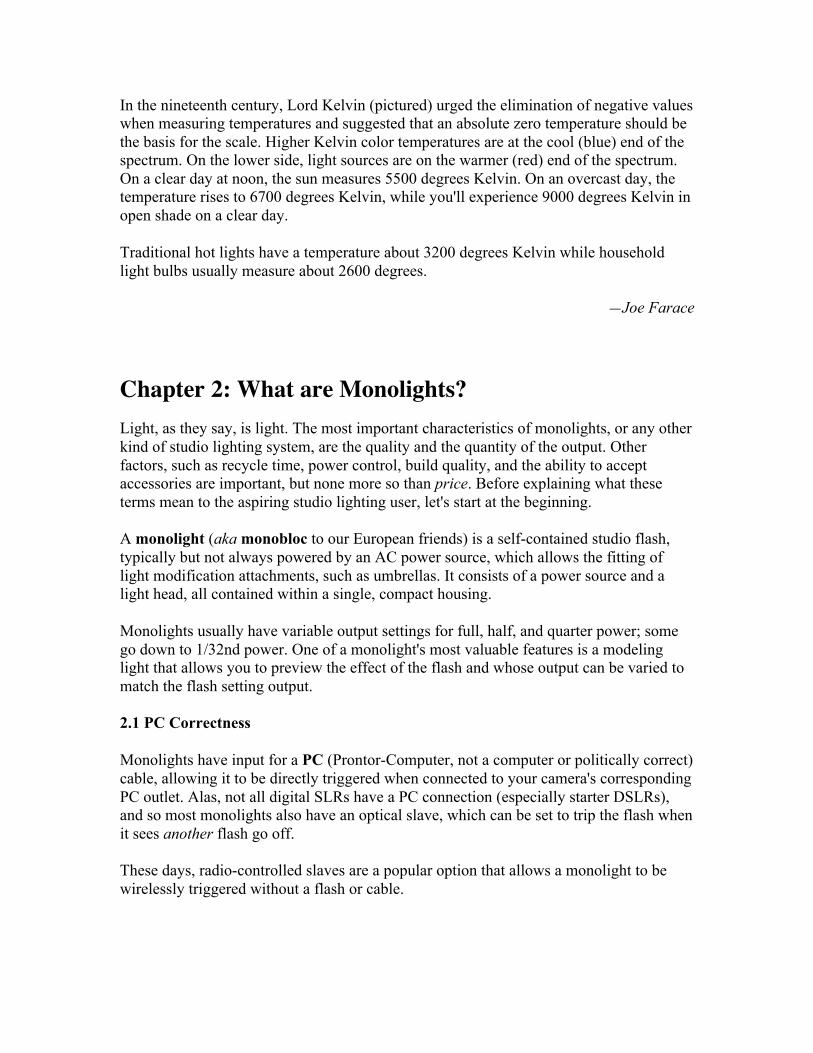
In the nineteenth century, Lord Kelvin (pictured) urged the elimination of negative values when measuring temperatures and suggested that an absolute zero temperature should be the basis for the scale. Higher Kelvin color temperatures are at the cool (blue) end of the spectrum. On the lower side, light sources are on the warmer (red) end of the spectrum. On a clear day at noon, the sun measures 5500 degrees Kelvin. On an overcast day, the temperature rises to 6700 degrees Kelvin, while you'll experience 9000 degrees Kelvin in open shade on a clear day. Traditional hot lights have a temperature about 3200 degrees Kelvin while household light bulbs usually measure about 2600 degrees.
—Joe Farace
Chapter 2: What are Monolights? Light, as they say, is light. The most important characteristics of monolights, or any other kind of studio lighting system, are the quality and the quantity of the output. Other factors, such as recycle time, power control, build quality, and the ability to accept accessories are important, but none more so than price. Before explaining what these terms mean to the aspiring studio lighting user, let's start at the beginning. A monolight (aka monobloc to our European friends) is a self-contained studio flash, typically but not always powered by an AC power source, which allows the fitting of light modification attachments, such as umbrellas. It consists of a power source and a light head, all contained within a single, compact housing. Monolights usually have variable output settings for full, half, and quarter power; some go down to 1/32nd power. One of a monolight's most valuable features is a modeling light that allows you to preview the effect of the flash and whose output can be varied to match the flash setting output. 2.1 PC Correctness Monolights have input for a PC (Prontor-Computer, not a computer or politically correct) cable, allowing it to be directly triggered when connected to your camera's corresponding PC outlet. Alas, not all digital SLRs have a PC connection (especially starter DSLRs), and so most monolights also have an optical slave, which can be set to trip the flash when it sees another flash go off. These days, radio-controlled slaves are a popular option that allows a monolight to be wirelessly triggered without a flash or cable.
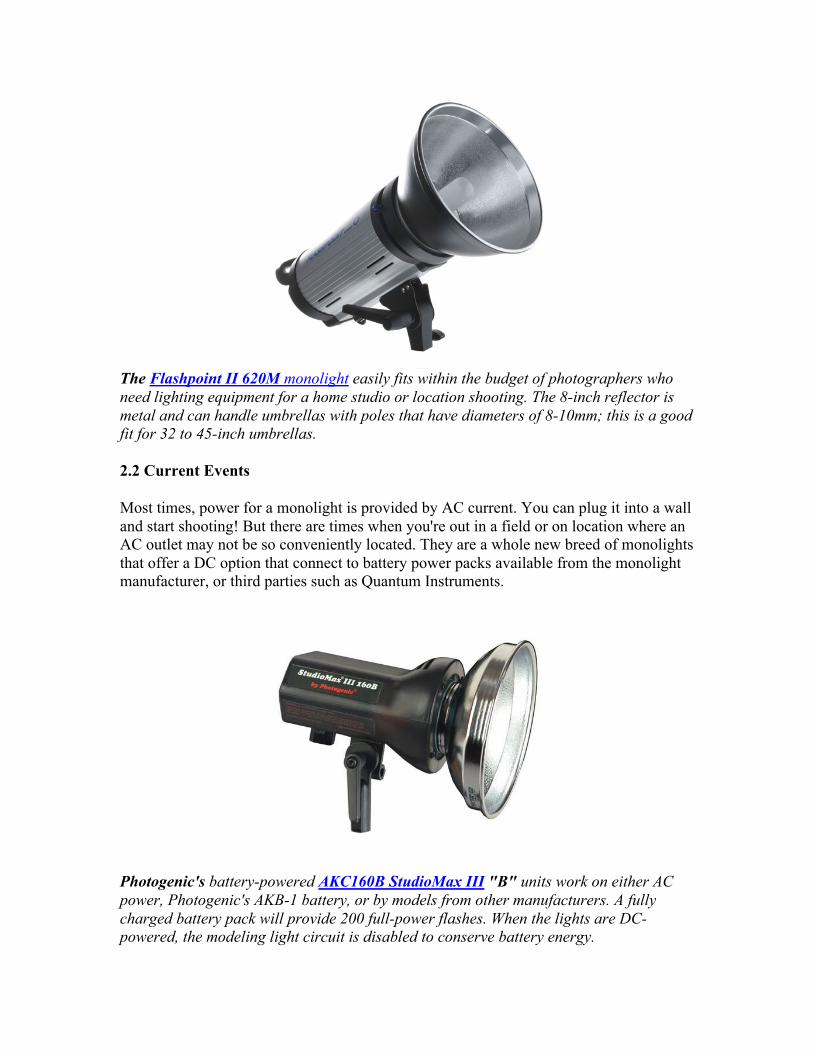
The Flashpoint II 620M monolight easily fits within the budget of photographers who need lighting equipment for a home studio or location shooting. The 8-inch reflector is metal and can handle umbrellas with poles that have diameters of 8-10mm; this is a good fit for 32 to 45-inch umbrellas. 2.2 Current Events Most times, power for a monolight is provided by AC current. You can plug it into a wall and start shooting! But there are times when you're out in a field or on location where an AC outlet may not be so conveniently located. They are a whole new breed of monolights that offer a DC option that connect to battery power packs available from the monolight manufacturer, or third parties such as Quantum Instruments.
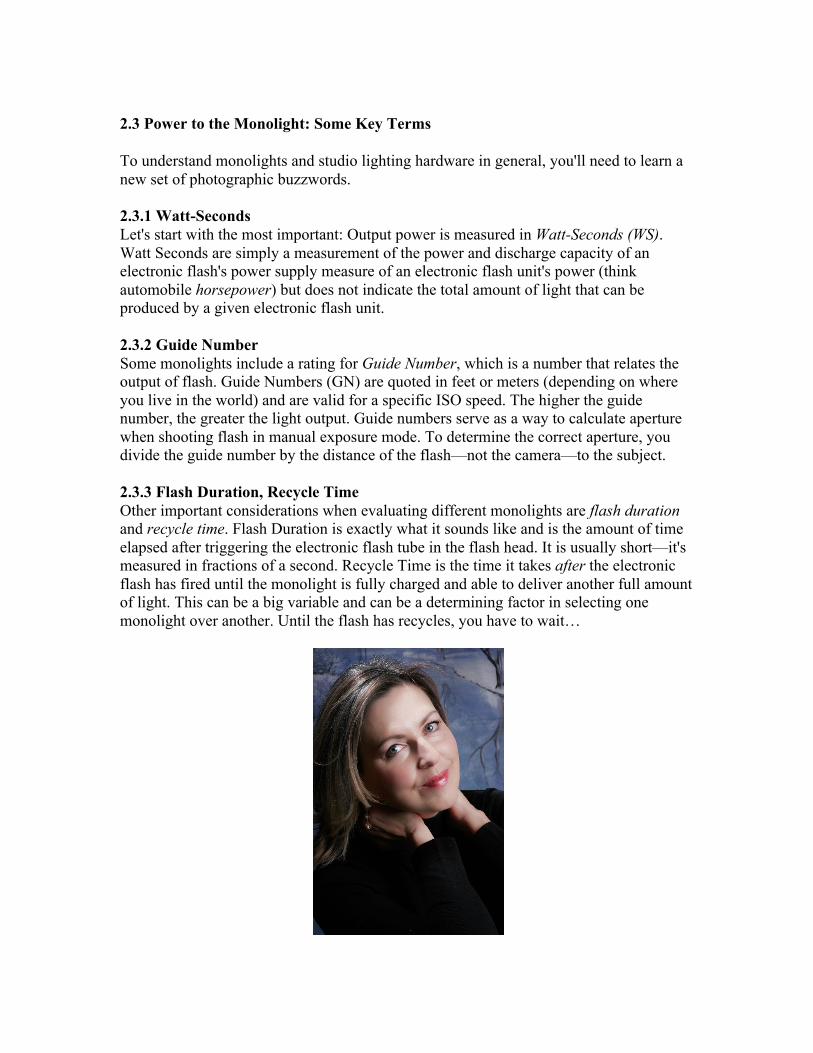
Photogenic's battery-powered AKC160B StudioMax III "B" units work on either AC power, Photogenic's AKB-1 battery, or by models from other manufacturers. A fully charged battery pack will provide 200 full-power flashes. When the lights are DC-powered, the modeling light circuit is disabled to conserve battery energy.
2.3 Power to the Monolight: Some Key Terms To understand monolights and studio lighting hardware in general, you'll need to learn a new set of photographic buzzwords. 2.3.1 Watt-Seconds Let's start with the most important: Output power is measured in Watt-Seconds (WS). Watt Seconds are simply a measurement of the power and discharge capacity of an electronic flash's power supply measure of an electronic flash unit's power (think automobile horsepower) but does not indicate the total amount of light that can be produced by a given electronic flash unit. 2.3.2 Guide Number Some monolights include a rating for Guide Number, which is a number that relates the output of flash. Guide Numbers (GN) are quoted in feet or meters (depending on where you live in the world) and are valid for a specific ISO speed. The higher the guide number, the greater the light output. Guide numbers serve as a way to calculate aperture when shooting flash in manual exposure mode. To determine the correct aperture, you divide the guide number by the distance of the flash—not the camera—to the subject. 2.3.3 Flash Duration, Recycle Time Other important considerations when evaluating different monolights are flash duration and recycle time. Flash Duration is exactly what it sounds like and is the amount of time elapsed after triggering the electronic flash tube in the flash head. It is usually short—it's measured in fractions of a second. Recycle Time is the time it takes after the electronic flash has fired until the monolight is fully charged and able to deliver another full amount of light. This can be a big variable and can be a determining factor in selecting one monolight over another. Until the flash has recycles, you have to wait…
Can you make a portrait with just one monolight? You sure can, as I did with this portrait of my wife, Mary. This shot was made with a single FlashPoint II monolight placed at camera right. Some of the shadows on the other side were filled with a $25 Flashpoint 5-in-1 Collapsible Disc Reflector. Later in this eBook, we’ll take a more in-depth look at single-light portrait techniques. Camera was a Canon EOS 20D with a Canon 85mm f/1.4 lens. Exposure was 1/60 sec at f/18 in Manual mode and ISO 100. Learn more in Chapter 5, Single-Light Portraits. Photo © Joe Farace. 2.4 A Monolight Shopping List Here are a few things to keep in mind when considering a monolight. As in all photography, this involves a series of trade-offs between functionality, ease-of-use, and cost. You’ll need to carefully juggle your budget with your want list. 2.4.1 Continuously variable output Most monolights have individual power settings of ¼, 1/8, and full, which is good because sometimes when working with a single-portrait subject you don't want to blast them with enough light for an exposure of f/64...but sometimes you need more control. Continuously variable output allows you to fine-tune the exposure to get precisely the aperture and depth-of-field that you want.
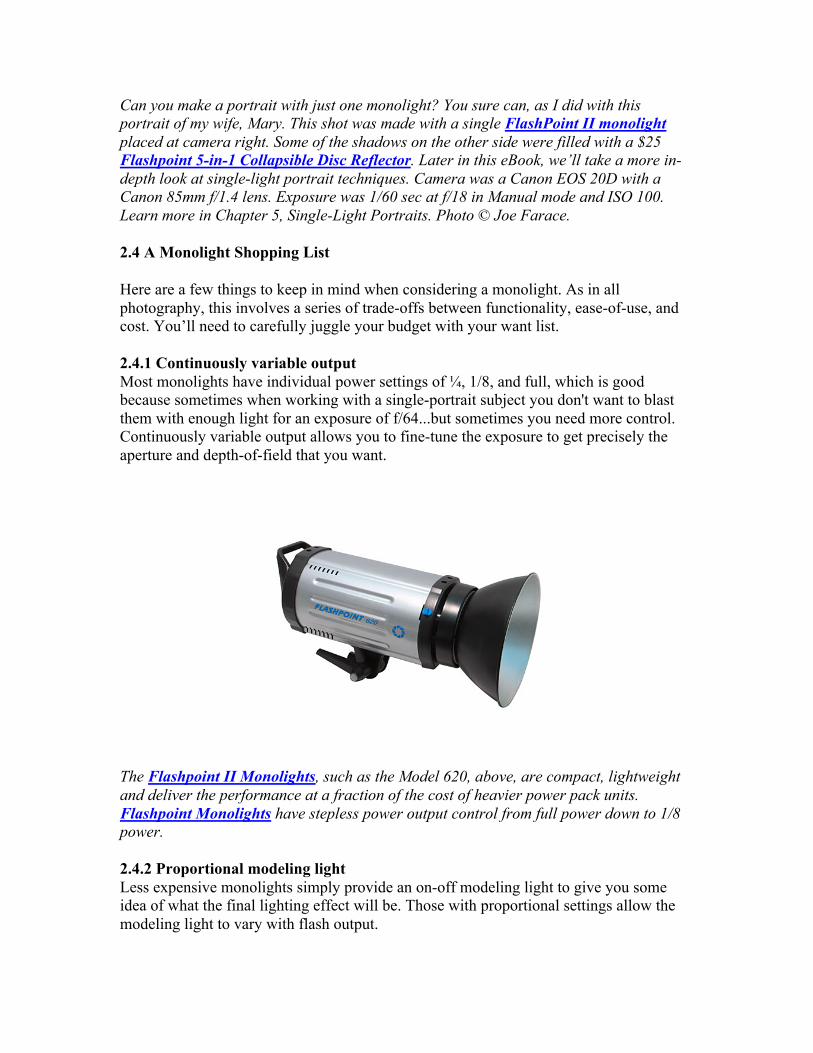
The Flashpoint II Monolights, such as the Model 620, above, are compact, lightweight and deliver the performance at a fraction of the cost of heavier power pack units. Flashpoint Monolights have stepless power output control from full power down to 1/8 power. 2.4.2 Proportional modeling light Less expensive monolights simply provide an on-off modeling light to give you some idea of what the final lighting effect will be. Those with proportional settings allow the modeling light to vary with flash output.
Keep in mind that although the modeling light may be bright, it is not as bright as the flash and when you set a low power setting the effect of the modeling light may be difficult to see if the ambient light is high. So, when possible, dim ambient light while working with modeling lights.
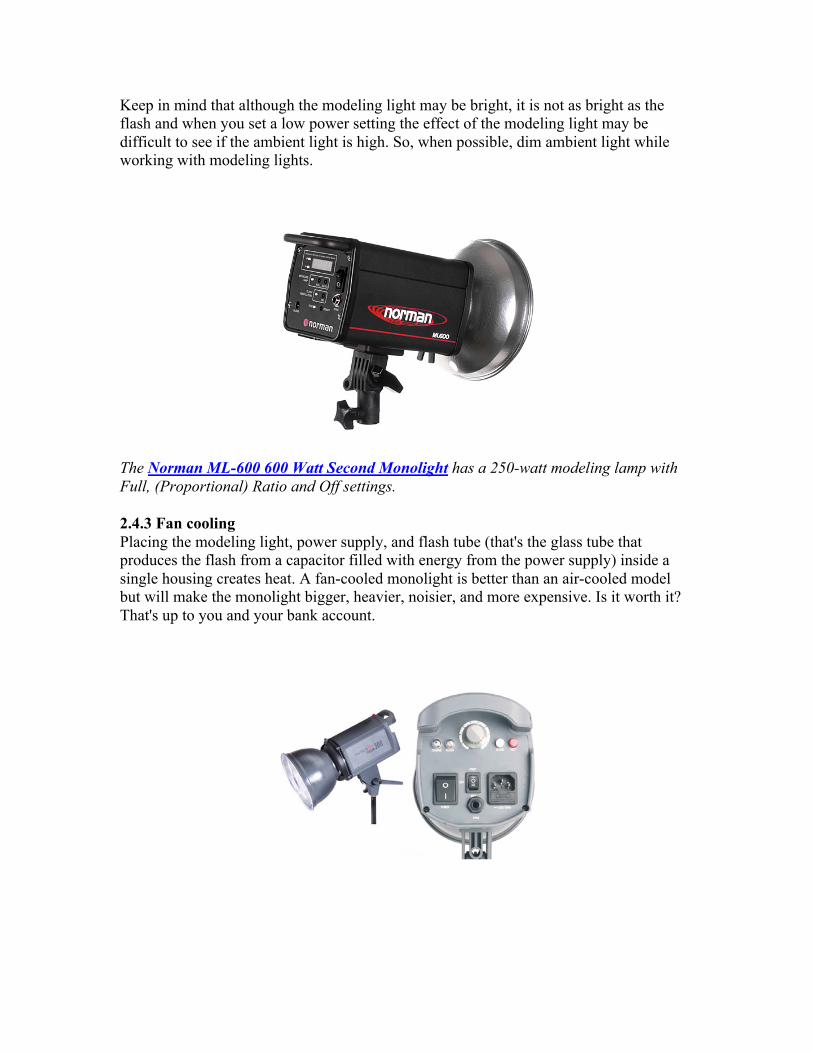
The Norman ML-600 600 Watt Second Monolight has a 250-watt modeling lamp with Full, (Proportional) Ratio and Off settings. 2.4.3 Fan cooling Placing the modeling light, power supply, and flash tube (that's the glass tube that produces the flash from a capacitor filled with energy from the power supply) inside a single housing creates heat. A fan-cooled monolight is better than an air-cooled model but will make the monolight bigger, heavier, noisier, and more expensive. Is it worth it? That's up to you and your bank account.
The Interfit Photographic Stellar is a modest-priced monolight that produces 1000 watt-seconds. It's fan-cooled, has a GN of 290 (feet), and has a 13 millisecond flash duration time. 2.4.4 Portability To many photographers, the ability to have the power supply and light head in a single package makes for simple set up and greater portability. That's why lots of companies offer packages consisting of monolights, umbrellas, light stands, and even a case for a single ready-to-go package.
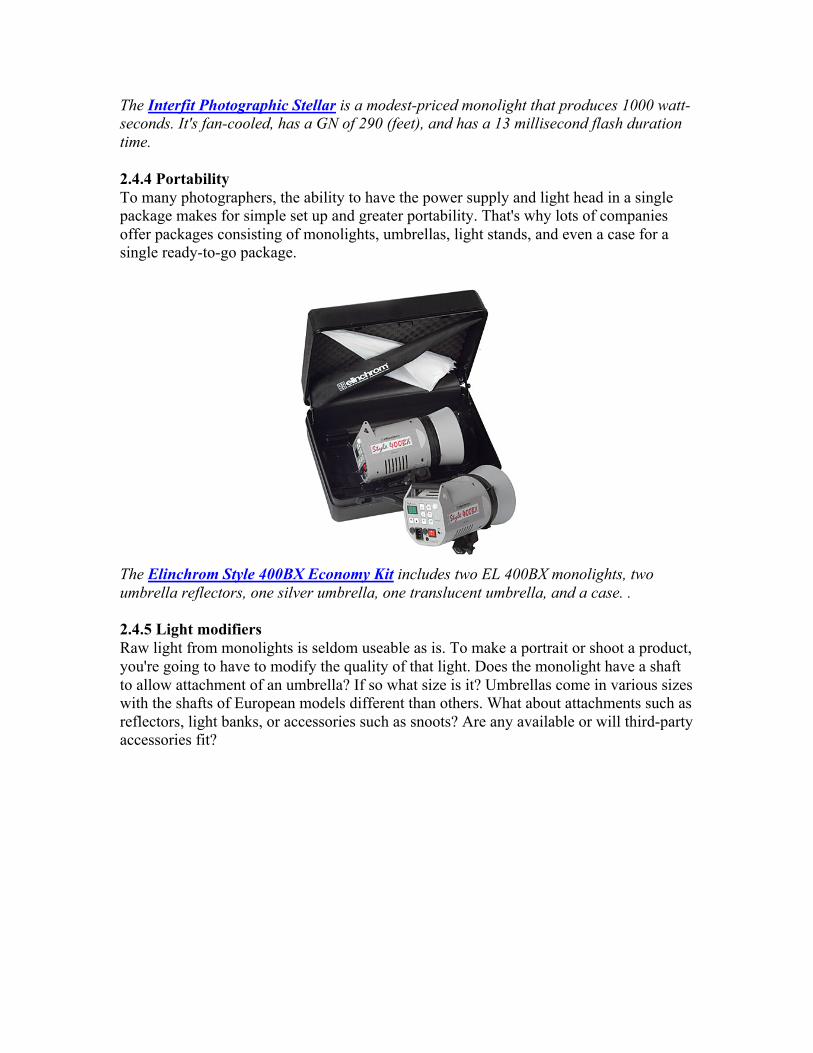
The Elinchrom Style 400BX Economy Kit includes two EL 400BX monolights, two umbrella reflectors, one silver umbrella, one translucent umbrella, and a case. . 2.4.5 Light modifiers Raw light from monolights is seldom useable as is. To make a portrait or shoot a product, you're going to have to modify the quality of that light. Does the monolight have a shaft to allow attachment of an umbrella? If so what size is it? Umbrellas come in various sizes with the shafts of European models different than others. What about attachments such as reflectors, light banks, or accessories such as snoots? Are any available or will third-party accessories fit?
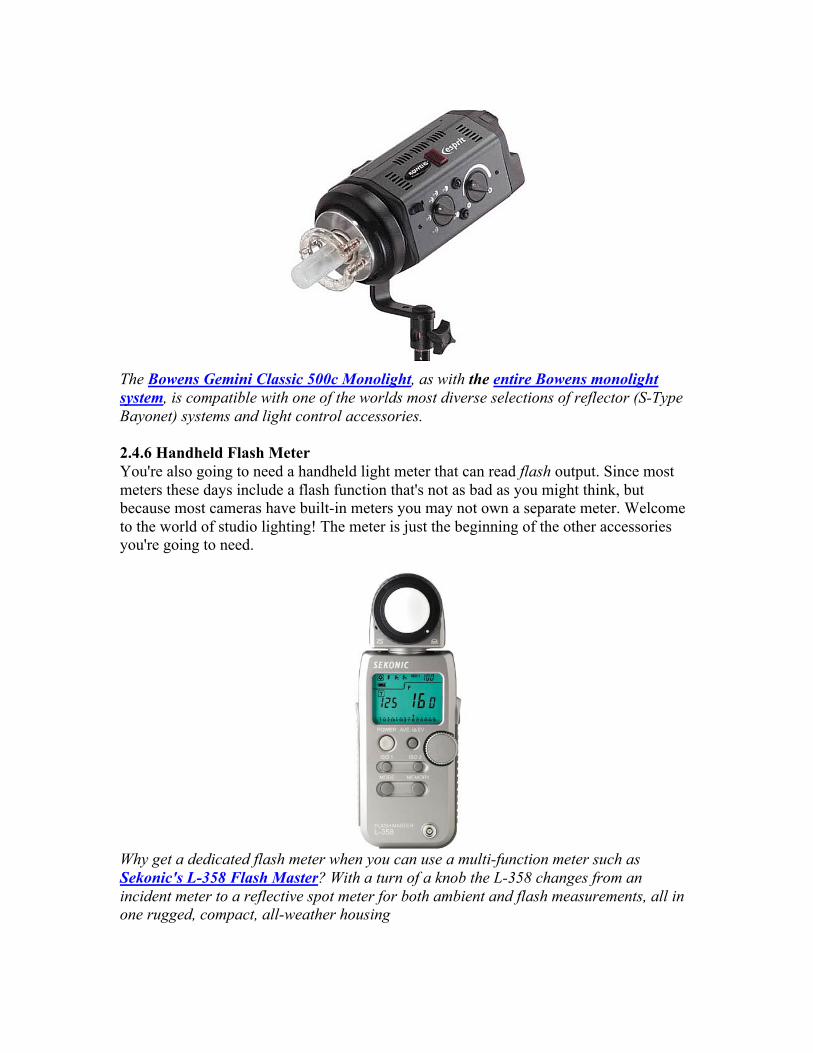
The Bowens Gemini Classic 500c Monolight, as with the entire Bowens monolight system, is compatible with one of the worlds most diverse selections of reflector (S-Type Bayonet) systems and light control accessories. 2.4.6 Handheld Flash Meter You're also going to need a handheld light meter that can read flash output. Since most meters these days include a flash function that's not as bad as you might think, but because most cameras have built-in meters you may not own a separate meter. Welcome to the world of studio lighting! The meter is just the beginning of the other accessories you're going to need.
Why get a dedicated flash meter when you can use a multi-function meter such as Sekonic's L-358 Flash Master? With a turn of a knob the L-358 changes from an incident meter to a reflective spot meter for both ambient and flash measurements, all in one rugged, compact, all-weather housing
—Joe Farace
Chapter 3: What are AC and DC Packs and Heads?
3.1 Divide and Conquer Monolights combine power supply and flash head into a single unit. An alternative approach is to separate the power supply and flash into two separate units—the AC power pack and flash head. Because there is no internal power supply, flash heads can be smaller; some are downright tiny, allowing you to place them in locations where larger monolights might not fit. Since the heads are smaller, there's room for adding cooling fans without the head size getting too large or the fan too big and noisy. A separate, single-unit power supply can control more than one head. Usually the output for each flash is controlled separately in either symmetric (all flashes operate at the same power output) or asymmetric (each flash output is controlled independently) configurations. The power supply itself can be larger because the design needn’t be concerned as much about heat buildup affecting the flash head (as with a monolight) allowing more flash heads to be connected along with overall higher Watt Second output. 3.2 A Ratio Approach An essential term to know is lighting ratio, which is especially important when using multiple flash heads. Power packs with asymmetric controls can be set so each flash connected has a different output intensity. Lighting ratio is the difference in the brightness of light falling on your subject from the main (sometimes called key) light and the other fill light, but there can also be tertiary lights that serve other purposes, such as adding highlights to the subject's hair (hair light) or illuminating the background (background light.) A ratio of 3:1 is considered "standard" or normal for color photography but photographers can be flexible in applying this rule.
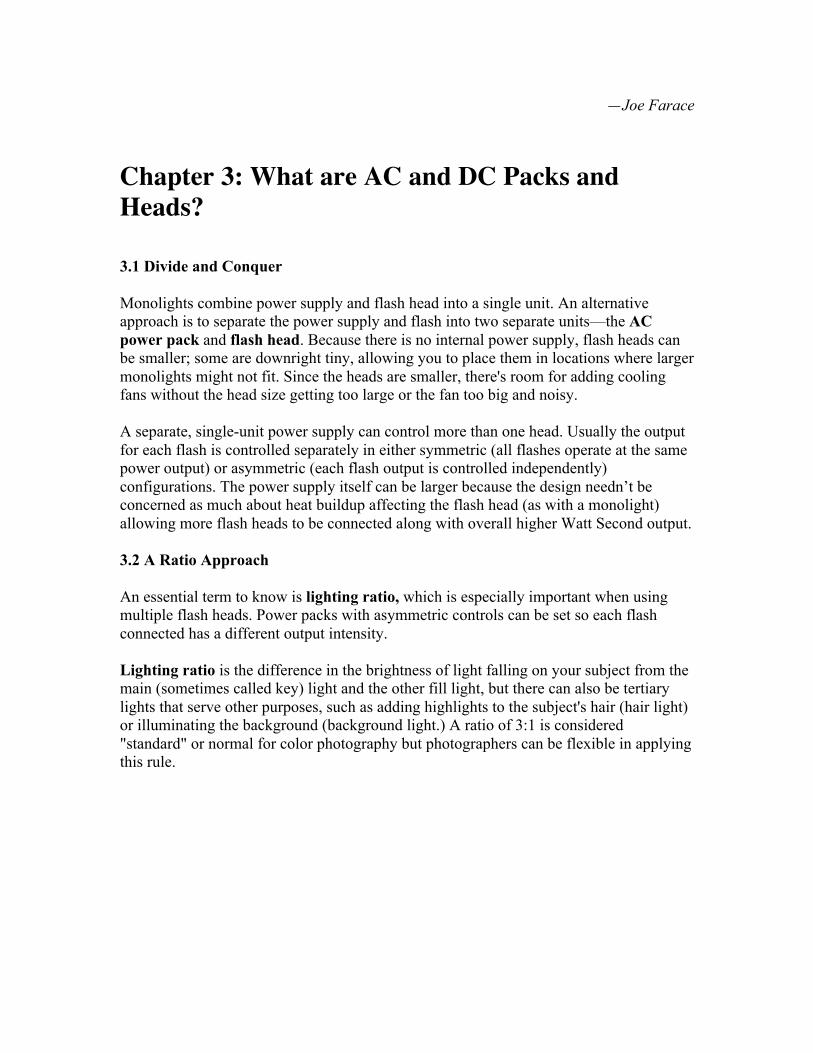
Dynalite RP400 400WS is the company's smallest power pack. It produces 400-Watt Seconds of flash power with a 1-second recycle time. It has a six f-stop range and a Variator to provide 2/10 stop fine-tuning to three flash heads. It weighs only 4.1 pounds, has a footprint of just 5 5/8x6 7/8 inches, and stands only 5 1/4 inches high including the handle. Like Monolights, power packs have input for a PC cable allowing it to be directly triggered when connected to your SLR's corresponding PC outlet. Many have an optical slave that can be set to trip the flash when it sees another flash go off or may be triggered by an infrared source. Radio-controlled slaves are a popular option that allows a power supply to be wirelessly triggered without requiring a camera-mounted flash or cable connection.

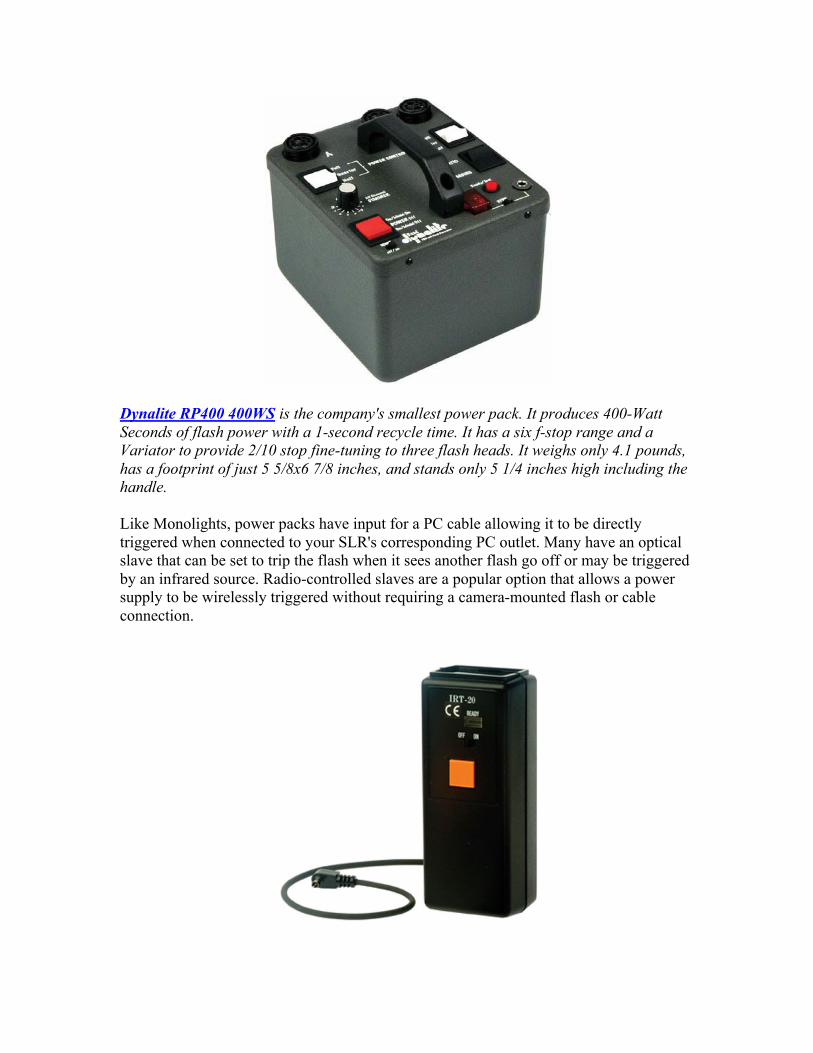
Smith Victor's PGIRT-20 Infrared Flash Trigger is an economical alternative to radio wireless triggering devices. It slides onto a camera's hot shoe or can be connected via the supplied PC cord. An infrared signal can be sent to the infrared slave built-into the power supply and trigger the flash heads from up to 50 feet away. 3.3 DC, Too Most power packs are AC powered but just as DC powered monolights are gaining favor with location photographers, DC power packs, such as Comet's Cbm-1200 are popular too. Many studio light systems give you a choice of using AC or DC power packs so you can have both options in your studio lighting kit and be able to use the one that fits the assignment or project you're working on. If you're thinking about the requirement for DC power, ask yourself the big question: How far away is the nearest AC outlet? If it's longer than your longest extension cord, it's time to think DC.
Comet's Cbm-1200 is a small, lightweight, 1200 Watt Second battery—operated power pack for the photographer who wants a fast DC unit to work on location with Comet flash heads. 3.4 A power pack checklist Here are a few things to keep in mind when considering a power pack and flash head system for your studio lighting needs. As in all other kinds of photography, this involves a series of tradeoffs between functionality, ease-of-use, and cost. You'll want to carefully juggle your budget with your want list. 3.4.1 Continuously variable output
Many power packs (aka power supplies) allow you to adjust power settings to suit the lighting setup you have. On some power supplies, output is symmetrical so the power from one head is the same as the other. When using these kinds of power packs, lighting ratios can be controlled using a light modifier such as a lightbank or by varying the distance from the subject to from the lamp head. It is here we run into one downside of the power pack/head system. In a two light system, if a power pack fails, you can't shoot. If you have two monolights and one's power supply fails, you still have one light to finish the shoot. It won't be perfect, but it fulfils the old newspaper adage of "f/8 and be there."
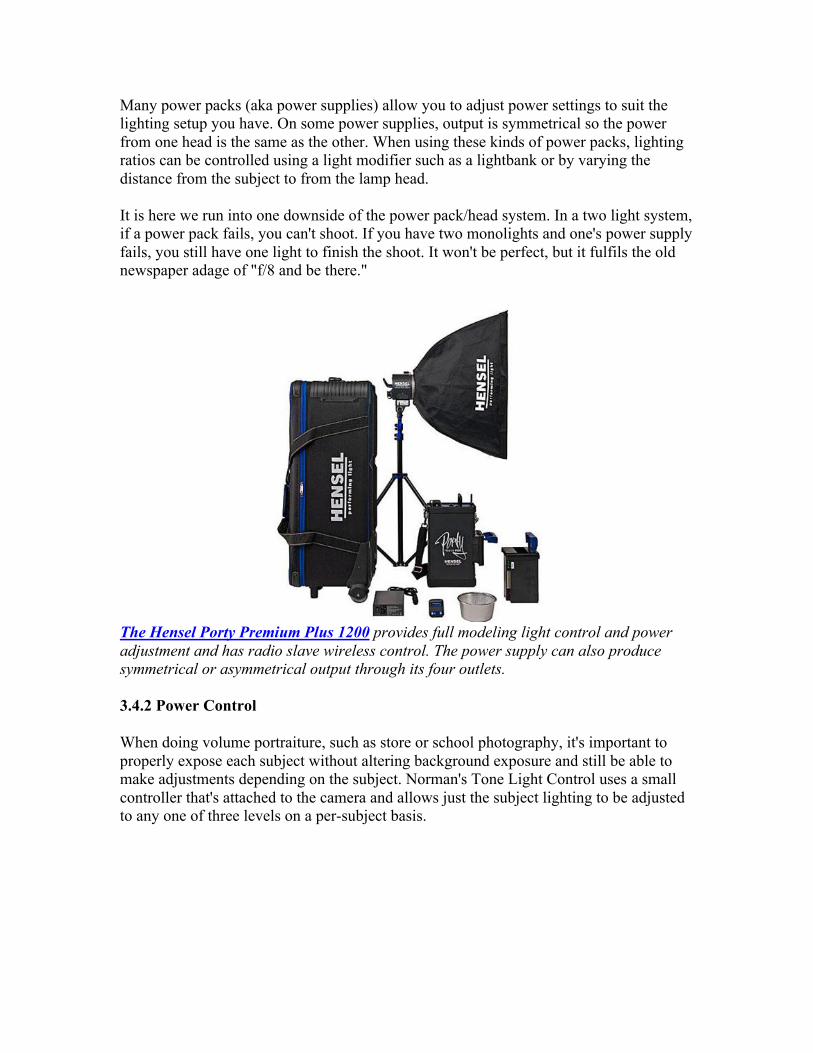
The Hensel Porty Premium Plus 1200 provides full modeling light control and power adjustment and has radio slave wireless control. The power supply can also produce symmetrical or asymmetrical output through its four outlets. 3.4.2 Power Control When doing volume portraiture, such as store or school photography, it's important to properly expose each subject without altering background exposure and still be able to make adjustments depending on the subject. Norman's Tone Light Control uses a small controller that's attached to the camera and allows just the subject lighting to be adjusted to any one of three levels on a per-subject basis.
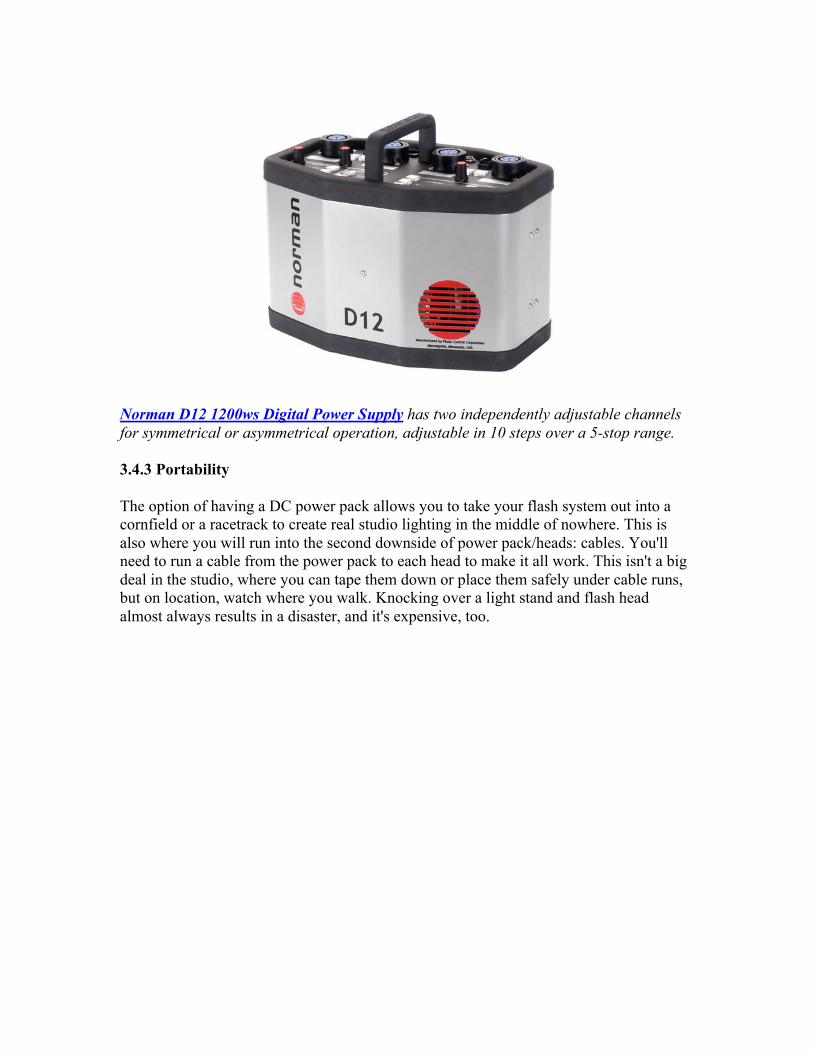
Norman D12 1200ws Digital Power Supply has two independently adjustable channels for symmetrical or asymmetrical operation, adjustable in 10 steps over a 5-stop range. 3.4.3 Portability The option of having a DC power pack allows you to take your flash system out into a cornfield or a racetrack to create real studio lighting in the middle of nowhere. This is also where you will run into the second downside of power pack/heads: cables. You'll need to run a cable from the power pack to each head to make it all work. This isn't a big deal in the studio, where you can tape them down or place them safely under cable runs, but on location, watch where you walk. Knocking over a light stand and flash head almost always results in a disaster, and it's expensive, too.
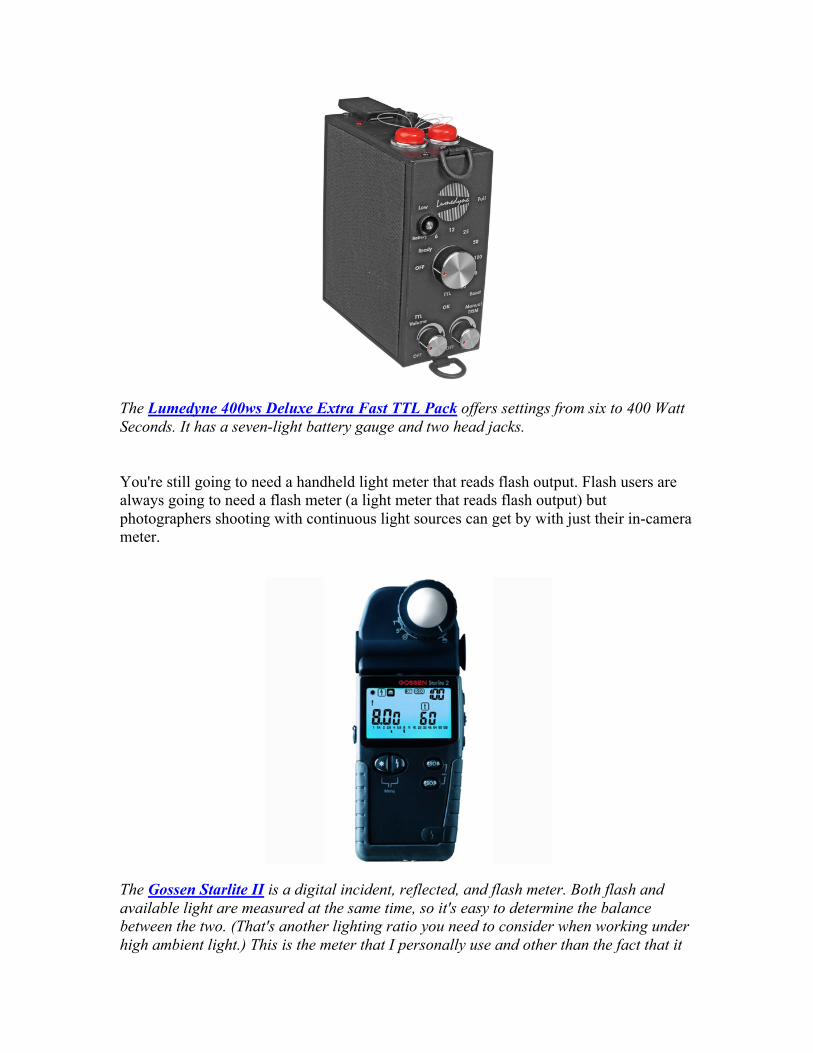
The Lumedyne 400ws Deluxe Extra Fast TTL Pack offers settings from six to 400 Watt Seconds. It has a seven-light battery gauge and two head jacks. You're still going to need a handheld light meter that reads flash output. Flash users are always going to need a flash meter (a light meter that reads flash output) but photographers shooting with continuous light sources can get by with just their in-camera meter.
The Gossen Starlite II is a digital incident, reflected, and flash meter. Both flash and available light are measured at the same time, so it's easy to determine the balance between the two. (That's another lighting ratio you need to consider when working under high ambient light.) This is the meter that I personally use and other than the fact that it
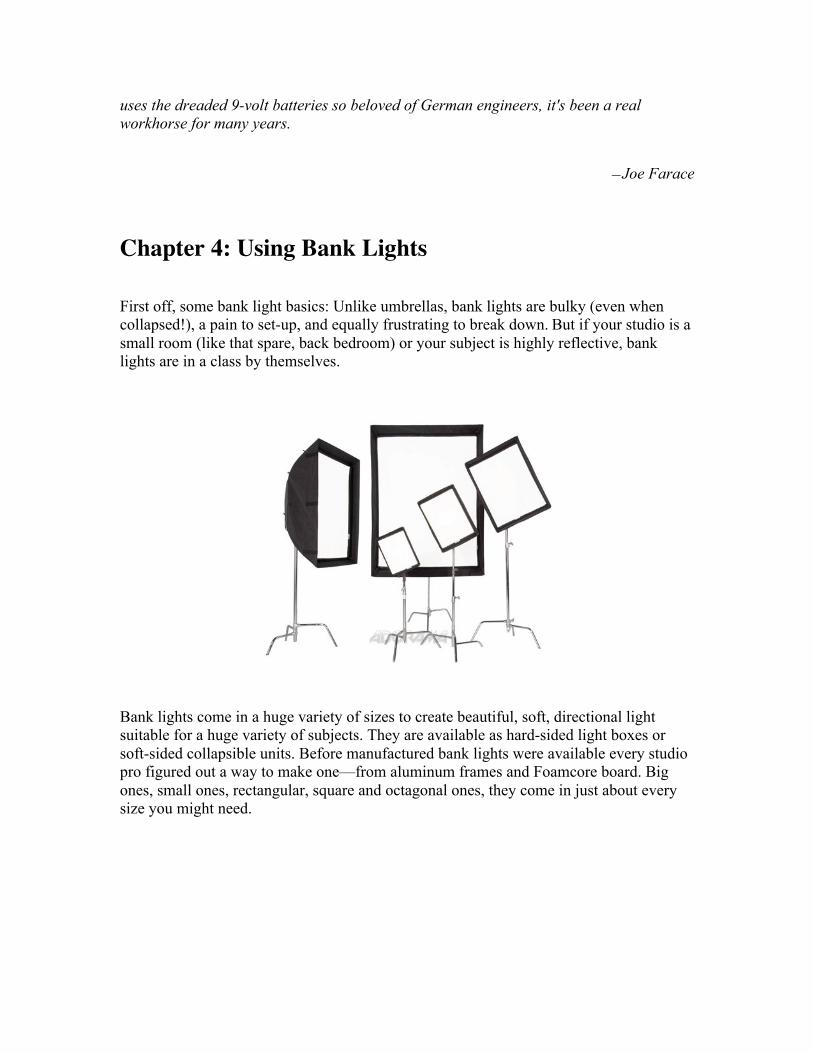
uses the dreaded 9-volt batteries so beloved of German engineers, it's been a real workhorse for many years.
—Joe Farace
Chapter 4: Using Bank Lights
First off, some bank light basics: Unlike umbrellas, bank lights are bulky (even when collapsed!), a pain to set-up, and equally frustrating to break down. But if your studio is a small room (like that spare, back bedroom) or your subject is highly reflective, bank lights are in a class by themselves.
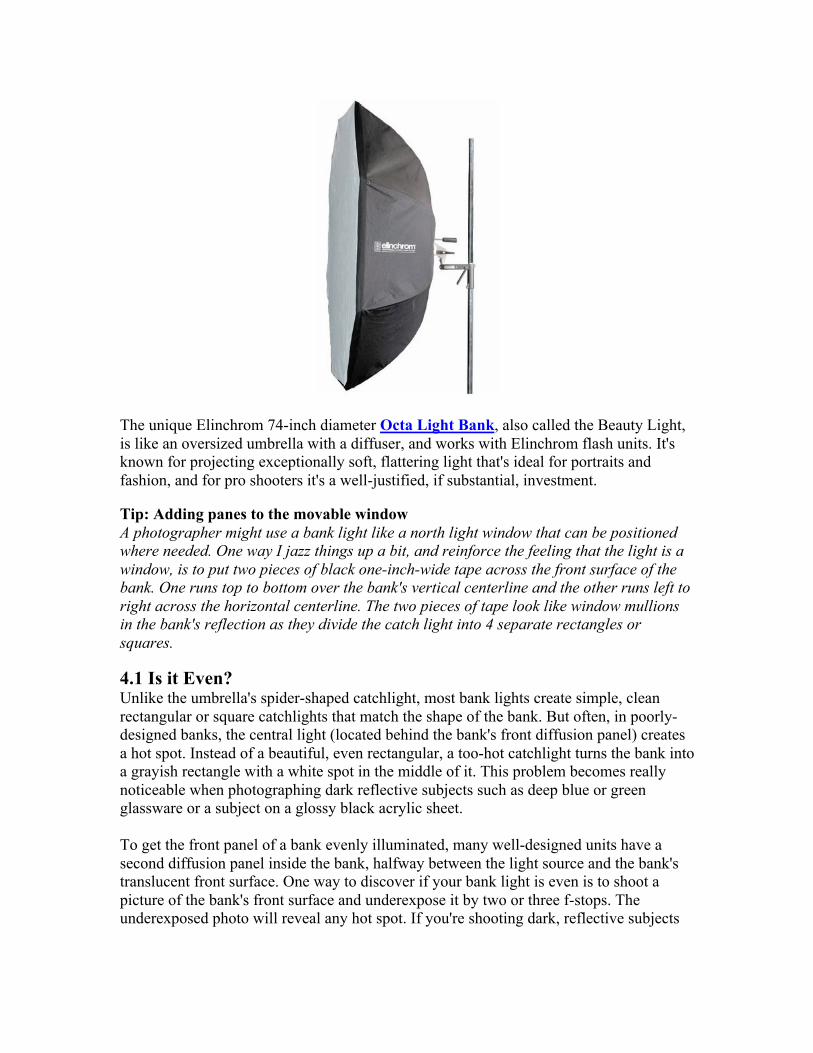
Bank lights come in a huge variety of sizes to create beautiful, soft, directional light suitable for a huge variety of subjects. They are available as hard-sided light boxes or soft-sided collapsible units. Before manufactured bank lights were available every studio pro figured out a way to make one—from aluminum frames and Foamcore board. Big ones, small ones, rectangular, square and octagonal ones, they come in just about every size you might need.
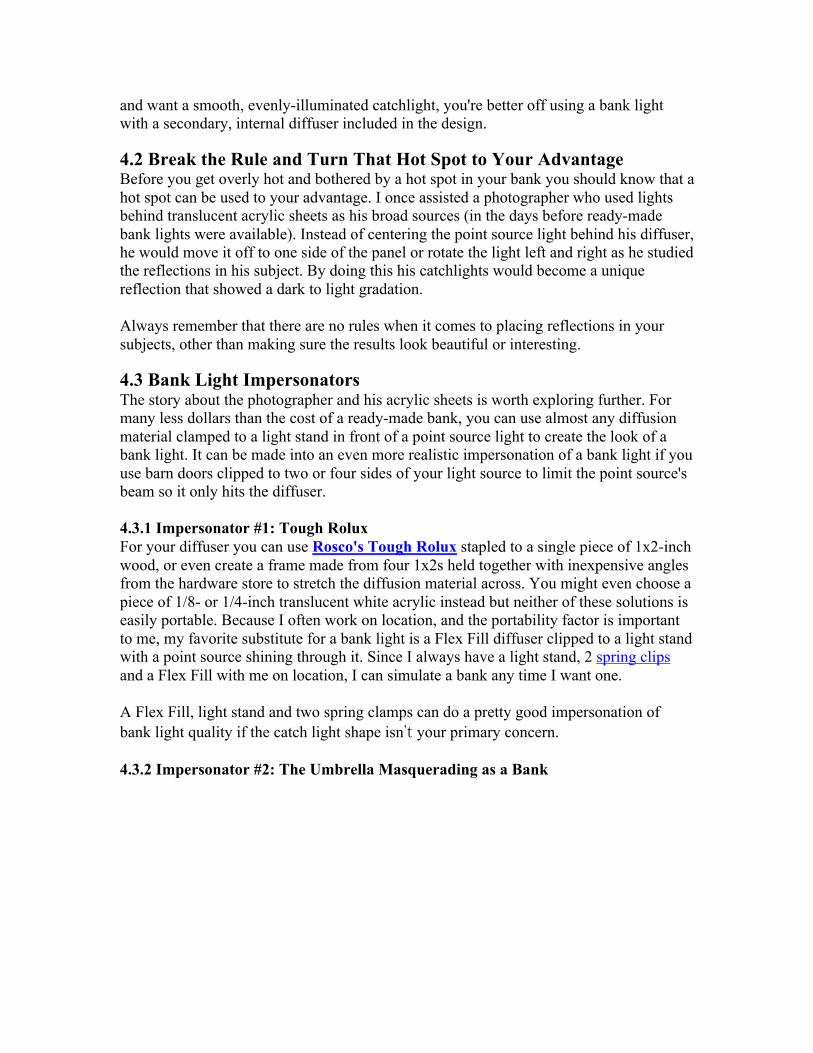
The unique Elinchrom 74-inch diameter Octa Light Bank, also called the Beauty Light, is like an oversized umbrella with a diffuser, and works with Elinchrom flash units. It's known for projecting exceptionally soft, flattering light that's ideal for portraits and fashion, and for pro shooters it's a well-justified, if substantial, investment. Tip: Adding panes to the movable window A photographer might use a bank light like a north light window that can be positioned where needed. One way I jazz things up a bit, and reinforce the feeling that the light is a window, is to put two pieces of black one-inch-wide tape across the front surface of the bank. One runs top to bottom over the bank's vertical centerline and the other runs left to right across the horizontal centerline. The two pieces of tape look like window mullions in the bank's reflection as they divide the catch light into 4 separate rectangles or squares. 4.1 Is it Even? Unlike the umbrella's spider-shaped catchlight, most bank lights create simple, clean rectangular or square catchlights that match the shape of the bank. But often, in poorly-designed banks, the central light (located behind the bank's front diffusion panel) creates a hot spot. Instead of a beautiful, even rectangular, a too-hot catchlight turns the bank into a grayish rectangle with a white spot in the middle of it. This problem becomes really noticeable when photographing dark reflective subjects such as deep blue or green glassware or a subject on a glossy black acrylic sheet. To get the front panel of a bank evenly illuminated, many well-designed units have a second diffusion panel inside the bank, halfway between the light source and the bank's translucent front surface. One way to discover if your bank light is even is to shoot a picture of the bank's front surface and underexpose it by two or three f-stops. The underexposed photo will reveal any hot spot. If you're shooting dark, reflective subjects
and want a smooth, evenly-illuminated catchlight, you're better off using a bank light with a secondary, internal diffuser included in the design. 4.2 Break the Rule and Turn That Hot Spot to Your Advantage Before you get overly hot and bothered by a hot spot in your bank you should know that a hot spot can be used to your advantage. I once assisted a photographer who used lights behind translucent acrylic sheets as his broad sources (in the days before ready-made bank lights were available). Instead of centering the point source light behind his diffuser, he would move it off to one side of the panel or rotate the light left and right as he studied the reflections in his subject. By doing this his catchlights would become a unique reflection that showed a dark to light gradation. Always remember that there are no rules when it comes to placing reflections in your subjects, other than making sure the results look beautiful or interesting. 4.3 Bank Light Impersonators The story about the photographer and his acrylic sheets is worth exploring further. For many less dollars than the cost of a ready-made bank, you can use almost any diffusion material clamped to a light stand in front of a point source light to create the look of a bank light. It can be made into an even more realistic impersonation of a bank light if you use barn doors clipped to two or four sides of your light source to limit the point source's beam so it only hits the diffuser. 4.3.1 Impersonator #1: Tough Rolux For your diffuser you can use Rosco's Tough Rolux stapled to a single piece of 1x2-inch wood, or even create a frame made from four 1x2s held together with inexpensive angles from the hardware store to stretch the diffusion material across. You might even choose a piece of 1/8- or 1/4-inch translucent white acrylic instead but neither of these solutions is easily portable. Because I often work on location, and the portability factor is important to me, my favorite substitute for a bank light is a Flex Fill diffuser clipped to a light stand with a point source shining through it. Since I always have a light stand, 2 spring clips and a Flex Fill with me on location, I can simulate a bank any time I want one. A Flex Fill, light stand and two spring clamps can do a pretty good impersonation of bank light quality if the catch light shape isn’tyour primary concern. 4.3.2 Impersonator #2: The Umbrella Masquerading as a Bank
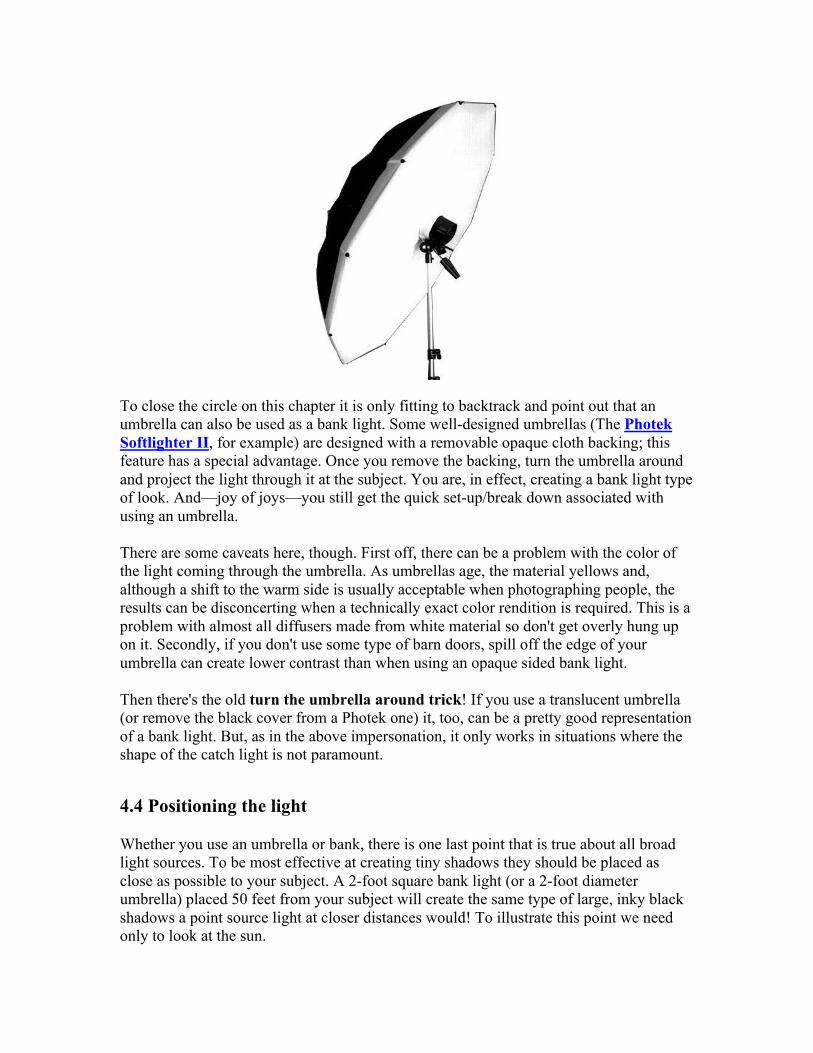
To close the circle on this chapter it is only fitting to backtrack and point out that an umbrella can also be used as a bank light. Some well-designed umbrellas (The Photek Softlighter II, for example) are designed with a removable opaque cloth backing; this feature has a special advantage. Once you remove the backing, turn the umbrella around and project the light through it at the subject. You are, in effect, creating a bank light type of look. And—joy of joys—you still get the quick set-up/break down associated with using an umbrella. There are some caveats here, though. First off, there can be a problem with the color of the light coming through the umbrella. As umbrellas age, the material yellows and, although a shift to the warm side is usually acceptable when photographing people, the results can be disconcerting when a technically exact color rendition is required. This is a problem with almost all diffusers made from white material so don't get overly hung up on it. Secondly, if you don't use some type of barn doors, spill off the edge of your umbrella can create lower contrast than when using an opaque sided bank light. Then there's the old turn the umbrella around trick! If you use a translucent umbrella (or remove the black cover from a Photek one) it, too, can be a pretty good representation of a bank light. But, as in the above impersonation, it only works in situations where the shape of the catch light is not paramount.
4.4 Positioning the light Whether you use an umbrella or bank, there is one last point that is true about all broad light sources. To be most effective at creating tiny shadows they should be placed as close as possible to your subject. A 2-foot square bank light (or a 2-foot diameter umbrella) placed 50 feet from your subject will create the same type of large, inky black shadows a point source light at closer distances would! To illustrate this point we need only to look at the sun.
Knowledgeable photographers treat direct sunlight as a point source light. In reality, our sun is almost a million miles in diameter (870,000 miles in diameter to be more exact) but, because it is about 93 million miles away from the earth, it creates the same type of large, inky black shadows that a 2x3 inch light creates when placed 5 feet from a subject. So, to paraphrase Al Pacino in Godfather Part 2, keep your friends close and your broad sources even closer!
—Steve Sint
Chapter 5: Trigger Your Studio Strobes Wirelessly On A Small Budget The built-in strobes on DSLRs are great for adding fill light in a pinch, but not for triggering the optic slaves on studio strobes. Quite simply put: modern built-in flashes are very smart are figuring out the light output, but to do so, they need to fire off an evaluative burst of light prior to image capture. This pre-flash is measured and then the shutter opens, the strobe emits enough light based on the camera settings and the pre-flash reading, and the image is captured. When the built-in flash is the only flash, this usually works just fine. But throw a set of studio strobes with optic slaves into the mix, and it all falls apart. The built-in light sensors on the external strobes dutifully identify a burst of light and trip their circuits with the pre-flash. But then the strobe needs to recycle and store up enough of an electrical charge for the next flash of light, and this recycle period is usually longer than the time between the pre-flash and the capture moment when the shutter opens and the onboard strobe fires again. Here's the result: the only flash lighting hitting the subject comes from the onboard flash, and the big studio heads juice themselves up for the next burst of light. Which will be your pre-flash. Again. And so it goes on and on. It's tough to get around this pre-flash issue with just the built-in strobe–not impossible, but tough. (Here's how: total darkness, second curtain flash sync, and a shutter time that is longer then the recycle time for all optically-triggered strobes. This may work OK for tabletop work, but it will be very weird and creepy for live models or anything moving.) 5.1: Non-Dedicated Flash as a Trigger The much easier solution lies in the center contact spot of your camera's hotshoe. This is the "non-dedicated" contact point for external strobes. The "non-dedicated" hotshoe mounted strobe gets triggered off a small electrical signal from the camera that says only one thing when the shutter button is pushed: GO!
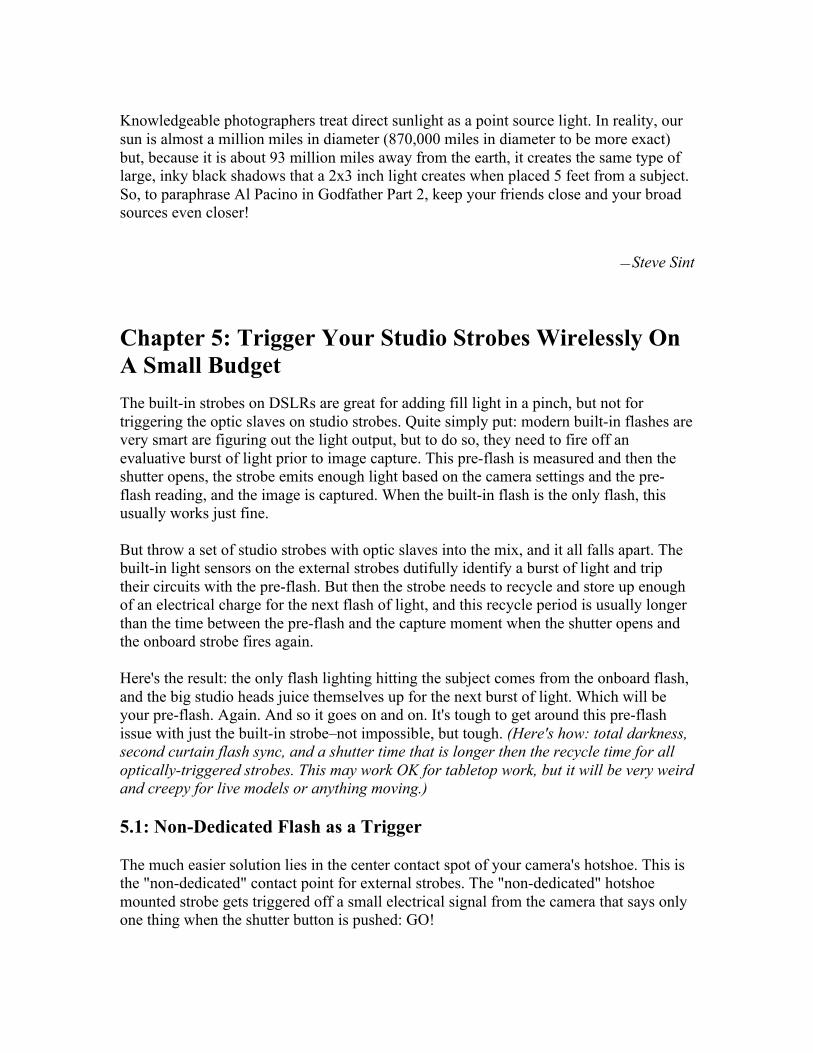
And then the strobe fires according to whatever the settings on the strobe are set to. Some non-dedicated strobes can be adjusted to emit only a ratio of their total charge, while others have fixed output–all or nothing, in other words. A very cheap solution is the Adorama RS-F18 Manual Flash Unit. But this strobe only fires straight ahead, which may lead to hotspots on the subject, and negate a little of the effect of the positioned studio strobes. Sure, you could rig a deflector in front of this little strobe to bounce the light skyward, or you could spend a few bucks more for a swivel-head unit that can bounce the light off the ceiling, such as the Adorama Auto Bounce Flash to trigger the external optically slaved lights. There's less chance of the shoe-mount trigger unit's output impacting the image when the light is bounced off the ceiling. (A dedicated strobe set to manual also skips the pre-flash, too, so that's another possible solution.) 5.2: Infrared Remote Triggers
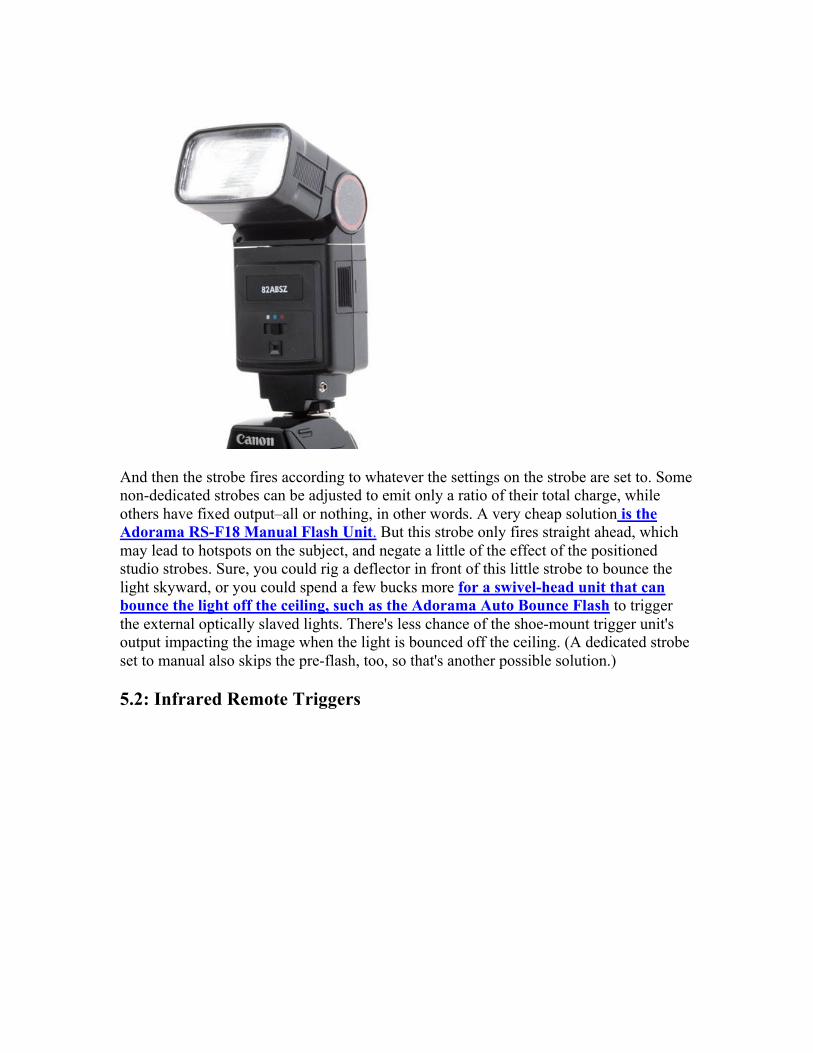
But there's another much cooler way to optically and wirelessly trigger the studio strobes from the hotshoe, and it's even more economical than the bounce flash above. It's the Flashpiont Infra Red Remote Trigger. You see, the optical slaves on virtually all strobes are sensitive into the infra red wavelengths, so a quick burst of invisible-to-the-human-eye-and-most-off-the-shelf-DSLRs infra red "light" from the hotshoe-mounted IR flash triggers the optic slaves on the external strobes! The light on the subject comes only from the studio strobes, there's no pre-flash issues from a built-in, and no stray light from a non-dedicated visible-spectrum shoe-mount strobe to deal with whatsoever! This is a great wireless solution for the home studio, but please bear in mind that optical triggers are considered taboo when there are multiple photographers at a location such as sporting events. In these cases, radio triggers and receivers, such as Pocket Wizards and Quantum Radio Slaves are the way to go.
Chapter 6: Single-Light Portraits While the strobist movement encourages the use of multiple wireless networks of flashes to blast away and create stunning portraits, a single flash may be all you can afford. Not to worry: There's a lot you can do with one light source. Let's face it: A good flash costs hundreds of dollars, and once you've added on such incidentals as a wireless controller, stands, brackets, diffusers and reflectors, a three- or four-flash setup can easily run you over a grand. Fortunately, there are techniques for getting dramatic, evocative portraits with a single light source.
6.1 Shaping The Light
Small light sources with little or no modification of the light output can create dramatic effects, while larger light sources windows, shooting flash through diffusion material such as a soft box, or reflecting flash off of an umbrella, a white bed sheet, or white wall wrap the light around your subject's face for more flattering results. In addition to the shape and intensity of the light, where you position your light will affect the look and feel of the portrait, as described below. There's no reason why you can't augment the light with reflectors, which kick some light into the shadow areas to pick up details and soften the intensity of the contrast between the lit areas of a face and the areas where the shadows fall. Let's look at some examples of single-light portraits.
6.2 Single-light photo samples
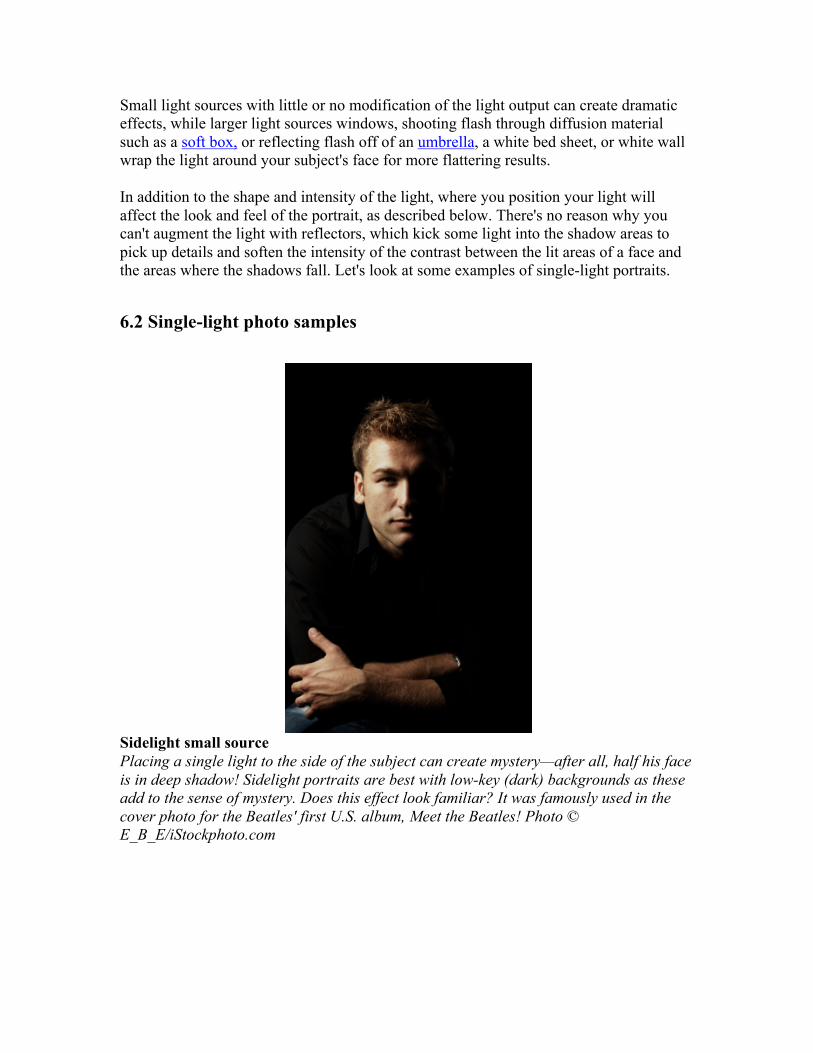
Sidelight small source Placing a single light to the side of the subject can create mystery—after all, half his face is in deep shadow! Sidelight portraits are best with low-key (dark) backgrounds as these add to the sense of mystery. Does this effect look familiar? It was famously used in the cover photo for the Beatles' first U.S. album, Meet the Beatles! Photo © E_B_E/iStockphoto.com
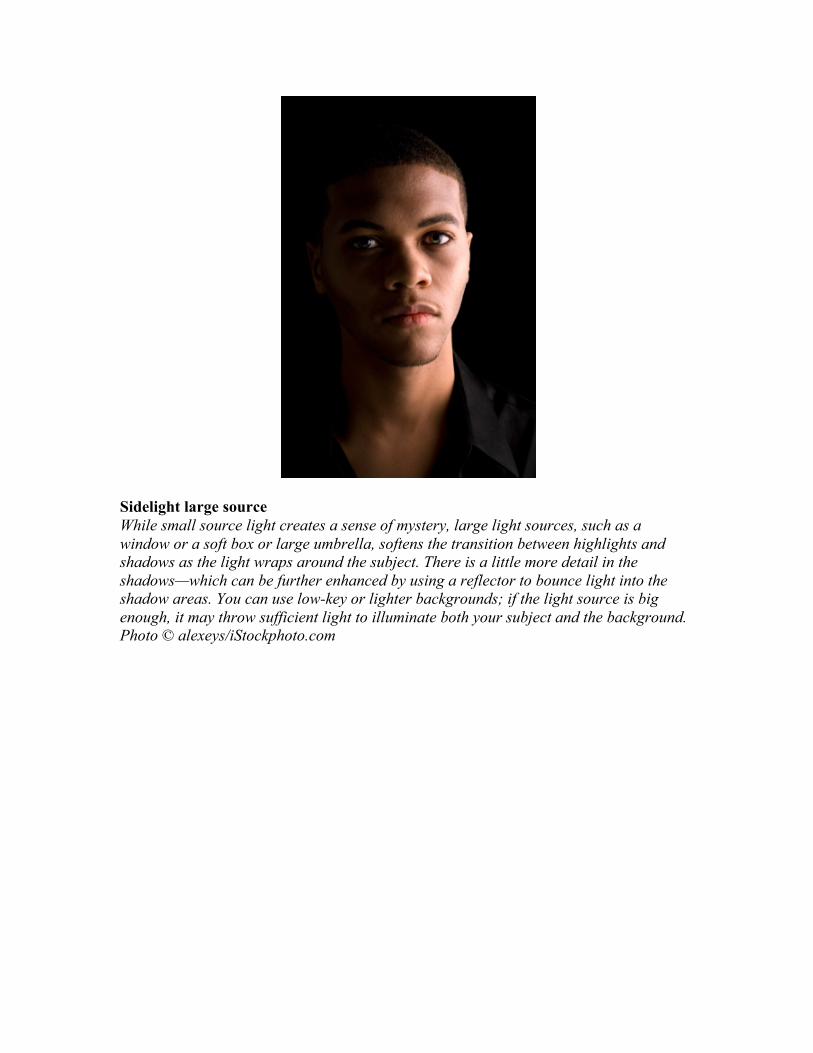
Sidelight large source While small source light creates a sense of mystery, large light sources, such as a window or a soft box or large umbrella, softens the transition between highlights and shadows as the light wraps around the subject. There is a little more detail in the shadows—which can be further enhanced by using a reflector to bounce light into the shadow areas. You can use low-key or lighter backgrounds; if the light source is big enough, it may throw sufficient light to illuminate both your subject and the background. Photo © alexeys/iStockphoto.com
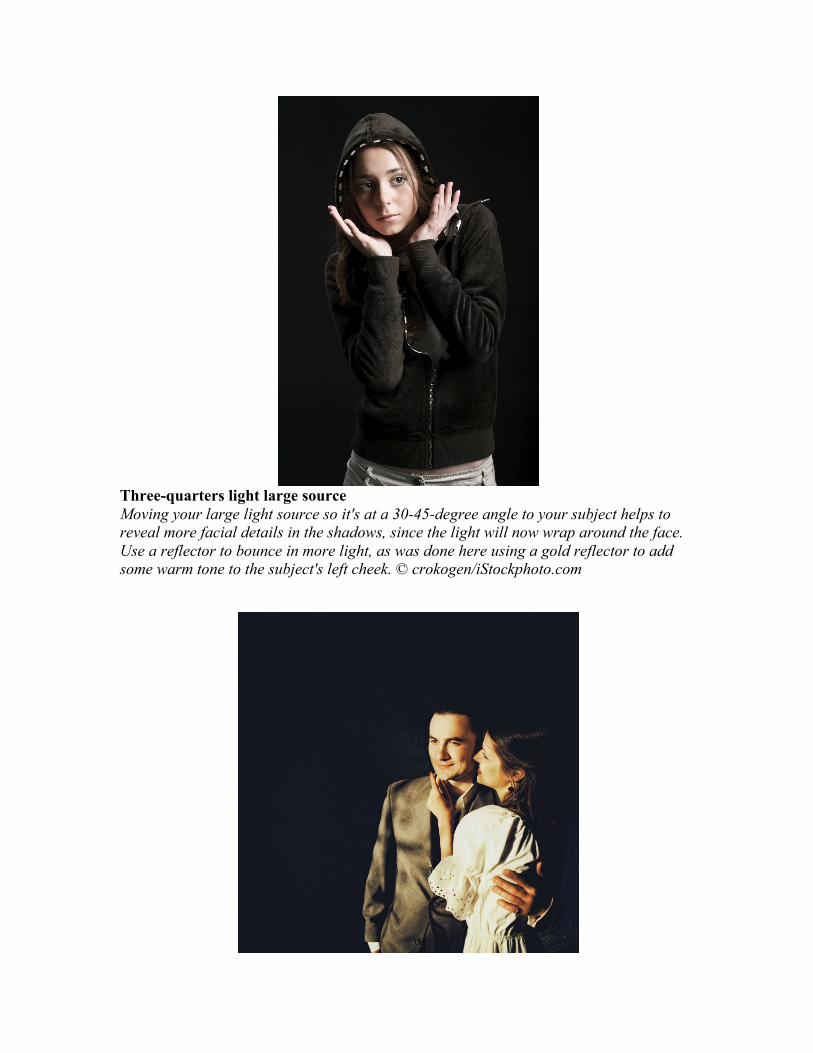
Three-quarters light large source Moving your large light source so it's at a 30-45-degree angle to your subject helps to reveal more facial details in the shadows, since the light will now wrap around the face. Use a reflector to bounce in more light, as was done here using a gold reflector to add some warm tone to the subject's left cheek. © crokogen/iStockphoto.com
Three quarters light small source A small light source projects a harsh light that can be used effectively when positioned at an angle to the camera. In this case, the light was placed at approximately 45 degrees from the camera, and the couple was turned to face the light directly. In this case, with a touch of warm tone, the directional light creates an intimate feel, despite the harsh shadows. © antoninaart/iStockphoto.com
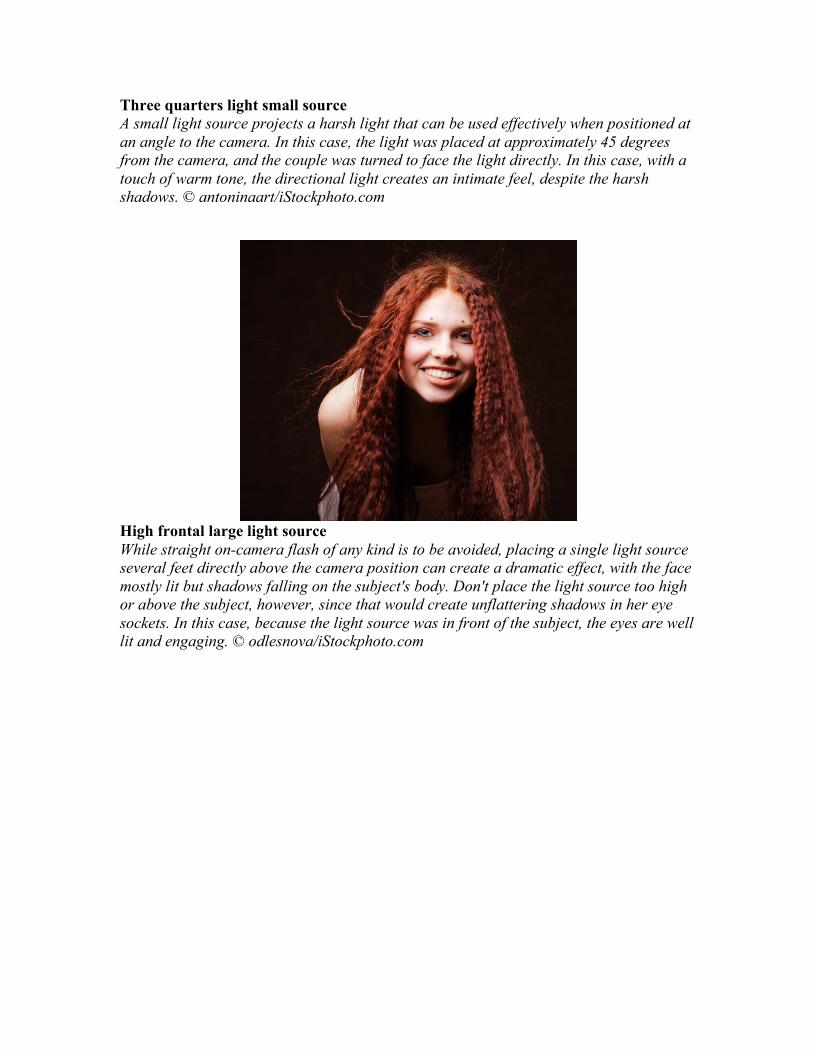
High frontal large light source While straight on-camera flash of any kind is to be avoided, placing a single light source several feet directly above the camera position can create a dramatic effect, with the face mostly lit but shadows falling on the subject's body. Don't place the light source too high or above the subject, however, since that would create unflattering shadows in her eye sockets. In this case, because the light source was in front of the subject, the eyes are well lit and engaging. © odlesnova/iStockphoto.com
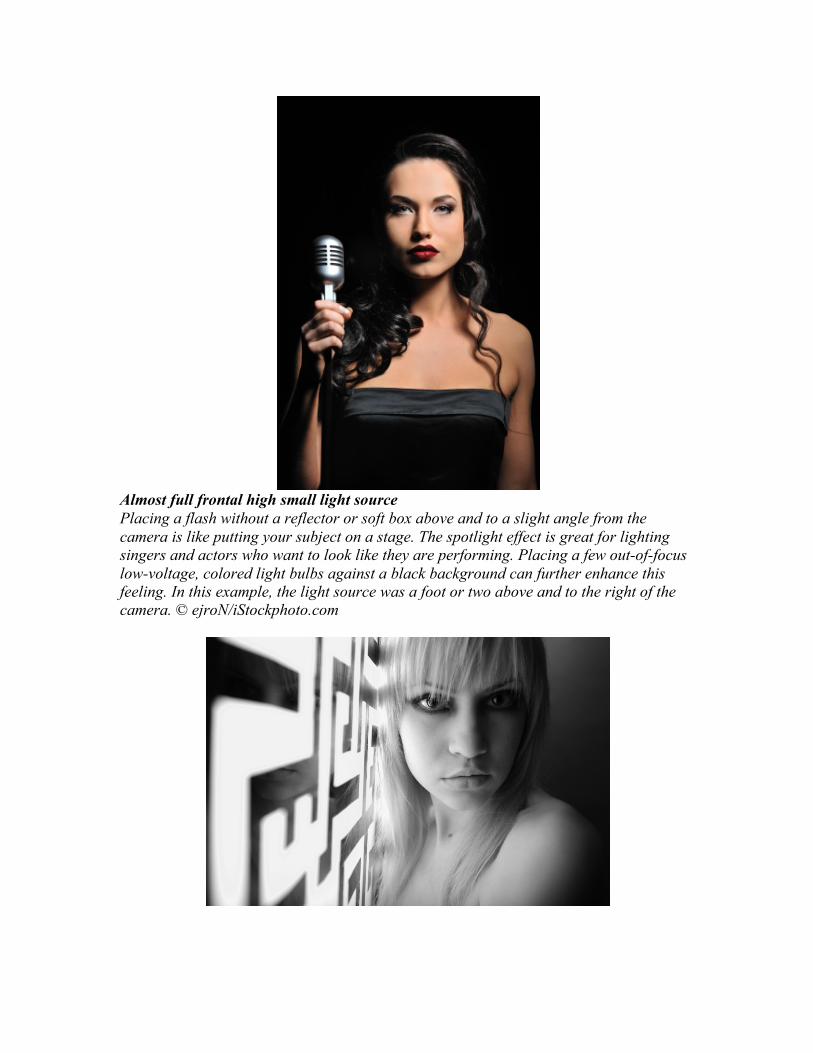
Almost full frontal high small light source Placing a flash without a reflector or soft box above and to a slight angle from the camera is like putting your subject on a stage. The spotlight effect is great for lighting singers and actors who want to look like they are performing. Placing a few out-of-focus low-voltage, colored light bulbs against a black background can further enhance this feeling. In this example, the light source was a foot or two above and to the right of the camera. © ejroN/iStockphoto.com
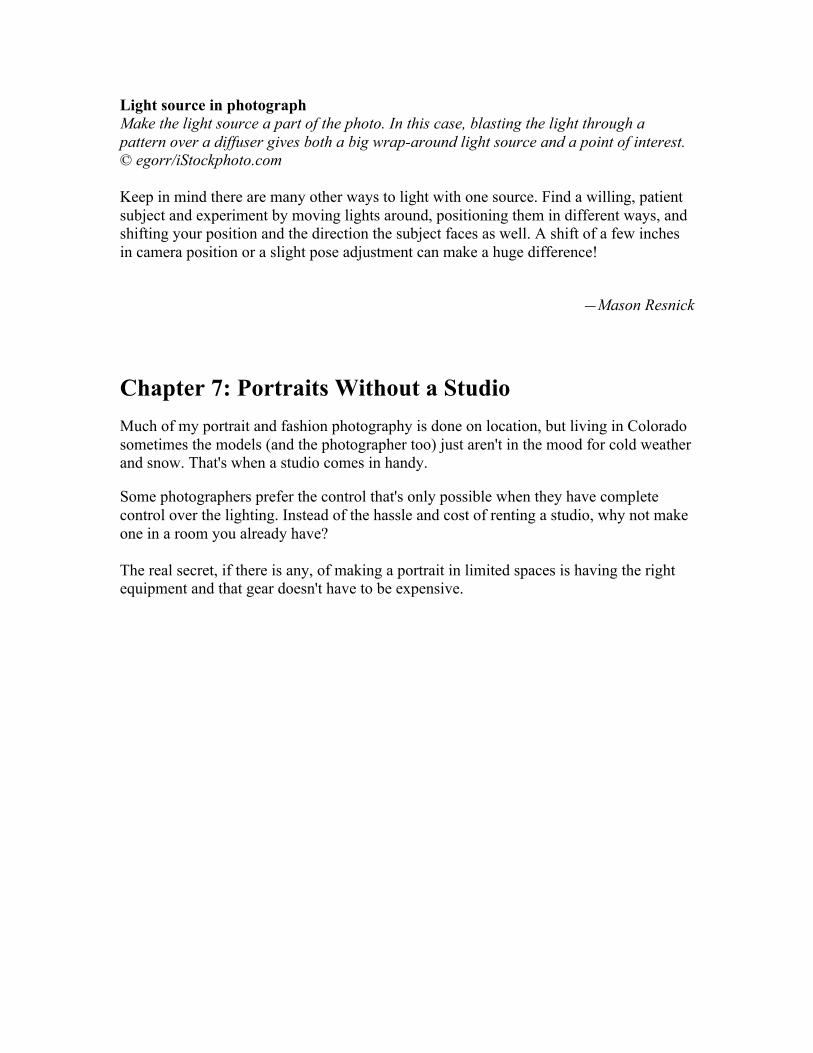
Light source in photograph Make the light source a part of the photo. In this case, blasting the light through a pattern over a diffuser gives both a big wrap-around light source and a point of interest. © egorr/iStockphoto.com Keep in mind there are many other ways to light with one source. Find a willing, patient subject and experiment by moving lights around, positioning them in different ways, and shifting your position and the direction the subject faces as well. A shift of a few inches in camera position or a slight pose adjustment can make a huge difference!
—Mason Resnick
Chapter 7: Portraits Without a Studio Much of my portrait and fashion photography is done on location, but living in Colorado sometimes the models (and the photographer too) just aren't in the mood for cold weather and snow. That's when a studio comes in handy. Some photographers prefer the control that's only possible when they have complete control over the lighting. Instead of the hassle and cost of renting a studio, why not make one in a room you already have? The real secret, if there is any, of making a portrait in limited spaces is having the right equipment and that gear doesn't have to be expensive.
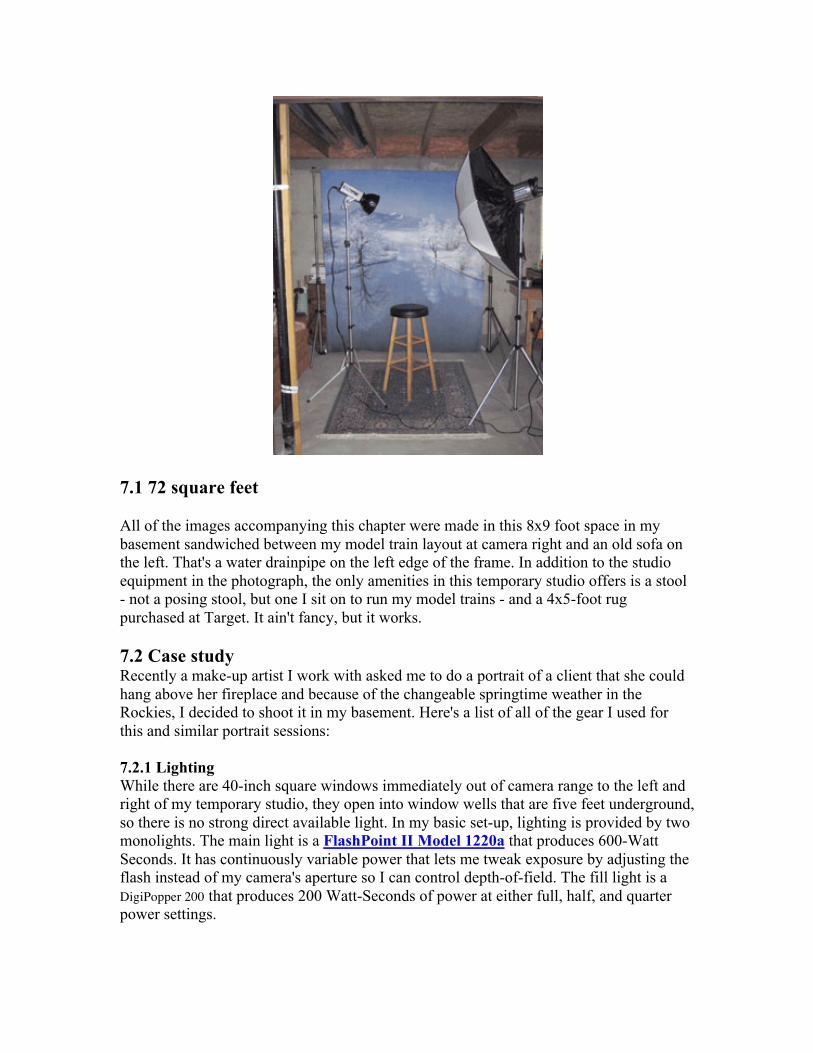
7.1 72 square feet All of the images accompanying this chapter were made in this 8x9 foot space in my basement sandwiched between my model train layout at camera right and an old sofa on the left. That's a water drainpipe on the left edge of the frame. In addition to the studio equipment in the photograph, the only amenities in this temporary studio offers is a stool - not a posing stool, but one I sit on to run my model trains - and a 4x5-foot rug purchased at Target. It ain't fancy, but it works. 7.2 Case study Recently a make-up artist I work with asked me to do a portrait of a client that she could hang above her fireplace and because of the changeable springtime weather in the Rockies, I decided to shoot it in my basement. Here's a list of all of the gear I used for this and similar portrait sessions: 7.2.1 Lighting While there are 40-inch square windows immediately out of camera range to the left and right of my temporary studio, they open into window wells that are five feet underground, so there is no strong direct available light. In my basic set-up, lighting is provided by two monolights. The main light is a FlashPoint II Model 1220a that produces 600-Watt Seconds. It has continuously variable power that lets me tweak exposure by adjusting the flash instead of my camera's aperture so I can control depth-of-field. The fill light is a DigiPopper 200 that produces 200 Watt-Seconds of power at either full, half, and quarter power settings.
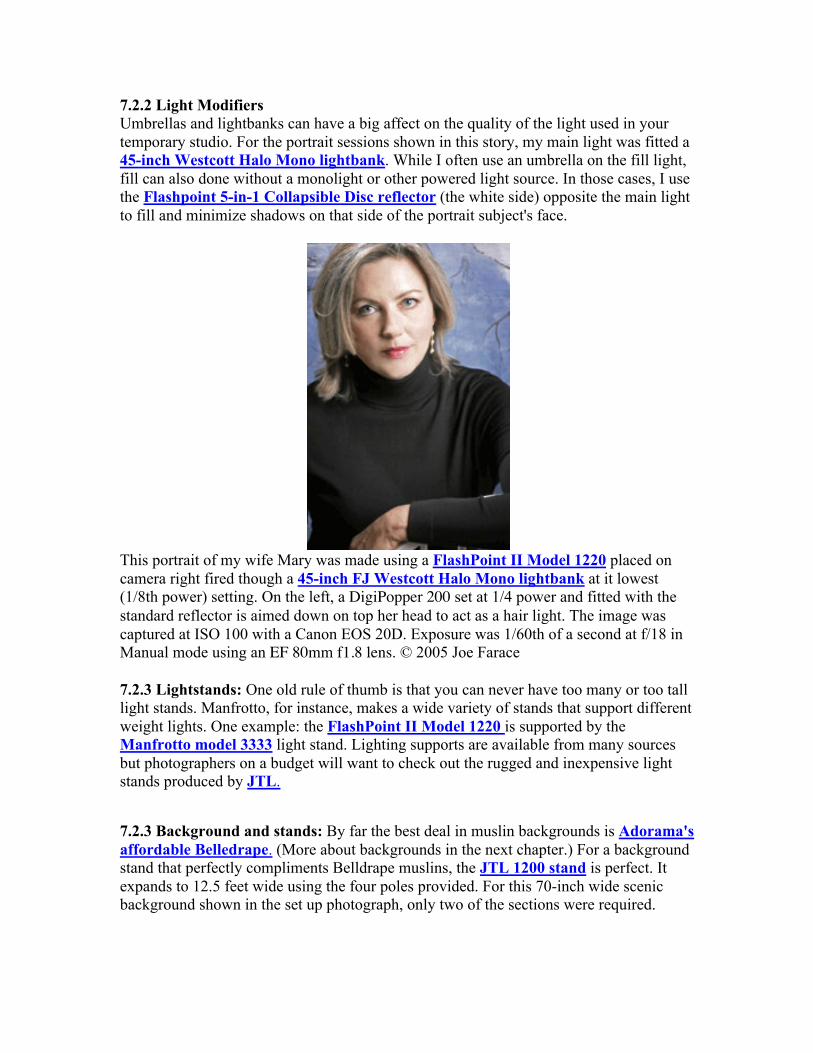
7.2.2 Light Modifiers Umbrellas and lightbanks can have a big affect on the quality of the light used in your temporary studio. For the portrait sessions shown in this story, my main light was fitted a 45-inch Westcott Halo Mono lightbank. While I often use an umbrella on the fill light, fill can also done without a monolight or other powered light source. In those cases, I use the Flashpoint 5-in-1 Collapsible Disc reflector (the white side) opposite the main light to fill and minimize shadows on that side of the portrait subject's face.
This portrait of my wife Mary was made using a FlashPoint II Model 1220 placed on camera right fired though a 45-inch FJ Westcott Halo Mono lightbank at it lowest (1/8th power) setting. On the left, a DigiPopper 200 set at 1/4 power and fitted with the standard reflector is aimed down on top her head to act as a hair light. The image was captured at ISO 100 with a Canon EOS 20D. Exposure was 1/60th of a second at f/18 in Manual mode using an EF 80mm f1.8 lens. © 2005 Joe Farace 7.2.3 Lightstands: One old rule of thumb is that you can never have too many or too tall light stands. Manfrotto, for instance, makes a wide variety of stands that support different weight lights. One example: the FlashPoint II Model 1220 is supported by the Manfrotto model 3333 light stand. Lighting supports are available from many sources but photographers on a budget will want to check out the rugged and inexpensive light stands produced by JTL.
7.2.3 Background and stands: By far the best deal in muslin backgrounds is Adorama's affordable Belledrape. (More about backgrounds in the next chapter.) For a background stand that perfectly compliments Belldrape muslins, the JTL 1200 stand is perfect. It expands to 12.5 feet wide using the four poles provided. For this 70-inch wide scenic background shown in the set up photograph, only two of the sections were required.
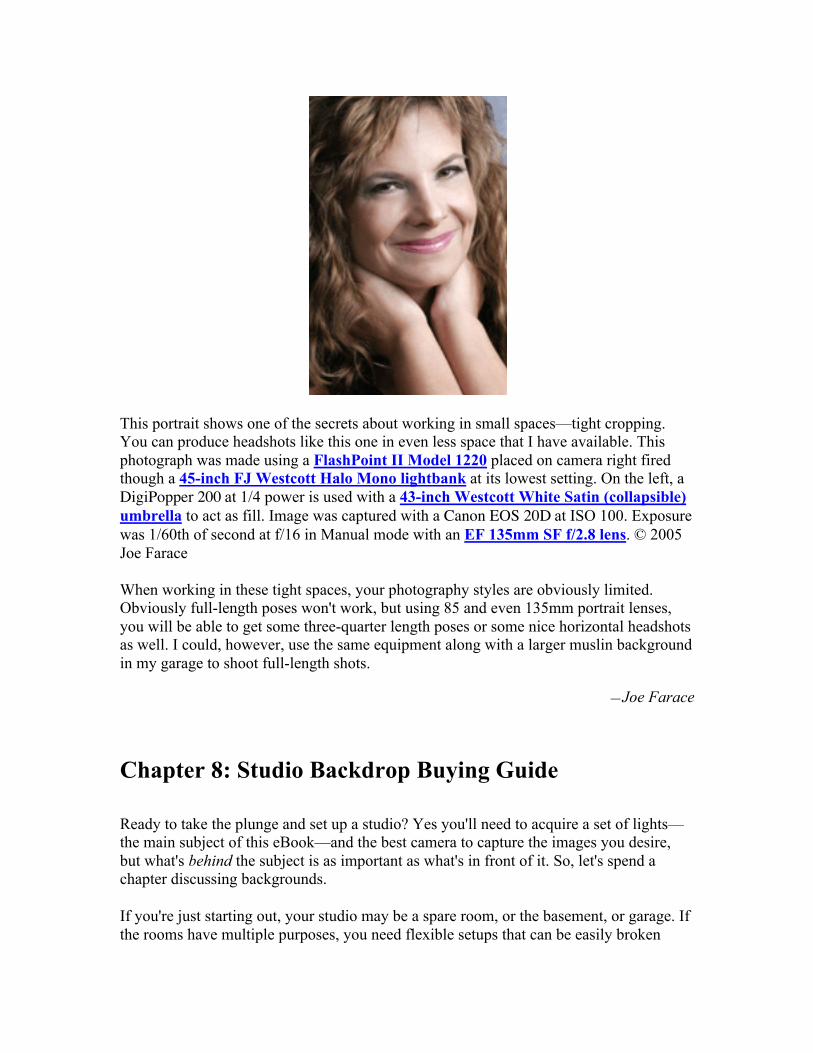
This portrait shows one of the secrets about working in small spaces—tight cropping. You can produce headshots like this one in even less space that I have available. This photograph was made using a FlashPoint II Model 1220 placed on camera right fired though a 45-inch FJ Westcott Halo Mono lightbank at its lowest setting. On the left, a DigiPopper 200 at 1/4 power is used with a 43-inch Westcott White Satin (collapsible) umbrella to act as fill. Image was captured with a Canon EOS 20D at ISO 100. Exposure was 1/60th of second at f/16 in Manual mode with an EF 135mm SF f/2.8 lens. © 2005 Joe Farace When working in these tight spaces, your photography styles are obviously limited. Obviously full-length poses won't work, but using 85 and even 135mm portrait lenses, you will be able to get some three-quarter length poses or some nice horizontal headshots as well. I could, however, use the same equipment along with a larger muslin background in my garage to shoot full-length shots.
—Joe Farace
Chapter 8: Studio Backdrop Buying Guide
Ready to take the plunge and set up a studio? Yes you'll need to acquire a set of lights—the main subject of this eBook—and the best camera to capture the images you desire, but what's behind the subject is as important as what's in front of it. So, let's spend a chapter discussing backgrounds. If you're just starting out, your studio may be a spare room, or the basement, or garage. If the rooms have multiple purposes, you need flexible setups that can be easily broken
down and stored. This limits your choices, but not by much. If you have dedicated space, anything goes, limited only by your budget and commitment. So, what kind of backdrops are out there, and which are best for you?
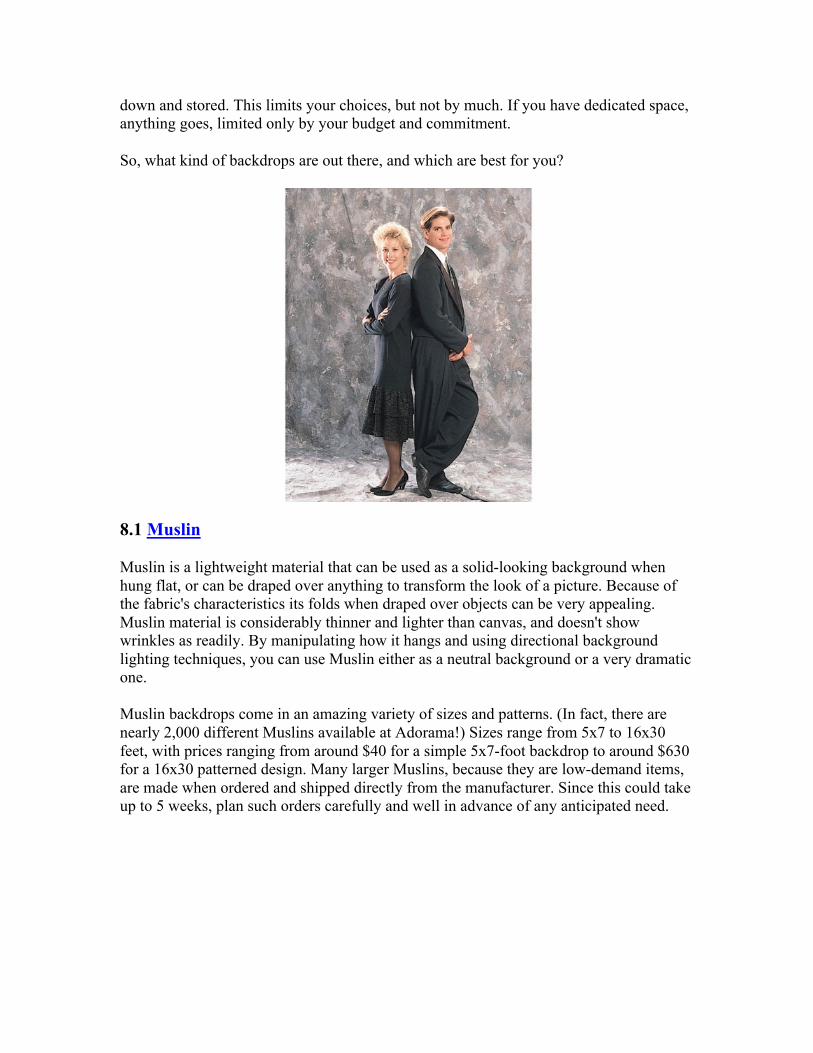
8.1 Muslin Muslin is a lightweight material that can be used as a solid-looking background when hung flat, or can be draped over anything to transform the look of a picture. Because of the fabric's characteristics its folds when draped over objects can be very appealing. Muslin material is considerably thinner and lighter than canvas, and doesn't show wrinkles as readily. By manipulating how it hangs and using directional background lighting techniques, you can use Muslin either as a neutral background or a very dramatic one. Muslin backdrops come in an amazing variety of sizes and patterns. (In fact, there are nearly 2,000 different Muslins available at Adorama!) Sizes range from 5x7 to 16x30 feet, with prices ranging from around $40 for a simple 5x7-foot backdrop to around $630 for a 16x30 patterned design. Many larger Muslins, because they are low-demand items, are made when ordered and shipped directly from the manufacturer. Since this could take up to 5 weeks, plan such orders carefully and well in advance of any anticipated need.
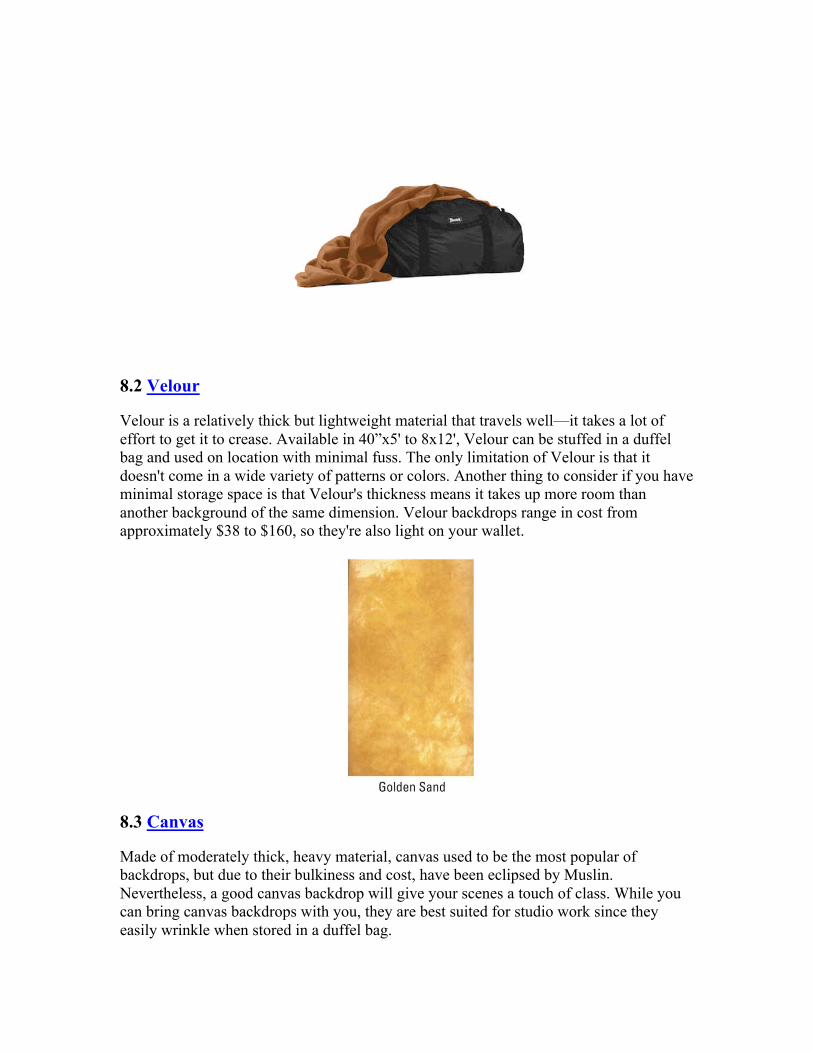
8.2 Velour Velour is a relatively thick but lightweight material that travels well—it takes a lot of effort to get it to crease. Available in 40”x5' to 8x12', Velour can be stuffed in a duffel bag and used on location with minimal fuss. The only limitation of Velour is that it doesn't come in a wide variety of patterns or colors. Another thing to consider if you have minimal storage space is that Velour's thickness means it takes up more room than another background of the same dimension. Velour backdrops range in cost from approximately $38 to $160, so they're also light on your wallet.
8.3 Canvas Made of moderately thick, heavy material, canvas used to be the most popular of backdrops, but due to their bulkiness and cost, have been eclipsed by Muslin. Nevertheless, a good canvas backdrop will give your scenes a touch of class. While you can bring canvas backdrops with you, they are best suited for studio work since they easily wrinkle when stored in a duffel bag.
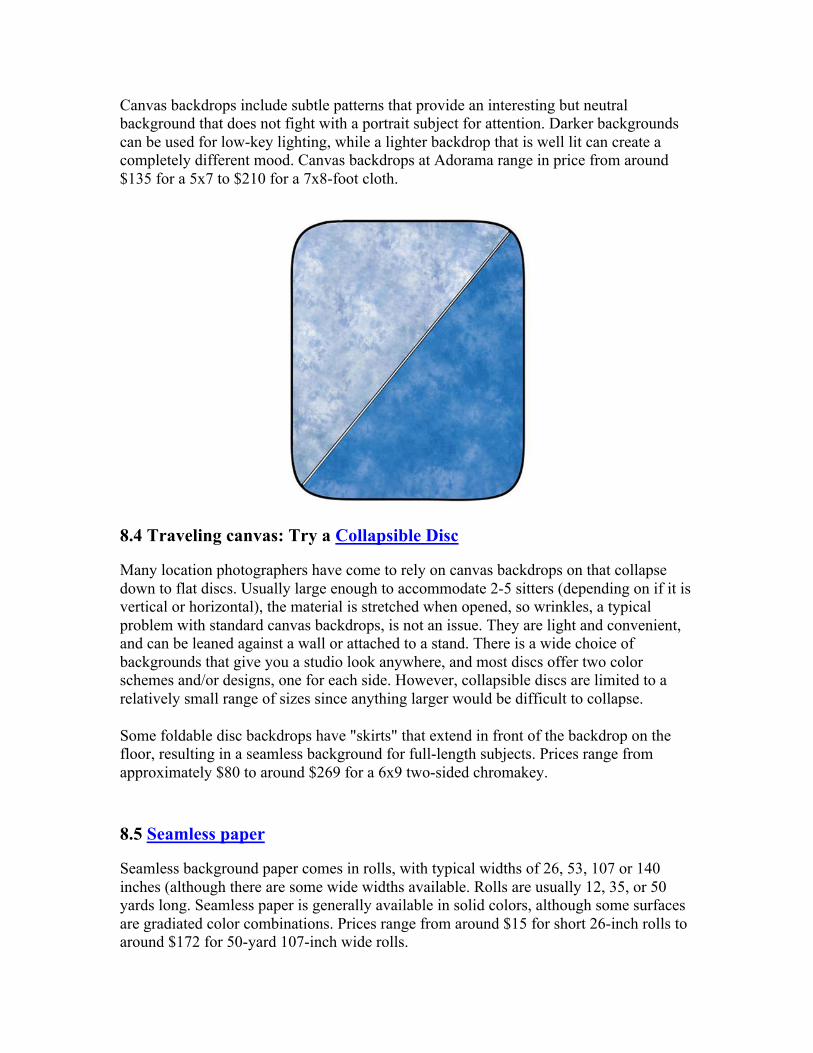
Canvas backdrops include subtle patterns that provide an interesting but neutral background that does not fight with a portrait subject for attention. Darker backgrounds can be used for low-key lighting, while a lighter backdrop that is well lit can create a completely different mood. Canvas backdrops at Adorama range in price from around $135 for a 5x7 to $210 for a 7x8-foot cloth.
8.4 Traveling canvas: Try a Collapsible Disc Many location photographers have come to rely on canvas backdrops on that collapse down to flat discs. Usually large enough to accommodate 2-5 sitters (depending on if it is vertical or horizontal), the material is stretched when opened, so wrinkles, a typical problem with standard canvas backdrops, is not an issue. They are light and convenient, and can be leaned against a wall or attached to a stand. There is a wide choice of backgrounds that give you a studio look anywhere, and most discs offer two color schemes and/or designs, one for each side. However, collapsible discs are limited to a relatively small range of sizes since anything larger would be difficult to collapse. Some foldable disc backdrops have "skirts" that extend in front of the backdrop on the floor, resulting in a seamless background for full-length subjects. Prices range from approximately $80 to around $269 for a 6x9 two-sided chromakey. 8.5 Seamless paper Seamless background paper comes in rolls, with typical widths of 26, 53, 107 or 140 inches (although there are some wide widths available. Rolls are usually 12, 35, or 50 yards long. Seamless paper is generally available in solid colors, although some surfaces are gradiated color combinations. Prices range from around $15 for short 26-inch rolls to around $172 for 50-yard 107-inch wide rolls.
The most popular color for seamless paper is white—no surprise—and the most popular width is 107 inches (a 12-yard roll of 107-inch-wide paper can range from approx $25 to 40). of This paper can be used for portraits, as well as product/still life photography. Most studio photographers keep several different rolls of seamless white paper available because it is so flexible and inexpensive. Prices range from under $10 for 26-inch wide paper to around $185 for 140-inch wide rolls. If you are just starting out in studio photography, get a roll or two of seamless paper, and stick with white and/or grey. You can build your collection from there as assignments warrant specific colors. For more on seamless backgrounds, go to the next chapter.
8.6 Backdrop supports Just as with lighting systems and cameras, backdrops require some kind of support. These can be basic affairs that are easy to set up and break down and are well suited for location work, or sophisticated, permanent studio systems that can hold multiple backgrounds that can be raised or lowered either manually or at the flip of a switch. Some photographers get the lightweight systems so they can bring them on location, but also use them in their studios with sand bags at the base to keep them stable. A sophisticated studio support system can cost well over $1,000, but a portable system shouldn't set you back more than $100-200.
—Mason Resnick
Chapter 9: What Color Is Your Seamless Background? While white seamless paper backgrounds are reasonably priced and very popular studio backdrops, there's a rainbow of other possibilities that can jazz up your photos and help to emphasize a feeling or concept, and they won't cost you a fortune. They are most commonly available in 53-inch lengths that cost around $20-30 for a 12-foot roll, but you can get them in 107-inch lengths for bigger setups as well as some other sizes. A background color not only can play off what someone's wearing, their eyes, fingernails, or hair color, but it can also imply different ranges of emotions and energies. Let's look at some commonly-available seamless colors, and how they can affect images: (Note to anyone reading this eBook on a monochrome e-reader: I highly recommend visiting going online and visiting Adorama.com/learn and looking up this article to see the accompanying images in color. This will help you get the concepts better.)
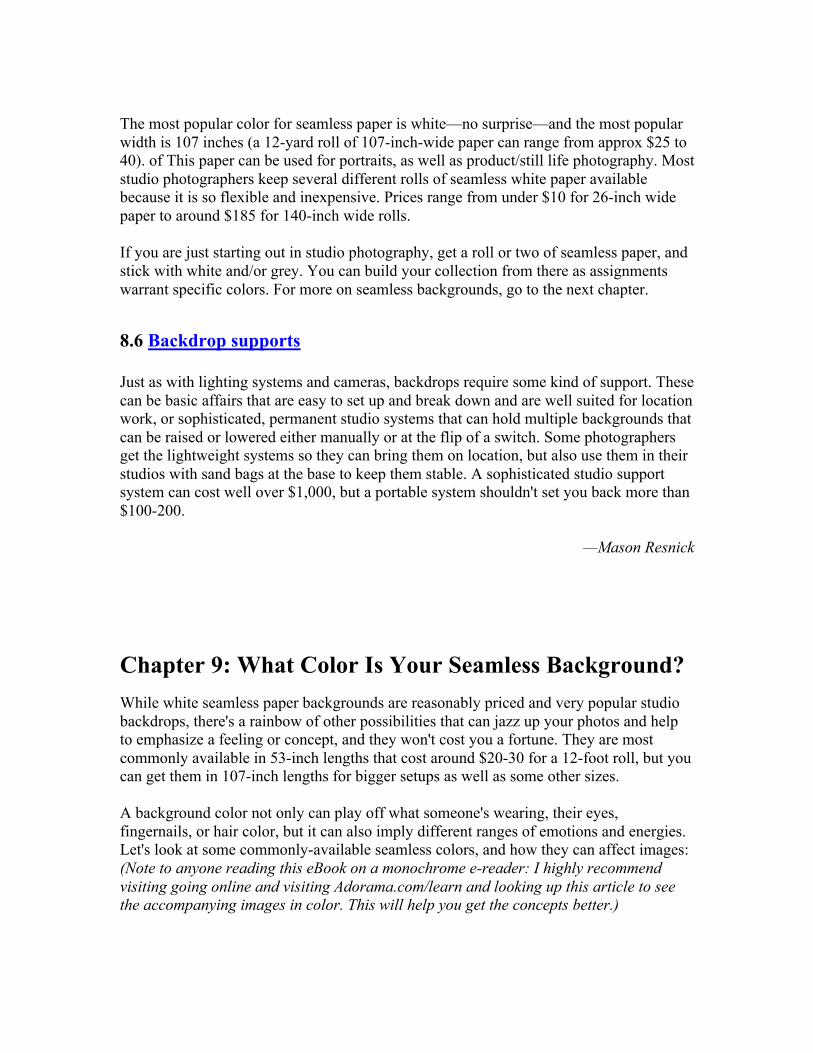
8.1 White The most popular seamless paper is white. Why? Well, white never goes out of style. It’sopen, uplifting, clean, and airy, gives a sense of purity, and serves to isolate people, pets, or objects and draw attention to them. The white material also bounces the light and brightens everything. White is also flexible: you can place color gels over light sources shining on the paper to effectively change the background color. Another advantage of using white? It goes with any other color. Photo: © NiDerLander/istockphoto
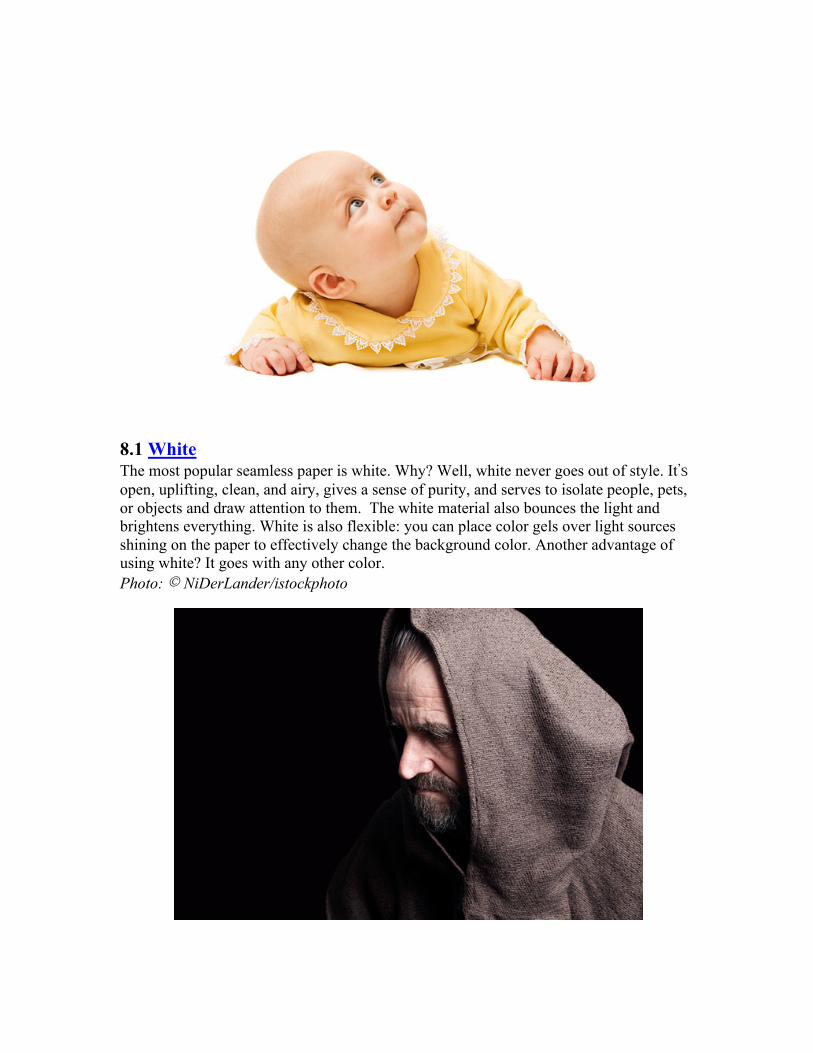
8.2 Black Black implies mystery, danger, foreboding, power, and elegance. It's also stylish: How many times have you heard (fill in the blank) is the New Black? Low-key portraits tend to have a greater mystique about them because you can lose detail in the shadows. At the same time, black backgrounds can help brighter colors, such as red and orange, stand out more. As with white, Black can go with any other color. Photo © dra_schwartz/istockphoto
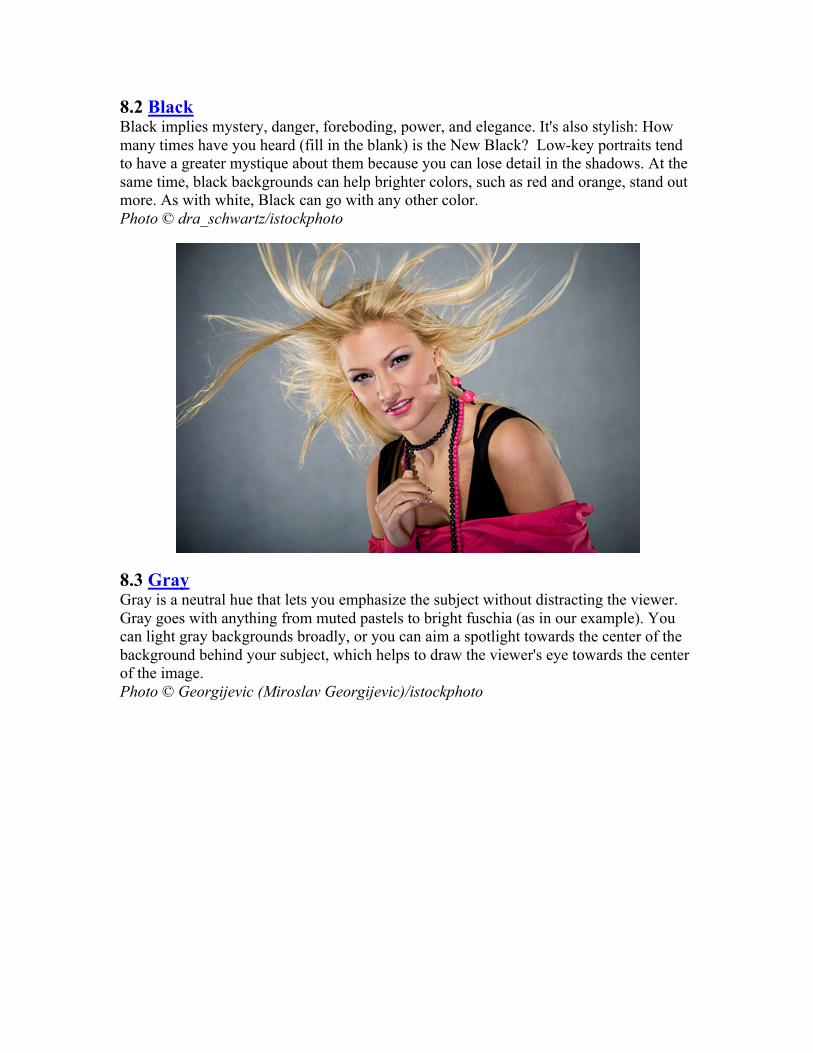
8.3 Gray Gray is a neutral hue that lets you emphasize the subject without distracting the viewer. Gray goes with anything from muted pastels to bright fuschia (as in our example). You can light gray backgrounds broadly, or you can aim a spotlight towards the center of the background behind your subject, which helps to draw the viewer's eye towards the center of the image. Photo © Georgijevic (Miroslav Georgijevic)/istockphoto
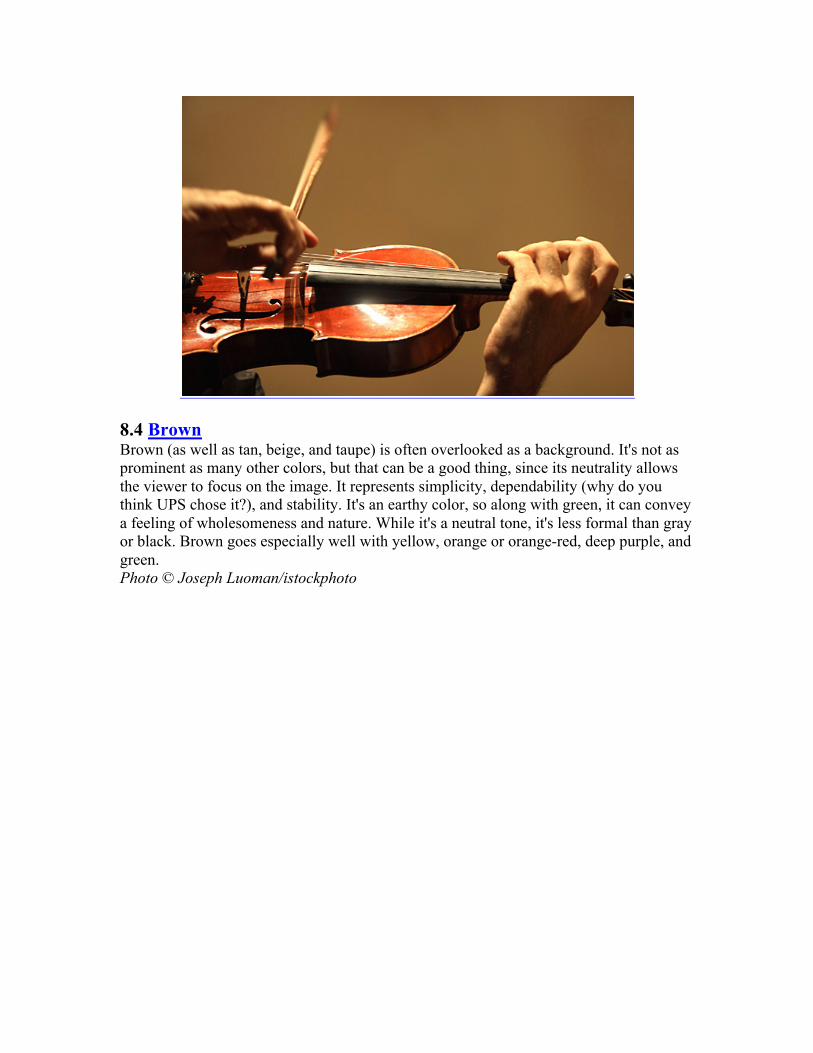
8.4 Brown Brown (as well as tan, beige, and taupe) is often overlooked as a background. It's not as prominent as many other colors, but that can be a good thing, since its neutrality allows the viewer to focus on the image. It represents simplicity, dependability (why do you think UPS chose it?), and stability. It's an earthy color, so along with green, it can convey a feeling of wholesomeness and nature. While it's a neutral tone, it's less formal than gray or black. Brown goes especially well with yellow, orange or orange-red, deep purple, and green. Photo © Joseph Luoman/istockphoto
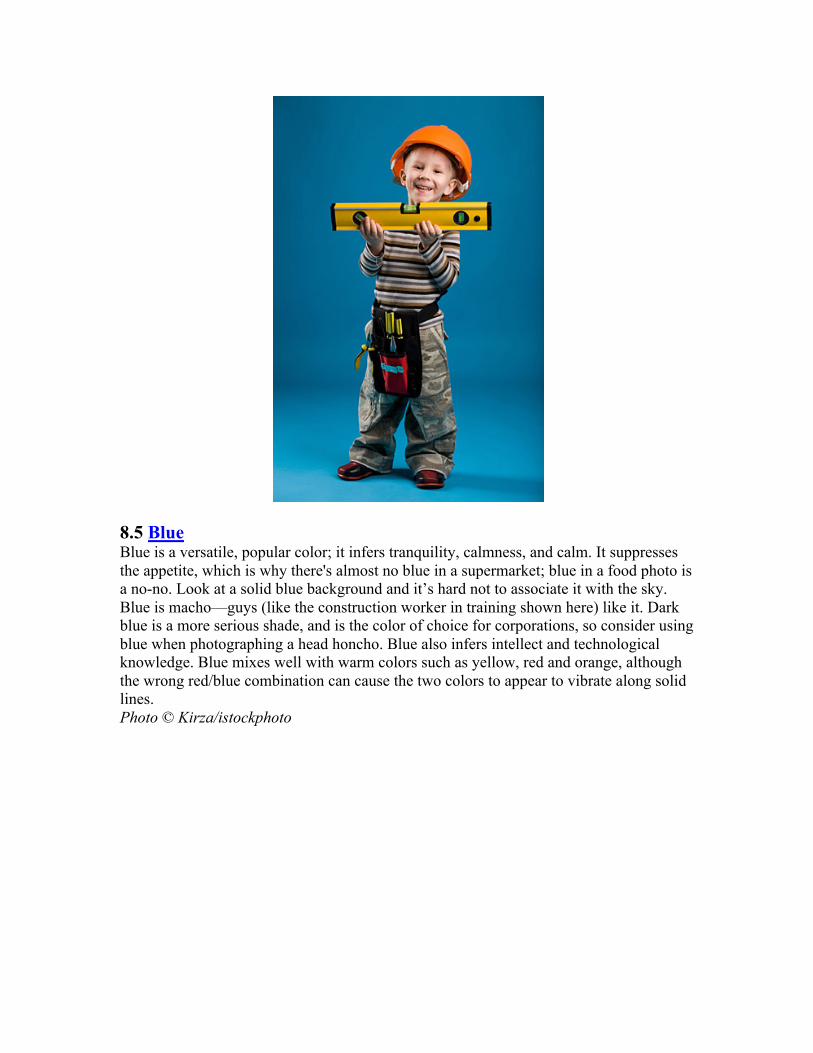
8.5 Blue Blue is a versatile, popular color; it infers tranquility, calmness, and calm. It suppresses the appetite, which is why there's almost no blue in a supermarket; blue in a food photo is a no-no. Look at a solid blue background and it’s hard not to associate it with the sky. Blue is macho—guys (like the construction worker in training shown here) like it. Dark blue is a more serious shade, and is the color of choice for corporations, so consider using blue when photographing a head honcho. Blue also infers intellect and technological knowledge. Blue mixes well with warm colors such as yellow, red and orange, although the wrong red/blue combination can cause the two colors to appear to vibrate along solid lines. Photo © Kirza/istockphoto
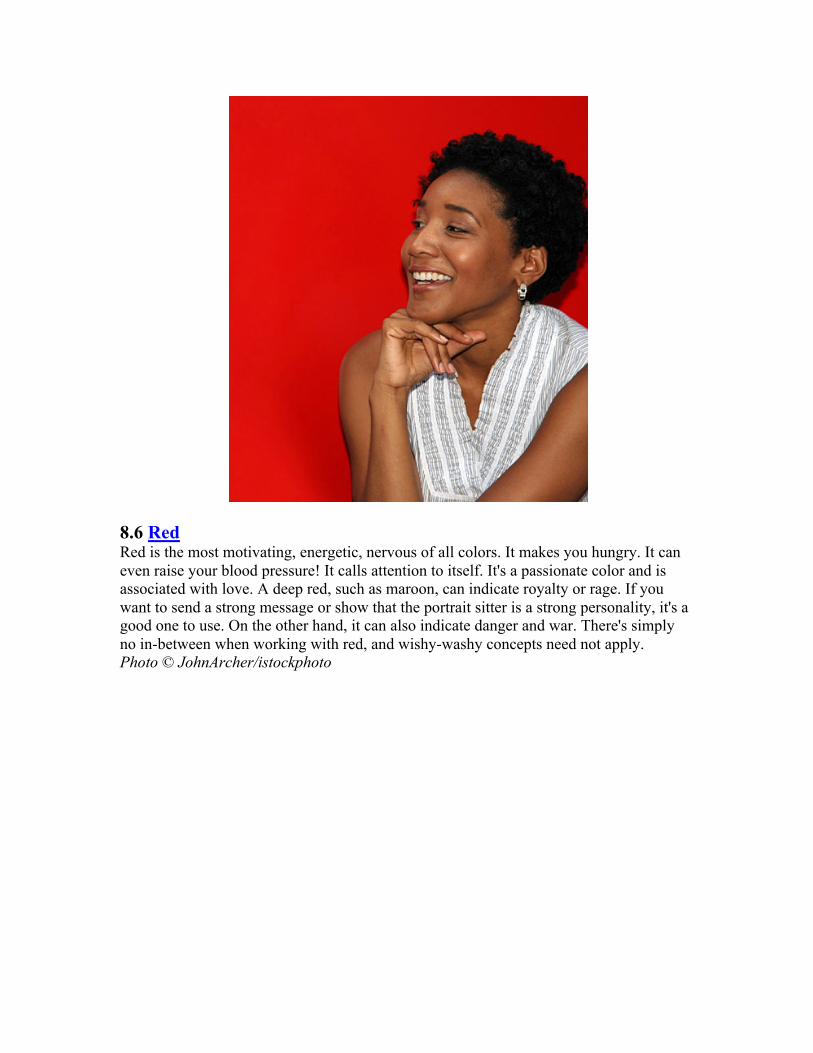
8.6 Red Red is the most motivating, energetic, nervous of all colors. It makes you hungry. It can even raise your blood pressure! It calls attention to itself. It's a passionate color and is associated with love. A deep red, such as maroon, can indicate royalty or rage. If you want to send a strong message or show that the portrait sitter is a strong personality, it's a good one to use. On the other hand, it can also indicate danger and war. There's simply no in-between when working with red, and wishy-washy concepts need not apply. Photo © JohnArcher/istockphoto
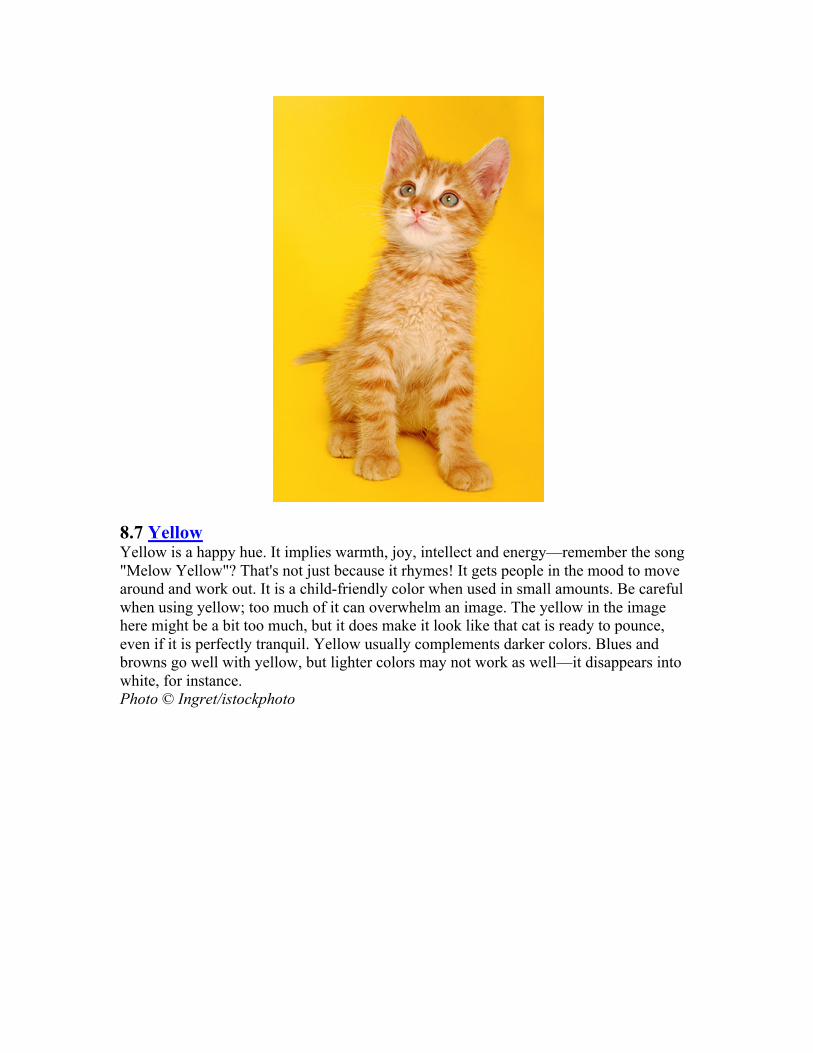
8.7 Yellow Yellow is a happy hue. It implies warmth, joy, intellect and energy—remember the song "Melow Yellow"? That's not just because it rhymes! It gets people in the mood to move around and work out. It is a child-friendly color when used in small amounts. Be careful when using yellow; too much of it can overwhelm an image. The yellow in the image here might be a bit too much, but it does make it look like that cat is ready to pounce, even if it is perfectly tranquil. Yellow usually complements darker colors. Blues and browns go well with yellow, but lighter colors may not work as well—it disappears into white, for instance. Photo © Ingret/istockphoto
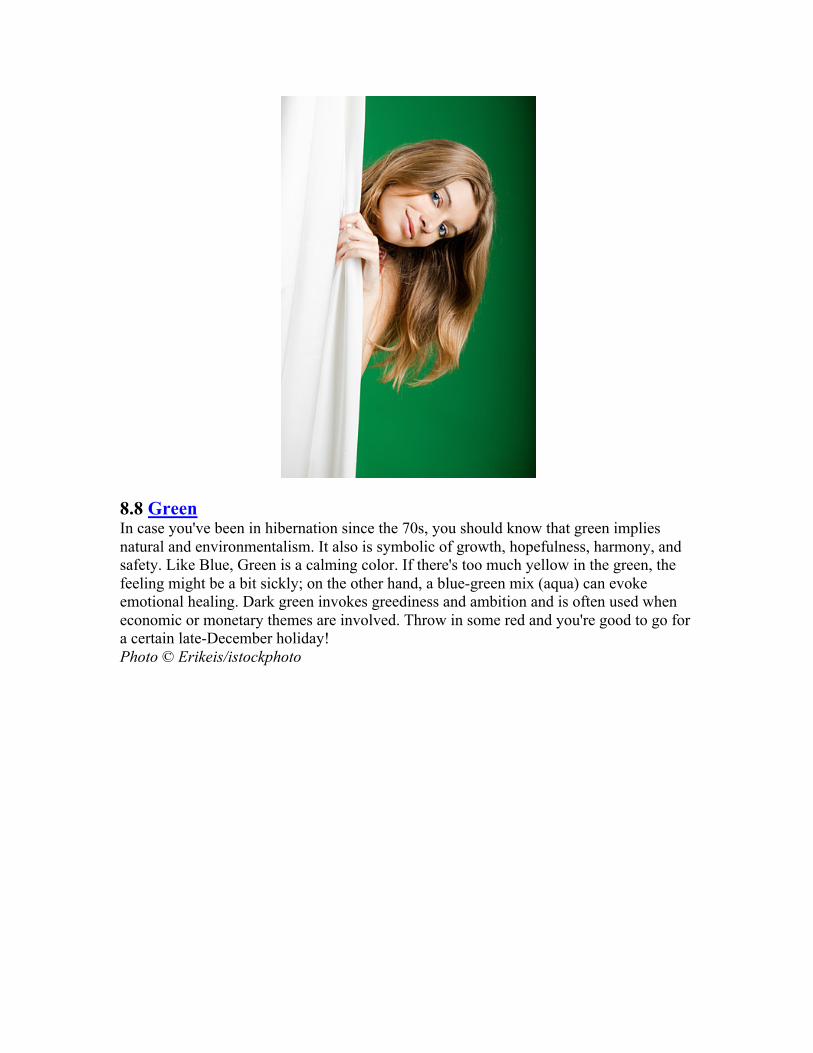
8.8 Green In case you've been in hibernation since the 70s, you should know that green implies natural and environmentalism. It also is symbolic of growth, hopefulness, harmony, and safety. Like Blue, Green is a calming color. If there's too much yellow in the green, the feeling might be a bit sickly; on the other hand, a blue-green mix (aqua) can evoke emotional healing. Dark green invokes greediness and ambition and is often used when economic or monetary themes are involved. Throw in some red and you're good to go for a certain late-December holiday! Photo © Erikeis/istockphoto
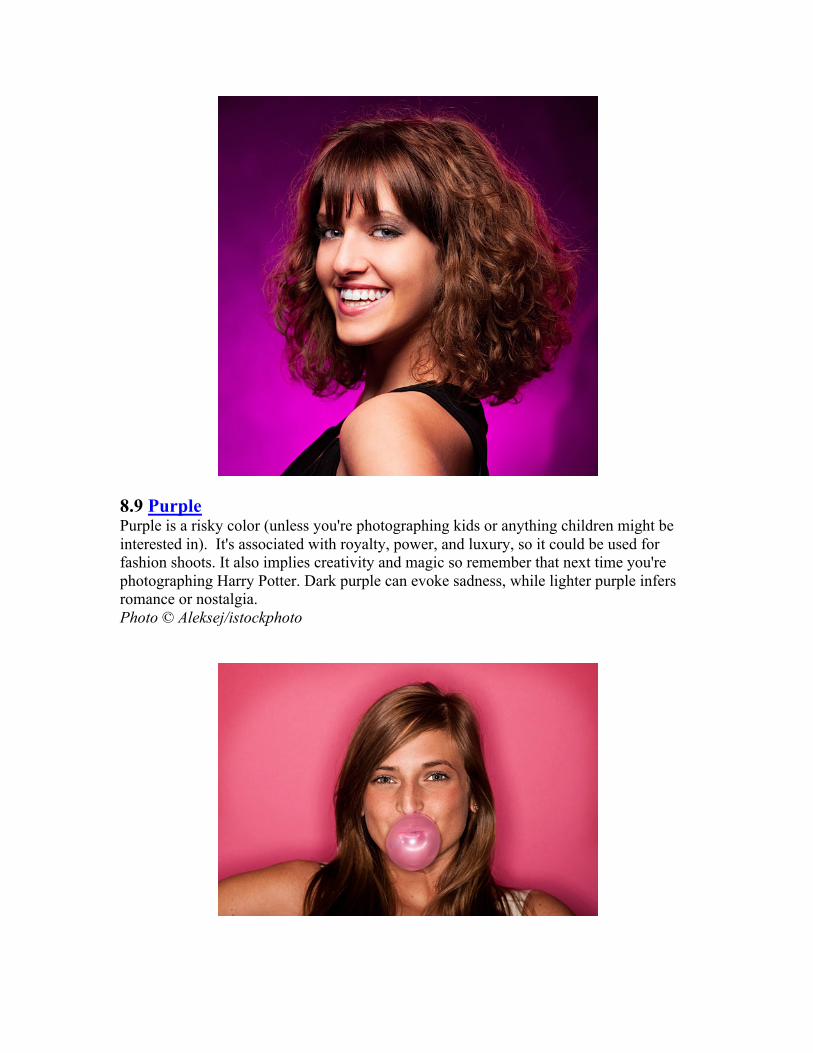
8.9 Purple Purple is a risky color (unless you're photographing kids or anything children might be interested in). It's associated with royalty, power, and luxury, so it could be used for fashion shoots. It also implies creativity and magic so remember that next time you're photographing Harry Potter. Dark purple can evoke sadness, while lighter purple infers romance or nostalgia. Photo © Aleksej/istockphoto
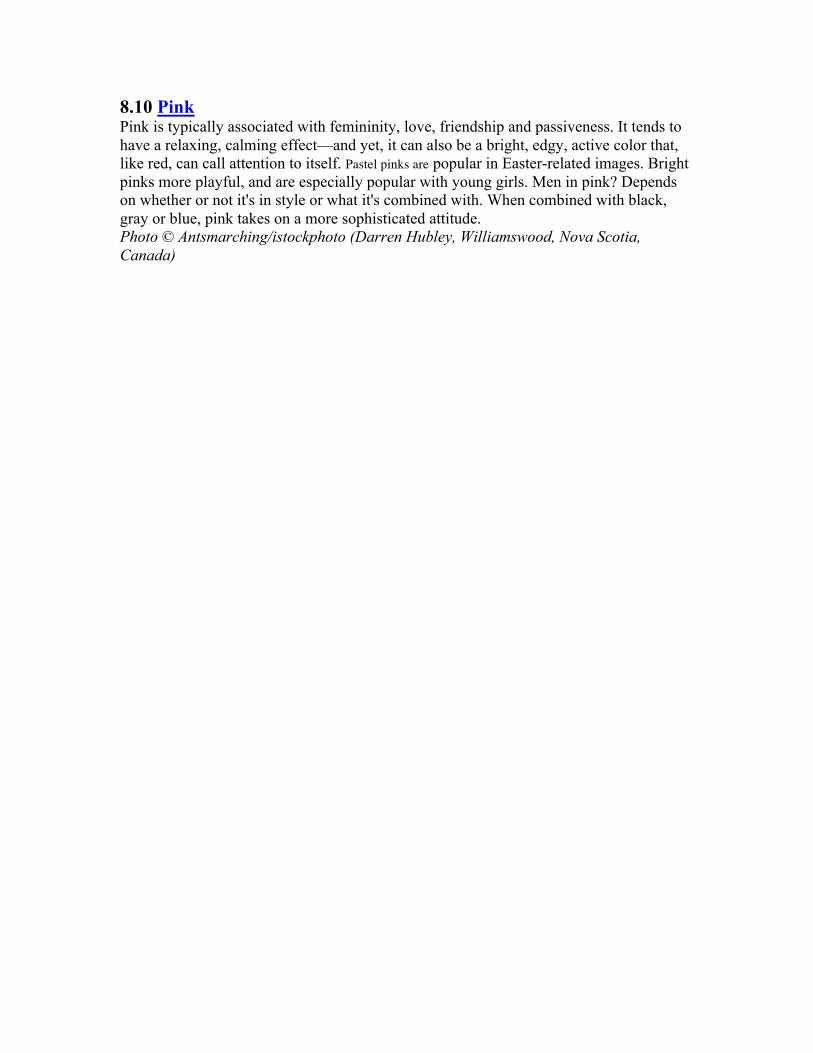
8.10 Pink Pink is typically associated with femininity, love, friendship and passiveness. It tends to have a relaxing, calming effect—and yet, it can also be a bright, edgy, active color that, like red, can call attention to itself. Pastel pinks are popular in Easter-related images. Bright pinks more playful, and are especially popular with young girls. Men in pink? Depends on whether or not it's in style or what it's combined with. When combined with black, gray or blue, pink takes on a more sophisticated attitude. Photo © Antsmarching/istockphoto (Darren Hubley, Williamswood, Nova Scotia, Canada)