July 30 & 31, 2009 OUSD TECHCAMP 2009 1
How to create a wikiHow to create a wiki
using using PBWorksPBWorks

July 30 & 31, 2009 OUSD TECHCAMP 2009 2
Choose a wiki host websiteChoose a wiki host website
•• http://pbworks.com/http://pbworks.com/
•• http://http://www.wetpaint.comwww.wetpaint.com//
•• http://www.wikispaces.com/http://www.wikispaces.com/
I have chosen I have chosen pbpbworksworks for these instructions. for these instructions.

July 30 & 31, 2009 OUSD TECHCAMP 2009 3
Create your own educationalCreate your own educationalworkspaceworkspace

July 30 & 31, 2009 OUSD TECHCAMP 2009 4
Using pbworks sign up to create an account, log in ifyou have an account, or create a wiki. Consider whowill be administering these wikis.
Click herefor the free
account.

July 30 & 31, 2009 OUSD TECHCAMP 2009 5
In your account the wikis you have created will be listed.In your account the wikis you have created will be listed.

July 30 & 31, 2009 OUSD TECHCAMP 2009 6
Carefully think about the name of your wiki. I use Carefully think about the name of your wiki. I use ““jensengrade2jensengrade2”” as a preface to as a preface toprovide an identity and an umbrella of association.provide an identity and an umbrella of association.
i.e. i.e. http://jensengrade2.pbworks.comhttp://jensengrade2.pbworks.comSelect Select ““educationeducation”” from the menu if appropriate. from the menu if appropriate.

July 30 & 31, 2009 OUSD TECHCAMP 2009 7
Now you can set your wiki for public or private viewing, determine who can editNow you can set your wiki for public or private viewing, determine who can editand check the Terms of Service. Then click and check the Terms of Service. Then click ““Take me to my workspace.Take me to my workspace.””

July 30 & 31, 2009 OUSD TECHCAMP 2009 8
Now you can begin to create your wiki space to your requirements.Now you can begin to create your wiki space to your requirements.

July 30 & 31, 2009 OUSD TECHCAMP 2009 9
Go into Go into ““settingssettings”” to rename your wiki and to choose a to rename your wiki and to choose a ““skinskin””. At present there. At present thereare only 10 are only 10 ““skinsskins””. Save your changes then go back to Home.. Save your changes then go back to Home.
July 30 & 31, 2009 OUSD TECHCAMP 2009 10
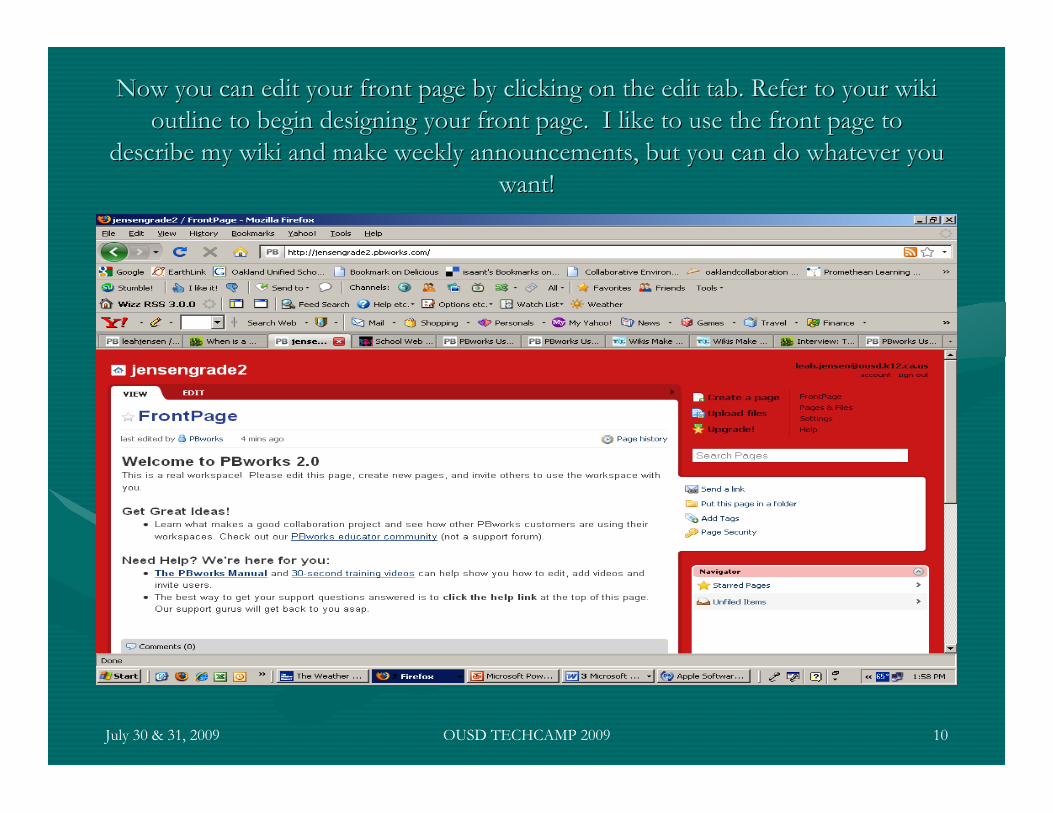
Now you can edit your front page by clicking on the edit tab. Refer to your wikiNow you can edit your front page by clicking on the edit tab. Refer to your wikioutline to begin designing your front page. I like to use the front page tooutline to begin designing your front page. I like to use the front page to
describe my wiki and make weekly announcements, but you can do whatever youdescribe my wiki and make weekly announcements, but you can do whatever youwant!want!

July 30 & 31, 2009 OUSD TECHCAMP 2009 11
Start by deleting all of the default text in the box, then add theStart by deleting all of the default text in the box, then add theinformation you require.information you require.
July 30 & 31, 2009 OUSD TECHCAMP 2009 12
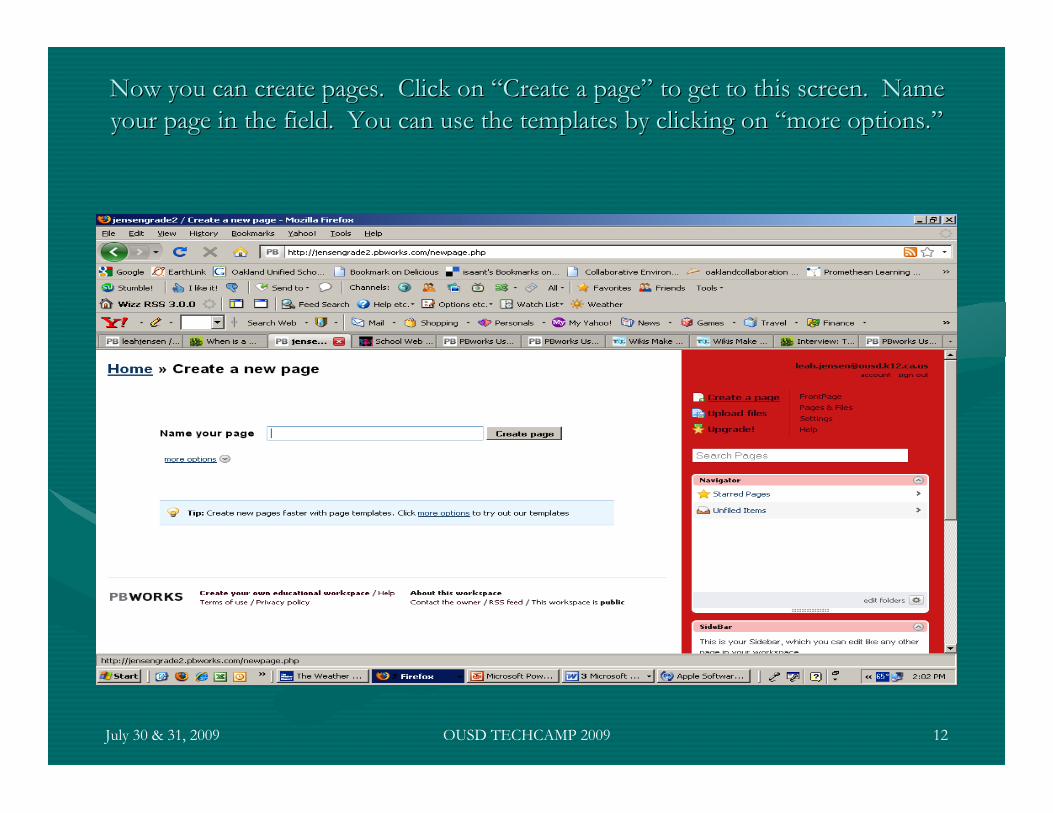
Now you can create pages. Click on Now you can create pages. Click on ““Create a pageCreate a page”” to get to this screen. Name to get to this screen. Nameyour page in the field. You can use the templates by clicking on your page in the field. You can use the templates by clicking on ““more options.more options.””

July 30 & 31, 2009 OUSD TECHCAMP 2009 13
Select a template from the drop down items, then click create.Select a template from the drop down items, then click create.

July 30 & 31, 2009 OUSD TECHCAMP 2009 14
You can choose the default of You can choose the default of ““No templateNo template”” or select one that is or select one that isoffered. Then click on offered. Then click on ““Create new pageCreate new page””. The new page will open. The new page will open
ready for you to add content or you can choose to do this later.ready for you to add content or you can choose to do this later.

July 30 & 31, 2009 OUSD TECHCAMP 2009 15
Once you have created all of the new pages you require, you willOnce you have created all of the new pages you require, you willneed to provide links to them via the need to provide links to them via the SideBarSideBar. So open the . So open the SideBarSideBar
for editing.for editing.

July 30 & 31, 2009 OUSD TECHCAMP 2009 16
Highlight and delete the default text in the sidebar. Your cursor will determineHighlight and delete the default text in the sidebar. Your cursor will determinewhere the text will come in. Select a page from the where the text will come in. Select a page from the ““PagesPages”” tab and it will appear tab and it will appear
in the text box.in the text box.

July 30 & 31, 2009 OUSD TECHCAMP 2009 17
Now you can add content to your pages. For example, on the Free OnlineNow you can add content to your pages. For example, on the Free OnlineResources page you might like to add websites that are relevant to this wiki.Resources page you might like to add websites that are relevant to this wiki.
Choose the Choose the ““Link TypeLink Type”” as URL then copy and paste the URL of the website into as URL then copy and paste the URL of the website intothe box. If you would like the link to open in a new window, check the box. Thenthe box. If you would like the link to open in a new window, check the box. Then
click OK. I highly recommend this option.click OK. I highly recommend this option.

July 30 & 31, 2009 OUSD TECHCAMP 2009 18
The The ““Free Online ResourcesFree Online Resources”” page created will now look like this. The live links page created will now look like this. The live linksare highlighted in blue.are highlighted in blue.

July 30 & 31, 2009 OUSD TECHCAMP 2009 19
To add a video that will play automatically,To add a video that will play automatically,click on Edit, then click on Edit, then ““Insert Insert PluginPlugin””, click on , click on ““Video & PhotoVideo & Photo””, then , then ““Upload aUpload a
video.video.””

July 30 & 31, 2009 OUSD TECHCAMP 2009 20
Step 17:Step 17: Locate the video you want to include from your computer, check theLocate the video you want to include from your computer, check the““Terms of UseTerms of Use”” box then click Submit. box then click Submit.

July 30 & 31, 2009 OUSD TECHCAMP 2009 21
Save the page. The video will display like this. You can do this with other videoSave the page. The video will display like this. You can do this with other videoformats also, such as choosing from Teacher Tube. (OUSDNET blocksformats also, such as choosing from Teacher Tube. (OUSDNET blocks
YouTube.)YouTube.)

July 30 & 31, 2009 OUSD TECHCAMP 2009 22
Want to add Google gadgets?Want to add Google gadgets?Open the page where you want to display the gadgets, then click theOpen the page where you want to display the gadgets, then click the
Edit tab, then Edit tab, then ““Insert Insert PluginPlugin””. This time choose the . This time choose the ““HTML &HTML &GadgetsGadgets”” option and option and ““Google GadgetGoogle Gadget””..

July 30 & 31, 2009 OUSD TECHCAMP 2009 23
To find a gadget you want, type a word into the search box and search. A fewTo find a gadget you want, type a word into the search box and search. A fewoptions will appear and you can decide which one is best for you. Click on theoptions will appear and you can decide which one is best for you. Click on the
Link to that gadget. (OUSDNET blocks some gadgets.)Link to that gadget. (OUSDNET blocks some gadgets.)

July 30 & 31, 2009 OUSD TECHCAMP 2009 24
Scroll down on the page and click on Scroll down on the page and click on ““Embed this gadgetEmbed this gadget””..

July 30 & 31, 2009 OUSD TECHCAMP 2009 25
Then click Then click ““get the codeget the code”” and this will be displayed in a box beneath. and this will be displayed in a box beneath.

July 30 & 31, 2009 OUSD TECHCAMP 2009 26
Copy and paste this text into the wiki gadget Copy and paste this text into the wiki gadget PluginPlugin box, then click Preview and box, then click Preview andOK.OK.

July 30 & 31, 2009 OUSD TECHCAMP 2009 27
In your wiki, the gadget will be displayed like this and will beIn your wiki, the gadget will be displayed like this and will berefreshed each time the page is visited.refreshed each time the page is visited.

July 30 & 31, 2009 OUSD TECHCAMP 2009 28
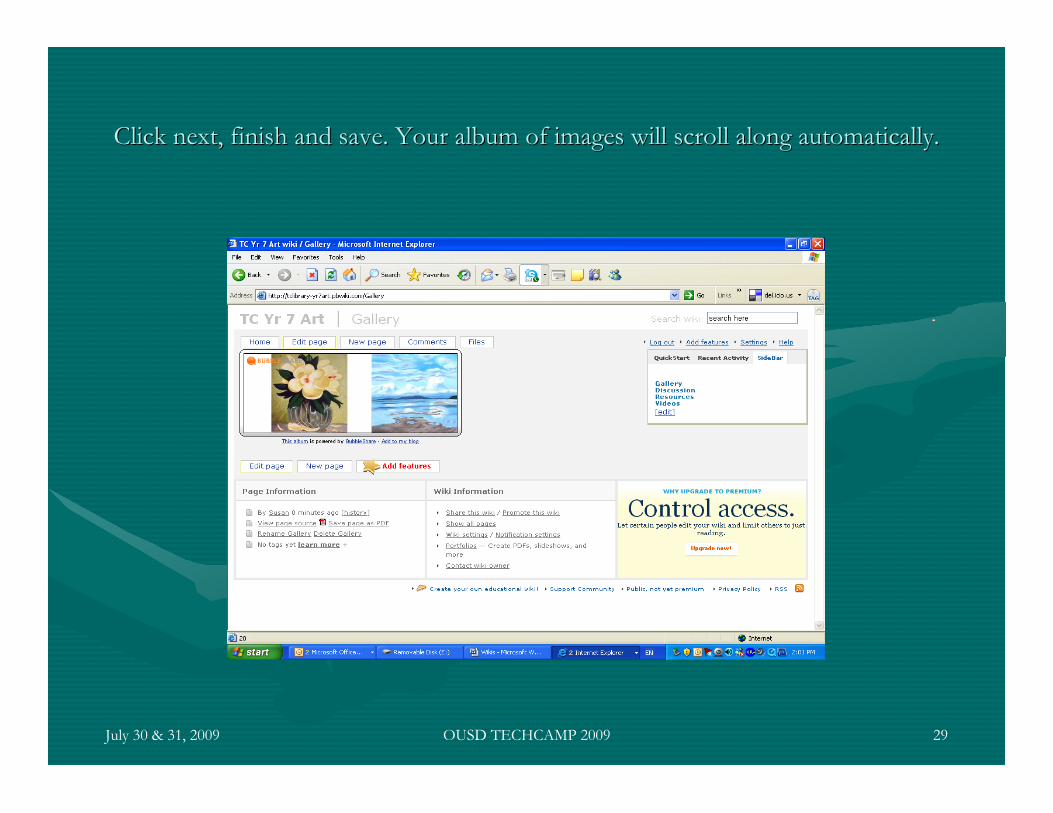
You can add a gallery of images that will be presented as a moving slideshow. ToYou can add a gallery of images that will be presented as a moving slideshow. Todo this you will need to make an account with either do this you will need to make an account with either BubbleShareBubbleShare or or Slide.comSlide.com,,
and then upload the photos you wish to display.and then upload the photos you wish to display.
July 30 & 31, 2009 OUSD TECHCAMP 2009 29
Click next, finish and save. Your album of images will scroll along automatically.Click next, finish and save. Your album of images will scroll along automatically.

July 30 & 31, 2009 OUSD TECHCAMP 2009 30
Sharing your wiki. Click on Sharing your wiki. Click on ““User SettingsUser Settings””..

July 30 & 31, 2009 OUSD TECHCAMP 2009 31
Type in the email addresses and then determine Permission level. Then clickType in the email addresses and then determine Permission level. Then click““Add userAdd user””..

July 30 & 31, 2009 OUSD TECHCAMP 2009 32
For your students, you can create accounts without email addresses. Follow theFor your students, you can create accounts without email addresses. Follow thesteps from this page.steps from this page.

July 30 & 31, 2009 OUSD TECHCAMP 2009 33
Remember to create an Acceptable User Policy with your students.Remember to create an Acceptable User Policy with your students.
•• http://http://mrsibrahim.wikispaces.com/Wiki+Warramrsibrahim.wikispaces.com/Wiki+Warrantynty

July 30 & 31, 2009 OUSD TECHCAMP 2009 34
Additional SupportAdditional Support
Contact Leah Jensen for more support withContact Leah Jensen for more support withyour wiki.your wiki.
[email protected]@ousd.k12.ca.us
510-551-6023510-551-6023
This presentation was created byThis presentation was created by
Leah Jensen Leah Jensen ©©20092009


