directions for importing video into movie maker on the pcs€¦ · web viewin movie maker, go to...
TRANSCRIPT

Directions for importing video into Movie Maker on the PCs
Getting to Movie Maker Go to the START menu Go to All Programs Click Movie Maker to open it. Click through the license agreement
Importing Movies from any of the Flip Cameras Connect your Flip Camera to the USB port on your machine
In Movie Maker, Go to the File icon
Then down to Import from Device
Click OK at the pop up window that lets you know that your videos will be imported into the My Pictures gallery.
In the window that opens, look for your device. If you are using a Flip Camera, the word Flip Camera will be displayed.
You can select all the videos to import or just some.
To select just some, click review/organize and choose the videos you would like to import
Adding your Videos to Movie Maker Click on the right side of the screen where it says Click Here to Browse for Videos
My Pictures will open
Browse to where your movies are and then click Import
Importing Movies from a camera that shoots video (Sony Camera) Connect the Camera to the USB port on your machine

In Movie Maker, Go to the File icon
Then down to Import from Device
Click OK at the pop up window that lets you know that your videos will be imported into the My Pictures gallery.
In the window that opens, look for your device. If you are using a Camera with video clips on it, open the E or F drive to access the videos.
You can select all the videos to import or just some.
To select just some, click review/organize and choose the videos you would like to import
Note: ***DO NOT ATTACH AN IPAD, IPHONE, or IPOD to the PCs to import video. The device may be erased and synched with a machine that has an empty iTunes Library.
Adding your Videos to Movie Maker Click on the right side of the screen where it says Click here to browse for videos
My Pictures will open
Browse to where your movies are and then click Import

Directions for importing movies into iMovie
We now have different cameras for importing movies and they can work different ways. This will serve as a guide to help you as you navigate through the process of adding movie files in to iMovie. Camcorders record with different file types. It is very important to know what the recording type is so that you will know how the file will be imported into iMovie.
Camcorders that record using .mp4 format.mp4 files are the standard for using on the Macs. If you choose a camera/camcorder that records to this file setting, the movies can be imported directly into iMovie.iPad 2 (.mp4)Flip Camera Mino HD (2nd Generation) (.mp4) (Checkout Flips 15, 16, 17, 19)Flip Camera Ultra (2nd Generation- white) (.mp4) (Checkout Flips W1 and W2)
Directions for importing video from a Flip Mino HD or Flip Ultra (white) camcorderUse the flip up USB arm to connect to the back of the Mac. The Flipvideo icon will show on your desktop. Note: if iPhoto opens, Quit out of it, we will not need it for this process.
a. Click on the finder in the dock
b. Click Applications on the left side of the window and look for iMovie on the right side of the window. Double click on iMovie to open it.

c. When iMovie opens, you will need to navigate to where the movies are being stored. Click FILE, IMPORT, MOVIES
d. You will need to navigate to FLIPVIDEO on the left side of the window, then to the DCIM folder, then to the 100VIDEO folder, then choose the videos that you want to import.
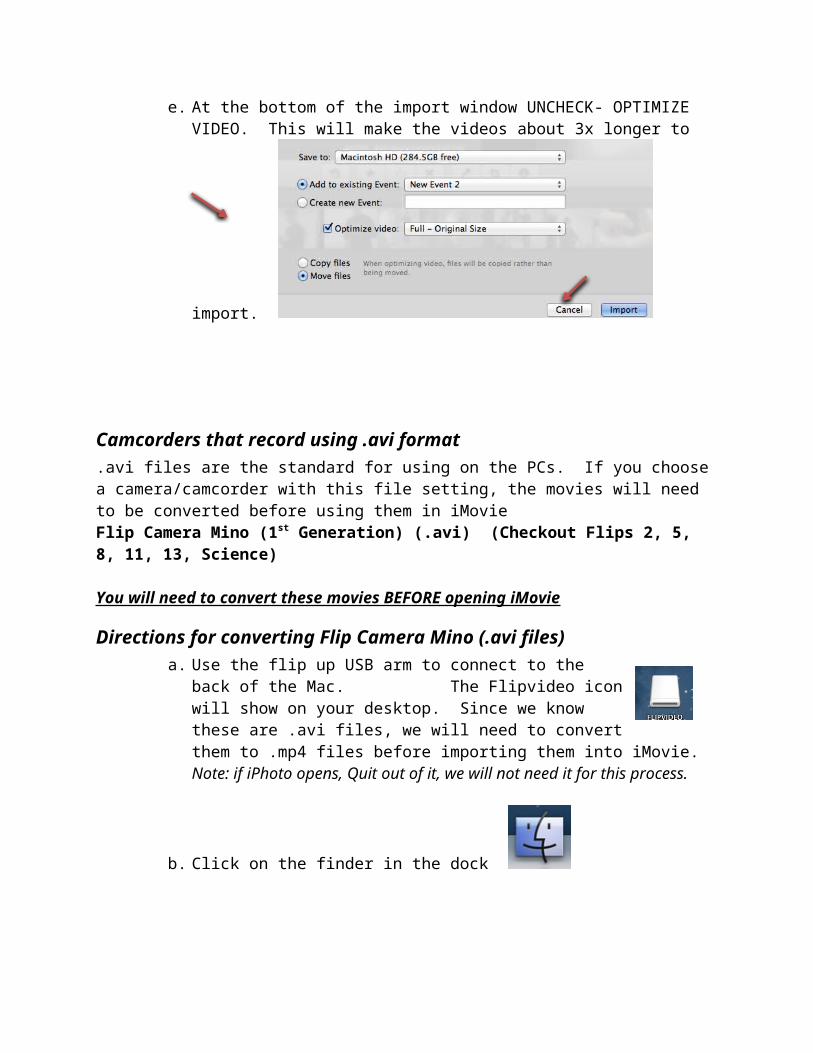
e. At the bottom of the import window UNCHECK- OPTIMIZE VIDEO. This will make the videos about 3x longer to import.

Camcorders that record using .avi format.avi files are the standard for using on the PCs. If you choose a camera/camcorder with this file setting, the movies will need to be converted before using them in iMovieFlip Camera Mino (1st Generation) (.avi) (Checkout Flips 2, 5, 8, 11, 13, Science)
You will need to convert these movies BEFORE opening iMovie
Directions for converting Flip Camera Mino (.avi files)a. Use the flip up USB arm to connect to the back of the Mac.
The Flipvideo icon will show on your desktop. Since we know these are .avi files, we will need to convert them to .mp4 files before importing them into iMovie. Note: if iPhoto opens, Quit out of it, we will not need it for this process.
b. Click on the finder in the dock
c. Click the Applications folder on the left side of the screen, then scroll down to the Handbrake application. Double click on Handbrake to open it.
d. When you double click on the application, it will open to a window asking where you would like to choose the files from to convert. On the left side of the window, choose Flipvideo.
e. On the right side of the screen, double click the DCIM folder, then double click the 100VIDEO folder, and then you will see the .avi files you just recorded.
f. Click OPEN
g. Handbrake is automatically set so that it know to convert the files into .mp4 format. DO NOT adjust any buttons
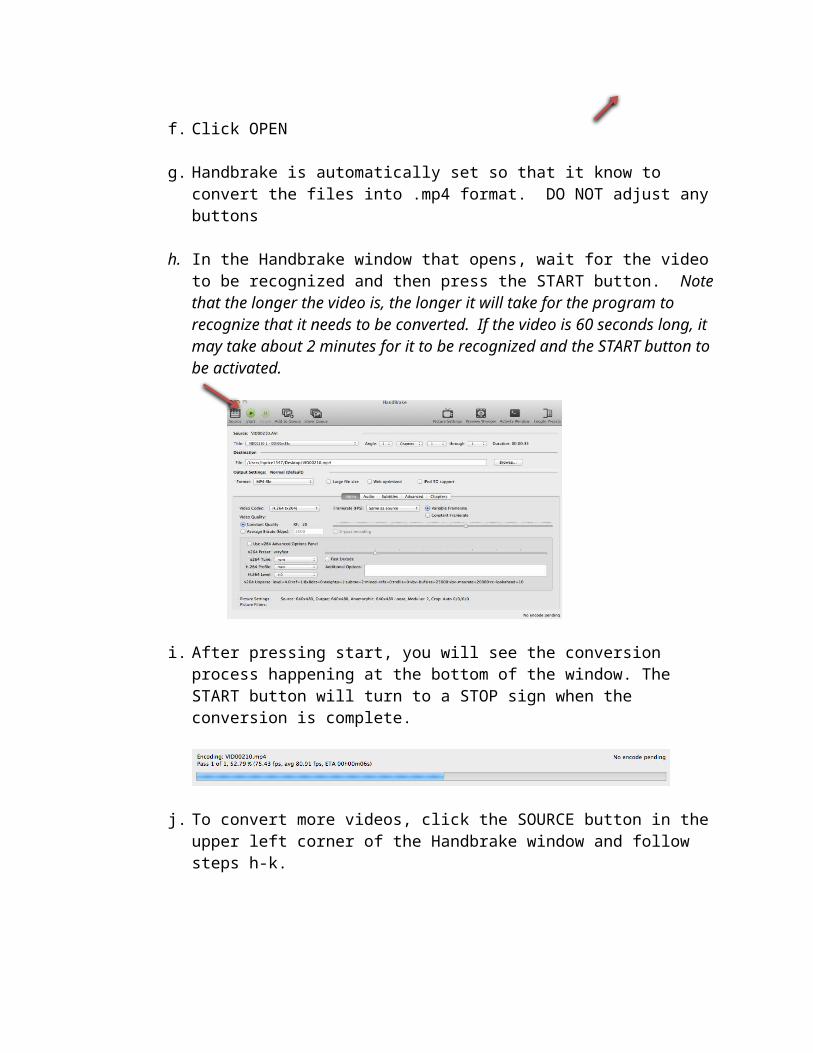
h. In the Handbrake window that opens, wait for the video to be recognized and then press the START button. Note that the longer the video is, the longer it will take for the program to recognize that it needs to be converted. If the video is 60 seconds long, it may take about 2 minutes for it to be recognized and the START button to be activated.
i. After pressing start, you will see the conversion process happening at the bottom of the window. The START button will turn to a STOP sign when the conversion is complete.

j. To convert more videos, click the SOURCE button in the upper left corner of the Handbrake window and follow steps h-k.
k. As videos are being converted, they will be placed on the desktop of the computer in .mp4 format.
Directions for importing video from a Flip Camera Mino (.avi files) in to iMovie
a. Click on the finder in the dock
b. Click Applications on the left side of the window and look for iMovie on the right side of the window. Double click on iMovie to open it.
c. When iMovie opens, you will need to navigate to where the movies are being stored. Click FILE, IMPORT, MOVIES
d. You will need to navigate to DESKTOP on the left side of the window, then choose the videos that you want to import.
e. At the bottom of the import window UNCHECK- OPTIMIZE VIDEO. This will make the videos about 3x longer to import.

Directions for importing video from an iPad 2
a. Use a USB cable to connect the iPad to the computer. iPhoto will automatically open
b. Click IMPORT PHOTO in the upper right corner. iPhoto thinks this video is a photo, and that is OK.
c. Click KEEP PHOTOS in case you need them again for this project. Note: the Delete photos button does not really delete the item from the iPad.
Directions for importing video from an iPad2 into iMovie
a. Click on the finder in the dock
b. Click Applications on the left side of the window and look for iMovie on the right side of the window. Double click on iMovie to open it.

c. When iMovie opens, you will need to navigate to where the movies are being stored. Click FILE, IMPORT, MOVIES
d. These were added to iPhoto so you will need to find them in the Photos folder. From the list on the left side of the window, scroll all the way down to PHOTOS, find your movie(s), then click IMPORT
e. At the bottom of the import window UNCHECK- OPTIMIZE VIDEO. This will make the videos about 3x longer to import.

Using Discovery Education editable files
Discovery Education has certain movie segments that due to copyright, students have permission to download and modify. This is a great way to check for student understanding of a concept. Students can download the movie file, import it into Movie Maker or iMovie, and then delete the sound and put their narration over top of the movie file.
Note- it’s always a good idea to search for editable videos on your topic before students search so that you know how many choices of videos they will have.
Log in to Discovery Education as a student1. Go to www.discoveryeducation.com (There is also a link to the student center from
Student Quicklinks on the CMHS home page)2. Students can log in using the same username and password they would use when
logging in to a computer.
Search for and downloading an editable movie3. At the Student Center, students can search for a topic in the search box at the top of the
web site
4. After typing in their keyword, there is a list of ways to Narrow Results on the left side of the window. Click VIDEO DETAIL to open the area where students can find only editable sources.
5. Click the Editable check box

6. Search through the remaining videos
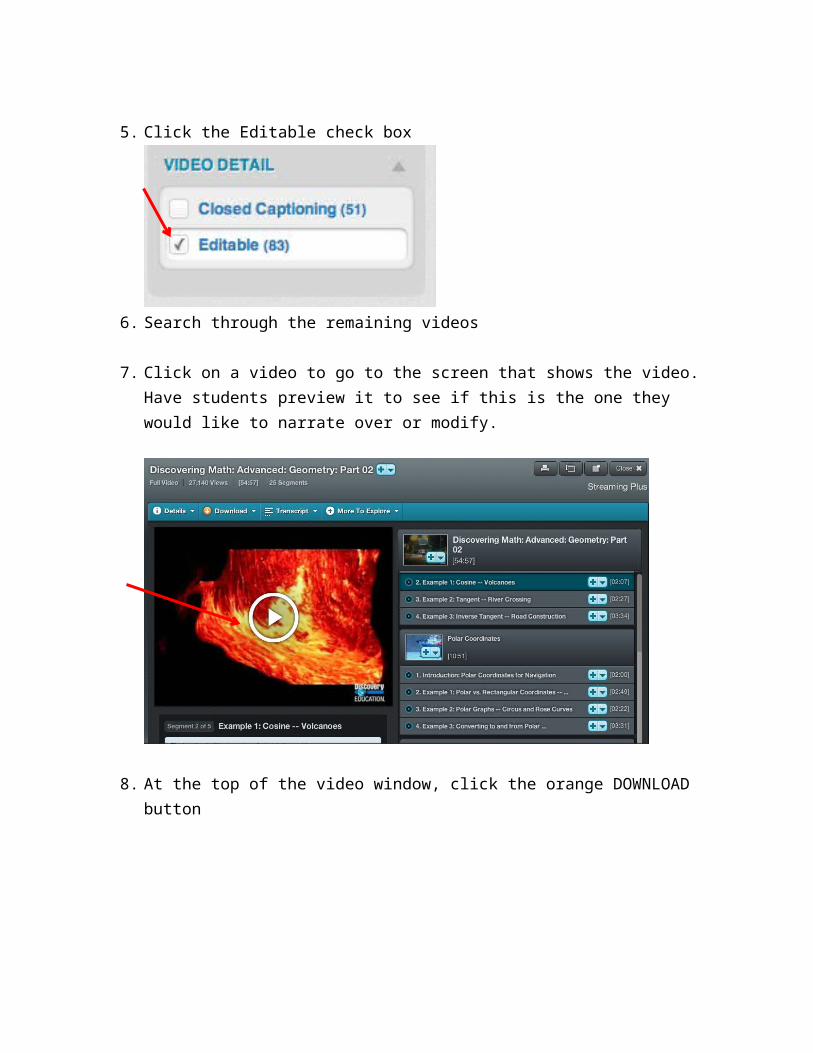
7. Click on a video to go to the screen that shows the video. Have students preview it to see if this is the one they would like to narrate over or modify.
8. At the top of the video window, click the orange DOWNLOAD button

9. It is VERY important to look at the right corner of that window to see what the download format is that’s displaying. Macs- need to download in Quicktime 256K. PCs need to download in Windows 256K.
10. To change the file format, click Quicktime or Windows, choose the radio button next to the format you would like to use, then click Save.
11. When you have chosen the correct file format, click the Orange download button next to the video you would like to use.
12. If you are using Firefox (the preferred browser for DE) then you will download the file to your downloads folder. (On the Mac, the downloads folder is in the dock.) Click on the downloads folder and drag the movie file to the desktop for easier access to it later on. On the PC, double click the Computer icon, then click the downloads folder, and drag the movie to the desktop for later.
Importing the movie into Movie Maker on the PCs1. Click Add Videos and Photos in the menu bar at the top of the window.
2. Click Downloads if you left your movie there, or Desktop if you moved your movie and then click Open to add it to Moviemaker

3. To mute the sound in the video, double click on the video so that the Video Tools Editing Tab open in the menu at the top of the screen. Click Video Volume and move the volume all the way to the left to mute it
4. To record your voice over the movie, go back to the Home tab and click on the Record Narration button. Click in the movie where you would like your narration to begin. Start recording your voice.
5. Continue to edit the movie as you wish.
Importing the movie into iMovie1. From iMovie, click File > Import > Movies
2. Navigate to the Desktop or wherever else you have saved your movies
3. Click the movie file, then Click Import
4. The movie will be imported and go to the bottom of the screen in the container of all movie files.
5. Click in the movie file so that a piece is selected (anything in the yellow box is what is selected) or click, then type Command- A on the keyboard to select the entire movie file
6. Drag the segment or entire movie to the upper left corner of the iMovie screen. This is the piece of movie that you can edit
7. To mute the video, click on Clip in the menu bar, then Mute Clip
8. To record over the muted video, click the microphone in the grey bar that runs across the middle of the iMovie window. The cursor will change to a microphone when you hover over the movie clip.
9. Click on a clip somewhere to being the recording process. iMovie will give you a three second countdown before the recording starts. When you are finished recording, click again to stop the voiceover.

10. Note- the spacebar starts and stops the movie. When you click to stop recording, the movie still plays. Click the spacebar to stop the movie from playing.
11. Continue to edit the movie as you wish