chromatography fall, 2008 vanderbilt student volunteers for science
TRANSCRIPT
Chromatography
Fall, 2008
Vanderbilt Student Volunteers for Science
Important!!!
• Please use this resource to reinforce your understanding of the lesson! Make sure you have read and understand the entire lesson prior to picking up the kit!
• We recommend that you work through the kit with your team prior to going into the classroom.
• This presentation does not contain the entire lesson—only selected experiments that may be difficult to visualize and/or understand.
I. Lesson Set-Up (pg. 2)
• Two VSVS members should do the set ups while a third VSVS member does the demonstration in Part II.
• Set-up for Part V – SEPARATING COLORS - Use the 30 mL measuring cup to add 30 mL of water to enough 16-oz cups for the class plus one for the demonstration in part IV.
• While one team member starts Part II, another should write the following vocabulary words on the board.
chromatography chromatogram capillary action forensic chromatography

II. Mixing Colors (pg. 2)• Fill 2 of the 10 oz. cups half full of
water. • Add 2 drops of yellow food coloring to
the water in one cup and stir. • Add 2 drops of blue food coloring to
the water in the second cup and stir.
• Hold the cups up so the students can see them.
• Pour 1/3 of the blue liquid and 1/3 of the yellow liquid into the third cup and show students that the mixture of the blue and yellow liquids makes a green liquid.
• Tell students that mixing blue and yellow to make green is something easy to do; something they already know.
• Tell students that what we want to discover is a way to separate mixtures of colors and other mixtures of chemicals.
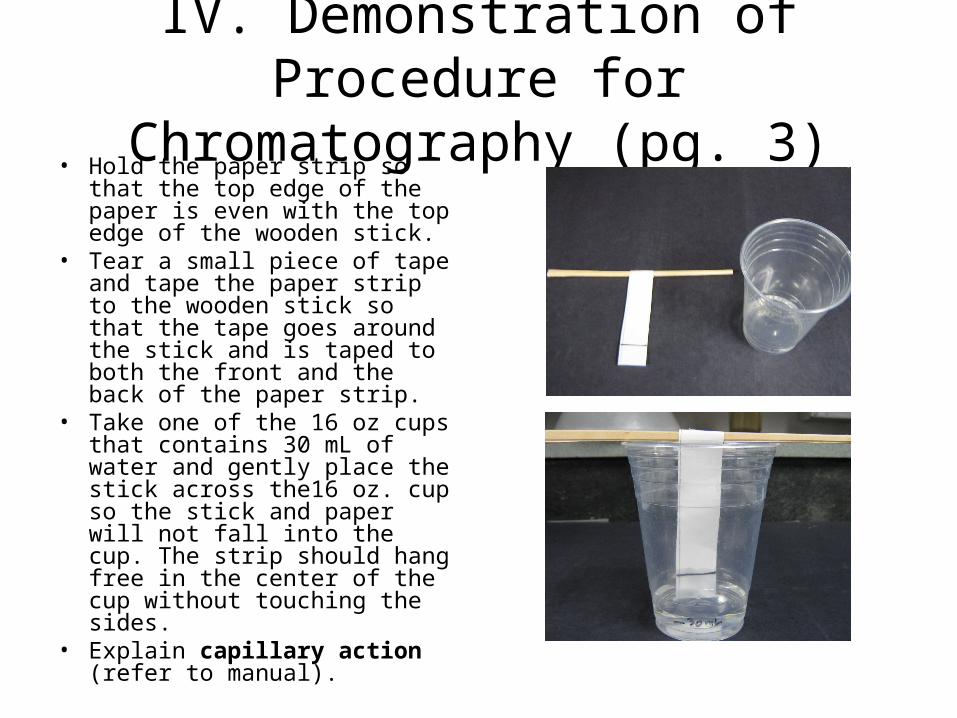
IV. Demonstration of Procedure for Chromatography (pg. 3)
• Hold the paper strip so that the top edge of the paper is even with the top edge of the wooden stick.
• Tear a small piece of tape and tape the paper strip to the wooden stick so that the tape goes around the stick and is taped to both the front and the back of the paper strip.
• Take one of the 16 oz cups that contains 30 mL of water and gently place the stick across the16 oz. cup so the stick and paper will not fall into the cup. The strip should hang free in the center of the cup without touching the sides.
• Explain capillary action (refer to manual).

V. Capillary Action and Separating Colors (pg. 4)
• Have each student do the following:– Take the paper strip and a wooden
stick.– Trace the pencil line with the green
felt-tipped pen.– Tear a small piece of tape and tape the
paper strip to the wooden stick so that the tape goes around the stick and is taped to both the front and the back of the paper strip.
– Take the 16 oz cup that contains 30 mL of water and gently place the stick across the 16 oz. cup so the stick and paper will not fall into the cup. The strip should hang free in the center of the cup without touching the sides.
• Note: The green line must not touch the water. The color will wash away if this happens and the experiment will not work properly. Caution students to use care when lowering the strip into the water.
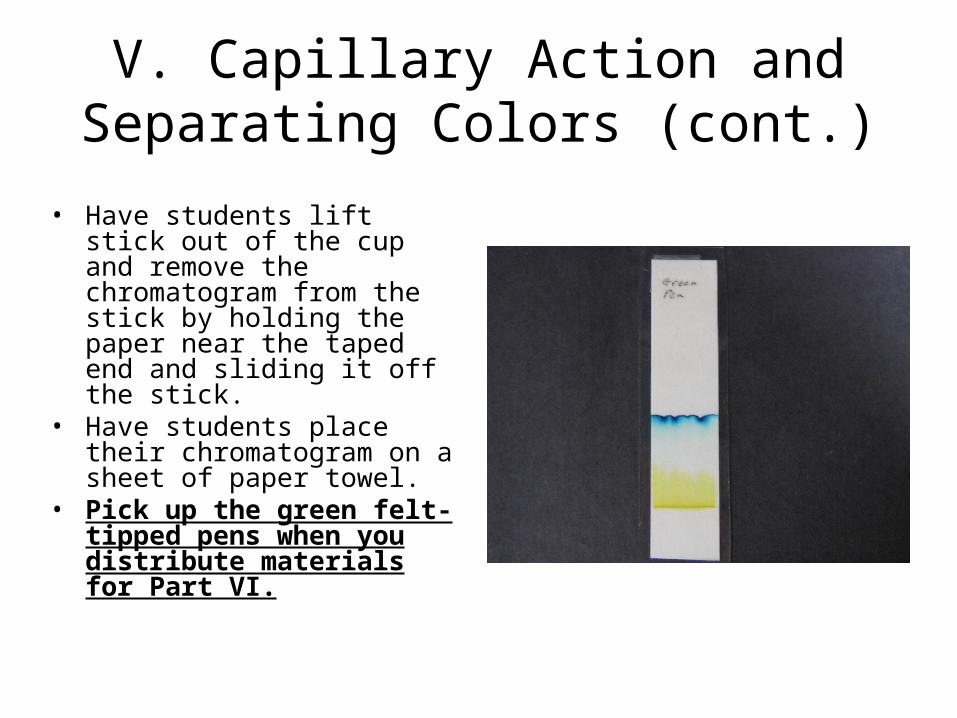
V. Capillary Action and Separating Colors (cont.)
• Have students lift stick out of the cup and remove the chromatogram from the stick by holding the paper near the taped end and sliding it off the stick.
• Have students place their chromatogram on a sheet of paper towel.
• Pick up the green felt-tipped pens when you distribute materials for Part VI.

VI. Forensic Chromatography (pg. 5)
• Re-use 16 oz cups and sticks from Part IV (The same water can be used unless ink from the green felt pen colored the water – if this happened, dump the water out, rinse, and replace with 30 mL of fresh water.)
• Provide the crime scenario in the manual to students and tell them they will use chromatography to determine "Whodunit”!
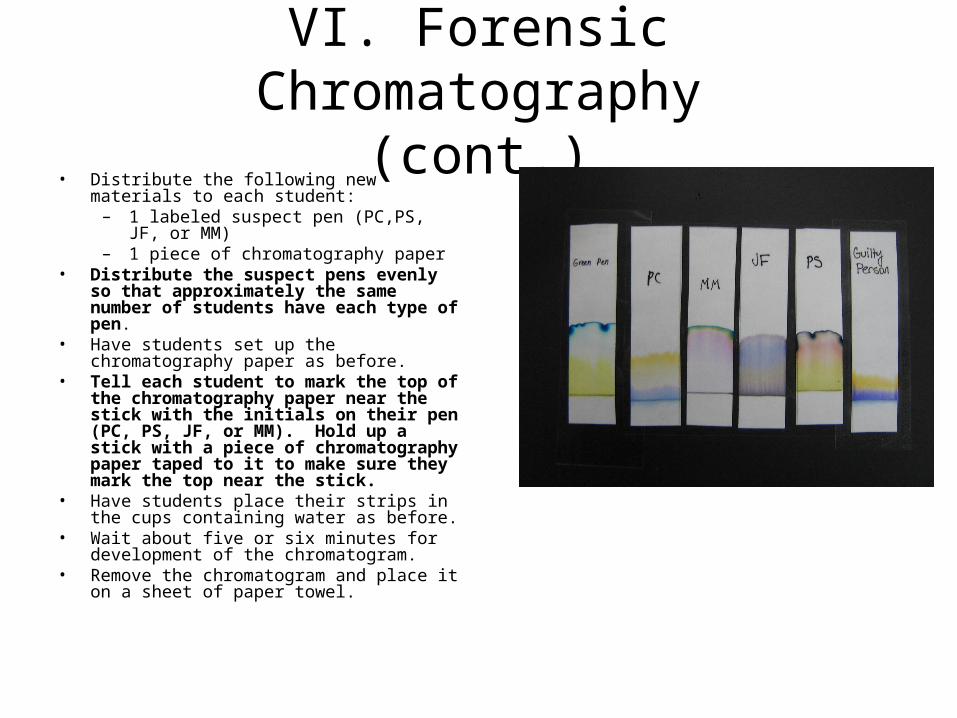
VI. Forensic Chromatography(cont.)
• Distribute the following new materials to each student:
– 1 labeled suspect pen (PC,PS, JF, or MM)
– 1 piece of chromatography paper• Distribute the suspect pens evenly so
that approximately the same number of students have each type of pen.
• Have students set up the chromatography paper as before.
• Tell each student to mark the top of the chromatography paper near the stick with the initials on their pen (PC, PS, JF, or MM). Hold up a stick with a piece of chromatography paper taped to it to make sure they mark the top near the stick.
• Have students place their strips in the cups containing water as before.
• Wait about five or six minutes for development of the chromatogram.
• Remove the chromatogram and place it on a sheet of paper towel.

VII. Review of Chromatography (pg. 8)
• After the chromatograms are finished, distribute the 8 laminated chromatograms prepared from the guilty person (about 1 every 4 students) and ask them to compare their chromatograms with the chromatogram prepared from the guilty person’s pen (made from the ransom note) and identify which pen matches the results from the ransom note.
• Ask, Who is the guilty person? (PC - Pam Chromatogram)• See manual for discussion and review questions.