checkered baby quilt tutorial€¦ · · 2018-01-28instead of marking the quilt top, i lined up...
TRANSCRIPT

Hi, I'm Deb Gehringer, the creator behind Monday Morning Designs. If you're a beginner quilter, this baby quilt is a great choice because it's precut friendly, it goes together quickly and there are no bias edges. You will also experience the ease of all your seams nesting and it's fun to make! Finished Size: 41" x 41"
© 2017 Monday Morning Designs All rights reserved.
Checkered Baby Quilt
by Deb Gehringer of Monday Morning Designs
mondaymorningdesigns.com
2
Checkered Baby Quilt
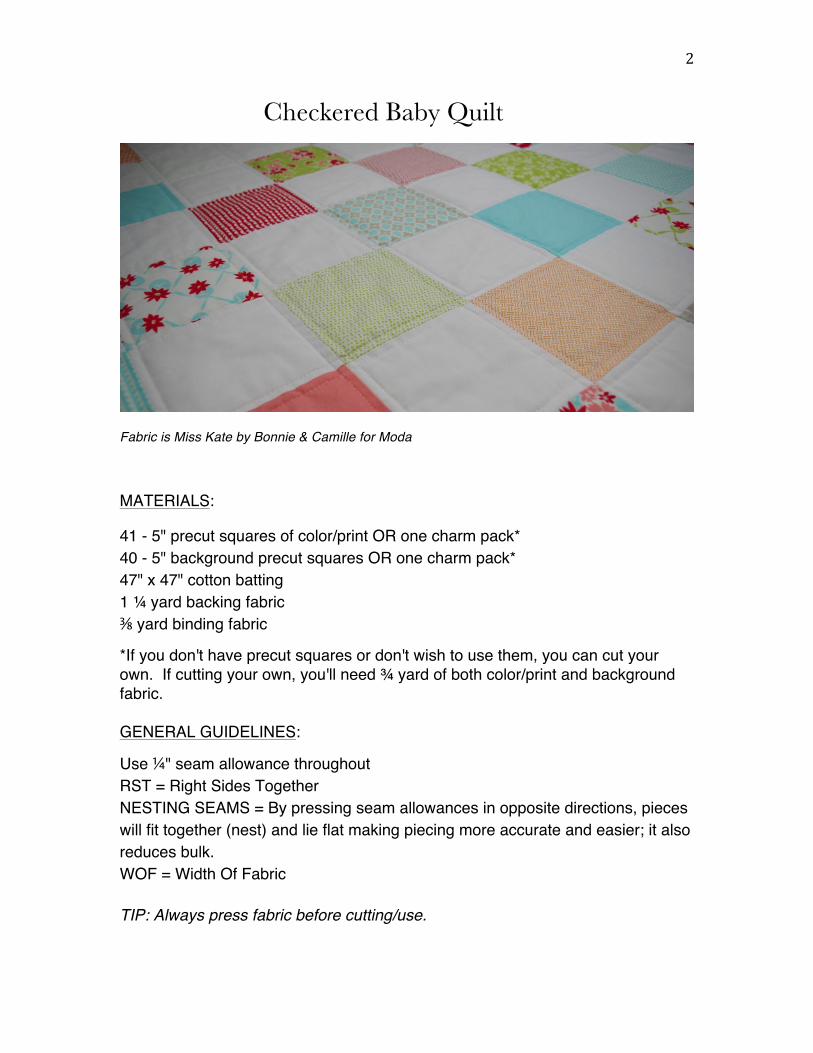
Fabric is Miss Kate by Bonnie & Camille for Moda
MATERIALS:
41 - 5" precut squares of color/print OR one charm pack* 40 - 5" background precut squares OR one charm pack* 47" x 47" cotton batting 1 ¼ yard backing fabric ⅜ yard binding fabric
*If you don't have precut squares or don't wish to use them, you can cut your own. If cutting your own, you'll need ¾ yard of both color/print and background fabric. GENERAL GUIDELINES: Use ¼" seam allowance throughout RST = Right Sides Together NESTING SEAMS = By pressing seam allowances in opposite directions, pieces will fit together (nest) and lie flat making piecing more accurate and easier; it also reduces bulk. WOF = Width Of Fabric TIP: Always press fabric before cutting/use.
3
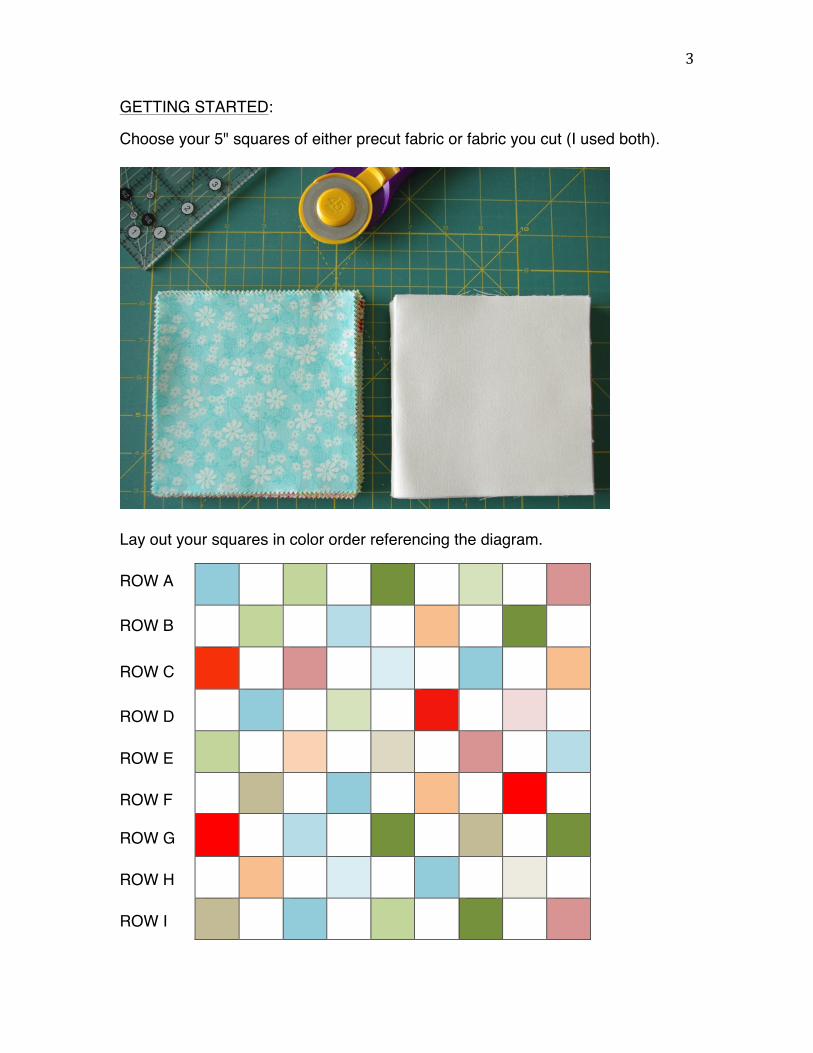
GETTING STARTED: Choose your 5" squares of either precut fabric or fabric you cut (I used both).
Lay out your squares in color order referencing the diagram. ROW A ROW B ROW C ROW D ROW E ROW F ROW G ROW H ROW I
4
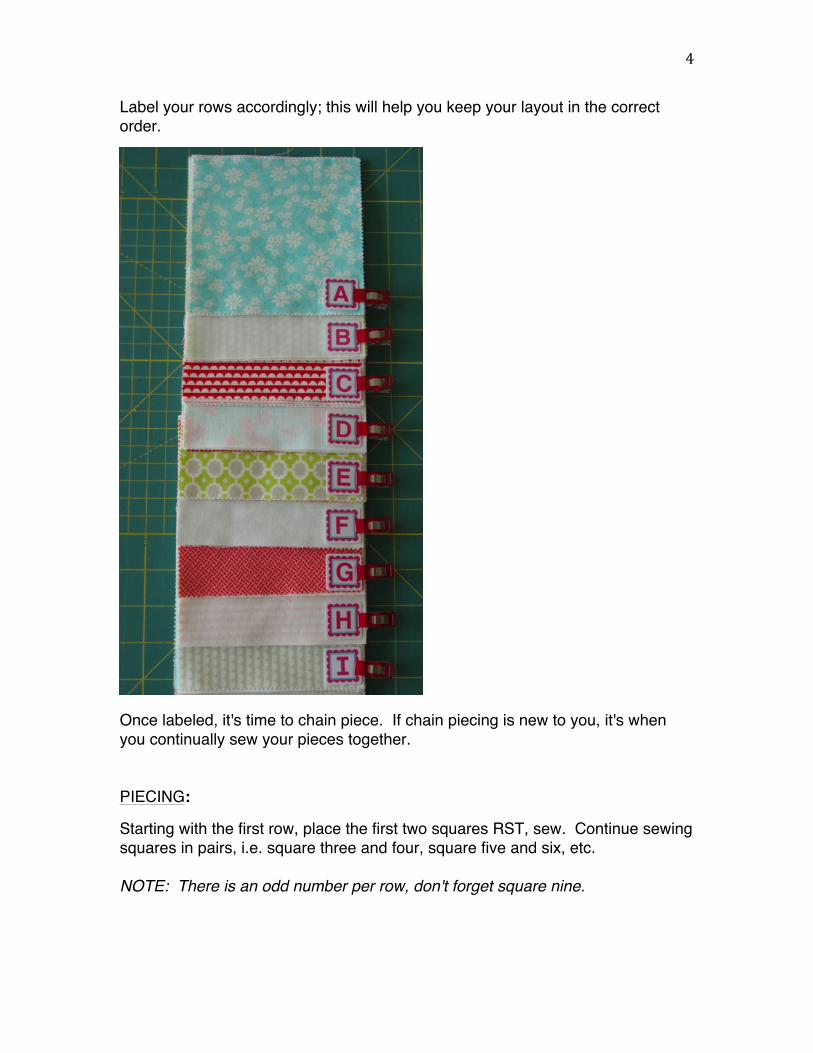
Label your rows accordingly; this will help you keep your layout in the correct order. Once labeled, it's time to chain piece. If chain piecing is new to you, it's when you continually sew your pieces together. PIECING: Starting with the first row, place the first two squares RST, sew. Continue sewing squares in pairs, i.e. square three and four, square five and six, etc. NOTE: There is an odd number per row, don't forget square nine.
5
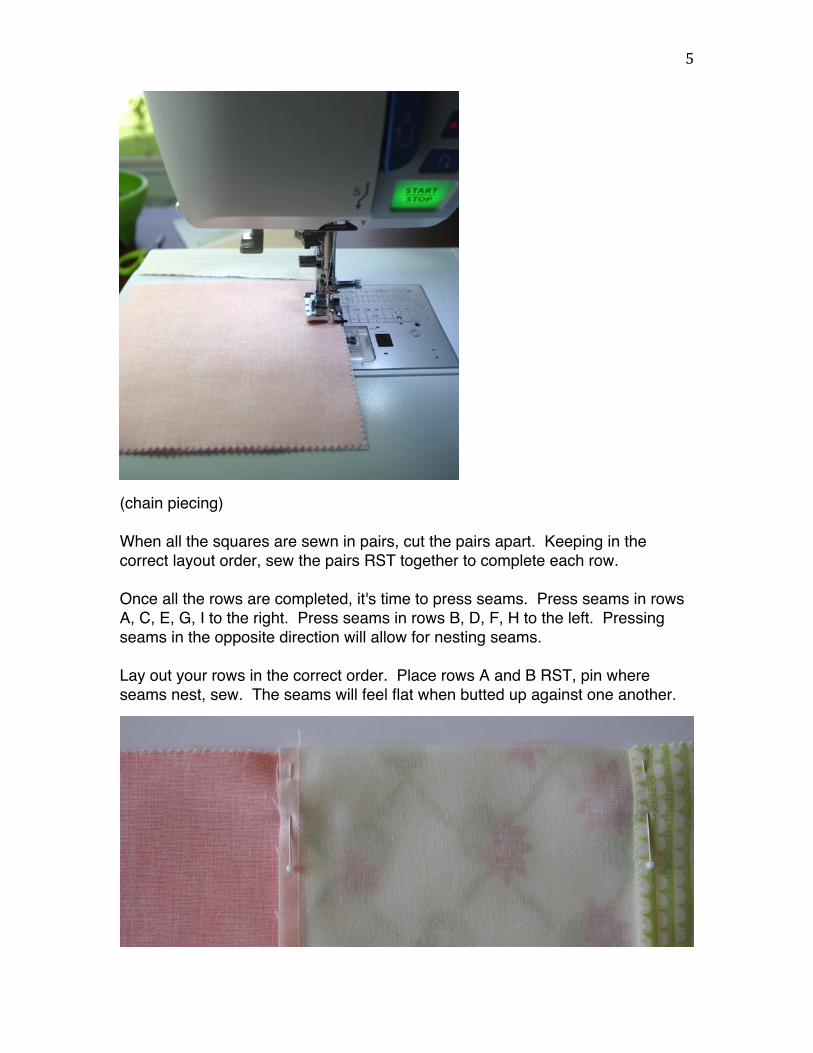
(chain piecing) When all the squares are sewn in pairs, cut the pairs apart. Keeping in the correct layout order, sew the pairs RST together to complete each row. Once all the rows are completed, it's time to press seams. Press seams in rows A, C, E, G, I to the right. Press seams in rows B, D, F, H to the left. Pressing seams in the opposite direction will allow for nesting seams. Lay out your rows in the correct order. Place rows A and B RST, pin where seams nest, sew. The seams will feel flat when butted up against one another.
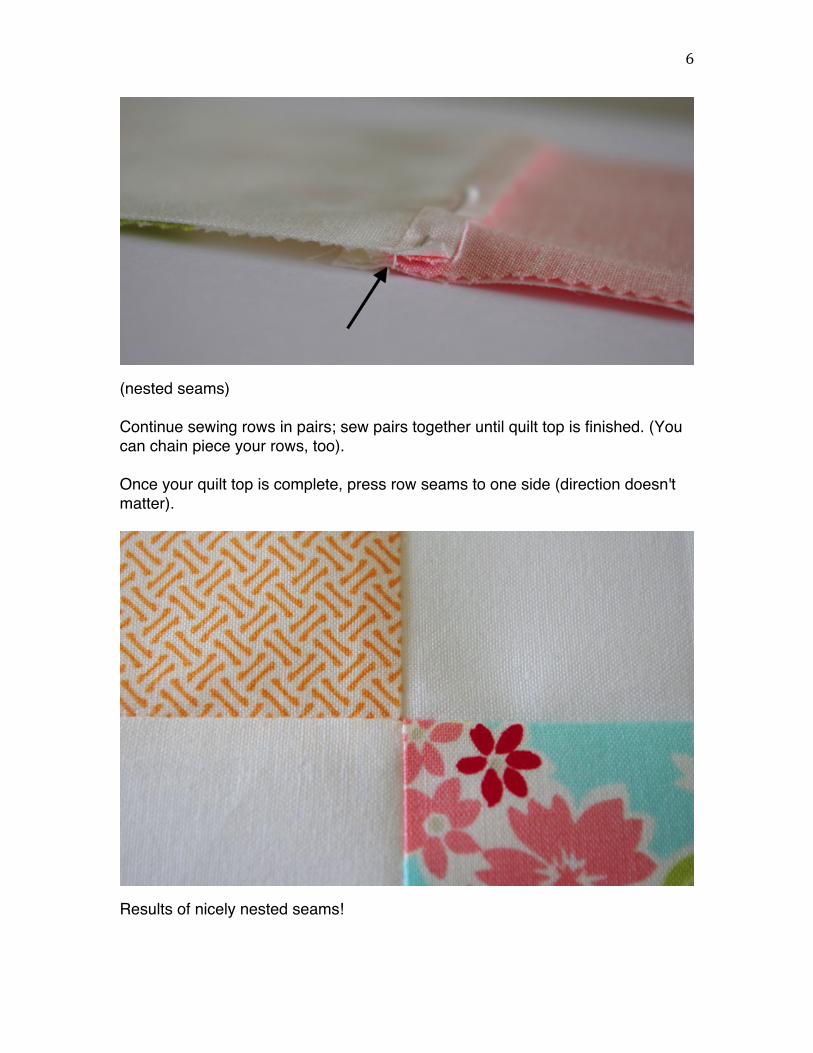
6
(nested seams) Continue sewing rows in pairs; sew pairs together until quilt top is finished. (You can chain piece your rows, too). Once your quilt top is complete, press row seams to one side (direction doesn't matter).
Results of nicely nested seams!
7
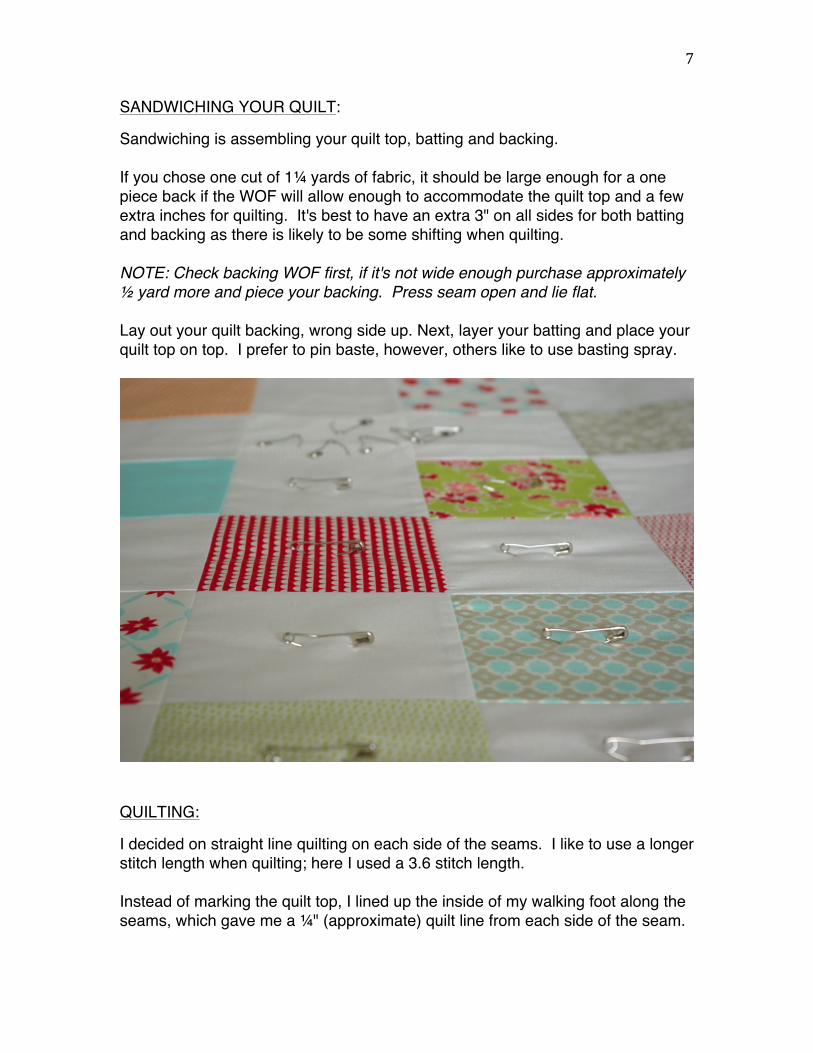
SANDWICHING YOUR QUILT: Sandwiching is assembling your quilt top, batting and backing. If you chose one cut of 1¼ yards of fabric, it should be large enough for a one piece back if the WOF will allow enough to accommodate the quilt top and a few extra inches for quilting. It's best to have an extra 3" on all sides for both batting and backing as there is likely to be some shifting when quilting. NOTE: Check backing WOF first, if it's not wide enough purchase approximately ½ yard more and piece your backing. Press seam open and lie flat. Lay out your quilt backing, wrong side up. Next, layer your batting and place your quilt top on top. I prefer to pin baste, however, others like to use basting spray.
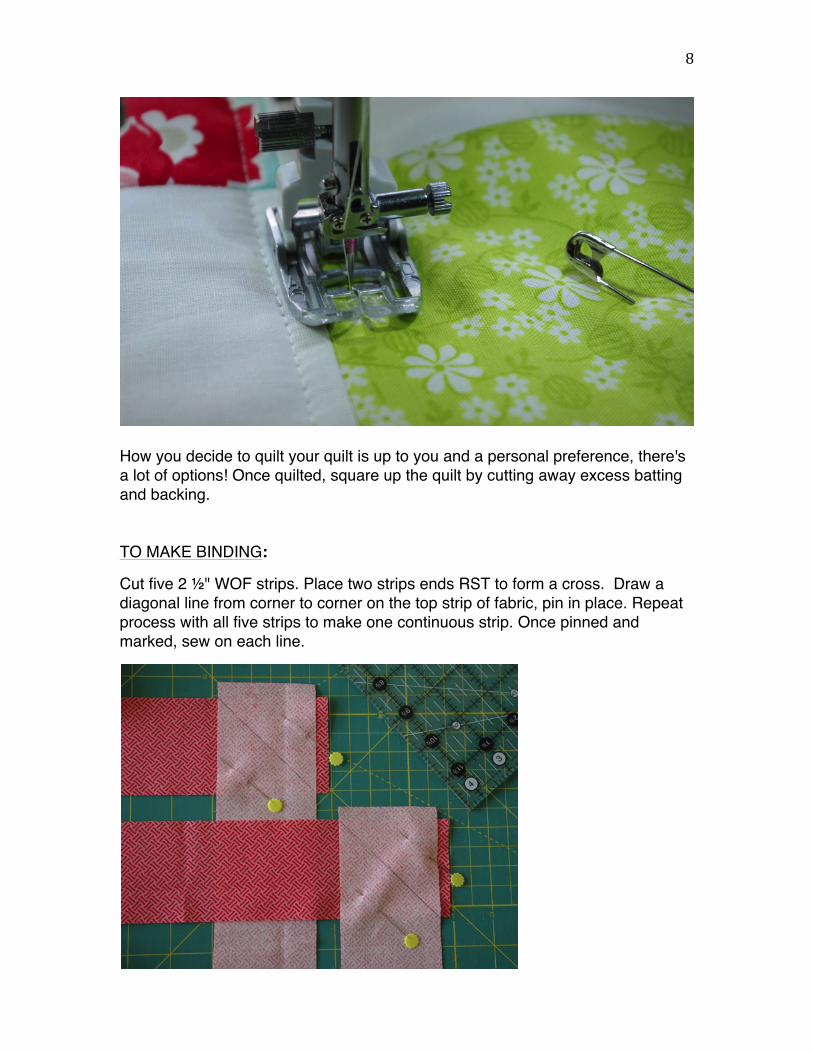
QUILTING: I decided on straight line quilting on each side of the seams. I like to use a longer stitch length when quilting; here I used a 3.6 stitch length. Instead of marking the quilt top, I lined up the inside of my walking foot along the seams, which gave me a ¼" (approximate) quilt line from each side of the seam.
8
How you decide to quilt your quilt is up to you and a personal preference, there's a lot of options! Once quilted, square up the quilt by cutting away excess batting and backing. TO MAKE BINDING: Cut five 2 ½" WOF strips. Place two strips ends RST to form a cross. Draw a diagonal line from corner to corner on the top strip of fabric, pin in place. Repeat process with all five strips to make one continuous strip. Once pinned and marked, sew on each line.
9
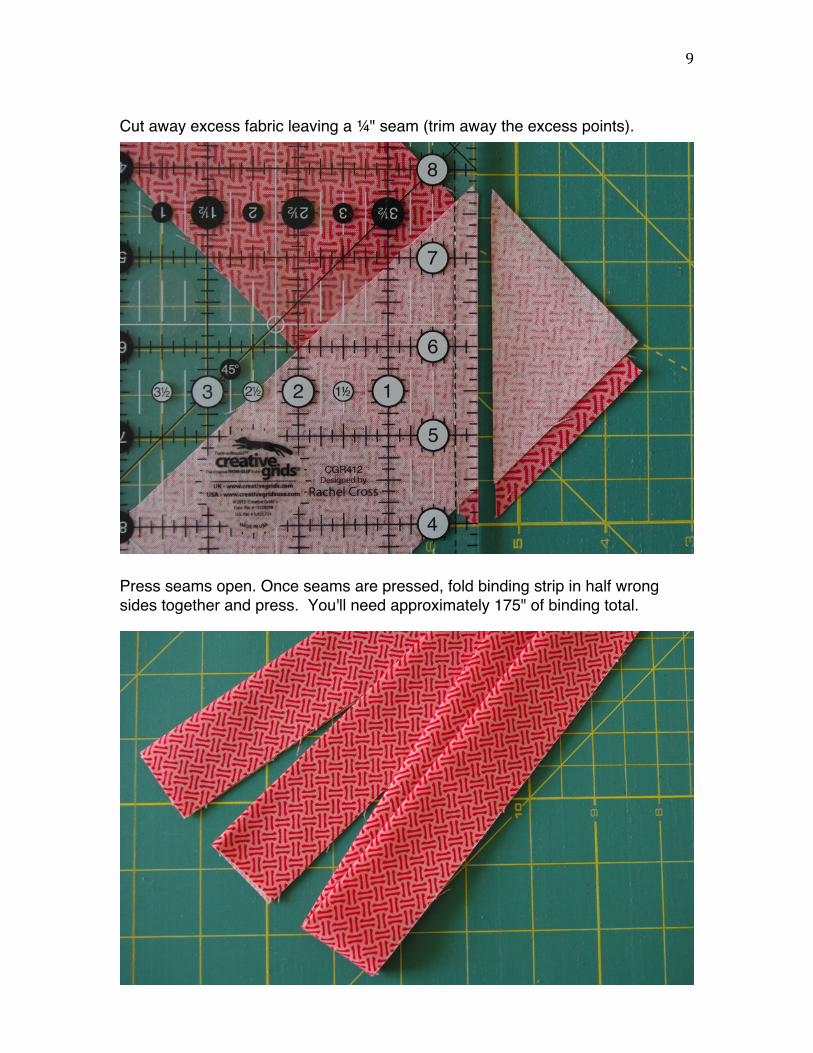
Cut away excess fabric leaving a ¼" seam (trim away the excess points). Press seams open. Once seams are pressed, fold binding strip in half wrong sides together and press. You'll need approximately 175" of binding total.
10
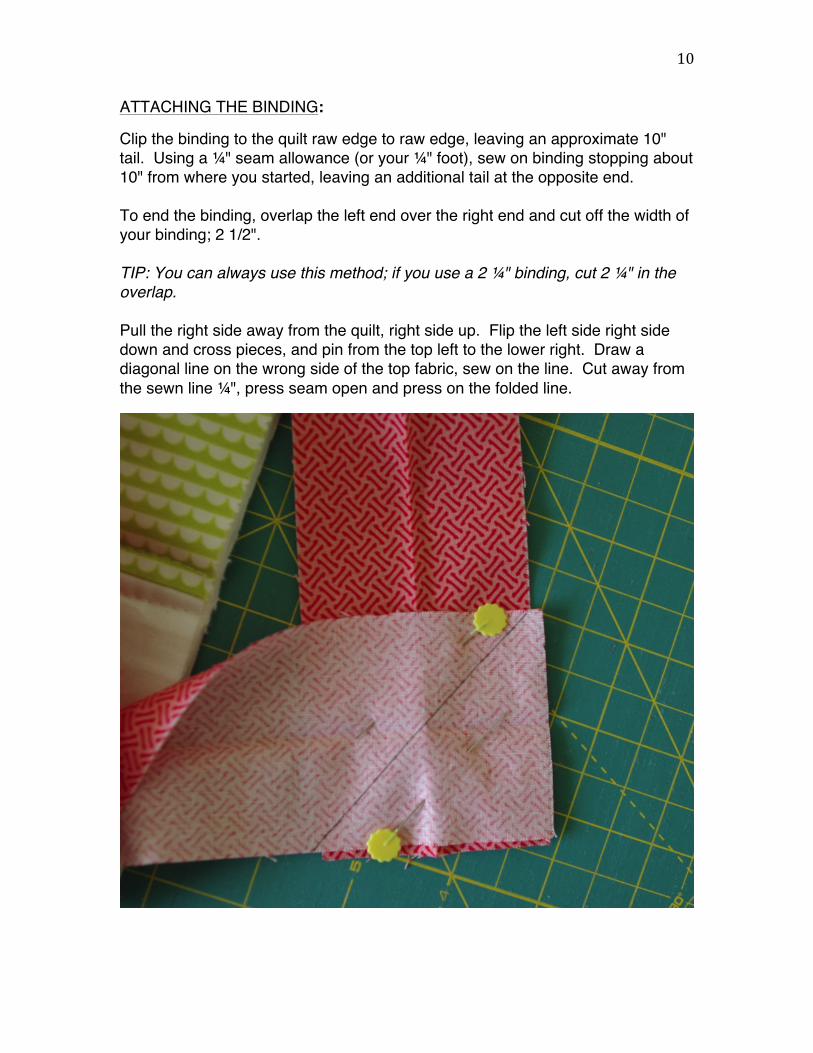
ATTACHING THE BINDING: Clip the binding to the quilt raw edge to raw edge, leaving an approximate 10" tail. Using a ¼" seam allowance (or your ¼" foot), sew on binding stopping about 10" from where you started, leaving an additional tail at the opposite end. To end the binding, overlap the left end over the right end and cut off the width of your binding; 2 1/2". TIP: You can always use this method; if you use a 2 ¼" binding, cut 2 ¼" in the overlap. Pull the right side away from the quilt, right side up. Flip the left side right side down and cross pieces, and pin from the top left to the lower right. Draw a diagonal line on the wrong side of the top fabric, sew on the line. Cut away from the sewn line ¼", press seam open and press on the folded line.
11
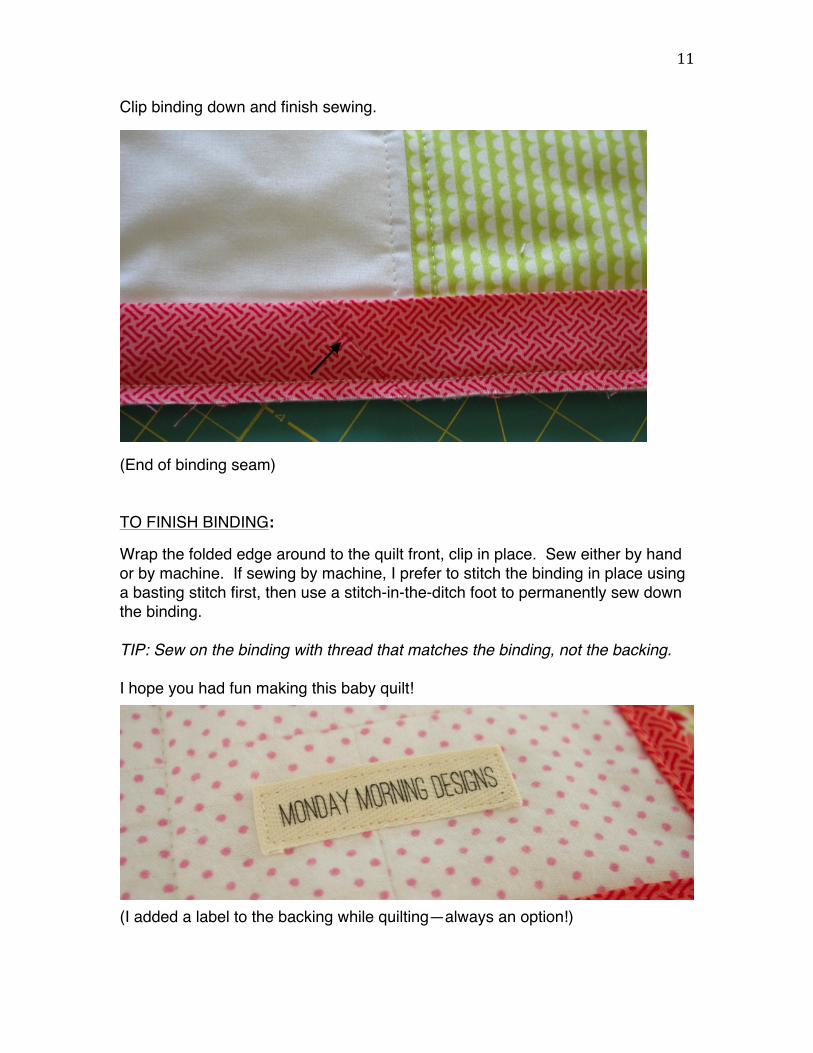
Clip binding down and finish sewing. (End of binding seam) TO FINISH BINDING: Wrap the folded edge around to the quilt front, clip in place. Sew either by hand or by machine. If sewing by machine, I prefer to stitch the binding in place using a basting stitch first, then use a stitch-in-the-ditch foot to permanently sew down the binding. TIP: Sew on the binding with thread that matches the binding, not the backing. I hope you had fun making this baby quilt! (I added a label to the backing while quilting—always an option!)