build it with project plan kitchen knife blockgo.rockler.com/plans/knife-block-plan.pdfkitchen knife...
TRANSCRIPT

KITCHEN KNIFE BLOCKBUILD IT WITHROCKLER PROJECT PLAN
BUILD QUESTIONS? Go to www.rockler.com or call 800-279-4441
38211 1/2" x 3" x 24" Walnut Boards (4)
63388 1/4" x 12" x 30" Baltic Birch Plywood
20701 1/8" x 36" Birch Dowel20719 1/4" x 36" Birch Dowel20743 3/8" x 36" Birch Dowel59517 Rockler® Corner Key
Doweling Jig
68329 1/8" Extended-Length Drill Bit
63837 1/4" Extended-Length Drill Bit
67434 3/8" Extended-Length Drill Bit
All items subject to changes in availability.
Stock # Item Stock # Item27080 17⁄8" D x 1" H x 1/2"
Shank Chamfer Router Bit
90385 1/4" D x 1" H x 1/2" Shank Straight 2-Flute Router Bit
1,400-1,500 10" Bamboo Skewers
Stock # Item

KITCHEN KNIFE BLOCK | PAGE 2
KNIFE BLOCK PARTS
MATERIAL LISTT x W x L
1 Front Panel 1/2" x 53⁄4" x 113⁄4"2 Back Panel 1/2" x 53⁄4" x 113⁄4"3 Left Panel 1/2" x 53⁄4" x 113⁄4"4 Right Panel 1/2" x 53⁄4" x 113⁄4"5 Bottom 1/4" x 51⁄4" x 51⁄4"6 1/8" Dowel (18) 1/8" x 1/8" x 17⁄8"7 1/4" Dowel (16) 1/4" x 1/4" x 2"8 3/8" Dowel (12) 3/8" x 3/8" x 2"
Exploded View
3 2
4
6
5
Note: Back corners get five 1/8" dowels
1
78

KITCHEN KNIFE BLOCK | PAGE 3
KNIFE BLOCK PARTS
11⁄4"
11⁄4"
103⁄4"
113⁄4"
1/2"
11⁄8"
1"
1"
1"
7/8"
7/8"
7/8"
7/8" 1/4" x
1/4"
7/8" 11⁄4"
4
1
10˚
103⁄4"
10˚
10˚
113⁄4"
2
Front Panel(Side View)
Back Panel(Side View)
Side Panel (Side View)
Note: This is the Right Panel; the Left Panel is a mirror image.
53⁄4"
KITCHEN KNIFE BLOCK | PAGE 4
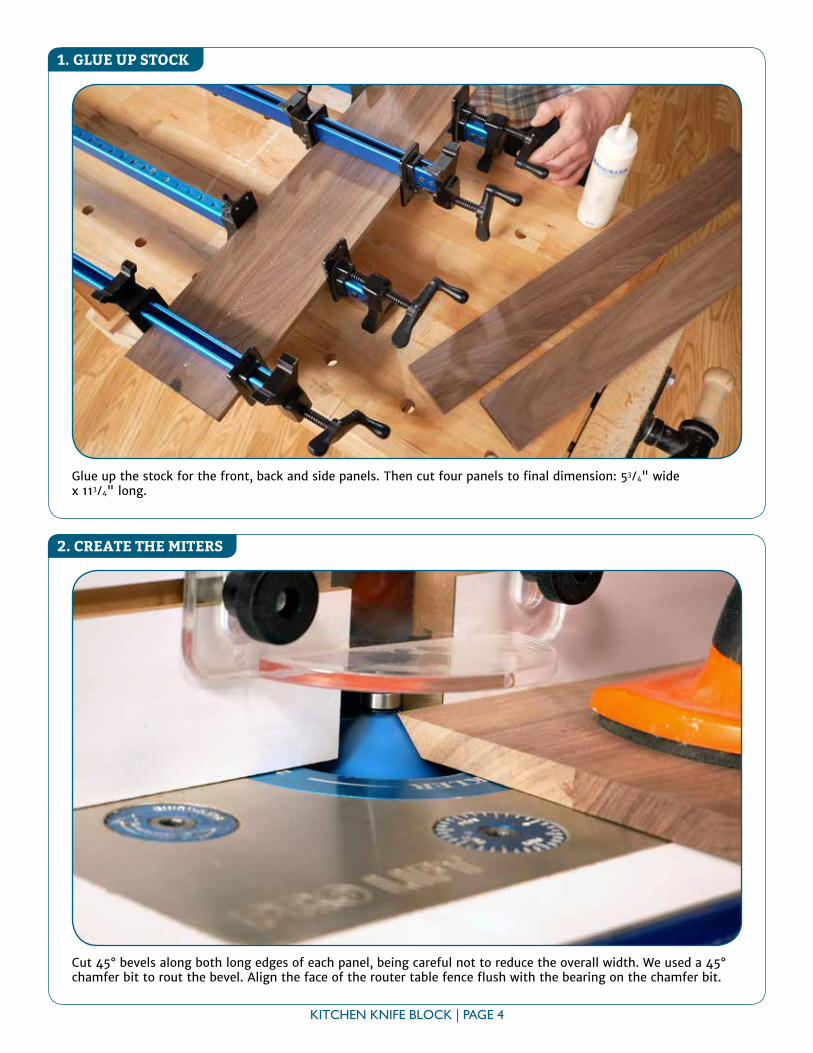
1. GLUE UP STOCK
2. CREATE THE MITERS
Glue up the stock for the front, back and side panels. Then cut four panels to final dimension: 53⁄4" wide x 113⁄4" long.
Cut 45° bevels along both long edges of each panel, being careful not to reduce the overall width. We used a 45° chamfer bit to rout the bevel. Align the face of the router table fence flush with the bearing on the chamfer bit.
KITCHEN KNIFE BLOCK | PAGE 5
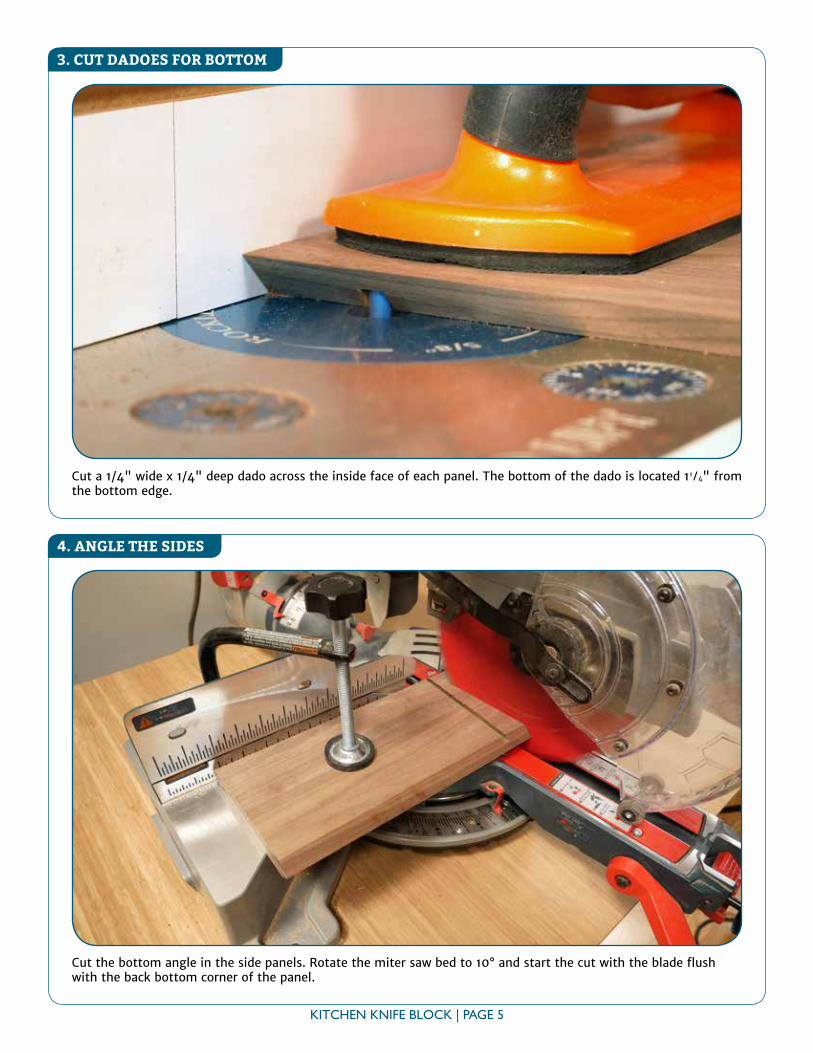
3. CUT DADOES FOR BOTTOM
4. ANGLE THE SIDES
Cut a 1/4" wide x 1/4" deep dado across the inside face of each panel. The bottom of the dado is located 11⁄4" from the bottom edge.
Cut the bottom angle in the side panels. Rotate the miter saw bed to 10° and start the cut with the blade flush with the back bottom corner of the panel.

KITCHEN KNIFE BLOCK | PAGE 6
5. BEVEL BOTTOM OF FRONT AND BACK
Bevel cut the bottom edges of the front and back panels. Tilt the miter saw to 10°. The cut line on the back panel is along the bottom edge of the panel. The cut line on the front panel is 1" up from the bottom edge. Be careful to orient the pieces correctly for each bevel. See illustrations on Page 3.
6. ASSEMBLE WITH GLUE
Cut the plywood bottom piece and then arrange the bottom, front, back and sides. Place two pieces of painter’s tape, sticky side up, on the workbench. Then position the front, back and sides in their assembled order on the tape with the inside faces up. Apply glue to the beveled edges.

KITCHEN KNIFE BLOCK | PAGE 7
7. USE TAPE TO CLAMP
Place the bottom panel in the dado in the first side piece. Then carefully fold the first panel up to close the adjoining panel bevel. Continue to “roll” the box, joining all four panels together. Pull the tape tight to hold the joints closed while the glue dries.
8. MARK DOWEL LOCATIONS
After the glue has dried, mark the centers of the corner dowels. The hairline indicator on the Corner Key Doweling Jig is about 2" back from the corner, so it’s best to draw the line across the entire face of the side. Transfer those alignment marks to all sides of the block.

KITCHEN KNIFE BLOCK | PAGE 8
9. DRILL DOWEL HOLES
Use the Corner Key Doweling Jig to drill the corner dowel holes. Start with the 1/8" diameter holes at the bottom of the block. (Starting with the smallest hole prevents the hole in the backer board on the jig from being too large when you move to the next size hole.)
Continue to drill the corner holes, working your way through the 1/8", 1/4" and 3/8" drill bits.
KITCHEN KNIFE BLOCK | PAGE 9
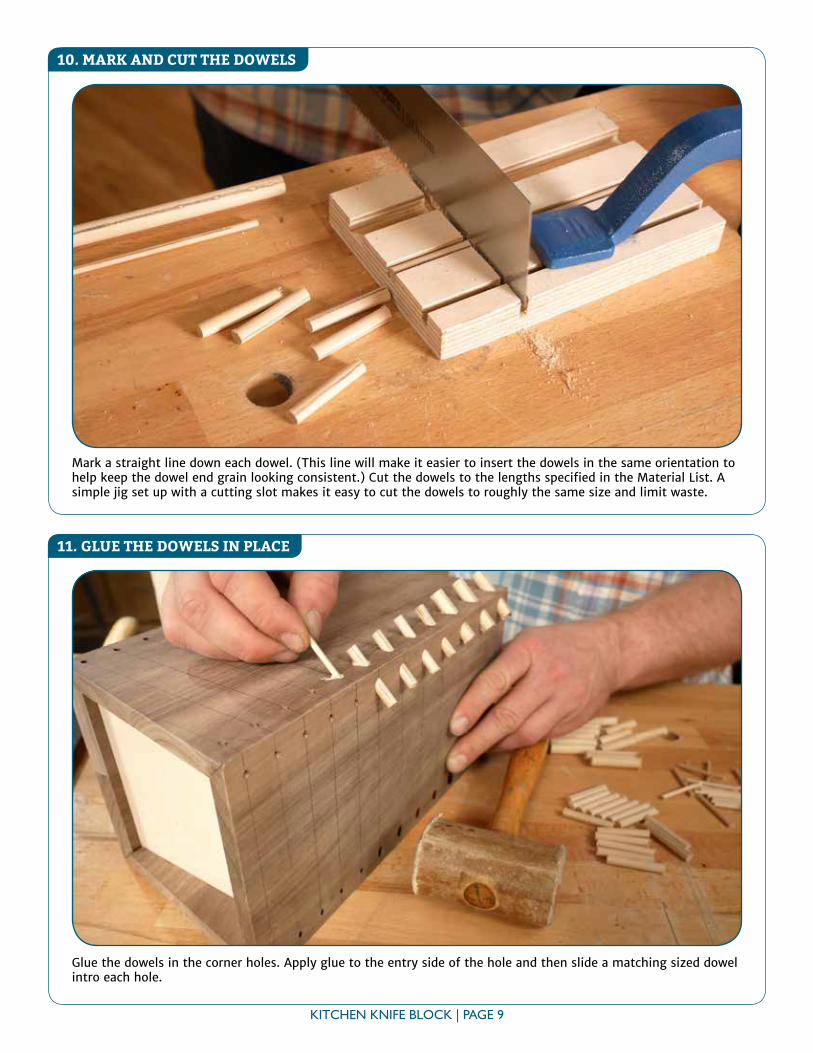
10. MARK AND CUT THE DOWELS
Mark a straight line down each dowel. (This line will make it easier to insert the dowels in the same orientation to help keep the dowel end grain looking consistent.) Cut the dowels to the lengths specified in the Material List. A simple jig set up with a cutting slot makes it easy to cut the dowels to roughly the same size and limit waste.
11. GLUE THE DOWELS IN PLACE
Glue the dowels in the corner holes. Apply glue to the entry side of the hole and then slide a matching sized dowel intro each hole.

KITCHEN KNIFE BLOCK | PAGE 10
12. TRIM THE DOWELS FLUSH
Trim the dowels flush with the sides after the glue has dried. (Strips of painter’s tape applied to the field of the block will lift the saw slightly to prevent gouging.) Then sand all the surfaces smooth.
13. APPLY FINISH AND INSTALL SKEWERS
Apply finish. We used Howard’s Butcher Block Conditioner (38535, sold separately). Carefully insert the bamboo skewers with the tips facing up to allow the knives to wedge in between.