bootstrap designer quick start guidebootstrapdesigner.com/docs/quickstartguide.pdf · bootstrap...
TRANSCRIPT
www.Bootstrapdesigner.com
Bootstrap Designer
Quick Start Guide A Step-by-step Guide to Designing Responsive HTML5 Templates
Bootstrap Designer Quick Start Guide
1
GETTING STARTED
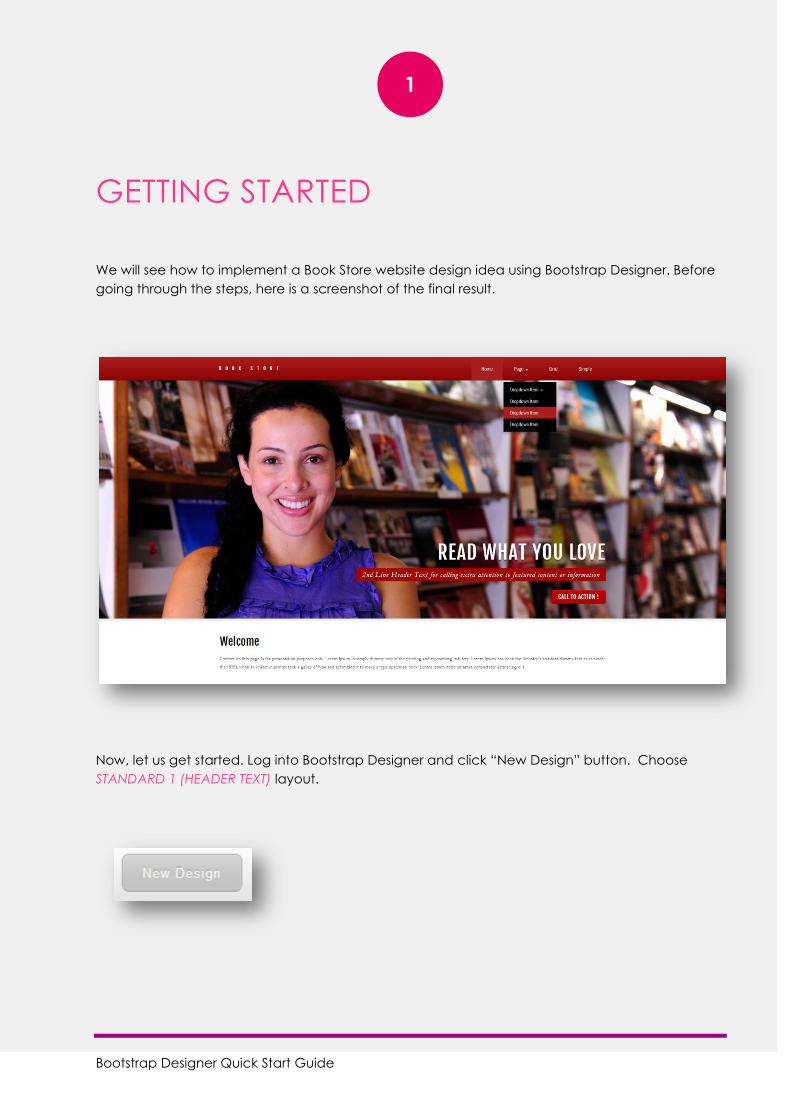
We will see how to implement a Book Store website design idea using Bootstrap Designer. Before
going through the steps, here is a screenshot of the final result.
Now, let us get started. Log into Bootstrap Designer and click “New Design” button. Choose
STANDARD 1 (HEADER TEXT) layout.
Bootstrap Designer Quick Start Guide
2
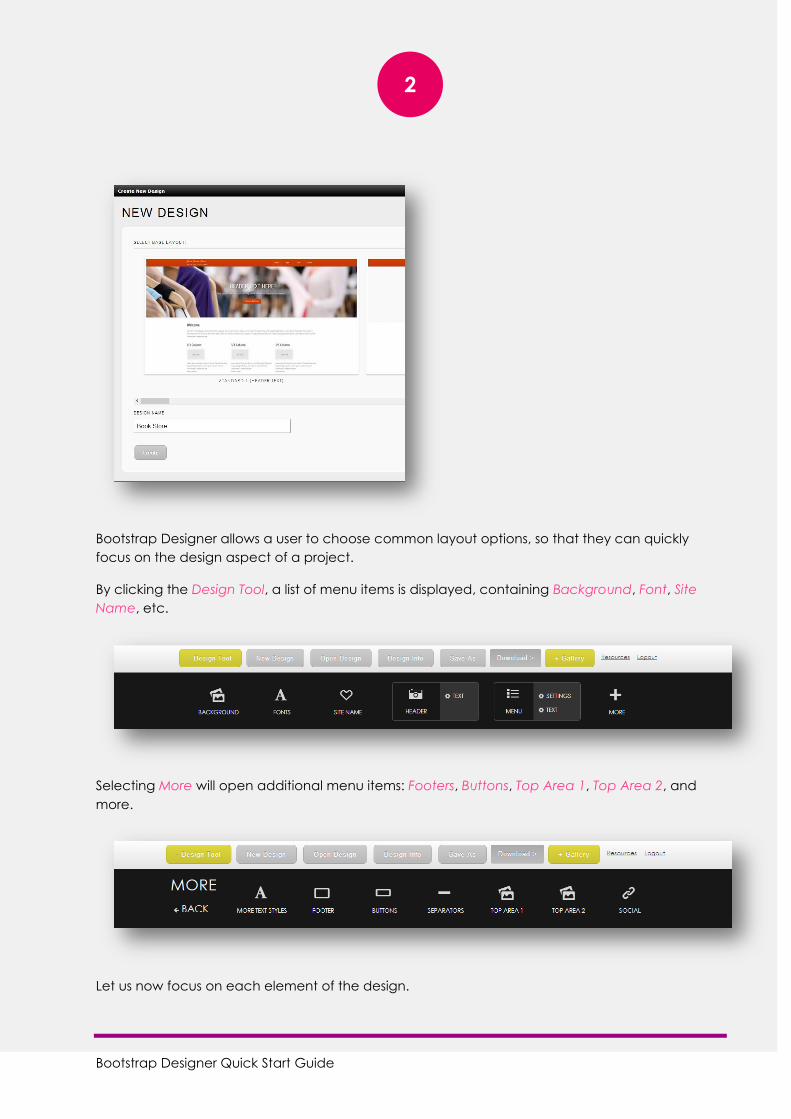
Bootstrap Designer allows a user to choose common layout options, so that they can quickly
focus on the design aspect of a project.
By clicking the Design Tool, a list of menu items is displayed, containing Background, Font, Site
Name, etc.
Selecting More will open additional menu items: Footers, Buttons, Top Area 1, Top Area 2, and
more.
Let us now focus on each element of the design.
Bootstrap Designer Quick Start Guide
3
SITE NAME
(ESTIMATED TIME: 2-3 MINUTES)
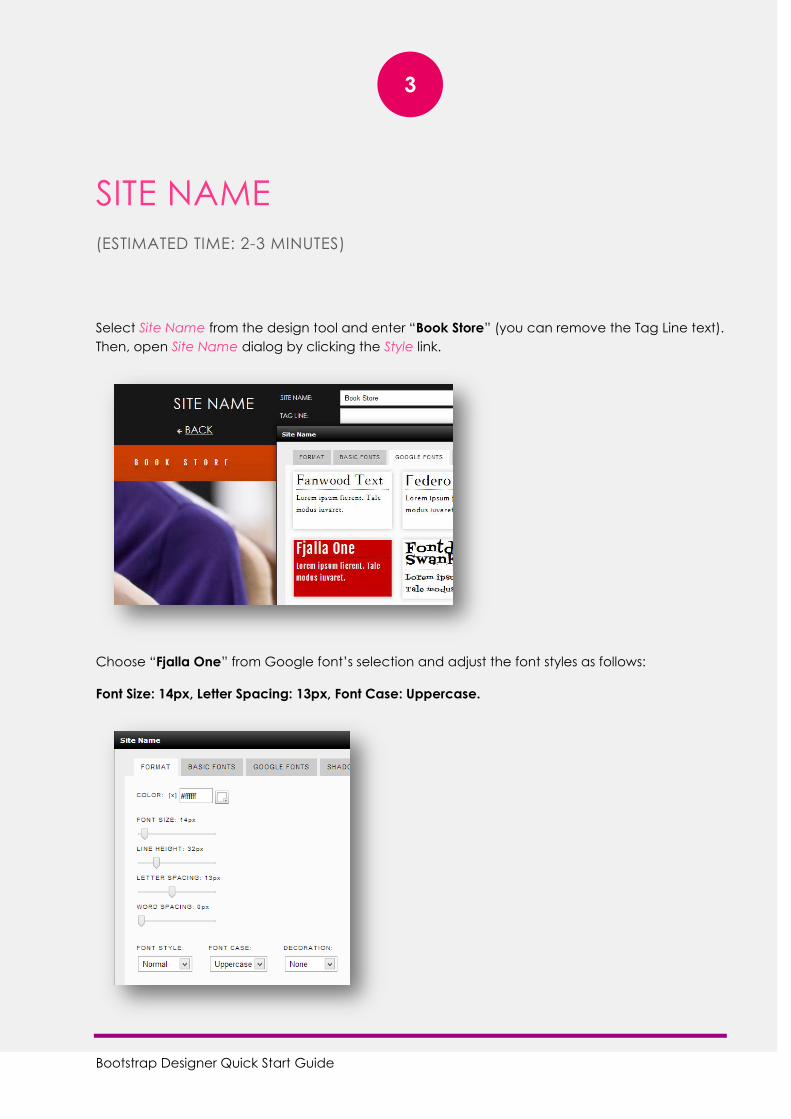
Select Site Name from the design tool and enter “Book Store” (you can remove the Tag Line text).
Then, open Site Name dialog by clicking the Style link.
Choose “Fjalla One” from Google font’s selection and adjust the font styles as follows:
Font Size: 14px, Letter Spacing: 13px, Font Case: Uppercase.
Bootstrap Designer Quick Start Guide
4
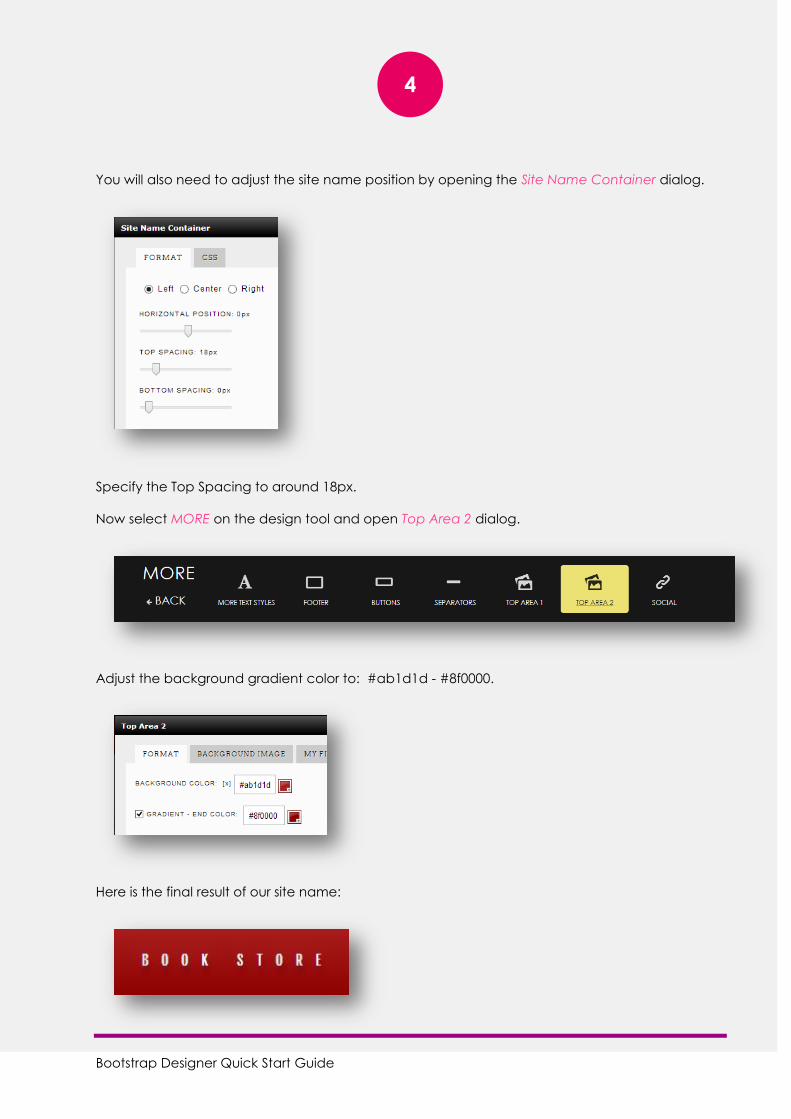
You will also need to adjust the site name position by opening the Site Name Container dialog.
Specify the Top Spacing to around 18px.
Now select MORE on the design tool and open Top Area 2 dialog.
Adjust the background gradient color to: #ab1d1d - #8f0000.
Here is the final result of our site name:
Bootstrap Designer Quick Start Guide
5
BIG PHOTO HEADER
(ESTIMATED TIME: 2-3 MINUTES)
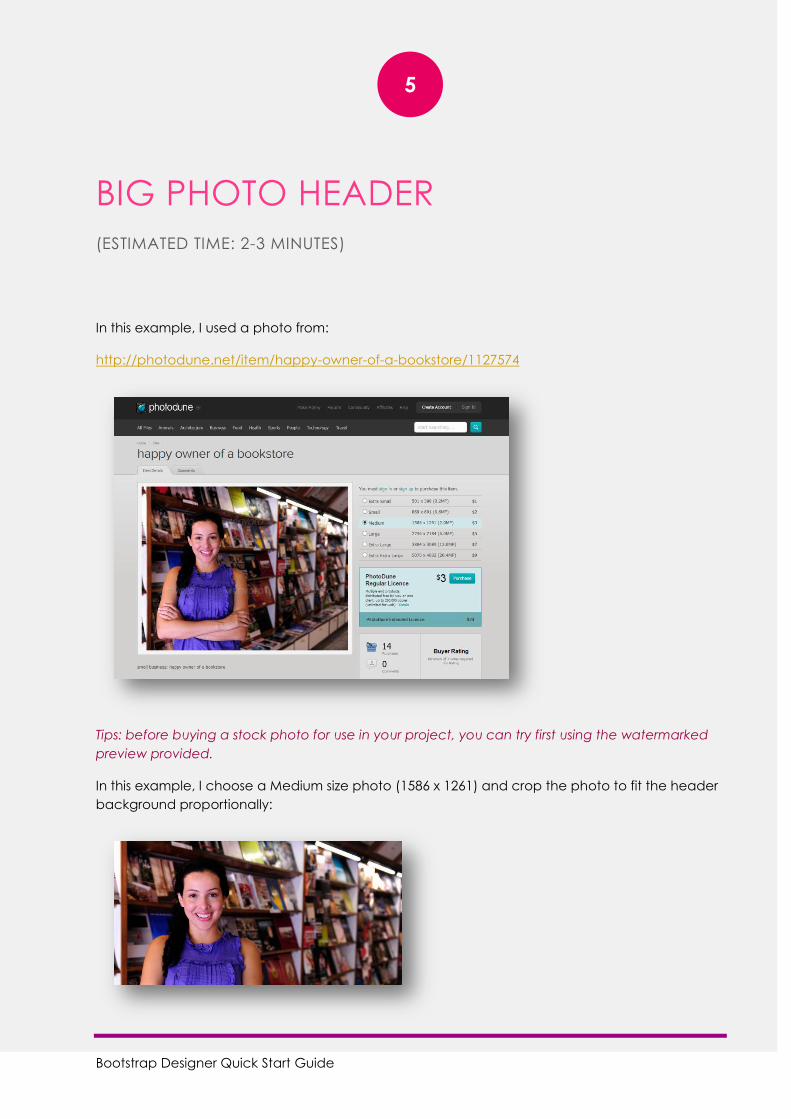
In this example, I used a photo from:
http://photodune.net/item/happy-owner-of-a-bookstore/1127574
Tips: before buying a stock photo for use in your project, you can try first using the watermarked
preview provided.
In this example, I choose a Medium size photo (1586 x 1261) and crop the photo to fit the header
background proportionally:
Bootstrap Designer Quick Start Guide
6
The photo dimension does not have to be accurately proportional, as Bootstrap Designer will
automatically adjust it to fit the intended area.
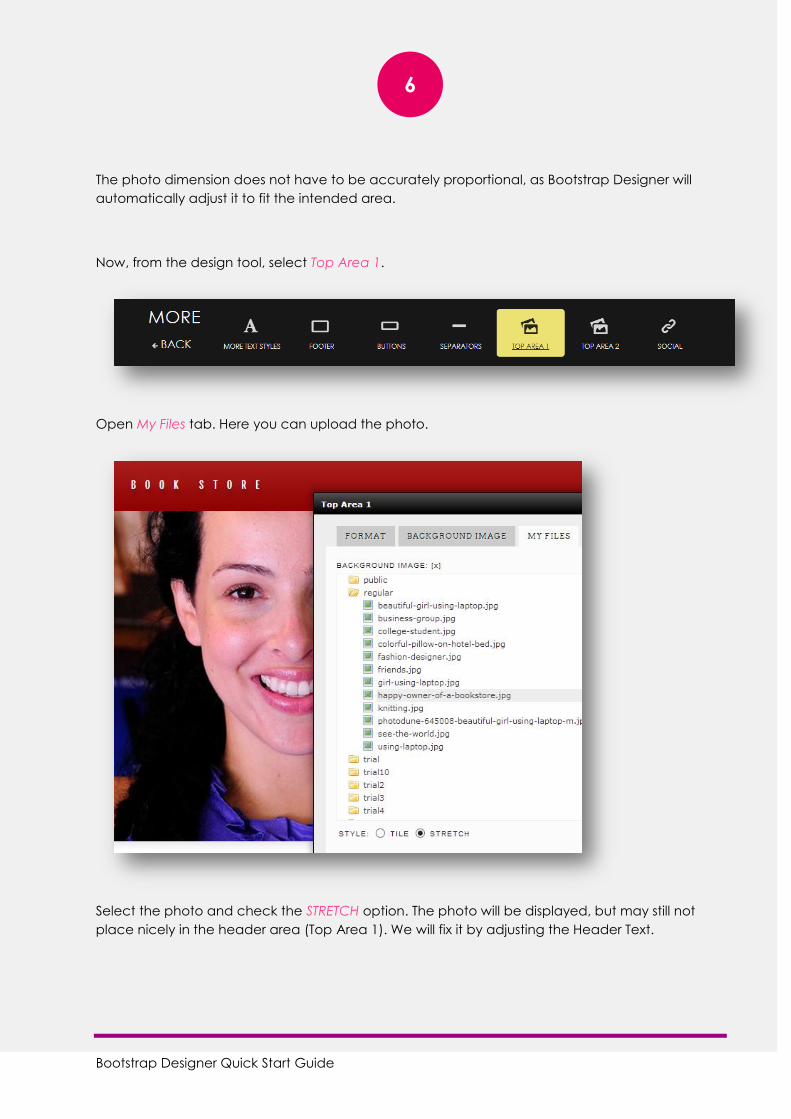
Now, from the design tool, select Top Area 1.
Open My Files tab. Here you can upload the photo.
Select the photo and check the STRETCH option. The photo will be displayed, but may still not
place nicely in the header area (Top Area 1). We will fix it by adjusting the Header Text.
Bootstrap Designer Quick Start Guide
7
HEADER TEXT
(ESTIMATED TIME: 4-5 MINUTES)
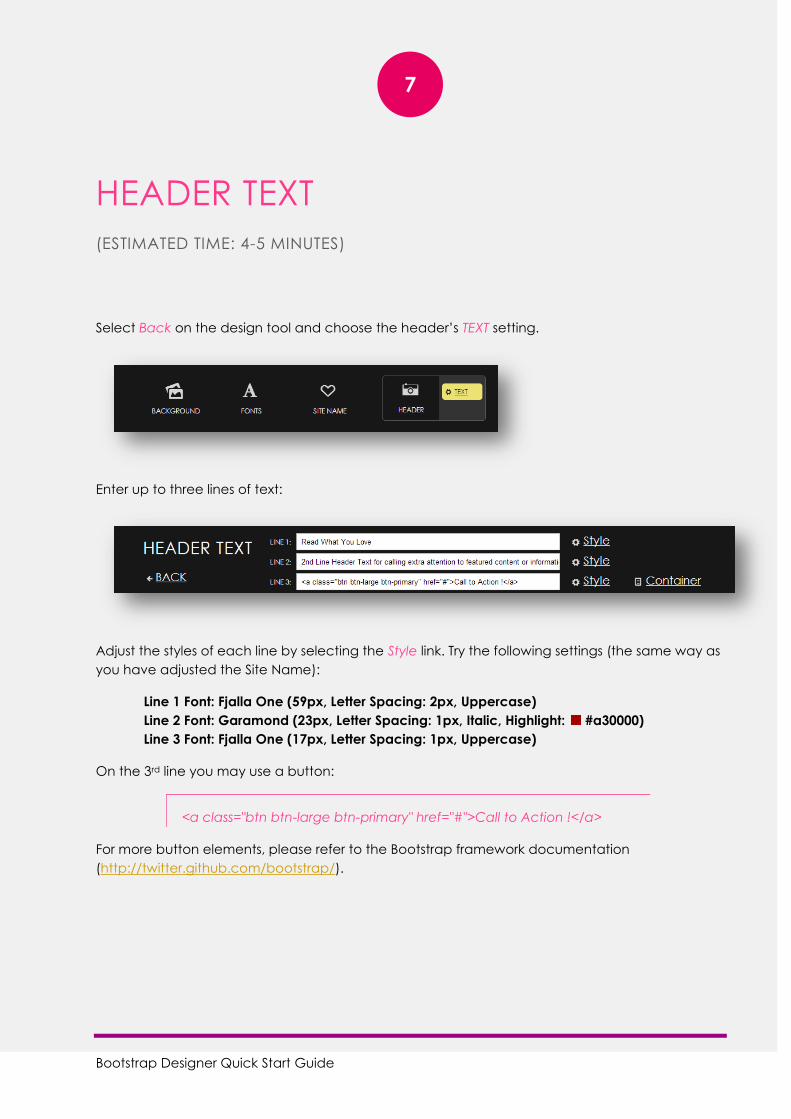
Select Back on the design tool and choose the header’s TEXT setting.
Enter up to three lines of text:
Adjust the styles of each line by selecting the Style link. Try the following settings (the same way as
you have adjusted the Site Name):
Line 1 Font: Fjalla One (59px, Letter Spacing: 2px, Uppercase)
Line 2 Font: Garamond (23px, Letter Spacing: 1px, Italic, Highlight: #a30000)
Line 3 Font: Fjalla One (17px, Letter Spacing: 1px, Uppercase)
On the 3rd line you may use a button:
<a class="btn btn-large btn-primary" href="#">Call to Action !</a>
For more button elements, please refer to the Bootstrap framework documentation
(http://twitter.github.com/bootstrap/).
Bootstrap Designer Quick Start Guide
8
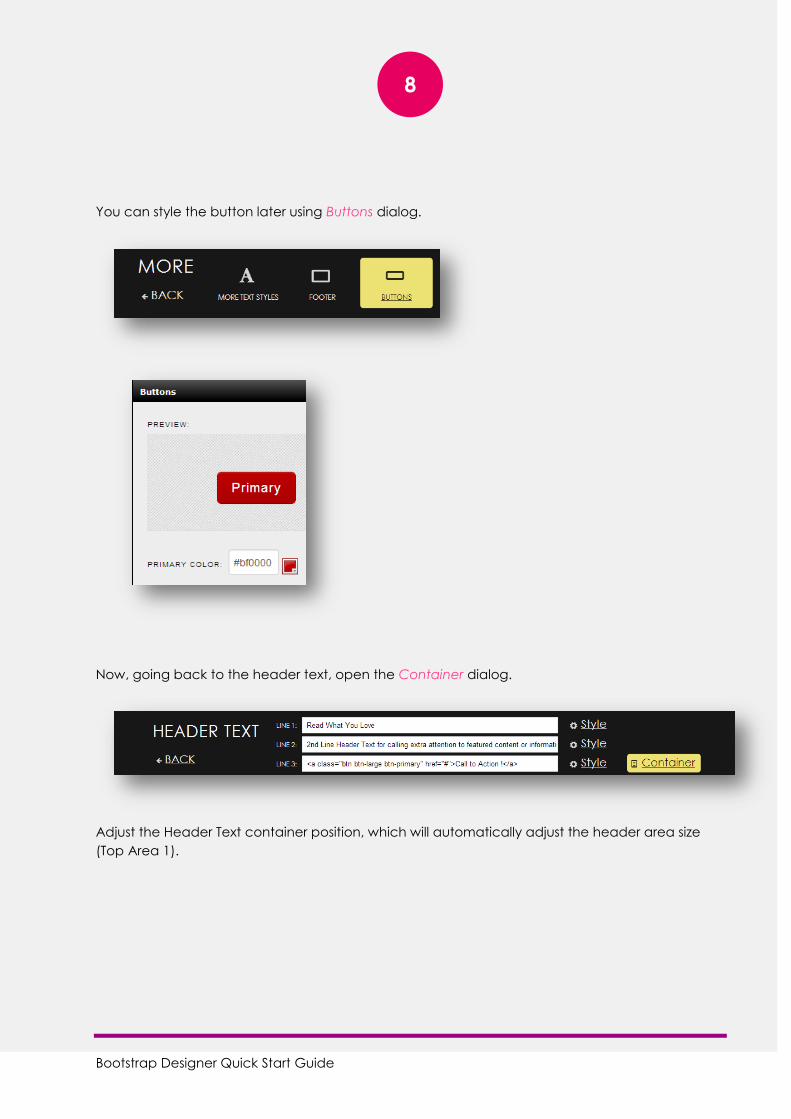
You can style the button later using Buttons dialog.
Now, going back to the header text, open the Container dialog.
Adjust the Header Text container position, which will automatically adjust the header area size
(Top Area 1).
Bootstrap Designer Quick Start Guide
9
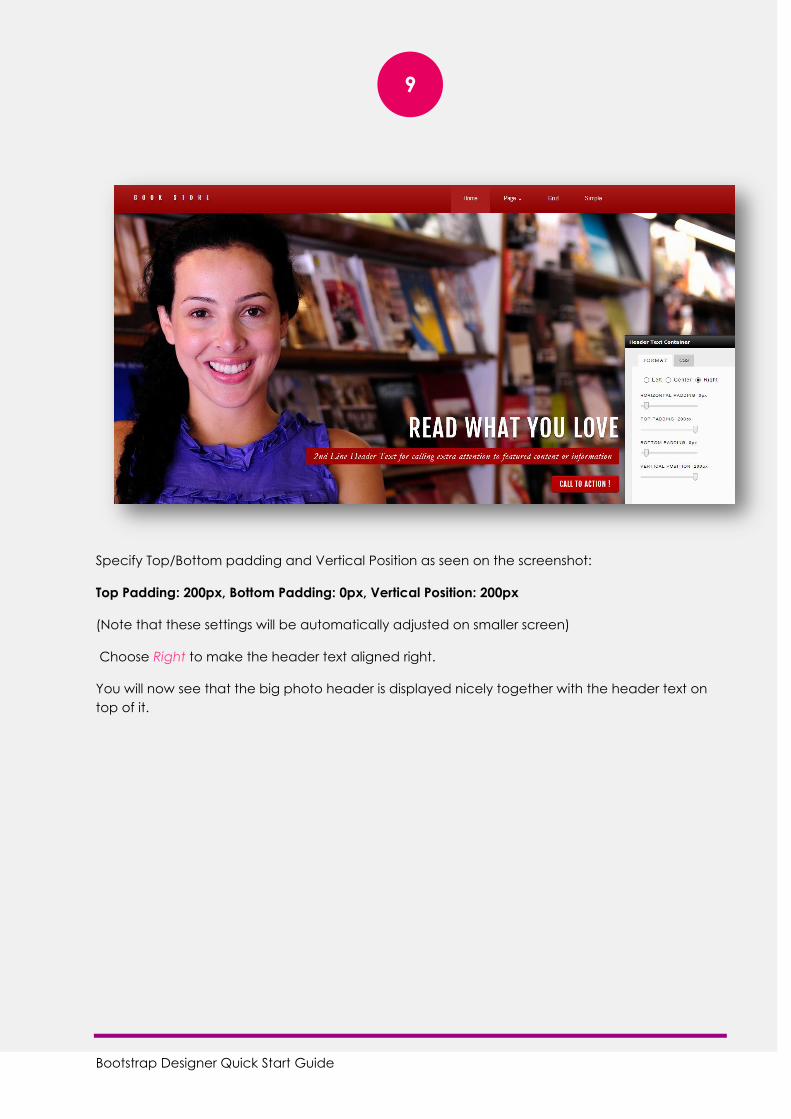
Specify Top/Bottom padding and Vertical Position as seen on the screenshot:
Top Padding: 200px, Bottom Padding: 0px, Vertical Position: 200px
(Note that these settings will be automatically adjusted on smaller screen)
Choose Right to make the header text aligned right.
You will now see that the big photo header is displayed nicely together with the header text on
top of it.
Bootstrap Designer Quick Start Guide
10
CONTENT TEXT
(ESTIMATED TIME: 2-3 MINUTES)
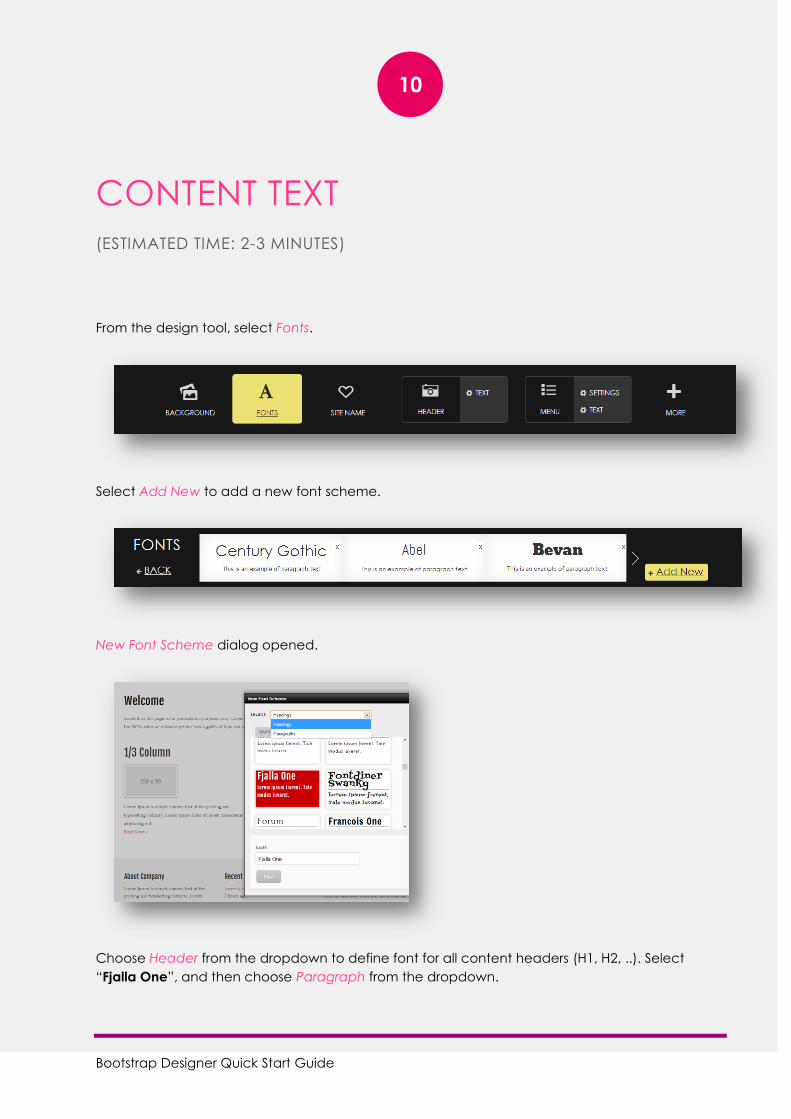
From the design tool, select Fonts.
Select Add New to add a new font scheme.
New Font Scheme dialog opened.
Choose Header from the dropdown to define font for all content headers (H1, H2, ..). Select
“Fjalla One”, and then choose Paragraph from the dropdown.
Bootstrap Designer Quick Start Guide
11
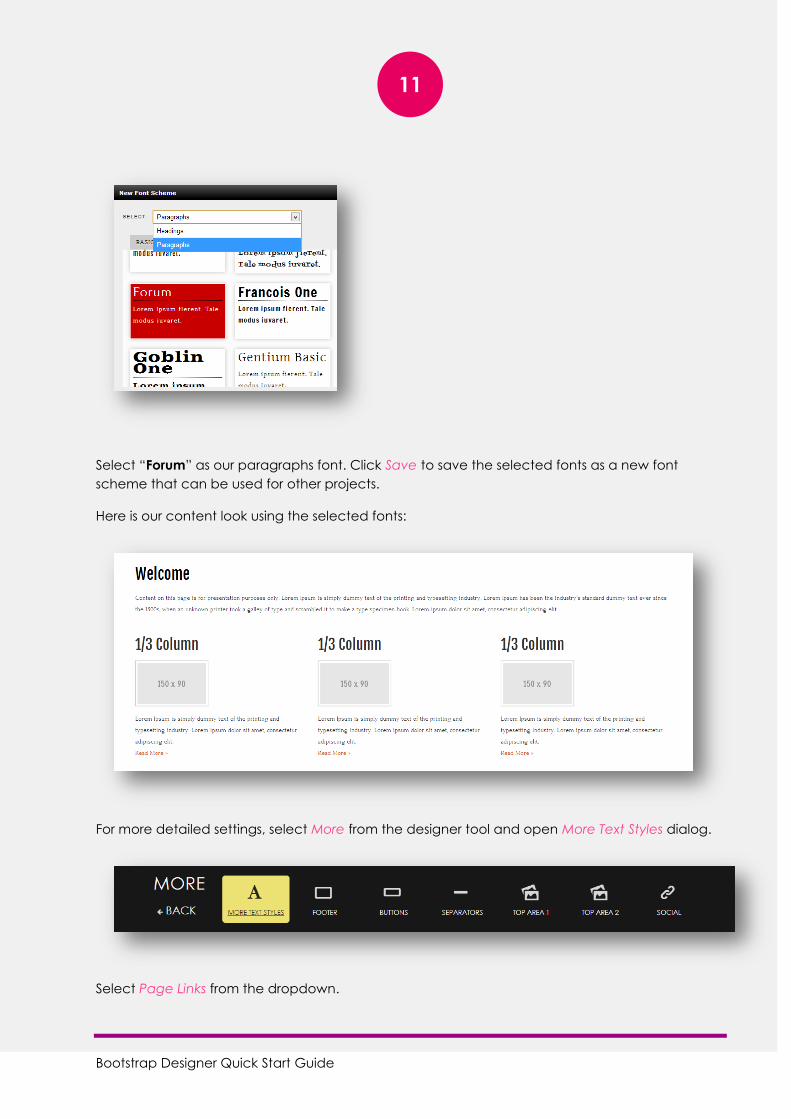
Select “Forum” as our paragraphs font. Click Save to save the selected fonts as a new font
scheme that can be used for other projects.
Here is our content look using the selected fonts:
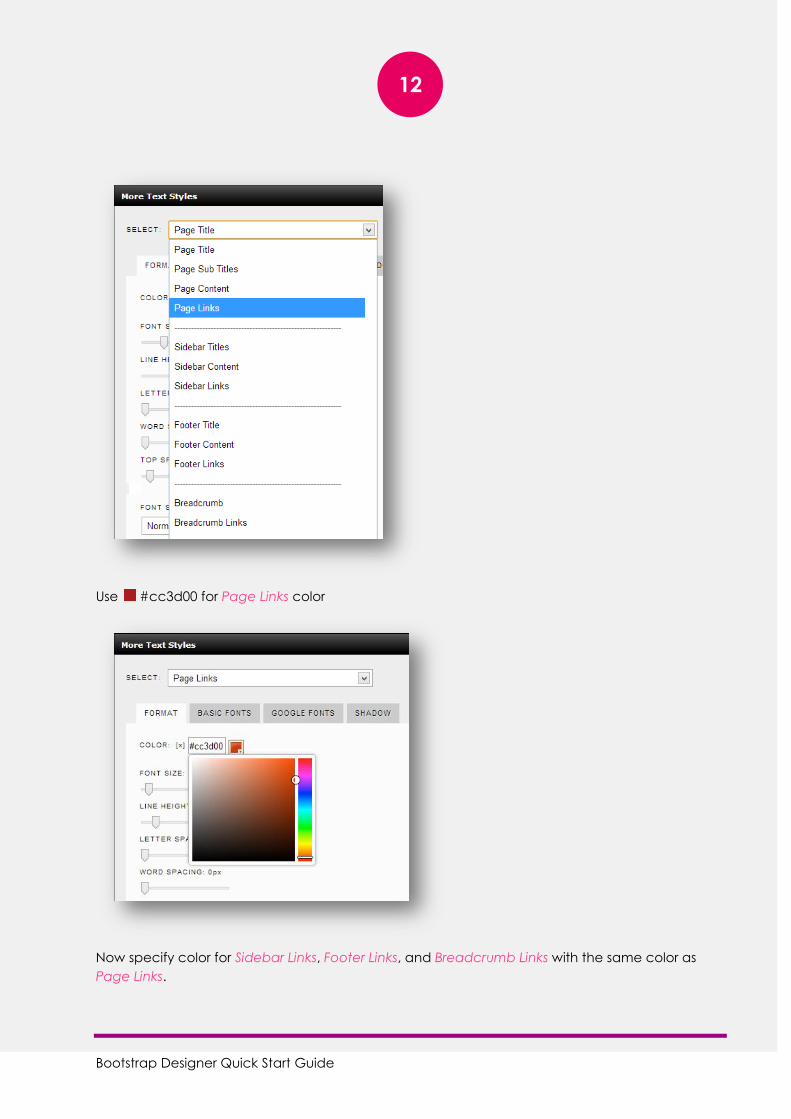
For more detailed settings, select More from the designer tool and open More Text Styles dialog.
Select Page Links from the dropdown.
Bootstrap Designer Quick Start Guide
12
Use #cc3d00 for Page Links color
Now specify color for Sidebar Links, Footer Links, and Breadcrumb Links with the same color as
Page Links.
Bootstrap Designer Quick Start Guide
13
MENU
(ESTIMATED TIME: 1-2 MINUTES)
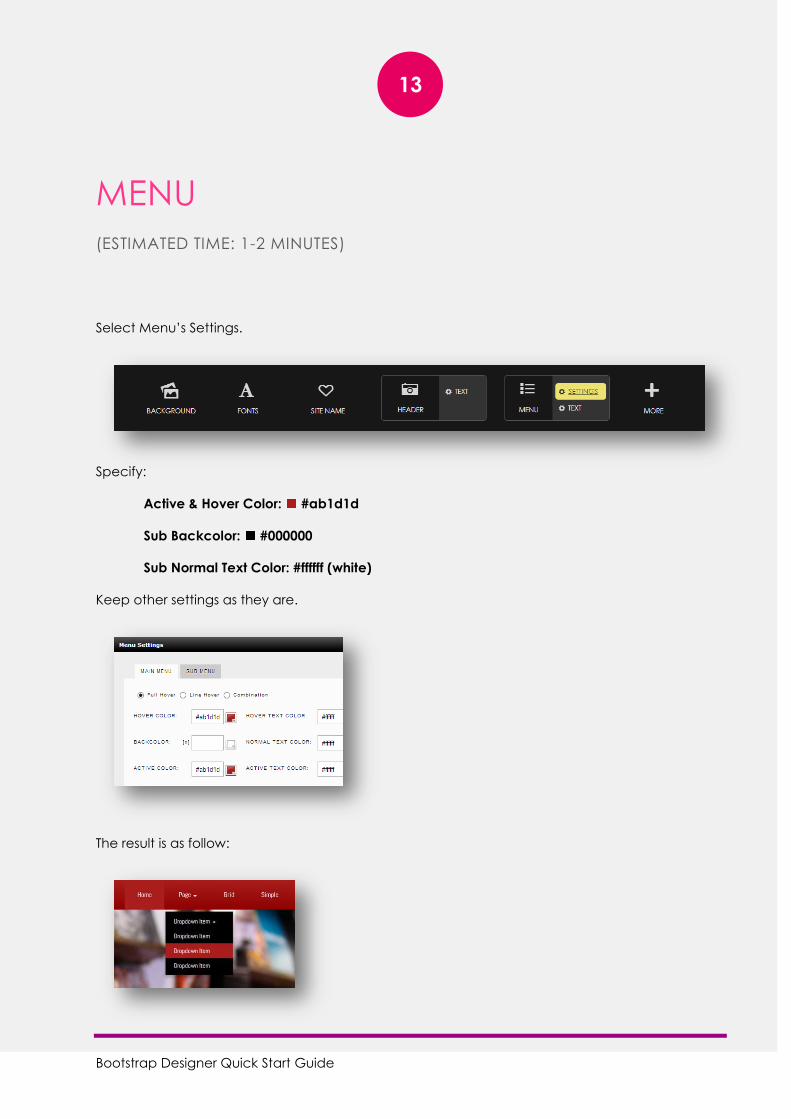
Select Menu’s Settings.
Specify:
Active & Hover Color: #ab1d1d
Sub Backcolor: #000000
Sub Normal Text Color: #ffffff (white)
Keep other settings as they are.
The result is as follow:
Bootstrap Designer Quick Start Guide
14
FINAL DESIGN
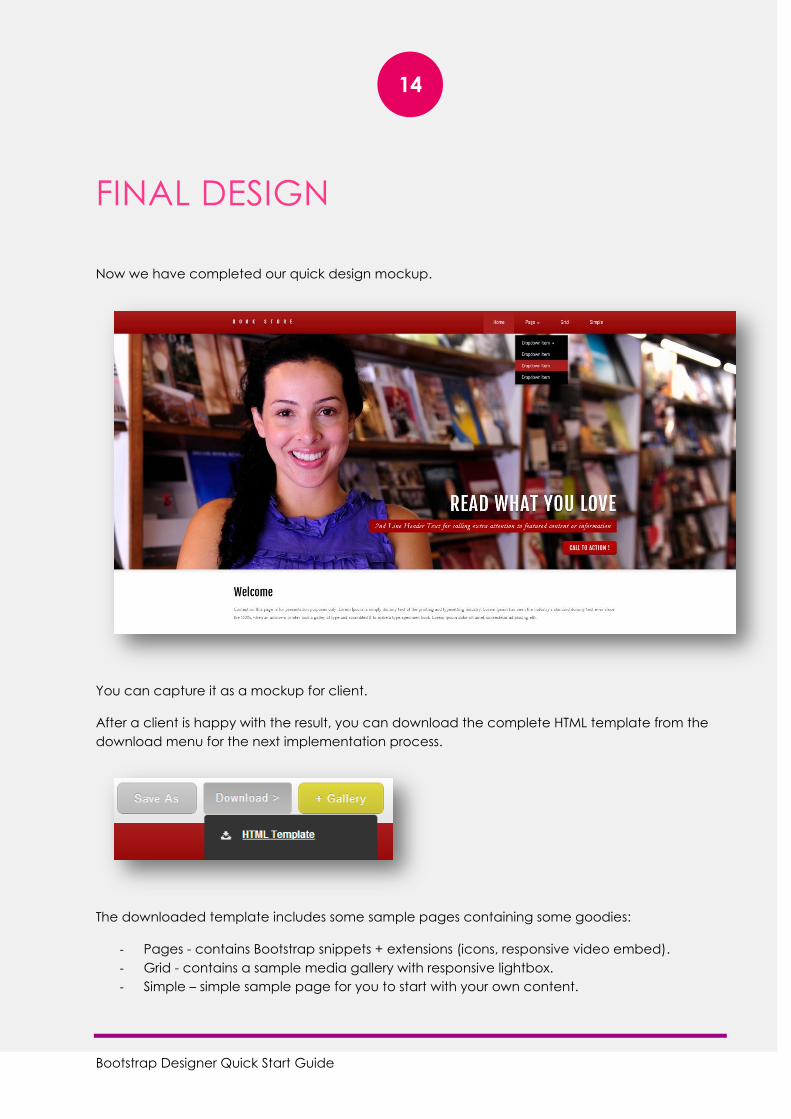
Now we have completed our quick design mockup.
You can capture it as a mockup for client.
After a client is happy with the result, you can download the complete HTML template from the
download menu for the next implementation process.
The downloaded template includes some sample pages containing some goodies:
- Pages - contains Bootstrap snippets + extensions (icons, responsive video embed).
- Grid - contains a sample media gallery with responsive lightbox.
- Simple – simple sample page for you to start with your own content.
Bootstrap Designer Quick Start Guide
15
MORE ELEMENTS (SIDEBAR AND
FOOTER)
On the initial phase of design, you don’t need to work with every element in detail. For example,
you can work with the sidebar and footer later, after the client has agreed and is happy with the
main elements of the design we have created previously.
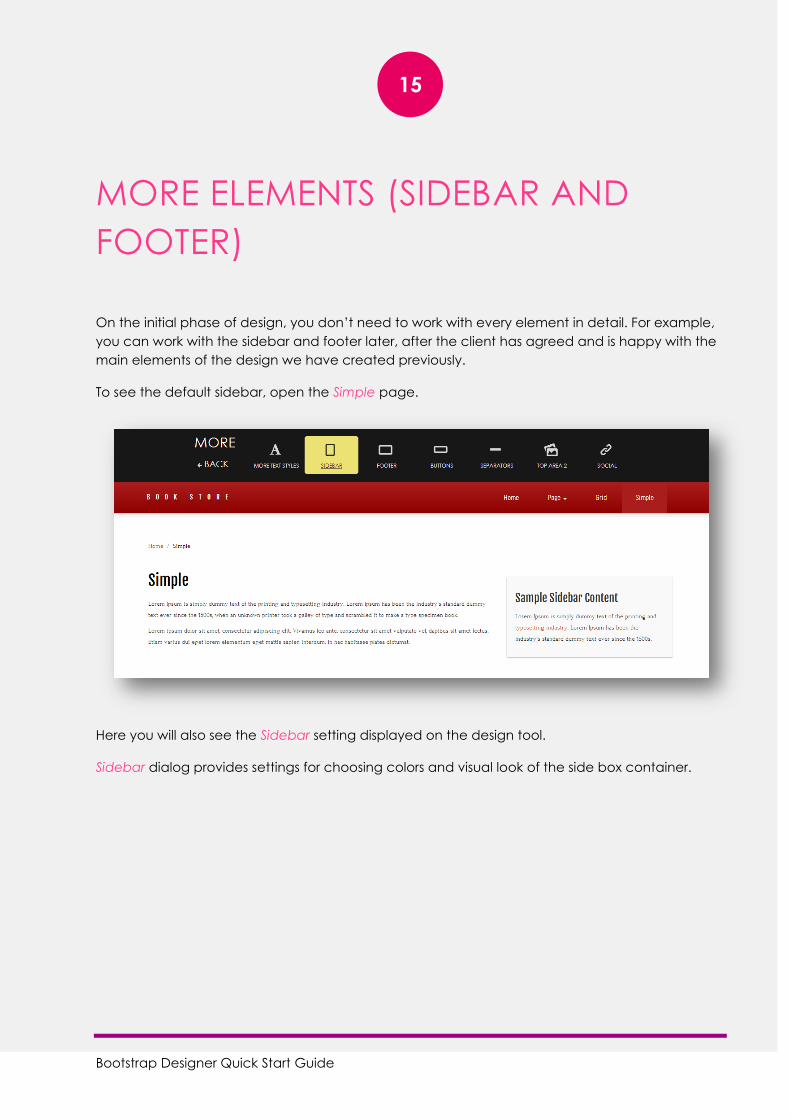
To see the default sidebar, open the Simple page.
Here you will also see the Sidebar setting displayed on the design tool.
Sidebar dialog provides settings for choosing colors and visual look of the side box container.

Bootstrap Designer Quick Start Guide
16
In practice, I rarely change the default settings of the sidebar. When I do set the Sidebar Link
color (as I did previously in More Text Styles dialog) it automatically adjusts the link color here in
Sidebar Settings dialog. The same also applies to Footer text.