blank slate blanctshirt
TRANSCRIPT
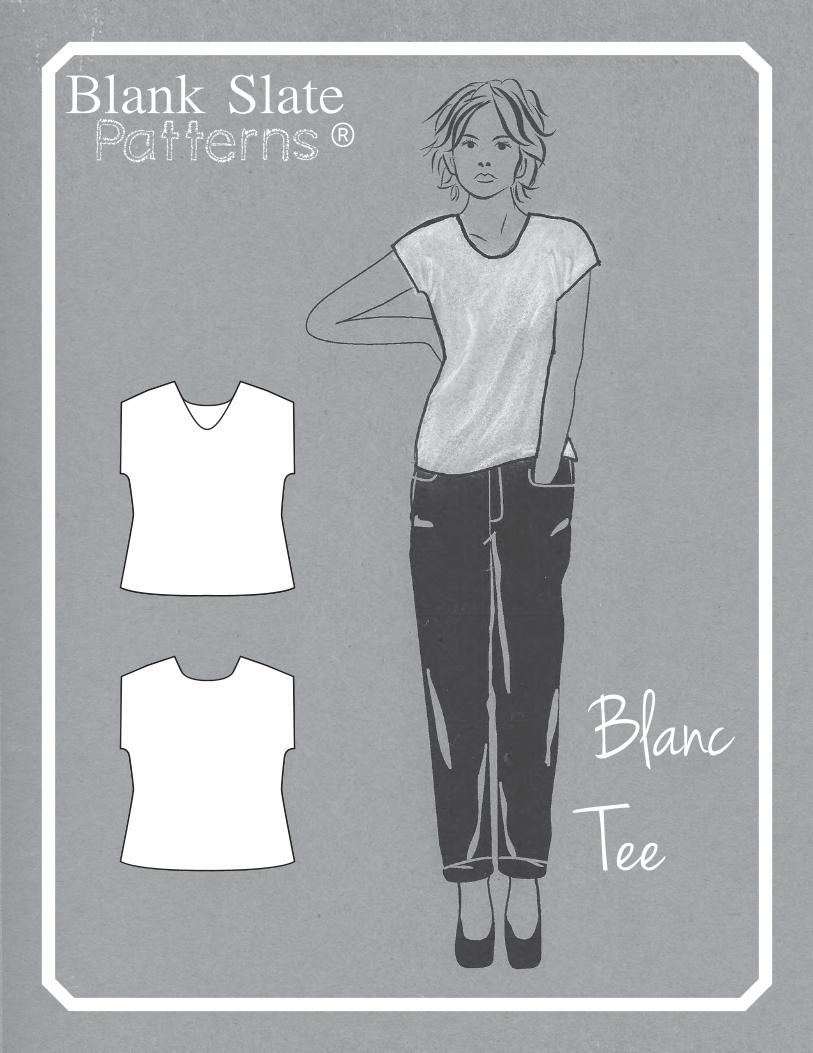
Blank Slate®
BlancTee
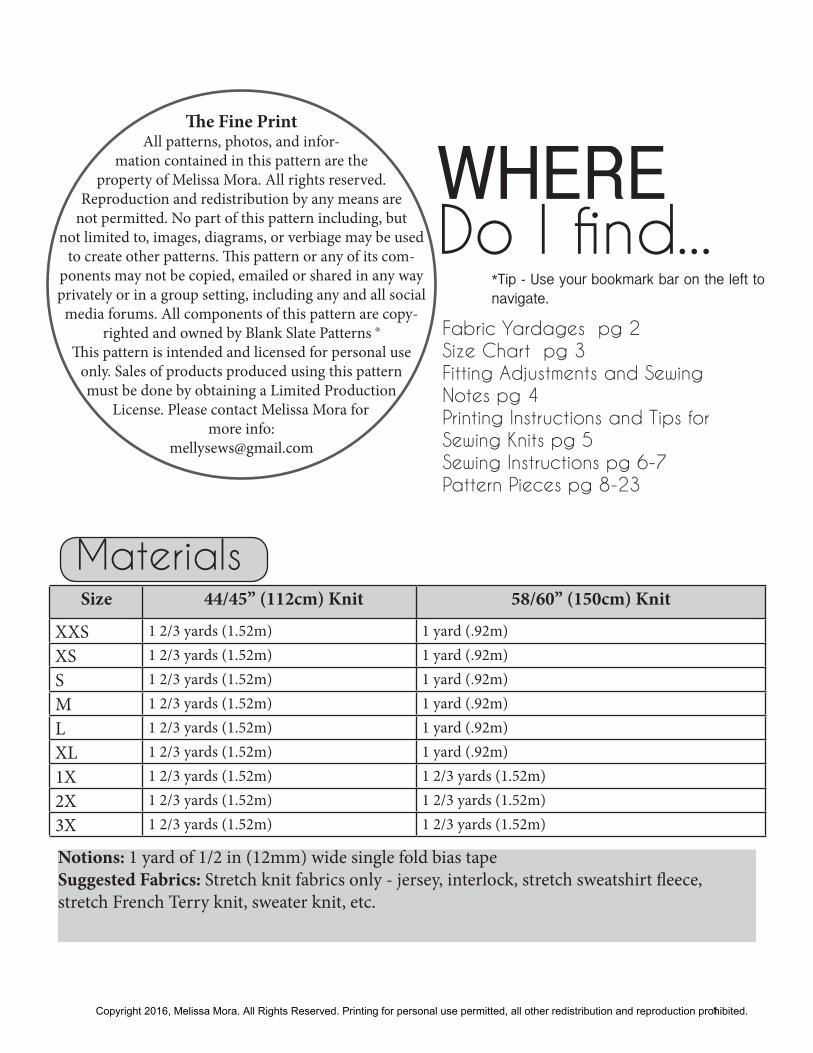
WHEREDo I find...Fabric Yardages pg 2Size Chart pg 3Fitting Adjustments and Sewing Notes pg 4Printing Instructions and Tips for Sewing Knits pg 5Sewing Instructions pg 6-7Pattern Pieces pg 8-23
�e Fine PrintAll patterns, photos, and infor-
mation contained in this pattern are the property of Melissa Mora. All rights reserved.
Reproduction and redistribution by any means are not permitted. No part of this pattern including, but
not limited to, images, diagrams, or verbiage may be used to create other patterns. �is pattern or any of its com-
ponents may not be copied, emailed or shared in any way privately or in a group setting, including any and all social
media forums. All components of this pattern are copy-righted and owned by Blank Slate Patterns ®
�is pattern is intended and licensed for personal use only. Sales of products produced using this pattern must be done by obtaining a Limited Production
License. Please contact Melissa Mora for more info:
*Tip - Use your bookmark bar on the left to navigate.
Notions: 1 yard of 1/2 in (12mm) wide single fold bias tapeSuggested Fabrics: Stretch knit fabrics only - jersey, interlock, stretch sweatshirt �eece, stretch French Terry knit, sweater knit, etc.
Size 44/45” (112cm) Knit 58/60” (150cm) Knit
XXS 1 2/3 yards (1.52m) 1 yard (.92m)
XS 1 2/3 yards (1.52m) 1 yard (.92m)
S 1 2/3 yards (1.52m) 1 yard (.92m)
M 1 2/3 yards (1.52m) 1 yard (.92m)
L 1 2/3 yards (1.52m) 1 yard (.92m)
XL 1 2/3 yards (1.52m) 1 yard (.92m)
1X 1 2/3 yards (1.52m) 1 2/3 yards (1.52m)
2X 1 2/3 yards (1.52m) 1 2/3 yards (1.52m)
3X 1 2/3 yards (1.52m) 1 2/3 yards (1.52m)
Materials
Copyright 2016, Melissa Mora. All Rights Reserved. Printing for personal use permitted, all other redistribution and reproduction prohibited.1

WHAT Size Do I Make?inches XXS XS S M L XL 1X 2X 3X
cm
High Bust
28 30 32 34 37 40 43 46 49
71 76 81 86 94 102 109 117 124
Bust 31 33 35 37 40 44 47 50 53
79 84 89 94 104 112 119 127 135
Waist 24 26 28 30 32 35 38 41 44
61 66 71 76 81 89 97 104 112
Hip 34 36 38 40 43 46 49 52 55
86 91 97 102 109 117 124 132 149
Wom
en
To ensure the best fit, start by choosing your size based on your bust and hip measurements below.
HELP! I’m all over the
size chart!
Never fear...start with your high bust measurement and read the next few pages to get a
PERFECT �t for your body!
High Bust
Bust
Waist
Hips
Neck
Inseam
Hips
Neck to Waist
Waist to Floor
Arm Length
Bicep
Armscye depth
Wrist
High Bust - Measure above the bust, under the arms and across the backBust - measure around the bust at the fullest pointWaist - Measure at the point where your side indents if you bend to the sideHips - Measure at the fullest portion of your lower body
Additional measurements for �t adjustments Neck to waist - measure from the bone at the base of your neck to the waistWaist to �oor - measure from the waist level to the �oorNeck - measure around the base of the neckBicep - measure around your bicep at the upper armWrist - measure around the wrist boneArm length - measure around your bent arm from the wrist to the shoulder pointInseam - measure from the lowest point of the crotch to the bottom of the foot.
Copyright 2016, Melissa Mora. All Rights Reserved. Printing for personal use permitted, all other redistribution and reproduction prohibited.2
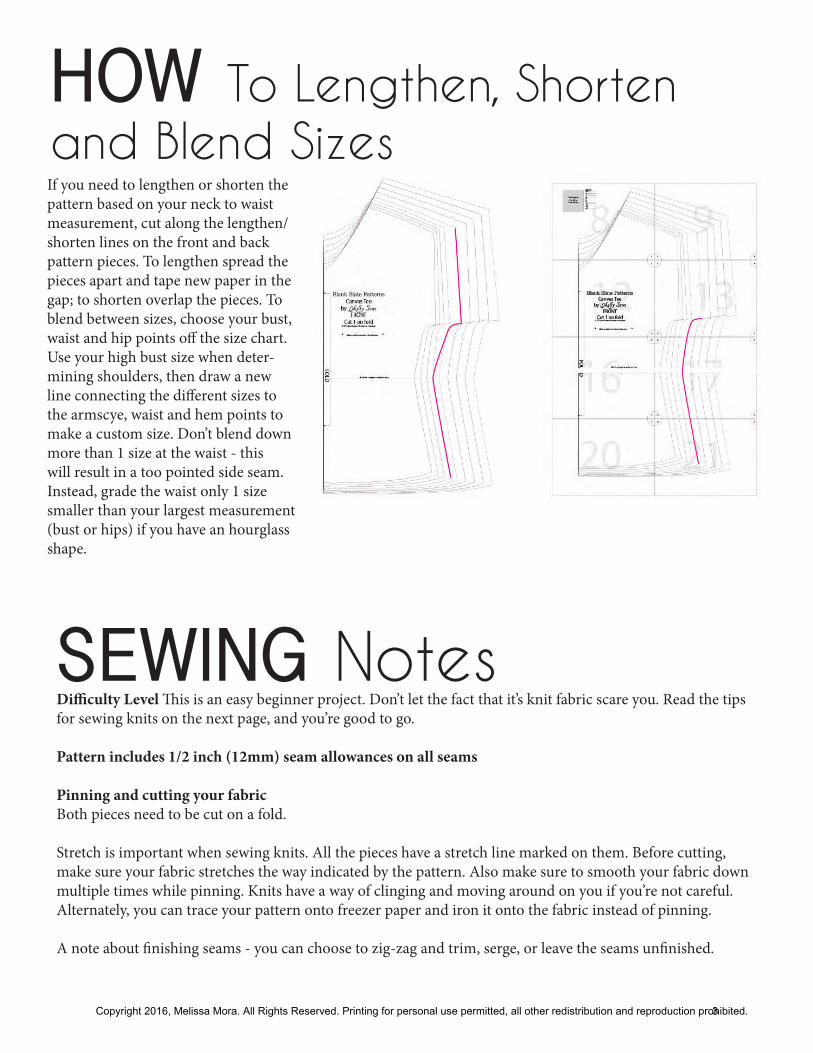
HOW To Lengthen, Shorten and Blend Sizes If you need to lengthen or shorten the pattern based on your neck to waist measurement, cut along the lengthen/shorten lines on the front and back pattern pieces. To lengthen spread the pieces apart and tape new paper in the gap; to shorten overlap the pieces. To blend between sizes, choose your bust, waist and hip points o� the size chart. Use your high bust size when deter-mining shoulders, then draw a new line connecting the di�erent sizes to the armscye, waist and hem points to make a custom size. Don’t blend down more than 1 size at the waist - this will result in a too pointed side seam. Instead, grade the waist only 1 size smaller than your largest measurement (bust or hips) if you have an hourglass shape.
SEWING NotesDi�culty Level �is is an easy beginner project. Don’t let the fact that it’s knit fabric scare you. Read the tips for sewing knits on the next page, and you’re good to go.
Pattern includes 1/2 inch (12mm) seam allowances on all seams
Pinning and cutting your fabricBoth pieces need to be cut on a fold.
Stretch is important when sewing knits. All the pieces have a stretch line marked on them. Before cutting, make sure your fabric stretches the way indicated by the pattern. Also make sure to smooth your fabric down multiple times while pinning. Knits have a way of clinging and moving around on you if you’re not careful. Alternately, you can trace your pattern onto freezer paper and iron it onto the fabric instead of pinning.
A note about �nishing seams - you can choose to zig-zag and trim, serge, or leave the seams un�nished.
Copyright 2016, Melissa Mora. All Rights Reserved. Printing for personal use permitted, all other redistribution and reproduction prohibited.3

HOW Do I Print This?Use Adobe Reader downloaded from
Adobe.com. Other programs, including Mac Preview and the Windows 8 version of Adobe Reader that comes pre-installed, can cause headaches.
If you print the whole �le, you’ll get something that looks like the layout to the right. Don’t cut o� gray borders. Match up the circle images on the edges of pages.
Print the �rst pattern page �rst and check your measurements. Do any adjust-ing necessary here.
Print at 100% Scale or Actual Size. Do not “�t to page” or “select paper by docu-ment size”. Just use your regular paper and print at Actual Size or 100%. Check “auto rotate and center” if you have that option.
Read this post for troubleshooting: http://mellysews.com/2014/02/print-pdf-sewing-patterns.html
Tips for Sewing Knits• DON’T STRETCH AS YOU SEW! If
you stretch the fabric, it will end up wavy looking and you don’t want that. If your machine has a presser foot adjustment, adjust it to the low-est amount of pressure. This will help you not to stretch the fabric as you sew.
• Use a ball point needle if you find your thread breaking or if your stitches keep pulling out. • Alternatively, you can use a serger to sew if you have one and are comfortable doing so. This is my pre-
ferred method, but I have sewed many t-shirts without one because I didn’t always have a serger, so you don’t need one.
• If you find your knits curling on the edges, spray starch and an iron can help you wrangle them.• For more knit tips, see this post: http://mellysews.com/2012/10/tips-for-sewing-with-knits.html• For information about types of knit fabric, see this post: http://mellysews.com/2014/03/types-knit-fabric.
html
Copyright 2016, Melissa Mora. All Rights Reserved. Printing for personal use permitted, all other redistribution and reproduction prohibited.4
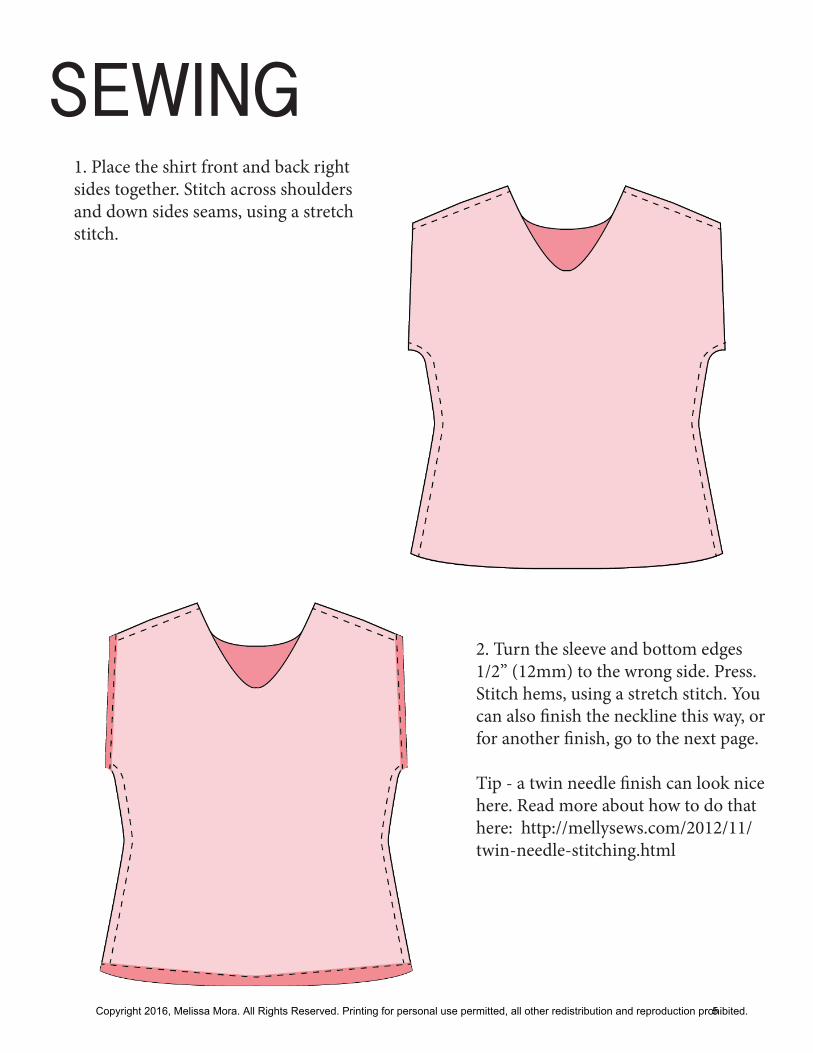
SEWING1. Place the shirt front and back right sides together. Stitch across shoulders and down sides seams, using a stretch stitch.
2. Turn the sleeve and bottom edges 1/2” (12mm) to the wrong side. Press. Stitch hems, using a stretch stitch. You can also �nish the neckline this way, or for another �nish, go to the next page.
Tip - a twin needle �nish can look nice here. Read more about how to do that here: http://mellysews.com/2012/11/twin-needle-stitching.html
Copyright 2016, Melissa Mora. All Rights Reserved. Printing for personal use permitted, all other redistribution and reproduction prohibited.5

BIAS NECKLINE1. Turn the tee right side out. Unfold the bias tape and start at one shoulder, pinning tape right sides together along the neckline, matching raw edges. Overlap the bias tape when you get back to the start, then cut. Stitch, using a regular straight stitch, in the crease mark closest to the raw edge. Keep the knit fabric against the feed dogs and the bias tape agains the presser foot as your stitch to prevent puckering.
2. Turn the tee wrong side out. Fold the bias tape along the creaselines in the tape, pinning it to the wrong side of the shirt. Stitch, using a regular straight stitch, close to the unsewn folded edge. Keep the knit fabric against the feed dogs and the bias tape agains the presser foot as your stitch to prevent puckering.
Need more help sewing bias tape �n-ishes? See this post: http://mellysews.com/2014/10/sew-curved-hem-hem-curves-bias-tape.html
Copyright 2016, Melissa Mora. All Rights Reserved. Printing for personal use permitted, all other redistribution and reproduction prohibited.6
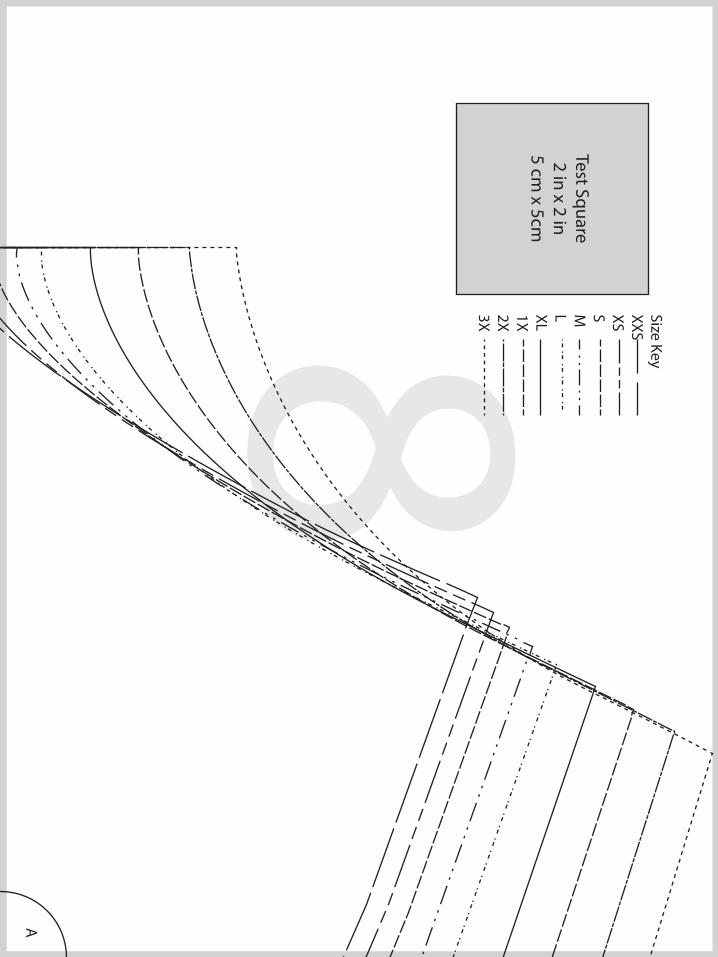
8A
Test Square2 in x 2 in
5 cm x 5cm
Size KeyXXSXSSMLXL1X2X3X

9A
B
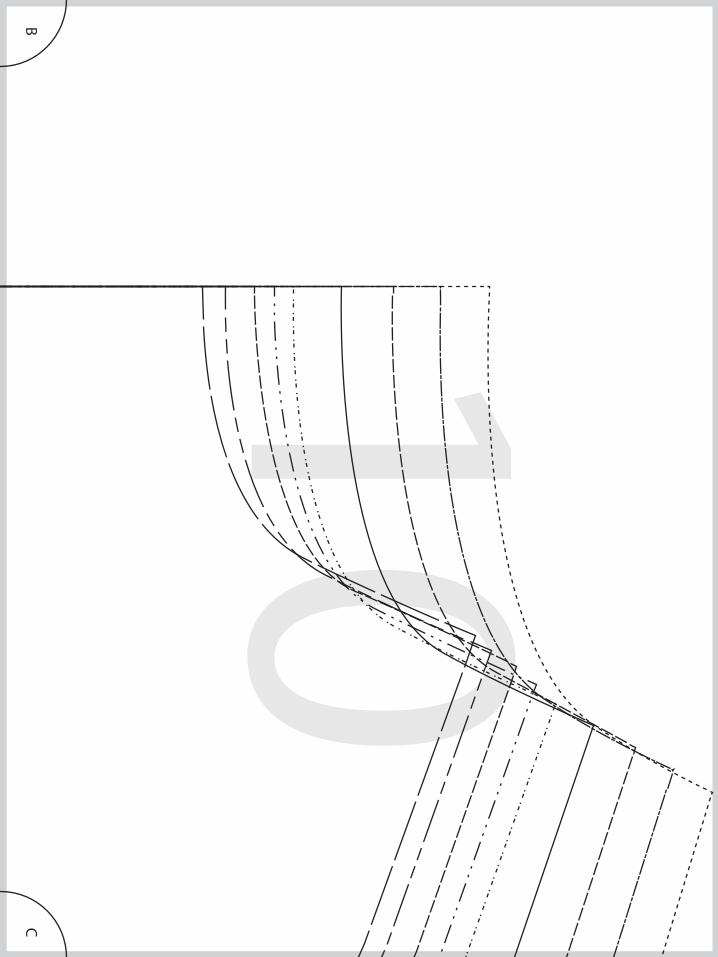
10B
C
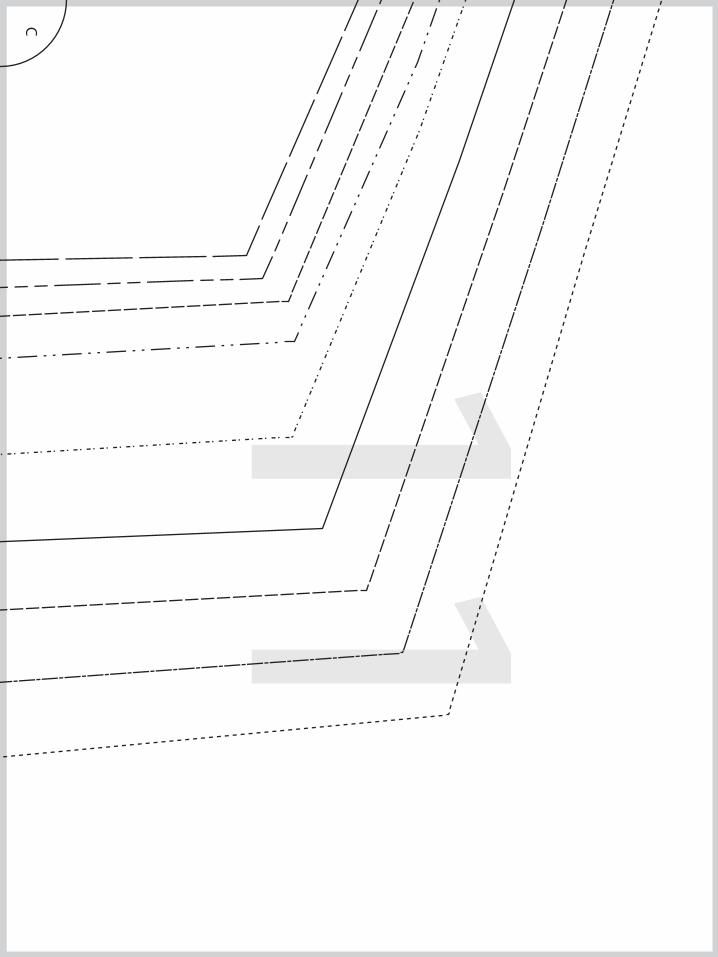
11C

12AD
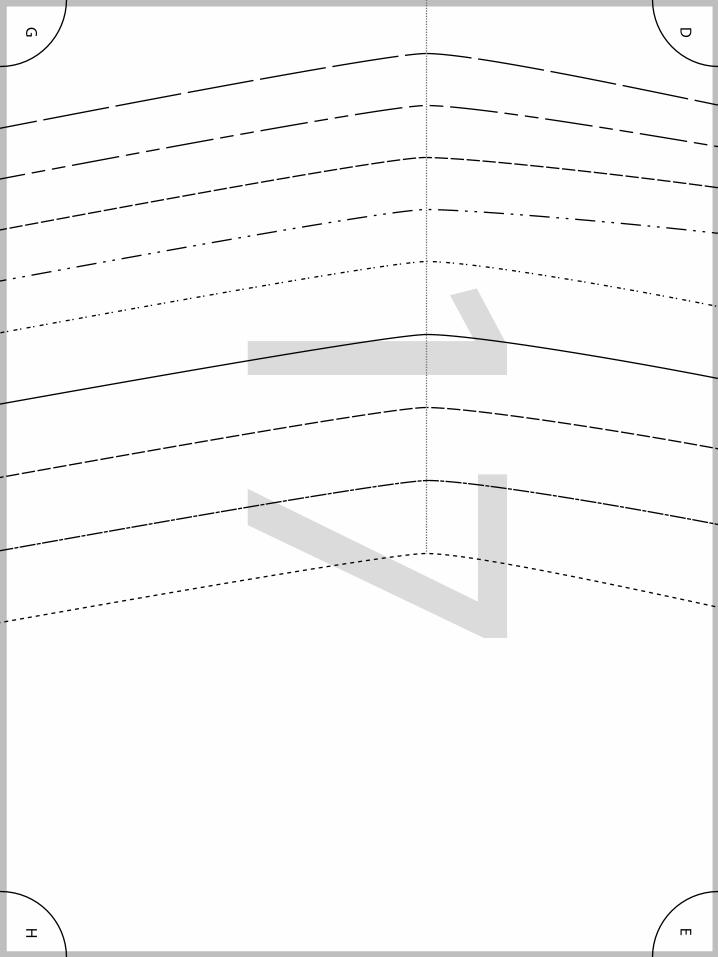
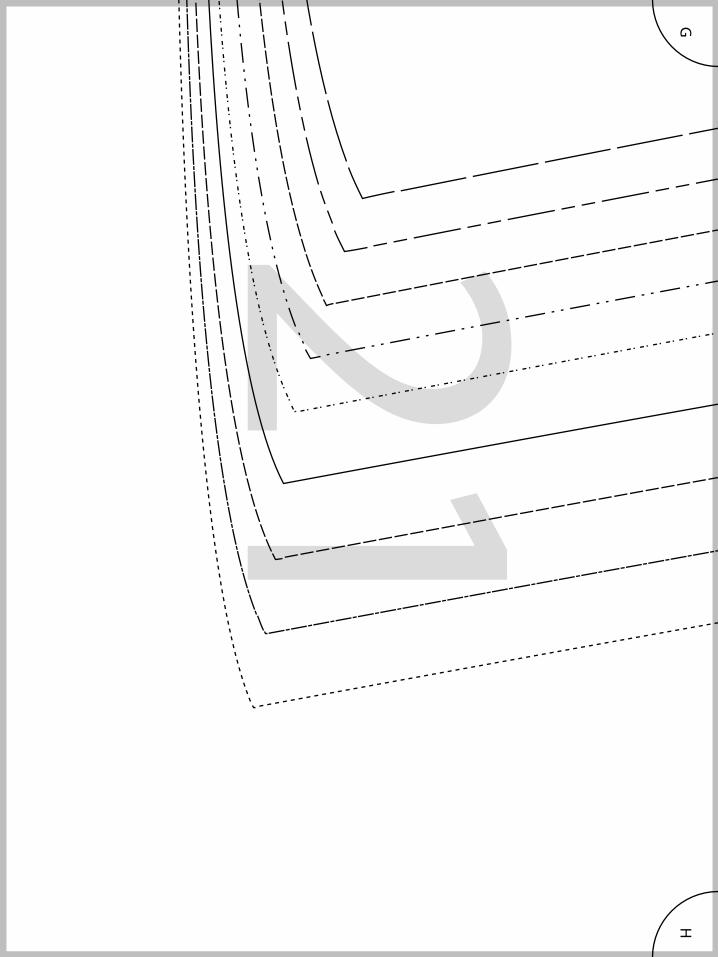
Blan
k S
late Pattern
sBlanc Tee
by Melly Sews
FRON
TCut 1 on fold
1/2” (12mm
) seam allow
ance included
Make sure fabric stretches this direction

13A
B
DE

14B
C
EF
Blan
k S
late Pattern
sBlanc Tee
by Melly Sews
BACKCut 1 on fold
1/2” (12mm
) seam allow
ance included

15CF
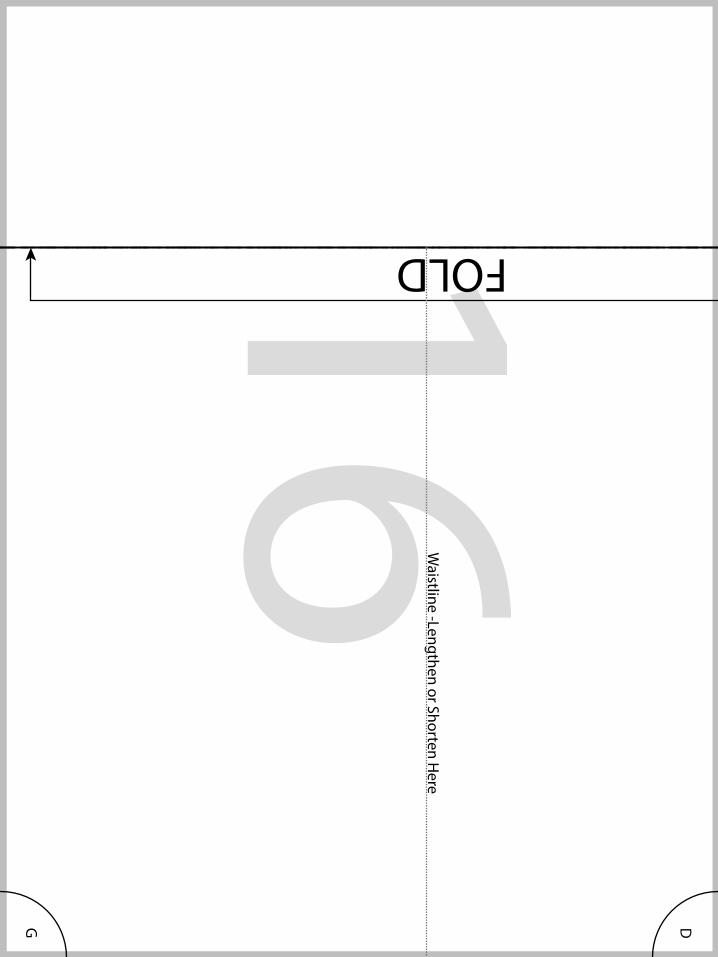
16DG
Waistline -Lengthen or Shorten H
ere
FOLD
17D
E
GH
18E
F
HI
Back Neck to H
em Length
XXS 22 in (38.4cm)
XS 22 3/8 in (38.7cm)
S 22 3/4 in (39cm)
M 23 1/8 in (39.3cm
)L 23 3/8 in (40cm
)XL 24 in (40.6cm
)1X 24 5/8in (41.3cm
)2X 25 1/4 in (42cm
)3X 25 7/8 in (42.5cm
)
FOLD
Blan
k S
late Pattern
sCanvas Tee
by Melly Sews
BACKCut 1 on fold
1/2” (12mm
) seam allow
ance included
Make sure fabric stretches this direction
Waistline -Lengthen or Shorten H
ere

19FI

20G
21G
H

22H
I

23I