benq ht1075 projector blower fan replacementnote that the benq ht1075 projector lamp replacement is...
TRANSCRIPT
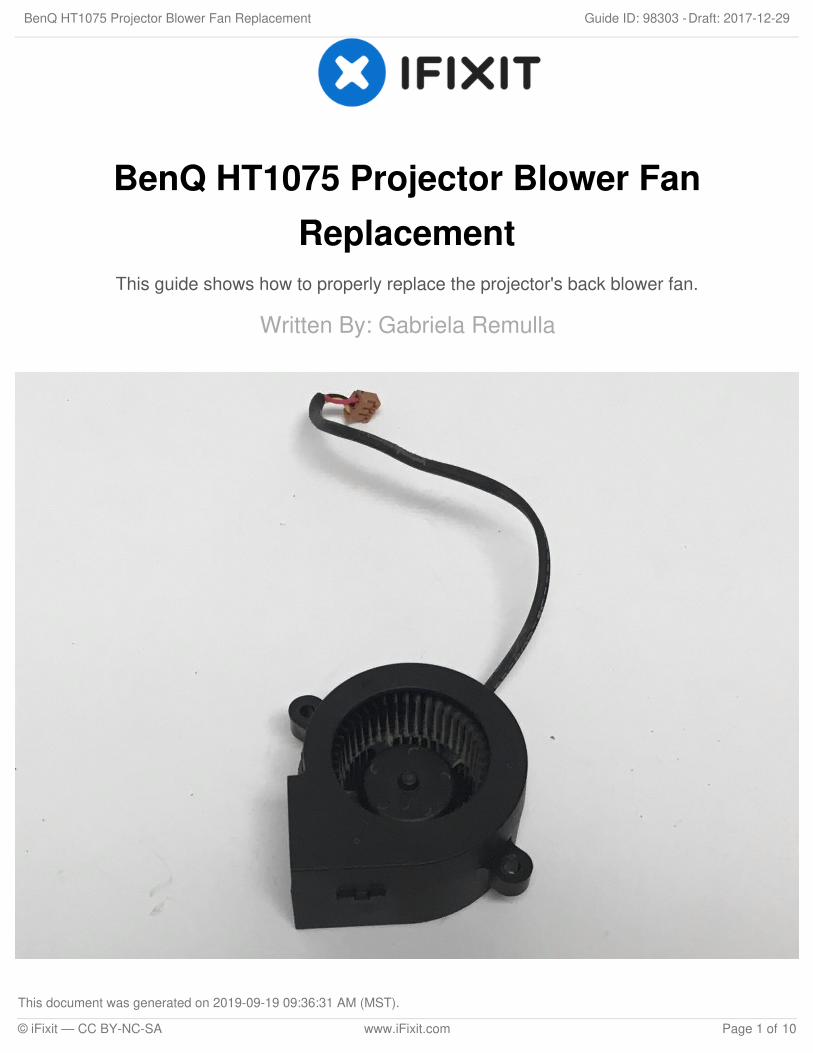
BenQ HT1075 Projector Blower FanReplacement
This guide shows how to properly replace the projector's back blower fan.
Written By: Gabriela Remulla
BenQ HT1075 Projector Blower Fan Replacement Draft: 2017-12-29Guide ID: 98303 -
This document was generated on 2019-09-19 09:36:31 AM (MST).
© iFixit — CC BY-NC-SA www.iFixit.com Page 1 of 10
INTRODUCTION
Similar to the main fan, the blower fan is essential in preventing the projector from overheating.Since projectors are prone to producing more heat than other electronic devices, the addition of thisblower fan helps in maintaining a low temperature. This guide will show how to replace the blowerfan, but it is also important to keep the fan clean from debris and particles that may potentially keep itfrom running smoothly.
Note that the BenQ HT1075 Projector Lamp Replacement is a prerequisite since damage tothe lamp is hazardous to both the projector and user.
TOOLS:Phillips #1 Screwdriver (1)iFixit Opening Tools (1)5mm Nut Driver (1)Phillips #2 Screwdriver (1)
BenQ HT1075 Projector Blower Fan Replacement Draft: 2017-12-29Guide ID: 98303 -
This document was generated on 2019-09-19 09:36:31 AM (MST).
© iFixit — CC BY-NC-SA www.iFixit.com Page 2 of 10
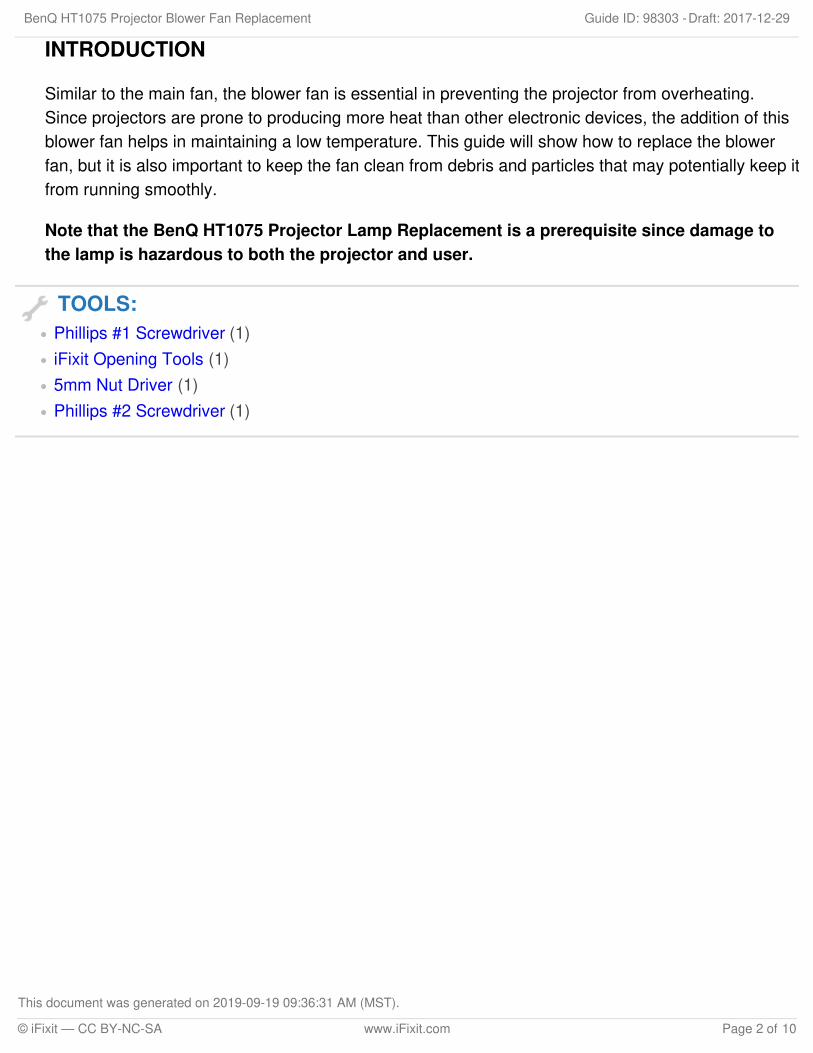
Step 1 — Lamp
Loosen the 2.5 mm Phillips #1 screwthat holds the top assembly in placeusing a Philips #1 (PH1)screwdriver. This will enable you tolift and slide off the top cover.
Fully remove the top cover in orderto get to the lamp housing.
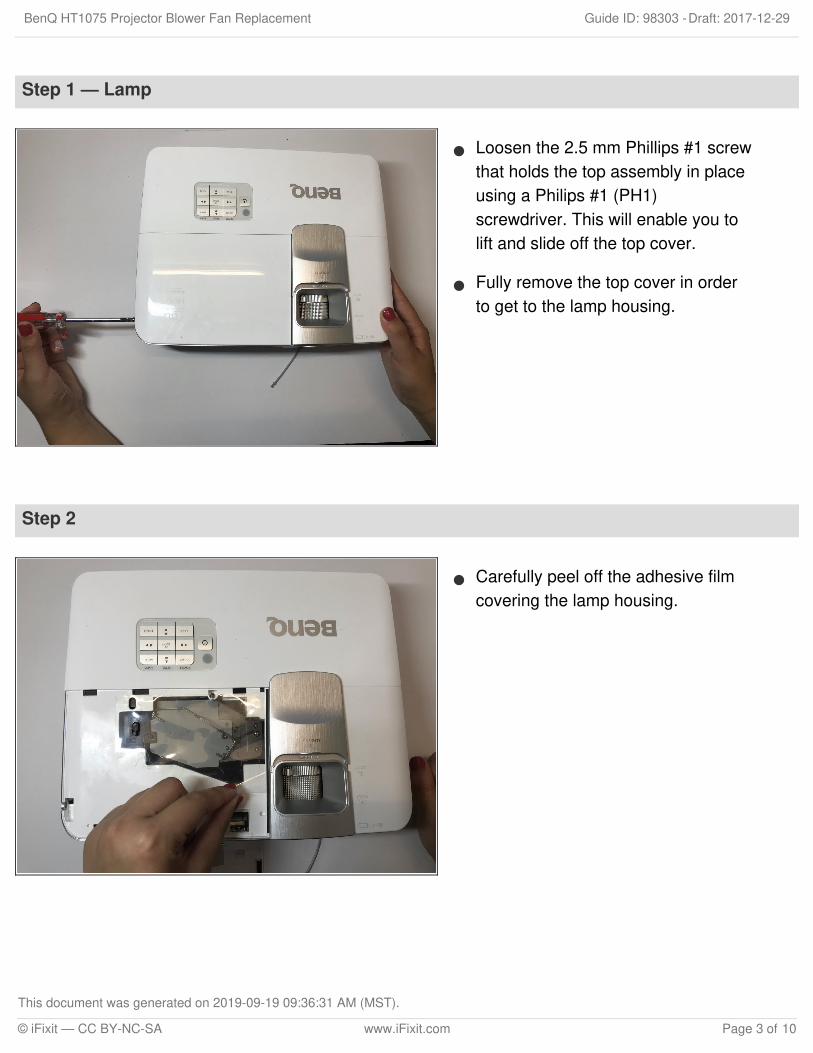
Step 2
Carefully peel off the adhesive filmcovering the lamp housing.
BenQ HT1075 Projector Blower Fan Replacement Draft: 2017-12-29Guide ID: 98303 -
This document was generated on 2019-09-19 09:36:31 AM (MST).
© iFixit — CC BY-NC-SA www.iFixit.com Page 3 of 10

Step 3
Using a Phillips #1 (PH1)screwdriver, loosen and remove thesingle 2.5 mm Phillips #1 screw thatsecures the lamp housing to theprojector.
Step 4
Remove the lamp from the projectorby pulling on the lamp handle.
Apply more force on the sideopposite of the newly removedscrew as you pull the lamp out.
BenQ HT1075 Projector Blower Fan Replacement Draft: 2017-12-29Guide ID: 98303 -
This document was generated on 2019-09-19 09:36:31 AM (MST).
© iFixit — CC BY-NC-SA www.iFixit.com Page 4 of 10
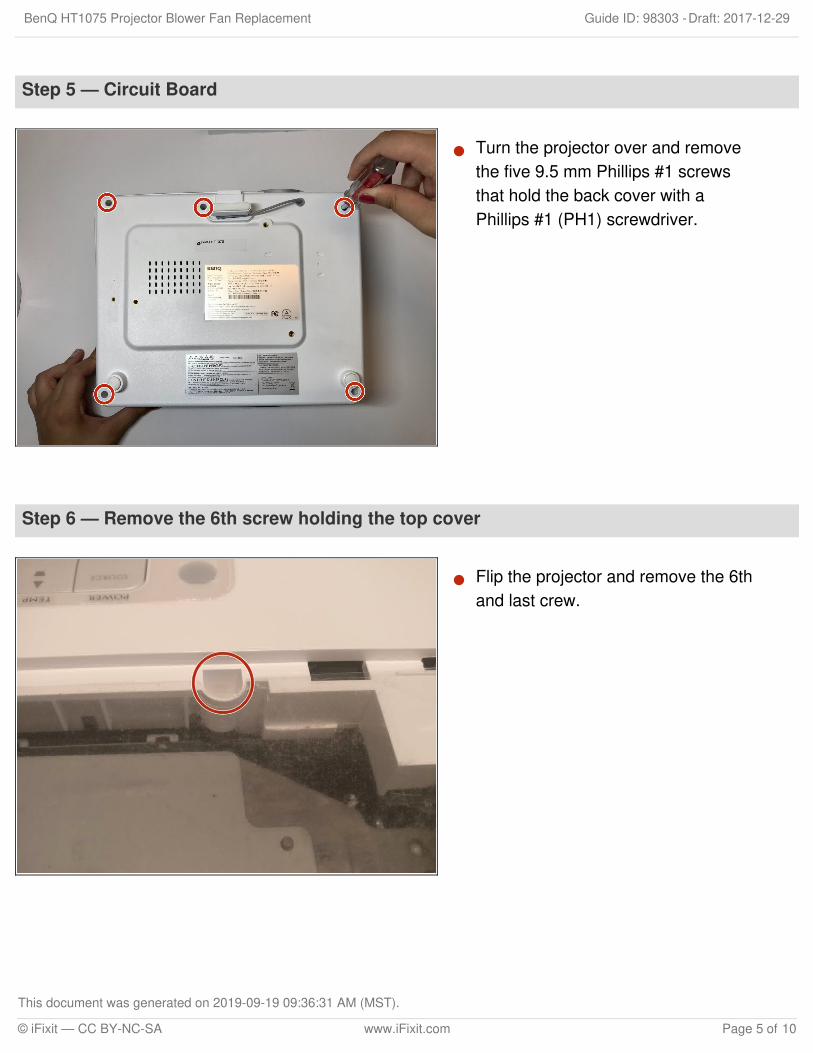
Step 5 — Circuit Board
Turn the projector over and removethe five 9.5 mm Phillips #1 screwsthat hold the back cover with aPhillips #1 (PH1) screwdriver.
Step 6 — Remove the 6th screw holding the top cover
Flip the projector and remove the 6thand last crew.
BenQ HT1075 Projector Blower Fan Replacement Draft: 2017-12-29Guide ID: 98303 -
This document was generated on 2019-09-19 09:36:31 AM (MST).
© iFixit — CC BY-NC-SA www.iFixit.com Page 5 of 10
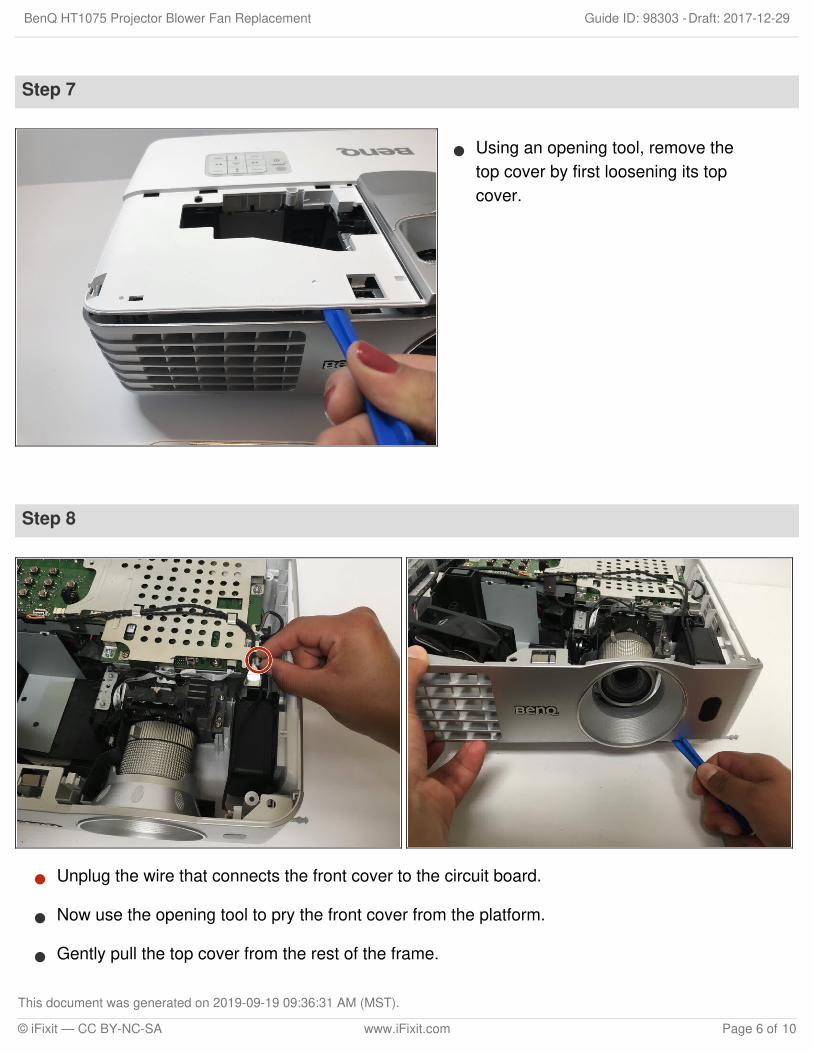
Step 7
Using an opening tool, remove thetop cover by first loosening its topcover.
Step 8
Unplug the wire that connects the front cover to the circuit board.
Now use the opening tool to pry the front cover from the platform.
Gently pull the top cover from the rest of the frame.
BenQ HT1075 Projector Blower Fan Replacement Draft: 2017-12-29Guide ID: 98303 -
This document was generated on 2019-09-19 09:36:31 AM (MST).
© iFixit — CC BY-NC-SA www.iFixit.com Page 6 of 10
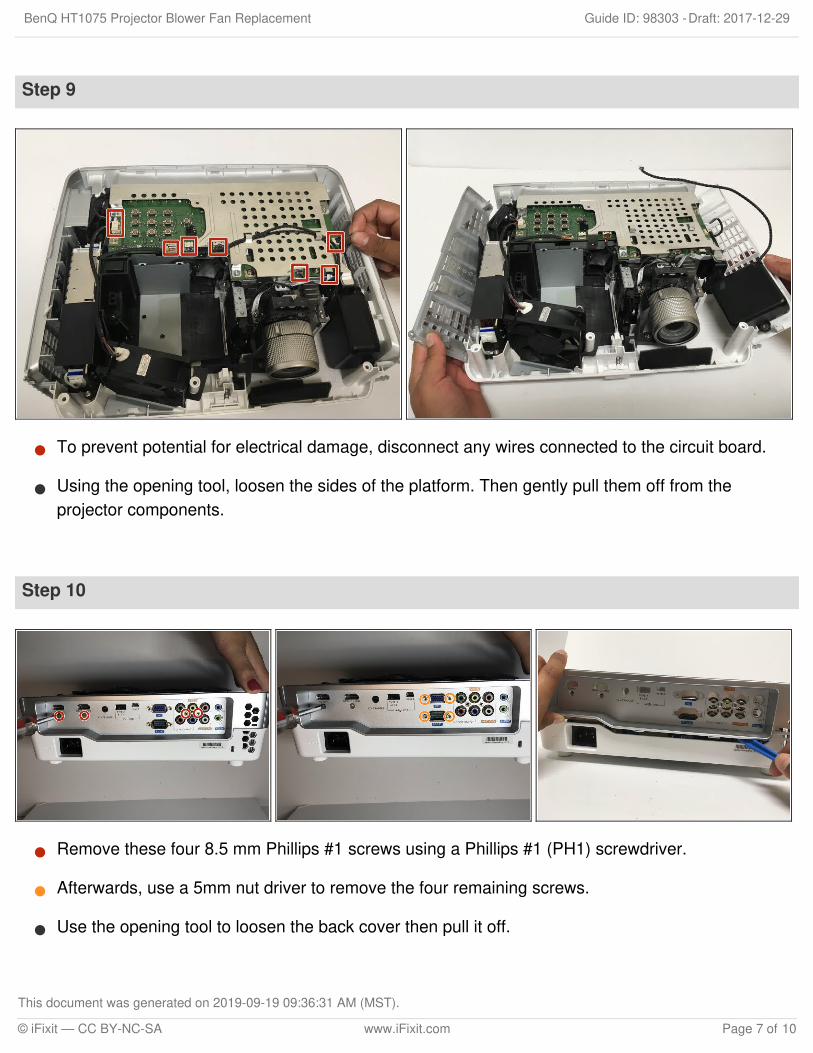
Step 9
To prevent potential for electrical damage, disconnect any wires connected to the circuit board.
Using the opening tool, loosen the sides of the platform. Then gently pull them off from theprojector components.
Step 10
Remove these four 8.5 mm Phillips #1 screws using a Phillips #1 (PH1) screwdriver.
Afterwards, use a 5mm nut driver to remove the four remaining screws.
Use the opening tool to loosen the back cover then pull it off.
BenQ HT1075 Projector Blower Fan Replacement Draft: 2017-12-29Guide ID: 98303 -
This document was generated on 2019-09-19 09:36:31 AM (MST).
© iFixit — CC BY-NC-SA www.iFixit.com Page 7 of 10
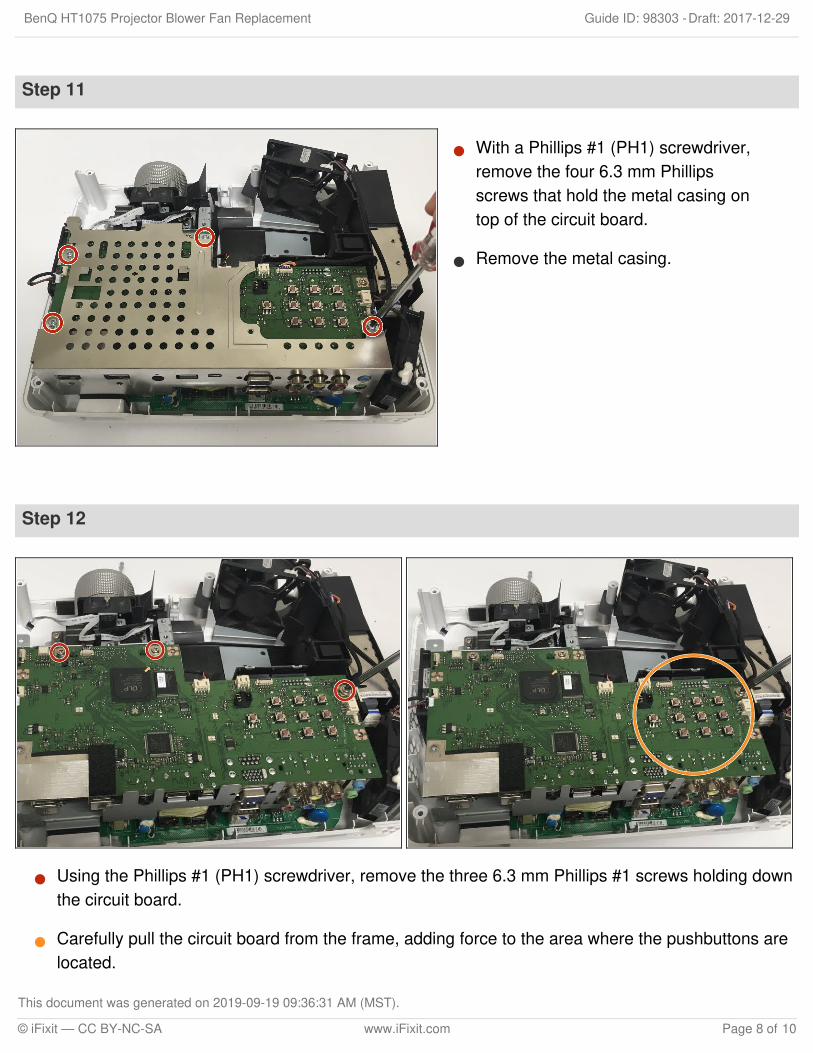
Step 11
With a Phillips #1 (PH1) screwdriver,remove the four 6.3 mm Phillipsscrews that hold the metal casing ontop of the circuit board.
Remove the metal casing.
Step 12
Using the Phillips #1 (PH1) screwdriver, remove the three 6.3 mm Phillips #1 screws holding downthe circuit board.
Carefully pull the circuit board from the frame, adding force to the area where the pushbuttons arelocated.
BenQ HT1075 Projector Blower Fan Replacement Draft: 2017-12-29Guide ID: 98303 -
This document was generated on 2019-09-19 09:36:31 AM (MST).
© iFixit — CC BY-NC-SA www.iFixit.com Page 8 of 10
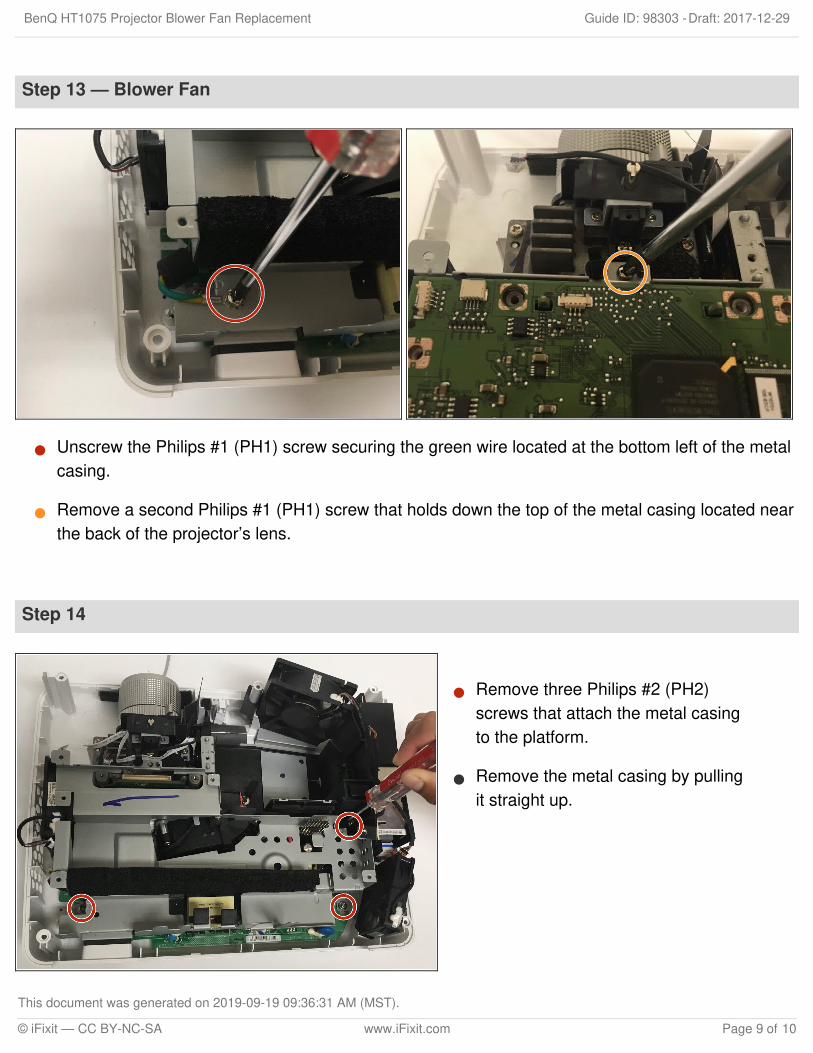
Step 13 — Blower Fan
Unscrew the Philips #1 (PH1) screw securing the green wire located at the bottom left of the metalcasing.
Remove a second Philips #1 (PH1) screw that holds down the top of the metal casing located nearthe back of the projector’s lens.
Step 14
Remove three Philips #2 (PH2)screws that attach the metal casingto the platform.
Remove the metal casing by pullingit straight up.
BenQ HT1075 Projector Blower Fan Replacement Draft: 2017-12-29Guide ID: 98303 -
This document was generated on 2019-09-19 09:36:31 AM (MST).
© iFixit — CC BY-NC-SA www.iFixit.com Page 9 of 10
To reassemble your device, follow these instructions in reverse order.
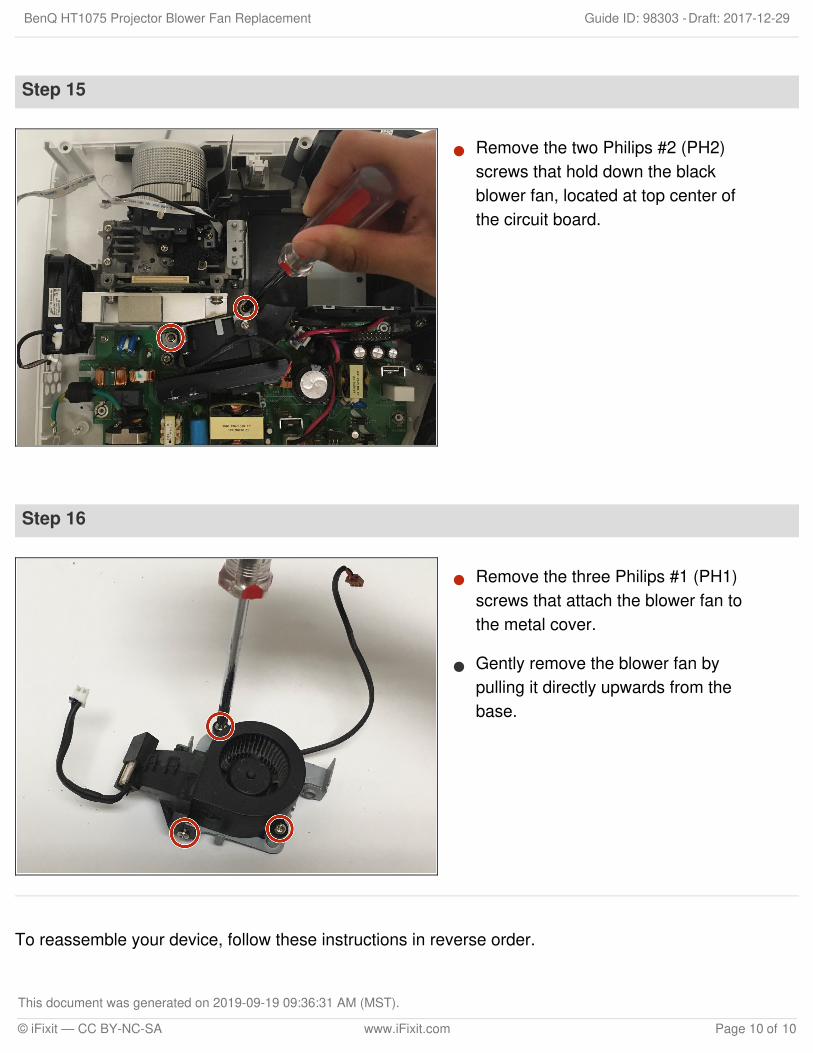
Step 15
Remove the two Philips #2 (PH2)screws that hold down the blackblower fan, located at top center ofthe circuit board.
Step 16
Remove the three Philips #1 (PH1)screws that attach the blower fan tothe metal cover.
Gently remove the blower fan bypulling it directly upwards from thebase.
BenQ HT1075 Projector Blower Fan Replacement Draft: 2017-12-29Guide ID: 98303 -
This document was generated on 2019-09-19 09:36:31 AM (MST).
© iFixit — CC BY-NC-SA www.iFixit.com Page 10 of 10