backup and recovery best practices for the oracle database ... · oracle database appliance backup...
TRANSCRIPT
Backup and Recovery Best Practices for the Oracle Database Appliance Protecting databases and applications running on Oracle Database Appliance O R A C L E W H I T E P A P E R | D E C E M B E R 2 0 1 7

BACKUP AND RECOVERY BEST PRACTICES FOR ORACLE DATABASE APPLIANCE
Introduction 1
Oracle Database Appliance Platform Configuration for Backup and Recovery 1
Oracle Recovery Manager (RMAN) 2
Oracle Secure Backup (OSB) 3
Oracle ZFS Storage Appliance (ZFSSA) 3
Oracle Database Backup Cloud Service 3
Oracle ASM Cloud File System 3
Backup and Recovery Procedures for Oracle Database Appliance 3
Restore and Recovery in Oracle Database Appliance (Bare Metal configuration) 4
Recovery from single server node failure on Oracle Database Appliance Bare Metal
configuration 4
Restore after simultaneous failure of both server nodes in Oracle Database
Appliance Bare Metal configuration 5
Backup and recovery in Oracle Database Appliance Virtualized Platform configuration 5
Backup and Restore of ODA_BASE Domain 6
Recovery from single server node failure on Oracle Database Appliance Virtualized
Platform 7
Restore after simultaneous failure of both server nodes in Oracle Database
Appliance Virtualized Platform 7
Backup and Restore of Guest Virtual Machines (VMs) 7
Backup and recovery in Oracle Cloud 7
1. Purchase the Oracle Database Backup Cloud Service subscription (or request a
trial) 8

ORACLE DATABASE APPLIANCE BACKUP AND RECOVERY BEST PRACTICES
2. Download Oracle Database Cloud Backup Module 9
3. Install Oracle Database Cloud Backup Module 9
3.1 Preparing to install Oracle Database Cloud Backup Module 9
4. Install Oracle Database Backup Cloud Module 13
5. Configure RMAN Settings 14
5.1 Configures RMAN channel 14
5.2 Configure autobackup 14
5.3 Setup PARALLELISM for backup processes 14
5.4 Multi-section backup 14
5.5 Define your backup strategy 15
5.6 Configure RMAN encryption for backups 15
5.6.1 Password encryption 15
5.6.2 Transparent Data Encryption (TDE) 15
5.6.3 Dual-mode encryption (combination of password and TDE) 16
5.7 Configuring Compression for Backups 16
5.8 Perform backup / recovery using Oracle Database Backup Cloud Service 16
5.9 Perform restore and recover operations from Oracle Database Backup Cloud
Service, when necessary 16
5.10 Throughput measurements 16
Backup and recovery using Tape devices 18
Media Management Software for Tape Backups 18
Disk backups 19
RMAN Backups to Local Disks 20
RMAN Backups to External Storage 20

ORACLE DATABASE APPLIANCE BACKUP AND RECOVERY BEST PRACTICES
Performance Observations 20
Backup and recovery with Network File System (NFS) storage 21
RMAN backups to the Oracle ZFS Storage Appliance 7120 21
Configuring RMAN to Use the ZFSSA 7120 24
Performance Numbers for ZFSSA-Based Backup Configurations 24
Restore and Recover the database 25
Backup and Recovery for Oracle Database Appliance S|M|L 25
Database Backup and Recovery Best Practices 25
Conclusion 26
Appendix A Configuring load-balanced backups 28
Appendix B: Sample Scripts 29
Appendix C Sample commands for backup and recovery in cloud 32
References 35

1 | BACKUP AND RECOVERY BEST PRACTICES FOR ORACLE DATABASE APPLIANCE
Introduction
The Oracle Database Appliance is an Oracle Engineered System consisting of hardware and software that saves
customers time and money by simplifying deployment, maintenance, and support of high availability database
solutions. Built using the world’s most popular database - Oracle Database. Along with Oracle Real Applications
Clusters (Oracle RAC), the Database Appliance offers customers a fully integrated system of software, servers,
storage and networking that delivers high availability database services for a wide range of custom and packaged
OLTP and Data Warehousing workloads.
The Oracle Database Appliance offers customers capacity-on-demand database software licensing, allowing
seamless scalability from 2 to 72 processor cores without any hardware upgrades. The appliance also offers the
option of deploying a virtualized platform based on Oracle VM. Support for virtualization allows customers and
ISVs to build a solution-in-a-box that efficiently utilizes resources and extends capacity-on-demand licensing to
both database and application workloads by leveraging Oracle VM hard partitioning.
With built-in redundancy Oracle Database Appliance offers high in case of hardware failures. However, you must
backup your databases, operating system, application software, and any other artifacts to ensure recoverability
from data loss and corruption type of scenario. This whitepaper discusses the different options and
considerations for backup and recovery operations in an Oracle Database Appliance environment.
The information in this white paper applies to Oracle Database Appliance Software versions 2.x to 12.1.2.x.
Oracle Database Appliance Platform Configuration for Backup and Recovery Backup and recovery procedures and processes are one of the key operational aspects of Oracle Database Appliance. In order to protect against data loss and corruption, you must ensure that files systems and databases running on your Oracle Database Appliance system are backed up regularly. These backups must be validated and consistent so that the databases and files systems can be restored and recovered when needed.
You can use standard backup and restore procedures if you need to reconfigure your Oracle Database Appliance platform storage configuration from triple mirroring to double mirroring and vice-versa.
This white paper describes the best practices for defining optimal backup and recovery strategies to protect mission-critical data and file systems in Oracle Database Appliance environments. The Oracle Database provides sophisticated and scalable backup technologies. These technologies work transparently on the Oracle Database Appliance.
Oracle Database Appliance includes high bandwidth bonded 1GbE/ 10GbE / 25GbE (SFP28)) port interfaces. For backup traffic either the regular public network interface or a dedicated backup network interface can be used.
The layout and available storage capacity of the Oracle Database Appliance disk groups depends on your selection of the “Backup Type” option and your choice of mirroring options in the Oracle Database Appliance Manager Configurator utility. During the deployment process, the Configurator allows you to select between triple mirroring (high redundancy) and double mirroring (normal

2 | BACKUP AND RECOVERY BEST PRACTICES FOR ORACLE DATABASE APPLIANCE
redundancy) of available storage. The Configurator also allows you a choice to either place the backups on the Oracle Database Appliance local storage or on external storage. When you choose Local Backup Type option, 40% of the disk is assigned to the DATA area, and 60% of the disk is assigned to the Fast Recovery Area (RECO) area. For the External Backup Type option, 80% of the disk is assigned to the DATA area, and 20% of the disk is assigned to the Fast Recovery Area (RECO) area.
Oracle Database Appliance X7-2 allows you to choose DATA disk group capacity between 10% and 90% of total shared disk storage (excluding REDO disk group storage). Note that Oracle Database Appliance storage capacity varies for different hardware models.
As an example, the following table provides the approximate amount of usable space for the Oracle Database Appliance X6-2-HA with local and external backup type.
Description Sizing for X6-2-HA with 10 SSD Drives
Sizing for X6-2-HA with 20 SSD Drives
Sizing for X6-2-HA with 40 SSD Drives
Number of SSD drives 10 20 40
Total usable space 10.9TB 22TB 44TB
Reserved space (Normal redundancy) 1.1TB 1.1TB 1.1TB
Total Usable space (Normal redundancy) 4.9TB 10.5TB 21.5TB
DATA Diskgroup (Normal redundancy, External backup (80% usable))
3.9TB 8.4TB 17.2TB
RECO Diskgroup (Normal redundancy, External backup (20% usable))
1.0TB 2.1TB 4.3TB
DATA Diskgroup (Normal redundancy, Internal backup (40% Usable))
2.0TB 4.2TB 8.6TB
RECO Diskgroup (Normal redundancy, Internal backup(60% usable))
2.9TB 6.3TB 12.9TB
Reserved Space (High redundancy) 2.2TB 2.2TB 2.2TB
Total usable space (High redundancy) 2.9TB 6.6TB 13.9TB DATA Diskgroup (High redundancy, External backup(80% usable))
2.3TB 5.3TB 11.1TB
RECO Diskgroup (High redundancy, External backup (20% usable))
0.6TB 1.3TB 2.8TB
DATA Diskgroup (High redundancy, Internal backup(40% usable))
1.2TB 2.6TB 5.6TB
RECO Diskgroup (10% usable) 1.7TB 4.0TB 8.3TB
TABLE 1: DISKGROUP SIZING FOR ORACLE DATABASE APPLIANCE X6-2 HARDWARE MODEL
The following core technologies are the key enablers of efficient backup and recovery operations on the Oracle Database Appliance platform.
Oracle Recovery Manager (RMAN)
Oracle Recovery Manager (RMAN) provides the native backup and recovery infrastructure within Oracle Database, enabling optimized data protection in the Oracle Database Appliance environments. Backup, restore, and recovery operations are performed using

3 | BACKUP AND RECOVERY BEST PRACTICES FOR ORACLE DATABASE APPLIANCE
standard RMAN commands. RMAN can parallelize backup operations across both Real Application Cluster (RAC) nodes. This allows all disks, all network connections and all CPUs in the system to contribute towards performing backup operations.
RMAN block change tracking allows incremental backups to run very quickly and efficiently. With block change tracking, only the areas of the database that have been modified since the last incremental backup, or full backup, are read from disk.
RMAN stores data in one of two formats – Image Copy or Backup Set. An Image Copy is an exact copy of a single data file, archived redo log file, or control file. Image copies are not stored in an RMAN-specific format. They are identical to the results of copying a file with operating system commands. RMAN can use Image Copies during RMAN restore and recovery operations, and it can use Image Copies with non-RMAN restore and recovery techniques.
A backup set contains the data from one or more data files, archived redo log files, control files or server parameter file. The smallest unit of a backup set is a binary file called a backup piece. Backup sets are the only form in which RMAN can write backups to sequential devices such as tape drives. For more information, refer Oracle Recovery Manager (RMAN) documentation.
Oracle Secure Backup (OSB)
Oracle Secure Backup (OSB) is a centralized tape backup management solution for the entire IT environment including file systems and Oracle Databases. With built-in RMAN integration, Oracle Secure Backup delivers the fastest Oracle Database backups to tape. Some important backup optimizations such as the following that provide substantial savings in backup time and tape costs are available only with Oracle Secure Backup and RMAN:
• Unused block compression eliminates the time and space needed to backup blocks that are allocated to tablespaces but are not currently used by tables.
• Undo optimization eliminates the time and space usage needed to back up undo data that is not required to recover using the current backup.
Oracle ZFS Storage Appliance (ZFSSA)
Oracle ZFS Storage Appliance can be used as a backup storage location for databases. The high-speed networks support good performance. With the ZFS HA solutions, customers do not have to worry about single point of network failures.
Oracle Database Backup Cloud Service
Oracle Database Backup Cloud Service is a secure, scalable, on-demand storage solution for backing up Oracle databases to Oracle Cloud. The service complements your existing backup strategy by providing an off-site storage location in the public cloud.
Storage management and data transfer complexities are handled by the service, not by database administrators. Database Administrators use the familiar RMAN interface to perform backup and restore operations and there’s no need to learn new tools or commands.
Oracle ASM Cloud File System
Oracle Database Appliance provides the ability to create a high availability (HA) clustered file system. It is highly recommended that you store all scripts and configuration files in the shared ACFS file system (identified by default as the /cloudfs mount point on Oracle Database Appliance) and take backup of this file system on a regular basis to external storage.
Backup and Recovery Procedures for Oracle Database Appliance Some of the core backup and recovery topics and procedures for the Oracle Database Appliance platform include the following:
1. Restore and recovery in Oracle Database Appliance Bare Metal configuration

4 | BACKUP AND RECOVERY BEST PRACTICES FOR ORACLE DATABASE APPLIANCE
2. Backup and recovery in Oracle Database Appliance Virtualized Platform configuration
3. Backup and Recovery in Oracle Cloud
4. Backup and recovery using Tape devices
5. Backup and recovery with Network File System (NFS) storage
This section outlines each of the above procedures that you can test, validate, and use in your Oracle Database Appliance environments. Note that the procedures for Oracle Database Appliance Virtualized Platform only apply when you are using such configurations.
Restore and Recovery in Oracle Database Appliance (Bare Metal configuration) This section describes the procedure to restore a failed server node in an Oracle Database Appliance Bare Metal configuration. This procedure may apply to situations such as the following:
- A server node crashed and you are unable to bring-up the server node and Clusterware
- Server OS file system is corrupted and cannot be repaired
- Failure of both local disks on a server node
- You are unable to bring up Clusterware and restore is the only option, etc.
This section covers the following two scenarios:
ü Restore of a single server node in Bare Metal configuration
ü Restore after simultaneous failure of both server nodes in Bare Metal configuration
Recovery from single server node failure on Oracle Database Appliance Bare Metal configuration
You should only need to execute this procedure if you cannot recover a Server node/Clusterware using any standard recovery procedures.
To restore a single server in Oracle Database Appliance Bare Metal platform configuration, refer to MOS note titled Oracle Database Appliance: Script to perform Bare Metal Restore of a Single node on ODA 12.1.x (Doc ID 2328555.1). When you execute and complete this procedure successfully, the restored node should be up and running with Grid infrastructure normally operational and all RDBMS HOMEs should also be added back to the restored node.
Once the failed server node is restored, if applicable, you may need to perform the following post-restoration steps
a. Add the instances back to restore node
For single instance
Bring-up the instance. If the instance is not coming up and if database backup exists, then restore and recovery the instance using standard RMAN procedures from the existing backups
For RAC instance
⇒ Delete the database instance corresponding to the restored server node using DBCA. This is to ensure that all the references to the inactive instance are deleted before the instance is adding back to the configuration
o Invoke DBCA in GUI mode from surviving node

5 | BACKUP AND RECOVERY BEST PRACTICES FOR ORACLE DATABASE APPLIANCE
o Select (Instance Management à Delete an instance à Select the instance to delete from the list of instances of cluster database àThen delete the instance)
⇒ Add the instance using DBCA from the surviving node back to restore node
o Invoke DBCA in GUI mode from surviving node
o Select Instance Management à Add an instance à continue to the next screens and add the instance
Note: Depending on your configured RMAN backup destination, refer RMAN best practices section of this document to setup backup procedures appropriately.
b. Complete any miscellaneous/missing steps on the restored server node
⇒ Need to bring-up the havip_1/havip_0 resource, if it shows offline using below command
$ $GRID_HOME/bin/srvctl start havip –id havip_[0|1] –node <node_name>
For example, for havip_1
$ /u01/app/12.1.0.2/grid/srvctl start havip –id havip_1 –node <node_name>
⇒ Run the command “oakcli show version –detail” and compare the patch level between the surviving server node and the restored server node. If there are any patch level mismatches, you should apply the missing patches on the restored server node. Note that on Oracle Database Appliance, patches are applied in specific order (i.e., SERVER à STORAGE à DB (database).
⇒ If any cron jobs were previously configured on the restored server node, you may want to add those back at this stage.
Restore after simultaneous failure of both server nodes in Oracle Database Appliance Bare Metal configuration
In case of a simultaneous unrecoverable failure of both server nodes, the two nodes can be re-imaged and re-deployed. The databases can then be recovered from backups. This is akin to a fresh deployment of the platform and a restore of the backups on to the newly re-deployed platform. Refer the My Oracle Support note “Oracle Database Appliance – 12.1.2 and 2.X Supported ODA Versions & Known Issues (Doc ID 888888.1)” for details and links to ISO images and GI/RDBMS software bundles that are used for deployments.
Backup and recovery in Oracle Database Appliance Virtualized Platform configuration This section describes the procedure to restore a failed server node in an Oracle Database Appliance Virtualized Platform configuration. This procedure may apply to situations such as the following:
- A server node crashed and you are unable to bring-up the server node and Clusterware
- Server OS file system is corrupted and cannot be repaired
- Failure of both local disks on a server node
- You are unable to bring up Clusterware and restore is the only option, etc.
- Unexpected malfunctioning of ODA_BASE domain post any wrongful patching activities or other changes introduced inappropriately in the environment
Recovery operations may vary depending on the nature of loss of part or whole of the Oracle Database Appliance virtualized platform configuration. This section covers the following three scenarios.
ü Backup and Restore of ODA_BASE domain
ü Recovery from single server node failure on Oracle Database Appliance Virtualized Platform
6 | BACKUP AND RECOVERY BEST PRACTICES FOR ORACLE DATABASE APPLIANCE
ü Recovery from simultaneous failure of both server nodes on Oracle Database Appliance Virtualized Platform
Backup and Restore of ODA_BASE Domain
Backup of ODA_BASE Domain
This sub-section describes the procedure to take backup of ODA_BASE, before applying Oracle Database Appliance Patch Set Bundle, any change management activities to environment and etc. Execute the steps below to take backup of the ODA_BASE
1. Login into Domain-0 as root user
2. Stop the ODA_BASE domain
$ oakcli stop ODA_BASE
3. You can use the “rsync” command as listed below to take a backup of the ODA_BASE domain.
$ /usr/bin/rsync -vaz --delete --progress --exclude '<exclude files>' <Source location: ODA_BASE location> <Target location: External NFS storage to move the backup>
For example,
$ /usr/bin/rsync -vaz --delete --progress --exclude *zip --exclude *gz ' /OVS/Repositories/odabaseRepo /external
The above command in effect backs up the /OVS/Repositories/odabaseRepo/VirtualMachines/oakDom1 directory to external NFS directory (e.g., “/external”)
4. Start the ODA_BASE domain
$ oakcli start ODA_BASE
5. Now, repeat this procedure (steps 1 to 4) on the ODA_BASE domain on the other server node
Restore of ODA_BASE Domain
This sub-section describes the process of restoring ODA_BASE domain from the backup.
Execute the steps below to restore the ODA_BASE domain from the backup (refer to previous sub-section for details).
1. Login into Domain-0 as root user
2. Stop the ODA_BASE
$ oakcli stop ODA_BASE
3. Create directory, if it does not already exist
$ mkdir -p /OVS/Repositories
4. Use “rsync” command (or any other restore procedure) to copy the ODA_BASE domain from the backup
$ /usr/bin/rsync -vaz --delete --progress --exclude '<exclude files>' <Backup location> <Restore location>
For example,
$ /usr/bin/rsync -vaz --delete --progress --exclude *zip --exclude *gz /external /OVS/Repositories/
5. The above command should restore backup of directory below to /OVS/Repositories/ from /external directory
/OVS/Repositories/odabaseRepo/VirtualMachines/oakDom1

7 | BACKUP AND RECOVERY BEST PRACTICES FOR ORACLE DATABASE APPLIANCE
6. Start the ODA_BASE domain
$ oakcli start ODA_BASE
7. Validate the environment using oakcli validate command and ensure ODA_BASE is functioning normally
$ oakcli validate –d
Recovery from single server node failure on Oracle Database Appliance Virtualized Platform
Refer to My Oracle Support note titled Oracle Database Appliance: How to perform Restoration of a Single node for ODA Virtualized Platform 12.1.x (Doc ID 2289376.1) for restoring a single server node of an Oracle Database Appliance Virtualized Platform implementation. At the end of the process, the restored node (ODA_BASE domain) along with the Grid infrastructure instance will be up and running and all RDBMS HOMEs should be added back to this restored node. If applicable, complete the post-restoration steps as referred in the sections above.
Restore after simultaneous failure of both server nodes in Oracle Database Appliance Virtualized Platform
As stated in the previous section, if both server nodes of an Oracle Database Appliance system are not recoverable and assuming you have database backups, then the quickest approach to recovery may be to re-image the server nodes and restore and recover the databases using the backups.
To re-image the server nodes, refer My Oracle Support note titled Oracle Database Appliance - 12.1.2 and 2.X Supported ODA Versions & Known Issues (Doc ID 888888.1) and choose the correct ISO image to re-deploy the system as a virtualized platform. Then deploy ODA_BASE using the correct end-user bundle and restore and recover the database(s) using your standard RMAN procedures. Further, restore or redeploy any virtual machines (VMs) that you may have previously deployed on the system.
Backup and Restore of Guest Virtual Machines (VMs)
Refer to My Oracle Support note titled How to backup/restore your VM Guest (Doc ID 1633166.1) for various backup and recovery scenarios applicable to Guest VMs deployed on Oracle Database Appliance Virtualized Platform.
Backup and recovery in Oracle Cloud This section describes the procedure to backup databases deployed on Oracle Database Appliance to Oracle Database Backup Cloud Service and restore them from those backups. Specifically, this section assumes you are backing up to the Object Storage in Oracle Cloud Infrastructure (OCI).

8 | BACKUP AND RECOVERY BEST PRACTICES FOR ORACLE DATABASE APPLIANCE
FIGURE 1: BACKUP TO ORACLE CLOUD
The high level procedure to setup backups to Oracle Cloud is as follows:
For more details about the Oracle Database Backup Cloud Service refer to Oracle Database Backup Cloud Service Technical White Paper available at http://www.oracle.com/technetwork/database/features/availability/twp-oracledatabasebackupservice-2183633.pdf
(1) Purchase the Oracle Database Backup Cloud Service subscription (or request a trial)
(2) Download and install the Oracle database cloud backup module
(3) Configure environment with Recovery Manager (RMAN) settings
(4) Use familiar recovery manager (RMAN) commands to perform backups using Oracle Database Backup Cloud Service
(5) Perform restore and recover operations from Oracle Database Backup Cloud Service, when necessary
1. Purchase the Oracle Database Backup Cloud Service subscription (or request a trial)
To get started with the Oracle Database Backup Cloud Service, you may request a trial subscription or purchase a service.
For more information, see https://docs.oracle.com/en/cloud/paas/db-backup-cloud/csdbb/how-begin-oracle-database-backup-service-subscriptions.html
For up-to-date details about using Oracle Database Backup Cloud Service refer to https://docs.oracle.com/en/cloud/paas/db-backup-cloud/csdbb/installing-oracle-database-cloud-backup-module.html and My Oracle Support note titled Oracle Database Backup Service - FAQ (Doc ID 1640149.1)
Storage Capacity Identity Domain Service Name User ID/Password
Download and Install the Oracle Database Cloud Backup Module
Configure Recovery Manager (RMAN) Settings (Encryption, Compression
and Parallelism
1
2 3 Perform Backup
and Recovery
4
Cloud subscription and
activation Full and
incremental backups
Setup and configuration Operational

9 | BACKUP AND RECOVERY BEST PRACTICES FOR ORACLE DATABASE APPLIANCE
2. Download Oracle Database Cloud Backup Module
If not already available on your system (systems deployed in Oracle Cloud may already have the module available on the hosts), you may download and install the Oracle Database Cloud Backup Module from Oracle Technology Network (OTN). The module enables cloud backups and restores. Install the backup module on the system (host(s)) where your Oracle database is running.
Download the Oracle Database Cloud Backup Module (opc_installer.zip) from Oracle Technology Network (OTN): http://www.oracle.com/technetwork/database/availability/oracle-cloud-backup-2162729.html
3. Install Oracle Database Cloud Backup Module
3.1 Preparing to install Oracle Database Cloud Backup Module
1. Upgrade database, if necessary
Oracle Database Cloud Backup Module supports Oracle Database release 11.2, 12.1, and 12.2. If necessary, upgrade your source database before configuring backups using Oracle Database Backup Cloud Service.
If using Oracle Database Standard Edition, refer to My Oracle Support note 1640149.1 for patching requirements for enabling RMAN encryption.
2. Install JDK 1.7 or later
You must have JDK 1.7 or later on the system on which you plan to install the Oracle Database Cloud Backup Module.
Use the following command to check your JDK version:
# java -version
3. Identify setup parameters for Oracle Database Cloud Backup Module
The following table lists the required parameters for installing the Oracle Database Cloud Backup Module. Optional parameters are also listed. These parameters can also be displayed by running the following command from the directory that contains the opc_install.jar installer file: $ java -jar opc_install.jar
Parameter Description Mandatory or Optional
-serviceName Service name associated with your Oracle Database Backup Cloud Service account. If you have a pre-paid metered subscription, the service name is Storage (case sensitive).
Optional if the -host parameter is used (don’t include -serviceName if -host is used)
-identityDomain Identity domain of the Oracle Database Backup Cloud Service account. Optional if the -host parameter is used (don’t include —identityDomain if -host is used)
-host REST endpoint for your service as listed on the service details page, in the format https://identityDomain.storage.oraclecloud.com/v1/serviceName-identityDomain
For example, https://abc.storage.oraclecloud.com/v1/hr-abc
Mandatory

10 | BACKUP AND RECOVERY BEST PRACTICES FOR ORACLE DATABASE APPLIANCE
Optional if the -serviceName and -identityDomain parameters are used (don’t include -host if -serviceName and -identityDomain are used)
-opcId User name for your Oracle Database Backup Cloud Service account. Enclose the username in single quotes.
Mandatory
-opcPass Password for the Oracle Database Backup Cloud Service account specified by —opcId.
Mandatory
-walletDir Directory in which Oracle Database Backup Cloud Service credentials are stored.
Mandatory
-libDir Directory in which the system backup to tape (SBT) library used for backups and restores is stored, e.g., ORACLE_HOME/lib
Required if you want to download the latest module
Optional if you just want to update the password after you change it in Oracle Cloud
-libPlatform Operating system for the SBT library used for backups and restores.
-container Custom container created by you, separate from Oracle Database Backup Cloud Service, to store backups. If omitted, backups are stored in the default container that’s created when the backup module is installed.
Optional
-configFile Directory in which the Oracle Database Cloud Backup Module configuration file is stored. If omitted, the configuration file is stored in a default location (ORACLE_HOME/dbs).
Optional
-containerClass Storage class of the OPC container. The only valid values are "Standard" and "Archive". If not specified, the default value is the storage class of the specified container, if it exists, or “Standard” is used.
Optional
-proxyHost HTTP proxy server host name Optional
-proxyPort HTTP proxy server port number Optional
-proxyId HTTP proxy server username, if needed Optional
-proxyPass HTTP proxy server password, if needed Optional
-argFile Indicates that parameters should be read from the specified file. For example, a file named arguments.txt might contain the following:
-opcID '[email protected]' -opcPass 'abc123$' -serviceName myService -identityDomain myDomain -libDir /home/oracle/OPC/lib -walletDir /home/oracle/OPC/wallet
Optional

11 | BACKUP AND RECOVERY BEST PRACTICES FOR ORACLE DATABASE APPLIANCE
For this example, the following command installs the backup module using the parameters specified in the file:
java -jar opc_install.jar -argFile arguments.txt
TABLE 2: PLANNING FOR ORACLE DATABASE BACKUP CLOUD MODULE
4. Identifying REST end-points for your Oracle Storage Cloud instance To find the REST Endpoint URL(-host) of your Oracle Storage Cloud Service instance: Sign in to Oracle Cloud My Services (https://<identityDomain>.storage.oraclecloud.com/v1/serviceName-<identityDomain>) ORACLE Cloud My Services dashboard is displayed. It lists the services that are assigned to your account. Look for Oracle Storage Cloud Classic and click on it.
FIGURE 2: ORACLE CLOUD MY SERVICES DASHBOARD
Click on “Overview”. The REST Endpoint URL is displayed under the “Overview”=>”Additional Information” section.
FIGURE 3: ORACLE CLOUD INFRASTRUCTURE OBJECT STORAGE CLASSIC DETAILS

12 | BACKUP AND RECOVERY BEST PRACTICES FOR ORACLE DATABASE APPLIANCE
5. Creating custom container
A default storage container is created automatically when you install the Oracle Database Cloud Backup Module, and backups are stored as objects in this default container, but customer also has option to store backups in custom containers and below are the steps to create custom containers
Login into ODA database server, switch to root user and execute below command to create custom container $ curl -v -u '<User name of the Oracle Database Backup Cloud Service account>:<Password for the Oracle Database Backup Cloud Service account> -X PUT https://<IDDomainame>.storage.oraclecloud.com/v1/<Servicename>-<IDDomainname>/<custom container name>
Specify REST Endpoint url for below https://gboracleco12345.storage.oraclecloud.com/v1/Storage-gboracleco12345
The following is an example of the output of this command and name of the custom container is ODA_BACKUPTO_CLOUD
root>curl -v -u '[email protected]:xxxxxx' -X PUT https://gboracleco12345.storage.oraclecloud.com/v1/Storage-gboracleco12345/ODA_BACKUPTO_CLOUD
* About to connect() to gboracleco12345.storage.oraclecloud.com port 443 (#0) * Trying 140.86.16.2... connected * Connected to gboracleco12345.storage.oraclecloud.com (140.86.16.2) port 443 (#0) * Initializing NSS with certpath: sql:/etc/pki/nssdb * CAfile: /etc/pki/tls/certs/ca-bundle.crt CApath: none * SSL connection using TLS_ECDHE_RSA_WITH_AES_128_GCM_SHA256 * Server certificate: * subject: CN=*.storage.oraclecloud.com,OU=Oracle CSEC AMSTERDAM,O=Oracle Corporation,L=Redwood City,ST=California,C=US
* start date: Sep 25 00:00:00 2017 GMT * expire date: Dec 25 23:59:59 2018 GMT * common name: *.storage.oraclecloud.com * issuer: CN=Symantec Class 3 Secure Server CA - G4,OU=Symantec Trust Network,O=Symantec Corporation,C=US
* Server auth using Basic with user '[email protected]' > PUT /v1/Storage-gboracleco12345/ODA_BACKUPTO_CLOUD HTTP/1.1 > Authorization: Basic Z2lyaWRoYXIucmVkZHkuc2FuZ2FsYUBvcmFjbGUuY29tOkFYUEE5OWFWIQ== > User-Agent: curl/7.19.7 (x86_64-redhat-linux-gnu) libcurl/7.19.7 NSS/3.27.1 zlib/1.2.3 libidn/1.18 libssh2/1.4.2
> Host: gboracleco12345.storage.oraclecloud.com > Accept: */* > < HTTP/1.1 201 Created < X-Trans-Id: txd20eb72a59294223842d0-0059e88095ga < Date: Thu, 19 Oct 2017 10:38:13 GMT < Connection: keep-alive < X-Last-Modified-Timestamp: 1508409493.67032 < Content-Type: text/html;charset=UTF-8 < Content-Length: 0 < Server: Oracle-Storage-Cloud-Service < * Connection #0 to host gboracleco12345.storage.oraclecloud.com left intact * Closing connection #0 /root>

13 | BACKUP AND RECOVERY BEST PRACTICES FOR ORACLE DATABASE APPLIANCE
4. Install Oracle Database Backup Cloud Module
Configure Oracle Database Backup Cloud Module
Login into ODA database server, switch to root user and change the directory to Oracle Database Cloud Backup Module software download location and extract the contents of the zip file.
$ cd /cloudfs $ unzip opc_installer.zip $ ls opc_install.jar opc_installer.zip opc_readme.txt
Switch to the ‘oracle’ user, source the environment variables, and execute below command to install backup module. $/cloudfs> java -jar opc_install.jar -host <REST endpoint url> -opcId 'User name of the Oracle Database Backup Cloud Service account' -opcPass 'Password for the Oracle Database Backup Cloud Service account specified by -opcId' -walletDir <walletDirectory location> -libDir <RMAN interface library > -container <Custom container name>
For example,
java -jar opc_install.jar –host https://gboracleco12345.storage.oraclecloud.com/v1/Storage-gboracleco12345 -opcId '[email protected]' -opcPass 'XXXXXXX' -walletDir $ORACLE_HOME/dbs/opc_wallet -libDir $ORACLE_HOME/lib -container ODA_BACKUPTO_CLOUD Oracle Database Cloud Backup Module Install Tool, build MAIN_2017-08-16 Oracle Database Cloud Backup Module credentials are valid. Backups would be sent to container ODA_BACKUPTO_CLOUD. Oracle Database Cloud Backup Module wallet created in directory /u01/app/oracle/product/12.1.0.2/dbhome_1/dbs/opc_wallet.
Oracle Database Cloud Backup Module initialization file /u01/app/oracle/product/12.1.0.2/dbhome_1/dbs/opcBACKUP.ora created.
Downloading Oracle Database Cloud Backup Module Software Library from file opc_linux64.zip.
Download complete.
After the Oracle Database Backup Cloud Module is installed, validate that the following files exist. These files are used by Oracle Database Backup Cloud Service to perform backups and restores to Oracle Cloud.
File Location Purpose
libopc.so As specified for the -libDir parameter when you run the backup module installer. For example: $ORACLE_HOME/lib
SBT library that enables cloud backups and restores.
opc$ORACLE_SID.ora Configured by the backup module installer under $ORACLE_HOME/dbs
Configuration file that contains the Oracle Database Backup Cloud Service container URL and credential wallet location, where ORACLE_SID is the system identifier of the Oracle database being backed up to Oracle Database Backup Cloud Service.
cwallet.sso As specified by the -walletDir parameter when you run the backup module installer. For example: $ORACLE_HOME/dbs/opc_wallet
Oracle wallet, which securely stores backup service credentials. This information is used during RMAN backups and restore operations

14 | BACKUP AND RECOVERY BEST PRACTICES FOR ORACLE DATABASE APPLIANCE
Wallet for encryption (optional –only needed for TDE)
Wallet location defined in $ORACLE_HOME/network/admin/sqlnet.ora
Used for backup encryption.
TABLE 3: ORACLE DATABASE BACKUP CLOUD MODULE RELATED FILES
Note: If your database server has multiple ORACLE_HOMEs, then the Oracle Database Backup Cloud Module must be installed into each ORACLE_HOME. Alternatively, you can copy the library file (libopc.so) to other ORACLE_HOME library location of each ORACLE_HOME, along with the opc$ORACLE_SID.ora configuration file (assuming you're using the same cloud credentials for backing up all databases in the database server). If using the latter approach, copy and rename the opc$ORACLE_SID.ora file for each database instance you are backing up to the cloud, where ORACLE_SID matches the SID for the database instance
Oracle Database Cloud Backup Service supports Oracle Database versions 10.2.0.5, 11.2, 12.1, and 12.2. Also, Linux, Solaris, SPARC, Windows, HP-UX, AIX, and zLinux platforms are supported. You can optionally choose to use the included RMAN Compression settings of HIGH, MEDIUM, BASIC, or LOW. Also included is mandatory RMAN Encryption (Password, TDE, and Dual-Mode).
5. Configure RMAN Settings
Once the Oracle Database Backup Cloud Module is installed, configure Recovery Manager (RMAN) to use Oracle Database Backup Cloud Service as the backup destination.
5.1 Configures RMAN channel
Configure RMAN channel to use the backup module SBT library and the provided configuration file for backup to the cloud
RMAN> CONFIGURE CHANNEL DEVICE TYPE sbt PARMS='SBT_LIBRARY=location-of-the-SBT-library, SBT_PARMS=(OPC_PFILE=location-of-the-configuration file)';
For example:
RMAN>CONFIGURE CHANNEL DEVICE TYPE sbt PARMS='SBT_LIBRARY=/u01/app/oracle/product/12.1.0.2/dbhome_1/lib/libopc.so,SBT_PARMS=(OPC_PFILE=/u01/app/oracle/product/12.1.0.2/dbhome_1/dbs/opcBACKUP.ora)';
In above example, ORACLE_HOME is /u01/app/oracle/product/12.1.0.2/dbhome_1 and ORACLE_SID is BACKUP
5.2 Configure autobackup
Configure RMAN to automatically back up the database control file and server parameter file.
RMAN> CONFIGURE CONTROLFILE AUTOBACKUP ON;
If you have configured control file autobackup, then the server parameter file is backed up with the control file whenever an autobackup is taken.
5.3 Setup PARALLELISM for backup processes
Use multiple RMAN channels for higher parallelism for utilizing maximum available network capacity. You can configure as many RMAN channels as you want. For example, the following configuration uses four channels in parallel to back up to the Cloud.
RMAN> CONFIGURE DEVICE TYPE 'SBT_TAPE' PARALLELISM 4 BACKUP TYPE TO BACKUPSET;
You can gradually increase parallelism to identify the optimal value for your environment that allows you to achieve an optimal transfer rate without affecting CPU/IO usage and database response time.
5.4 Multi-section backup

15 | BACKUP AND RECOVERY BEST PRACTICES FOR ORACLE DATABASE APPLIANCE
Multi-section backups allow you to break up large backup objects (say large data files) into smaller, granular chunks. This helps optimize throughput when parallelism is used for backup processes.
RMAN> BACKUP DEVICE TYPE sbt DATABASE SECTION SIZE 1g;
5.5 Define your backup strategy
For many situations you may find a weekly full and daily incremental backup strategy to be an optimal choice. This strategy results in faster backups and could save a significant amount of network bandwidth during backup operations. Use the RMAN fast incremental backup feature (based on block change tracking) to optimize the performance of your daily incremental backups.
5.6 Configure RMAN encryption for backups
Recovery Manager (RMAN) encrypted backups are securely created, transmitted, and stored in the cloud. Use one of the following RMAN encryption modes to encrypt your backups:
Note: The customer manages the keys each of the following encryption modes and data is securely transmitted to the Cloud over HTTPS.
5.6.1 Password encryption
RMAN encryption for backups is enforced (mandatory for On-Premise Databases)
Use the RMAN set encryption clause in RMAN run block.
RMAN> SET ENCRYPTION ON IDENTIFIED BY '<Specify password>' ONLY;
For example:
RMAN> SET ENCRYPTION ON IDENTIFIED BY 'odabackup123' ONLY;
Note: The password must be specified each time you backup and restore. If you forget or lose the password, you will not be able to restore your backup.
5.6.2 Transparent Data Encryption (TDE)
To backup using Transparent Data Encryption you need to have a TDE wallet (TDE keystore), which is different from the OPC wallet that stores Oracle Database Backup Cloud Service credentials.
With Transparent Data Encryption you don’t need to provide a password every time you create or restore a backup.
Before creating a TDE wallet, if not present, add the following line to the $ORACLE_HOME/network/admin/sqlnet.ora file:
ENCRYPTION_WALLET_LOCATION=(SOURCE=(METHOD=FILE)(METHOD_DATA=(DIRECTORY=<path_to_TDE_wallet>)))
Where, <path_to_TDE_wallet> is the location where the TDE wallet will be created.
For example:
ENCRYPTION_WALLET_LOCATION=(SOURCE=(METHOD=FILE)(METHOD_DATA=(DIRECTORY=/u01/app/oracle/product/12.1.0.2/dbhome_1/dbs/tde)))
In above example “path_to_TDE_wallet” is /u01/app/oracle/product/12.1.0.2/dbhome_1/dbs/tde
Create the TDE wallet as follows:
sqlplus / as sysdba SQL> alter system set encryption key identified by "TDE-password"; For example: SQL> alter system set encryption key identified by "odabackup123tde"; System altered.
The above command, creates wallet file in location specified in file sqlnet.ora
$ pwd

16 | BACKUP AND RECOVERY BEST PRACTICES FOR ORACLE DATABASE APPLIANCE
/u01/app/oracle/product/12.1.0.2/dbhome_1/dbs/tde $ ls ewallet.p12
Note: Whenever the database is restarted, open the TDE wallet with the following command:
SQL> alter system set encryption wallet open identified by "TDE-password";
TDE-password is same password, which was used to create TDE wallet in above step
5.6.3 Dual-mode encryption (combination of password and TDE)
You can use dual-mode encryption to back up to Oracle Database Backup Cloud Service. Dual-mode encryption is a combination of password encryption and Transparent Data Encryption (TDE).
5.7 Configuring Compression for Backups
Recovery Manager (RMAN) supports binary compression using HIGH, MEDIUM, BASIC, and LOW compression levels. The recommended compression level for cloud backups is MEDIUM.
The following RMAN commands configure compression using the MEDIUM algorithm: RMAN> CONFIGURE COMPRESSION ALGORITHM 'MEDIUM'; RMAN> CONFIGURE DEVICE TYPE sbt BACKUP TYPE TO COMPRESSED BACKUPSET;
5.8 Perform backup / recovery using Oracle Database Backup Cloud Service
You can now connect to the target database and configure an RMAN channel, then issue standard RMAN backup, restore, and recovery commands. Use the online dashboard to monitor your service and storage capacity being used by your backups. If needed, additional storage capacity can be added. Refer to Appendix C for sample commands.
5.9 Perform restore and recover operations from Oracle Database Backup Cloud Service, when necessary
Check on the day-to-day operation of your service, monitor performance, and review important notifications. Refer to Appendix C for sample commands.
You can also configure backups to Oracle Cloud Infrastructure Object Storage. For more details see https://docs.us-phoenix-1.oraclecloud.com/Content/Database/Tasks/backingupOS.htm
5.10 Throughput measurements
You can find out network throughput between customer environments to Oracle Cloud. This information helps the customer to know the time of the data transfers.
Ø Lunch the browser from customer database appliance server
Ø Sign in to the Oracle Cloud My Services application using below url (https://<identityDomain>.storage.oraclecloud.com/v1/serviceName-<identityDomain>) ORACLE Cloud My Services dashboard is displayed. It lists the services that are assigned to your account
Ø On the top right corner of the browser, click on your account name and following screen will appear

17 | BACKUP AND RECOVERY BEST PRACTICES FOR ORACLE DATABASE APPLIANCE
FIGURE 4: ORACLE CLOUD MY SERVICES DASHBOARD
Ø From above screen, select Diagnostics from the drop down menu and the following screen will appear.
FIGURE 5: ORACLE CLOUD MY SERVICES MEASURING THROUGHPUT
Ø Within one to two minutes, the test will complete, then click on the “Details” hyperlink and the following screen will appear with the results.
FIGURE 6: ORACLE CLOUD MY SERVICES THROUGHPUT MEASUREMENT

18 | BACKUP AND RECOVERY BEST PRACTICES FOR ORACLE DATABASE APPLIANCE
Backup and recovery using Tape devices You may choose to store your database backups on tape devices. Some of the key benefits of a tape-based backup strategy include:
• The Oracle Database Appliance and tape-based backups provide fast backup and restore rates
• Tape-only solutions isolate faults from the Oracle Database Appliance
• Oracle Database Appliance storage capacity and network bandwidth are maximized
For a tape-based backup solution, the recommended strategy is as follows:
o Weekly RMAN level 0 (full) backups of the database
o Daily cumulative RMAN incremental level 1 backups of the database
o Daily backups of the Oracle Secure Backup catalog
FIGURE 7: ORACLE DATABASE APPLIANCE TAPE BACKUP SETUP EXAMPLE
Media Management Software for Tape Backups
In order to perform backups to tape, RMAN is integrated with a media management software, Media management software is the software layer that facilitates RMAN backups to tape. Oracle Secure Backup is the media management software used during the course of the writing of this white paper. It is a highly scalable backup solution with a client/server architecture in which all hosts in the backup domain are centrally managed using a single console and a common management interface across multiple servers and NAS devices. For more information about OSB see the Oracle Secure Backup Documentation.
The tape backup performance numbers reported in this white paper were achieved using a single OSB Administrative/Media server with a dedicated 1 Gb active-passive bonded network connected to an Oracle Database Appliance system and the 10 Gb active-passive bonded network connected an Oracle StorageTek SL150 containing two LTO-6 tape drives attached via a 6 Gb/sec SAS connection to the OSB Media Server.
• Target database has 1 TB of data with a data compression of approximately 1.4 to 1. Depending on the composition of the data, compression will vary and so will transfer rates to the tape drive.
• There were minimal archive logs to backup and the database was mostly idle during backup. If a significant number of archive logs are present, then it will impact backup times as backing up a large number of small files slows performance. Additionally, if there is heavy load on the database and CPU is fully consumed, backup rates could be affected.
• The performance of the 1 Gb backup was limited by the single active-passive bond on the OSB Media Server. Each node on the Oracle Database Appliance has multiple 1 Gb bonded interfaces. Through any configured interface it can send 120 MB/sec for an

19 | BACKUP AND RECOVERY BEST PRACTICES FOR ORACLE DATABASE APPLIANCE
aggregate transfer rate of 240 MB/sec, but since there is only one bonded NIC on the Media Server, it can consume a maximum of 120 MB/sec which limits the transfer to 120 MB/sec.
• The performance of the 10 Gb backup was limited by the two LTO-6 tape drives. Average rates were 373 MB/sec per tape drive and additional tape drives could be added up to 1 GB/sec assuming the Database Appliance I/O bandwidth is not exhausted first (single active-passive bond on OSB Media Server).
• Restore tests consisted of restoring the control file and data files from tape, but the recovery operation retrieved archive logs from the local Fast Recovery Area (FRA).
• Backup rates assume tape drives are mounted before the job starts and rates are calculated on data transfer time utilizing OSB recorded start/stop times.
DESCRIPTION BACKUP RATE (TB/HR) HOST CPU USAGE
1 Gb Load Balanced Across Both Nodes 2 Cores
.43 TB
2 – 6%
1 Gb Load Balanced Across Both Nodes 24 Cores
.43 TB .5 – 3%
1 Gb Single Node 2 Cores .43 TB
2 – 6%
10 Gb Load Balanced Across Both Nodes 2 Cores
2.7 TB 2 – 6%
10 Gb Load Balanced Across Both Nodes 24 Cores
2.7 TB .5 – 3%
10 GB Single Node 2 Cores 1.0 TB 2– 6%
TABLE 5: TAPE BACKUP PERFORMANCE OBSERVATIONS
Disk backups Depending on your backup and recovery requirements and resource availability you may choose to use disk-based backups. You may also choose to use disk-based backups if you require Tablespace Point-in-Time Recovery (TSPITR), switching to a backup copy, or perform incremental merges, as these options are not available with tape-based backups. When you perform disk-based backups on Oracle Database Appliance, the backups are stored in the Fast Recovery Area (FRA) located in the RECO disk group.
Some of the key benefits of a disk-based backup strategy include:
• Faster recovery times during data and logical corruptions
• Ability to perform Tablespace Point-in-Time Recovery (TSPITR)
• Ability to use backups directly with no restore by switching to a copy of the database, tablespace or data file.
For disk-based backup solutions, Oracle recommends the following:
• Use a Fast Recovery Area (FRA)
• Perform an initial RMAN level 0 (full) backup
• Perform daily RMAN incremental level 1 backups

20 | BACKUP AND RECOVERY BEST PRACTICES FOR ORACLE DATABASE APPLIANCE
• Roll incremental backups into full backup and delay by 24 hours (see RMAN discussion for details)
RMAN Backups to Local Disks
On Oracle Database Appliance Fast Recovery Area (FRA) is created on the RECO ASM diskgroup. Together the Oracle database and RMAN manage the space inside this area, keep track of and manage backups, including deleting old unneeded backups. Oracle RMAN backs up image copies, archived logs, control files, and flashback logs to the FRA. When new backups demand more room, Oracle automatically removes the nonessential backups, freeing the DBA from this chore. The files in the FRA are considered nonessential when they become obsolete according to the backup retention policy, or when they have already been backed up to tape with Oracle RMAN.
RMAN Backups to External Storage
External storage on Network Attached Storage can be made available on Oracle Database Appliance using NFS mounts. This may be useful if you choose to store backups on external storage (or tapes) and want to a larger sized DATA diskgroup. External Backup Type specified as the Backup Type during Oracle Database Appliance deployment allows you to allocate more storage to the DATA diskgroup.
Performance Observations
RMAN allows for parallel processing of backup workloads in Oracle Real Application Clusters (RAC) environments. Use the following general guidelines to maximize backup transfer rates to local storage:
§ Use both instances and start with one RMAN channel per instance.
§ Add additional RMAN channels to reach an optimum level.
Optimal backup rates were observed when utilizing both RAC instances and one to four RMAN channels per instance, depending on the system configuration.
Backup operation Backup Rate (TB/hr) Restore Rate (TB/hr)
Host Busy (CPU)
Image copy 8 Cores
4 channels
2.22 TB
2.35 TB 28-38%
Image Copy 32 Cores
8 channels
2.25 TB 2.40 TB 10-20%
TABLE 6: BACKUP AND RESTORE PERFORMANCE OBSERVATIONS IN A RAC DATABASE ENVIRONMENT
For single instance database deployments, the following performance observations were made.
Backup operation Backup Rate (TB/hr) Restore Rate (TB/hr)
Host Busy
Image copy 2 Cores
2 channels
1.92 TB
2.05 TB 50-80%
Image copy 4 Cores
2 channels
1.99 TB 2.10 TB 25-38%
Image Copy 16 Cores
4 channels
2.16 TB 2.24 TB 15-20%

21 | BACKUP AND RECOVERY BEST PRACTICES FOR ORACLE DATABASE APPLIANCE
TABLE 7: BACKUP AND RESTORE PERFORMANCE OBSERVATIONS IN A SINGLE INSTANCE DATABASE ENVIRONMENT
The performance numbers shown in these tables are for Bare Metal installations, except for the single instance with 2 cores configuration. The same tests performed in a virtualized environment showed backup rates that were 2-5% lower and the hosts were slightly busier.
RMAN Backup sets were created and restored with similar CPU usage. Compression required more CPU depending on the compression algorithm chosen.
Backup and recovery with Network File System (NFS) storage The Oracle ZFS Appliance 7000 is a unified storage system that provides flexible configuration and attachment options for a wide range of storage demands. The Oracle ZFS 7120 was selected to demonstrate the ability to send RMAN backups over the 10 Gb interfaces on the Oracle Database Appliance to network storage using the Oracle-exclusive dNFS high performance NFS client.
Using network-attached storage for database backups allows isolation of backups from the Oracle Database Appliance internal storage, and opens a range of possibilities for management of the backups including replication to a remote site, snapshots for additional copies of backups, compression of backups by the ZFS Appliance, and sharing of the backups with another database server.
The methodology for network-attached storage is similar to FRA-based backups:
§ Use NFS shares and define the NFS Appliance shares to dNFS so that the dNFS client is used
§ Perform an initial RMAN level 0 (full) backup
§ Perform daily RMAN incremental level 1 backups
§ Roll incremental backups into full backup and delay by 24 hours (see see RMAN product documentation (Choose database version (12c|11gR2) =>Database Administration=> Backup and Recovery))
RMAN backups to the Oracle ZFS Storage Appliance 7120
The ZFSSA 7120 is a single-head storage controller with capacity and performance that matches well with the Database Appliance. It can be configured from 3.3 TB to 177 TB of raw capacity and 73 GB of write-optimized flash storage that can be accessed using 1 Gb, 10 Gb, or fiber channel interfaces, using a wide variety of protocols. For use as a Database Appliance backup target, NFS shares accessed over 10 Gb interfaces are recommended. The 7120 comes standard with 4 x 1 Gb network interfaces. For optimal backup performance, the optional 10 Gb interfaces are recommended for the 7120.
The ZFSSA architecture provides flexible configuration options. For this white paper, we chose a configuration that optimizes the RMAN large block, streaming write and read performance over Ethernet interfaces, while maintaining fault-tolerance. Defining NFS shares in a single double parity (RAID-Z2) storage pool provides the necessary performance and availability. We will assume the ZFSSA 7120 has an optional dual 10 Gb network interface card, two dedicated boot drives, and twelve 2 TB or 3 TB HDD for data storage.
The ZFS Storage Appliance 7120 can be configured using the web-based Browser User Interface (BUI) or via CLI commands executed directly on the ZFS Appliance. In all examples below it is assumed the user has logged into the BUI using the root user and password. The usual form of the BUI URL is:
https://<ZFSSA Name or IP Address>:215
The complete documentation for the configuration of all aspects of the Storage Appliance is available in the BUI help screens.
Ø Pools - The ZFS Storage Appliance 7120 stores data in groups of hard disks aggregated into pools. There are several possible pool configurations: Single, double or triple parity and mirrored or striped. Given the emphasis with Oracle Database

22 | BACKUP AND RECOVERY BEST PRACTICES FOR ORACLE DATABASE APPLIANCE
Appliance on maximum data availability and good performance, choosing double parity (RAID-Z2) is the best balance between performance and availability. While multiple pools can be configured on a dedicated 7120 the best choice is to define a single storage pool.
o Click Configuration->Storage
o Click the plus sign (+) next to Available Pools
o Give the pool a name (Pool-0 for example) and click Apply
o At the “Verify and add devices” screen select all HDDs but do not select the Boot drives
o Click “Commit”
o On the next screen choose the Double parity storage profile
o Click “Commit”
Ø Shares - The ZFS Storage Appliance 7120 supports NFS, CIFS/SMB and iSCSI network storage protocols, as well as Fiber Channel with an optional interface card. The Oracle Database Appliance has the ability to run a highly-optimized version of the NFS file system client called dNFS, so defining and using NFS shares as targets for Oracle Database Appliance backup is a natural choice. NFS shares can be defined with several options, and for targets for Oracle Database Appliance backup, these are recommended:
o Database record size: 128 KB
o Synchronous write bias: Throughput
o Data Compression: Off for best performance, LZJB for good inflight compression
The number of NFS shares to define for Oracle Database Appliance backup depends on the number of services and RMAN channels defined to execute the RMAN backups. Generally, one NFS share per RMAN channel provides optimum throughput. As with the FRA based backup configurations, two RMAN channels per server are a good starting point. For a RAC configuration, a total of four RMAN channels and four shares work well. NFS shares belong to a Project on the appliance, so first we define a Project, then the shares owned by the Project.
Ø In the BUI:
o Click Shares->Projects
o In the Projects pane on the left side, click the plus sign (+) next to the word “All”
o Enter a name for the project and click Apply
o Click on the new Project name in the Projects pane, then click General
o Change Synchronous Write Bias to Throughput, Database record size to 128K, and set Data compression to Off or LZJB as desired.
o Adjust the default permissions for the shares in the project
o Click Apply – You now have a Project for your ODA backup shares
o The Filesystems pane will appear, click the plus sign (+) next to the word “Filesystems”
o Provide a share name
o Adjust the default permissions given to the share if necessary

23 | BACKUP AND RECOVERY BEST PRACTICES FOR ORACLE DATABASE APPLIANCE
o Click Apply
o Create three more shares
o Note the export mount point name shown in the Properties page of each share
Ø Network Configuration
We will assume a 7120 configuration with the optional 2 x 10 Gb interface card. The ports can be used independently or can be bound together using the Link Aggregation Protocol (LACP) or IP Multi-Pathing (IPMP). In general, LACP is used for improved performance, while IPMP is used for availability. LACP requires a switch that can use the LACP techniques to load balance between physical ports, while IPMP does not require special switch configuration. Alternatively, the 10 Gb ports on the ZFSSA 7120 can be directly connected, one port to each server on the Oracle Database Appliance, without a switch, using a 192.168.* private non-routable network domain between the Oracle Database Appliance and the 7120. Jumbo frames should be specified.
Ø Mounting the Shares on the ODA and Configuring dNFS
i. The /etc/fstab file on each server should be modified on each ODA server to mount each share created on the ZFSSA 7120 on mount points created on each server.
ii. mkdir /mnt/backup1 /mnt/backup2 /mnt/backup3 /mnt/backup4
iii. Edit /etc/fstab to include an entry for each mount point. For example:
192.168.2.1:/export/ODA/backup1 on /mnt/backup1 type nfs (rw,bg,hard,nointr,rsize=1048576,wsize=1048576,tcp,nfsver=3,timeo=600)
iv. Issue the command ‘mount –a’ to read fstab
v. Adjust ownership and permissions, if desired (using chown/chmod commands)
The Oracle database has a special NFS client called Direct NFS or dNFS. The I/O throughput from an Oracle database to an NFS share is greatly increased if dNFS is used.
vi. A summary of how to configure dNFS follows:
o Shut down the Oracle database instance(s) on each server
o Issue this command from the oracle user on each server:
$ make –f $ORACLE_HOME/rdbms/lib/ins_rdbms.mk dnfs_on
o Create a file called $ORACLE_HOME/dbs/oranfstab on each server with entries showing the shares defined on the 7120 Appliance server: zfs-server path: 192.168.2.1
export /export/ODA/backup1 mount: /mnt/backup1 export /export/ODA/backup2 mount: /mnt/backup2 export /export/ODA/backup3 mount: /mnt/backup3 export /export/ODA/backup4 mount: /mnt/backup4
o Restart the Oracle database instance(s) on each server
When executing RMAN, the following SQL queries can verify the use of dNFS:
select * from v$dnfs_servers; select * from v$dnfs_files;
You may also want to review the database alert log and check database startup messages.

24 | BACKUP AND RECOVERY BEST PRACTICES FOR ORACLE DATABASE APPLIANCE
Configuring RMAN to Use the ZFSSA 7120
In order to efficiently allocate resources across the database nodes during backups, the backup load should be spread evenly between the RAC nodes.
• Create one service for each RMAN Channel/NFS mount point to run on selected nodes in the cluster:
$ srvctl add service –d <dbname> -s <service name1> -r <instance1> -a<instance2> $ srvctl add service –d <dbname> -s <service name2> -r <instance2> -a <instance1> For example: srvctl add service –d isr –s isrsvc1 –r isr1 –a isr2 srvctl add service –d isr –s isrsvc2 –r isr2 –a isr1
• Start the services:
$ srvctl start service –d <db_unique_name> -s <service_name1> $ srvctl start service –d <db_unique_name> -s <service_name2> For example: srvctl start service –d isr –s isrsvc1 srvctl start service –d isr –s isrsvc2
The database backup and recovery strategies when using the ZFSSA 7120 as the target are similar to RMAN commands backing up to the local FRA. The ALLOCATE CHANNEL commands in the RMAN run block need to target the NFS mount points created on the 7120, and they need to connect to the services created to write to each mount. In the example, service isrsvc1 will write to /mnt/backup1 and service isrsvc2 will write to /mnt/backup2. If each service is running on a different server, the resources of both servers will be used to create the RMAN backup set.
For example:
run { allocate channel oem_backup_disk1 type disk format '/mnt/backup1/%U' connect ’@isrsvc1’; allocate channel oem_backup_disk2 type disk format '/mnt/backup2/%U' connect ’@isrsvc2’; allocate channel oem_backup_disk3 type disk format '/mnt/backup3/%U' connect ’@isrsvc3’; allocate channel oem_backup_disk4 type disk format '/mnt/backup4/%U' connect ’@isrsvc4’; backup as BACKUPSET tag '%TAG' database; backup as BACKUPSET tag '%TAG' archivelog all not backed up; release channel oem_backup_disk1; release channel oem_backup_disk2; release channel oem_backup_disk3; release channel oem_backup_disk4; }
Performance Numbers for ZFSSA-Based Backup Configurations
To scale backup rates for disk on Oracle Database Appliance using a RAC configuration:
Use both instances and start with two RMAN channels per instance
Dedicate an NFS mount point to each channel
Continue to add additional RMAN channels for performance per instance.
On the Oracle Database Appliance with a 12 TB 7120 configuration, optimal backup rates were achieved with both RAC instances and two RMAN channels per instance.

25 | BACKUP AND RECOVERY BEST PRACTICES FOR ORACLE DATABASE APPLIANCE
Configuration Backup Rate (TB/hr) Restore Rate (TB/hr)
10 Gb Load Balanced Across Both Nodes 1.2 TB 0.6 TB
TABLE 8: BACKUP AND RESTORE PERFORMANCE OBSERVATIONS ON ZFS STORAGE APPLIANCE
Engineered Systems Backup Utility
RMAN backups of the ODA to an Oracle ZFS Storage Appliance can be configured automatically using the Engineered Systems Backup Utility 2.0 (ESBU), a free utility available on OTN. The ESBU 2.0 User's Guide can guide the user through the setup of the utility. This document illustrates an alternative method of configuring backups to the ZFS Appliance using manual interfaces.
Restore and Recover the database
Use standard RMAN procedures for restore and recovery of the instances for all these scalable destinations. Refer section 5.5 for sample steps (exclude oracle cloud specific configuration steps)
Backup and Recovery for Oracle Database Appliance S|M|L The Oracle Database Appliance S|M|L are single node configurations. Thus, these configurations do not provide high availability that Oracle Database Appliance HA configurations provide. If an Oracle Database Appliance S|M|L server becomes unrecoverable, in most cases, you must re-image, re-deploy, restore, and recover your system from backups.
When re-imaging the system, refer the My Oracle Support note titled “Oracle Database Appliance X6-2S, X6-2M and X6-2 L (Doc ID 2144642.1”, to identify and download ISO image for the Operating System. You can then re-image the Oracle Database Appliance S|M|L server using the ISO Image and redeploy the software using the standard process, which includes setting up the operating system, and installing Grid Infrastructure and RDBMS software. Once the system has been redeployed, you cab restore and recover the database(s) from your backups using standard RMAN procedures.
Database Backup and Recovery Best Practices This section outlines some of the core best practices when establishing your backup and recovery configuration in an Oracle Database Appliance environment.
1. Choose backup location based on RTO/RPO requirements
During the Oracle Database Appliance deployment process, you are required to choose backup location and storage mirroring. These choices determine storage allocation to the DATA and RECO disk groups. The placement of backups on local storage has direct bearing on backup and recovery processes and time requirements. However, local storage on Oracle Database Appliance is premium storage and limited to a maximum capacity and configuration. Choosing the backup location and mirroring options appropriately should allow you to meet your requirements and objectives.
2. Use “weekly full and daily incremental” backup strategy
Incremental backups allow you to back up only those data blocks that have changed since a previous backup. Incremental backups are thus efficient in terms of time and space requirements. However, prior to you should evaluate if your RTO requirements can still be met if you choose to use this approach.

26 | BACKUP AND RECOVERY BEST PRACTICES FOR ORACLE DATABASE APPLIANCE
Incremental backup typically require substantially less time to execute, giving you the option to backup more frequently and reduce RTO/RPO. By doing incremental backups, you also reduce network usage and network bandwidth requirements when backing up over a network. Further, incremental database backups reduce backup overhead and read I/O volume on the database.
3. Schedule archived log backup more frequently to reduce RPO
The archived redo logs residing on the system are vulnerable to loss in case of a complete system failure that renders the whole system in an unrecoverable state. For this reason, archived redo logs are backed up to a separate external (often remote) location. Choose a frequency of archived redo log backups that meets your requirements. Many customers use a standby system to transfer redo data to the remote location to ensure minimal redo loss in case of a complete system failure.
4. Validate backups
Perform RMAN CROSSCHECK operation on the backups to ensure validate backups.
RMAN> CROSSCHECK BACKUP;
5. Perform backup validate weekly
RMAN> BACKUPVALIDATE CHECK LOGICAL DATABASE ARCHIVELOG ALL;
Check weekly that a restore can be successfully performed in the event it is needed.
6. Perform restore validate weekly
Use the RMAN RESTORE VALIDATE command to check and verify the integrity of the backups. RESTORE DATABASE VALIDATE command only checks for the datafile backups and not ARCHIVELOG or CONTROLFILE backups. Issue RESTORE ARCHIVELOG VALIDATE and RESTORE CONTROLFILE VALIDATE commands for the latter. Use RESTORE SPFILE VALIDATE command to check server parameter file backup. By default, RMAN only checks for physical corruption during the VALIDATE operation. You may check for logical corruption using the VALIDATE CHECK LOGICAL command. For more information, please see Oracle Database documentation.
7. Quarterly full restore
Test a full restore of the database in a test environment on a quarterly basis to ensure backups can be reliably used if needed.
8. Use Fast Connect when using backups to Oracle Cloud
If storing backups in Oracle Cloud, use the Fast Connect facility to leverage greater bandwidth and lower latency and perform backups most efficiently.
9. Update RMAN SBT Module
If using the RMAN SBT module, update it periodically to ensure you are using a more current version and avoid known issues that may have surfaced and may have been fixed in a latter version.
Conclusion Oracle Database Appliance benefits from native Oracle database integration with Oracle Recovery Manager (RMAN). You can choose from a variety of backup destinations depending on your requirements. When Oracle Database Appliance is deployed with the best practices outlined in this white paper, the backup, restore, and recovery operations for your Oracle Databases can be optimized.
Backup placement for Oracle Databases running on Oracle Database Appliance can be either on local storage or external storage. Local backups are placed in the RECO disk group on Oracle Database Appliance storage while external backups can be placed on

27 | BACKUP AND RECOVERY BEST PRACTICES FOR ORACLE DATABASE APPLIANCE
NFS storage, tape storage, or in the Oracle Cloud. Oracle ZFS Storage Appliance and Oracle StorageTek SL150 Tape device provide a unique value proposition in terms of performance and high availability for hosting external database backups for databases running on Oracle Database Appliance. Oracle Cloud presents a unique opportunity to store backup securely and cost effectively in an offsite location.
During testing, the peak backup performance was observed to be 1.2TB per hour for ZFS Storage Appliance and over 2.7TB per hour for Oracle StorageTek SL150. Backup placed on local Oracle Database Appliance storage executed at the rate of 2.5TB per hour.
Oracle Cloud Database Backup Service offers an effective and low cost alternative to protect your Oracle Appliance databases while at the same time securing your backups in a remote location.

28 | BACKUP AND RECOVERY BEST PRACTICES FOR ORACLE DATABASE APPLIANCE
Appendix A Configuring load-balanced backups In order to efficiently allocate resources across the database nodes during backups, the backup load should be spread evenly between the RAC nodes. Create a service that runs on the selected nodes in the cluster.
$ srvctl add service –d <dbname> -s <service name> -r <instance1>,<instance2> $ srvctl add service –d isr –s isrsvc –r isr1,isr2
Start the service
$ srvctl start service –d <db_unique_name> -s <service_name> $ srvctl start service
Add a net service name to $ORACLE_HOME/network/admin/tnsnames.ora, which is used for automatic load balancing the connection:
ISR = (DESCRIPTION = (ADDRESS = (PROTOCOL = TCP)(HOST = hamms-scan)(PORT = 1521)) (CONNECT_DATA = (SERVER = DEDICATED) (SERVICE_NAME = isr) ) )
For specific node connectivity use net names as shown here
ISR1 = (DESCRIPTION = (ADDRESS = (PROTOCOL = TCP)(HOST = hamms1)(PORT = 1521)) (CONNECT_DATA = (SERVER = DEDICATED) (SERVICE_NAME = isr) (SID = isr1) ) ) ISR2 = (DESCRIPTION = (ADDRESS = (PROTOCOL = TCP)(HOST = hamms2)(PORT = 1521)) (CONNECT_DATA = (SERVER = DEDICATED) (SERVICE_NAME = isr) (SID = isr2) ) )

29 | BACKUP AND RECOVERY BEST PRACTICES FOR ORACLE DATABASE APPLIANCE
Appendix B: Sample Scripts For all scripts in this section archive logs needed for recovery are available on disk. The scripts do not cover special considerations that may arise when restoring a production database. Customers may use these examples, adjust them to their needs and embed them in shell scripts.
Tape Backup in RAC environments
The script allocates two channels because we have tested with two tape drives and creates a full backup including the archive logs.
Note: Channels are load balanced in RAC
Tape Restore for Single Instance and RAC One Node
For the restore two channels are allocated well and the database is recovered automatically with the available archive logs. Sometimes even the old redo logs were available so that the database could be recovered without open resetlogs.
Note: To run parallel restores you must mount the database on the second node and allocate channels using connect strings.
Image copy backup (RAC, RAC One Node and Single Instance)
Before executing the backup as copy operation the configuration details like backup type and parallelism are set.
RUN { ALLOCATE CHANNEL ch00 TYPE 'SBT_TAPE' CONNECT='@isr'; ALLOCATE CHANNEL ch01 TYPE 'SBT_TAPE' CONNECT='@isr'; BACKUP INCREMENTAL LEVEL 0 DATABASE PLUS ARCHIVELOG; }
ALTER DATABASE MOUNT RUN { ALLOCATE CHANNEL ch00 TYPE 'SBT_TAPE'; ALLOCATE CHANNEL ch01 TYPE 'SBT_TAPE' ;
RESTORE DATABASE; RECOVER DATABASE; } ALTER DATABASE OPEN RESETLOGS;
CONFIGURE DEFAULT DEVICE TYPE TO DISK; CONFIGURE SNAPSHOT CONTROLFILE NAME TO '+RECO/ISR/snap.cf'; CONFIGURE DEVICE TYPE DISK BACKUP TYPE TO COPY; CONFIGURE DEVICE TYPE disk PARALLELISM 2; CONFIGURE CONTROLFILE AUTOBACKUP ON; RUN {
backup as copy database; }

30 | BACKUP AND RECOVERY BEST PRACTICES FOR ORACLE DATABASE APPLIANCE
Image copy restores on RAC The channel allocations use the credentials of the user connected to the instance.
Note: To run parallel restores you must mount the database on the second node and allocate channels using connect strings.
Image restore RAC One Node and Single Instance
Restore can also be parallelized and speed up performance.
Backup script for backup set
The configure command sets the backup type for the backup operation.
Monitoring disk based backups
When an RMAN job is executed the job transcript is written to stdout by default, but the output can be redirected to a log file that can be analyzed for errors and warnings, as well as to review backup piece names that are written. Additionally, RMAN uses the NLS_DATE_FORMAT environment variable to report times in hours / minutes and seconds, that can be useful to monitor run times.
run { ALLOCATE CHANNEL ch1 DEVICE TYPE DISK CONNECT ‘@isr1'; ALLOCATE CHANNEL ch2 DEVICE TYPE DISK CONNECT ‘@isr2'; restore database; recover database; } startup;
CONFIGURE DEVICE TYPE disk PARALLELISM 2; run { restore database; recover database; } startup;
CONFIGURE DEFAULT DEVICE TYPE DISK; CONFIGURE DEVICE TYPE DISK BACKUP TYPE TO BACKUPSET; CONFIGURE SNAPSHOT CONTROLFILE NAME TO '+RECO/ISR/snap.cf'; CONFIGURE DEVICE TYPE disk PARALLELISM 2; CONFIGURE CONTROLFILE AUTOBACKUP ON; Run {
Backup database; }
SELECT sid, serial#, context, sofar, totalwork, round(sofar/totalwork*100,2) "% Complete" FROM v$session_longops WHERE opname LIKE 'RMAN%' AND opname NOT LIKE '%aggregate%' AND totalwork != 0 AND sofar <> totalwork /
31 | BACKUP AND RECOVERY BEST PRACTICES FOR ORACLE DATABASE APPLIANCE
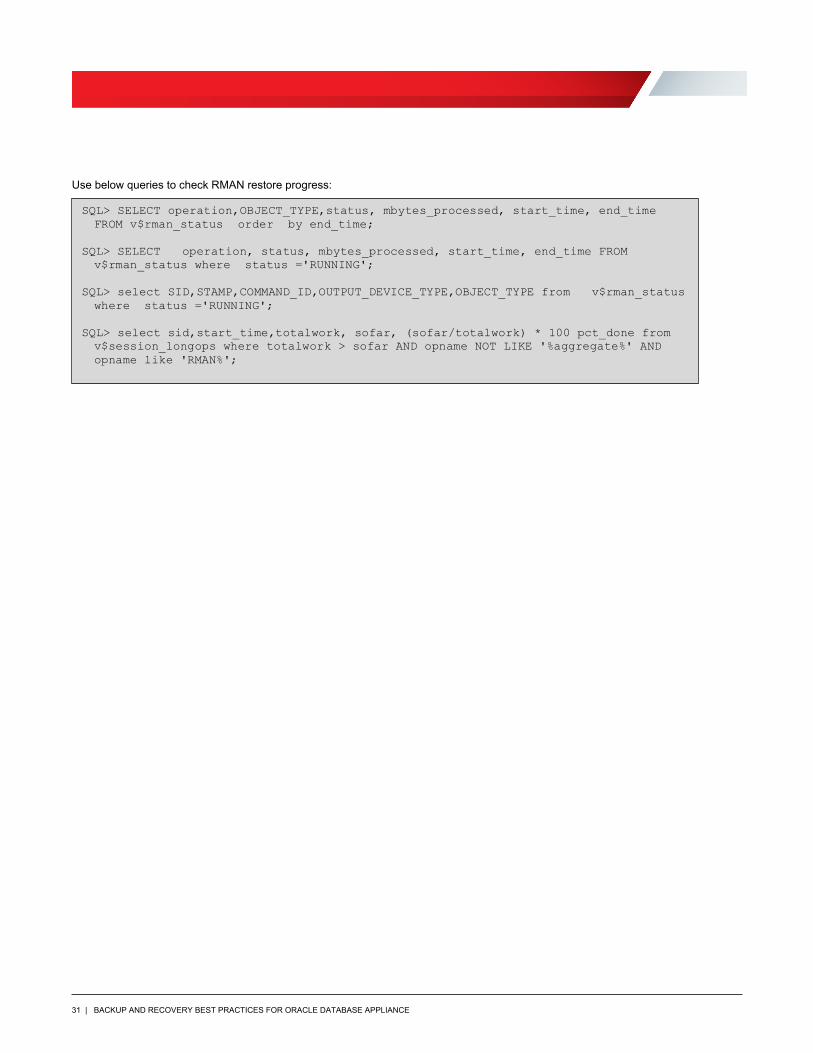
Use below queries to check RMAN restore progress:
SQL> SELECT operation,OBJECT_TYPE,status, mbytes_processed, start_time, end_time FROM v$rman_status order by end_time;
SQL> SELECT operation, status, mbytes_processed, start_time, end_time FROM v$rman_status where status ='RUNNING';
SQL> select SID,STAMP,COMMAND_ID,OUTPUT_DEVICE_TYPE,OBJECT_TYPE from v$rman_status where status ='RUNNING';
SQL> select sid,start_time,totalwork, sofar, (sofar/totalwork) * 100 pct_done from v$session_longops where totalwork > sofar AND opname NOT LIKE '%aggregate%' AND opname like 'RMAN%';

32 | BACKUP AND RECOVERY BEST PRACTICES FOR ORACLE DATABASE APPLIANCE
Appendix C Sample commands for backup and recovery in cloud Backing Up (Level 0) to Oracle Database Backup Cloud Service Using Password Encryption
RMAN> SET ENCRYPTION ON IDENTIFIED BY '<Specify password>’ ONLY; RMAN> BACKUP DEVICE TYPE SBT AS COMPRESSED BACKUPSET DATABASE PLUS ARCHIVELOG FORMAT '%d_%U';
For example
RMAN> SET ENCRYPTION ON IDENTIFIED BY 'odabackup123' ONLY; RMAN> BACKUP DEVICE TYPE SBT AS COMPRESSED BACKUPSET DATABASE PLUS ARCHIVELOG FORMAT '%d_%U';
Backing Up (Level 1) to Oracle Database Backup Cloud Service Using Password Encryption
SET ENCRYPTION ON IDENTIFIED BY 'odabackup123' ONLY; run { BACKUP DEVICE TYPE SBT AS COMPRESSED BACKUPSET INCREMENTAL LEVEL 1 DATABASE; }
Backup Validation
rman target / RMAN> SET DECRYPTION IDENTIFIED BY '<Specify password>’; #Get the password from section 5.5.1 RMAN> restore database validate check logical; }
For example
[oracle@slcac456 ~]$ rman target / RMAN> SET DECRYPTION IDENTIFIED BY 'odabackup123'; RMAN> restore database validate check logical;
Restore and recover the database using password encryption
Connect to Recovery Manager (RMAN), set the decryption password, set the DBID, and restore the SPFILE
rman target / RMAN> STARTUP NOMOUNT; RMAN> SET DECRYPTION IDENTIFIED BY 'odabackup123'; RMAN> set DBID=2985052152 #Source database DBID RMAN> RUN { ALLOCATE CHANNEL t1 DEVICE TYPE sbt PARMS 'SBT_LIBRARY=libopc.so ENV=(OPC_FILE=/u01/app/oracle/product/12.1.0.2/dbhome_1/dbs/opcRESTORE.ora)';
RESTORE SPFILE TO PFILE '/u01/app/oracle/product/12.1.0.2/dbhome_1/dbs/initRESTORE.ora' FROM AUTOBACKUP;
}
Edit the PFILE to reflect the restore server, changing control file locations (control_files), create (db_create_file_dest), recovery (db_recovery_file_dest) file destinations, audit (audit_file_dest) file destinations, archive log location and db_unique_name (if ORACLE_SID is changing). For example, change the *_dest parameters, so all destinations are correct, change the control_files parameter, and so on. If necessary, create the relevant directories on the restore server.
Restore the control file
RMAN> SHUTDOWN IMMEDIATE; RMAN> STARTUP NOMOUNT; RMAN> RUN { ALLOCATE CHANNEL t1 DEVICE TYPE sbt PARMS 'SBT_LIBRARY=libopc.so ENV=(OPC_FILE=/u01/app/oracle/product/12.1.0.2/dbhome_1/dbs/opcRESTORE.ora)';
RESTORE CONTROLFILE FROM AUTOBACKUP; }

33 | BACKUP AND RECOVERY BEST PRACTICES FOR ORACLE DATABASE APPLIANCE
Mount the database
RMAN> ALTER DATABASE MOUNT;
Start the restore and recovery
RMAN> RUN { SET NEWNAME FOR DATABASE TO <new location for the restored datafiles> ALLOCATE CHANNEL t1 DEVICE TYPE sbt PARMS 'SBT_LIBRARY=libopc.so ENV=(OPC_FILE=<ORACLE_HOME>/dbs/opc<ORACLE_SID>.ora)';
RESTORE DATABASE; SWITCH DATAFILE ALL; SWITCH TEMPFILE ALL; SQL "ALTER DATABASE RENAME FILE ''<Specify the location of the source database online redo logfile'' TO ''<Specify the location of restore database online redo logfile>''";
……………….. }
Find the system change number (SCN) to make the database consistent
RMAN> run { ALLOCATE CHANNEL t1 DEVICE TYPE sbt PARMS 'SBT_LIBRARY=libopc.so ENV=(OPC_FILE=/u01/app/oracle/product/12.1.0.2/dbhome_1/dbs/opcRESTORE.ora)';
RESTORE DATABASE PREVIEW; }
Recover the database to that point as per above command output, where scn is the SCN identified in the previous step.
RMAN> run { ALLOCATE CHANNEL t1 DEVICE TYPE sbt PARMS 'SBT_LIBRARY=libopc.so ENV=(OPC_FILE=/u01/app/oracle/product/12.1.0.2/dbhome_1/dbs/opcRESTORE.ora)';
RECOVER DATABASE UNTIL SCN <SCN from the previous command>; }
Open the database with the RESETLOGS option after restore and recovery is complete
RMAN> ALTER DATABASE OPEN RESETLOGS;
Backing Up (Level 0) to Oracle Database Backup Cloud Service Using Transparent Data Encryption (TDE)
RMAN> SET ENCRYPTION ON; RMAN> BACKUP DEVICE TYPE SBT AS COMPRESSED BACKUPSET DATABASE PLUS ARCHIVELOG FORMAT '%d_%U';
Restore and Recover the database using Transparent Data Encryption (TDE)
Validate the backup
rman target / RMAN> SET ENCRYPTION ON; RMAN> restore database validate check logical; }
And use previous section sample steps to complete restore and recovery of the database using TDE
Point-in-time restore and recovery from the oracle cloud
Depending upon the date and time of the restore, need to identify the control file and use “set until time” clause to do the point-in-time recovery. Use previous section sample steps to complete restore and recovery the database using Password Encryption or TDE
Backing Up to Oracle Database Backup Cloud Service Using Dual-Mode Encryption
RMAN> SET ENCRYPTION ON IDENTIFIED BY '<Password'; BACKUP DEVICE TYPE SBT AS COMPRESSED BACKUPSET DATABASE PLUS ARCHIVELOG FORMAT '%d_%U';
For example

34 | BACKUP AND RECOVERY BEST PRACTICES FOR ORACLE DATABASE APPLIANCE
RMAN> SET ENCRYPTION ON IDENTIFIED BY ' odabackup123'; BACKUP DEVICE TYPE SBT AS COMPRESSED BACKUPSET DATABASE PLUS ARCHIVELOG FORMAT '%d_%U';

35 | BACKUP AND RECOVERY BEST PRACTICES FOR ORACLE DATABASE APPLIANCE
References Oracle Database Backup and Recovery User’s Guide
https://docs.oracle.com/en/database/oracle/oracle-database/12.2/bradv/backup-and-recovery-users-guide.pdf
Oracle StorageTek SL150 Modular Tape Library
https://www.oracle.com/storage/tape-storage/sl150-modular-tape-library/index.html
Oracle Database Cloud Backup Module
http://www.oracle.com/technetwork/database/availability/oracle-cloud-backup-2162729.html
Using Oracle Database Backup Cloud Service
https://docs.oracle.com/en/cloud/paas/db-backup-cloud/csdbb/getting-started-oracle-database-backup-cloud-service.html

Oracle Corporation, World Headquarters Worldwide Inquiries 500 Oracle Parkway Phone: +1.650.506.7000 Redwood Shores, CA 94065, USA Fax: +1.650.506.7200
Copyright © 2017, Oracle and/or its affiliates. All rights reserved. This document is provided for information purposes only, and the contents hereof are subject to change without notice. This document is not warranted to be error-free, nor subject to any other warranties or conditions, whether expressed orally or implied in law, including implied warranties and conditions of merchantability or fitness for a particular purpose. We specifically disclaim any liability with respect to this document, and no contractual obligations are formed either directly or indirectly by this document. This document may not be reproduced or transmitted in any form or by any means, electronic or mechanical, for any purpose, without our prior written permission. Oracle and Java are registered trademarks of Oracle and/or its affiliates. Other names may be trademarks of their respective owners. Intel and Intel Xeon are trademarks or registered trademarks of Intel Corporation. All SPARC trademarks are used under license and are trademarks or registered trademarks of SPARC International, Inc. AMD, Opteron, the AMD logo, and the AMD Opteron logo are trademarks or registered trademarks of Advanced Micro Devices. UNIX is a registered trademark of The Open Group. 0615 Oracle Cloud Infrastructure: Backup and Recovery Best Practices for Oracle Database Appliance Date: December 2017 Author: Giridhar Reddy Sangala Contributing Authors: Erich Kreisler, Sankar Bose, Kyle Noonan, Scott Ledbetter, RACPack Cloud Innovation and Solution Engineering Team
C O N N E C T W I T H U S
blogs.oracle.com/oracle
facebook.com/oracle
twitter.com/oracle
oracle.com