assignment 3: scene graph and sky box - due: feb 28 · assignment 3: scene graph and sky box - due:...
TRANSCRIPT
Assignment 3: Scene Graph and Sky Box - Due: Feb 28
In this project you will need to implement a scene graph to render a group of animated robots.
You also need to create a bezier track to make a robot army march along this track.
You can reuse the code from the assignment 2 for this project.
In this project you will learn how to (100 pts):
1. render a skybox for your 3D world (15 pts)
a. Skybox gets rendered correctly (10 pts)
b. Opengl Culling technology gets set correctly (5 pts)
2. create your own scene graph engine (15 pts)
3. design your own robots (35 pts)
a. The robot has at least 3 body parts given (20 pts)
b. animating you robot to make at least 3 body parts move indepently (15 pts)
4. build a robot army containing at least 25 robots (10 pts)
5. create one bezier curve track for robot army (25 pts)
a. the track is a closed curve composed of cubic curve segments (15 pts)
b. robot army moved along the track smoothly (10 pts)
A demo video has been posted in piazza, you don’t need to fully follow the style in demo. For
more information please refer to piazza.

1. Sky Box
Start with code that uses your trackball code, but modify it to control the camera instead. (If you
didn’t get that to work, keyboard controls will suffice.)
Create a sky box for your scene with robots. A sky box is a large, square box which is drawn
around your entire scene, to give it a nice background. The camera is located inside of this box.
The inside walls of the box usually consist of pictures of a sky and a horizon, as well as the
terrain below. Sky boxes are typically cubic, which means that they consist of six square
textures for the six sides of a cube. Here is a great tutorial for sky boxes and how to implement
them in modern OpenGL.
Here is a nice collection of textures for sky boxes . Make sure the width and height of your sky
box textures are powers of two, such as 512x512 or 1024x1024. You are allowed to create your
own sky box if you want.
Draw a cubic sky box and make it extremely big. For instance, by giving it coordinates like -1000
and +1000. Check to see if the textures align correctly at the edges - if not you may need to
rotate some of the textures. There should not be any visible seams.
Make sure single-sided rendering (triangle culling) is enabled with these lines somewhere in
your code to ensure that you will never see the outside of the box (this assumes that your sky
box is defined with the triangles facing inward):
Use the following settings for your texture after your first
glBindTexture(GL_TEXTURE_CUBE_MAP, id) for correct lighting and filtering settings:

To familiarize yourself with texture mapping in OpenGL, we provide sample code (in
texture.cpp), which loads a PPM file and uses it as a texture for a quad. If you decide to use one
of the above referenced sky box images, you will have to convert them from JPEG to PPM
format. The free image processing tool IrfanView for Windows will do this for you. Alternatively,
you can use a third party library such as SOIL to natively load JPEG images.
2. Scene Graph Engine
To connect the parts of the robot (head, torso, limbs, eyes, antennae), you need to first
implement a simple scene graph structure for our rendering engine. This scene graph should
consist of at least three nodes: Node, Transform, and Geometry. You are free to add more
scene graph node types as you see fit.
❏ Class Node should be abstract and serve as a common base class. It should implement
the following class methods:
❏ an abstract draw method: virtual void draw(Matrix4 C)=0
❏ an abstract virtual void update()=0 method to separate bounding sphere updates
from rendering
❏ Transform should be derived from Node and have the following features:
❏ store a 4x4 transformation matrix M
❏ store a list of pointers to child nodes (std::vector<Node*>)
❏ provide a class methods to add a child node (addChild(), removeChild()) to the
list
❏ its draw method needs to traverse the list of children and call each child node's
draw function
❏ when draw(C) is called, multiply matrix M with matrix C.
❏ Geometry should be derived from Node and have the following features:
❏ set the modelview matrix to the current C matrix
❏ an initialization method to load a 3D model (OBJ file) whose filename is passed to
it (init(string filename). Your OBJ loader from project 2 should work.
❏ have a class method which draws the 3D model associated with this node.
3. Walking Robot
Now that we have the scene graph classes, it is time to put them to work. You have the
following robot components, as obj files, to choose from: head, body (torso), limb, eye, and
antenna.
Build your own robot using the addChild methods. Use at least 3 different types of parts for your
robot (e.g., body, head and limb). In total, your robot needs to consist of at least 4 parts, 3 of
which need to be moving independently from one another and they need to be connected to the
4th part.
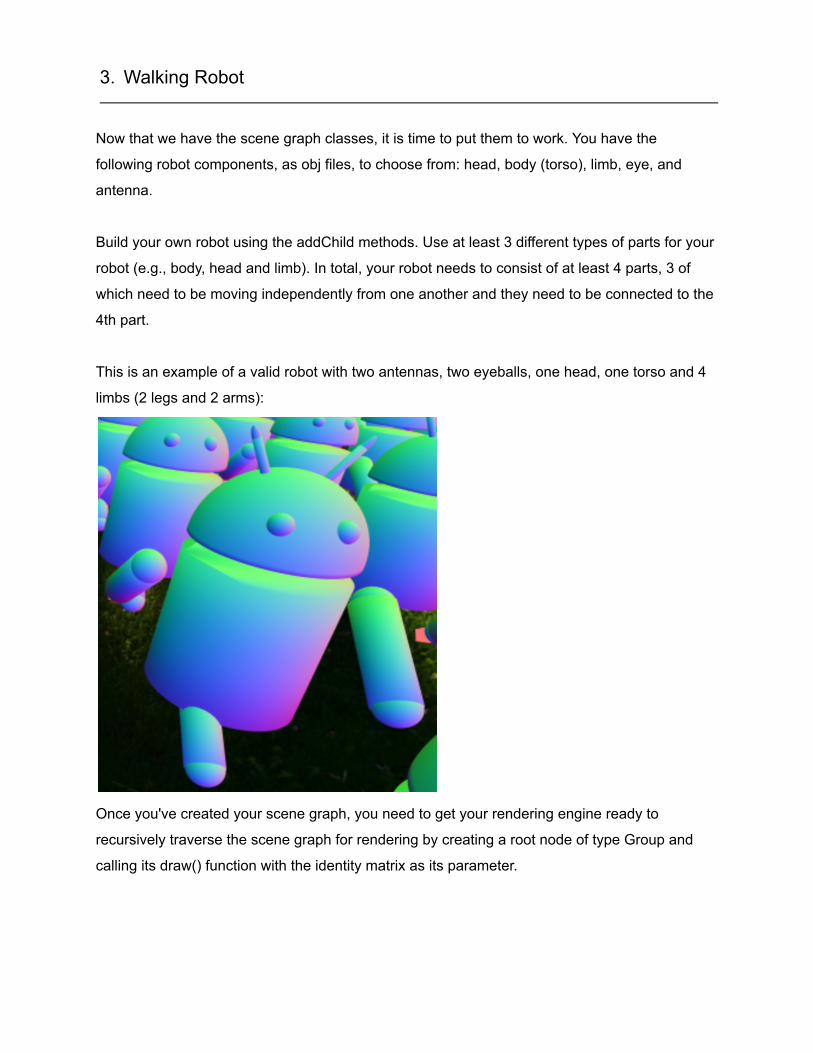
This is an example of a valid robot with two antennas, two eyeballs, one head, one torso and 4
limbs (2 legs and 2 arms):
Once you've created your scene graph, you need to get your rendering engine ready to
recursively traverse the scene graph for rendering by creating a root node of type Group and
calling its draw() function with the identity matrix as its parameter.

Animate the robot to make it look like it is walking, by changing the matrices in the Transform
nodes.
Note : unlike the previous obj files in the course, each face from those robot parts has different
indices for v/vt/vn. (You may want to check Wikipedia for more information about *.obj format)
One way to deal with the different indices is to re-order (and duplicate) the v//vn data when
parsing so that their indices align. The following code might be helpful for this:
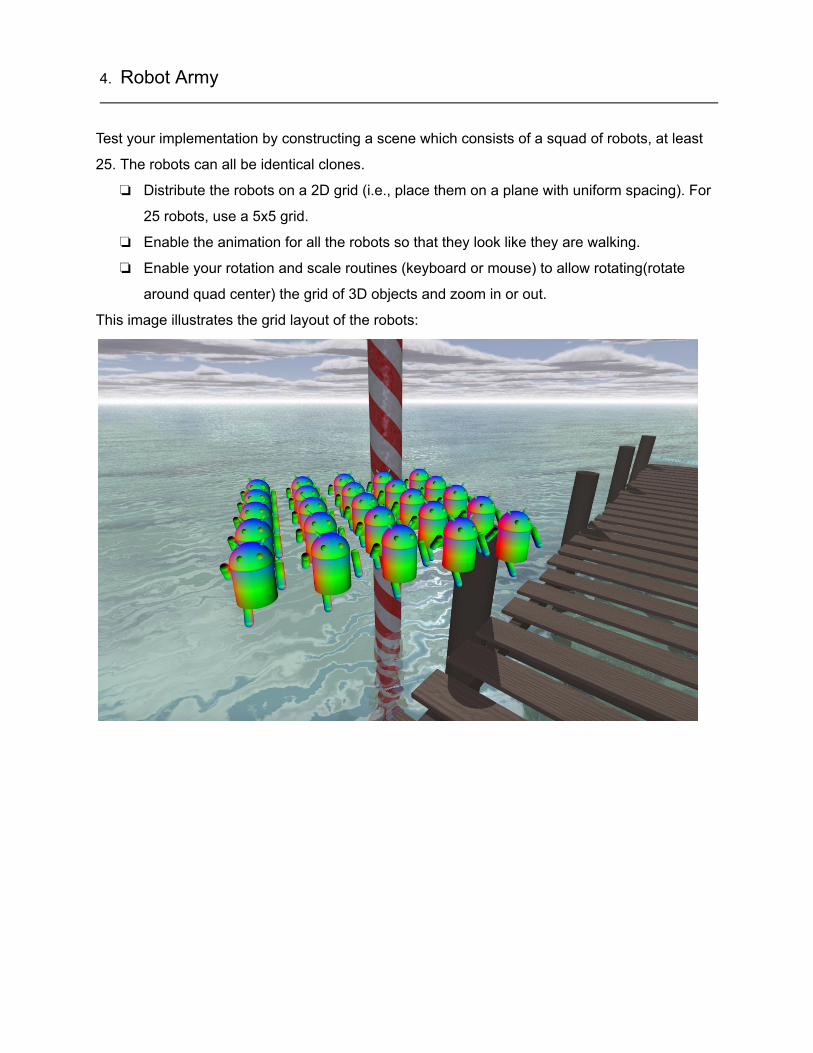
4. Robot Army
Test your implementation by constructing a scene which consists of a squad of robots, at least
25. The robots can all be identical clones.
❏ Distribute the robots on a 2D grid (i.e., place them on a plane with uniform spacing). For
25 robots, use a 5x5 grid.
❏ Enable the animation for all the robots so that they look like they are walking.
❏ Enable your rotation and scale routines (keyboard or mouse) to allow rotating(rotate
around quad center) the grid of 3D objects and zoom in or out.
This image illustrates the grid layout of the robots:
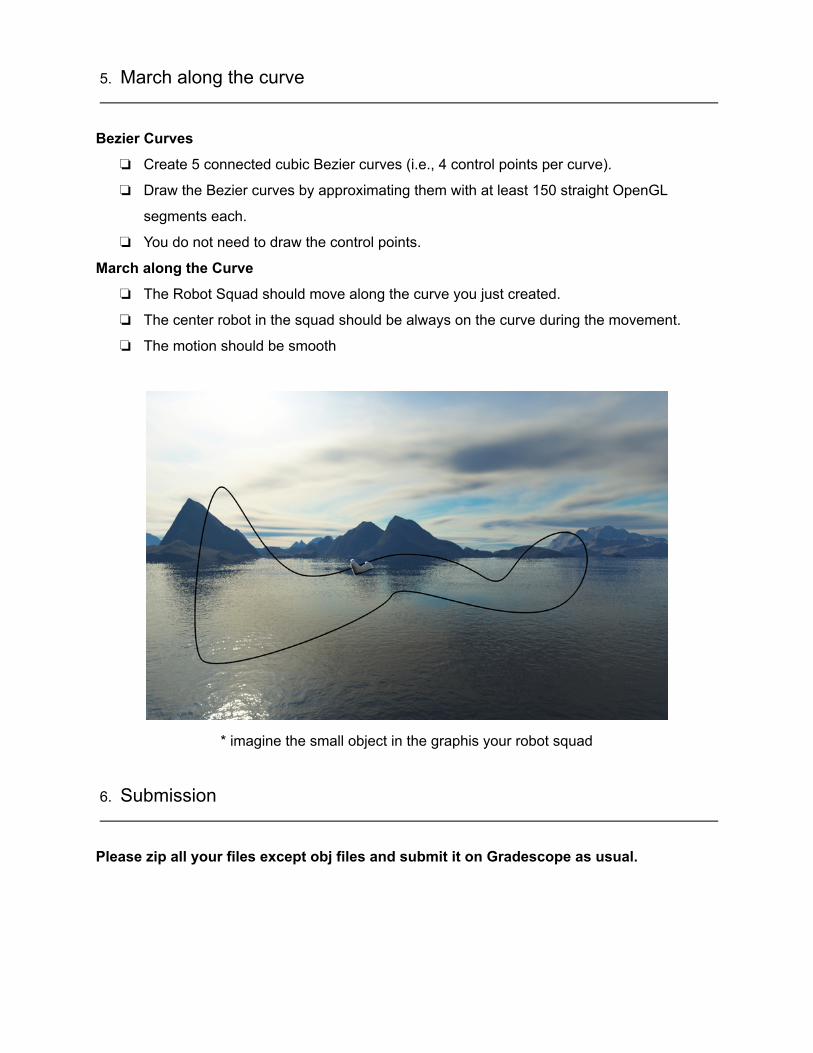
5. March along the curve
Bezier Curves
❏ Create 5 connected cubic Bezier curves (i.e., 4 control points per curve).
❏ Draw the Bezier curves by approximating them with at least 150 straight OpenGL
segments each.
❏ You do not need to draw the control points.
March along the Curve
❏ The Robot Squad should move along the curve you just created.
❏ The center robot in the squad should be always on the curve during the movement.
❏ The motion should be smooth
* imagine the small object in the graphis your robot squad
6. Submission
Please zip all your files except obj files and submit it on Gradescope as usual.