assembly & filling guide for welded wire mesh gabions · 2019-02-14 · 2 unfold gabion panels...
TRANSCRIPT
1
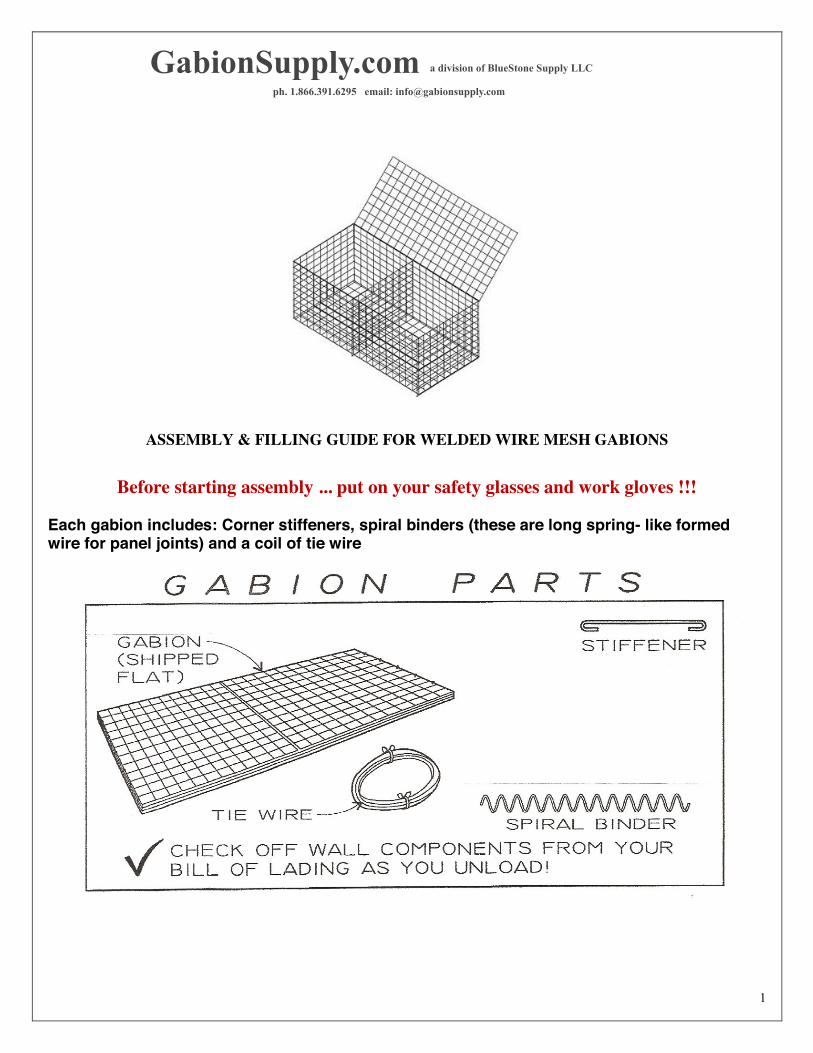
ASSEMBLY & FILLING GUIDE FOR WELDED WIRE MESH GABIONS
Before starting assembly ... put on your safety glasses and work gloves !!!
Each gabion includes: Corner stiffeners, spiral binders (these are long spring- like formed wire for panel joints) and a coil of tie wire
GabionSupply.com a division of BlueStone Supply LLC
ph. 1.866.391.6295 email: [email protected]
2
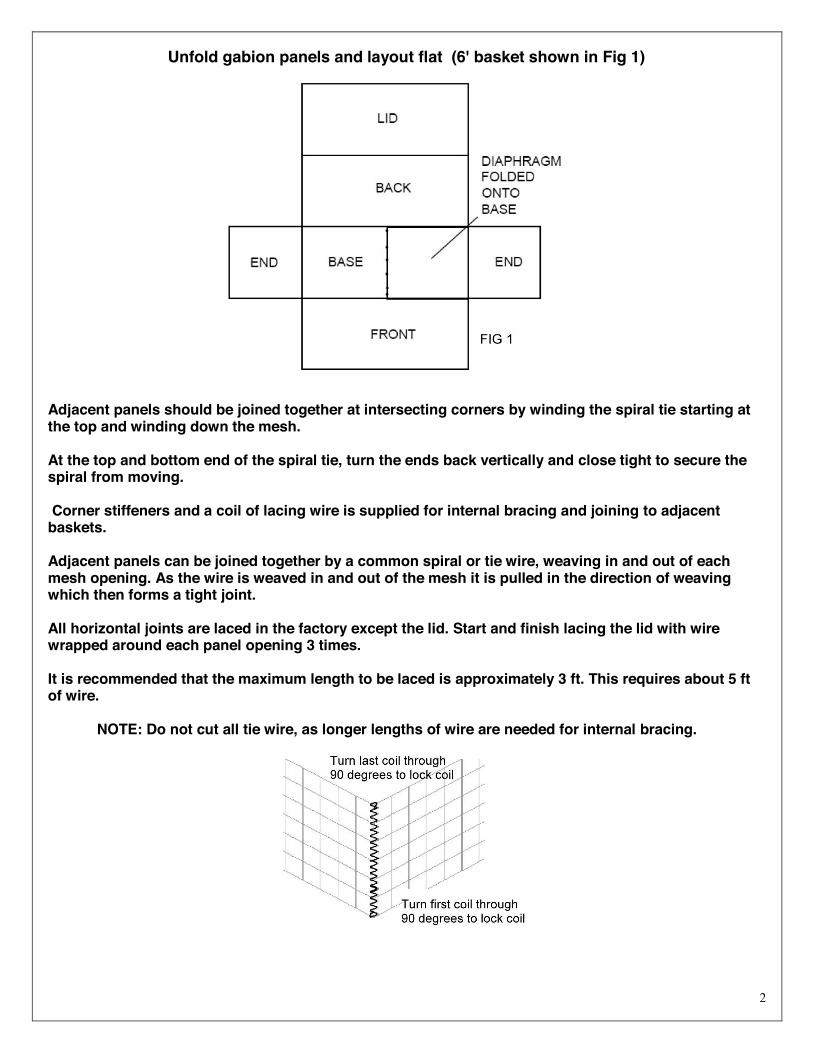
Unfold gabion panels and layout flat (6' basket shown in Fig 1)
Adjacent panels should be joined together at intersecting corners by winding the spiral tie starting at the top and winding down the mesh. At the top and bottom end of the spiral tie, turn the ends back vertically and close tight to secure the spiral from moving. Corner stiffeners and a coil of lacing wire is supplied for internal bracing and joining to adjacent baskets. Adjacent panels can be joined together by a common spiral or tie wire, weaving in and out of each mesh opening. As the wire is weaved in and out of the mesh it is pulled in the direction of weaving which then forms a tight joint. All horizontal joints are laced in the factory except the lid. Start and finish lacing the lid with wire wrapped around each panel opening 3 times. It is recommended that the maximum length to be laced is approximately 3 ft. This requires about 5 ft of wire. NOTE: Do not cut all tie wire, as longer lengths of wire are needed for internal bracing.
3
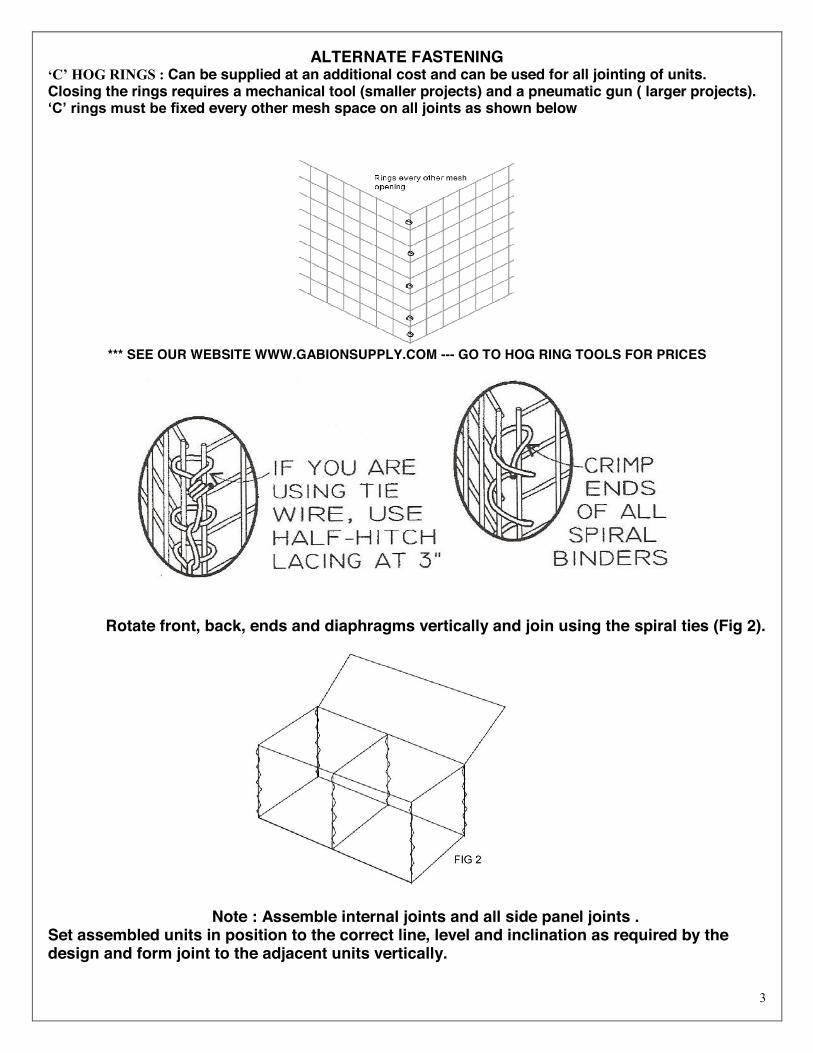
ALTERNATE FASTENING ‘C’ HOG RINGS : Can be supplied at an additional cost and can be used for all jointing of units. Closing the rings requires a mechanical tool (smaller projects) and a pneumatic gun ( larger projects). ‘C’ rings must be fixed every other mesh space on all joints as shown below
*** SEE OUR WEBSITE WWW.GABIONSUPPLY.COM --- GO TO HOG RING TOOLS FOR PRICES
Rotate front, back, ends and diaphragms vertically and join using the spiral ties (Fig 2).
Note : Assemble internal joints and all side panel joints . Set assembled units in position to the correct line, level and inclination as required by the design and form joint to the adjacent units vertically.
4
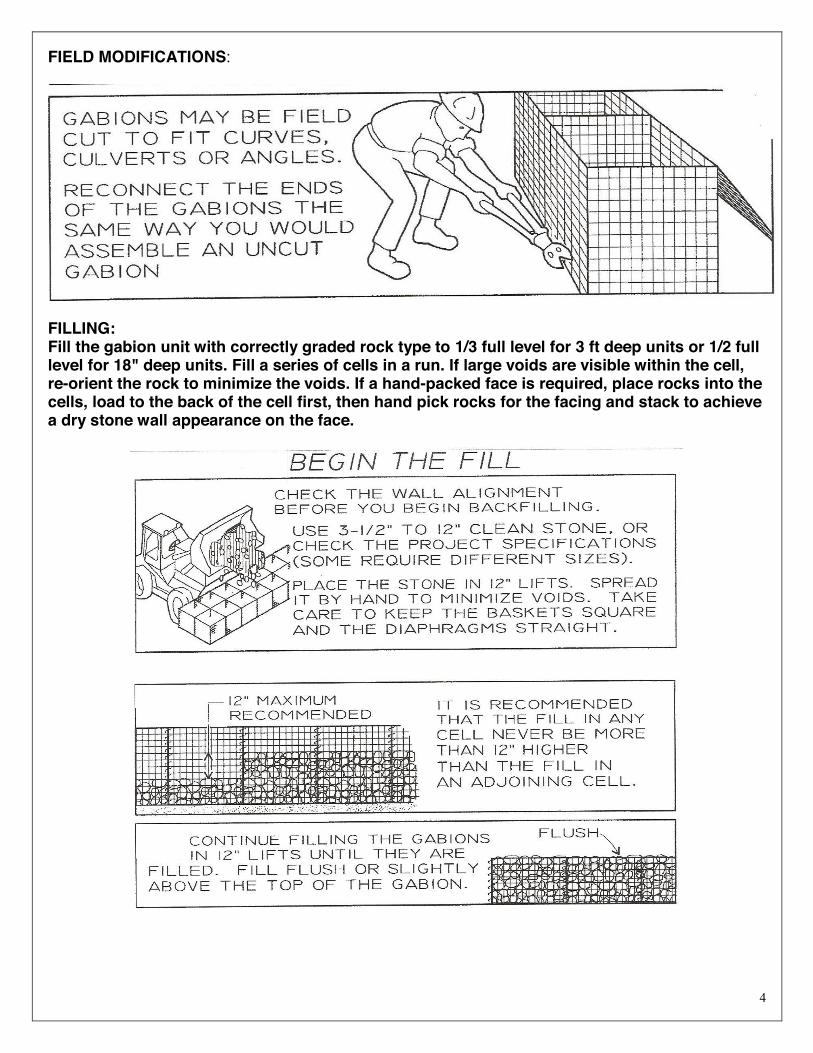
FIELD MODIFICATIONS:
FILLING: Fill the gabion unit with correctly graded rock type to 1/3 full level for 3 ft deep units or 1/2 full level for 18" deep units. Fill a series of cells in a run. If large voids are visible within the cell, re-orient the rock to minimize the voids. If a hand-packed face is required, place rocks into the cells, load to the back of the cell first, then hand pick rocks for the facing and stack to achieve a dry stone wall appearance on the face.
5
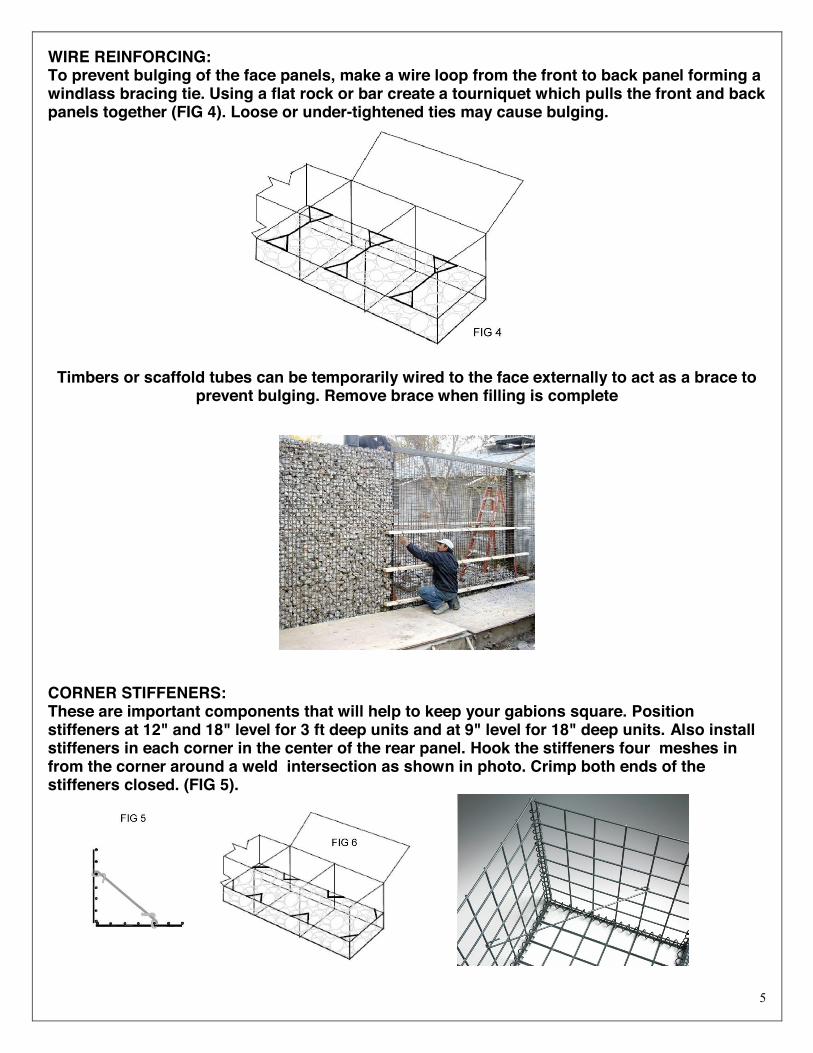
WIRE REINFORCING: To prevent bulging of the face panels, make a wire loop from the front to back panel forming a windlass bracing tie. Using a flat rock or bar create a tourniquet which pulls the front and back panels together (FIG 4). Loose or under-tightened ties may cause bulging.
Timbers or scaffold tubes can be temporarily wired to the face externally to act as a brace to prevent bulging. Remove brace when filling is complete
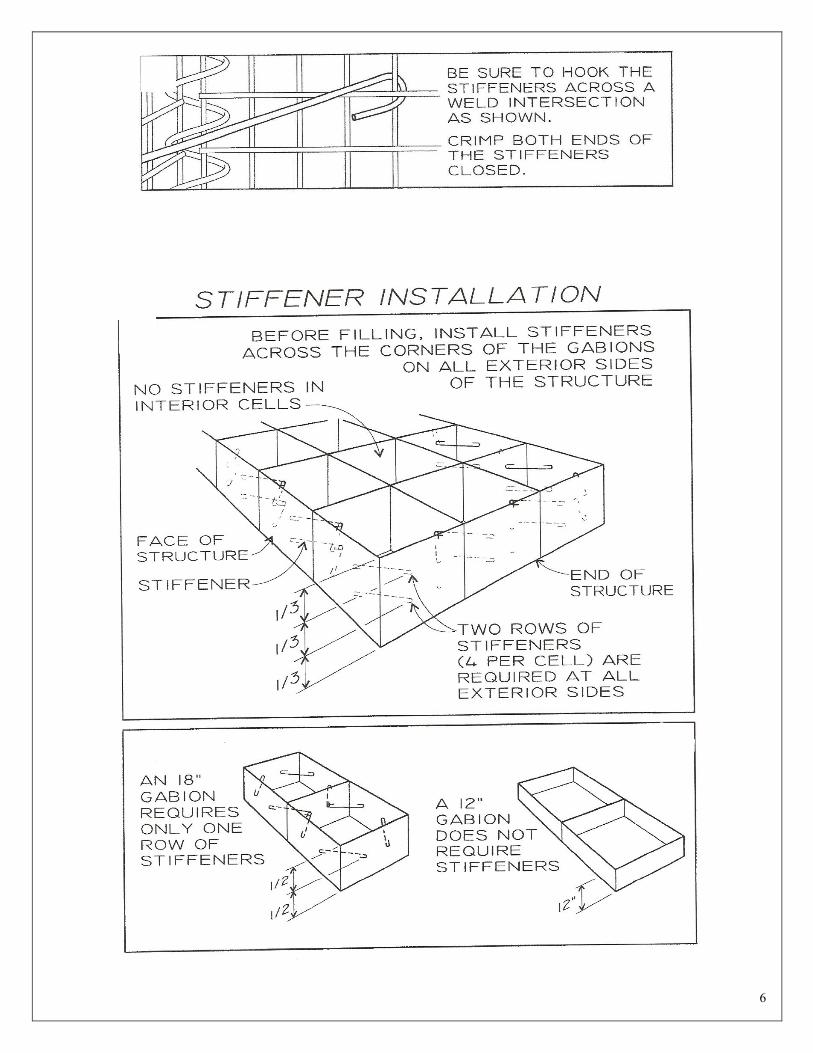
CORNER STIFFENERS: These are important components that will help to keep your gabions square. Position stiffeners at 12" and 18" level for 3 ft deep units and at 9" level for 18" deep units. Also install stiffeners in each corner in the center of the rear panel. Hook the stiffeners four meshes in from the corner around a weld intersection as shown in photo. Crimp both ends of the stiffeners closed. (FIG 5).
6
7
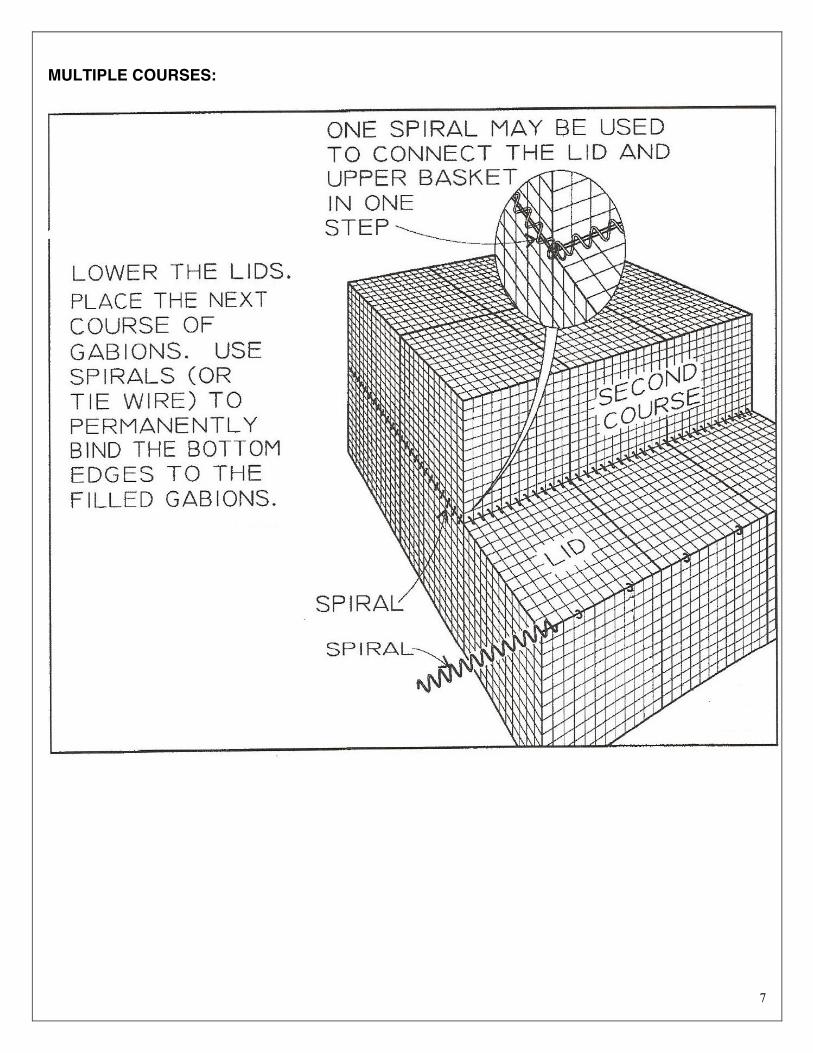
MULTIPLE COURSES:
8
9
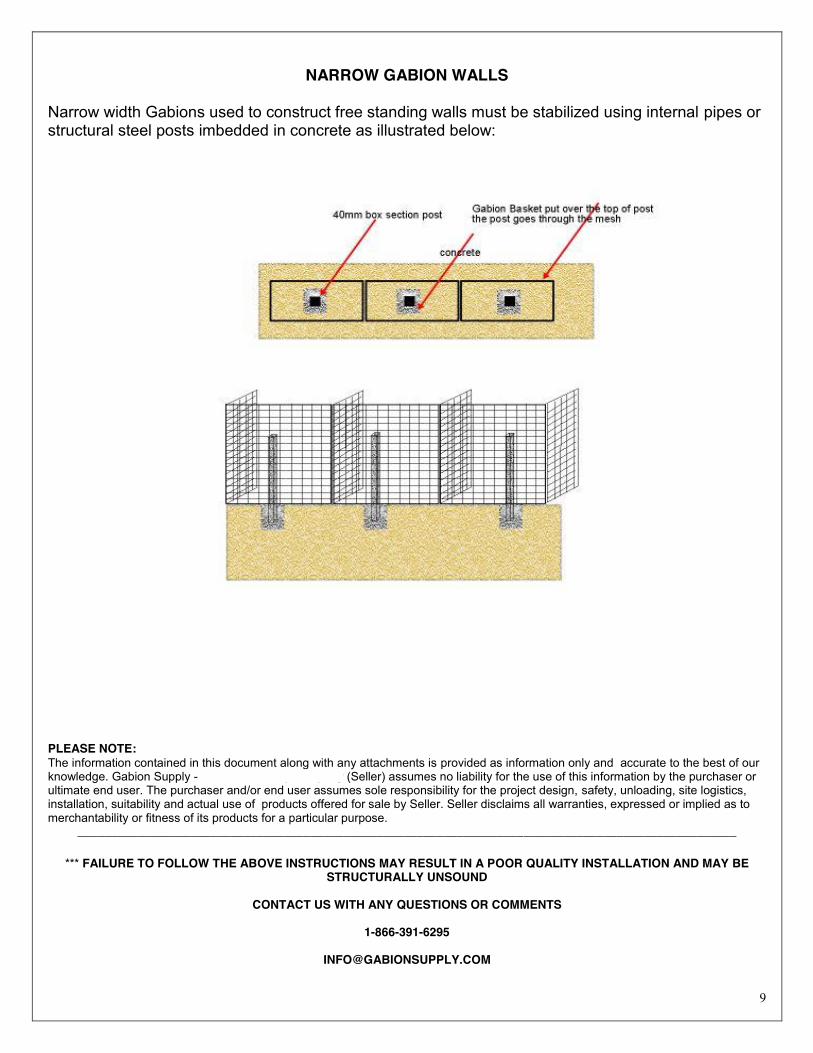
NARROW GABION WALLS
Narrow width Gabions used to construct free standing walls must be stabilized using internal pipes or structural steel posts imbedded in concrete as illustrated below:
PLEASE NOTE: The information contained in this document along with any attachments is provided as information only and accurate to the best of our knowledge. Gabion Supply - a LWECO Group company (Seller) assumes no liability for the use of this information by the purchaser or ultimate end user. The purchaser and/or end user assumes sole responsibility for the project design, safety, unloading, site logistics, installation, suitability and actual use of products offered for sale by Seller. Seller disclaims all warranties, expressed or implied as to merchantability or fitness of its products for a particular purpose.
___________________________________________________________________________________________________
*** FAILURE TO FOLLOW THE ABOVE INSTRUCTIONS MAY RESULT IN A POOR QUALITY INSTALLATION AND MAY BE STRUCTURALLY UNSOUND
CONTACT US WITH ANY QUESTIONS OR COMMENTS
1-866-391-6295