analogue / digital watches - amazon web services€¦ · 14 analogue digital watches description of...
TRANSCRIPT

14
ANALOGUE DIGITAL WATCHES
DESCRIPTION OF MODES & FUNCTIONSTIME, DATE, ALARM, STOPWATCH AND LIGHT
ANALOGUE TIMETo change time1. Pull the crown out fully.2. Turn the hands to the exact time.3. Push the crown back in.
WARNING!For your watch to be properly sealed, the crown must be fully pushed in.
Never pull the crown out when the watch is in water or is wet.
In Normal Time mode• Press SLEEP button to ON/OFF
the digital display screen.
Light Function• In any MODE you can simply
push the LIGHT button and the whole screen will light up and stay on for 3 seconds.
* Please make sure your watch matches the display shown.

English P.3 Français P.6 Español P.8 German P.10 Portuguès P.12 ⽇本 P.14Indonesia P.17
2
ALANOGUE DIGITAL WATCHES

15
ANALOGUE DIGITAL WATCHES
DESCRIPTION OF MODES & FUNCTIONSTIME, DATE, ALARM, STOPWATCH AND LIGHT
ANALOGUE TIMETo change time1. Pull the crown out fully.2. Turn the hands to the exact time.3. Push the crown back in.
WARNING!For your watch to be properly sealed, the crown must be fully pushed in.
Never pull the crown out when the watch is in water or is wet.
In Normal Time mode• Press SLEEP button to ON/OFF
the digital display screen.
Light Function• In any MODE you can simply
push the LIGHT button and the whole screen will light up and stay on for 3 seconds.
* Please make sure your watch matches the display shown.
Mode
Start/StopA B
Sleep
Crown
Light/Reset
3
16
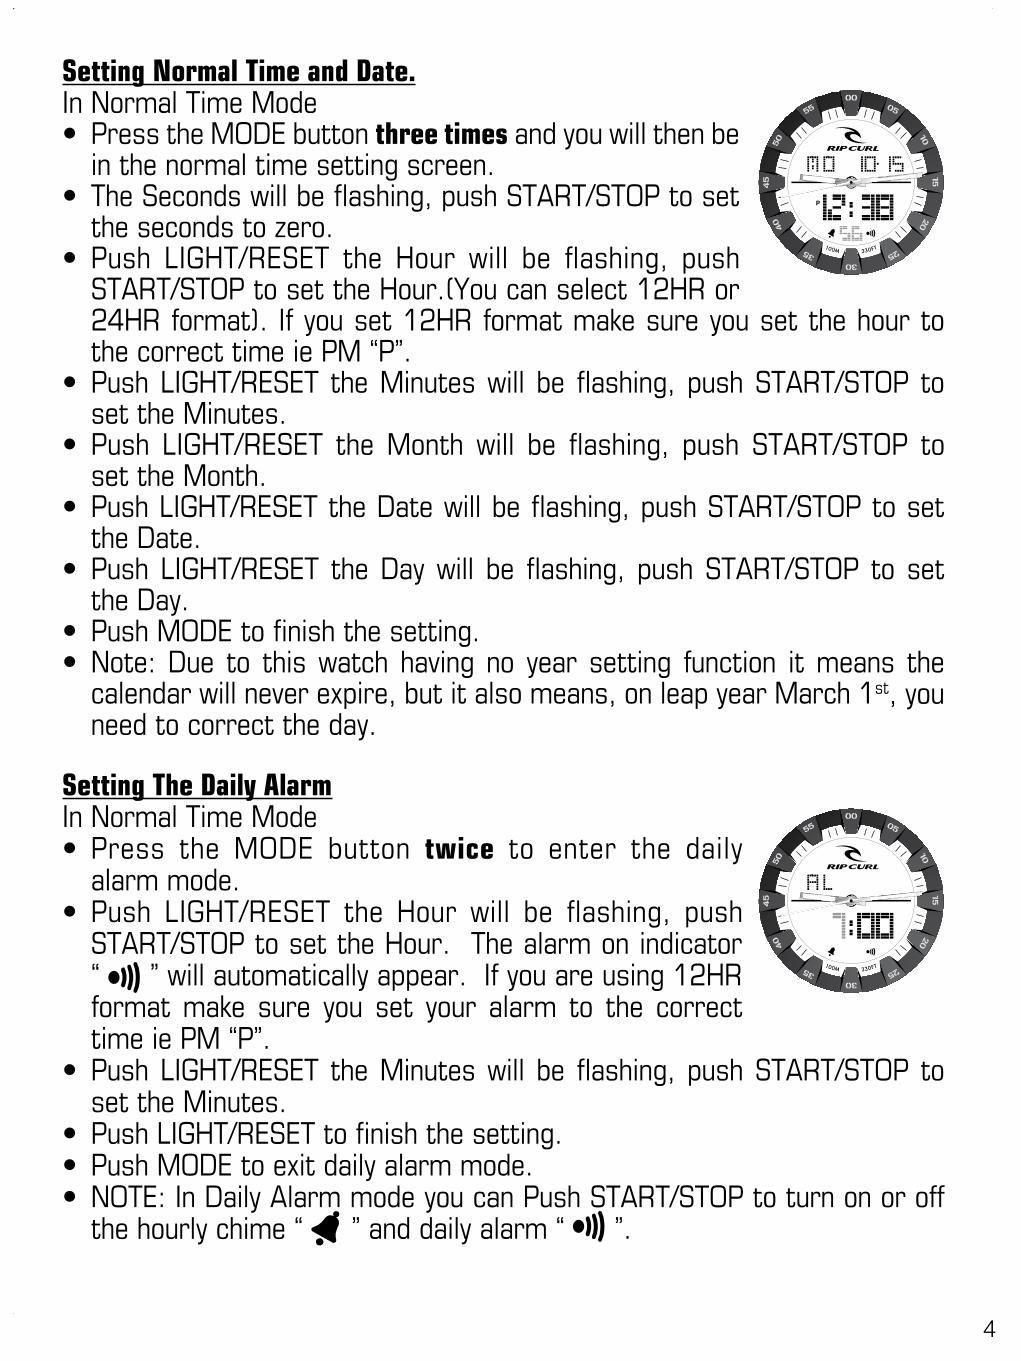
Setting Normal Time and Date.In Normal Time Mode• Press the MODE button three times and you will then be
in the normal time setting screen.• The Seconds will be flashing, push START/STOP to set
the seconds to zero.• Push LIGHT/RESET the Hour will be flashing, push
START/STOP to set the Hour.(You can select 12HR or 24HR format). If you set 12HR format make sure you set the hour to the correct time ie PM “P”.
• Push LIGHT/RESET the Minutes will be flashing, push START/STOP to set the Minutes.
• Push LIGHT/RESET the Month will be flashing, push START/STOP to set the Month.
• Push LIGHT/RESET the Date will be flashing, push START/STOP to set the Date.
• Push LIGHT/RESET the Day will be flashing, push START/STOP to set the Day.
• Push MODE to finish the setting.• Note: Due to this watch having no year setting function it means the
calendar will never expire, but it also means, on leap year March 1st, you need to correct the day.
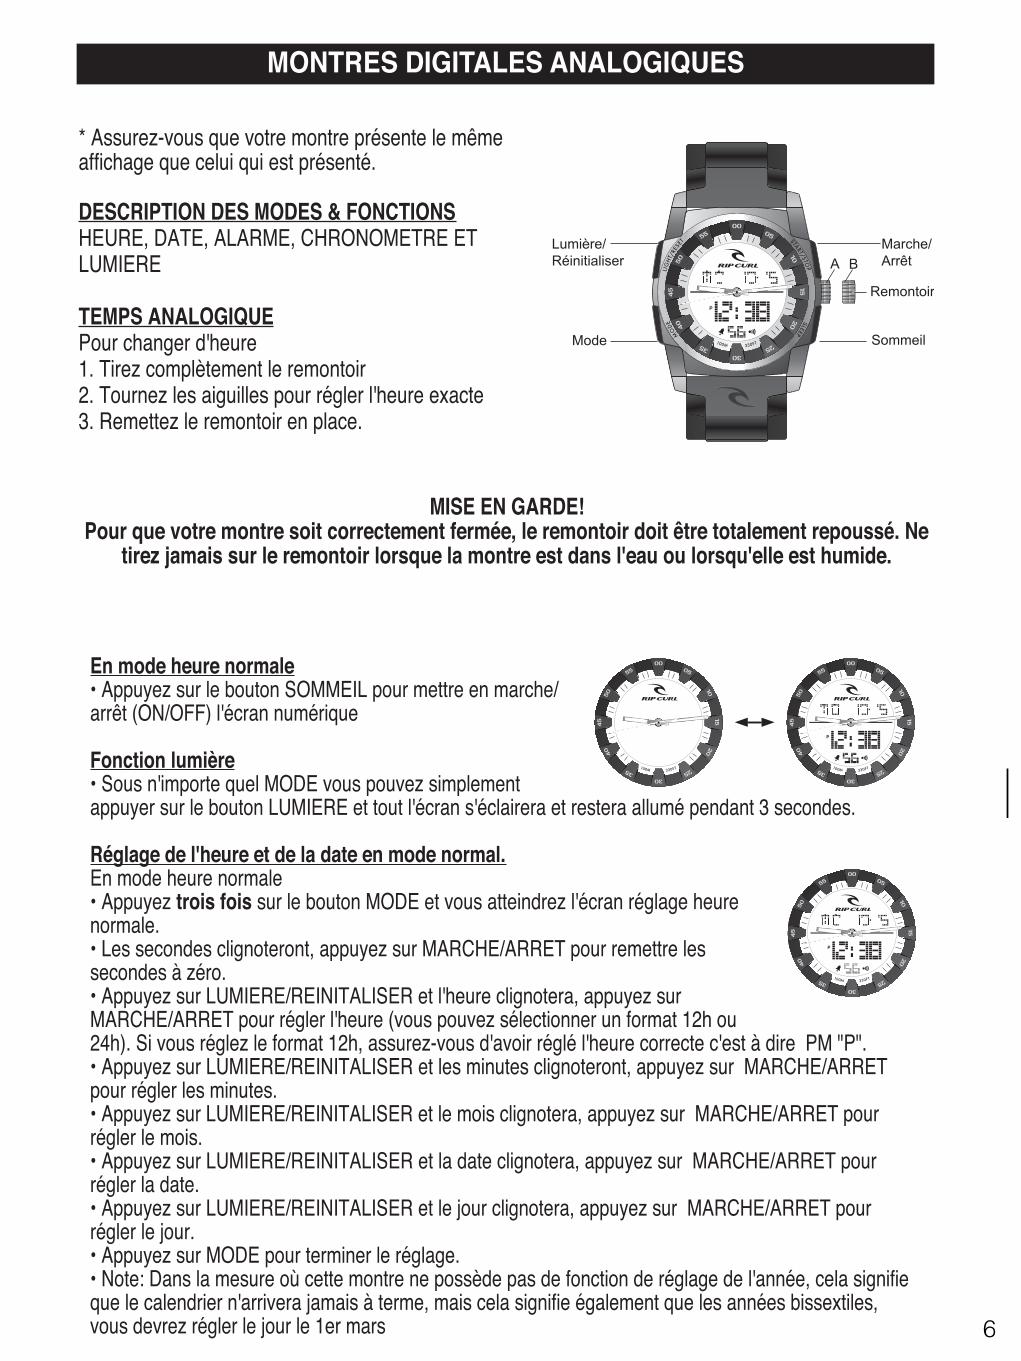
Setting The Daily AlarmIn Normal Time Mode• Press the MODE button twice to enter the daily
alarm mode.• Push LIGHT/RESET the Hour will be flashing, push
START/STOP to set the Hour. The alarm on indicator “ ” will automatically appear. If you are using 12HR format make sure you set your alarm to the correct time ie PM “P”.
• Push LIGHT/RESET the Minutes will be flashing, push START/STOP to set the Minutes.
• Push LIGHT/RESET to finish the setting.• Push MODE to exit daily alarm mode.• NOTE: In Daily Alarm mode you can Push START/STOP to turn on or off
the hourly chime “ ” and daily alarm “ ”.
4

17
Setting Normal Time and Date.In Normal Time Mode• Press the MODE button three times and you will then be
in the normal time setting screen.• The Seconds will be flashing, push START/STOP to set
the seconds to zero.• Push LIGHT/RESET the Hour will be flashing, push
START/STOP to set the Hour.(You can select 12HR or 24HR format). If you set 12HR format make sure you set the hour to the correct time ie PM “P”.
• Push LIGHT/RESET the Minutes will be flashing, push START/STOP to set the Minutes.
• Push LIGHT/RESET the Month will be flashing, push START/STOP to set the Month.
• Push LIGHT/RESET the Date will be flashing, push START/STOP to set the Date.
• Push LIGHT/RESET the Day will be flashing, push START/STOP to set the Day.
• Push MODE to finish the setting.• Note: Due to this watch having no year setting function it means the
calendar will never expire, but it also means, on leap year March 1st, you need to correct the day.
Setting The Daily AlarmIn Normal Time Mode• Press the MODE button twice to enter the daily
alarm mode.• Push LIGHT/RESET the Hour will be flashing, push
START/STOP to set the Hour. The alarm on indicator “ ” will automatically appear. If you are using 12HR format make sure you set your alarm to the correct time ie PM “P”.
• Push LIGHT/RESET the Minutes will be flashing, push START/STOP to set the Minutes.
• Push LIGHT/RESET to finish the setting.• Push MODE to exit daily alarm mode.• NOTE: In Daily Alarm mode you can Push START/STOP to turn on or off
the hourly chime “ ” and daily alarm “ ”.
Chronograph Mode. (Stopwatch)In Normal Time Mode• Press the MODE button once to enter the chronograph
mode. • Push START/STOP to start the chronograph.• Push START/STOP to stop the chronograph.• Push LIGHT/RESET to reset the chronograph to zero.
Using the Chronograph Lap Function.In Normal Time Mode• Press the MODE button to enter the chronograph mode.• Push START/STOP to start the chronograph.• Push LIGHT/RESET to stop the chronograph’s 1st Lap.• Push LIGHT/RESET to restart the chronograph and it will have continued
the count and now will display the full time elapsed.• Push START/STOP to completely stop the chronograph.• Push LIGHT/RESET to reset the chronograph to zero.
5
6
24
Lorsque tous ces réglages ont été effectués, appuyer sur LIGHT pour les enregistrer.Alarme ON / OFF:Quand vous régler votre alarme, elle se règle automatiquement par défaut sur ( ). Pourla désactiver, lorsque vous êtes dans le mode ALARM, appuyer sur LAP/RESET et lesymbole ( ) apparaît ou disparaît.
Régler les deux fuseaux horaire• En mode NORMAL, appuyer sur START/STOP pour voir selon quel fuseau horaire (Time1) ou (Time 2) l’heure est indiquée.• Rester appuyé 2 secondes sur START/STOP pour changer de fuseau horaire (Time 1 ouTime2)• Appuyer longtemps sur LIGHT pour régler le changement d’heure existant entre le Time 1 et le Time 2.• Avancer ou reculer la différence d’heure entre Time 1 et Time 2 en appuyant sur START/STOP ou LAP/RESET.Lorsque tous ces réglages ont été effectués, appuyer sur LIGHT pour les enregistrer.
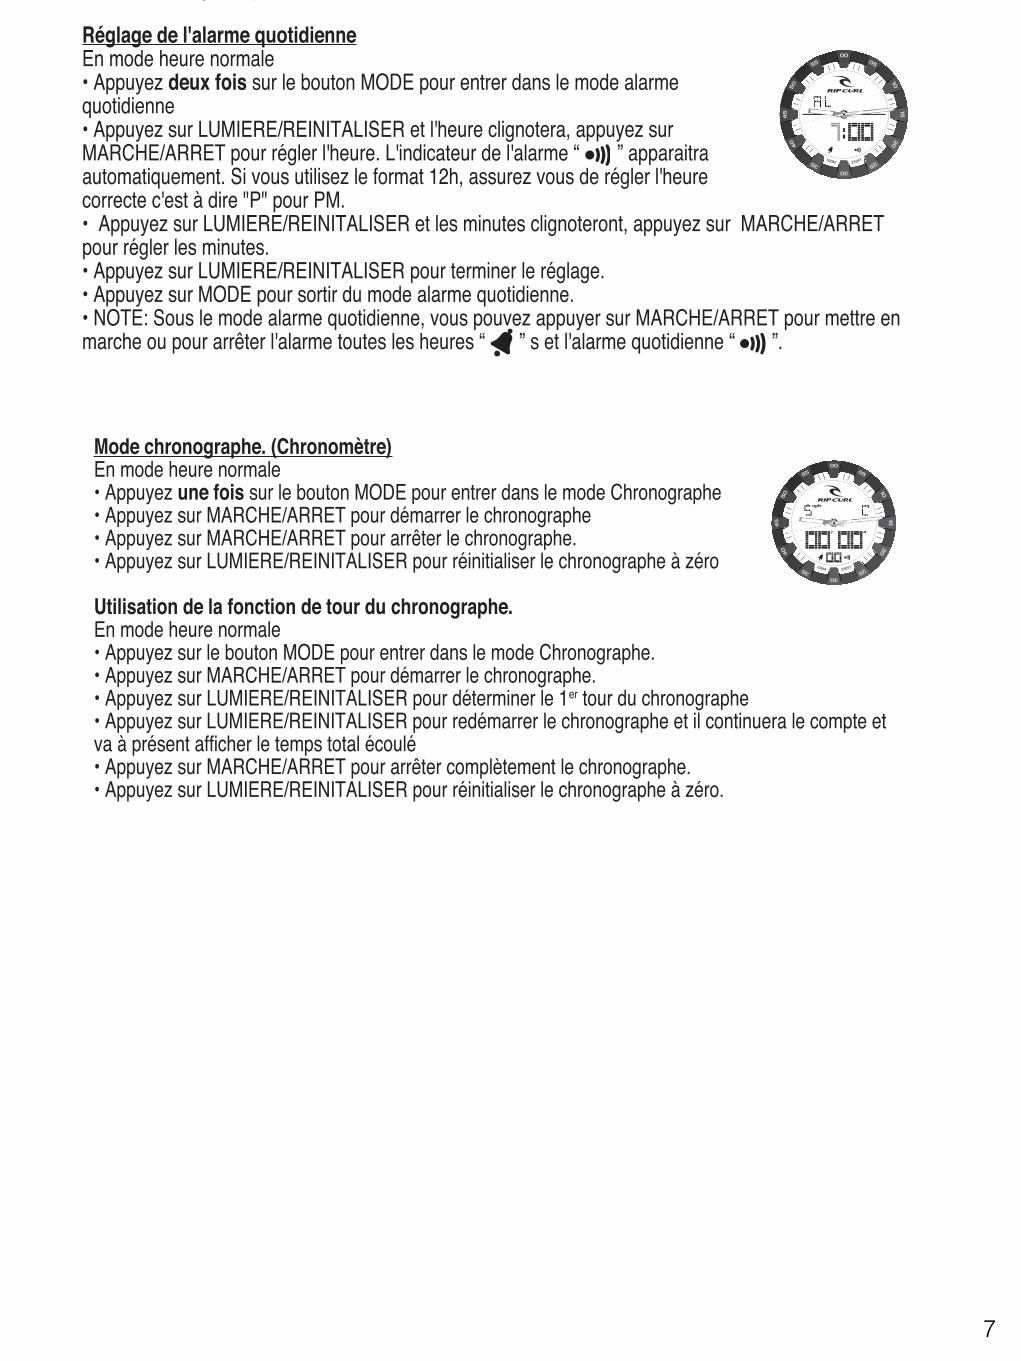
* Assurez-vous que votre montre présente le mêmeaffichage que celui qui est présenté.
DESCRIPTION DES MODES & FONCTIONSHEURE, DATE, ALARME, CHRONOMETRE ETLUMIERE
TEMPS ANALOGIQUEPour changer d'heure1. Tirez complètement le remontoir2. Tournez les aiguilles pour régler l'heure exacte3. Remettez le remontoir en place.
MISE EN GARDE!Pour que votre montre soit correctement fermée, le remontoir doit être totalement repoussé. Ne
tirez jamais sur le remontoir lorsque la montre est dans l'eau ou lorsqu'elle est humide.
MONTRES DIGITALES ANALOGIQUES
ModeA B RemontoirMarche/ArrêtLumière/Réinitialiser
Sommeil
En mode heure normale• Appuyez sur le bouton SOMMEIL pour mettre en marche/arrêt (ON/OFF) l'écran numérique
Fonction lumière• Sous n'importe quel MODE vous pouvez simplementappuyer sur le bouton LUMIERE et tout l'écran s'éclairera et restera allumé pendant 3 secondes.
Réglage de l'heure et de la date en mode normal.En mode heure normale• Appuyez trois fois sur le bouton MODE et vous atteindrez l'écran réglage heurenormale.• Les secondes clignoteront, appuyez sur MARCHE/ARRET pour remettre lessecondes à zéro.• Appuyez sur LUMIERE/REINITALISER et l'heure clignotera, appuyez surMARCHE/ARRET pour régler l'heure (vous pouvez sélectionner un format 12h ou24h). Si vous réglez le format 12h, assurez-vous d'avoir réglé l'heure correcte c'est à dire PM "P".• Appuyez sur LUMIERE/REINITALISER et les minutes clignoteront, appuyez sur MARCHE/ARRETpour régler les minutes.• Appuyez sur LUMIERE/REINITALISER et le mois clignotera, appuyez sur MARCHE/ARRET pourrégler le mois.• Appuyez sur LUMIERE/REINITALISER et la date clignotera, appuyez sur MARCHE/ARRET pourrégler la date.• Appuyez sur LUMIERE/REINITALISER et le jour clignotera, appuyez sur MARCHE/ARRET pourrégler le jour.• Appuyez sur MODE pour terminer le réglage.• Note: Dans la mesure où cette montre ne possède pas de fonction de réglage de l'année, cela signifieque le calendrier n'arrivera jamais à terme, mais cela signifie également que les années bissextiles,vous devrez régler le jour le 1er mars
Réglage de l'alarme quotidienneEn mode heure normale• Appuyez deux fois sur le bouton MODE pour entrer dans le mode alarmequotidienne• Appuyez sur LUMIERE/REINITALISER et l'heure clignotera, appuyez surMARCHE/ARRET pour régler l'heure. L'indicateur de l'alarme “ ” apparaitraautomatiquement. Si vous utilisez le format 12h, assurez vous de régler l'heurecorrecte c'est à dire "P" pour PM.• Appuyez sur LUMIERE/REINITALISER et les minutes clignoteront, appuyez sur MARCHE/ARRETpour régler les minutes.• Appuyez sur LUMIERE/REINITALISER pour terminer le réglage.• Appuyez sur MODE pour sortir du mode alarme quotidienne.• NOTE: Sous le mode alarme quotidienne, vous pouvez appuyer sur MARCHE/ARRET pour mettre enmarche ou pour arrêter l'alarme toutes les heures “ ” s et l'alarme quotidienne “ ”.
25
7
En mode heure normale• Appuyez sur le bouton SOMMEIL pour mettre en marche/arrêt (ON/OFF) l'écran numérique
Fonction lumière• Sous n'importe quel MODE vous pouvez simplementappuyer sur le bouton LUMIERE et tout l'écran s'éclairera et restera allumé pendant 3 secondes.
Réglage de l'heure et de la date en mode normal.En mode heure normale• Appuyez trois fois sur le bouton MODE et vous atteindrez l'écran réglage heurenormale.• Les secondes clignoteront, appuyez sur MARCHE/ARRET pour remettre lessecondes à zéro.• Appuyez sur LUMIERE/REINITALISER et l'heure clignotera, appuyez surMARCHE/ARRET pour régler l'heure (vous pouvez sélectionner un format 12h ou24h). Si vous réglez le format 12h, assurez-vous d'avoir réglé l'heure correcte c'est à dire PM "P".• Appuyez sur LUMIERE/REINITALISER et les minutes clignoteront, appuyez sur MARCHE/ARRETpour régler les minutes.• Appuyez sur LUMIERE/REINITALISER et le mois clignotera, appuyez sur MARCHE/ARRET pourrégler le mois.• Appuyez sur LUMIERE/REINITALISER et la date clignotera, appuyez sur MARCHE/ARRET pourrégler la date.• Appuyez sur LUMIERE/REINITALISER et le jour clignotera, appuyez sur MARCHE/ARRET pourrégler le jour.• Appuyez sur MODE pour terminer le réglage.• Note: Dans la mesure où cette montre ne possède pas de fonction de réglage de l'année, cela signifieque le calendrier n'arrivera jamais à terme, mais cela signifie également que les années bissextiles,vous devrez régler le jour le 1er mars
Réglage de l'alarme quotidienneEn mode heure normale• Appuyez deux fois sur le bouton MODE pour entrer dans le mode alarmequotidienne• Appuyez sur LUMIERE/REINITALISER et l'heure clignotera, appuyez surMARCHE/ARRET pour régler l'heure. L'indicateur de l'alarme “ ” apparaitraautomatiquement. Si vous utilisez le format 12h, assurez vous de régler l'heurecorrecte c'est à dire "P" pour PM.• Appuyez sur LUMIERE/REINITALISER et les minutes clignoteront, appuyez sur MARCHE/ARRETpour régler les minutes.• Appuyez sur LUMIERE/REINITALISER pour terminer le réglage.• Appuyez sur MODE pour sortir du mode alarme quotidienne.• NOTE: Sous le mode alarme quotidienne, vous pouvez appuyer sur MARCHE/ARRET pour mettre enmarche ou pour arrêter l'alarme toutes les heures “ ” s et l'alarme quotidienne “ ”.
25
Mode chronographe. (Chronomètre)En mode heure normale• Appuyez une fois sur le bouton MODE pour entrer dans le mode Chronographe• Appuyez sur MARCHE/ARRET pour démarrer le chronographe• Appuyez sur MARCHE/ARRET pour arrêter le chronographe.• Appuyez sur LUMIERE/REINITALISER pour réinitialiser le chronographe à zéro
Utilisation de la fonction de tour du chronographe.En mode heure normale• Appuyez sur le bouton MODE pour entrer dans le mode Chronographe.• Appuyez sur MARCHE/ARRET pour démarrer le chronographe.• Appuyez sur LUMIERE/REINITALISER pour déterminer le 1er tour du chronographe• Appuyez sur LUMIERE/REINITALISER pour redémarrer le chronographe et il continuera le compte etva à présent afficher le temps total écoulé• Appuyez sur MARCHE/ARRET pour arrêter complètement le chronographe.• Appuyez sur LUMIERE/REINITALISER pour réinitialiser le chronographe à zéro.
Pour changer l’heure:1. Tirer totalement le remontoir en position C.2. Actionner le remontoir dans le sens des aiguilles d’une montrepour régler l’heure A.Pour changer la date: (si applicable)1. Tirer le remontoir en position B;2. Actionner le remontoir dans le sens des aiguilles d’une montrepour régler la date.(Dans certains modèles, veuillez le tourner dansle sens inverse des aiguilles d’une montre.)3. Remettez le remontoir en position A.La date sera automatiquement change un peu avant minuit.Pour changer le jour: (Si applicable)1. Tirer le remontoir en position B;2. Actionner le remontoir dans le sens inverse des aiguilles d’unemontre pour régler le jour. (Dans certains modèles, veuillez le tournerdans’le sens des aiguilles d’une montre.)3. Remettez le remontoir en position A.L’heure sera automatiquement change un peu avant minuit.
MONTRES AVEC JOUR/DATE/HEURE
AB
C
REMONTOIR
MISE EN GARDE!Pour que votre montre soit correctement réglée, le remontoir doit être totalement repoussé. Ne
tirez jamais sur le remontoir lorsque votre montre est dans l’eau ou lorsqu’elle est mouillée.
26

Alarma ON / OFF:Cuando ajuste su alarma, ésta se ajusta automáticamente en ( ). Para desactivarla,cuando esté en el modo ALARM, Pulsar LAP/RESET y el símbolo ( ) aparecerá odesaparecerá.Ajustar los dos husos horarios• En el modo NORMAL, Pulsar START/STOP para ver en qué huso horario (Time 1) o(Time 2) se indica la hora.• Mantener pulsado durante 2 segundos START/STOP para cambiar de huso horario(Time 1 o Time2)• Mantener pulsado LIGHT para ajustar el cambio de hora existente entre Time 1 y Time 2.• Avanzar o retroceder la diferencia de hora entre Time 1 y Time 2 pulsando START/STOP o LAP/RESET.Cuando se hayan realizado todos los ajustes, Pulsar LIGHT para registrarlos.
DESCRIPCIÓN DE LOS MODOS Y LAS FUNCIONESHORA, FECHA, ALARMA, CRONÓMETRO Y LUZ
HORA ANALÓGICACambiar la hora1. Tire hacia fuera de la corona hasta el tope2. Gire las manecillas hasta la hora exacta3. Presione la corona hasta volver a colocarla en suposición.
¡ATENCIÓN!Para que el reloj esté bien sellado, la corona deberá estar totalmente pulsada hacia adentro.
Nunca tire hacia fuera de la corona cuando el reloj se encuentre dentro del agua o esté mojado.
En el modo Hora normal (Normal Time)• Pulse el botón SLEEP para ENCENDER/APAGAR la pantallade visualización digital.
Función de iluminación• En cualquier MODO, podrá presionar simplemente el botónde la luz (LIGHT) y se iluminará la pantalla al completo y permanecerá iluminada durante 3 segundos.
Configurar la hora normal y la fecha.En el modo Hora normal (Normal Time)• Presione tres veces el botón de modo (MODE) y llegará a la pantalla para configurarla hora normal.• El segundero empezará a parpadear; pulse START/STOP (INICIAR/DETENER) sidesea que los segundos se pongan a cero.
RELOJES ANALÓGICOS Y DIGITALES* Asegúrese de que su reloj se corresponde con el que se muestra en la imagen.
ModoA B
SleepLuz /Reestablecer CoronaIniciar /Detener
39
8
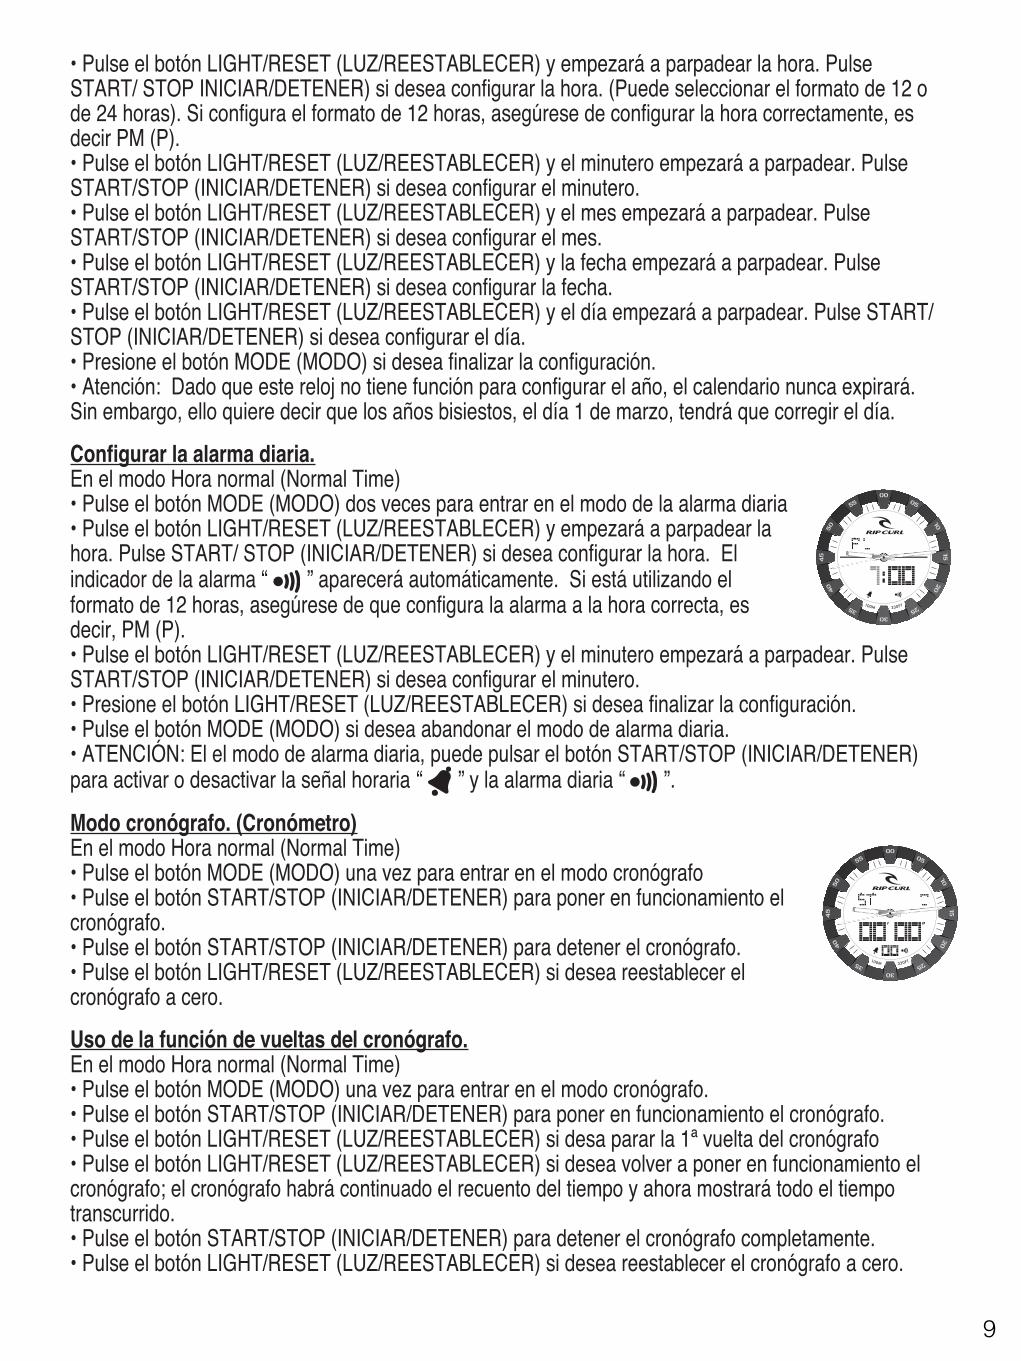
• Pulse el botón LIGHT/RESET (LUZ/REESTABLECER) y empezará a parpadear la hora. PulseSTART/ STOP INICIAR/DETENER) si desea configurar la hora. (Puede seleccionar el formato de 12 ode 24 horas). Si configura el formato de 12 horas, asegúrese de configurar la hora correctamente, esdecir PM (P).• Pulse el botón LIGHT/RESET (LUZ/REESTABLECER) y el minutero empezará a parpadear. PulseSTART/STOP (INICIAR/DETENER) si desea configurar el minutero.• Pulse el botón LIGHT/RESET (LUZ/REESTABLECER) y el mes empezará a parpadear. PulseSTART/STOP (INICIAR/DETENER) si desea configurar el mes.• Pulse el botón LIGHT/RESET (LUZ/REESTABLECER) y la fecha empezará a parpadear. PulseSTART/STOP (INICIAR/DETENER) si desea configurar la fecha.• Pulse el botón LIGHT/RESET (LUZ/REESTABLECER) y el día empezará a parpadear. Pulse START/STOP (INICIAR/DETENER) si desea configurar el día.• Presione el botón MODE (MODO) si desea finalizar la configuración.• Atención: Dado que este reloj no tiene función para configurar el año, el calendario nunca expirará.Sin embargo, ello quiere decir que los años bisiestos, el día 1 de marzo, tendrá que corregir el día.Configurar la alarma diaria.En el modo Hora normal (Normal Time)• Pulse el botón MODE (MODO) dos veces para entrar en el modo de la alarma diaria• Pulse el botón LIGHT/RESET (LUZ/REESTABLECER) y empezará a parpadear lahora. Pulse START/ STOP (INICIAR/DETENER) si desea configurar la hora. Elindicador de la alarma “ ” aparecerá automáticamente. Si está utilizando elformato de 12 horas, asegúrese de que configura la alarma a la hora correcta, esdecir, PM (P).• Pulse el botón LIGHT/RESET (LUZ/REESTABLECER) y el minutero empezará a parpadear. PulseSTART/STOP (INICIAR/DETENER) si desea configurar el minutero.• Presione el botón LIGHT/RESET (LUZ/REESTABLECER) si desea finalizar la configuración.• Pulse el botón MODE (MODO) si desea abandonar el modo de alarma diaria.• ATENCIÓN: El el modo de alarma diaria, puede pulsar el botón START/STOP (INICIAR/DETENER)para activar o desactivar la señal horaria “ ” y la alarma diaria “ ”.Modo cronógrafo. (Cronómetro)En el modo Hora normal (Normal Time)• Pulse el botón MODE (MODO) una vez para entrar en el modo cronógrafo• Pulse el botón START/STOP (INICIAR/DETENER) para poner en funcionamiento elcronógrafo.• Pulse el botón START/STOP (INICIAR/DETENER) para detener el cronógrafo.• Pulse el botón LIGHT/RESET (LUZ/REESTABLECER) si desea reestablecer elcronógrafo a cero.Uso de la función de vueltas del cronógrafo.En el modo Hora normal (Normal Time)• Pulse el botón MODE (MODO) una vez para entrar en el modo cronógrafo.• Pulse el botón START/STOP (INICIAR/DETENER) para poner en funcionamiento el cronógrafo.• Pulse el botón LIGHT/RESET (LUZ/REESTABLECER) si desa parar la 1ª vuelta del cronógrafo• Pulse el botón LIGHT/RESET (LUZ/REESTABLECER) si desea volver a poner en funcionamiento elcronógrafo; el cronógrafo habrá continuado el recuento del tiempo y ahora mostrará todo el tiempotranscurrido.• Pulse el botón START/STOP (INICIAR/DETENER) para detener el cronógrafo completamente.• Pulse el botón LIGHT/RESET (LUZ/REESTABLECER) si desea reestablecer el cronógrafo a cero.
409
67
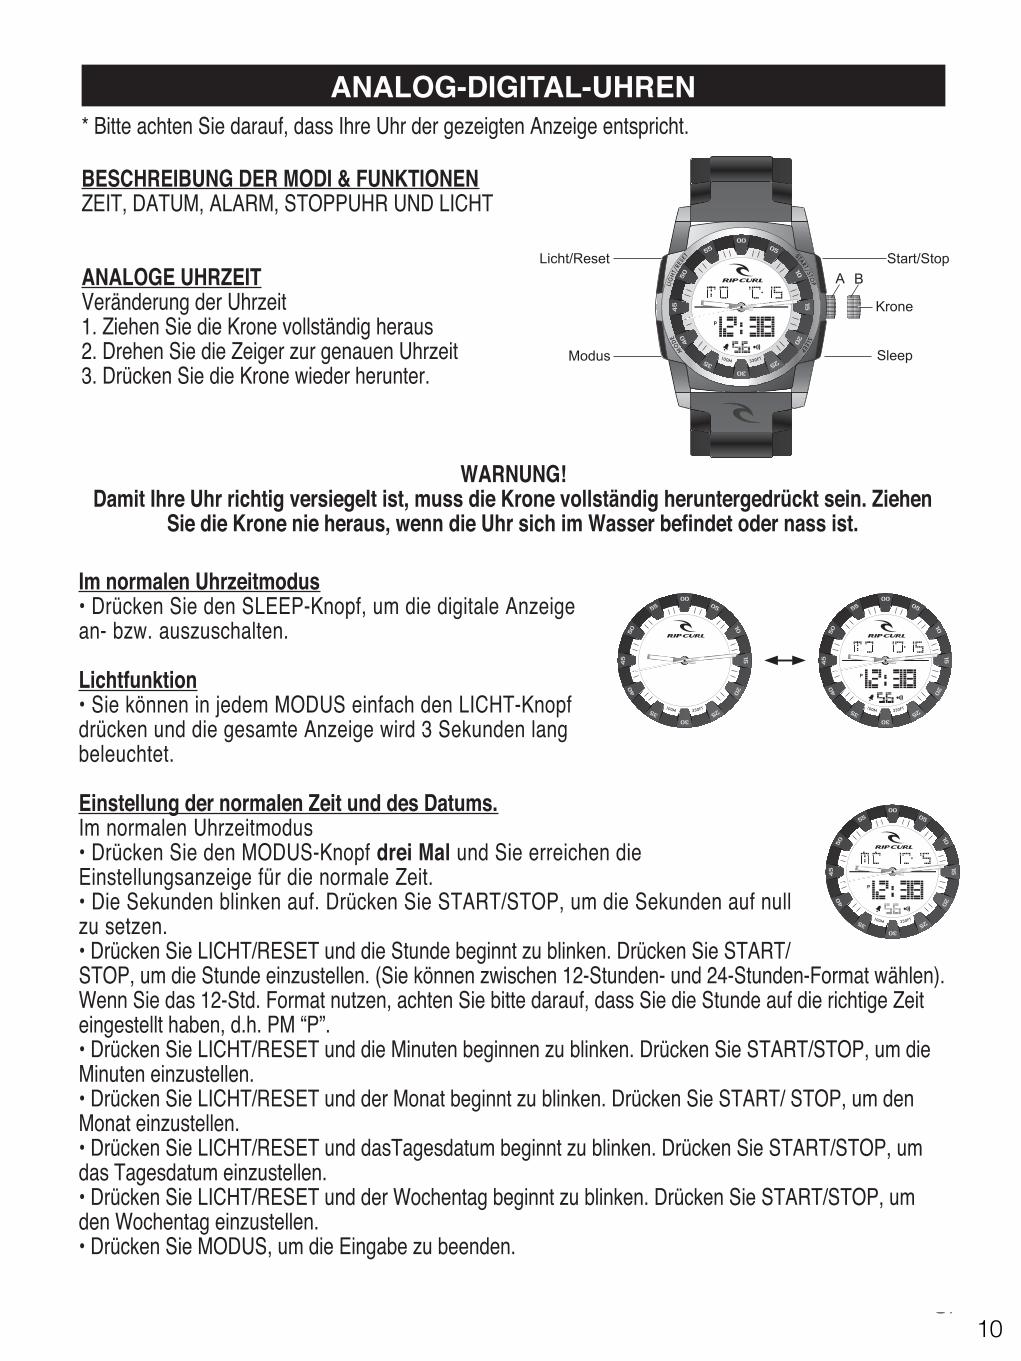
* Bitte achten Sie darauf, dass Ihre Uhr der gezeigten Anzeige entspricht.ANALOG-DIGITAL-UHREN
Start/StopA BSleepKroneLicht/Reset
Modus
BESCHREIBUNG DER MODI & FUNKTIONENZEIT, DATUM, ALARM, STOPPUHR UND LICHT
ANALOGE UHRZEITVeränderung der Uhrzeit1. Ziehen Sie die Krone vollständig heraus2. Drehen Sie die Zeiger zur genauen Uhrzeit3. Drücken Sie die Krone wieder herunter.
WARNUNG!Damit Ihre Uhr richtig versiegelt ist, muss die Krone vollständig heruntergedrückt sein. Ziehen
Sie die Krone nie heraus, wenn die Uhr sich im Wasser befindet oder nass ist.
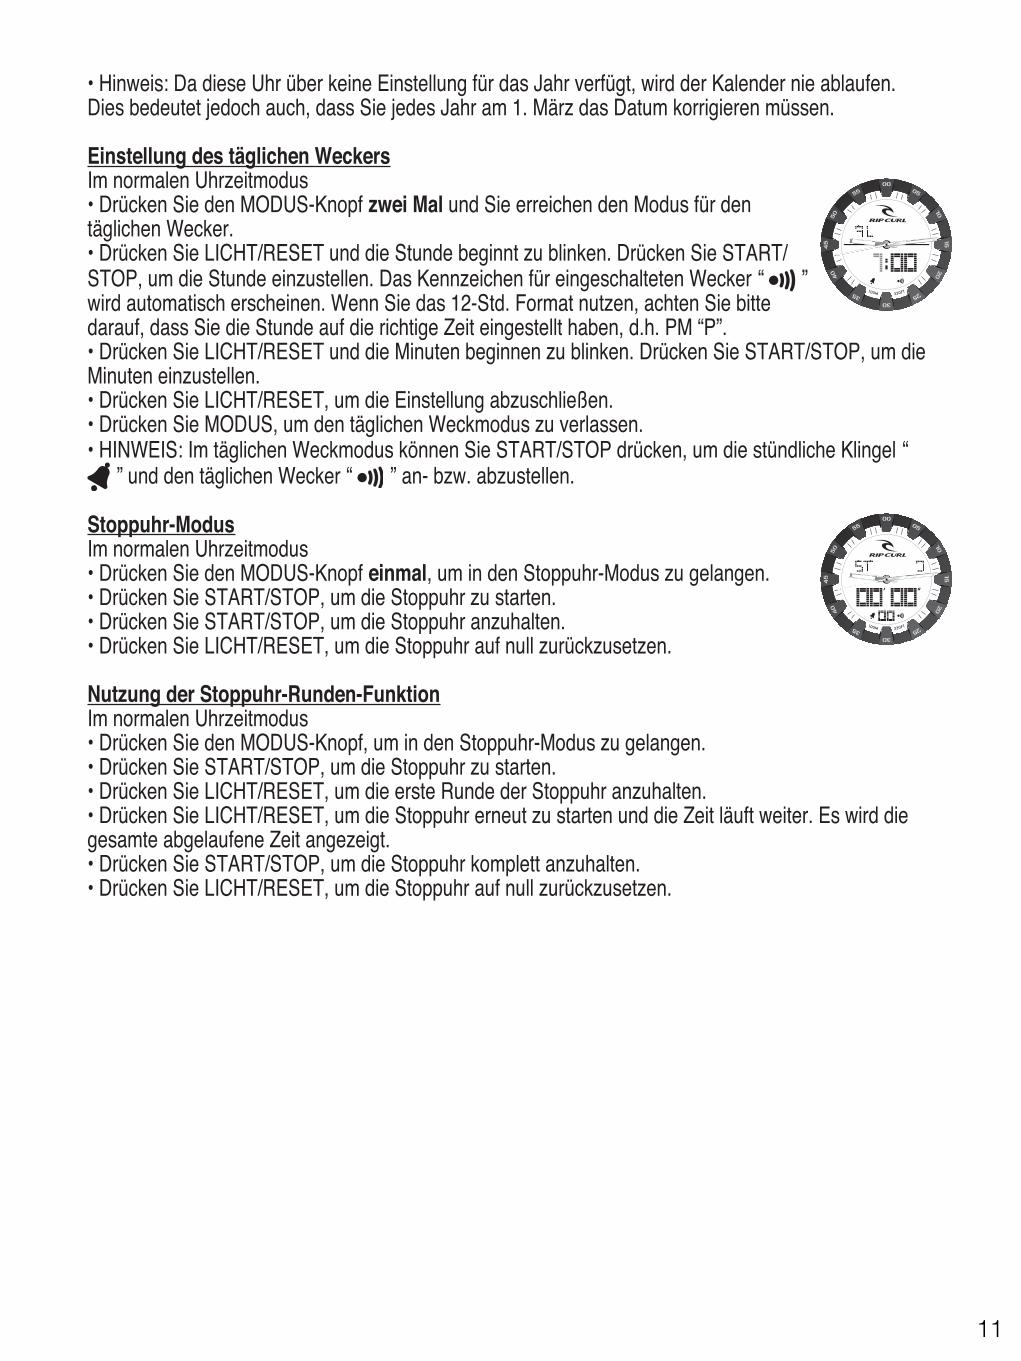
Im normalen Uhrzeitmodus• Drücken Sie den SLEEP-Knopf, um die digitale Anzeigean- bzw. auszuschalten.
Lichtfunktion• Sie können in jedem MODUS einfach den LICHT-Knopfdrücken und die gesamte Anzeige wird 3 Sekunden langbeleuchtet.
Einstellung der normalen Zeit und des Datums.Im normalen Uhrzeitmodus• Drücken Sie den MODUS-Knopf drei Mal und Sie erreichen dieEinstellungsanzeige für die normale Zeit.• Die Sekunden blinken auf. Drücken Sie START/STOP, um die Sekunden auf nullzu setzen.• Drücken Sie LICHT/RESET und die Stunde beginnt zu blinken. Drücken Sie START/STOP, um die Stunde einzustellen. (Sie können zwischen 12-Stunden- und 24-Stunden-Format wählen).Wenn Sie das 12-Std. Format nutzen, achten Sie bitte darauf, dass Sie die Stunde auf die richtige Zeiteingestellt haben, d.h. PM “P”.• Drücken Sie LICHT/RESET und die Minuten beginnen zu blinken. Drücken Sie START/STOP, um dieMinuten einzustellen.• Drücken Sie LICHT/RESET und der Monat beginnt zu blinken. Drücken Sie START/ STOP, um denMonat einzustellen.• Drücken Sie LICHT/RESET und dasTagesdatum beginnt zu blinken. Drücken Sie START/STOP, umdas Tagesdatum einzustellen.• Drücken Sie LICHT/RESET und der Wochentag beginnt zu blinken. Drücken Sie START/STOP, umden Wochentag einzustellen.• Drücken Sie MODUS, um die Eingabe zu beenden.
10
• Hinweis: Da diese Uhr über keine Einstellung für das Jahr verfügt, wird der Kalender nie ablaufen.Dies bedeutet jedoch auch, dass Sie jedes Jahr am 1. März das Datum korrigieren müssen.
Einstellung des täglichen WeckersIm normalen Uhrzeitmodus• Drücken Sie den MODUS-Knopf zwei Mal und Sie erreichen den Modus für dentäglichen Wecker.• Drücken Sie LICHT/RESET und die Stunde beginnt zu blinken. Drücken Sie START/STOP, um die Stunde einzustellen. Das Kennzeichen für eingeschalteten Wecker “ ”wird automatisch erscheinen. Wenn Sie das 12-Std. Format nutzen, achten Sie bittedarauf, dass Sie die Stunde auf die richtige Zeit eingestellt haben, d.h. PM “P”.• Drücken Sie LICHT/RESET und die Minuten beginnen zu blinken. Drücken Sie START/STOP, um dieMinuten einzustellen.• Drücken Sie LICHT/RESET, um die Einstellung abzuschließen.• Drücken Sie MODUS, um den täglichen Weckmodus zu verlassen.• HINWEIS: Im täglichen Weckmodus können Sie START/STOP drücken, um die stündliche Klingel “
” und den täglichen Wecker “ ” an- bzw. abzustellen.
Stoppuhr-ModusIm normalen Uhrzeitmodus• Drücken Sie den MODUS-Knopf einmal, um in den Stoppuhr-Modus zu gelangen.• Drücken Sie START/STOP, um die Stoppuhr zu starten.• Drücken Sie START/STOP, um die Stoppuhr anzuhalten.• Drücken Sie LICHT/RESET, um die Stoppuhr auf null zurückzusetzen.
Nutzung der Stoppuhr-Runden-FunktionIm normalen Uhrzeitmodus• Drücken Sie den MODUS-Knopf, um in den Stoppuhr-Modus zu gelangen.• Drücken Sie START/STOP, um die Stoppuhr zu starten.• Drücken Sie LICHT/RESET, um die erste Runde der Stoppuhr anzuhalten.• Drücken Sie LICHT/RESET, um die Stoppuhr erneut zu starten und die Zeit läuft weiter. Es wird diegesamte abgelaufene Zeit angezeigt.• Drücken Sie START/STOP, um die Stoppuhr komplett anzuhalten.• Drücken Sie LICHT/RESET, um die Stoppuhr auf null zurückzusetzen.
6811
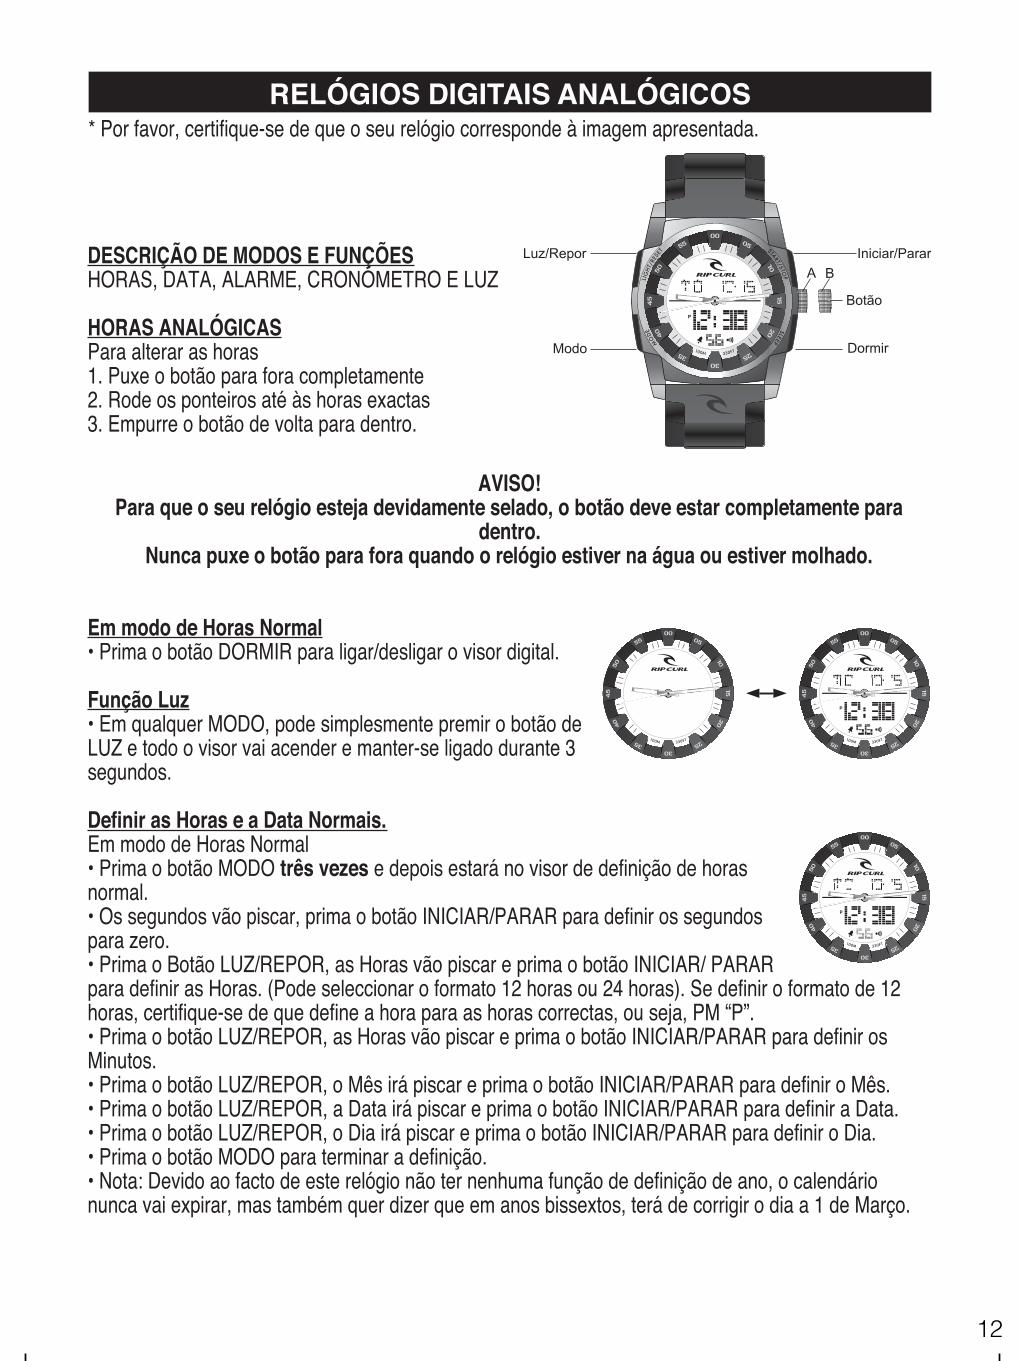
* Por favor, certifique-se de que o seu relógio corresponde à imagem apresentada.RELÓGIOS DIGITAIS ANALÓGICOS
ModoA B
DormirBotãoIniciar/PararLuz/ReporDESCRIÇÃO DE MODOS E FUNÇÕESHORAS, DATA, ALARME, CRONÓMETRO E LUZ
HORAS ANALÓGICASPara alterar as horas1. Puxe o botão para fora completamente2. Rode os ponteiros até às horas exactas3. Empurre o botão de volta para dentro.
AVISO!Para que o seu relógio esteja devidamente selado, o botão deve estar completamente para
dentro.Nunca puxe o botão para fora quando o relógio estiver na água ou estiver molhado.
Em modo de Horas Normal• Prima o botão DORMIR para ligar/desligar o visor digital.
Função Luz• Em qualquer MODO, pode simplesmente premir o botão deLUZ e todo o visor vai acender e manter-se ligado durante 3segundos.
53
Definir as Horas e a Data Normais.Em modo de Horas Normal• Prima o botão MODO três vezes e depois estará no visor de definição de horasnormal.• Os segundos vão piscar, prima o botão INICIAR/PARAR para definir os segundospara zero.• Prima o Botão LUZ/REPOR, as Horas vão piscar e prima o botão INICIAR/ PARARpara definir as Horas. (Pode seleccionar o formato 12 horas ou 24 horas). Se definir o formato de 12horas, certifique-se de que define a hora para as horas correctas, ou seja, PM “P”.• Prima o botão LUZ/REPOR, as Horas vão piscar e prima o botão INICIAR/PARAR para definir osMinutos.• Prima o botão LUZ/REPOR, o Mês irá piscar e prima o botão INICIAR/PARAR para definir o Mês.• Prima o botão LUZ/REPOR, a Data irá piscar e prima o botão INICIAR/PARAR para definir a Data.• Prima o botão LUZ/REPOR, o Dia irá piscar e prima o botão INICIAR/PARAR para definir o Dia.• Prima o botão MODO para terminar a definição.• Nota: Devido ao facto de este relógio não ter nenhuma função de definição de ano, o calendárionunca vai expirar, mas também quer dizer que em anos bissextos, terá de corrigir o dia a 1 de Março.
12
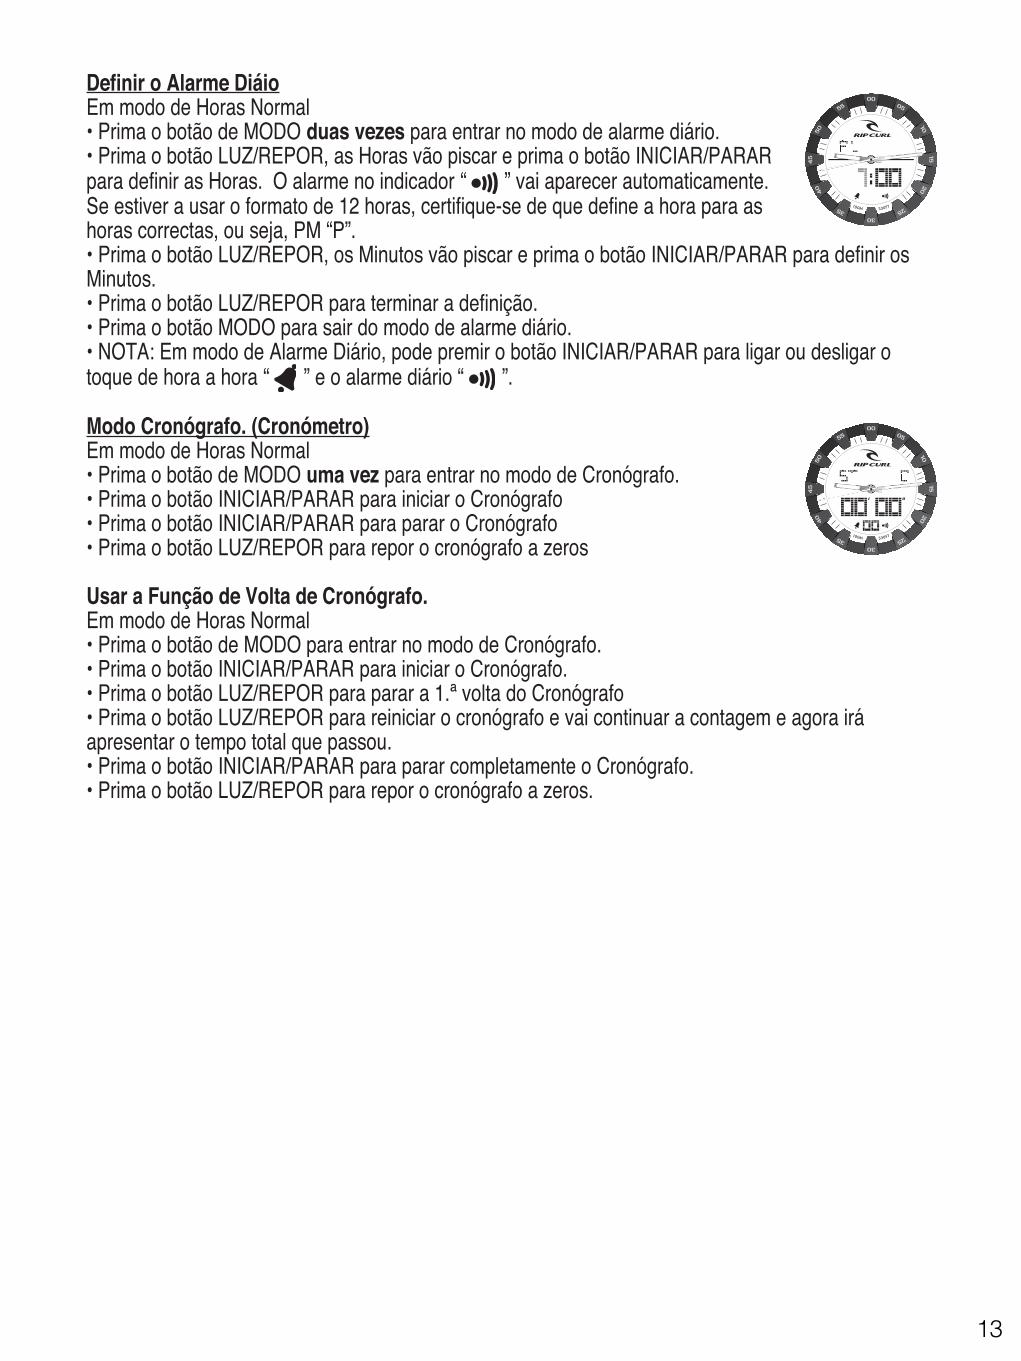
Definir o Alarme DiáioEm modo de Horas Normal• Prima o botão de MODO duas vezes para entrar no modo de alarme diário.• Prima o botão LUZ/REPOR, as Horas vão piscar e prima o botão INICIAR/PARARpara definir as Horas. O alarme no indicador “ ” vai aparecer automaticamente.Se estiver a usar o formato de 12 horas, certifique-se de que define a hora para ashoras correctas, ou seja, PM “P”.• Prima o botão LUZ/REPOR, os Minutos vão piscar e prima o botão INICIAR/PARAR para definir osMinutos.• Prima o botão LUZ/REPOR para terminar a definição.• Prima o botão MODO para sair do modo de alarme diário.• NOTA: Em modo de Alarme Diário, pode premir o botão INICIAR/PARAR para ligar ou desligar otoque de hora a hora “ ” e o alarme diário “ ”.
Modo Cronógrafo. (Cronómetro)Em modo de Horas Normal• Prima o botão de MODO uma vez para entrar no modo de Cronógrafo.• Prima o botão INICIAR/PARAR para iniciar o Cronógrafo• Prima o botão INICIAR/PARAR para parar o Cronógrafo• Prima o botão LUZ/REPOR para repor o cronógrafo a zeros
Usar a Função de Volta de Cronógrafo.Em modo de Horas Normal• Prima o botão de MODO para entrar no modo de Cronógrafo.• Prima o botão INICIAR/PARAR para iniciar o Cronógrafo.• Prima o botão LUZ/REPOR para parar a 1.ª volta do Cronógrafo• Prima o botão LUZ/REPOR para reiniciar o cronógrafo e vai continuar a contagem e agora iráapresentar o tempo total que passou.• Prima o botão INICIAR/PARAR para parar completamente o Cronógrafo.• Prima o botão LUZ/REPOR para repor o cronógrafo a zeros.
5413
14
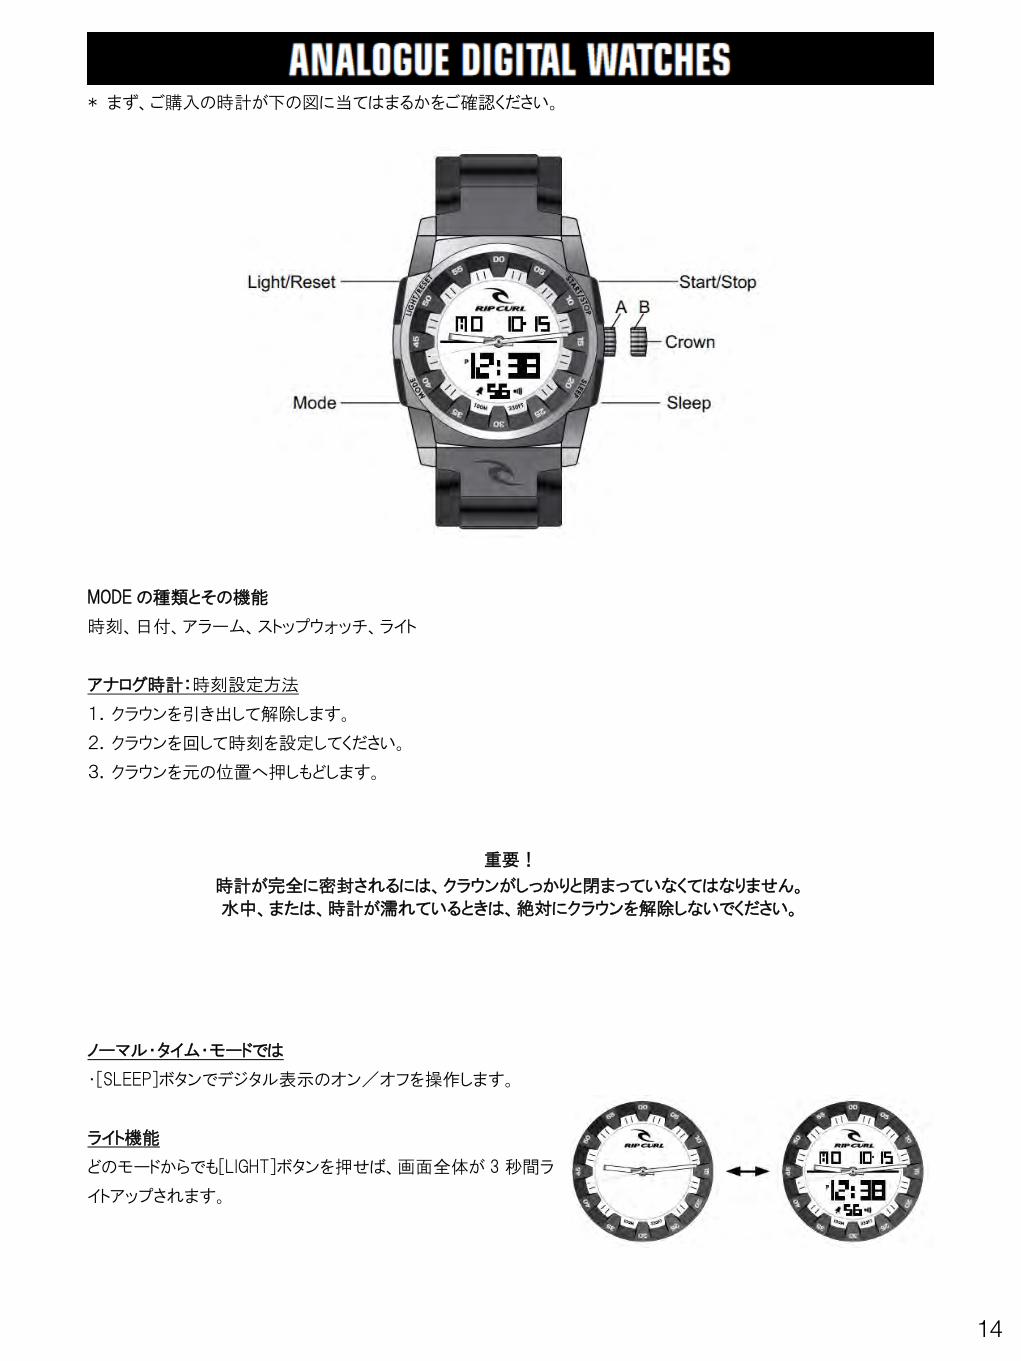
* まず、ご購入の時計が下の図に当てはまるかをご確認ください。
MODEの種類とその機能
時刻、日付、アラーム、ストップウォッチ、ライト
アナログ時計:時刻設定方法
1.クラウンを引き出して解除します。
2.クラウンを回して時刻を設定してください。
3.クラウンを元の位置へ押しもどします。
重要!
時計が完全に密封されるには、クラウンがしっかりと閉まっていなくてはなりません。
水中、または、時計が濡れているときは、絶対にクラウンを解除しないでください。
ノーマル・タイム・モードでは
・[SLEEP]ボタンでデジタル表示のオン/オフを操作します。
ライト機能
どのモードからでも[LIGHT]ボタンを押せば、画面全体が 3秒間ラ
イトアップされます。
15
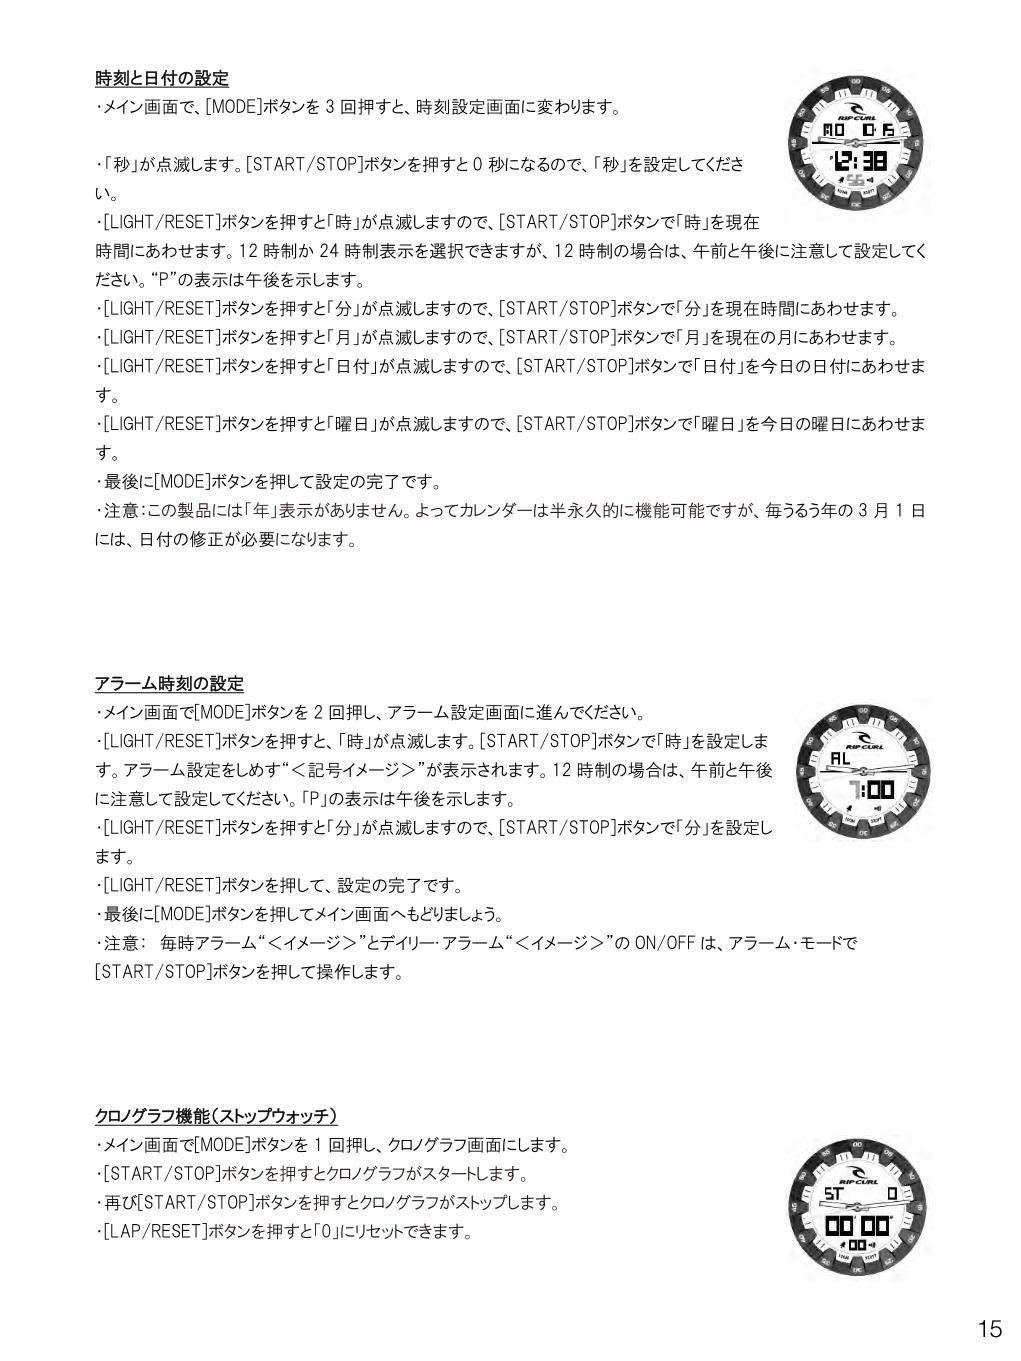
時刻と日付の設定
・メイン画面で、[MODE]ボタンを 3回押すと、時刻設定画面に変わります。
・「秒」が点滅します。[START/STOP]ボタンを押すと 0秒になるので、「秒」を設定してくださ
い。
・[LIGHT/RESET]ボタンを押すと「時」が点滅しますので、[START/STOP]ボタンで「時」を現在
時間にあわせます。12時制か 24時制表示を選択できますが、12時制の場合は、午前と午後に注意して設定してく
ださい。“P”の表示は午後を示します。
・[LIGHT/RESET]ボタンを押すと「分」が点滅しますので、[START/STOP]ボタンで「分」を現在時間にあわせます。
・[LIGHT/RESET]ボタンを押すと「月」が点滅しますので、[START/STOP]ボタンで「月」を現在の月にあわせます。
・[LIGHT/RESET]ボタンを押すと「日付」が点滅しますので、[START/STOP]ボタンで「日付」を今日の日付にあわせま
す。
・[LIGHT/RESET]ボタンを押すと「曜日」が点滅しますので、[START/STOP]ボタンで「曜日」を今日の曜日にあわせま
す。
・最後に[MODE]ボタンを押して設定の完了です。
・注意:この製品には「年」表示がありません。よってカレンダーは半永久的に機能可能ですが、毎うるう年の 3月 1日
には、日付の修正が必要になります。
アラーム時刻の設定
・メイン画面で[MODE]ボタンを 2回押し、アラーム設定画面に進んでください。
・[LIGHT/RESET]ボタンを押すと、「時」が点滅します。[START/STOP]ボタンで「時」を設定しま
す。アラーム設定をしめす“<記号イメージ>”が表示されます。12時制の場合は、午前と午後
に注意して設定してください。「P」の表示は午後を示します。
・[LIGHT/RESET]ボタンを押すと「分」が点滅しますので、[START/STOP]ボタンで「分」を設定し
ます。
・[LIGHT/RESET]ボタンを押して、設定の完了です。
・最後に[MODE]ボタンを押してメイン画面へもどりましょう。
・注意: 毎時アラーム“<イメージ>”とデイリー・アラーム“<イメージ>”の ON/OFFは、アラーム・モードで
[START/STOP]ボタンを押して操作します。
クロノグラフ機能(ストップウォッチ)
・メイン画面で[MODE]ボタンを 1回押し、クロノグラフ画面にします。
・[START/STOP]ボタンを押すとクロノグラフがスタートします。
・再び[START/STOP]ボタンを押すとクロノグラフがストップします。
・[LAP/RESET]ボタンを押すと「0」にリセットできます。
16
クロノグラフ・ラップ機能
・ [MODE]ボタンを押して、クロノグラフ・モードへ進んでください。
・ [START/STOP]ボタンでクロノグラフをスタートします。
・ [LAP/RESET]ボタンを押して、1stラップをストップします。
・ [LAP/RESET]ボタンを押して、クロノグラフを再開します。カウントは継続していますので、経過したフルタイムが表示
されます。
・ [START/STOP]ボタンでクロノグラフを完全にストップします。
・ [LAP/RESET]ボタンを押すと、「0」にリセットできます。
17
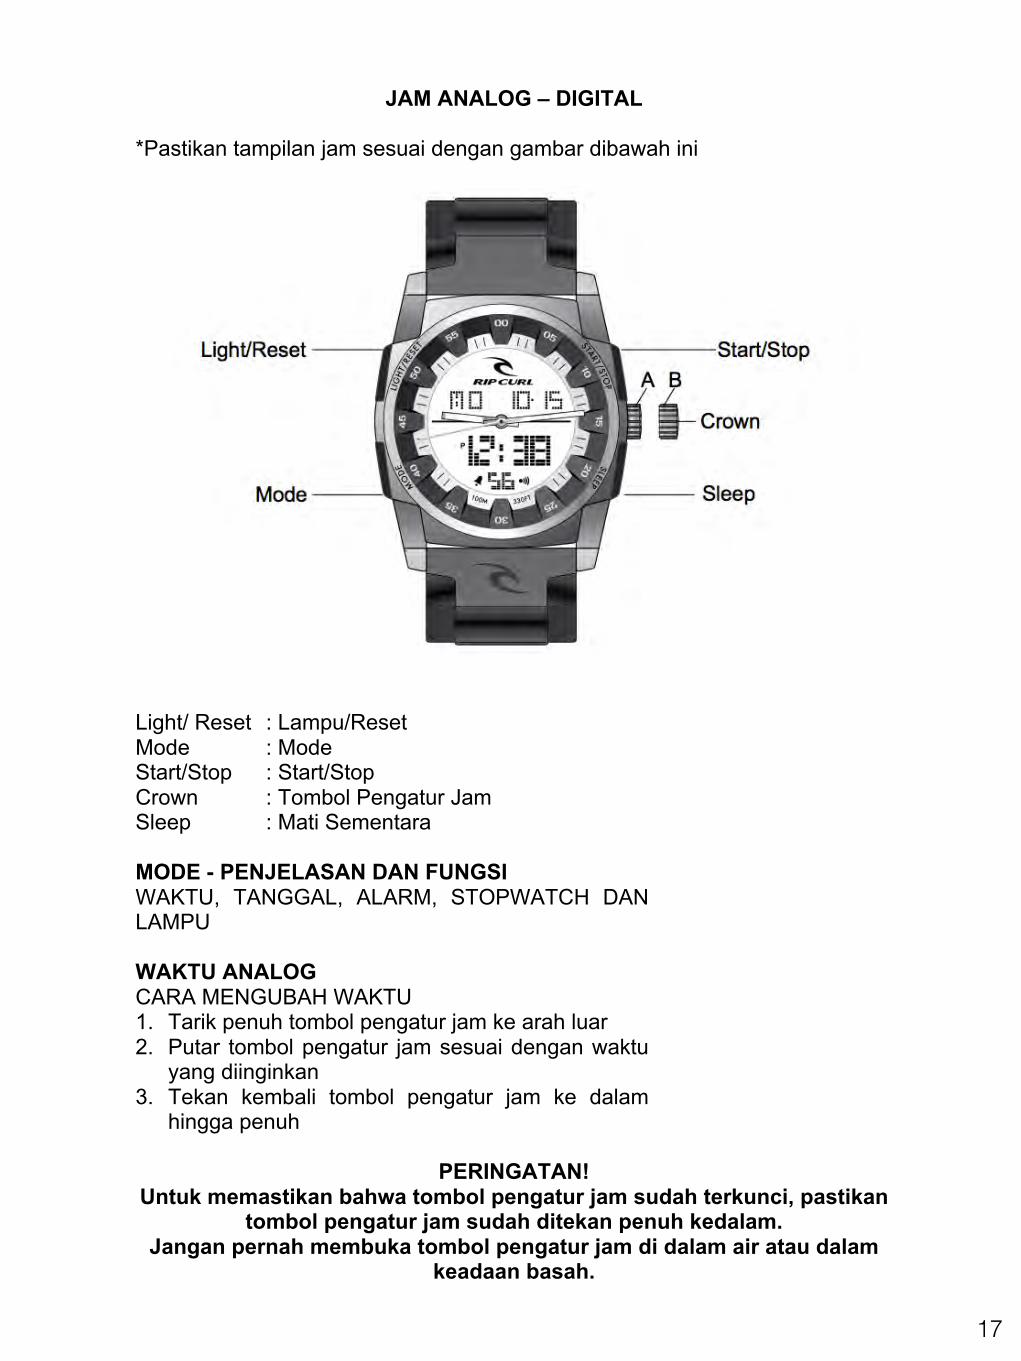
JAM ANALOG – DIGITAL *Pastikan tampilan jam sesuai dengan gambar dibawah ini Light/ Reset : Lampu/Reset Mode : Mode Start/Stop : Start/Stop Crown : Tombol Pengatur Jam Sleep : Mati Sementara MODE - PENJELASAN DAN FUNGSI WAKTU, TANGGAL, ALARM, STOPWATCH DAN LAMPU WAKTU ANALOG CARA MENGUBAH WAKTU 1. Tarik penuh tombol pengatur jam ke arah luar 2. Putar tombol pengatur jam sesuai dengan waktu
yang diinginkan 3. Tekan kembali tombol pengatur jam ke dalam
hingga penuh
PERINGATAN! Untuk memastikan bahwa tombol pengatur jam sudah terkunci, pastikan
tombol pengatur jam sudah ditekan penuh kedalam. Jangan pernah membuka tombol pengatur jam di dalam air atau dalam
keadaan basah.
18
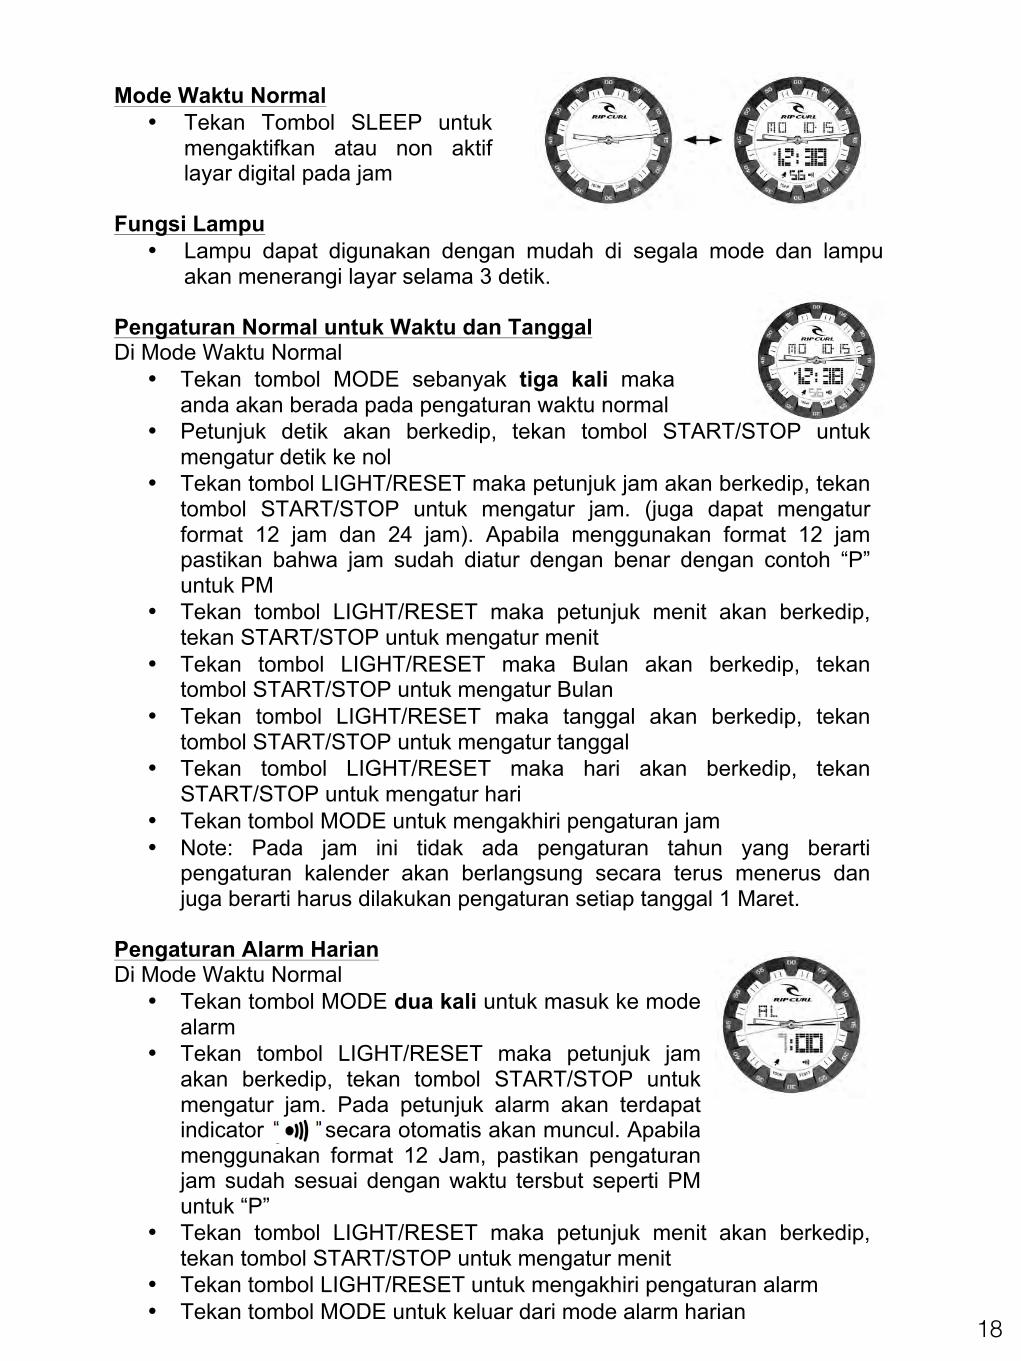
Mode Waktu Normal
• Tekan Tombol SLEEP untuk mengaktifkan atau non aktif layar digital pada jam
Fungsi Lampu
• Lampu dapat digunakan dengan mudah di segala mode dan lampu akan menerangi layar selama 3 detik.
Pengaturan Normal untuk Waktu dan Tanggal Di Mode Waktu Normal
• Tekan tombol MODE sebanyak tiga kali maka anda akan berada pada pengaturan waktu normal
• Petunjuk detik akan berkedip, tekan tombol START/STOP untuk mengatur detik ke nol
• Tekan tombol LIGHT/RESET maka petunjuk jam akan berkedip, tekan tombol START/STOP untuk mengatur jam. (juga dapat mengatur format 12 jam dan 24 jam). Apabila menggunakan format 12 jam pastikan bahwa jam sudah diatur dengan benar dengan contoh “P” untuk PM
• Tekan tombol LIGHT/RESET maka petunjuk menit akan berkedip, tekan START/STOP untuk mengatur menit
• Tekan tombol LIGHT/RESET maka Bulan akan berkedip, tekan tombol START/STOP untuk mengatur Bulan
• Tekan tombol LIGHT/RESET maka tanggal akan berkedip, tekan tombol START/STOP untuk mengatur tanggal
• Tekan tombol LIGHT/RESET maka hari akan berkedip, tekan START/STOP untuk mengatur hari
• Tekan tombol MODE untuk mengakhiri pengaturan jam • Note: Pada jam ini tidak ada pengaturan tahun yang berarti
pengaturan kalender akan berlangsung secara terus menerus dan juga berarti harus dilakukan pengaturan setiap tanggal 1 Maret.
Pengaturan Alarm Harian Di Mode Waktu Normal
• Tekan tombol MODE dua kali untuk masuk ke mode alarm
• Tekan tombol LIGHT/RESET maka petunjuk jam akan berkedip, tekan tombol START/STOP untuk mengatur jam. Pada petunjuk alarm akan terdapat indicator secara otomatis akan muncul. Apabila menggunakan format 12 Jam, pastikan pengaturan jam sudah sesuai dengan waktu tersbut seperti PM untuk “P”
• Tekan tombol LIGHT/RESET maka petunjuk menit akan berkedip, tekan tombol START/STOP untuk mengatur menit
• Tekan tombol LIGHT/RESET untuk mengakhiri pengaturan alarm • Tekan tombol MODE untuk keluar dari mode alarm harian
19
• NOTE: pada Mode alarm harian kita bisa dengan menekan tombol START/STOP untuk mengaktifkan dan non aktif “hourly chime” atau pengingat suara tiap jam dan alarm harian
Mode Chronograph (Stopwatch) Di Mode Waktu Normal
• Tekan tombol MODE sekali untuk memindahkan ke mode chronograph
• Tekan tombol START/STOP untuk start chronograph • Tekan tombol START/STOP untuk stop chronograph • Tekan tombol LIGHT/RESET untuk mereset cronograph ke nol (awal)
Menggunakan Cronograph pada Fungsi Putaran (Lap) Di Mode Waktu Normal
• Tekan tombol MODE sekali untuk memindahkan ke mode chronograph
• Tekan tombol START/STOP untuk start chronograph • Tekan tombol LIGHT/RESET untuk stop chronograph di putaran 1 • Tekan tombol LIGHT/RESET untuk merestart chronograph dan secara
langsung akan menghitung total waktu yang telah berlalu • Tekan tombol START/STOP untuk stop seluruh waktu dalam
chronograph • Tekan tombol LIGHT/RESET untuk mereset chronograph ke nol
(awal)