aleph one year on loans, returns, and problems with loans and returns
TRANSCRIPT

Aleph One Year OnLoans, Returns, and Problems with Loans and Returns

Log into Aleph• Go into the Start Menu, find the Aleph folder, and select
Circulation.• Please go ahead and log into your Aleph account• Close out your Applications Toolbar

How to loan an item
• Click on the loan tab or press F5 to open a loan session.• Scan the patron’s barcode number (or enter the UF-ID) in the patron
box.
• If the patron is blocked, blocks will show in the lower right-hand pane.• If there are no problems, the cursor will move to the item box.
• Scan the barcode of the item(s) to be loaned, watching for any error messages.
• The due date/time will appear in the loan session tab in the lower right-hand pane.
• Stamp the appropriate due date/time for each item and desensitize.Note: do not desensitize videos/disks or “library use only” reserves.
• When finished with the loan session press F4 to clear the patron record.

Loaning to a Proxy Borrower
• Proxy borrowers must present their Gator-1 card and tell circulation staff that they are checking out materials for their faculty Sponsor.
• In the patron field of the Patron tab, type in the Proxy ID. The Proxy ID is the capital letter “P” followed by the borrower’s original UF ID. (For example, P3570-4900.)
• Press Enter or click go. The Proxy name will appear to the right of the patron field.
• Click on the Proxies/Sponsor node under the Patron tab. Confirm the name of the faculty Sponsor in the pane that opens to the right.
• Click on the Loan tab and continue to loan item(s).
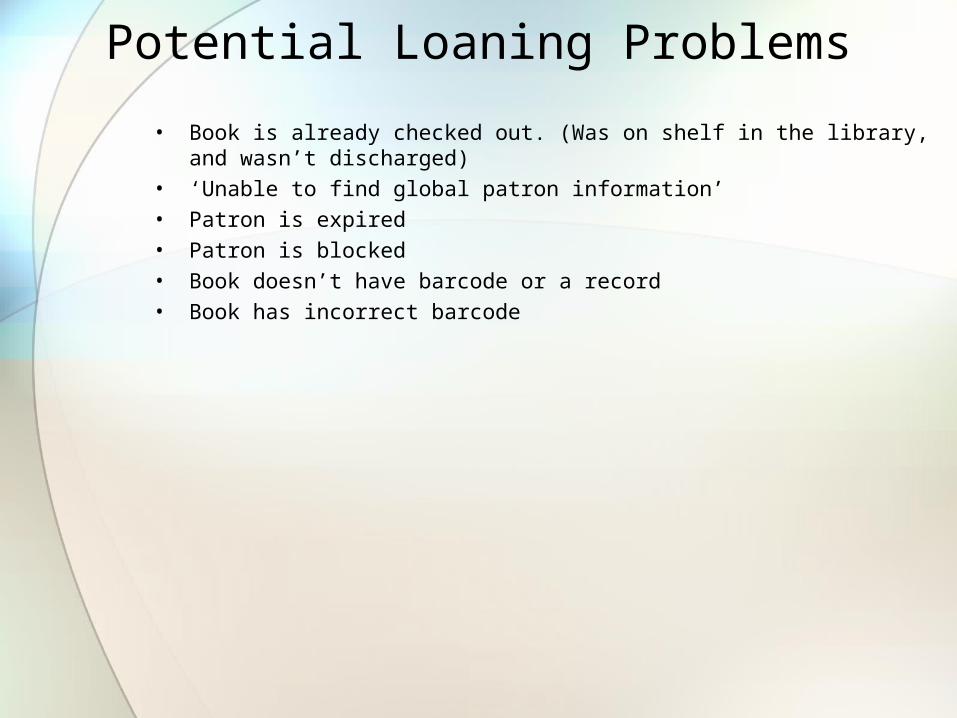
Potential Loaning Problems
• Book is already checked out. (Was on shelf in the library, and wasn’t discharged)
• ‘Unable to find global patron information’• Patron is expired• Patron is blocked• Book doesn’t have barcode or a record• Book has incorrect barcode

Book is already checked out
• If when you’re checking out a book, the book was on shelf, but not checked in, the system will not display a message indicating that the book is checked out to another user. The loan will simply transfer over to the new patron, and the old patron will be assessed any fines associated with the item.
• In this instance, we will waive/credit any erroneous charges.
• If the book was on shelf, not discharged, and has holds, the system will display the error message ‘Item has holds’ when you try to loan, unless you’re loaning to the patron that placed the hold.

Unable to find Global Patron Information
• If the patron’s 14 digit number isn’t yet in the system, you will get this message:
• You will typically be able to bring up their record using their UF-ID (XXXX-XXXX) number, and add their 14 digit barcode from there.
• If it is a new faculty member (or staff or student) and their UF-ID number isn’t yet in the system, try to verify their details in the UF Directory or through my.ufl.edu

Patron is expired
• Example: 2934-7480• If you’re able, verify registration/ employment in UF Directory.• If it is an expired student who will be registered next semester they
can be updated. • Update by clicking ‘Local information’ tab and updating the expiration
date in the bottom pane. Click ‘Update’ to save the information.
• Patrons with no further affiliation can purchase a Special Borrowers card from MSL.

Patron is blocked
• If patron is blocked, it will likely be due to overdues or fines. • You can check on the status of their Loans and Active cash
delinquencies by clicking on ‘Loans’ or ‘Cash’ in the Patron tab.
• Inform them of their options (return overdue items, pay fines at Criser
etc), and let them know that as a courtesy, you can hold the items for 24 hours, at which point they can check out the items (if the problem has been resolved).
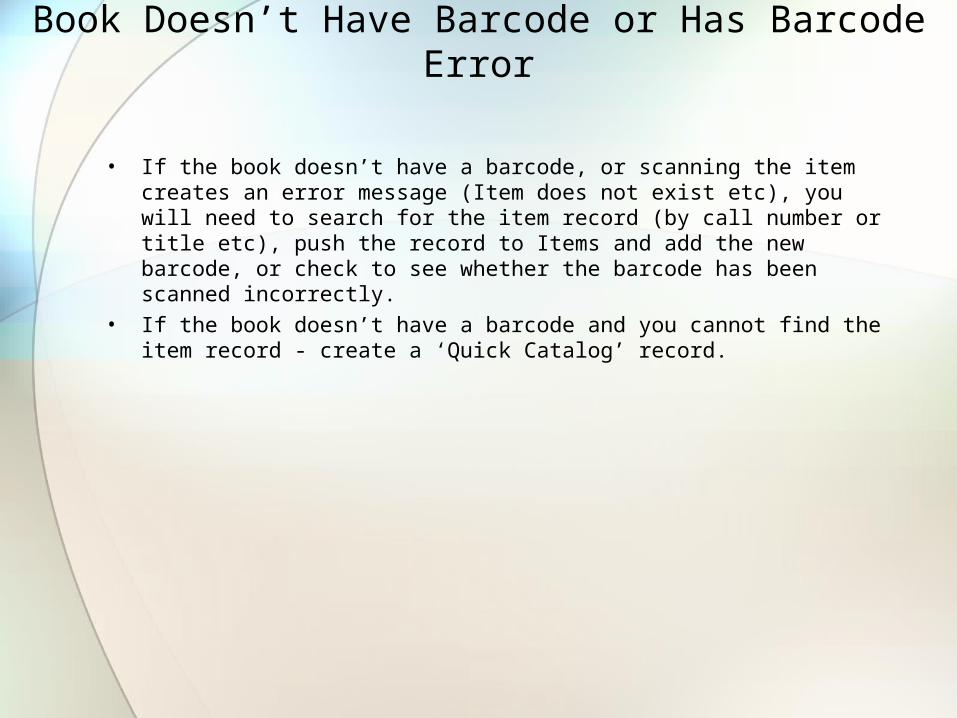
Book Doesn’t Have Barcode or Has Barcode Error
• If the book doesn’t have a barcode, or scanning the item creates an error message (Item does not exist etc), you will need to search for the item record (by call number or title etc), push the record to Items and add the new barcode, or check to see whether the barcode has been scanned incorrectly.
• If the book doesn’t have a barcode and you cannot find the item record - create a ‘Quick Catalog’ record.
Searching for an Item record to add/verify barcode

Searching in the Items Module
• Click on the Item tab.• There are two ways to search for an item – Find and Scan.
• Scan is best used for call number and author searches. • Click on the Scan icon in the upper right-hand side of the Items pane:
• A ‘Scan for an Administrative Record’ window will open. Pull down
the appropriate Scan Code for the desired search term (Call Number, Title, Author, etc.) that opens.
• Type in the information (call number etc) and click Search.• Typically, the second record will be the correct one. Click on the one
you want to make it highlight in blue. Click Full then Select. This will take you to the Item Record.

Searching in the Items Module continued…
• Find is best used for keyword searches and ISBN/ISSN searches:• Click on the Find icon in the upper right-hand side of the Items
pane: • Enter the desired search terms (Keyword Title, Keyword Author,
etc.) in the Search for an Administrative Record window that opens.
• Click Search.• Click the required item from the Brief List. Click Select.
• This takes you into the Item Record.
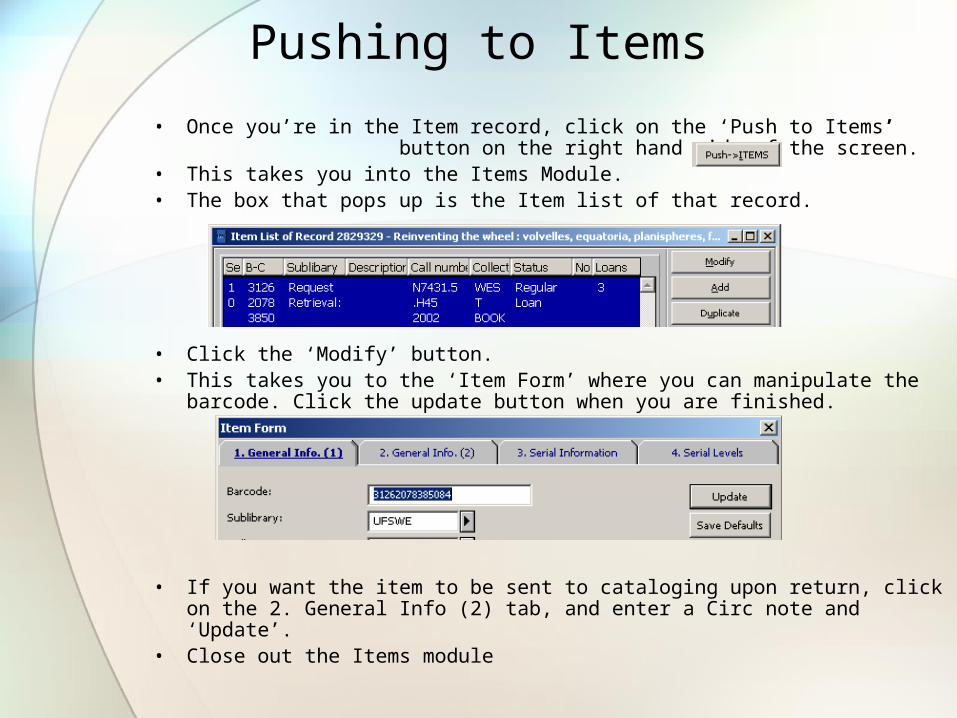
Pushing to Items
• Once you’re in the Item record, click on the ‘Push to Items’ button on the right hand side of the screen.
• This takes you into the Items Module. • The box that pops up is the Item list of that record.
• Click the ‘Modify’ button.• This takes you to the ‘Item Form’ where you can manipulate the
barcode. Click the update button when you are finished.
• If you want the item to be sent to cataloging upon return, click on the 2. General Info (2) tab, and enter a Circ note and ‘Update’.
• Close out the Items module

Creating an Item Record (Quick Cataloging)
• When an item has no barcode and you cannot find the item record:
• Click on the Item tab. • Click on the Catalog Item icon on the upper right-hand pane:
• In the Catalog Item window that opens, the 1. Document Information tab will be selected. Complete the following:• Author, Title and Date (represents copyright date)
• Continued….

Creating an Item Record (Quick Cataloging) continued…
• Click on the 2. Item Information window and complete the following:• Item Barcode: scan in directly• Material Type• Sublibrary• Item Status: loan period or availability• Call Number type• Call Number• Circulation note: Quick catalog items must be returned to cataloging for
full cataloging after circulation. Therefore, a note like ‘Route to cataloging upon return. MD. 08/05/05’ is important.
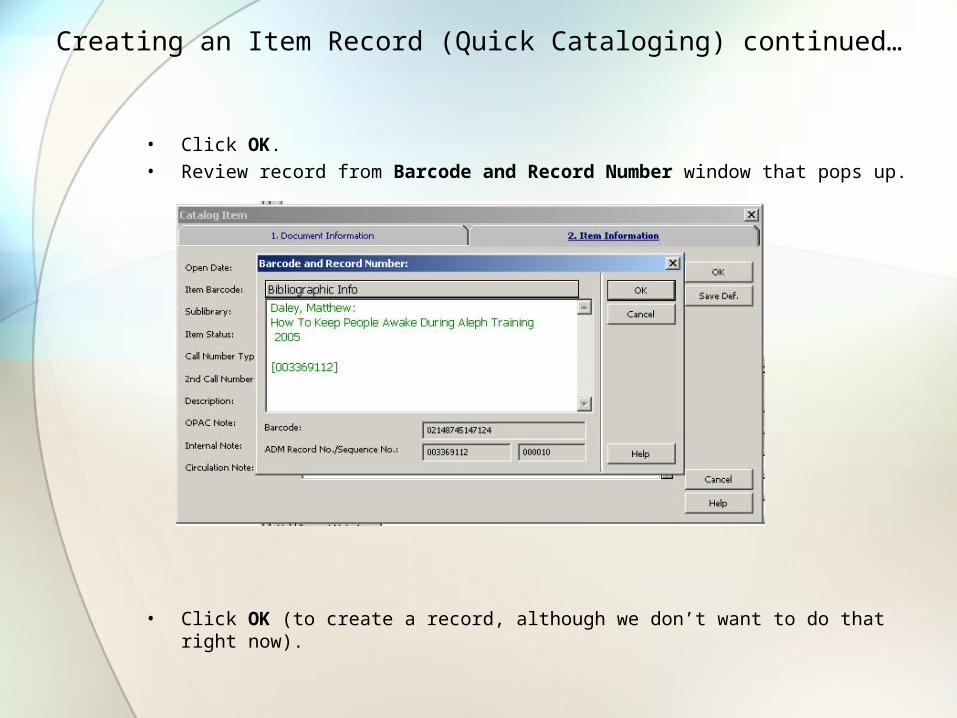
Creating an Item Record (Quick Cataloging) continued…
• Click OK.• Review record from Barcode and Record Number window that pops up.
• Click OK (to create a record, although we don’t want to do that right now).

Returning Items
• Stamp the return date and sensitize the item. Note: Do not sensitize videos/disks.
• Click on the Return tab or press F6 to open a return session. • Scan the item barcode in the item box. • If a message appears that an item has been recalled, print the Hold
Request letter (to be mailed to the patron) and put the Hold Request Slip in the book, and place the item on the hold shelf. (Prepare letters for posting at the end of the return session).
• If the item is also to be routed to another location, print the Hold Request letters and place them inside the book before sending it to the owning location.
• When finished press F4 to clear the patron and return information.

Return Receipt
• If a patron requests a return receipt, they need to ask before you begin the return session.
• First click on ALEPH in the top circulation toolbar, scroll down to Options and choose Setup Return Options. Check Print Return Receipt. Click OK. Then begin the return session. Only certain circulation staff may have the permissions to change these options; If so, you may need to get a supervisor.
• After the patron has been given their return receipt, change the settings back by unchecking Print Return Receipt.

Backdating Items for Return
• Open return session by clicking on Return tab. • In lower right-hand pane on the right, click Override Date.
• Type over the existing date or use the drop-down calendar to select the appropriate date.
• Type over the existing time or use the arrow buttons to select the appropriate time.
• Click OK. • Click the Return box again and scan in the item(s). • Be sure to click Clear Override when finished returning the backdated item(s). • Items returned to a book drop are backdated to a library’s most recent closing
date and time prior to reopening. All other transactions using the Override Date function must be approved by a circulation supervisor.

How to change the Item Process Status (IPS)
• In Circulation Services, you will change the IPS’s whenever an item leaves the library for a reason other than check out. For example, if a book needs to be sent to Preservation upon return, it will be given a IPS of ‘PR’, and sent to Preservation. Other times that an IPS should be used include when an item is lost, missing, withdrawn, or claimed returned.
• In the Circulation module, select “Items” from the top menu bar. • Select “Item Process Status” from the Items drop down menu.
• Continued…

How to change the IPS continued….
• This will bring up a new window box, labeled “Update Item Process Status”
• Click on the right arrow next to the box labeled “Process Status:”
• Select the appropriate status for the action being taken for that particular item (e.g., if sending an item to MSL from ALF, then select TR), and double click on that code.

How to change the IPS continued…
• Next, scan the barcode of the item(s) in question. There will be no confirmation that any action has been completed.
• If you want to check that the status change has gone through, close the “Update Item Process Status” window by selecting “Cancel”.
• Then, select the “Item” tab, and scan in the barcode.
• The ‘Status’ field will display the updated status.
• To remove the item process status, go through the same procedure and select ‘not in process’, and scan the book as directed above.
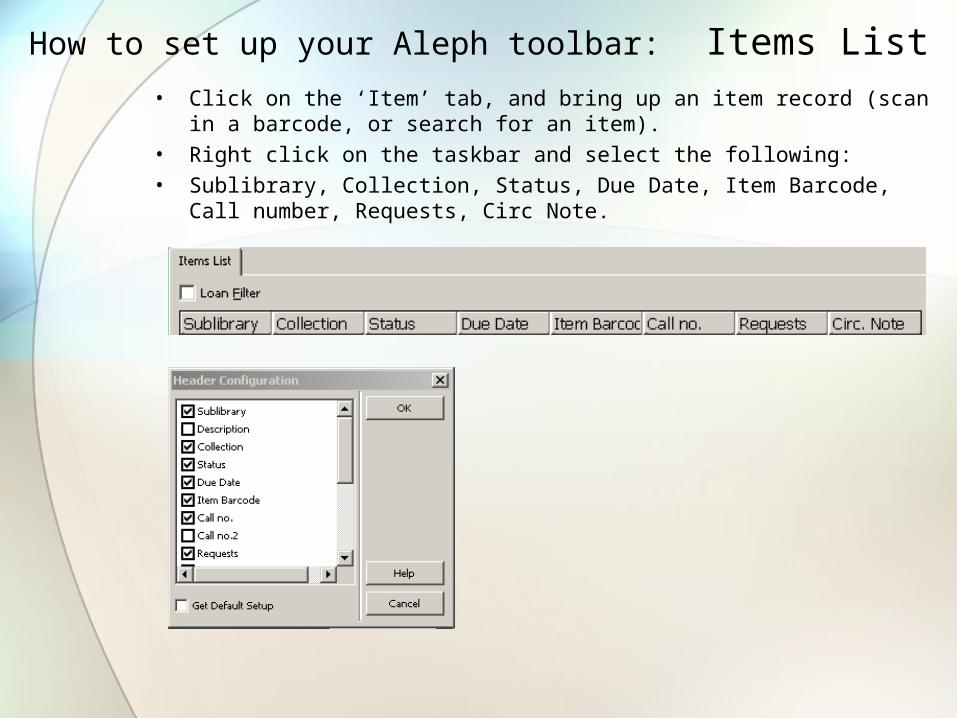
How to set up your Aleph toolbar: Items List• Click on the ‘Item’ tab, and bring up an item record (scan in a barcode,
or search for an item). • Right click on the taskbar and select the following:• Sublibrary, Collection, Status, Due Date, Item Barcode, Call number,
Requests, Circ Note.

How to set up your Aleph toolbar: Item – Hold Request
• Click on the ‘Item’ tab, and ensure that ‘Hold Requests’ is highlighted.
• Right click on the taskbar and select the following:• Patron name, Patron ID, Req Date, End Req, Hold Date, End Hold Date,
Status

How to set up your Aleph toolbar: Patron – Hold Requests
• Click on the ‘Patron’ tab, bring up a patron record and click Hold Requests.
• Right click on the taskbar and select the following:• Bib Info, Req Date, End Req Date, Hold Date, Call #, Status, Barcode,
Sublibrary N.

How to set up your Aleph toolbar: Patron - Loans
• Click on the ‘Patron’ tab, bring up a patron record and ensure that Loans is highlighted.
• Right click on the taskbar and select the following:• Bib Info, Due Date, Hour, Barcode, Call #, Item Status, Sublibrary,
Fine, Requests

How to Version Check your Aleph
• Go into your start menu.• Go to Programs• Go to your Aleph folder• Scroll down to Version Check
• You can verify your version of Aleph by going to the taskbar at the top of the screen, and selecting Help, then About.
• Unless you have multiple modules on your computer, this should be automatic.
• Current version is: 505155

Questions?

Next training sessions…
• Hold Requests• Creating• Deleting• Modifying
• Creating and interfacing with patron records• Community College• State University Libraries• Staff and Faculty• New Staff and Faculty• Proxy Borrowers• Computer Access Cards
Suggestions for future training topics?