airway adjuncts part i - northwest community … adjuncts include various devices used to access and...
TRANSCRIPT
Northwest Community EMS System
Paramedic Training Program AIRWAY ADJUNCTS PART I
Connie J. Mattera, M.S., R.N., EMT-P
Reading assignments: Aehlert Vol 1; 488-498; 518-531 NWC EMSS Lab (Procedure) Manual:
Nasopharyngeal airways Oropharyngeal airways Oropharyngeal and tracheal suctioning Orotracheal intubation
SOP: Airway Obstruction
OBJECTIVES:
Upon completion of the class and study questions, each participant will independently do the following with a degree of accuracy that meets or exceeds the standards established for their scope of practice:
1. Explain the unique aspects of upper airway anatomy as it affects the selection, insertion, and monitoring of airway adjuncts.
2. Describe the indications, precautions and process steps for oral and tracheal suctioning.
3. Prioritize airway access maneuvers from patient positioning to intubation.
4. Compare and contrast the indications for and process steps for manual airway opening maneuvers including head tilt-chin lift, jaw thrust, and modified jaw thrust.
5. List the indications, contraindications, critical steps of insertion, methods to confirm placement, and possible hazards of nasopharyngeal airways, oropharyngeal airways and orotracheal intubation.
6. Discuss methods to secure an ETT into place.
7. Identify assessment priorities prior to, during, and after airway adjunct insertion.
CJM F11

NWC EMSS Paramedic Training Program AIRWAY ACCESS
Connie J. Mattera, M.S., R.N., EMT-P I. Introduction
A. As the initial assessment is performed on a patient, you note that his mouth is open and he is breathing spontaneously. However, there is a copious amount of blood around his mouth, multiple abrasions and lacerations on his face, and he makes a gurgling sound when he breathes. What kind of airway access maneuvers and/or adjuncts should a paramedic select?
B. The proper airway positioning, suction, insertion of adjuncts, and use of oxygen delivery devices are essential in assisting patients with their ventilatory and respiratory processes. Airway adjuncts include various devices used to access and maintain a patent airway, such as oropharyngeal and nasopharyngeal airways, tracheal intubation, rescue airways, and cricothyrotomy procedures. Once the airway is secured, oxygen can be delivered to a patient who has adequate ventilations by nasal cannula or various facemasks. One can also provide ventilation through the use of pocket masks, bag-valve-mask (BVM) devices or mechanical ventilation.
C. Preventable deaths from airway impairment and/or inadequate ventilations stem from the following: 1. Failure to recognize obstruction or impaired laryngeal reflexes and the need for an
airway; 2. Inability to establish an airway; 3. Failure to recognize an incorrectly placed airway adjunct; 4. Displacement of an airway established previously; 5. Failure to recognize hypoventilaton and the need for ventilation; 6. Hypercarbia, cerebral vasodilation; and 7. Aspiration of gastric contents and hypoxemia, pneumonia or ARDS (ATLS)
II. Causes of airway impairment A. Obstructions may be acute, insidious, progressive or recurrent B. Etiologies of airway impairment/obstruction
1. Altered mental status: When a patient has an altered level of consciousness due to intra or extracranial factors, they may be unable to maintain their airway. The tongue obstructing the pharynx and the epiglottis are the most common causes of airway obstruction in the unconscious victim.
2. Debris; foreign body, teeth, food, dentures 3. Fluids: secretions, blood, vomitus 4. Inflammation, edema 5. Anatomical tissue distortion/destruction from trauma 6. Loss of airway support: fractured mandible 7. Laryngeal spasm 8. Upper airway diseases: croup 9. Goiter pressing on anterior trachea 10. Improper placement of an oropharyngeal airway 11. Lower airway narrowing (asthma) 12. Prolonged, severe, compression to chest 13. Tracheobronchial injuries
III. Physical assessment
A. Inspection
1. Level of consciousness and mental status 2. Presence/absence of spontaneous ventilatory efforts 3. Face/neck for symmetry, wounds, edema, F/B, secretions in mouth 4. Chest wall integrity/contour/symmetry/ease of chest expansion and depth -
retractions?

NWC EMSS Paramedic Training Program page 2 Airway Access Part 1 F11
5. Work of breathing; accessory muscle use 6. Movement of air 7. Audible noises: stridor, snoring, gurgling, audible wheezes 8. Position: upright, tripoding, hand to throat? 9. Ability to talk
a. Breath to word ratio b. Content of words c. Quality of voice d. Vocal noises, stridor, gurgling
10. Drooling
B. Signs and symptoms suggesting airway impairment
1. Unable to breathe; labored or violent ventilatory effort 2. Inspiratory/expiratory stridor, snoring, gurgling 3. Unable to speak or make sounds appropriate for age; change in normal voice
sound or patterns 4. Faint or absent breath sounds 5. Use of accessory muscles, nasal flaring/head bobbing 6. Substernal/intercostal retractions; tracheal tugging 7. Evidence of hypoxia, hypercarbia: Restlessness, anxiety, dyspnea,
unresponsiveness 8. Copious secretions in airway
IV. Management of upper airway impairment– See Procedure Manual
A. Early interventions in airway management and O2 delivery have priority over other systems in the initial assessment and resuscitation of all patients because an adequate exchange of oxygen and carbon dioxide is essential for cellular metabolism.
B. Unchanging priorities
1. Patent airway 2. Adequate ventilation 3. Adequate gas exchange
C. Progress from least invasive to most invasive methods
1. Position 2. Suction 3. NPA/OPA 4. Intubation using an endotracheal tube (ETT) 5. Rescue airway 6. Cricothyrotomy
D. Apply BSI as needed: gloves, goggles, face shield
E. Patient positioning
1. Mechanical obstruction from the tongue in a patient with altered mental status may be prevented in a spontaneously breathing person with NO evidence of spine trauma by placing them in the recovery position (on their side).
2. Pediatric patients: Pad torso
3. Extremely obese patients: Elevate upper body into sniffing position: earlobe horizontal with xiphoid process – may need LOTS of padding
F. Manual maneuvers to open an airway
1. Three options if NO history of recent injury to the head or neck
a. Head-tilt/chin-lift maneuver: Gently tilt the forehead back with one hand and elevate the jaw by placing the other hand on the bony area of the chin and lifting upward.

NWC EMSS Paramedic Training Program page 3 Airway Access Part 1 F11
b. Chin lift alone – contraindicated with mandibular fractures
c. Jaw thrust: Gently tilt the head backwards and place two or three fingertips of each hand under the angles of the mandible. Lift the jaw upward and outward.
d. If c-spines not cleared: modified jaw-thrust without tilting the head
e. Tongue/jaw lift
2. Small peds patients: pad under torso, tilt head slowly backwards so nose points to ceiling until airway is open
3. Apply foreign body airway obstruction maneuvers as necessary
a. All foreign bodies (F/B) must be removed. Perform abdominal thrusts in conscious adult and peds patients until either the airway is cleared or more sophisticated measures are performed. If unconscious, start chest compressions.
b. In an infant, replace the abdominal thrusts with a series of 5 back slaps with the baby face down and then 5 chest thrusts with the infant supine, keeping the head lower than the trunk
c. A blind finger sweep may be performed on adult but never on pediatric patients because their airway is cone-shaped and narrower at the bottom (cricoid ring) than the top. Therefore, a F/B could easily be pushed deeper into the airway.
d. If these maneuvers don't work, prepare for direct visualization of the airway via laryngoscopy and remove any F/B with Magill forceps.
G. Oropharyngeal suctioning
1. Remove debris, foreign bodies, fluid, vomitus, or blood from the mouth and oropharynx by using a suction source and catheter.
2. In the event that wall suction is not available, a portable suction unit, either oxygen or battery-powered or hand operated (V-VacTM), should be available.
3. Types of suction catheters
a. Whistle (flexible) tip b. Rigid (Yankauer) pharyngeal tip
4. Procedure
a. All suction units should be checked daily for proper function; portable units should be checked daily for a full battery charge.
b. Preoxygenate patient if possible. If the upper airways are full of secretions, do not ventilate them down into the lower airways with preoxygenation.
c. Without applying suction, insert a hard catheter to the base of the tongue. Insert a soft catheter only as far as the distance from the lips to the earlobe or angle of the jaw.
d. Once catheter is in place, apply suction for no longer than 10 seconds in an adult and 5 seconds in a child at one time. Attempt to ventilate and suction again as necessary.
5. Secretions that cannot be removed by using a suction catheter should be cleared by log rolling the patient and sweeping foreign material from the mouth or use a manually powered suction apparatus.
H. Tracheal suctioning
1. Suctioning through a tracheal tube is a sterile procedure that depletes oxygen from the airways while removing secretions.

NWC EMSS Paramedic Training Program page 4 Airway Access Part 1 F11
2. Preoxygenate with 15L O2 for 2 minutes while preparing the equipment. 3. Select an appropriate size catheter (no larger than ½ the internal diameter of the
ETT). Using sterile technique, open catheter packaging. Apply one sterile glove on dominant hand. Using sterile hand, lift catheter from packaging and wrap catheter around sterile hand. Maintain sterility of the catheter.
4. Without applying suction, insert the catheter in the ETT to the carina. Apply suction as the catheter is withdrawn. Do not suction for longer than 10 seconds at one time on adults. Rinse the catheter with sterile NS after withdrawing from the ETT.
5. The principal hazard associated with suctioning is hypoxia related to the length of suction application evidenced by cardiac dysrhythmias (bradycardia), coughing/ retching, damage to mucosa, spikes in ICP, and possible hypotension. If these occur, immediately discontinue the procedure and manually ventilate the patient with 15 L O2/BVM. Before repeating, ventilate the patient with 15 L O2/BVM at 10-12 BPM for about 30 seconds.
6. Coughing from copious secretions or stimulation of the carina will increase ICP, decrease cerebral blood flow, and should be prevented as much as possible in the head injured patient.
7. In a pediatric patient, suction attempts should not exceed 5 seconds and should be preceded and followed by a short periods of ventilation with 15 L O2/ped BVM to avoid hypoxemia. Monitor the heart rate (for bradycardia) and the child’s clinical appearance during suctioning.
I. Non-invasive airway adjuncts
1. General considerations
a. The airway adjunct must be clean and clear of obstructions
b. Proper size is critical to avoid complications and ineffectiveness
2. Nasopharyngeal airway (NPA)
a. Nasopharyngeal airways are uncuffed tubes made of soft rubber or plastic. They follow the natural curvature of the nasopharynx, passing through the nose and extending from the nostril to the posterior pharynx, just below the base of the tongue. The proximal end has a funnel or flange to prevent the tube from slipping inside the nose. The distal tip is beveled to facilitate insertion.
b. Indications: Should be inserted in responsive patients with an intact gag reflex who need their airway maintained after it is successfully opened through positioning or suctioning. Ex: Those with altered mental status who cannot tolerate an oral airway. Also indicated prior to intubation, in those whose jaws are clenched (trismus) or in trauma if an OPA is impractical.
c. Contraindications
(1) A patient < 4 years has enlarged adenoid tissue and a nasal airway may be difficult to insert.
(2) Any patient with suspected nasal, midface, or cribriform plate (anterior basilar skull) fracture
d. Advantages
(1) Can be rapidly inserted and safely placed blindly (2) Bypasses the tongue, providing a patent airway (3) Can be used in the presence of a gag reflex (4) Does not have to be removed prior to tracheal intubation (5) Can use when there is oral trauma (6) Can use if the teeth are clenched (7) May suction through it

NWC EMSS Paramedic Training Program page 5 Airway Access Part 1 F11
e. Disadvantages
(1) Smaller than the oropharyngeal airway (2) Does not isolate the trachea (3) May cause epistaxis if inserted too forcefully (4) May cause pressure necrosis of the nasal mucosa (5) It may kink and clog, obstructing the airway (6) Insertion may be difficult if nasal damage is present
f. Size: Varies from 17-20 cm long; diameters range from 12-36 Fr (French). Measure desired length from the tip of the patient's nose to the ear lobe. Diameter should correspond to size of nare or patient's little finger.
g. Insertion
(1) Assess for a gag reflex. Lightly tap an apparently unconscious patient on the forehead between the eyebrows with one fingertip and see if the eyelids blink (Glabellar tap). If a blink reflex remains intact, a gag reflex is also probably present.
(2) Lubricate the exterior of the airway with water soluble gel.
(3) Push up gently on the tip of the nose and insert into the largest nare (usually right side) or the one without obvious secretions/ trauma or obstruction.
(4) Gently advance along the floor of the nasal passage with the bevel oriented towards the septum (only applies to R nostril) until the flange rests against the patient's nostril. Avoid pushing against any resistance. Gentle rotation of the airway may facilitate insertion. If resistance is met, withdraw the airway and attempt to insert into the other nostril.
h. Confirm placement: Close mouth and feel air movement through tube.
i. Complications: Insertion may cause bleeding in both adult and pediatric patients, so suction should be available. It may also cause trauma to the septum, vomiting and laryngospasm.
3. Oropharyngeal airway (OPA)
a. An OPA is a noninvasive semicircular plastic device designed to follow the palate's curvature and to seat under (behind) the tongue.
b. Indications: Used to elevate the tongue away from the posterior oropharynx in an unconscious patient without a gag reflex. Insertion in a patient with an intact gag reflex may precipitate vomiting and aspiration.
c. Advantages
(1) Easy to place using proper technique (2) Air can pass around and through the device (3) Helps prevent airway obstruction by the teeth and lips (4) It helps to open the airway of unconscious patients who are
breathing spontaneously prior to intubation. (5) Facilitates suction of the pharynx as a catheter can pass on both
sides of the device (6) It serves as an effective bite block to protect an ETT
d. Disadvantages
(1) Does not isolate the trachea (2) Cannot be inserted when the teeth are clenched (3) May obstruct the airway if improperly inserted (4) Is easily dislodged (5) Return of the gag reflex may produce vomiting

NWC EMSS Paramedic Training Program page 6 Airway Access Part 1 F11
e. Types
(1) Tubular (2) Channeled side
f. Size: Range from #0 (for newborns) to #6 (for large adults). Measure length by holding the airway against the patient’s face with the flange at the front of the patient's lips. The distal tip should extend to the angle of the jaw. If too long, it can press the epiglottis against the entrance of the larynx, resulting in an airway obstruction. Equally, the distal tip of the airway can mechanically irritate the epiglottis causing it to swell.
g. Insertion technique
(1) Position patient to optimally open airway. (2) Assess for a gag reflex. (3) Open mouth and remove any visible obstructions. (4) Suction mouth, if necessary, then hold the tongue out of the way
with a tongue depressor or grasp the jaw and lift anteriorly. (5) Insert a tongue blade and insert the airway along the curvature of
the tongue/mouth.
h. Confirm placement: Close the nares and feel for air movement through the mouth.
i. If airway remains impaired or patient is an aspiration risk, consider need for intubation.
4. Ortinau method: 2 NPA + OPA
V. Tracheal intubation
A. Successful intubation is accomplished by a combination of keen observation and assessment, rationale and timely decision-making, careful patient preparation, and strong motor skills honed through practice and tireless reassessment.
B. If any component is missed or sloppy the pt may be the one who pays the price.
C. Advantages
1. Isolates the trachea 2. Minimizes gastric distention by providing a direct path for ventilations into trachea 3. Reduces risk of aspiration 4. Eliminates the need to maintain a bag-mask seal on the face 5. Offers a direct route for tracheal suctioning 6. Ensures delivery of high FiO2 7. Permits medication administration route for lidocaine, atropine, naloxone, and
epinephrine (however, this route is discouraged) 8. Permits faster, uninterrupted chest compressions
D. Disadvantages
1. Technique requires considerable training and experience 2. Requires specialized equipment 3. Usually requires direct visualization of the vocal cords 4. Bypasses upper airway's function of warming, filtering, humidifying the inhaled air
E. You need lots of practice: “Statistical modeling indicates that a 90% probability of a “good intubation” required 47 attempts.” “Traditional teaching for nonanesthesia personnel using manikin alone is inadequate” (Mulcaster et al, 2003).
1. Residents and nurse anesthetists are required to perform 35-200 intubations prior to graduation. One study showed that it takes PM students 15-20 intubation encounters to attain proficiency. You have to do 5 on humans- will need lots more in labs.

NWC EMSS Paramedic Training Program page 7 Airway Access Part 1 F11
2. Pennsylvania study of 40 EMS agencies
a. Error rate of 22-40% b. Misplacement c. 4 or more attempts d. Failure to intubate
3. Seattle Medic One Program:
a. Requires 12 field or OR ETIs per year b. Success rate of 90%
4. NWC EMSS requires 4 per year (manikin or real) for CE
F. Indications
1. Actual or impending airway obstruction 2. Hypoventilation needing assisted ventilations 3. Severe hypoxia despite O2 4. GCS 8 or less from acute event unlikely to be self-limited 5. Respiratory or cardiac arrest: Unmedicated orotracheal intubation is generally
performed on apneic patients and allows insertion of a larger tube than the nasotracheal route, which decreases the work of breathing.
6. PU-52
a. Identified by Mason as a simple, quick way to ID patients in need of rapid airway/oxygen intervention using AVPU and SpO2.
b. If unresponsive (“U”) or only responsive to pain (“P”) with SpO2 of 92% or less – intervene rapidly.
c. If in doubt about the need to intubate contact OLMC.
G. Options
1. Orotracheal: Inserting a tracheal tube into the mouth of an unconscious, unresponsive (usually apneic) person through the vocal cords and directly into the trachea facilitated by the use of a laryngoscope.
2. In-line 3. Drug-assisted (DAI) 4. Tactile/digital 5. Anterior/inverse (Kentucky) 6. Transilluminated 7. Nasotracheal
H. Optimal best attempt factors
1. Person doing the intubation is competent and reasonably experienced 2. Use of optimal patient position 3. All equipment is prepped in advance 4. Patient is preoxygenated 5. Use of external laryngeal manipulation and lip retraction during visualization of
glottis 6. Change of PM, position, blade length and/or type, process one time if unsuccessful
I. Equipment needed
1. Appropriate size cuffed tracheal tubes (ETT), one size larger and one size smaller than measured size.
2. 10 mL syringe to inflate cuff 3. Stylet: Malleable plastic coated metal wire helps to direct the TT anteriorly by
bending its distal end into a hockey-stick shape. Particularly useful in patients with an anterior trachea, short neck or where head positioning is difficult. All tubes in the NWC EMSS must have a stylet placed prior to insertion.

NWC EMSS Paramedic Training Program page 8 Airway Access Part 1 F11
4. Laryngoscope handle and appropriate sized straight (Miller) and curved (Macintosh) blades. Blade type is based on personal preference in most adults. Have one of each prepared in the event of a difficult intubation. Preparing extra bulbs is helpful.
5. Suction source and Yankauer tip catheters 6. OPA or NPAs 7. Water soluble gel 8. Commercial tube immobilizer to secure the tube 9. Stethoscope, BVM, EDD, capnography, SpO2, ECG monitor 10. Non-invasive BP monitor (NIBP) helpful 11. Folded towels or padding to position head in sniffing position 12. BSI 13. Head immobilizer 14. Alternative airway: King LTSD
J. Preoxygenate
1. Top priority is to oxygenate and ventilate the patient; NOT to place an ET tube
2. Give O2 as soon as hypoxia is identified; do not wait for an ETT to be placed to provide O2. Preoxygenation will wash out nitrogen to avoid premature desaturation during ETI attempt.
3. Assess SpO2 on room air if immediately available
4. If patient is breathing adequately – NRM at 15 L for 3 minutes to minimize risk of gastric distention from BVM ventilations
5. If airway is impaired or patient is apneic: Insert a NPO and/or OPA and pre-oxygenate for 3 minutes with 15 L O2/NRM or BVM with a good mask seal at 10-12 breaths per minutes. Squeeze bag over 1 sec, just enough to see chest rise. Maintain open airway by lifting chin with middle, ring, and 5th fingers. Avoid high pressure as it opens esophagus & causes gastric distention. To prevent gastric distention: Prefer 2 person technique. Have partner squeeze bag while you open airway and seat mask. Have partner apply downward pressure over the anterior cricoid cartilage (Sellick's maneuver) to collapse esophagus. Preoxygenation will maximize oxyhemoglobin saturation and provide an O2 reserve during the intubation process to prevent hypoxemia.
6. Conditions that may interfere with mask ventilation: Beards, large tongue and jaw structure, lack of teeth, protruding teeth, burns, upper airway trauma, or facial dressings. Tip: Place water-soluble gel into facial hair around the mouth to help facilitate a better mask seal.
K. Prepare equipment
1. Select correct size ETT: Estimate needed size by assessing diameter of patient’s little finger or nares. Multiple sizes of cuffed tubes carried on ambulance: 6.0, 6.5, 7.0, 7.5, 8.0, 8.5, or 9.0. Ave adult female usually needs a 7-8; while adult males often need 8-9. We tend to use tubes that are too small. Insert the largest tube that will fit through the vocal cords of an adult.
a. Adult and children 8 or older: cuffed b. Children < 8: Uncuffed
2. Check balloon cuff for leaks by inflating and deflating it while still in the packaging. Do not touch cuff directly. Fill syringe with 10 mL of air and leave attached to pilot balloon. Field intubations have a high rate of pneumonia– maintain tube sterility as long as possible.

NWC EMSS Paramedic Training Program page 9 Airway Access Part 1 F11
3. Insert stylet while tube is still in the package. Stylets are mandatory in NWC EMSS except for nasal/digital approaches. They are more important now than ever before because ETTs are softer to minimize tissue trauma. They provide stiffness to facilitate tube placement. End of stylet should be recessed from distal tip of the ETT by ½ inch (not beyond Murphy eye of tube). Form the tube by bending the tip ONLY just distal to the balloon cuff at a 45° angle (like a hockey stick). Do not bend into a c-shaped curve (no matter what your preceptors tell you!). A C-shape will obstruct your view of the glottic opening when inserting the tube.
4. Apply a thin film of water-soluble gel to the outside of the tube as it is withdrawn from the sterile packaging.
5. Select blade. Select several types and blade sizes (straight and curved).
a. The Macintosh blade is curved for better tongue control. The tip of the blade is placed in the vallecula (natural stopping point). Lifting the blade stretches the hypoglottic ligament that lifts the epiglottis. Avoid using too large of a blade. Most adults require a Mac 2 or 3.
b. The Miller blade is straight and is placed directly under epiglottis to lift it directly. This blade is recommended in younger pediatric patients. Most adults require a Miller 3.
c. Engage the laryngoscope blade on the handle and lift; confirm that the bulb is secure (if an older model) and the light is tight, bright, and white.
6. Connect tonsil tip catheter to suction tubing; ready suction machine and rest of equipment within reach
7. Connect EtCO2 device to BVM
8. Put stethoscope around your neck
9. Place ETT holder under patient’s neck
10. Put on PPE: gloves, goggles, and face mask L. Prepare patient
1. Assess patient for the possibility of a difficult intubation. Possible causes of a difficult to intubate patient (LaCombe, 2001):
a. LEMON law
(1) Look externally (2) Evaluate the 3-3-2 rule (3) Mallampati (4) Obstruction? (5) Neck mobility
b. Look externally
c. Obese or very small: Obese or pregnant patients will be a challenge to position. They may need significant padding to place them in sniffing position. They are at extreme risk of desaturation when positioned supine. It is usually difficult to visualize their glottic opening.
(1) Large breasts (2) Dental overbite; angled teeth (3) Dentures (4) Burns (5) Distortion/Facial trauma:
Hematoma, tumor, or goiter (6) Swelling/edema (7) Stridor (8) FBAO

NWC EMSS Paramedic Training Program page 10 Airway Access Part 1 F11
d. Palpate neck: Should be able to easily palpate trachea, thyroid and cricoid cartilages, trachea in midline and neck mobility without scars or contractures
2. Evaluate 3-2-2 Rule
a. There should be 3 finger breadths from jaw to thyroid cartilage
b. Jaw should be > 3 fingers wide
c. Jaw/mouth should open > 2 fingers wide
d. Mouth, mandible: Assess patient for mobility of the mandible. Measure the oral opening by having a conscious patient open their mouth as wide as possible. Open the mouth of an unconscious patient using a scissors maneuver. Less than three fingers wide may suggest a complicated laryngoscopy. The mandible should be midline without fracture or dislocation. A recessed mandible, small mandibular space, or poor mandibular mobility (TMJ disorders), oral abscesses or lesions, maxillofacial or airway trauma complicate visualization.
e. Thyromental distance: Measure the space between the patient's chin and the thyroid cartilage. The tongue must be displaced into this space by the laryngoscope blade. If it is too small (less than 3 finger breadths), it is difficult to control the tongue and lift it with the blade.
f. Uvula: With the mouth open, inspect the posterior wall of the oropharynx.
You should be able to visualize the entire uvula (Mallampati classifications). Compares tongue size to oropharyngeal space
(1) Class I view is a Grade I intubation 99% of the time (2) Class IV view is a Grade III or IV intubation 99% of the time
g. Patients whose tongue obscures the uvula are typically difficult to intubate (Class 4)
h. Assess for disruption/obstruction
(1) Blood (2) Emesis: Inspect mouth for vomitus, excessive secretions and
possibility of aspirated material (3) Teeth

NWC EMSS Paramedic Training Program page 11 Airway Access Part 1 F11
(4) Epiglottis (5) Dentures (6) Tumors (7) Impaled objects (8) Burns: Soot around the mouth and nose often indicates
inhalational burns that could result in mucosal and laryngeal swelling
i. Neck mobility: Ideally, patient should be able to extend head at least 35° and flex neck at least 35°. Short muscular neck, cervical arthritis, kyphosis, former cervical laminectomy (check anterior neck for surgical scars), old burns with significant scar tissue, past trauma, and spine motion restriction devices limit the ability to assume a sniffing position.
j. Risks when performing a difficult intubation: Patients presenting with a difficult airway to access face hazards of direct airway trauma as well as morbidity from hypoxia and hypercarbia. They are also at risk for increased use of physical force during intubation attempts increasing the potential for iatrogenic injury (caused by the intubator) which may inflict damage to teeth, facial or eye structures, upper airway soft tissue contusions, lacerations and hemorrhage, tissue emphysema, and fracture or subluxation of the cervical spine. Interruption of effective gas exchange may cause arrhythmias, hypoxia, hypercapnia, brain damage or death (Somerson & Sicilia, 1993).
3. Remove any dentures or partial plates
4. Apply ECG monitor prior to intubation if immediately available.
5. Before intubation: Is there another means of securing the airway/ventilatory/oxygenation status BEFORE attempting intubation?
a. NPA/OPA & BVM? b. CPAP? c. Do you have all the help you need? d. All needed airway equipment prepared?
M. Position patient
1. Neutral position will not afford an adequate view of the larynx. Align the oral, pharyngeal, and laryngeal axes into more of a straight line by positioning the head and neck in a "sniffing position" with some head extension unless contraindicated.
a. Adult: Place folded towels under the occiput to raise the head until the ear lobe is level with the sternum. This may be 8-10 cm (4") or higher if not contraindicated. In this position, less of the tongue obscures the view and less effort is required to anteriorly displace the tongue with the laryngoscope blade.
b. Pediatric < 2 years: Place a towel/pad under shoulder blades (torso)
N. Pass the tube
1. Do not take longer than 30 seconds w/ each intubation attempt. Have partner time and watch ECG & SpO2; tell you when 15 & 25 sec have passed
2. Suction prn
3. Open the mouth with a scissors (crossed finger) movement
4. Hold the laryngoscope in your non-dominant hand; remove ETT from packaging and hold like a pencil in your dominant hand.
5. Have partner stop bagging the patient; remove OPA if inserted

NWC EMSS Paramedic Training Program page 12 Airway Access Part 1 F11
6. Suction as necessary
7. If using a curved blade, insert the blade into the mouth from the right, sweeping the tongue to the left (midline) with the flange. This helps to control the tongue. Seat the tip of blade in the vallecula at the base of the tongue. Note: every insertion of a blade into a patient’s mouth is considered an intubation attempt. Maximum: 2 attempts per patient.
8. Insert straight blade down the middle of tongue and under the epiglottis.
9. Aids to visualization: Have an assistant apply downward pressure over the thyroid cartilages (external laryngeal pressure) to lower the vocal cords into view and gentle lip retraction to the side of the mouth to improve visualization.
10. If using a curved blade, visualize the tip of the epiglottis as the blade is inserted; look for the arytenoid cartilages below the glottic opening, and the vocal cords. With a straight blade, look for the arytenoid cartilages and the vocal cords. They should look like white, glistening bands.
11. Gently lift blade at a 45° angle to the floor of the mouth to lift the tongue and visualize the glottic opening. DO NOT bend the wrist backwards - keep blade off of the upper teeth.
12. a. You may need to apply suction at this point to visualize the glottic opening
b. If you cannot recognize any landmarks, gently lower and reposition the blade, slowly and slightly. If you observed the epiglottis fall when using a straight blade, advance the blade farther into the hypopharynx and lift again. If you see nothing but a black hole, you may have advanced the blade into the esophagus. Lower blade and pull back slightly. Look for the tip of the epiglottis.
c. If the vocal cords are closed in spasm you can
(1) wait a moment to see if they relax or (2) instill a small amount of lidocaine or Hurricaine spray over the
cords to reduce their spasm
d. BURP technique
(1) Backward (2) Upward (3) Rearward (4) Posterior
e. Once the cords or the arytenoid cartilages are visualized, pass the tube from R side of mouth (not down blade) down the midline of the oropharynx through vocal cords. Advance it until the balloon cuff is no more than ½-1 inches (1-2 cm) past the cords. If the tube is inserted too deeply and hits the carina, the patient with cough, gag or retch and the tube may be displaced if the PM is not holding on to it securely.

NWC EMSS Paramedic Training Program page 13 Airway Access Part 1 F11
(1) 13. If visualization is not achieved and the ETT is not successfully passed within
30 seconds
a. Remove ETT b. Reoxygenate X 30 sec – do not hyperventilate c. Try again or consider need for King airway (cannot visualize cords at all)
14. If passed, hold ETT in place with your hand, remove laryngoscope blade from mouth and stylet from the tube.
O. Confirm tube placement – objectively (measured)
Note: No single technique to confirm ETT placement is 100% reliable in all circumstances. The use of an objective device to confirm tube placement is essential as research shows that physical exam, alone, is often inadequate to determine tube location.
1. Attach an EDD to the tube and aspirate for ease of air return
a. An EDD (bulb or syringe) aspirated prior to inflating the cuff or delivering the first breath relies on the fact that the trachea is rigid and permits free aspiration of air from the pulmonary dead space. Conversely, the suction created by the EDD will collapse the lumen of the esophagus or pull esophageal tissue against tip of ETT and bulb will NOT re-expand or it will be impossible to pull back barrel of syringe
b. Limitations of an EDD: An EDD may yield misleading results in pts with morbid obesity, late pregnancy, status asthmaticus, or when there are copious tracheal secretions. With all of these conditions, the trachea tends to collapse. If resistance is felt, attempt to directly visualize ETT in cords again.
c. Listen carefully for gastric sounds, absent breath sounds, and absence of exhaled CO2 before assuming incorrect tube placement.
2. Apply capnography monitor and ventilate w/ BVM at 10 BPM (1 every 6 sec) (6-8 BPM if asthma/COPD). Need 6 breaths before the EtCO2 detector reading is reliable, so immediately perform 5-point auscultation of gastric and lung sounds.
Color-metric, visual analogue scale, or capnography waveform devices detect exhaled CO2. Carbon dioxide will only be exhaled from the lungs. It is not present in sufficient levels in the esophagus to register on a capnography monitor. A colormetric device is purple when removed from the package.

NWC EMSS Paramedic Training Program page 14 Airway Access Part 1 F11
a. CO2 colormetric detector theoretical correlations:
(1) A reading (purple color) = pCO2 of < 2.28 mmHg (2) B reading (tan) = levels between 3.8 - 7.6 mmHg (3) C reading (yellow) = levels > 15.2 mmHg
b. In perfusing patients, the color turns yellow after 6 breaths when the tube is placed in the trachea. If the patient has a pulse and the color remains purple, the tube is in the esophagus.
(1) Yellow = Yes – CO2 being exhaled (2) Tan = Think about it: ↓CO2 exhalation; poor perfusion? (3) Purple = Problem – No CO2 being exhaled
c. False negative reading (failure to detect CO2 despite tracheal ETT placement):
(1) Blood flow & CO2 delivery to lungs low during CPR
(2) Pulmonary embolus: Blood flow to lung reduced
(3) If EDD is contaminated with gastric contents or acidic drugs (ET epi) – may display a constant color rather than breath-breath color changes
(4) CO2 elimination & detection reduced after IV epi, severe airway obstruction (status asthmaticus) and pulm edema
d. Note: Inflate TT balloon before using this type of detector device.
3. Capnography monitors that use sidestream or mainstream monitoring enable caregivers to determine the waveform and/or the CO2 level and are the most accurate confirmatory measures.
The four phase capnography waveform includes the respiratory baseline, expiratory upstroke, expiratory plateau, and inspiratory down stroke. If a high EtCO2 reading is obtained or this waveform is present, no matter how small, tracheal placement is confirmed. Limitation: If the patient had just ingested a large quantity of carbonated beverage, you can get a false positive reading in an esophageal tube placement. Waveform will fall off after a few breaths.
4. Observed (subjective) methods of confirming ETT placement
a. First auscultate over the stomach for sounds of air entry. If absent, listen over both midaxillary lines and then both anterior chest walls for bilateral breath sounds. If breath sounds are clear on the right and absent on the left the tube is likely in the right mainstem. Withdraw the tube slightly and listen again for bilateral breath sounds. If difficult to hear breath sounds, consider inflating cuff to minimize air leak and listen again. Breath sounds are documented as present in 15% of esophageal placement.
b. Presence of an exhaled tidal volume c. Bag compliance; highly variable and inconsistent d. Tube condensation with exhalation (Also seen in 83% of cases where
the TT is in the esophagus) (Wayne et al, 1999) e. Absence of gastric contents within the tube - also unreliable if the
patient has aspirated f. Absence of phonation or vocal sounds once the tube is passed
NWC EMSS Paramedic Training Program page 15 Airway Access Part 1 F11
5. Evidence of esophageal intubation
a. Cannot aspirate EDD b. No change in EtCO2 color; no capnography waveform c. Gurgling heard over epigastrium d. Absence of chest rise e. Absence of breath sounds f. Phonation (patient can speak or make sounds)
6. Pulse ox readings with persistent high saturation values longer than 5 minutes in the presence of a perfusing rhythm suggest tracheal placement of the ETT. A gradual drop may indicate esophageal placement. Limited value in shock, hypovolemia, cardiac arrest, and other conditions with peripheral vasoconstriction.
P. If successful, inflate cuff with 4-10 mL of air if not done already (until no air leak is heard – called minimal leak technique) and remove the syringe. Do not overinflate the cuff. It can reduce vascular perfusion to the tracheal wall under the cuff and cause tracheal damage or stenosis. Palpate tension in pilot balloon to assess the ongoing integrity of cuff.
Q. Note ETT depth (cm at front teeth/gums)
1. Tube depth should correlate to 3 X the internal diameter of the tube. (Example size 7 ETT should be inserted to 21 cm; size 9 to 27 cm – Ave. 21-24)
2. Complications of too high or too low tube placement
a. Extubation b. Suboptimal oxygenation/ventilation c. Barotrauma d. Atelectasis e. Direct bronchial injury f. Unilateral pulmonary edema
R. Secure ETT in place with commercial tube holder. Apply lateral head immobilization to prevent flexion/extension of the neck. Neck flexion has been associated with 3-5 cm of ETT movement, which can dislodge the tube.
S. Insert oropharyngeal airway as bite block
T. Continue to ventilate at 10 breaths/minute
1. Hyperventilation hazards
a. Tend to ventilate too fast b. One study of EMT-Ps showed 37 breaths/ min; after training reduced to
22/min c. Need engineering controls (watch, clock, timing device
2. Complications of hyperventilation
a. Ventilations increase pressure in chest
b. High intrathoracic pressures reduce venous return to heart (preload) – thus reduce CO
c. Hyperventilation can cause hypotension, alkalosis, electrolyte imbalances (hypocalcemia), cerebral and coronary vasoconstriction
d. Hyperventilation reduces time to exhale causing air trapping that can result in pneumothorax and tension pneumothorax
U. If tracheal intubation is not confirmed: Withdraw tube and ventilate with a BVM X 30 seconds before trying again. Repeated unsuccessful attempts at intubation should be avoided as they may lead to laryngeal edema or hemorrhage that can critically compromise airway maintenance.

NWC EMSS Paramedic Training Program page 16 Airway Access Part 1 F11
1. Plan A if placement is unsuccessful on 1st attempt – Alternate/adapt – change one or more of the following
a. Person intubating the patient b. Pt head position c. Laryngoscope blade type or length d. Tube curvature e. Method f. External laryngeal manipulation (do it!) g. BURP h. Possible need for pharmacologic agents
2. If unsuccessful at second attempt:
a. Can you ventilate with a BVM? (Consider two NPAs + OPA with gentle ventilation) Inadequate ventilation is defined as the inability to obtain chest excursion sufficient to maintain a clinically acceptable capnogram waveform despite optimal head and neck positioning, use of an OPA, and optimal application of a facemask.
b. Rescue airway for NWC EMSS – King LTSD c. Other EMS Systems: Combitube; LMA; perilaryngeal airways
V. Reassess tube placement after every patient move
Confirmation of tube placement is a dynamic process requiring ongoing patient assessments. Reconfirmation should be performed any time the patient is moved or if tube dislodgment is suspected.
1. From point of contact to stretcher 2. From location to back of ambulance 3. Enroute 4. After removal from ambulance and movement to ED stretcher
W. Common errors
1. Using upper teeth as a fulcrum w/ dental trauma 2. Trauma to teeth or soft tissues 3. Improper tongue control 4. Right mainstem intubation 5. Hypoxia from prolonged attempts, dysrhythmia 6. Undetected esophageal intubation 7. Pneumothorax or tension pneumothorax
X. Risks of intubation
1. Excessive cervical spine motion 2. Damage to tracheal tube 3. Vomiting and aspiration 4. Inadvertent extubation 5. Laryngeal trauma or disruption 6. Forcing debris in mouth into trachea 7. Esophageal perforation 8. Blood clots in ETT
Y. Troubleshooting
1. Increased resistance to ventilation: See if tube is dislodged, obstructed, kinked; or pneumothorax is present
2. If ease of compliance is increased (easier to bag) check for leak in the circuit (cuff, connections)

Northwest Community EMS System
Paramedic Training Program
AIRWAY ACCESS PART II Connie J. Mattera, M.S., R.N., EMT-P
Reading assignment: Aehlert Vol. 1; SOP: DAI NWC EMSS Lab Manual: In-line intubation; Drug Assisted Intubation; Transilluminated Intubation; Digital Intubation; Inverse Intubation; Nasotracheal intubation; King LTS-D rescue airway
OBJECTIVES Upon completion of the class and study questions, each participant will independently do the following with a degree of accuracy that meets or exceeds the standards established for their scope of practice: 1. identify the indications, and contraindications, and potential complications for alternative routes of
intubation including in-line, drug-assisted, transilluminated, digital, inverse, and nasotracheal. 2. sequence the equipment preparation and critical steps for performing alternative routes of
intubation. 3. state the classification, actions, indications, contraindications, dose, route, side effects, and
special precautions for premedications, sedatives, analgesics and reversal agents used during drug-assisted intubation.
4. explain the parameters to monitor when performing intubation or inserting a rescue airway. 5. compare and contrast the indications, contraindications, advantages and disadvantages for
alternatives to intubation (rescue airways) including the King LTS-D airway, CombiTube and laryngeal mask airway (LMA).
6. sequence the equipment preparation and critical steps for inserting a King LTS-D airway
CJM: F06; CBF07; CJM F08; F10

NWC EMSS Paramedic Training Program AIRWAY ACCESS PART II
Connie J. Mattera, M.S., R.N., EMT-P
* Procedures performed in the NWC EMSS I. *In-line intubation
A. Indications: Whenever the c-spines should be moved as little as possible during an intubation attempt.
B. Special requirement: Second person to provide spine motion restriction and adjunctive maneuvers during tube insertion.
1. The second person places his or her hands over the patient's ears with the 5th, ring, and middle fingers placed under the occipital skull, the index finger anterior to the ears, and the thumbs on each side of the face over the maxillary sinuses.
2. Maintain spine stabilization without distraction with the head in a neutral position throughout the procedure.
3. 3rd person should perform Sellick’s maneuver gently along with external laryngeal pressure and lip retraction.
C. Sitting position method: Intubator positions themselves at the patient's head with their legs straddling the patient's shoulder and arms. The head is secured between the rescuer's thighs. After inserting the laryngoscope blade per usual procedure, the intubator should tilt their upper torso back until the cords are seen. Insert tube per usual and customary procedure.
D. Prone position method: The intubator lies prone at the patient's head and the second rescuer maintains in-line stabilization as above.
II. *Drug-assisted intubation (DAI) – Also see SOP
A. Purpose: DAI is a series of specific steps designed to achieve optimal and rapid tracheal intubation of a responsive patient who needs an immediate airway through the use of pharmacologic aids and techniques that facilitate intubation.
B. Indications – Patient with protective airway reflexes intact experiencing one or more of the following:
1. Actual or potential airway impairment or aspiration risk (trauma, stroke, AMS)
2. Actual or impending ventilatory failure (severe HF, pulmonary edema, COPD, asthma, anaphylaxis with RR <10 or >40; shallow/labored effort; or SpO2 ≤ 92%).
3. Increased work of breathing (retractions, use of accessory muscles) resulting in severe fatigue
4. Patients resistant to OTI due to clenched teeth, vocal cord spasm, vomiting, retained airway reflexes with coughing or gagging, combativeness or seizure activity
5. Anticipated deterioration of patient
6. Consider need for intubation if GCS 8 or less due to a head injury or an acute condition w/ retained airway reflexes unlikely to be self-limited (Examples of self-limited conditions: seizures, hypoglycemia, postictal states, certain drug overdoses)
7. Inability to ventilate/oxygenate adequately after insertion of OPA/NPA and/or using a BVM
8. Need for increased inspiratory or positive end expiratory pressure to maintain gas exchange
9. Need for sedation to control ventilations

NWC EMSS Paramedic Training Program Page 2 Airway Access: Part II F09
C. Consider the following
1. Is there a failure to maintain an adequate airway? 2. Does the airway need to be protected from aspiration? 3. Is there a failure to oxygenate or ventilate? 4. Is there an intervention that requires intubation? 5. Is there some other circumstance that requires intubation? 6. Is the patient expected to deteriorate?
7. If yes, consider DAI. If no, consider less invasive interventions to correct the problem, i.e., repositioning, non-invasive airways, oxygen, or naloxone
D. Contraindications
1. Coma with absent airway reflexes – you don’t need to sedate someone who is already unconscious!
2. Known hypersensitivity/allergy to the medications
3. Use in pregnancy could be potentially harmful to the fetus, consider the risk/benefit
E. Physiologic responses to intubation
1. Airway manipulation during tracheal intubation in an older child or adult usually produces a profound catecholamine response evidenced by a significant increase in pulse and mean arterial pressure (MAP) through stimulation of alpha and beta receptors. Many patients have an intact gag reflex that not only exacerbates the above responses but also causes increased gastric pressures. As a result of the hemodynamic changes, ICP rises. Hypercarbia (high carbon dioxide levels) triggers chemoreceptors to cause cerebral vasodilation resulting in an increased blood supply to the brain (hyperemia). Occasionally, airway manipulation will trigger a vagal response producing bradycardia and hypotension. This is particularly true in young children less than 20 kg. Either extreme is unwanted (Cummings, 1996).
2. Aspiration: Physiologic responses plus laxity of the lower esophageal sphincter
F. Advantages of medicated intubation - Depending on the drugs used, DAI may...
1. eliminate coughing and the muscular resistance of a gag response associated with intubation, reduce oxygen consumption, and ↓ ICP by quieting muscle activity.
2. provide a cerebroprotective effect by blunting the catecholamine response to intubation.
3. prevent bradycardia from Vagal stimulation. 4. decrease the likelihood of aspiration. 5. prevent a rise or fall in BP. 6. relieve bronchospasm. 7. reduce trauma to the mouth, teeth, pharynx, and vocal cords from laryngoscopy. 8. relieve laryngospasm (Cummings, 1996).
G. Assumptions prior to DAI
1. The patient has a full stomach. 2. The intubator is skilled in airway management. 3. Equipment for alternative airway access is immediately available. 4. Full resuscitative equipment is ready; one good IV line is in place.
H. Process steps
1. IMC: SpO2 on room air; evaluate before and after airway intervention; confirm patent IV; ECG monitor
2. Prepare the patient
a. Explain what you are doing and why; provide full disclosure of risk; answer questions the patient may have. Gain verbal consent from a patient with decisional capacity.
NWC EMSS Paramedic Training Program Page 3 Airway Access: Part II F09
b. Position patient appropriately based on age, size, and nature of illness/ injury per oral intubation procedure. Usually sniffing position (earlobe horizontal with sternum).
c. Assess patient for the possibility of a difficult intubation per OTI procedure.
3. Preoxygenate with O2 for 3 minutes per OTI procedure
a. If pt is spontaneously breathing, use a NRM at 12-15 L/min.
b. Avoid using a BVM if possible. Inappropriate technique results in gastric distention and increased risk of aspiration. If the patient needs assistance, ventilate cautiously with NP/OP airway placed and a BVM at 10-12 BPM while performing Sellick's maneuver to decrease aspiration risk.
4. Prepare equipment
a. While the patient is being oxygenated, assemble and prepare all intubation and resuscitation equipment per OTI procedure.
b. Medications: Premedications, sedatives, analgesics; and reversal agents (naloxone).
c. Adjunctive/monitoring equipment: Full BSI, suction, cardiac monitor, SpO2; EtCO2 or capnography, NIBP (helpful). Rescue airway and cricothyrotomy equipment should be readily available if intubation is unsuccessful and patient deteriorates.
5. Premedicate prior to intubation as indicated: Premedication involves the use of drugs to counteract or minimize possible complications associated with injury or the airway management activity.
a. Lidocaine 1.5 mg/kg IVP: Head trauma, stroke & HTN crisis: Lidocaine is a sodium channel blocker that acts like a surge protector for the brain.. It is also a local anesthetic that is given to suppress cough and gag; prevent rises in ICP during the intubation process; and prevent increases in intraocular pressures in those with penetrating injuries to the eye.
b. Atropine 0.02 mg/kg to a max of 1 mg rapid IVP: Peds patients < 8: to prevent bradycardia due to the vagal response associated with laryngeal stimulation by the laryngoscope blade and asystole associated with procedural hypoxia (Walls, 1998).
c. Gag reflex present - topical anesthetic: Benzocaine (Hurricaine/ Americaine/Cetacaine) 1-2 second spray, 30 seconds apart X 2 to posterior pharynx prior to intubation in a responsive patient. Anticipate residual gag reflex, as the pressure receptors responsible for the gag reflex are located submucosally at the tongue's root and cannot be easily blocked with a topical agent. Use caution, as overuse may result in methemoglobinemia that can decrease oxygen binding on hemoglobin.
d. If patient in pain: Fentanyl 0.5 mcg/kg up to 100 mcg slow IVP. Narcotic analgesic, is nearly immediately effective. Have naloxone standing by.
6. Sedate (Put ‘em down): All patients must receive adequate sedation prior to laryngoscopy. Sedative-hypnotics produce a dose-dependent spectrum of CNS depression that progresses from anxiolysis (anti-anxiety) to sedation, hypnosis, anesthesia and coma.
a. With appropriate technique, sedation should produce the following:
(1) Altered mental status (2) Protective reflexes blunted but intact (3) Stable vital signs (4) Amnesia
NWC EMSS Paramedic Training Program Page 4 Airway Access: Part II F09
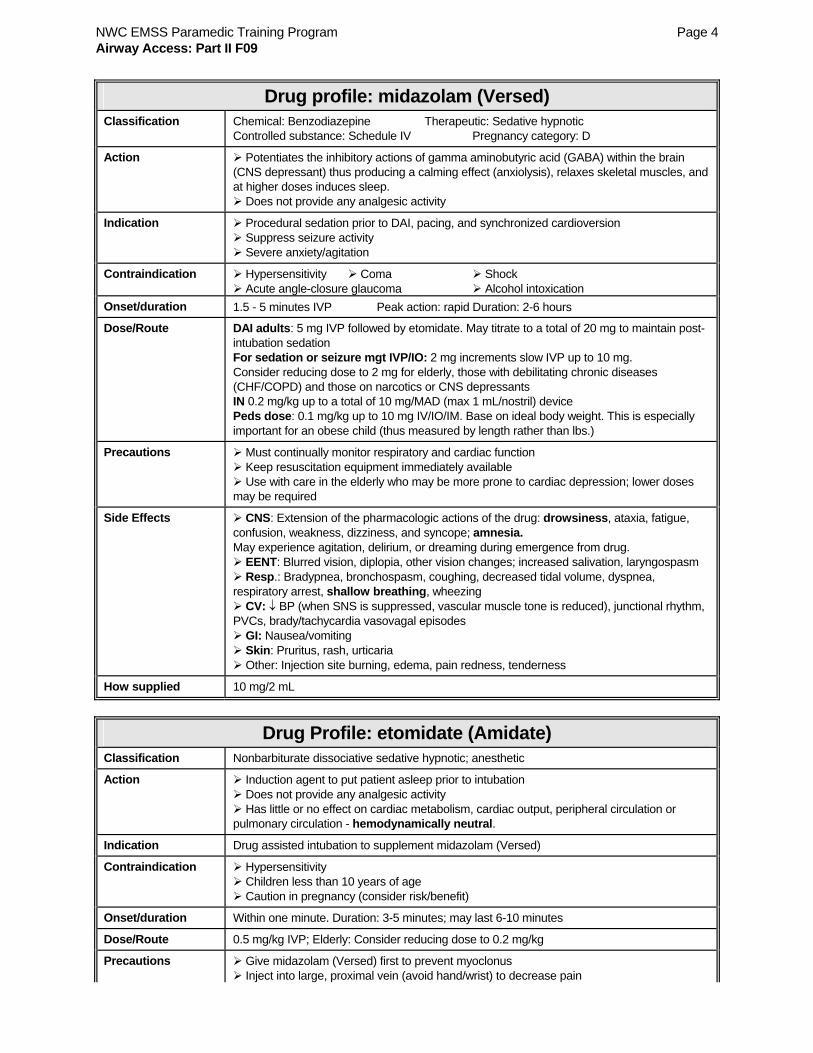
Drug profile: midazolam (Versed) Classification Chemical: Benzodiazepine Therapeutic: Sedative hypnotic
Controlled substance: Schedule IV Pregnancy category: D
Action Potentiates the inhibitory actions of gamma aminobutyric acid (GABA) within the brain (CNS depressant) thus producing a calming effect (anxiolysis), relaxes skeletal muscles, and at higher doses induces sleep.
Does not provide any analgesic activity
Indication Procedural sedation prior to DAI, pacing, and synchronized cardioversion Suppress seizure activity Severe anxiety/agitation
Contraindication Hypersensitivity Coma Shock Acute angle-closure glaucoma Alcohol intoxication
Onset/duration 1.5 - 5 minutes IVP Peak action: rapid Duration: 2-6 hours
Dose/Route DAI adults: 5 mg IVP followed by etomidate. May titrate to a total of 20 mg to maintain post-intubation sedation For sedation or seizure mgt IVP/IO: 2 mg increments slow IVP up to 10 mg. Consider reducing dose to 2 mg for elderly, those with debilitating chronic diseases (CHF/COPD) and those on narcotics or CNS depressants IN 0.2 mg/kg up to a total of 10 mg/MAD (max 1 mL/nostril) device Peds dose: 0.1 mg/kg up to 10 mg IV/IO/IM. Base on ideal body weight. This is especially important for an obese child (thus measured by length rather than lbs.)
Precautions Must continually monitor respiratory and cardiac function Keep resuscitation equipment immediately available Use with care in the elderly who may be more prone to cardiac depression; lower doses
may be required
Side Effects CNS: Extension of the pharmacologic actions of the drug: drowsiness, ataxia, fatigue, confusion, weakness, dizziness, and syncope; amnesia. May experience agitation, delirium, or dreaming during emergence from drug.
EENT: Blurred vision, diplopia, other vision changes; increased salivation, laryngospasm Resp.: Bradypnea, bronchospasm, coughing, decreased tidal volume, dyspnea,
respiratory arrest, shallow breathing, wheezing CV: ↓ BP (when SNS is suppressed, vascular muscle tone is reduced), junctional rhythm,
PVCs, brady/tachycardia vasovagal episodes GI: Nausea/vomiting Skin: Pruritus, rash, urticaria Other: Injection site burning, edema, pain redness, tenderness
How supplied 10 mg/2 mL
Drug Profile: etomidate (Amidate) Classification Nonbarbiturate dissociative sedative hypnotic; anesthetic
Action Induction agent to put patient asleep prior to intubation Does not provide any analgesic activity Has little or no effect on cardiac metabolism, cardiac output, peripheral circulation or
pulmonary circulation - hemodynamically neutral.
Indication Drug assisted intubation to supplement midazolam (Versed)
Contraindication Hypersensitivity Children less than 10 years of age Caution in pregnancy (consider risk/benefit)
Onset/duration Within one minute. Duration: 3-5 minutes; may last 6-10 minutes
Dose/Route 0.5 mg/kg IVP; Elderly: Consider reducing dose to 0.2 mg/kg
Precautions Give midazolam (Versed) first to prevent myoclonus Inject into large, proximal vein (avoid hand/wrist) to decrease pain

NWC EMSS Paramedic Training Program Page 5 Airway Access: Part II F09
Drug Profile: etomidate (Amidate) Once sedation is achieved, may need Versed to keep pt. sedated Use with care in the elderly who may be more prone to cardiac depression; lower doses
may be required
Side Effects Transient involuntary skeletal movements (32%) classified as myoclonus (74%), averting movements (7%), tonic movements (10%), and eye movements (9%). Most are bilateral.
Transient pain at injection site (20%) Resp.: Hyper/hypoventilation; apnea of short duration (5-90 sec. w/ spontaneous
recovery); laryngospasm, hiccup and snoring suggestive of partial upper airway obstruction. Slight elevation in arterial CO2 level
Circulatory: Hyper/hypotension (especially with too rapid or repeated injections), tachycardia/bradycardia, arrhythmias.
GI: Nausea/vomiting (Up to 40%)
How supplied 2 mg/mL in 10 mL (20 mg) and 20 mL (40 mg) ampules and vials
b. Problems associated with the use of sedatives/relaxants:
(1) Serious, occasionally fatal, side effects such as respiratory depression, apnea, and cardiac arrest have been reported.
(2) Hypoxic encephalopathy and death have been reported when respiratory depression was not promptly recognized or managed effectively.
(3) Many of the serious adverse effects have occurred in pts receiving high doses, rapid IV injections, and geriatric or debilitated patients.
(4) COPD pts are often sensitive to respiratory depressant effects.
(5) Failure to complete a neurologic examination before sedating, may lead to a delay in diagnosis
(6) Failure to provide sufficient sedation or analgesia to responsive patients
(7) Aspiration, dysrhythmias, and failed intubation requiring a surgical airway (Rosen, 1992).
c. Patient monitoring during administration of sedatives
(1) Hemodynamic baselines and responses q. 5 minutes during and after the procedure (BP, P, ECG, RR and depth; level of consciousness; skin color; SpO2)
(2) Assist ventilations if respiratory rate or depth diminish or BP falls
(3) Observe for allergic reactions during and just after drug injection
d. Allow at least 1-2 min for clinical response before intubating
Scoring system for intubating conditions Score Jaw relaxation
(laryngoscopy) Vocal cords Response to intubation
0 Poor (impossible) Closed Severe coughing or bucking
1 Minimal (difficult) Closing Mild coughing
2 Moderate (fair) Moving Slight diaphragmatic movement
3 Good (easy) Open None
8-9 = excellent; 6-7 = good; 3-5 = fair; 0-2 = poor

NWC EMSS Paramedic Training Program Page 6 Airway Access: Part II F09
7. Pass the tube Orally intubate using the standard approach with in-line stabilization added for those patients with suspected or confirmed C-spine injury. An assistant should provide enhanced visualization by gently applying lip retraction and applying external laryngeal manipulation and Sellick's maneuver.
8. Confirm tube placement: Confirm placement using direct visualization, EDD, EtCO2, SpO2, and 5 point auscultation while ventilating per usual orotracheal intubation procedure.
a. If another intubation attempt is necessary, consider the need for additional medication.
b. If tube placement is confirmed, inflate cuff, note depth of insertion, and secure tube, apply lateral head immobilization as per OTI procedure.
c. After successful intubation ventilate at 8-10/BPM (every 6-8 sec)
d. If the patient begins to rouse and is biting the tube, administer Versed (midazolam) 2 mg IVP increments to a total dose of 20 mg prn if BP > 90 to maintain post-intubation sedation
9. Document the following:
a. Name, dose, route, and time of all medications administered b. Patient's responses to medications c. Monitoring data: BP, HR, cardiac rhythm, SpO2, EtCO2 or capnography, q.
5 minutes III. *Nasotracheal intubation
A. Indications: A nasal approach is no longer advocated (ATLS, 1997 & 2007) but may be acceptable in a spontaneously ventilating patient with the following:
1. Suspected c-spine fracture 2. Oral trauma 3. Clenched teeth preventing opening of the patient's mouth 4. Fractured jaw 5. Significant angioedema (facial and airway swelling) 6. Arthritis, preventing placement in the sniffing position 7. Obesity 8. Need for intubation in a conscious patient. DAI is usually the preferred approach
in the NWC EMSS when intubating awake patients or those with protective airway reflexes intact unless patient cannot lay flat.
B. Contraindications
1. Apneic patients 2. Midface and basilar skull fx 3. Significantly deviated nasal septum or other nasal obstruction
C. Disadvantages
1. It is more difficult and time-consuming to perform than orotracheal intubation. 2. It is potentially more traumatic for patients. Passage of the tube may lacerate the
pharyngeal mucosa or larynx during insertion. 3. The tube may kink or clog more easily than an orally placed ETT. 4. It poses a greater risk of infection because the ETT introduces nasal bacteria into
the trachea and sinus ostia. 5. Improper placement is more likely when performing blind NTI as the tube's
passage through the glottic opening cannot be visualized 6. Blind NTI requires the patient to be breathing
D. Prepare equipment: Prepare as for OTI. No stylet and no laryngoscope is generally necessary.

NWC EMSS Paramedic Training Program Page 7 Airway Access: Part II F09
E. Critical steps
1. If time permits, spray the naso and oropharynx with benzocaine spray
2. Insert a NPA to confirm a passable nostril and to compress the mucosa thus allowing a less traumatic placement while performing preoxygenation.
3. Choose a cuffed ETT one size smaller than optimal for oral intubation. Prepare and check all equipment as usual except for the stylet. Do not place a stylet into the tube for this procedure. Prepare tube by forming it into a circle.
4. Preoxygenate the patient for 3 minutes with 15L O2.
5. Lubricate the ETT with water soluble gel as it is withdrawn from the packaging.
6. Stand or sit to the side of the patient's head.
7. Insert the tube through the largest and clearest nare (usually right side) and advance and along the nasal floor to the laryngopharynx. Place the thumb and index finger of the non-dominant hand over the larynx.
8. Gently advance the tube along the natural curvature of the airway. As you feel the tube drop into the posterior pharynx, listen and feel closely at its proximal end for the patient's ventilatory sounds until maximal airflow is heard through the tube. These sounds are loudest when the ETT is proximal to the epiglottis.
9. When the ETT's tip reaches the posterior pharyngeal wall, direct it toward the glottic opening. It may catch in the pyriform sinus. If you feel resistance and the skin on either side of the thyroid cartilage "tents" out, slightly withdraw the tube and rotate it to midline.
10. Immediately after exhalation, advance the tube gently but quickly into the trachea as the patient inhales. Continue passing the ETT until the cuff is just past the vocal cords. At this point the patient may cough or strain. Gagging or vocal sounds are signs of esophageal placement, while slight bulging and anterior displacement of the larynx usually indicate correct tracheal placement.
11. Observe for condensation inside the ETT and feel air coming from the proximal end of the tube.
12. Confirm tube placement per OTI procedure; inflate balloon cuff, and secure per usual procedure.
13. After successful intubation ventilate at 8-10/BPM (every 6-8 sec)
F. Complications
1. Epistaxis 2. Injury to nasal septum or turbinates 3. Retropharyngeal laceration 4. Vocal cord injury 5. Avulsion of an arytenoid cartilage 6. Esophageal intubation 7. Sinus infections 8. Intracranial placement if patient has a basilar skull fracture
IV. *Digital intubation
A. While direct laryngoscopy is the primary method used for orotracheal intubation, even the most skilled practitioner sometimes experiences failed attempts in patients who are difficult or challenging to intubate. An alternative to direct laryngoscopy is digital intubation where the tube is guided into the trachea with the intubator's fingers.
B. Tactile orotracheal/digital intubation offers a safe and efficient method of intubation when the conventional methods of intubation are impractical or impossible (Hardwick & Bluhm, 1984).

NWC EMSS Paramedic Training Program Page 8 Airway Access: Part II F09
C. First performed in 1880 by William MacEwan, it fell into disfavor after Chevalier Jackson introduced laryngoscopy in 1907 and further declined after Magill further improved the laryngoscope in 1920.
D. Indications
Comatose and non-responsive patient with one or more of the following:
1. Copious oral secretions obscure visualization of the cords with a laryngoscope 2. Obese or with short neck 3. Entrapped with airway obstruction and/or apnea 4. Equipment failure has occurred
E. Contraindications
1. Any responsive patient 2. The teeth are clenched
F. Prepare equipment: Will need usual and customary intubation equipment except for a laryngoscope handle and blade. Prepare as usual.
G. Critical steps
1. Position self at the patient's left side: maintain spine motion restriction if indicated
2. Confirm unresponsiveness
3. Preoxygenate for 3 minutes with 15 L O2/BVM
4. Insert OPA between molars to hold patient's mouth open and to protect rescuer's fingers
5. Insert gloved left middle and index fingers into the patient's mouth. Depress the tongue and "walk" the fingers along the back of the tongue until the epiglottis is palpated in the midline. May use gauze to hold and extend the tongue more effectively.
6. Palpate the arytenoid cartilage posterior to the glottis. When a flap of cartilage covered by mucous membrane is felt anteriorly with the middle finger, the epiglottis has been located.
7. Maintain contact, press the epiglottis forward, and advance the ETT with the right hand over the tongue (but under the left hand) and into the trachea, using the index finger of the left hand to guide the tube anteriorly into the trachea.
8. Once the ETT cuff passes the fingertips, inflate the cuff, remove the stylet, confirm placement, ventilate at 8-10/BPM, and secure tube in the usual manner.
H. Limitations: Size of rescuer's fingers, size of the patient's mouth, and difficulty identifying the epiglottis.
V. *Anterior / "Inverse" / "Kentucky" Intubation
A. Indication: Inability to position self to intubate normally (e.g., entrapped patient)
B. Special considerations
1. Intubator is positioned facing the patient 2. Hold laryngoscope in the right hand (not left) 3. Insert blade and pull forward 4. Bending over, the intubator can visualize the vocal cords and pass TT with left
hand
C. Confirm placement per usual and customary measures D. Secure and apply head immobilization per usual and customary measures

NWC EMSS Paramedic Training Program Page 9 Airway Access: Part II F09
VI. *Rescue Airways – King LTS-D
A. Description: The King LTS-D is a sterile, single use curved double lumen tube with separate pathways for ventilation and access to the stomach. The ventilation lumen ends between two inflatable cuffs with a variety of openings intended to align with the laryngeal inlet. The gastric access lumen allows passage of up to an 18 Fr standard gastric tube from its external proximal opening to the distal tip of the airway that is intended to be positioned in the upper esophagus. In the absence of a gastric tube, the gastric access lumen allows channeling of gases and fluids from the esophagus and stomach to a point outside of the patient’s mouth. The King LTS-D has two cuffs that are inflated with a singe valve/pilot balloon. The distal cuff is designed to seal the esophagus and the proximal cuff is intended to seal the oropharynx.
B. Indications for use in the NWC EMSS: Airway management in unconscious patients over 4 ft in height (122 cm) without a gag reflex for controlled ventilation when tracheal intubation is unsuccessful or the vocal cords cannot be visualized on the first intubation attempt. This device is considered a rescue airway.
C. Contraindications
1. Responsive patients with an intact gag reflex. 2. Patients with known esophageal disease. 3. Patients who have ingested caustic substances.
D. Advantages
1. Single inflation port (vs. CombiTube that has two) 2. Single valve to inflate both esophageal and pharyngeal cuffs (CombiTube has 2
valves) 3. Primary and secondary ventilatory openings 4. Distal opening of gastric lumen allows gastric access, via side lumen, to allow
passage of an 18 Fr gastric tube to decompress the stomach. 5. Disposable 6. Latex-free (CombiTube contains latex) 7. More economical than CombiTube or LMA 8. In ED, an ET tube exchanger (like a bougie) can be inserted through the King
airway to assist in exchanging the King for a tracheal tube. 9. Pediatric sizes are available in Europe and awaiting FDA approval in US 10. Easy sizing based on patient’s height 11. Easier to teach, shorter learning curve, preferred by students in published studies 12. Easy insertion (studies show 5 to 15 seconds
E. Precautions
1. The King LTS-D does not protect the airway from the effects of regurgitation and aspiration.
2. High airway pressures may divert gas to the stomach or atmosphere. 3. Intubation of the trachea cannot be ruled out as a potential complication of the
insertion of the King TLS-D. After placement, the EMT-P MUST perform standard checks for breath sounds and use an appropriate CO2 monitor as required by standard protocol.
4. The King LTS-D is not intended for reuse. 5. During transition to spontaneous ventilations, airway manipulations or other
methods may be needed to maintain airway patency.
F. Insertion procedure critical steps
1. Put on gloves, goggles, and face mask
2. Choose the correct size King LTS-D airway based on patient height

NWC EMSS Paramedic Training Program Page 10 Airway Access: Part II F09
Size Patient height Connector color Inflation volume 3 4-5 feet Yellow 45-60 mL 4 5-6 feet Red 60-80 mL 5 Greater than 6 feet Purple 70-90 mL
3. Using the syringe that comes with the kit, test cuff inflation system by injecting the maximum recommended volume of air (see above table) into cuffs while maintaining sterility of the device. Remove all air from both cuffs prior to insertion.
4. Apply a water-based lubricant to the beveled distal tip and posterior aspect of the tube, taking care to avoid introduction of lubricant in or near the ventilatory openings onto the anterior surface of the tube.
5. Preoxygenate for 30 sec. if possible; suction as necessary
6. Ensure absence of gag reflex.
7. Place head in sniffing position unless contraindicated.
8. Hold King LTS-D at the connector with dominant hand. With non-dominant hand. Hold mouth open and lift chin (“hold like a bass”).
9. Introduce tip into the mouth with the King LTS-D rotated laterally 45 to 90˚ so that the blue line is touching the corner of the mouth. Advance the airway behind the tongue. Never force the tube into position.
10. As tube passes under the tongue, rotate tube back to midline (blue line faces chin).
11. Without exerting excessive force, advance King LTS-D into the hypopharynx/ upper esophagus until proximal opening of gastric access lumen is aligned with the teeth/gums.
Note: After releasing tube, if “bounce back” occurs, tube is probably placed incorrectly into a pyriform fossa. Pull back slightly and readvance.
12. Inflate the cuff with the minimum volume necessary to seal the airway at peak ventilatory pressure (just seal volume) as above. To assure full inflation, maintain pressure on plunger until syringe is removed from the valve.
13. Attach BVM and begin ventilating the patient with 15 LO2 at 10-12 BPM (if pulse present) while simultaneously withdrawing the airway until ventilation is easy and free flowing (adequate tidal volume with minimal airway pressure).
14. Confirm proper position by auscultating bilateral breath sounds over midaxillary lines & anterior chest, aspirate an EDD, and verify CO2.
15. If air leak, adjust cuff inflation to just seal volume (60 cm H2O). Avoid overinflation of cuff.
16. Secure airway to patient using tape (commercial tube holders may be too small to secure airway. DO NOT cover proximal opening of gastric access lumen.
G. Removal
1. If protective reflexes return, the patient will not tolerate the King LTS-D airway.
2. Removal should always be carried out in an area where suction equipment and the ability to rapidly intubate is present.
3. Deflate both cuffs completely prior to removal.

NWC EMSS Paramedic Training Program Page 11 Airway Access: Part II F09
VII. Esophageal-tracheal CombiTube (not used in NWC EMSS)
A. CombiTube description: A double lumen airway with a ventilation port for each lumen. The longer blue port is the distal port; the shorter clear port is the proximal port that terminates in the hypopharynx (Bledsoe, 571). The tube is inserted blindly into the mouth with the patient's head in a neutral position and the operator standing at the side of the patient's head. The airway has a large balloon (100 cc) that occludes the posterior pharynx and a smaller balloon (15 cc) that occludes either the trachea or esophagus (whichever is intubated). If the trachea is intubated, direct ventilation occurs through the blue port. If the esophagus is intubated, ventilation occurs by applying positive pressure to the clear port. Air will exit through ports on the side of the tube.
B. Advantages
1. It provides alternate airway control when conventional intubation techniques are unsuccessful or unavailable
2. No extensive skills or additional equipment is required for insertion 3. Insertion is rapid and easily placed 4. Insertion does not require visualization of the larynx or special equipment 5. The pharyngeal balloon anchors the airway behind the hard palate 6. The patient may be ventilated regardless of tube placement location 7. It significantly diminishes gastric distention and regurgitation 8. It can be used on trauma patients, since the neck remains in neutral position during
insertion and use 9. It is suitable for patients with difficult anatomical situations 10. If the tube is placed in the esophagus, gastric contents can be suctioned for
decompression through the distal port
C. Disadvantages/Contraindications
1. Maintaining an adequate mask seal is difficult 2. Suctioning tracheal secretions is impossible when the airway is in the esophagus 3. Placing a TT is very difficult with the ETC in place 4. It cannot be used in conscious patients or in those with a gag reflex 5. The cuffs can cause esophageal, tracheal, and hypopharyngeal ischemia 6. It does not isolate and completely protect the airway 7. It cannot be used in patients with esophageal disease or caustic ingestions 8. It cannot be used in pediatric patients 9. Placement is not fool-proof: errors can be made if assessment skills are inadequate
(Bledsoe, 573).
D. Critical steps
1. IMC per usual and customary procedures 2. Place the patient supine and kneel at their head 3. Prepare equipment as usual 4. Insert the ETC gently at midline through the oropharynx, using a tongue-jaw-lift
maneuver, and advance it past the hypopharynx to the depth indicated by the markings on the tube. The black rings on the tube should be between the patient's teeth.
5. Inflate the pharyngeal cuff with 100 mL and the distal cuff with 10-15 mLof air 6. Ventilate through the longer blue proximal port with a BVM at 15 L O2 while
auscultating over the chest and stomach. If you hear bilateral breath sounds over the chest and none over the stomach, secure the tube and continue ventilating.
7. If you hear gastric sounds over the chest instead of breath sounds, change ports and ventilate through the clear connector
8. Confirm breath sounds over the chest with no gastric sounds. Confirm placement per usual and customary procedure.
9. Secure tube, ventilate, immobilize, per usual and customary procedure

NWC EMSS Paramedic Training Program Page 12 Airway Access: Part II F09
VIII. Pharyngo-Tracheal Lumen Airway (Nice to know; not used in NWC EMSS)
A. The PtL airway is also a two tube system that is separated by a partition wall. The first tube is short with a large diameter; its proximal end is green. A large cuff encircles the tube's lower 1/3. When inflated, the cuff seals the entire oropharynx. Air introduced at the tube's proximal end will enter the hypopharynx.
B. The second tube is long, with a small diameter and is clear. It passes through and extends about 10 cm beyond the first tube. This second tube may be inserted blindly into either the trachea or the esophagus. A distal cuff seals off whichever anatomical structure the tube has entered.
C. When the second tube enters the trachea, the patient is ventilated through it
D. Each tube has a 15/22 mm connector at the proximal end for attaching a BVM
E. A semi-rigid plastic stylet in the clear tube allows redirection of the oropharyngeal cuff while the other cuff remains inflated
F. When the long, clear tube is in the esophagus, deflating the cuff in the oropharynx allows you to move the device to the left side of the patient's mouth. This may permit ET intubation while the PtL remains in place, although this is a difficult procedure.
G. Advantages: Same as CombiTube
H. Disadvantages
1. It does not isolate the completely protect the trachea from aspiration 2. The oropharyngeal balloon can migrate out of the mouth anteriorly, partially
dislodging the airway 3. Intubation around the PtL is extremely difficult 4. It cannot be used in conscious patients or those with a gag reflex. It must be
removed if the patient becomes responsive or agitated 5. It cannot be used in peds patients younger than 14 years of age or those under 5
feet tall 6. It cannot be used in patients with caustic ingestions or esophageal disease 7. It can only be passed orally
I. Critical steps
1. IMC per usual and customary procedures
2. Prepare patient, preoxygenate, prepare equipment
3. Position patient supine
4. Insert the PtL gently, using the tongue-jaw-lift maneuver. Inflate distal cuffs on both tubes simultaneously with a sustained breath into the inflation valve
5. Deliver a breath into the green oropharyngeal tube. If the patient's chest rises and you hear bilateral breath sounds, the long, clear tube is in the esophagus. Inflate the pharyngeal balloon and continue ventilations via the green tube.
6. If the chest does not rise and you auscultate no breath sounds, the long clear tube is in the trachea. Remove the stylet from the clear tube and ventilate the patient through that tube.
7. Attach a BVM to the 15 mm connector, secure, and ventilate with 100% O2
8. Continue to confirm placement
IX. Laryngeal mask airway (LMA) (not used in NWC EMSS)
A. The LMA is an airway device developed in England and approved by the FDA in 1991 for clinical use in the U.S.
B. It can be used to assist ventilations in the unconscious patient without laryngeal reflexes when tracheal intubation is unsuccessful or in spontaneously breathing patients

NWC EMSS Paramedic Training Program Page 13 Airway Access: Part II F09
C. The LMA has an inflatable distal end (cuff) that is similar to a facemask attached to a tube that is placed into the hypopharynx and then inflated. It can provide controlled positive pressure ventilation by forming a low pressure seal around the laryngeal inlet providing a good end-to-end connection between the artificial and the anatomic airway without penetration of the larynx or esophagus (Ferson et al, 1997; Iven et al, 1995).
D. It is designed to be used at peak airway pressures of less than 20 cm H2O and tidal volumes of 8-10 mL/kg.
E. The LMA is made of medical-grade silicone (safe for those with latex allergies), is reusable, autoclavable, and cost effective (Ferson et al, 1997).
F. Preparation: Choose correct size (6 choices: size 3 recommended for children and small adults weighing more than 30 kg. Size 4 used in normal size men and most women. Largest is size 5 used in large adults)
G. Insertion technique
1. Flatten the fully deflated cuff against the hard palate
2. Guide the LMA into the hypopharynx with the index finger of your dominant hand until slight resistance is met as the tip of the mask encounters the upper esophageal sphincter
3. Inflate the cuff to achieve an effective seal around the glottis
H. Advantages over OTI
1. Avoids laryngoscopy 2. Requires less skill than orotracheal intubation 3. Less trauma to local tissues and vocal cords 4. Minimal effect on cardiovascular response 5. Can be placed successfully in patients with difficult airway access
I. Limitations of LMA
1. It does not isolate the trachea nor prevent aspiration 2. Gastric insufflation is a possible side effect with an ineffective mask seal 3. It cannot be used in a patient with a gag reflex 4. It is impractical in a patient with copious secretions
J. Troubleshooting: air leak
1. Suspect inappropriately small tube. Check inflation pressures by feeling the pilot balloon. Pressure should not exceed 60 cm H2O.
2. Posterior folding of LMA cuff within the pharynx
3. Incomplete advancement of the tip of the LMA beyond the arytenoids, most often a complication of incomplete cuff deflation before LMA insertion
4. Reassess position of the head and neck and fixation technique (taped to chin)
CJM: F10

NWC EMSS Paramedic Training Program Page 14 Airway Access: Part II F09
Study questions 1. What are two indications for drug-assisted intubation?
2. What is the purpose of giving medications prior to DAI?
3. List two physiologic responses to intubation in a conscious patient
4. List four classifications of medications that must be prepared prior to DAI
5. What premedication drug may be given prior to DAI in a patient with head trauma to protect their
brain cells from the sympathetic NS response to intubation (surge protector)?
6. How does this drug work? What is its action?
7. If a patient weighs 200 pounds, how much of this drug must you give in mg? 8. If the drug comes packaged 100 mg/10 mL, how many mL must you push? 9. What premedication drug should be given to children < 8 or 20 kg prior to DAI to prevent
laryngoscope or hypoxia-induced bradycardia?
10. What is the action of this drug, why does it work in these patients? 11. What is the dose to be given? 12. If the patient weighs 40 pounds, how many mg should they receive?

NWC EMSS Paramedic Training Program Page 15 Airway Access: Part II F09
13. If the drug comes packaged 1 mg/10 mL, how many mL must you push? 14. What premedication is given topically to blunt the gag reflex?
15. What is the dose, route, and timing of this drug? 16. What is the major complication a patient could experience if you used too much of this drug?
17. List the first sedating drug that is given prior to DAI
18. What is the classification of this drug?
19. Is it considered a controlled substance in the NWC EMSS? 20. What is the action of this drug? How does it work?
21. How much should be given in the initial dose? 22. By what routes can this drug be given? 23. If the drug comes packaged 10 mg/2 mL, how many mL must you push initially? 24. How much additional drug may be given and in what time frames after intubation? 25. List two side effects of this drug
26. Does this drug eradicate the gag reflex? 27. What complications could the patient experience if you gave too much?
28. What is the second sedating drug to be given? 29. What is the classification of this drug?

NWC EMSS Paramedic Training Program Page 16 Airway Access: Part II F09
30. What is the action of this drug? How does it work?
31. How is the dose calculated for this drug? 32. If the drug comes packaged 40 mg/20 mL, how many mL should you give to a 120 pound patient? 33. What is the onset of action for this drug? 34. How long should you wait after giving this drug before attempting intubation?
35. What are the two most common side effects of this drug?
36. What is given to attempt to avoid the main side effect? 37. What can be done to help avoid the second most common side effect?
38. How do you know that an adequate amount of sedative has been given prior to intubation?
39. List three components of the on-going monitoring that must occur during and after DAI.
40. What approach to intubation requires a spontaneously ventilating patient and may be attempted if a
patient’s teeth are clenched?
41. Which intubation technique requires two rescuers to hold the head in axial alignment during the
procedure?
42. Which is an indication for digital intubation?
A. Awake and responsive patient has a suspected cervical spinal injury. B. Entrapment prevents laryngoscopy of an unconscious patient with apnea. C. The patient’s teeth are clenched and an EETT cannot be passed through the nose. D. Patient has insufficient responses to IV sedatives and needs an airway.

NWC EMSS Paramedic Training Program Page 17 Airway Access: Part II F09
43. Which is the preferred method to intubate a trauma patient with a GCS of 8 or less who still has a gag reflex and responds to a painful stimulus?
A. Digital B. Transilluminated C. Nasal D. Drug-assisted
44. Which height in feet requires a size 4 King LTS-D airway?
A. Under 4 B. 4 to 5 C. 5 to 6 D. Over 6
45. How many mL of air should be inserted into a size 5 King LTS-D airway to test the integrity of the
cuff system?
46. What portion of the King LTS-D airway should be covered with water-soluble lubricant prior to
insertion?
47. How should the patient’s airway be opened prior to introduction of the King LTS-D?
48. How should the King LTS-D be oriented when introducing it into the mouth?
49. How should the King LTS-D be oriented when it passes over the back of the tongue?
50. What has probably occurred if you experience bounce back when the King LTS-D is released?
51. How deeply should the King LTS-D be inserted originally?
52. Is the cuff system of the King LTS-D inflated prior to or after placement confirmation?
53. How many mL of air should be inserted into a size 4 King LTS-D when first placed?
54. What action should be taken immediately after insertion to ensure optimal ability to ventilate through
the King LTS-D?
55. How should correct placement of the King LTS-D be confirmed?

NWC EMSS Paramedic Training Program Page 18 Airway Access: Part II F09
56. What should be done to adjust cuff inflation after optimal positioning of the King LTS-D has been ensured?
57. How should a King LTS-D airway be secured in place?
58. After securing a King LTS-D, should the gastric port be left open to vent or covered with tape to
prevent gastric distention?
59. List two contraindications for nasotracheal intubation
60. What should be inserted to confirm a patent nasal cavity prior to NT intubation?
61. How do you know at what point to advance the ETT into the trachea when attempting to perform
blind nasotracheal intubation?
62. What should be placed into the mouth prior to attempting digital intubation?
63. What anatomical structure must be palpated when attempting digital intubation?
64. How should the ETT be guided into the trachea when performing digital intubation?
65. In what hand should a right handed paramedic hold the laryngoscope when performing anterior or
inverse intubation?
66. How should the intubator be positioned in relation to the patient prior to performing inverse
intubation?
67. Describe the technique of blade insertion, cord visualization and tube placement in inverse
intubation.

Northwest Community EMS System
Paramedic Training Program
AIRWAY ACCESS PART III Connie J. Mattera, M.S., R.N., PM
Diana Neubecker, RN, BSN, PM
Reading assignment: Aehlert Vol. 1 pp 539 - 545 NWC EMSS Lab Manual: Needle and surgical cricothyrotomy
OBJECTIVES Upon completion of the class and study questions, each participant will independently do the following with a degree of accuracy that meets or exceeds the standards established for their scope of practice: 1. describe the indications, contraindications, advantages, and disadvantages for needle and surgical
cricothyrotomy.
2. sequence the equipment preparation and critical steps for performing a cricothyrotomy. 3. explain the parameters to monitor when performing a cricothyrotomy and state the common
complications of each procedure. 4. perform a needle and surgical cricothyrotomy on a sheep trachea and manikin. CJM/DN: F11

NWC EMSS Paramedic Training Program Airway Access: Part III
Lower Airway Access Procedures
I. Percutaneous Transtracheal Ventilation (PTV) (needle cricothyrotomy)
A. When the trachea is unable to be intubated for any reason, a rescue airway is unsuccessful, and the patient cannot be ventilated effectively, a lower airway must be established (ATLS).
B. Indications - Failed OTI intubation and failed or contraindicated rescue airway placement and inability to ventilate adequately per BVM due to any of the following:
1. Inability to visualize the glottic opening due to uncontrollable hemorrhage or emesis
2. Inability to introduce the laryngoscope blade into oropharynx due to
a. clenched teeth; b. structural deformities of the oropharynx (congenital or traumatic); or c. upper airway stenosis (constriction or narrowing of the airway).
3. Inability to pass the ETT through the vocal cords due to laryngospasms or a combination of the above conditions
4. Airway obstruction (partial or complete)
a. Non-traumatic causes
(1) Swelling/edema (2) Laryngospasm (3) Mass/tumor
b. Traumatic causes
(1) Swelling/edema (2) Laryngospasm or fractured larynx (3) Damaged upper airway (e.g. crushed trachea) (4) Foreign body obstructing the airway
5. Traumatic injuries that make oral or nasal intubation difficult or dangerous
a. Maxillofacial injuries b. Cervical spine injuries
C. Advantages
1. Inexpensive and temporarily effective when properly performed 2. Requires minimal spinal manipulation 3. Is the least invasive of lower airway procedures 4. Requires minimal equipment; may be initiated quickly
D. Disadvantages
1. Invasive procedure – Risk of complications from misplacement 2. Requires constant monitoring 3. Does not protect the airway from aspiration 4. Does not allow for efficient elimination of CO2 (apneic oxygenation) 5. Only provides temporary relief (30-45 minutes) 6. Does not allow direct suctioning of secretions
E. Equipment needed
1. 10 gauge catheter-over-the-needle device (adults) may use 14 g in peds 2. 20 mL syringe 3. Chlorhexidine/IPA skin prep 4. Adhesive tape 5. 3 mL syringe with 7.0 ETT adaptor

NWC EMSS Paramedic Training Program Page 2 Airway Access Part III
6. Peds BVM; oxygen source 7. 4X4, tape 8. Full BSI 9. Stethoscope 10. SpO2, EtCO2 detector, ECG monitor 11. Sharps container
F. Prepare equipment:
1. Remove plunger from 3 mL syringe. Insert 7.0 ETT adapter into syringe barrel. 2. Prepare needle: Remove hub from end of needle. Attach 20 mL syringe to needle
(acts like an EDD)
G. Prepare the patient
1. Position patient supine with towel/blanket roll under shoulder blades to achieve neck extension unless contraindicated.
2. Attempt to preoxygenate with 15 L O2/BVM prior to attempting procedure.
3. Attempt manual maneuvers for opening the upper airway, including direct visualization with laryngoscope. Attempt to remove F/B with Magill forceps. May or may not attempt intubation and rescue airway insertion depending on patient's situation.
H. Critical steps
1. Put on full BSI
2. Identify anatomy/locate landmarks. Palpate the thyroid cartilage (Adam's apple) superiorly and the cricoid cartilage inferiorly. Locate the cricothyroid membrane between these two landmarks.
3. Prep skin with chlorhexidine/IPA prep.
4. Stabilize the thyroid cartilage in the midline using the thumb and index/middle fingers of your non-dominant hand.
5. Insert a 10 g IV catheter at a 90° angle to the skin through the midline of the cricothyroid membrane using firm downward pressure.
6. When you feel a "pop" or resistance abruptly diminishes, stop advancing the needle; aspirate air into the syringe to confirm placement in the trachea. Should aspirate easily without resistance.
7. Direct the tip of the needle toward the feet and posteriorly (caudally) at a 45° angle to facilitate insertion of the catheter and limit the risk of perforating the posterior tracheal wall or damaging the vocal cords.
8. While holding the needle stationary, advance ONLY the catheter into the trachea to its hub (similar to advancing an IV catheter when cannulating a vein). The needle acts like a guidewire preventing catheter kinking.
9. Remove the needle from the catheter and attach the 3 mL syringe and 7.0 mm adaptor directly onto the hub of the IV catheter. Attach the EtCO2 detector and ventilate with a peds BVM. Confirm exhaled CO2.
10. Set O2 at 15 L/min. Ventilate slowly w/ peds BVM at a rate of 10-12/BPM. Auscultate over the epigastrium and both midaxillary lines.
a. If upper airways are open: For each 1 second of inspiration allow 4 seconds for exhalation to prevent barotrauma.
b. If the upper airways are entirely obstructed: Allow 8 seconds of exhalation for each 1 second of inhalation.
c. May need to compress chest to assist exhalation
11. Secure catheter in place using tape.
NWC EMSS Paramedic Training Program Page 3 Airway Access Part III
12. Patients can be adequately oxygenated for 30 to 45 minutes using this technique. Because of inadequate exhalation, CO2 slowly accumulates and limits the long-term use of this approach, especially in head-injured patients (ATLS).
13. High flow oxygen (>15 L/min) may actually dislodge a foreign body in the airway, however...significant barotrauma may occur including pulmonary rupture with tension pneumothorax if exhalation is poor. Low flow rates (5 to 7 liters per minute) should be used when total glottic obstruction is present (ATLS).
I. Complications
1. High pressure during ventilation and air entrapment may produce pneumothorax. 2. Hemorrhage may occur at the insertion site. 3. The thyroid gland and esophagus can be perforated if the needle is inserted
inappropriately and/or advanced too far. 4. Subcutaneous emphysema
II. Surgical cricothyrotomy
A. First performed in the late 1800s in response to the diphtheria epidemics. The procedure lacked standardization of approach and death rate was high.
B. In 1909, Chevalier Jackson, M.D., a prominent surgeon from Temple University School of Medicine in Philadelphia, standardized the technique of tracheotomy. He noted many complications following cricothyrotomies and in 1921, condemned the procedure.
C. Due to Dr. Jackson's standing in the medical community the procedure was almost extinct until the 1960s. During Viet Nam, the successful use of cricothyrotomy by military corpsmen and physicians saved many casualties. Concurrent advances in antibiotics and the changing pattern of diseases processes caused physicians to revisit cricothyrotomy (Kleinberg, 2001).
D. Indications: Same as needle cricothyrotomy
1. Severe facial injuries that prevent oral or nasal intubation, rescue airway insertion, and ventilation with a BVM
2. Oropharyngeal obstruction due to
a. edema; b. infection (epiglottis); c. caustic ingestion; d. anaphylaxis; e. inhalation injuries; f. thermal injuries; or g. foreign bodies that cannot be dislodged by AHA methods, direct
laryngoscopy and/or Magill forceps.
3. Failed oral/nasal intubation where the patient cannot be ventilated by BVM or any other means (rescue airway) and cannot maintain sufficient oxygen saturation (sufficient is > 90%).
4. Penetrating trauma with hemorrhage in upper & mid-cervical areas of the neck.
E. Contraindications
1. Children less than 8: The anatomy of the cricoid membrane and the larynx cannot support passage of a tube of sufficient diameter to support life without destroying the membrane and possibly the cricoid cartilage. Care must be taken, especially with children, to avoid damage to the cricoid cartilage, which is the only circumferential support to the upper trachea. An increased incidence of subglottic stenosis occurs in children following cricothyrotomy. A surgical cricothyrotomy may be considered for children ages 8-12 with an OLMC physician’s orders.
2. Patients with known bleeding disorders and/or anticoagulant therapy.
NWC EMSS Paramedic Training Program Page 4 Airway Access Part III
3. Laryngeal fractures or trauma that causes distortion or obliteration of the landmarks.
F. Equipment needed
1. BSI: gloves, mask, eye protection 2. #11 scalpel 3. Hemostat clamp/spreader (forceps); tracheal hook (optional) 4. 6.0 to 7.0 cuffed ETTs 5. 10 mL syringe (to inflate cuff) 6. Suction source 7. Gauze pads (4X4) 8. Commercial tube holder 9. EDD, capnography monitor 10. Skin prep (Chlorhexidine/IPA prep) 11. Stethoscope 12. Sharp container to collect used scalpel 13. Water-soluble lubricant 14. SpO2 and ECG monitors 15. BVM; oxygen source
G. Prepare equipment
1. Choose correct size tracheal tube (one size smaller than needed for ET intubation) 2. Check tube cuff integrity by inflation and then deflation while maintaining sterility of
tube in packaging; leave syringe attached 3. Lubricate the end of the tube with water-soluble gel in process of removing from
packaging
H. Prepare the patient
1. Position patient supine with towel/blanket roll under shoulder blades to achieve neck extension unless contraindicated.
2. Assess SpO2 on room air if not done already.
3. Attempt to preoxygenate patient with 15 L O2/BVM prior to attempting procedure.
4. Attempt manual maneuvers for opening the upper airway, including direct visualization with laryngoscope. Attempt to remove F/B with Magill forceps. May or may not have attempted intubation and rescue airway insertion depending on patient's situation (degree of airway edema or trauma).
I. Critical steps
1. Put on full BSI
2. Identify anatomical landmarks. Palpate thyroid and cricoid cartilages with thumb and middle finger. Using your index finger, locate the laryngeal prominence of the thyroid cartilage (point of the Adam's apple), then slide your finger caudally (toward the feet) to the cricothyroid membrane (notch just superior to the cricoid ring).
3. Prep the skin with chlorhexidine/IPA.
4. Stabilize the trachea in the midline with your non-dominant hand.
5. With dominant hand, make a mid-line vertical incision ½-1" long just through the skin over the cricothyroid membrane. If you lose midline, the anatomy will distort and you may cut muscle and/or blood vessels on either side of the trachea. A vertical incision promotes dissection in the midline and rapid identification of structures underneath.
6. Expect brisk bleeding. This procedure is done by feel, not by sight!
7. Have a partner apply direct pressure to the wound margins with gauze pads and suction the field as necessary. Don't waste time trying to stop the bleeding.

NWC EMSS Paramedic Training Program Page 5 Airway Access Part III
8. Feel through the incision with an index finger to locate the cricothyroid membrane.
9. When found, make a second horizontal (transverse) incision through the cricothyroid membrane the width of the space. Never direct the knife towards the head. The vocal cords lie just above the membrane and can be easily damaged. If the patient breathes spontaneously, secretions, blood, and air will spray out of the opening. Suction as necessary.
10. BEFORE REMOVING THE SCALPEL BLADE, insert forcep through the incision on either side of the scalpel blade. Withdraw the scalpel. Open & close forceps to horizontally dilate opening.
11. Attempt to insert the tip of your 5th finger through the incision to confirm penetration into the trachea. Dispose of sharp appropriately. Suction blood from airway.
12. A tracheal hook may be applied to the cricoid ring to stabilize the distal segment of the trachea anteriorly.
13. Insert an ETT through the opening next to your finger (aiming at feet) until the balloon cuff is in the trachea; advance about 1".
14. Confirm tube placement with an EDD and capnography per normal intubation procedure.
15. Ventilate and observe chest rise. Auscultate to confirm tube placement per usual intubation procedure.
16. If breath sounds are present and equal bilaterally, inflate cuff with up to 10 mL of air
17. Ventilate patient with 15 L O2 at a rate of 10-12 breaths/minute if they have a pulse; 8-10 BPM if pulseless.
18. Secure tube in place using a commercial tube holder. May place 4X4 around tube to help absorb bleeding, but do not cut the gauze, as fibers may enter the trachea.
19. Reassess to affirm tube location per usual procedure.
20. Monitor insertion site for bleeding, sub-q emphysema.
J. Complications
1. Prolonged execution time: Should be completed in less than 3 minutes. Experienced personnel can perform the procedure within 30-60 seconds.
2. Hemorrhage: The cricothyroid arteries lie high in the membrane. A lower incision will avoid these structures. Incorrect skin incisions also contribute to excess bleeding.
3. Aspiration; subcutaneous emphysema
4. False placement: May cause laceration of arteries, veins, esophageal perforation, vocal cord injuries, laryngeal fractures, pneumothorax, pneumomediastinum, creation of false passages in the soft tissues of the neck and patient will suffer asphyxia. Injury to the vocal cords, nerves, and carotid and/or jugular vessels lateral to the incision, thyroid gland
5. Tube obstruction from kinking, plugging
6. Asphyxia, dysrhythmias, and cardiac arrest related to an inaccurately performed procedure and a procedure that takes too long.
7. Late complications: Dysphonia (abnormality in the speaking voice), infection, sub-q and mediastinal emphysema, and subglottic stenosis (narrowing or stricture of a duct or canal).
K. Document indication for procedure, size of ETT placed, ongoing assessment findings, any complications, your interventions, and the patient's response.
CJM: 10/06; 11/08; 11/10; 11/11

NWC EMSS Paramedic Training Program Page 6 Airway Access Part III
References
Caroline, N. (2007). Emergency Care in the Streets. (pp. 11.97 – 11.109). Boston: Jones and Bartlett Publishing. Vitberg, D.A. & Reed, D.B. (2001). Crackdown on crics. JEMS, 26(3),58-65;78-9;80-3. Kleinberg, P. (2001). Guide to prehospital surgical cricothyrotomy. JEMS, 26(3), 75-76

NWC EMSS Paramedic Training Program Page 7 Airway Access Part III
Study Questions 1. An unconscious adult presents following an MVC with massive head and facial injuries. The patient
has only agonal respirations (3 BPM) and is bradycardic (P 48). The patient responds weakly to a pain stimulus. Oral intubation attempts have been unsuccessful and ventilation with a King airway is unsuccessful. What should a paramedic do next?
A. Nasally intubate the patient B. Perform a cricothyrotomy C. Digitally intubate the patient D. Perform an emergency tracheostomy
2. Describe the landmarks for performing a cricothyrotomy. 3. List the equipment needed for performing percutaneous transtracheal ventilation (needle cric). 4. In what position should a patient be placed prior to the procedure? 5. How should the skin be prepared for a cricothyrotomy? 6. At what angle should the needle be inserted into the neck? What clinical finding signals penetration into the trachea and the need to stop advancing the
needle? 7. How should needle placement in the trachea be confirmed? 8. Explain the steps of catheter cannulation into the trachea 9. What two options can be placed on the catheter to allow oxygen administration?

NWC EMSS Paramedic Training Program Page 8 Airway Access Part III
10. What size BVM works best for ventilating a patient with a needle cric? 11. At what rate should a paramedic ventilate an adult with a needle cricothyrotomy? What is the inspiration/expiration ratio if the upper airway is at least partially open? 12. How should the catheter be secured? 13. List three complications of a needle cric:
14. List two indications for a surgical cric:
15. What equipment is needed for a surgical cricothyrotomy? 16. What size tracheal tube is generally needed for a surgical cric? 17. How and where is the first incision made? How should the surgical field be cleared of blood? How should the internal landmarks be identified before making the second incision? Where should the second incision be made? 18. What should be used to enlarge the surgical opening in order to pass the tube? 19. How can you stabilize the trachea when passing the tube?

NWC EMSS Paramedic Training Program Page 9 Airway Access Part III
20. How far should the tracheal tube be inserted? 21. How should you confirm tube placement into the trachea?
22. How should the tube be secured into place? 23. What are three major complications of a surgical cric?