6 lecture 1 entering charge transactions and patient payments
Post on 19-Dec-2015
227 views
TRANSCRIPT
6Lecture 1
Entering Charge Transactions and Patient
Payments
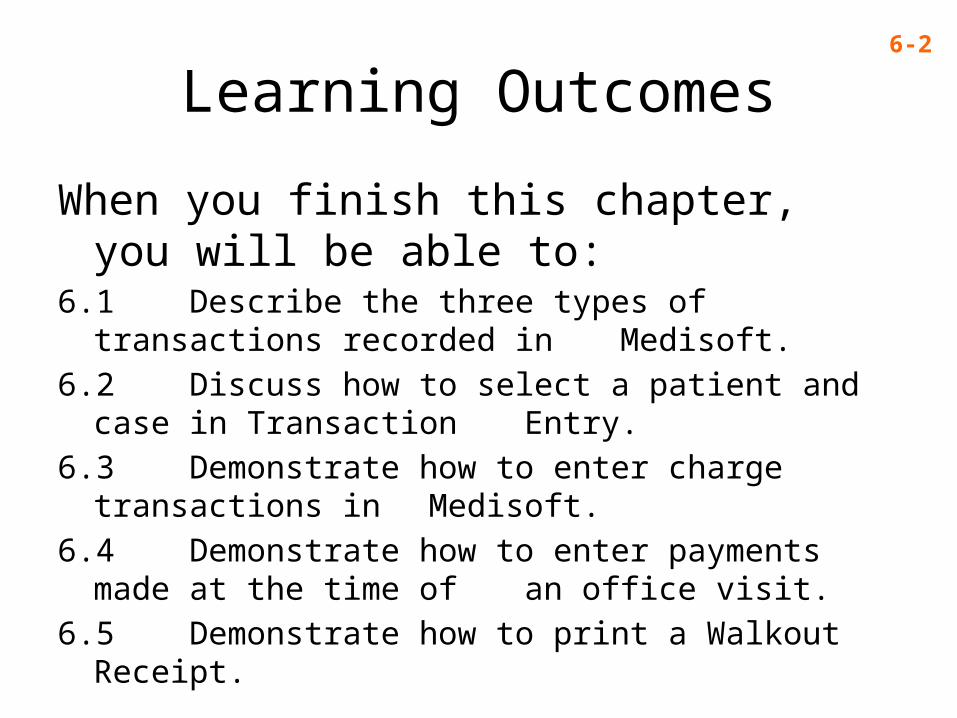
Learning Outcomes
When you finish this chapter, you will be able to:6.1 Describe the three types of transactions recorded in
Medisoft.6.2 Discuss how to select a patient and case in Transaction
Entry. 6.3 Demonstrate how to enter charge transactions in
Medisoft.6.4 Demonstrate how to enter payments made at the time
of an office visit.6.5 Demonstrate how to print a Walkout Receipt.
6-2

Learning Outcomes (Continued)
When you finish this chapter, you will be able to:6.6 Demonstrate how to process a refund for a patient.6.7 Demonstrate how to post a Nonsufficient Funds (NSF)
check.
6-3
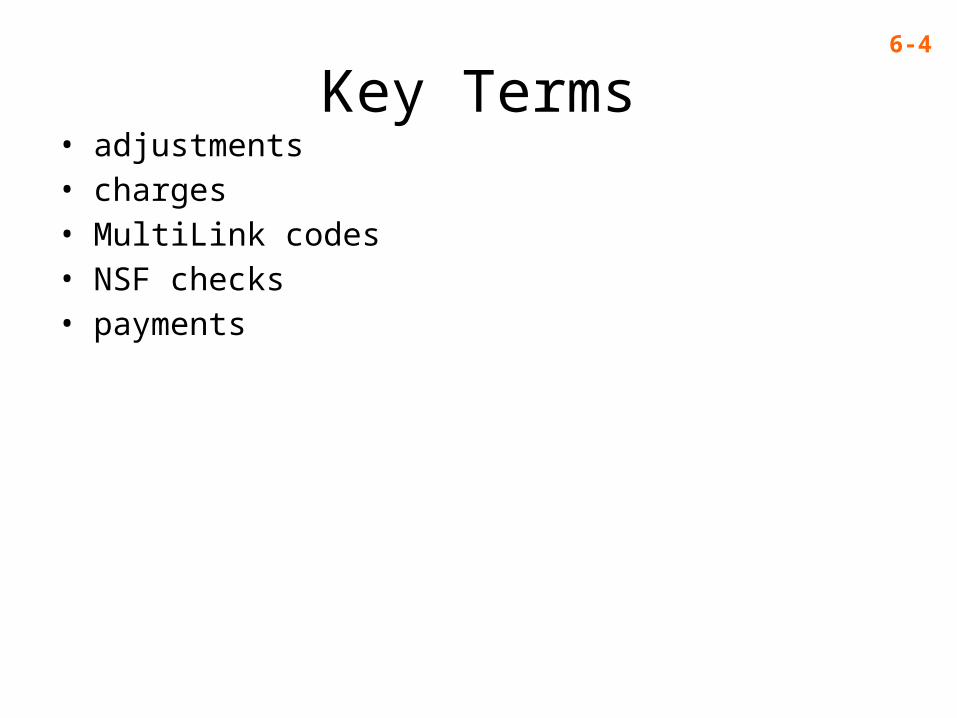
Key Terms• adjustments• charges• MultiLink codes• NSF checks• payments
6-4
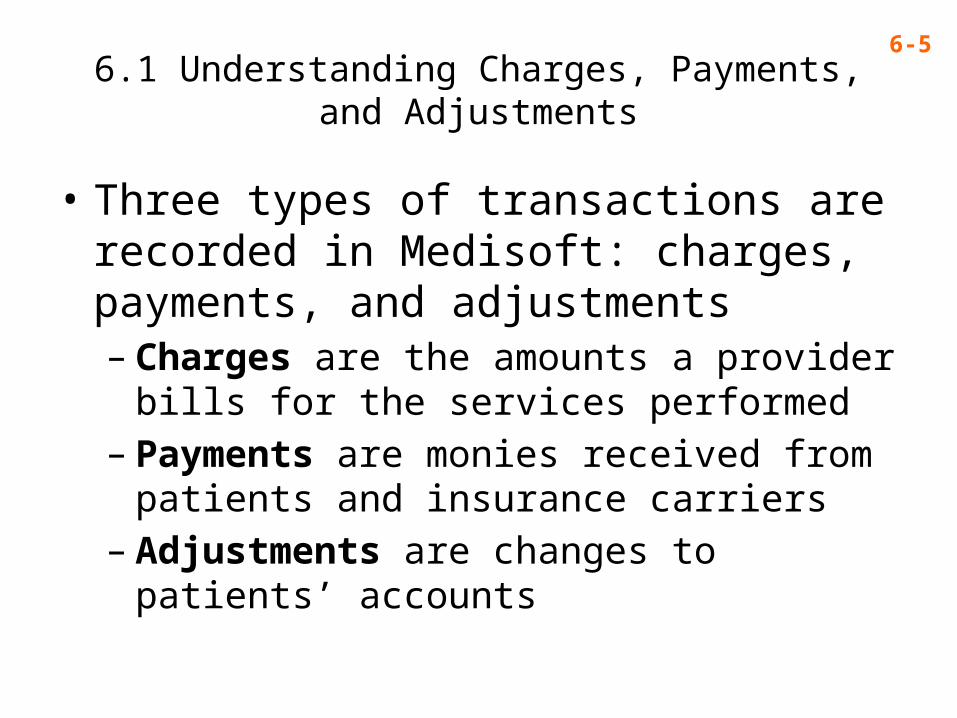
6.1 Understanding Charges, Payments,and Adjustments
6-5
• Three types of transactions are recorded in Medisoft: charges, payments, and adjustments– Charges are the amounts a provider bills for the
services performed– Payments are monies received from patients and
insurance carriers– Adjustments are changes to patients’ accounts
6.1 Understanding Charges, Payments,and Adjustments (Continued)
6-6
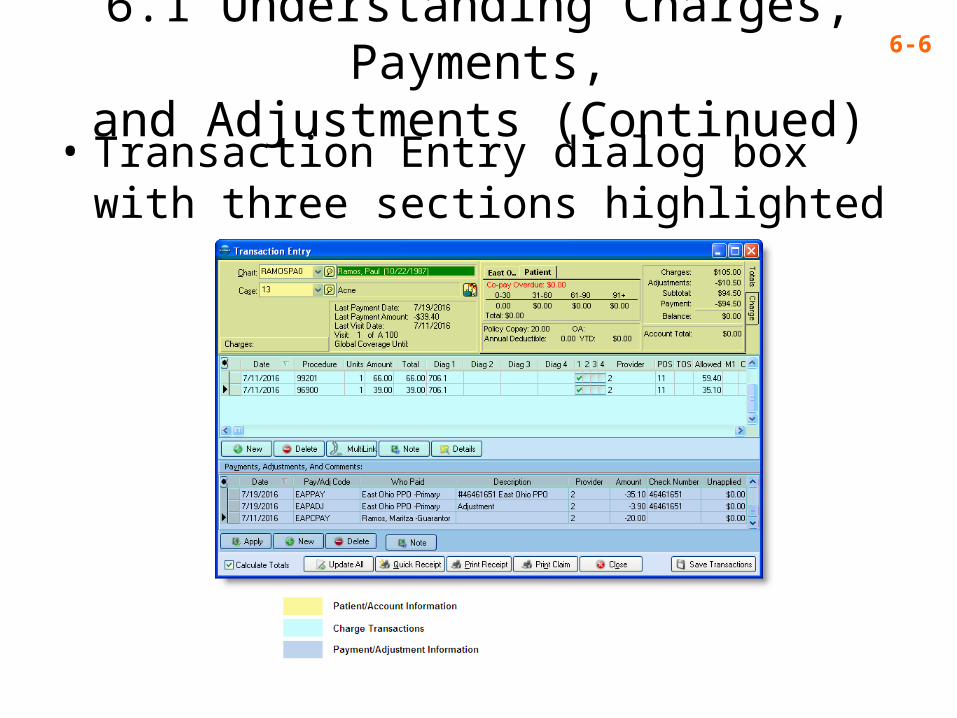
• Transaction Entry dialog box with three sections highlighted
6.2 Selecting a Patient and Case6-7
• Selecting a patient chart– Key first several letters of patient’s last name– If correct choice is not highlighted, use arrow keys
to move up and down through charts– When the desired patient is highlighted, press Tab
to select and close the drop-down list
6.2 Selecting a Patient and Case (Continued)
6-8
• Selecting the case that relates to the current charges or payments– Must locate the patient’s chart first– Select the desired choice from the case numbers
and descriptions for the patient– Only one case can be opened at a time
6.3 Entering Charge Transactions6-9
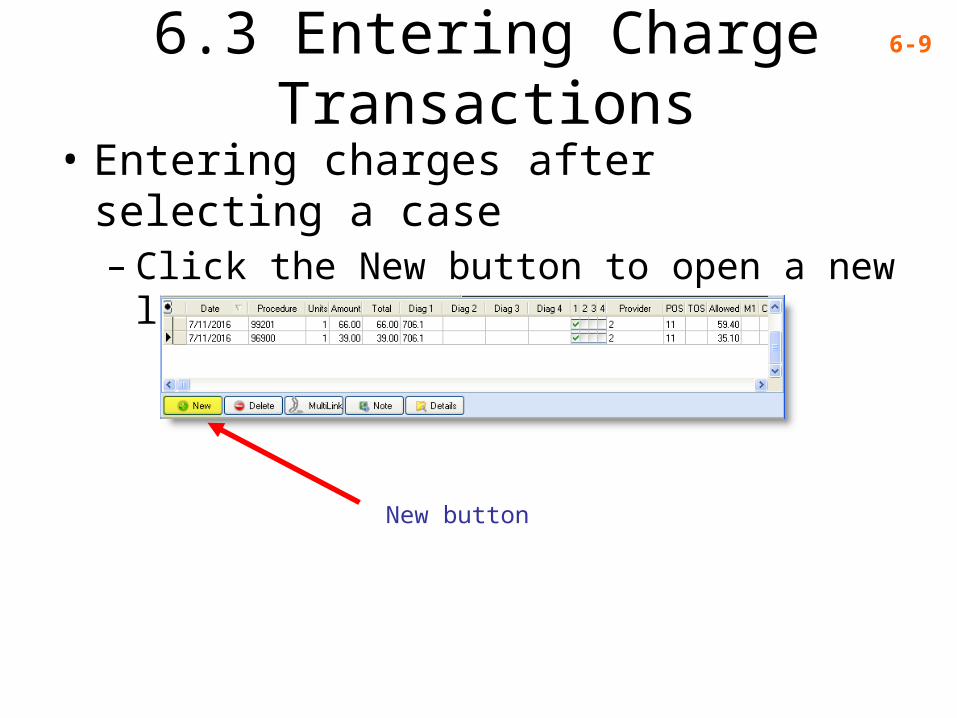
• Entering charges after selecting a case– Click the New button to open a new line for
entering charges
New button
6.3 Entering Charge Transactions (Continued)
6-10
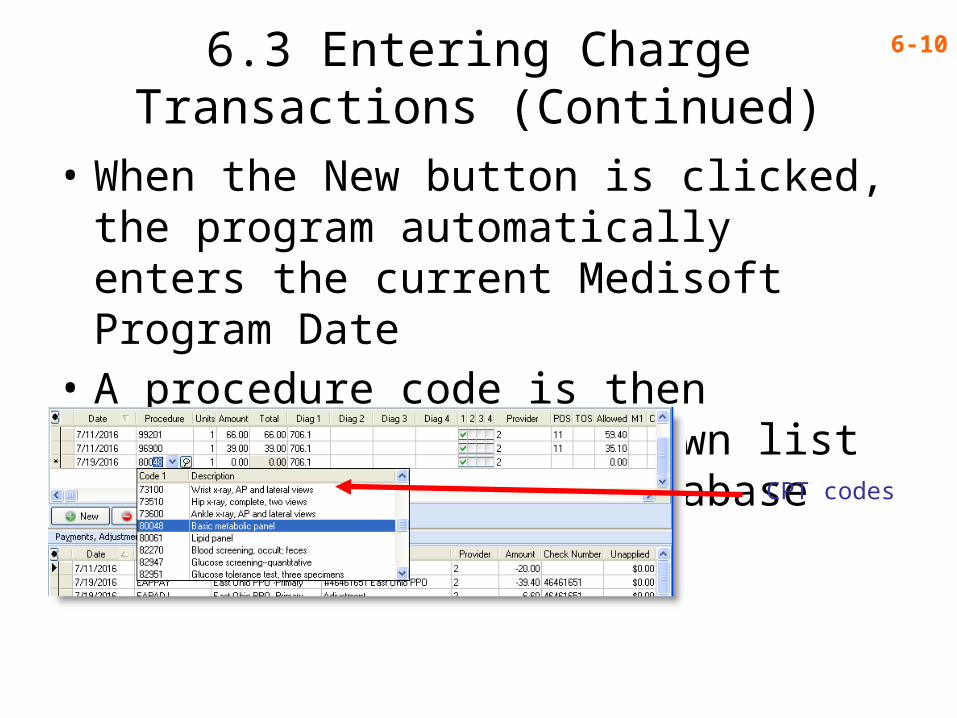
• When the New button is clicked, the program automatically enters the current Medisoft Program Date
• A procedure code is then selected from a drop-down list of CPT codes in the database
CPT codes
6.3 Entering Charge Transactions (Continued)
6-11
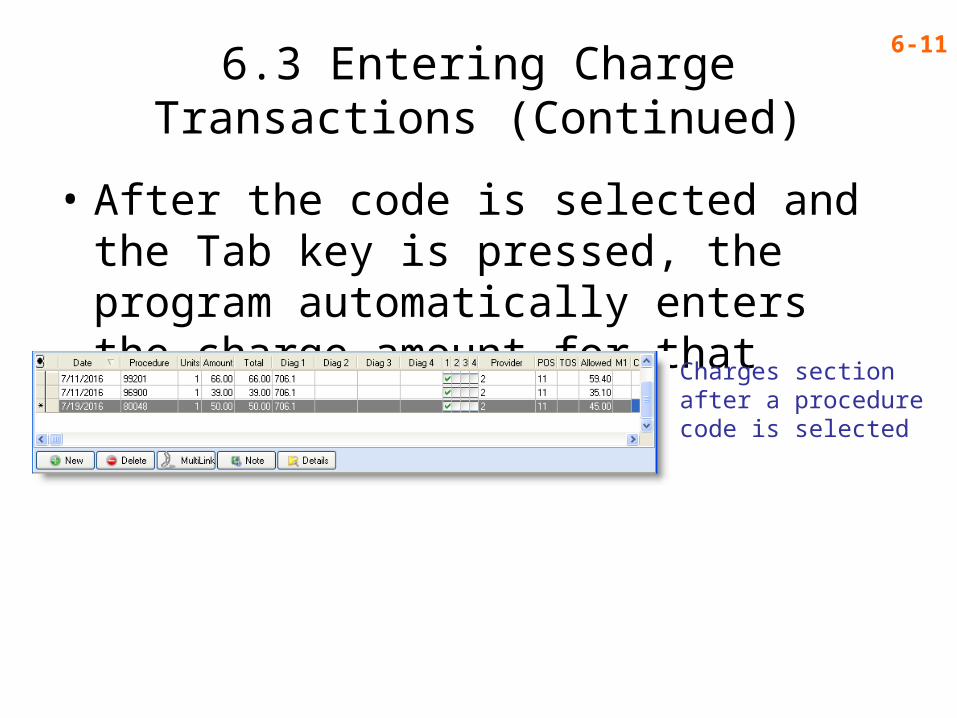
• After the code is selected and the Tab key is pressed, the program automatically enters the charge amount for that procedure
Charges sectionafter a procedurecode is selected
6.3 Entering Charge Transactions (Continued)
6-12
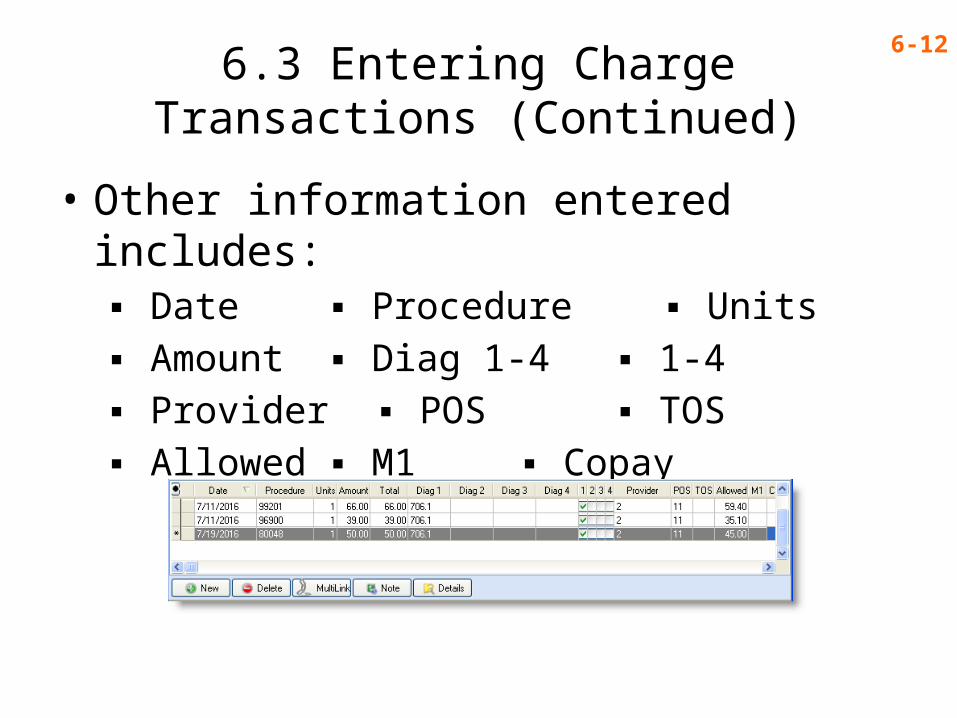
• Other information entered includes:▪ Date ▪ Procedure ▪ Units▪ Amount ▪ Diag 1-4 ▪ 1-4▪ Provider ▪ POS ▪ TOS▪ Allowed ▪ M1 ▪ Copay
6.3 Entering Charge Transactions (Continued)
6-13
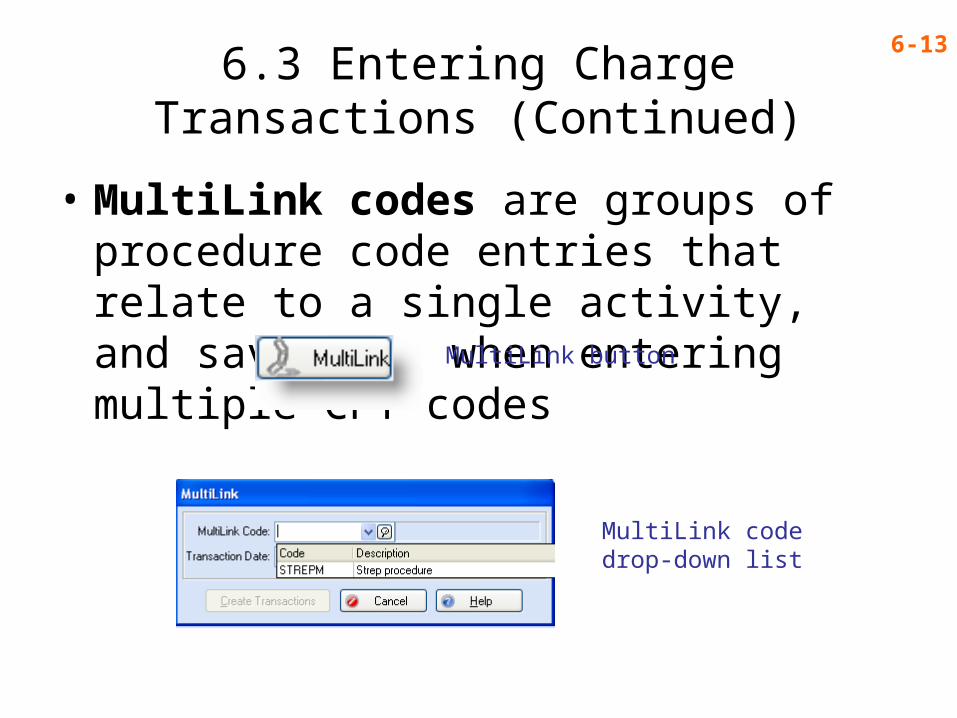
• MultiLink codes are groups of procedure code entries that relate to a single activity, and save time when entering multiple CPT codes
MultiLink button
MultiLink codedrop-down list
6.3 Entering Charge Transactions (Continued)
6-14
• Transactions are color-coded, making it easy to determine the status of a charge or payment– No payment (gray)– Partially paid charge (aqua)– Overpaid (yellow)
• Transactions are saved by clicking the Save Transactions button, or the Update All button
6.3 Entering Charge Transactions (Continued)
6-15
• Transactions already entered can be edited by clicking in the field that contains the error and entering new data– Data must be saved after making edits
• Exercise 6-1 page 185• Exercise 6-2 page 188
6.4 Entering Payments Made at theTime of an Office Visit
6-16
• Payments in Medisoft are entered in two ways– Patient payments made at the office are entered
in the Transaction Entry dialog box– Payments received electronically or by mail, such
as insurance payments and mailed patient payments, are entered in the Deposit List dialog box
6.4 Entering Payments Made at theTime of an Office Visit (Continued)
6-17
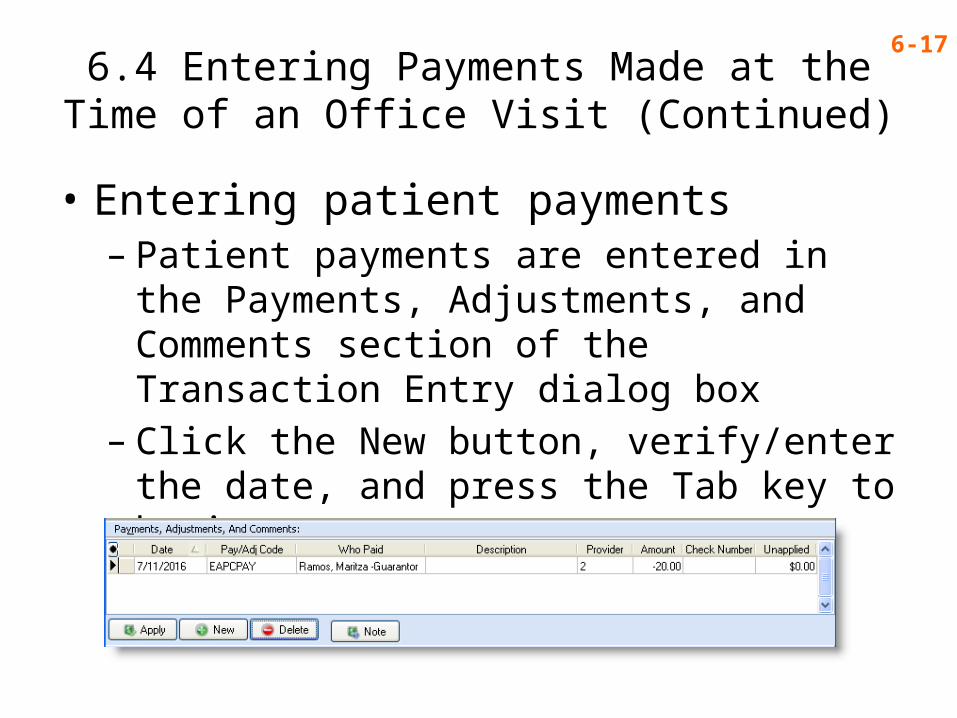
• Entering patient payments– Patient payments are entered in the Payments,
Adjustments, and Comments section of the Transaction Entry dialog box
– Click the New button, verify/enter the date, and press the Tab key to begin
6.4 Entering Payments Made at theTime of an Office Visit (Continued)
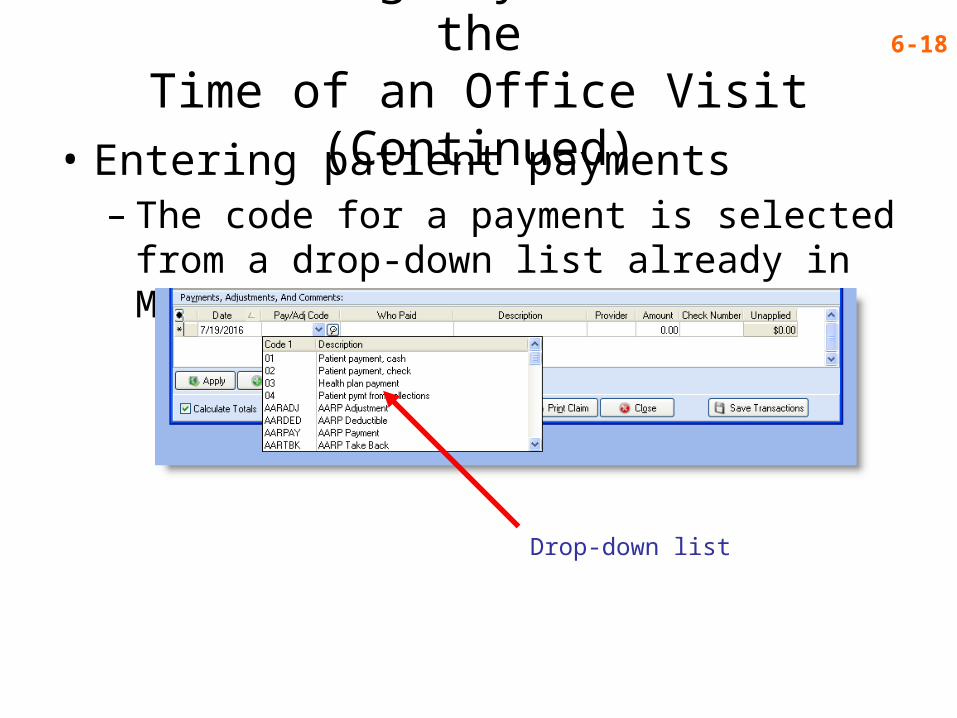
6-18
• Entering patient payments– The code for a payment is selected from a drop-
down list already in Medisoft
Drop-down list
6.4 Entering Payments Made at theTime of an Office Visit (Continued)
6-19
• Entering patient payments– The Who Paid field displays a drop-down list of
guarantors and carriers that are assigned in the patient case folder• Select the person who is paying for the charges
6.4 Entering Payments Made at theTime of an Office Visit (Continued)
6-20
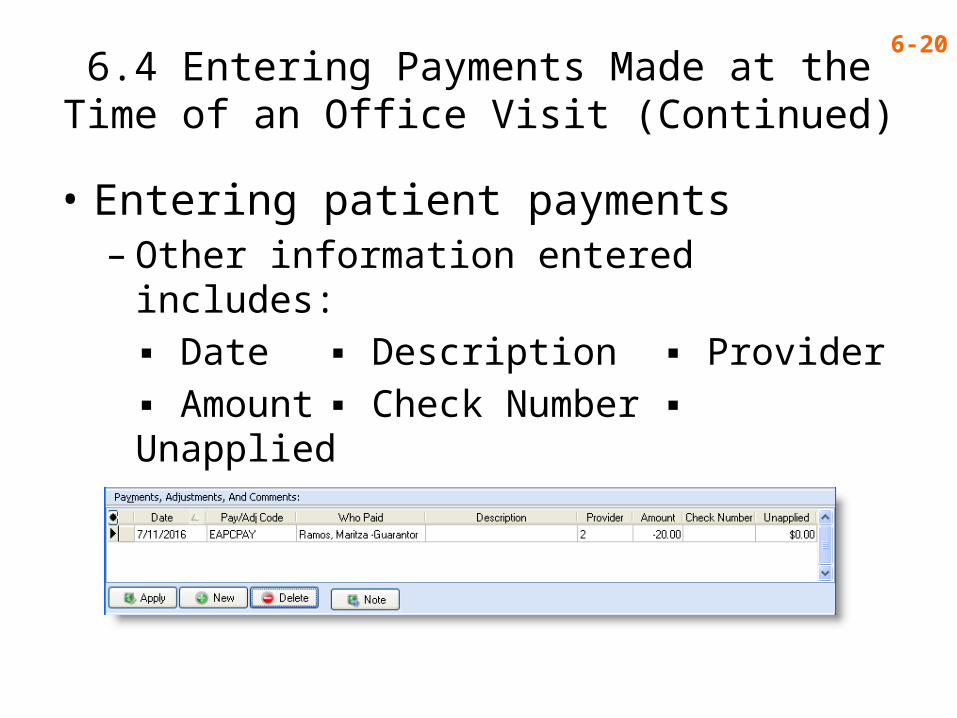
• Entering patient payments– Other information entered includes:
▪ Date ▪ Description ▪ Provider▪ Amount ▪ Check Number ▪ Unapplied
6.4 Entering Payments Made at theTime of an Office Visit (Continued)
6-21
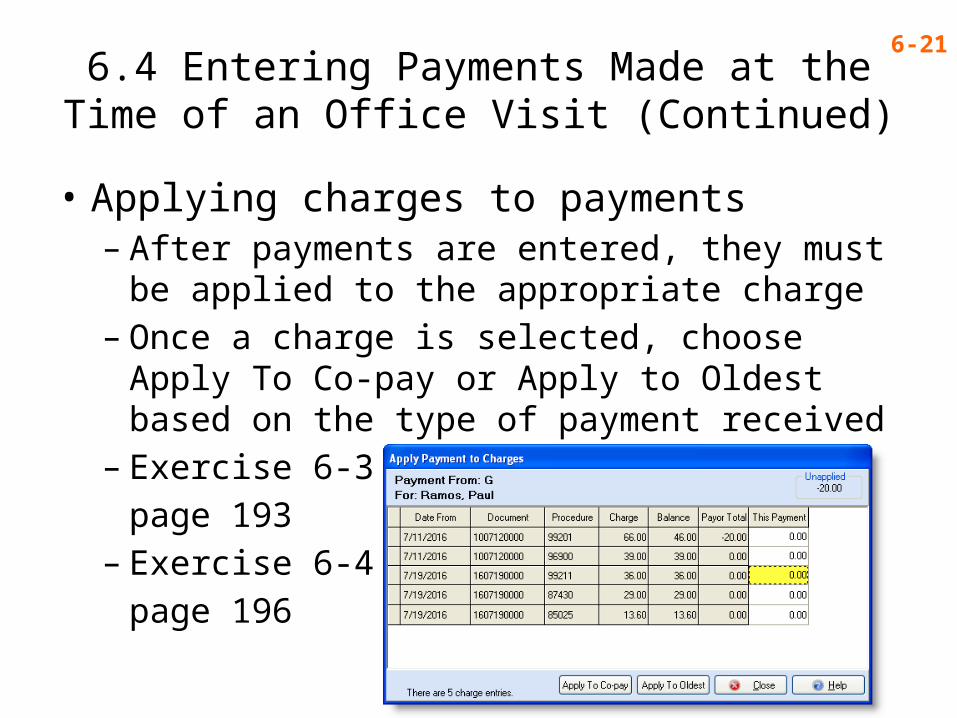
• Applying charges to payments– After payments are entered, they must be applied to
the appropriate charge– Once a charge is selected, choose Apply To Co-pay
or Apply to Oldest based on the type of payment received
– Exercise 6-3page 193
– Exercise 6-4page 196
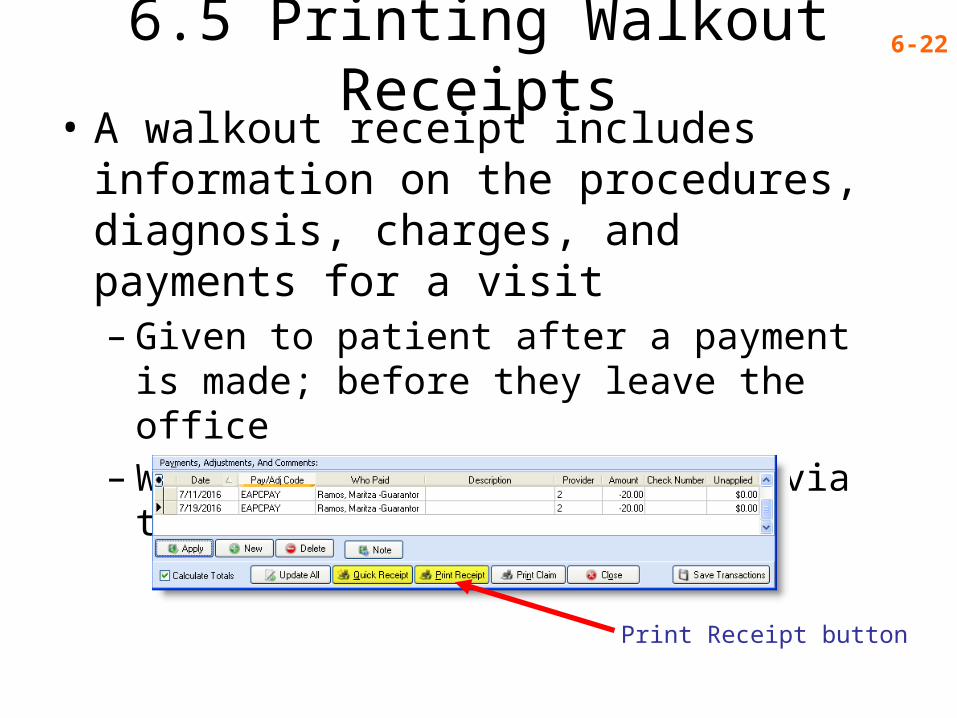
6.5 Printing Walkout Receipts 6-22
• A walkout receipt includes information on the procedures, diagnosis, charges, and payments for a visit– Given to patient after a payment is made; before
they leave the office– Walkout receipts are created via the Print Receipt
button
Print Receipt button
6.5 Printing Walkout Receipts (Continued)6-23
• When the Print Receipt button is clicked, the Open Report window appears with the first report highlighted Walkout Receipt (All Transactions)
• Click the OK button• Choose an option from the Print Report Where?
dialog box and click the Start button• Select the date for the receipt from the Data
Selection Question dialog box and click the OK button to print the walkout receipt
• Exercise 6-5 page 200
6.6 Processing a Patient Refund6-24
• Adjustments to patient accounts are entered in the same manner as payments are recorded, in the lower third of the Transaction Entry dialog box– The New button begins the process of entering an
adjustment– Overpayments are color-coded yellow
• Exercise 6-6 page 201

6.7 Processing a NonsufficientFunds (NSF) Check
6-25
• An NSF check is one not honored by a bank because the account it was written on does not have sufficient funds to cover the check– When a practice receives a NSF notice from a
bank, an adjustment is made in the patient’s account
– Patient then owes the amount of the returned check, and often an additional fee
• Exercise 6-7 page 204