18 ½ inch cabbage patch kids blouse · when cutting out the sleeve, you will need to be cut either...
TRANSCRIPT

1
18 ½ INCH CABBAGE PATCH KIDS BLOUSE
Make Your Outfit Instructions
1. Preview of Completed Outfit
Play this video and check out this great outfit that YOU will make! 2. Tools and Resources Required
1) Paper pattern (printed from PDF file downloaded to your computer)
2) Fabric Blouse – 8 inches (20cm) cotton, cotton blend, any light weight woven fabric
3) Fabric Trim – small amount of contrasting light weight woven fabric
4) Velcro strip 3 x ½ inch (80mm x 12mm)
5) 2 x Velcro strips for long sleeve – Loop 1” x ½ “ (25mm x 12mm) and Hook ½ “ x ½ “ (12mm x 12mm)
6) Matching thread
7) Paper scissors
8) Fabric scissors
9) Clippers/snips
10) Marking pen
11) Pins
12) Ruler

2
3. Preparing Paper Pattern
1) Check the ‘Tip’ measurement is correct.
2) Cut out pattern pieces following the solid line. When cutting out the sleeve, you will need to be cut either the short sleeve piece #3 or the long sleeve piece #8.
4. Cutting Out Fabric
1) With the blouse fabric in a single layer, place pattern pieces #1 (Front) and #6 (Neck Cuff) onto the fabric with the grain line of the pattern running parallel to the selvedge of the fabric. Pin in place.
2) For the remaining pattern pieces, you need to cut 2 pieces of fabric so bring the other selvedge over and place it beside the pattern pieces you have pinned to the single layer. You can now place the remaining pattern pieces onto the fabric with the grain line of the pattern running parallel to the selvedge of the fabric. Pin in place.
3) Cut around with scissors or rotary cutter.
4) Transfer the markings from pattern pieces #1 (Front) and #3 (Short Sleeve) or #8 (Long Sleeve) onto the fabric with a marking pen, making sure to mark both sleeves top and bottom. These mark the centre point and also where you will sew your gathering thread.
5) If you are using a contrasting trim, place pattern piece #7 onto a single layer of fabric ensuring that the grain line is parallel to the selvedge or grain of fabric. Pin and cut around with scissors or rotary cutter.
6) Double the remaining fabric over and place pattern piece #5 onto the fabric ensuring that the grain line is parallel to the selvedge or grain of fabric. Pin and cut around with scissors or rotary cutter.
3
5. Sew Shoulder Seams
1) With right sides together match the shoulder seam of the first back piece to the shoulder seam of the front, making sure to also match the armholes. Pin shoulder seam.
2) Repeat with the second back piece.
3) Using a straight stitch sew ¼ inch (6mm) seam allowance along the two shoulder seams securing the beginning and end with reverse stitches.
4) Overcast raw edges with a zigzag stitch.
SHORT & LONG SLEEVE
6. Prepare Sleeve
1) Sew a row of gathering stitch along the top of each sleeve just inside ¼ inch (6mm) from the raw edge starting a couple of stitches before the first line that you have marked and finish a couple of stitches after the last line that you have marked.
2) Sew a second row of gathering stitch beside the first row and a little more than ¼ inch (6mm) in from the raw edge.
3) Sew a row of gathering stitch along the bottom of each sleeve just inside ¼ inch (6mm) from the raw edge starting a couple of stitches before the first line that you have marked and finish a couple of stitches after the last line that you have marked.
4) Sew a second row of gathering stitch beside the first row and a little more than ¼ inch (6mm) in from the raw edge.
5) Fold both the sleeve cuffs and the cuff trims in half so that the long raw edges meet and the right side of the fabric is on the outside. Press with an iron.
6) Place the trim on top of the cuff matching all four long raw edges. Pin.
7) Sew a straight stitch just inside ¼ inch (6mm) from the raw edges joining the cuff and the trim together.
8) Fold the cuff in half matching the two short ends and place a pin at the fold – this is the centre point of the cuff. Repeat for second cuff.
9) Place the sleeve down in front of you with the right side of the fabric facing up and the bottom of the sleeve at the top. Place the cuff on top of the sleeve with rights sides

4
together (the trim of the cuff should be sandwiched between the cuff and the sleeve) match the pin to the centre mark at the bottom of the sleeve and with raw edges even pin together.
10) Turn the sleeve over so you are now looking at the wrong side of the fabric.
11) Match one end of the sleeve with the end of the cuff and pin. Place another pin joining the sleeve to the cuff at the gathering line marked on the sleeve. Repeat on the other end of the sleeve.
12) Pull gathering threads on one end to gather sleeve in until same length as cuff, even out gathering, match raw edges and pin. Repeat on other end of sleeve.
13) Using a straight stitch sew ¼ inch (6mm) seam allowance securing beginning and end with reverse stitches. Remove gathering threads.
14) Overcast raw edges together with a zigzag stitch.
15) Repeat steps 9) to 14) with the second sleeve.
7. Attach Sleeve
1) Place the bodice down in front of you with the right side of the fabric facing up. With the right side of the sleeve facing down, match the centre mark on the top of the sleeve with the shoulder seam of the armhole. Making sure raw edges are even, pin together.
2) Match one end of the sleeve with one end of the armhole making sure raw edges are even. Pin. Note: If you are sewing the long sleeve version, you will be matching the zigzagged edge of the sleeve with the end of the armhole.
3) Place another pin joining the sleeve to the armhole at the gathering line you have marked on the sleeve.
4) Repeat with the other end of the sleeve.
5) Pull gathering threads on one side to gather sleeve in between the pins marking the centre point and the gathering point. When the sleeve is the same length as the armhole, match raw edges, even out the gathers and pin. Repeat with the other side of the sleeve.
6) Using a straight stitch sew ¼ inch (6mm) seam allowance securing beginning and end with reverse stitches. Remove gathering threads.
7) Overcast raw edges together with a zigzag stitch.
8) Repeat steps 1) to 7) with the second sleeve.
5
8. Sew Side Seams
1) With right sides of fabric together, match the seams under the armhole, pushing one seam allowance one way and the other seam allowance the other way. Pin.
2) Match the raw edges of the side seam and pin.
3) Making sure the folded edge of the sleeve cuff (hem of the sleeve) is even, match the raw edges of the sleeve and pin.
4) Using a straight stitch, sew ¼ inch (6mm) seam allowance from the hem of the sleeve down to the hem of the blouse securing the beginning and end with reverse stitches.
5) Repeat steps 1) to 4) on the other side.
6) Overcast raw edges together with a zigzag stitch. Turn blouse to right side.
7) At the sleeve cuff, push the seam allowance to the back and stitch to the cuff using some zigzag stitches with the length set on 0 or with the feed dogs down. This will finish off the sleeve nicely so the seam allowance is not so visible. Repeat on second sleeve.
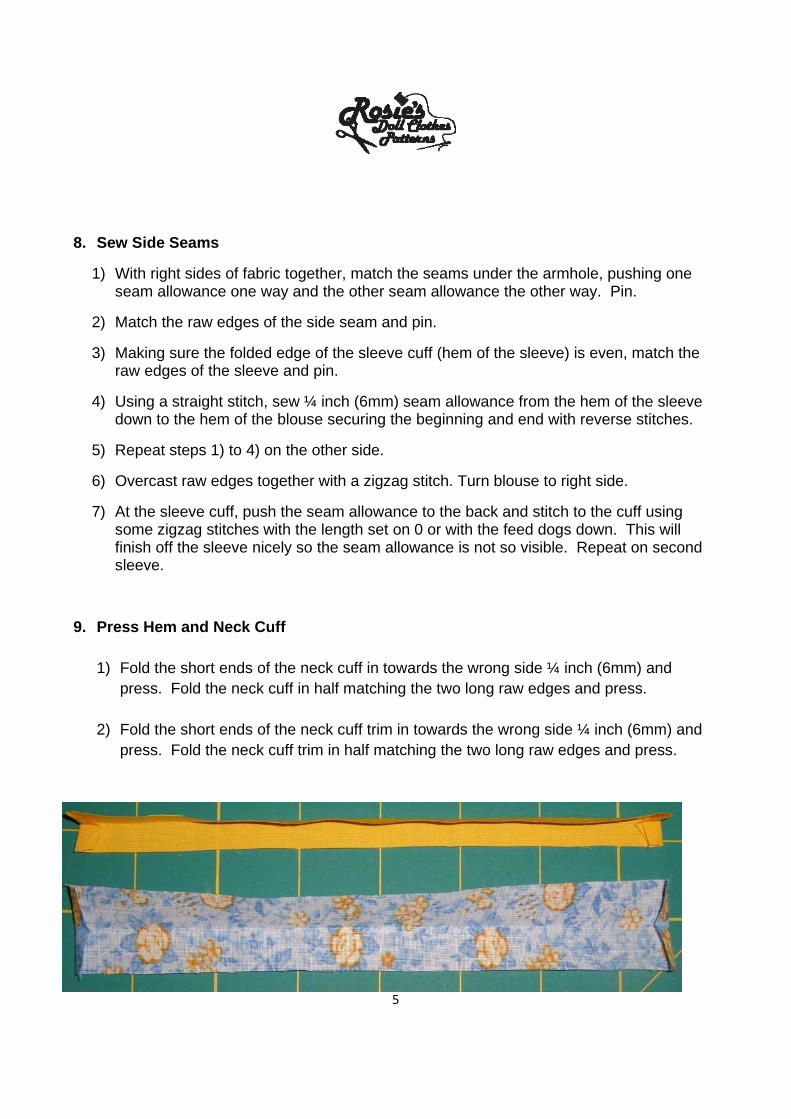
9. Press Hem and Neck Cuff 1) Fold the short ends of the neck cuff in towards the wrong side ¼ inch (6mm) and
press. Fold the neck cuff in half matching the two long raw edges and press.
2) Fold the short ends of the neck cuff trim in towards the wrong side ¼ inch (6mm) and press. Fold the neck cuff trim in half matching the two long raw edges and press.

6
3) Fold the hem of the blouse up ½” (12mm) to the wrong side, pin and press.
4) Fold the raw edge of the hem down into the fold made when pressing. Pin and press.
5) Repeat steps 3) and 4) with both sides of the back of the blouse.

7
11) Attach Neck Cuff
1) Place the Neck Cuff Trim on top of the Neck Cuff matching short ends and all four long raw edges. Pin.
2) Sew a straight stitch just inside ¼ inch (6mm) from the raw edges joining the cuff and the trim together. You want this stitching to be inside the seam allowance.
3) Fold the Neck Cuff in half matching the two short ends and place a pin at the fold – this is the centre point of the Neck Cuff.
4) Place the blouse down in front of you with the right side of the fabric facing up and the neck at the top. Place the Neck Cuff on top of the blouse with rights sides together (the trim of the cuff should be sandwiched between the cuff and the blouse) match the pin in the cuff to the centre mark at the neckline and with raw edges even pin together.
5) Match one end of the cuff with the second fold at the back of the blouse, this will be ½” (12mm) in from the raw edge. Hold or pin in place. Fold the back of the blouse over on top of the cuff at this fold so that the wrong side of the fabric is showing. Pin. Make sure to have the raw edge of the back of the blouse folded in towards the wrong side of the fabric (this is what you pressed in towards the ½ (12mm) fold when you pressed the back of the blouse. The end of the Neck Cuff will be sandwiched in between the blouse and the hem of the back of the blouse.
Note: This image shows the end of the neck cuff after sewing the seam and overcasting.

8
6) Match the raw edges of the Neck cuff with the raw edge of the neckline at the shoulder seam, making sure to press the seam allowance the same way that it is facing at the sleeve. Pin.
7) Repeat steps 5) and 6) with the other end of the Neck Cuff.
8) Sew a ¼” (6mm) seam along the Neck Cuff securing beginning and end with reverse stitches.
9) Overcast raw edges with a zigzag stitch securing beginning and end with reverse stitches. Turn to right side and you will notice the hem at the back of the blouse is folded under ready for stitching.
12) Hem
1) Pin hem that you pressed earlier starting at one neckline, down the back, along the bottom and back up the other side.
2) Sew hem with a straight stitch close to the inside fold, again starting at the neckline, sewing down the back, along the bottom and back up the other side. Secure beginning and end of sewing with reverse stitches.
13) Attach Velcro
1) With the back of the blouse facing you, place the hook (prickly) side of Velcro on the right side of the fabric just below the Neck Cuff and close to the back edge of the blouse. Stitch in place with a straight stitch securing beginning and end with reverse stitches.
2) On the other side of the back of the blouse, place the loop (fluffy) side of Velcro onto the wrong side of the fabric just below the Neck Cuff and close to the back edge of the blouse. Stitch in place with a straight stitch securing beginning and end with reverse stitches.
14) Congratulations YOU did it!
Celebrate! YOU made another great outfit. Well done!