1 winter moccasin making instructions
TRANSCRIPT
1
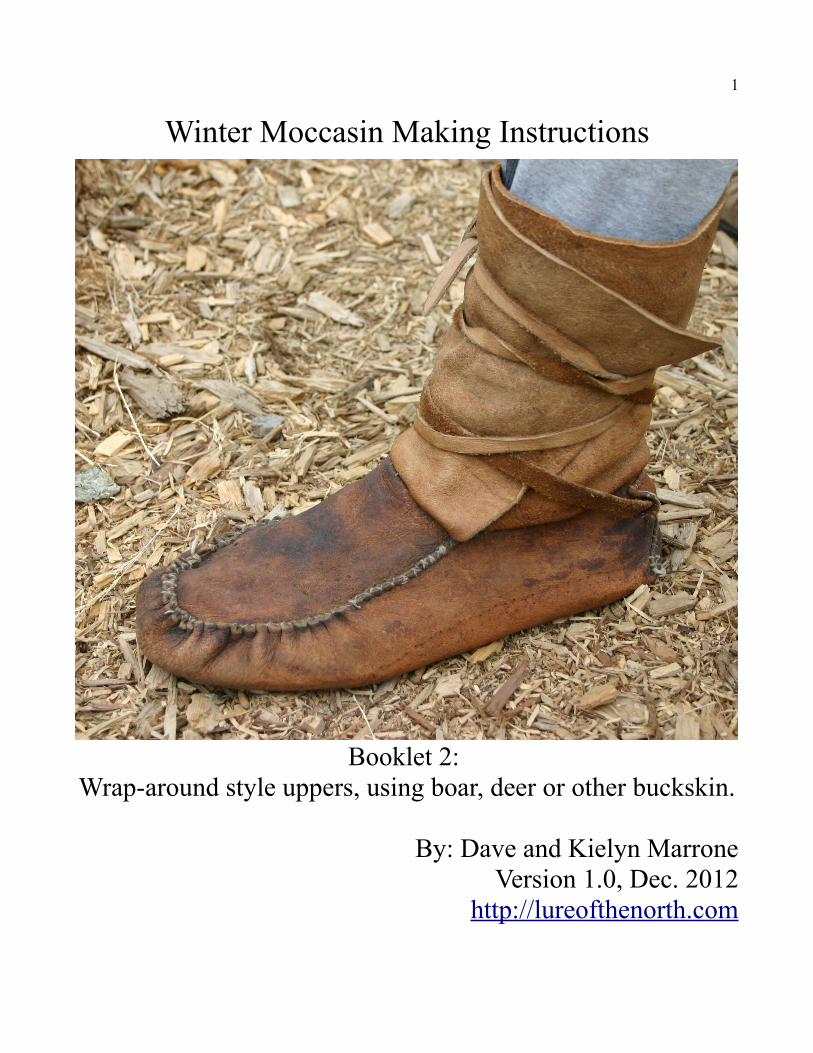
Winter Moccasin Making Instructions
Booklet 2: Wrap-around style uppers, using boar, deer or other buckskin.
By: Dave and Kielyn MarroneVersion 1.0, Dec. 2012
http://lureofthenorth.com

2
Note: This booklet is a continuation of a larger moccasin making series. For all other publications in this series please see the web page: http://lureofthenorth.com/?product=winter-moccasin-making-kits
3
Table of Contents:
0.0 About the Wrap-Style Uppers..............................................................................................................40.1 Alternatives to Boar Skin................................................................................................................5
1.0 Getting Prepared..................................................................................................................................61.1 Material Requirements....................................................................................................................61.2 Tool Requirements...........................................................................................................................61.3 Insulating Layers.............................................................................................................................6
2.0 Measure and Cut Your Uppers.............................................................................................................72.1 Cut lacing tabs.................................................................................................................................8
3.0 Reinforce the bottom seam...................................................................................................................94.0 Attach your upper to your lower..........................................................................................................95.0 Add Cotton Wrap-Around Lacing......................................................................................................106.0 Add Buttons........................................................................................................................................10
4
0.0 About the Wrap-Style Uppers
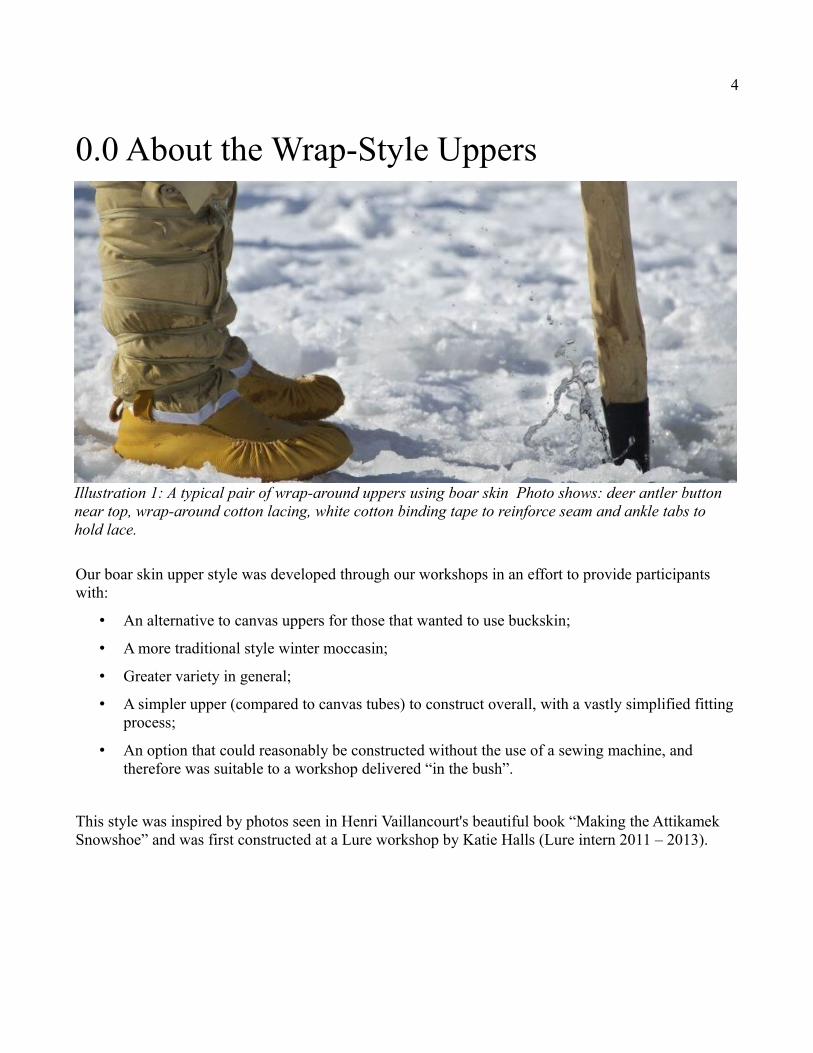
Our boar skin upper style was developed through our workshops in an effort to provide participants with:
• An alternative to canvas uppers for those that wanted to use buckskin;
• A more traditional style winter moccasin;
• Greater variety in general;
• A simpler upper (compared to canvas tubes) to construct overall, with a vastly simplified fitting process;
• An option that could reasonably be constructed without the use of a sewing machine, and therefore was suitable to a workshop delivered “in the bush”.
This style was inspired by photos seen in Henri Vaillancourt's beautiful book “Making the Attikamek Snowshoe” and was first constructed at a Lure workshop by Katie Halls (Lure intern 2011 – 2013).
Illustration 1: A typical pair of wrap-around uppers using boar skin Photo shows: deer antler button near top, wrap-around cotton lacing, white cotton binding tape to reinforce seam and ankle tabs to hold lace.
5
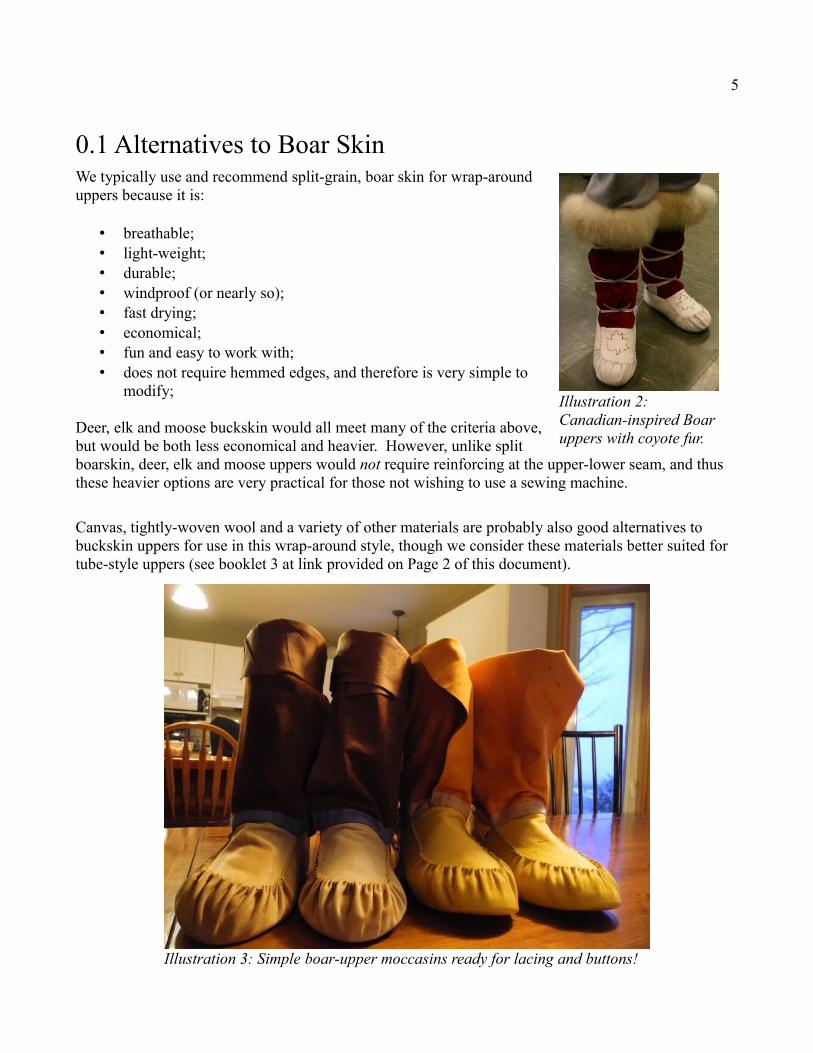
0.1 Alternatives to Boar SkinWe typically use and recommend split-grain, boar skin for wrap-around uppers because it is:
• breathable;• light-weight;• durable;• windproof (or nearly so);• fast drying;• economical;• fun and easy to work with;• does not require hemmed edges, and therefore is very simple to
modify;
Deer, elk and moose buckskin would all meet many of the criteria above, but would be both less economical and heavier. However, unlike split boarskin, deer, elk and moose uppers would not require reinforcing at the upper-lower seam, and thus these heavier options are very practical for those not wishing to use a sewing machine.
Canvas, tightly-woven wool and a variety of other materials are probably also good alternatives to buckskin uppers for use in this wrap-around style, though we consider these materials better suited for tube-style uppers (see booklet 3 at link provided on Page 2 of this document).
Illustration 2: Canadian-inspired Boar uppers with coyote fur.
Illustration 3: Simple boar-upper moccasins ready for lacing and buttons!
6
1.0 Getting Prepared1.1 Material RequirementsBoar skin, “wrap-style” uppers require the following materials:
• A completed pair of moccasin lowers (see booklet 1 in series);• 8 – 10 sq ft of boar skin for uppers (or other suitable hide);• OPT: 2 x buttons (wood or deer antler are nice);• 2 x 1” x 2', light cotton tape to reinforce boar-deer seam (not required for deer/ elk/ moose
uppers);• 2 x 1/2” x 10' light cotton webbing uses as wrap-around ties, ends sealed w/ beeswax;• Artificial sinew – enough for project, plus extra for repair kit;• 2x “Glover's Needles” (Aka. “Triangular Needles” or “Leather Needles”);
1.2 Tool Requirements• A regular household sewing machine with regular thread and denim needle (not required for
deer/ elk/ moose uppers);
• scissors;
• measuring tape;
• ruler;
1.3 Insulating LayersYou should have all your insulating layers on hand to properly size your uppers. Insulating layers are covered in more detail in booklet 1.
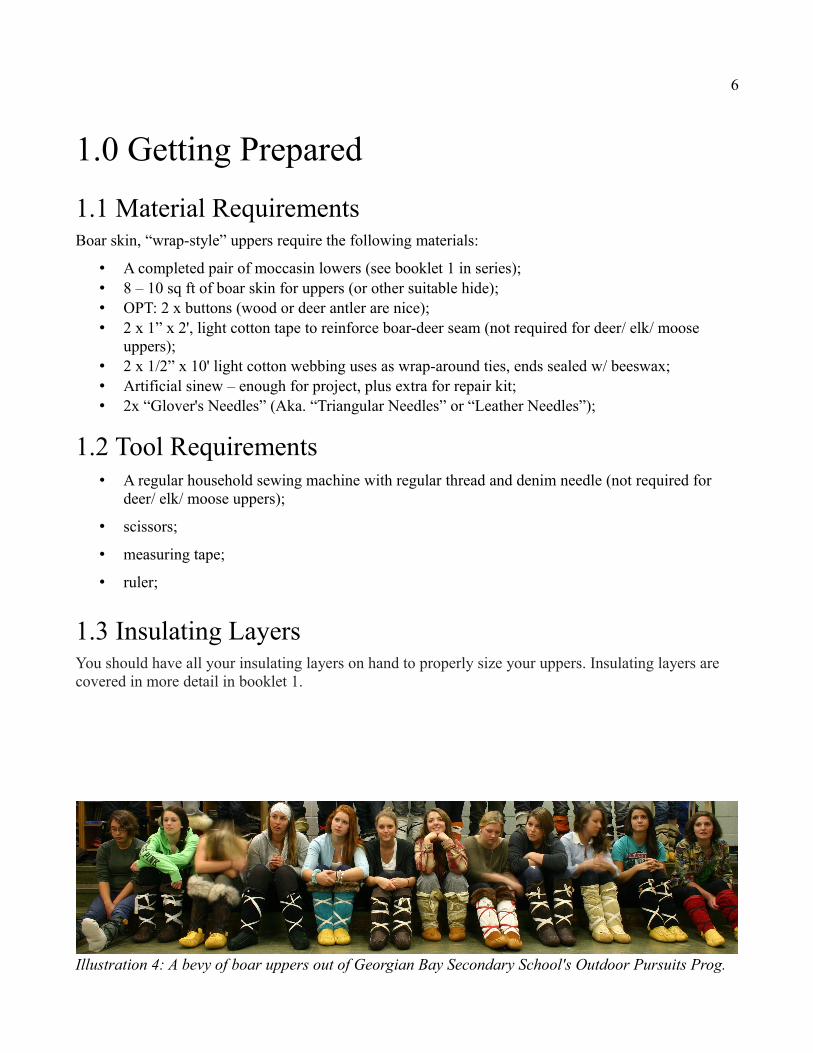
Illustration 4: A bevy of boar uppers out of Georgian Bay Secondary School's Outdoor Pursuits Prog.
7
2.0 Measure and Cut Your Uppers
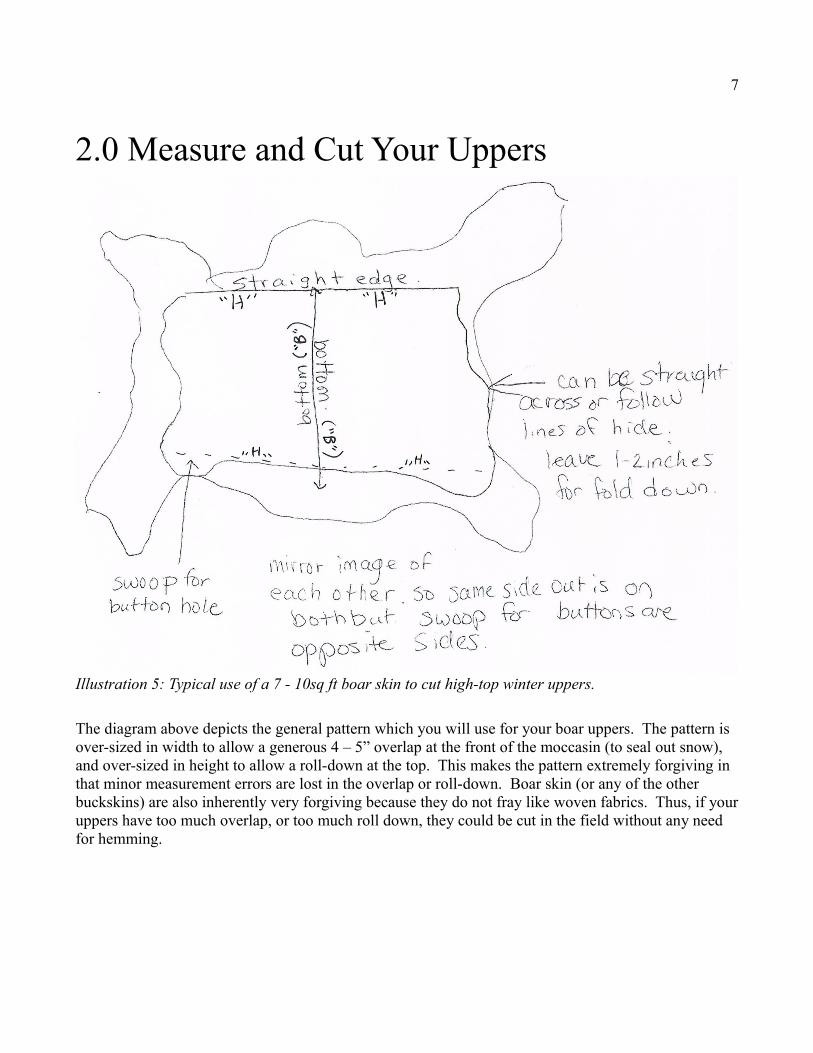
The diagram above depicts the general pattern which you will use for your boar uppers. The pattern is over-sized in width to allow a generous 4 – 5” overlap at the front of the moccasin (to seal out snow), and over-sized in height to allow a roll-down at the top. This makes the pattern extremely forgiving in that minor measurement errors are lost in the overlap or roll-down. Boar skin (or any of the other buckskins) are also inherently very forgiving because they do not fray like woven fabrics. Thus, if your uppers have too much overlap, or too much roll down, they could be cut in the field without any need for hemming.
Illustration 5: Typical use of a 7 - 10sq ft boar skin to cut high-top winter uppers.
8
Measure and cut the upper in the following way:
1. Fold your boar hide in half and crease. Unfold. You should still be able to see the centre line
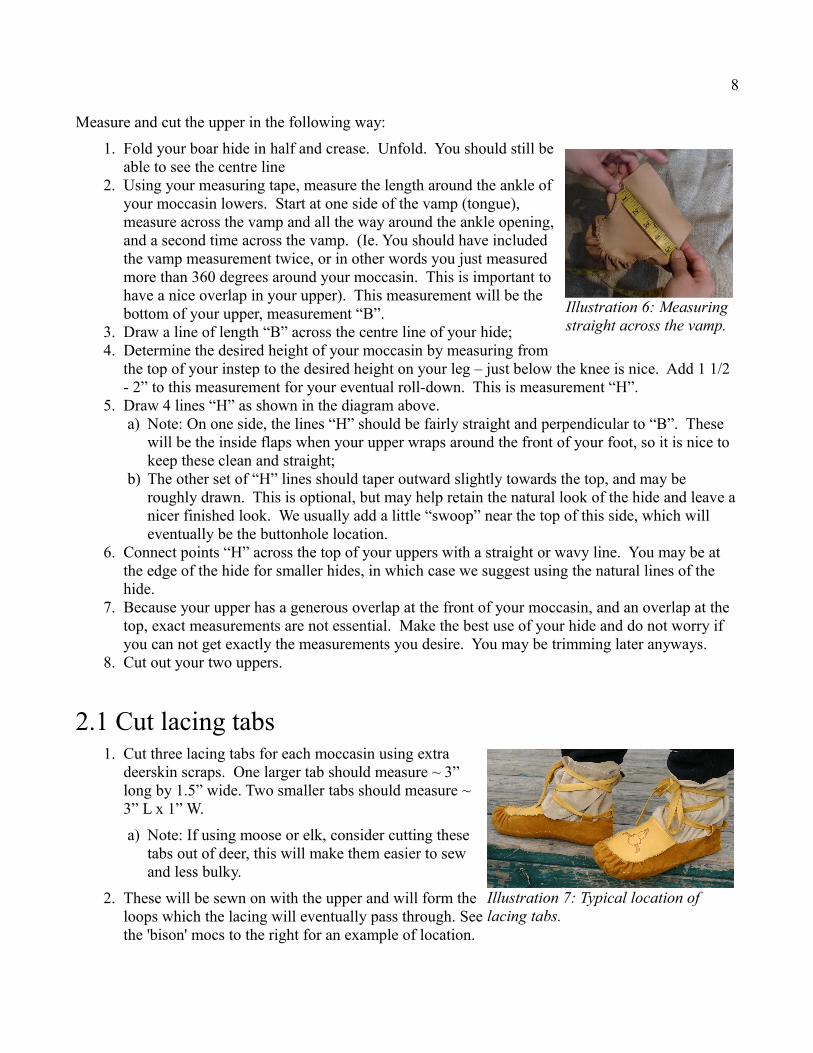
2. Using your measuring tape, measure the length around the ankle of your moccasin lowers. Start at one side of the vamp (tongue), measure across the vamp and all the way around the ankle opening, and a second time across the vamp. (Ie. You should have included the vamp measurement twice, or in other words you just measured more than 360 degrees around your moccasin. This is important to have a nice overlap in your upper). This measurement will be the bottom of your upper, measurement “B”.
3. Draw a line of length “B” across the centre line of your hide; 4. Determine the desired height of your moccasin by measuring from
the top of your instep to the desired height on your leg – just below the knee is nice. Add 1 1/2 - 2” to this measurement for your eventual roll-down. This is measurement “H”.
5. Draw 4 lines “H” as shown in the diagram above. a) Note: On one side, the lines “H” should be fairly straight and perpendicular to “B”. These
will be the inside flaps when your upper wraps around the front of your foot, so it is nice to keep these clean and straight;
b) The other set of “H” lines should taper outward slightly towards the top, and may be roughly drawn. This is optional, but may help retain the natural look of the hide and leave a nicer finished look. We usually add a little “swoop” near the top of this side, which will eventually be the buttonhole location.
6. Connect points “H” across the top of your uppers with a straight or wavy line. You may be at the edge of the hide for smaller hides, in which case we suggest using the natural lines of the hide.
7. Because your upper has a generous overlap at the front of your moccasin, and an overlap at the top, exact measurements are not essential. Make the best use of your hide and do not worry if you can not get exactly the measurements you desire. You may be trimming later anyways.
8. Cut out your two uppers.
2.1 Cut lacing tabs 1. Cut three lacing tabs for each moccasin using extra
deerskin scraps. One larger tab should measure ~ 3” long by 1.5” wide. Two smaller tabs should measure ~ 3” L x 1” W.
a) Note: If using moose or elk, consider cutting these tabs out of deer, this will make them easier to sew and less bulky.
2. These will be sewn on with the upper and will form the loops which the lacing will eventually pass through. See the 'bison' mocs to the right for an example of location.
Illustration 6: Measuring straight across the vamp.
Illustration 7: Typical location of lacing tabs.
9
3.0 Reinforce the bottom seamThe upper-lower seam on your moccasins is a high-stress point, particularly at the 3-way intersection where the vamp, tongue and upper all come together. We reinforce the thinner boar skin by sewing a strip of 1” wide cotton webbing flush with the bottom of the boar skin This is most easily done with a machine. This strip can be placed on the outside of the boar skin if you want it visible, or on the inside to hide it. This strip is not visible in every photograph in this instructional booklet – it is probably best demonstrated on Page 4.
Note: This step is not necessary when using deer hide (or heavier) for your uppers.
4.0 Attach your upper to your lower
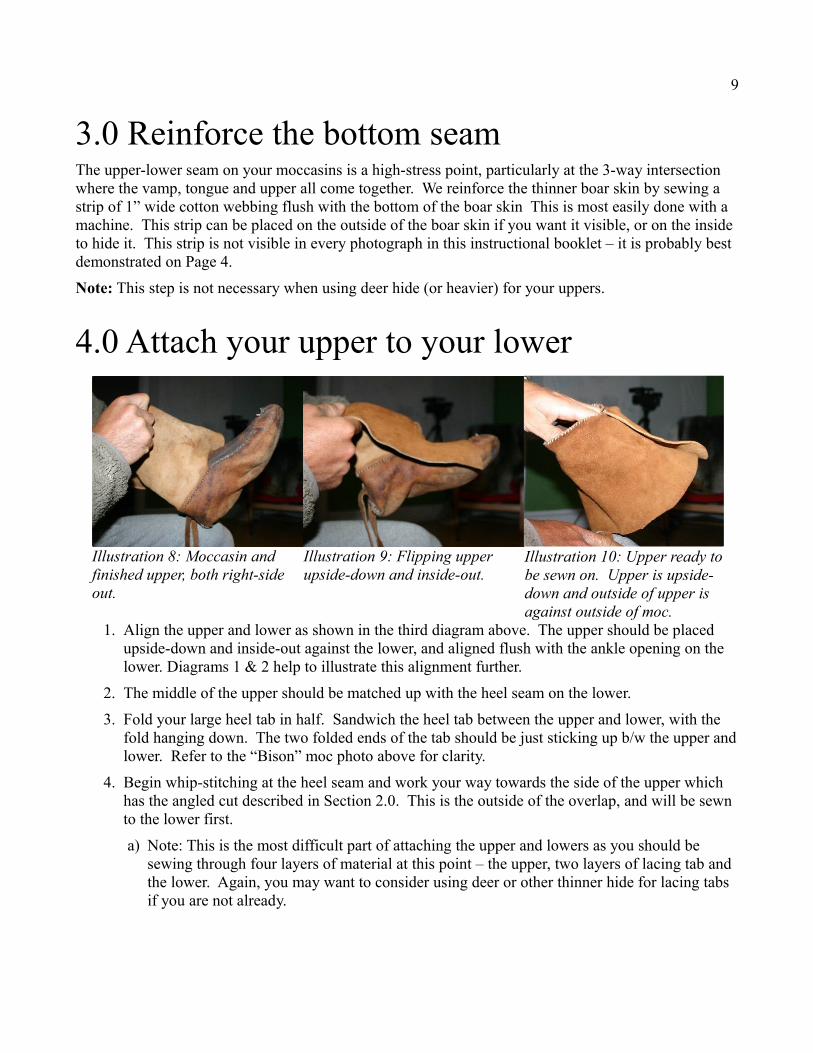
1. Align the upper and lower as shown in the third diagram above. The upper should be placed upside-down and inside-out against the lower, and aligned flush with the ankle opening on the lower. Diagrams 1 & 2 help to illustrate this alignment further.
2. The middle of the upper should be matched up with the heel seam on the lower.
3. Fold your large heel tab in half. Sandwich the heel tab between the upper and lower, with the fold hanging down. The two folded ends of the tab should be just sticking up b/w the upper and lower. Refer to the “Bison” moc photo above for clarity.
4. Begin whip-stitching at the heel seam and work your way towards the side of the upper which has the angled cut described in Section 2.0. This is the outside of the overlap, and will be sewn to the lower first.
a) Note: This is the most difficult part of attaching the upper and lowers as you should be sewing through four layers of material at this point – the upper, two layers of lacing tab and the lower. Again, you may want to consider using deer or other thinner hide for lacing tabs if you are not already.
Illustration 8: Moccasin and finished upper, both right-side out.
Illustration 9: Flipping upper upside-down and inside-out.
Illustration 10: Upper ready to be sewn on. Upper is upside-down and outside of upper is against outside of moc.
10
5. Continue whip-stitching around the ankle. When you reach the side of the moccasin, slip in one of the smaller lacing tabs and sew it in as with the heel tab.
6. When you reach the vamp/ tongue, continue sewing right across the tongue. Your upper should pass completely across the tongue, but not much further. Trim to fit.
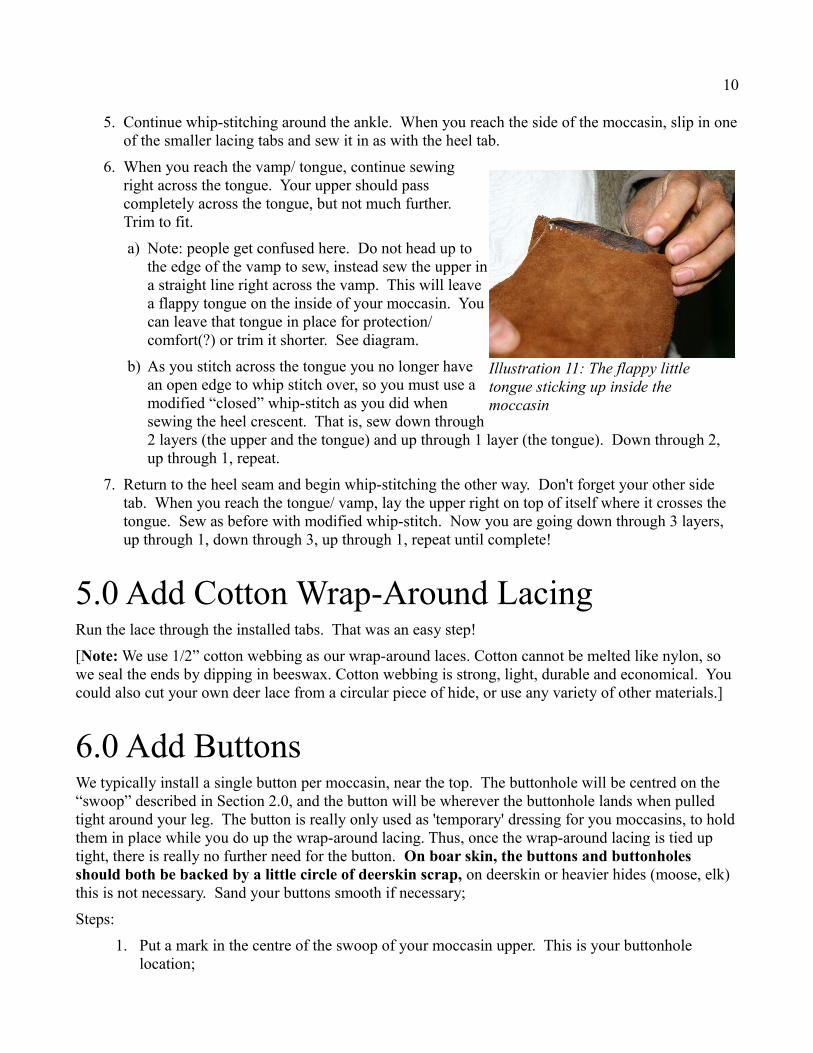
a) Note: people get confused here. Do not head up to the edge of the vamp to sew, instead sew the upper in a straight line right across the vamp. This will leave a flappy tongue on the inside of your moccasin. You can leave that tongue in place for protection/ comfort(?) or trim it shorter. See diagram.
b) As you stitch across the tongue you no longer have an open edge to whip stitch over, so you must use a modified “closed” whip-stitch as you did when sewing the heel crescent. That is, sew down through 2 layers (the upper and the tongue) and up through 1 layer (the tongue). Down through 2, up through 1, repeat.
7. Return to the heel seam and begin whip-stitching the other way. Don't forget your other side tab. When you reach the tongue/ vamp, lay the upper right on top of itself where it crosses the tongue. Sew as before with modified whip-stitch. Now you are going down through 3 layers, up through 1, down through 3, up through 1, repeat until complete!
5.0 Add Cotton Wrap-Around LacingRun the lace through the installed tabs. That was an easy step!
[Note: We use 1/2” cotton webbing as our wrap-around laces. Cotton cannot be melted like nylon, so we seal the ends by dipping in beeswax. Cotton webbing is strong, light, durable and economical. You could also cut your own deer lace from a circular piece of hide, or use any variety of other materials.]
6.0 Add ButtonsWe typically install a single button per moccasin, near the top. The buttonhole will be centred on the “swoop” described in Section 2.0, and the button will be wherever the buttonhole lands when pulled tight around your leg. The button is really only used as 'temporary' dressing for you moccasins, to hold them in place while you do up the wrap-around lacing. Thus, once the wrap-around lacing is tied up tight, there is really no further need for the button. On boar skin, the buttons and buttonholes should both be backed by a little circle of deerskin scrap, on deerskin or heavier hides (moose, elk) this is not necessary. Sand your buttons smooth if necessary;
Steps:
1. Put a mark in the centre of the swoop of your moccasin upper. This is your buttonhole location;
Illustration 11: The flappy little tongue sticking up inside the moccasin
11
2. Put on your moccasin on top of all your insulating layers (ideally this would also include the thickest pants you are likely to wear inside your mocs);
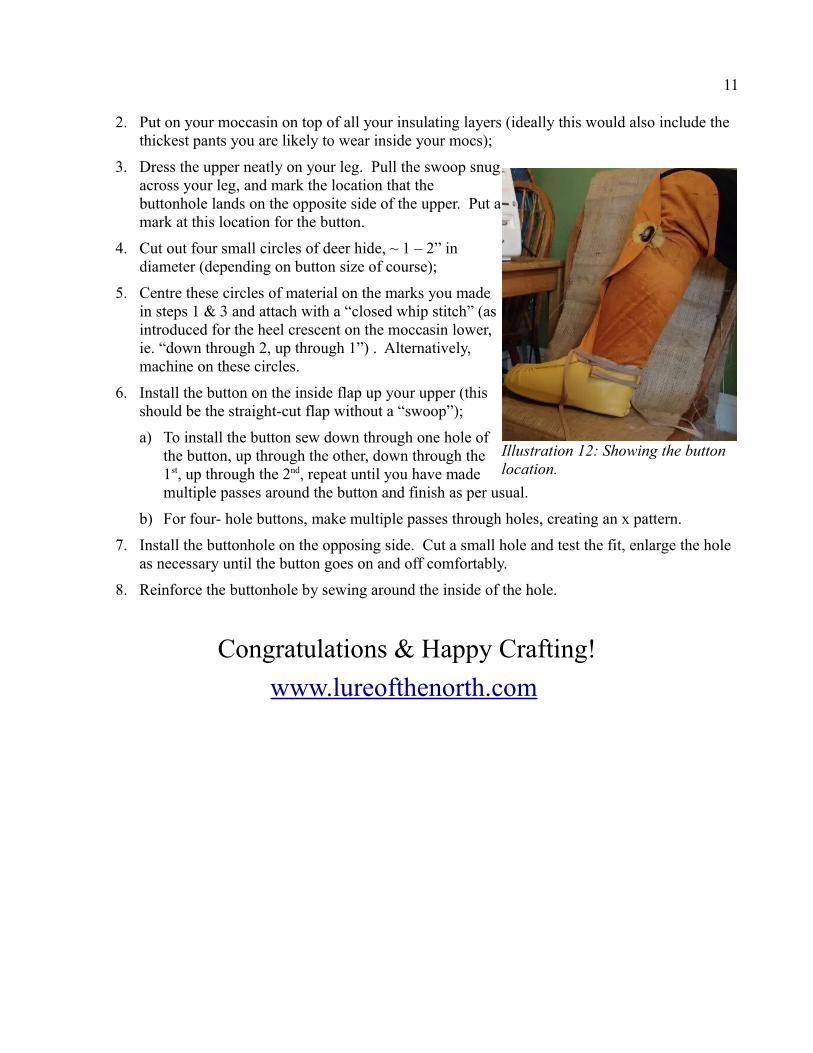
3. Dress the upper neatly on your leg. Pull the swoop snug across your leg, and mark the location that the buttonhole lands on the opposite side of the upper. Put a mark at this location for the button.
4. Cut out four small circles of deer hide, ~ 1 – 2” in diameter (depending on button size of course);
5. Centre these circles of material on the marks you made in steps 1 & 3 and attach with a “closed whip stitch” (as introduced for the heel crescent on the moccasin lower, ie. “down through 2, up through 1”) . Alternatively, machine on these circles.
6. Install the button on the inside flap up your upper (this should be the straight-cut flap without a “swoop”);
a) To install the button sew down through one hole of the button, up through the other, down through the 1st, up through the 2nd, repeat until you have made multiple passes around the button and finish as per usual.
b) For four- hole buttons, make multiple passes through holes, creating an x pattern.
7. Install the buttonhole on the opposing side. Cut a small hole and test the fit, enlarge the hole as necessary until the button goes on and off comfortably.
8. Reinforce the buttonhole by sewing around the inside of the hole.
Congratulations & Happy Crafting!www.lureofthenorth.com
Illustration 12: Showing the button location.